Briljant - Bike rack Pro-User - Free user manual and instructions
Find the device manual for free Briljant Pro-User in PDF.
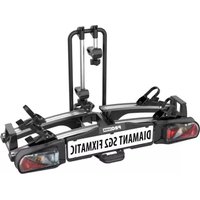
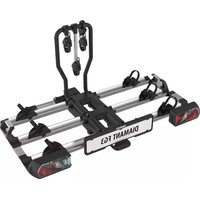
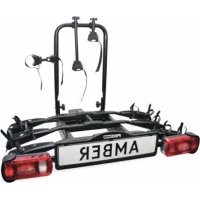
| Product Type | Towbar bike rack |
| Brand | Pro-User |
| Model | Briljant |
| Capacity | 2 bikes |
| Maximum load on bike rack | 40 kg |
| Net weight of bike rack | 6.5 kg |
| Total permissible weight (hitch + rack + bikes) | Up to 90 kg depending on hitch |
| Attachment | On tow ball, universal |
| Assembly | Tool-free, foldable |
| Lighting | Male plug 7 and 13 pin (Jaeger), rear lights included |
| License plate holder | Bracket included with clips |
| Protections | Foam frame protectors, safety straps |
| Storage bag | Included |
| Maintenance | Clean with water, lubricate moving parts, check bolts |
| Warranty | 2 years |
| After-sales service | +31 (0) 345-470998, service@tradekar.nl |
Frequently Asked Questions - Briljant Pro-User
User questions about Briljant Pro-User
0 question about this device. Answer the ones you know or ask your own.
Ask a new question about this device
Download the instructions for your Bike rack in PDF format for free! Find your manual Briljant - Pro-User and take your electronic device back in hand. On this page are published all the documents necessary for the use of your device. Briljant by Pro-User.
USER MANUAL Briljant Pro-User
UK: Assembly instruction and safety regulations
- Mounting the bike carrier 32
- Mounting of the bike carrier onto the tow bal 34
• How to take the bike carrier of the tow bar 35
- Mounting of the bikes on the bike carrier 36
• The license plate holder & lighting 38
• S a f e t y r e g u l a t
- M a i n t e n a n c e &
- Part list & exploded view
T a b l e d e s m a t i
• I n t r o d u c t i o n
- I on r f m a t i o n s i m p
natural_image
Mechanical clamp tool with multiple black clamps and metal brackets (no visible text or symbols)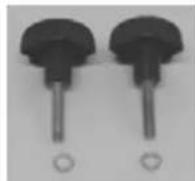
De montage:
natural_image
Mechanical linkage device with articulated joints and black connectors (no text or symbols visible)Stap 2
Onderdelen:
De montage:
natural_image
Exterior view of a black rectangular device with metallic brackets and a central screen (no text or symbols visible)MONTAGE VAN DE FIETSENDRAGER OP DE TREKHAAK
natural_image
Top-down view of a car trunk with attached bicycle truss structure (no visible text or symbols)natural_image
Close-up of a robotic arm with black arrows pointing to the upper arm (no text or symbols visible)natural_image
Top-down view of a car's backrest with four metal anchor bolts (no visible text or symbols)natural_image
Close-up of a metal bracket with a hanging hook and black arrow indicating direction (no text or symbols)natural_image
Top-down view of a car's backrest with two metal tractors and a small figurine on the roof (no visible text or symbols)natural_image
Close-up of a metal bracket with a black arrow pointing to a bolt, no visible text or symbolsnatural_image
Close-up of hands operating a mechanical lever with arrows indicating motion (no text or symbols visible)natural_image
Close-up of a black medical or surgical device with a rectangular lens and metallic components (no visible text or symbols)MONTAGE VAN DE FIETSEN OP DE FIETSENDRAGER
natural_image
Close-up of a mechanical device with black clamps and a lever, no visible text or symbols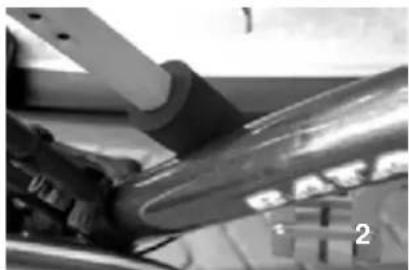
natural_image
Close-up of mechanical components with no visible text or symbols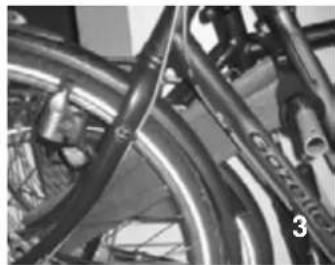
natural_image
Close-up of bicycle wheels and suspension components (no visible text or symbols)natural_image
Close-up of a hand holding a metallic mechanical bracket with bolts, no visible text or symbolsnatural_image
Close-up of bicycle frame structure with visible levers and brackets (no text or symbols)natural_image
Black and white striped fabric with a small metallic object on top (no text or symbols visible)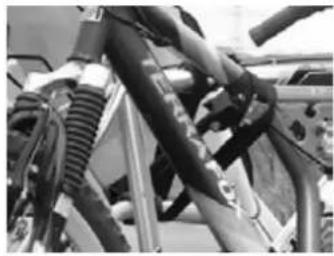
natural_image
Close-up of bicycle suspension system components (no visible text or symbols)natural_image
Close-up of a hand holding a small cylindrical object with a ring, mounted on a mechanical device (no visible text or symbols)natural_image
Black-and-white photo of a bicycle parked in front of a vehicle, no visible text or symbols on the car or background.DE NUMMERPLAATHOUDER
natural_image
Black cylindrical device with attached cable and connector (no visible text or symbols)VEI LIGHEIDVOORSCHRIFTEN
natural_image
Close-up of a mechanical lever mechanism with a knob and control panel (no visible text or symbols)text_image
Exploded view diagram of a mechanical assembly with numbered parts for identificationEINFÜHRUNG
natural_image
Two metal clamp holders with black plastic clips, no visible text or symbols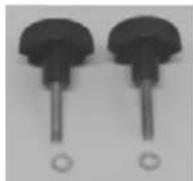
Die Montage:
natural_image
Mechanical linkage component with four articulated joints and a central support bracket (no text or symbols visible)ausklappen
natural_image
Mechanical clamp tool with curved arrows indicating rotation (no text or symbols)Rändelschraube (M8)
Step 2
Bauteile:
natural_image
Two identical mechanical components with black blocks and a central cable, shown from top and side views (no text or symbols visible)
natural_image
Metal beam with two black triangular supports at both ends (no text or symbols visible)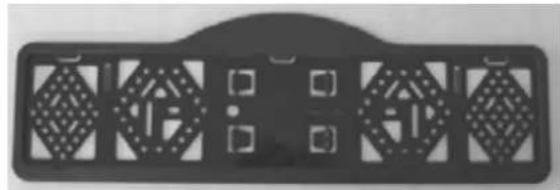
natural_image
Black rectangular object with geometric cutouts and mounting holes, no visible text or symbolsDie Montage:
natural_image
Exterior view of a black rectangular mechanical component with two side brackets and a central blank screen (no text or symbols visible)natural_image
Top-down view of a car's rear bumper with visible structural components and directional arrows (no text or symbols)natural_image
Close-up of a hand using a tool to lift a metal frame structure (no text or symbols visible)natural_image
Top-down view of a car backrest with four metal tractors supporting the hull (no visible text or symbols)natural_image
Close-up of a metal bracket with a hanging hook and arrow indicating direction (no text or symbols)natural_image
Top-down view of a car's backrest with visible mechanical components and a small figure on the side (no text or symbols)natural_image
Close-up of a metal bracket with a black arrow pointing to a bolt, no visible text or symbolsnatural_image
Close-up of hands operating a metal bench with arrows indicating movement (no text or symbols visible)natural_image
Black and white photo of a medical or surgical device with a rectangular device and attached hardware (no visible text or symbols)MONTAGE DER FAHRRÄDER AUF DEM FAHRRADTRÄGER
natural_image
Close-up of a mechanical bench with black clamps and metal railings, no visible text or symbols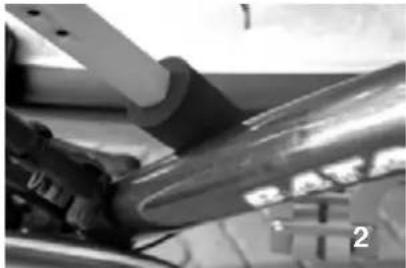
natural_image
Close-up of a mechanical component with no visible text or symbols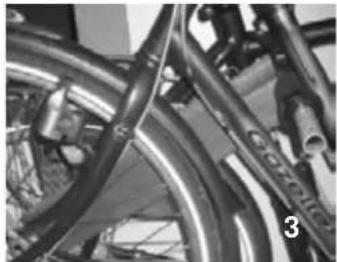
natural_image
Close-up of bicycle wheels and suspension components (no visible text or symbols)natural_image
Close-up of a hand holding a metallic mechanical bracket with bolted joints (no visible text or symbols)natural_image
Close-up of bicycle frame with visible tire and seat brackets (no text or symbols)natural_image
Black and white striped fabric with a small metallic object on top (no text or symbols visible)
natural_image
Close-up of bicycle suspension system components (no visible text or symbols)natural_image
Close-up of a hand holding a metallic object above a laptop keyboard (no visible text or symbols)natural_image
Black-and-white photo of a bicycle parked in front of a car, no visible text or symbolsnatural_image
Close-up of a black automotive electrical plug with attached cable (no visible text or symbols)SI CHERHEI TSVORSCHRI FTEN
natural_image
Close-up of a mechanical lever mechanism with a knob and control panel (no visible text or symbols)text_image
Exploded view diagram of a mechanical assembly with numbered parts for identificationINTRODUCTION
The Pro-User BRILJANT bike carrier is part of the family of bike carriers manufactured by Tradekar Benelux BV.
√ Safe and reliable bike carrier for the transportation of 2 bicycles
√ Universal fitting on the tow ball
√ Easy fitting without the use of tools
√ Easy and quick storage
√ Including storage/carry bag
√ Good protection of bicycles by several foam rubber accessories
√ Including lighting and license plate holder
√ Lighting via a combined 7 and 13 -pin (Jaegers) plug
√ Almost no influence on the driving behaviour of your car


Read the following safety- and operating instructions carefully and act accordingly before using the bike carrier.
IMPORTANT INFORMATION
Read these instructions carefully before using the product for the first time.
Do not use this product until the manual and safety regulations are read and are entirely clear.
The assembly and installation of the bike carrier can only be done according to this instruction manual.
The steps that are mentioned and the safety regulations for assembly, handling and use of the bike carrier need to be followed! The slightest non conformity can lead to incorrect assembly or wrong use.
The carrier is suitable for the transport of two bikes at most. Please check the maximum permissible ball load. You can find it on the identification plate of the tow bar of your car (for most cars this is 75kg). The total weight of the carrier with the bikes cannot exceed the maximum permissible ball load of the tow bar.
The maximum permissible load for the carrier itself may be 40kg. The net weight of the carrier is 6,5kg.
| Max. permissible Ball load | Weight bike carrier Max. load | |
| 50kg | 6,5kg | Max. 40kg |
| 60kg | 6,5kg | Max. 40kg |
| 75kg | 6,5kg | Max. 40kg |
| 90kg | 6,5kg | Max. 40kg |
Not suitable for the use on an aluminium hitch ball.
Keep these instructions in your car.
CONSUMER HELPDESK & SUPPORT

+31 (0) 345-470998 (Monday till Thursday 8:30-12:30)

service@tradekar.nl
MOUNTING THE BIKE CARRIER
The bike carrier is already assembled in part. Remove all parts from packaging and arrange them in a well-organized way. The instructions will clearly describe and show the parts that you need for further assembly of the bike carrier and mounting of the bikes.
Step 1
Parts:
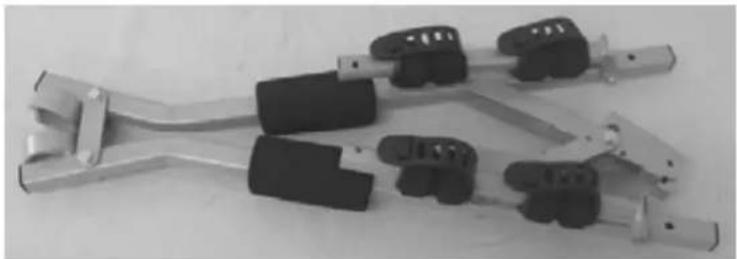
natural_image
Two metal clamp holders with black connectors, no visible text or symbols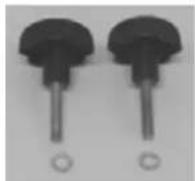
Assembly:
Unfold the two hinged arms so that they are at right angles to the base of the carrier. Next, tighten them with the plastic knobs (M8) that are also supplied.
Make sure that the plastic knobs are strongly tightened!
The carrier is now ready for use!
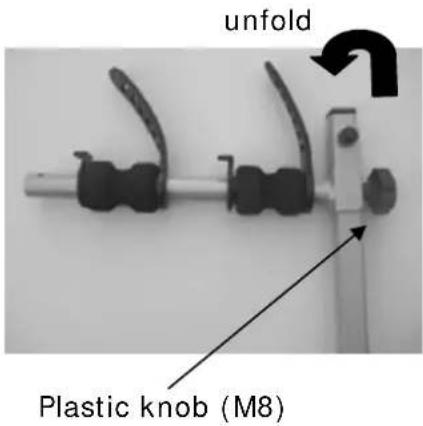
text_image
unfold Plastic knob (M8)End result:
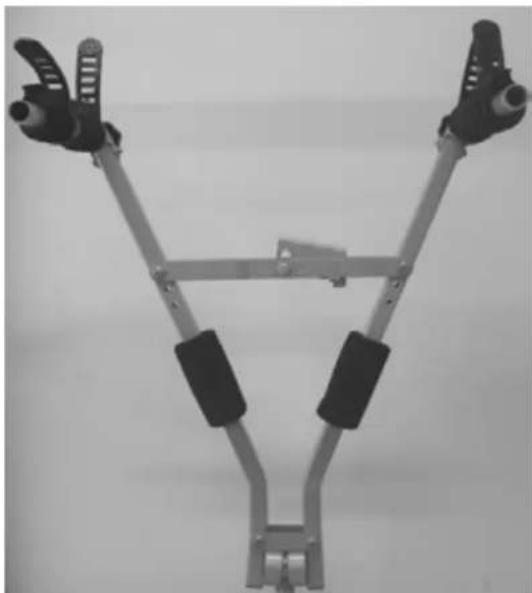
natural_image
Mechanical linkage device with articulated joints and black connectors (no text or symbols visible)Step 2
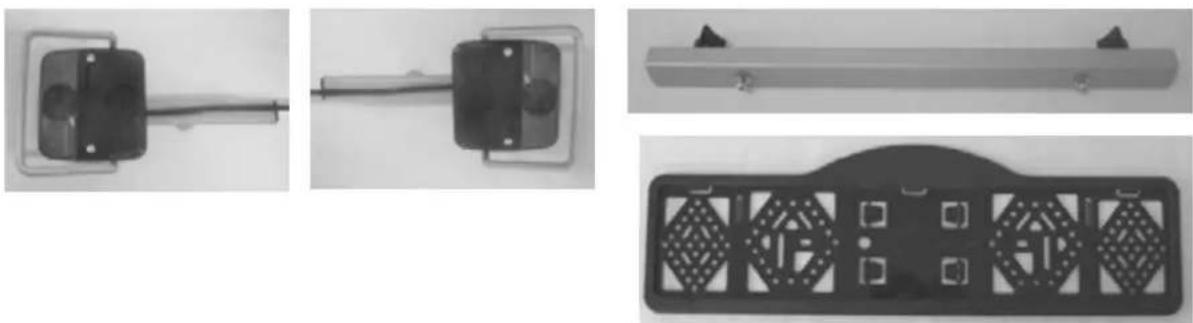
Parts:
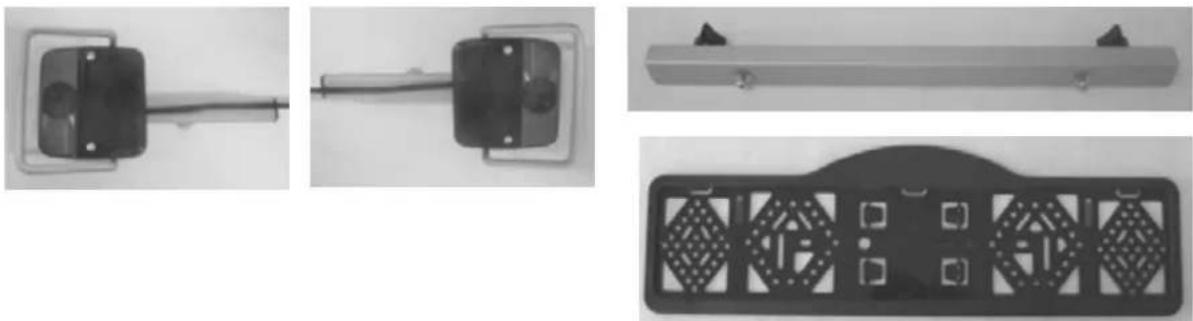
Assembly:
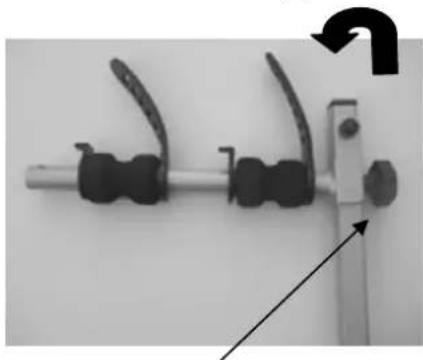
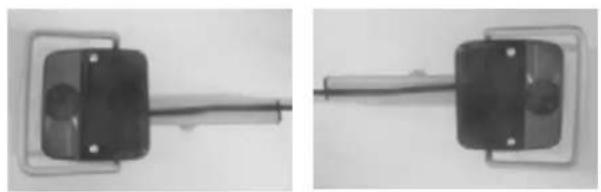
The light frame is a loose part of the bike carrier that can be mounted on the far ends of the unfolded arms. However, it must be assembled first.
Slide the two rear light holders (incl. lights) onto the light holder rail (make sure that the lamp with an "R" on it is mounted on the right side) and fasten them with the two plastic knobs.
Loosen and remove the little screws intended for the mounting of the number plate holder from the light holder rail and fasten the number plate holder to the rail. The number plate holder has to be level with the lighting.
End result:
natural_image
Exterior view of a black rectangular device with two metallic brackets and a central screen (no text or symbols visible)MOUNTING OF THE BIKE CARRIER ON THE CAR
When mounting the bike carrier to the car, it is best that the car is parked straight, the engine is turned off and the parking brake is activated. Make sure that the tow ball is undamaged, clean and not greasy!
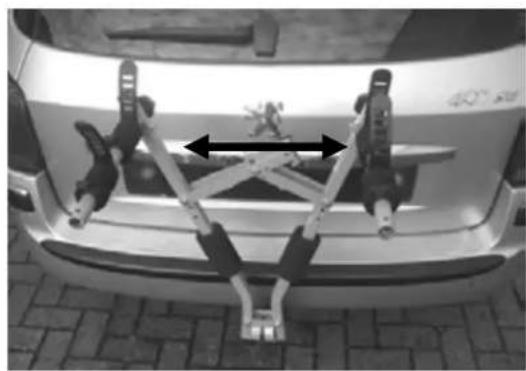
natural_image
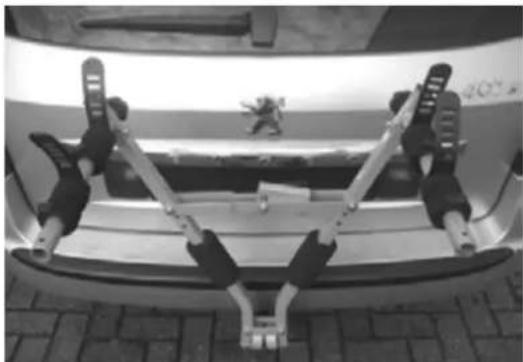
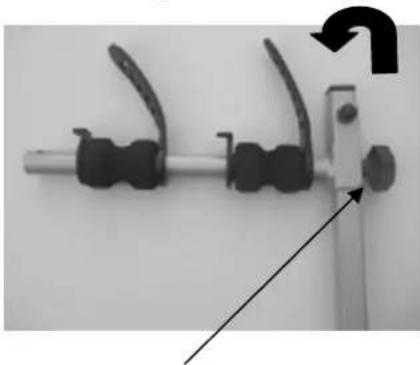
Top-down view of a car's rear bumper with mechanical arms and structural components (no visible text or symbols)Put the bike carrier on the tow ball. Make sure it is optically straight and unfold the carrier by pushing out the "legs" until more force is needed (position similar as on the picture).
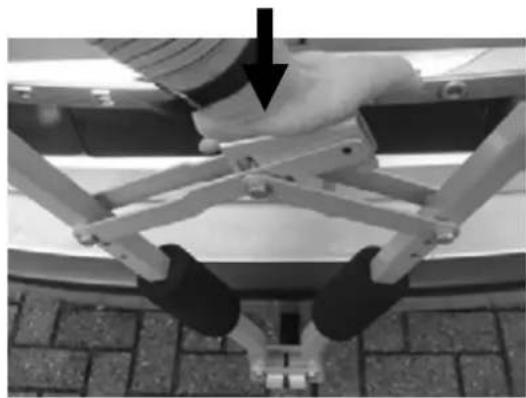
natural_image
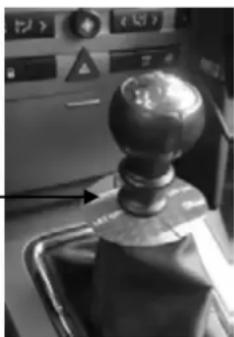
Close-up of a robotic arm with black legs and a hand, mounted on a platform (no visible text or symbols)Next, press with the flat hand the locking handle down. Push until this is not possible anymore (this can cost some force!)
WARNING: Please don't hold the locking handle with your complete hand since this can cause some harm on your hand!
natural_image
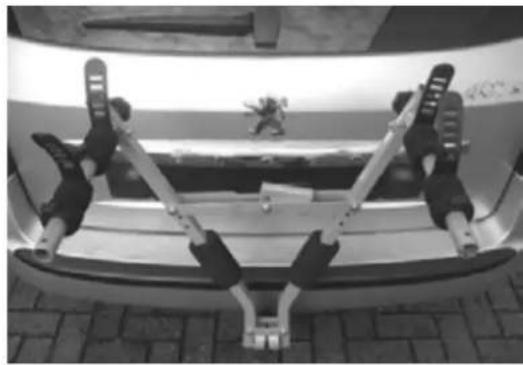
Top-down view of a car's rear bumper with two metal anchor clips and a small vehicle on the side (no visible text or symbols)Loosen the locking handle and the locking system will make sure the bike carrier will stay on the hitch ball.

natural_image
Close-up of a metal bracket with a hanging hook and arrow indicating direction (no text or symbols)Next, insert the safety pin in the in the appropriate holes. The carrier is now ready to carry your bikes!
Make sure that the carrier is the well secured with the safety pin. The carrier may not be used when the handle is not secured with the safety pin.
When you want to put the carrier away, you follow the mounting instruction in reverse order:
natural_image
Top-down view of a car backrest with two metal anchor legs and a small figurine on the side (no text or symbols visible)NOTE: the bike carrier can only be taken from the tow ball when the lamp holder frame is not mounted!
(situation as shown on the picture)
natural_image
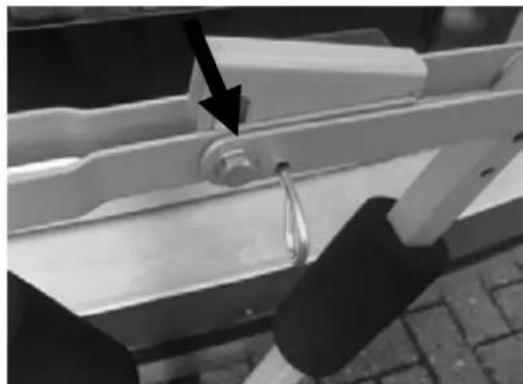
Close-up of a metal bracket with a black arrow pointing to a small component, no visible text or symbolsTo release the bike carrier from the hitch ball, first take out the safety pin.
natural_image
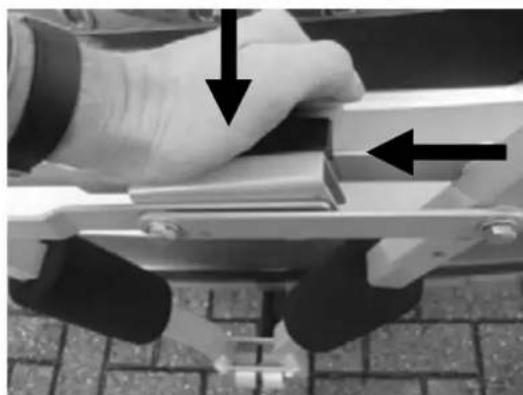
Close-up of a hand using a tool to adjust or install a metal bracket, with arrows indicating direction (no text or symbols visible)Press down the locking handle with the flat hand and tilt the bike carrier up with your other hand (or by your fingers) on the black handle.
WARNING: Because of the high tension on bike carrier, the locking handle can be pushed up by a high speed and with a lot of force!!
Remove the bike carrier from the tow ball and then fold it together (note your fingers!).
Now the bike carrier can be folded together and be stored.

natural_image
Close-up of a black and white handheld device with a rectangular lens and metal bracket (no visible text or symbols)MOUNTING OF THE BIKES ON THE BIKE CARRIER
NOTE: The number plate and lights can only be mounted after having mounted the bikes.
The bikes are well protected by several foam rubber accessories. It is possible to move these foam rubber accessories, to provide optimum protection for your bike.
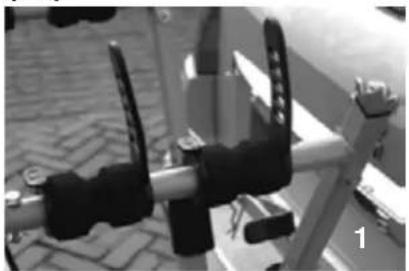
natural_image
Close-up of a mechanical clamp or bracket with black clamps and metal railings, placed on a brick-patterned surface (no visible text or symbols)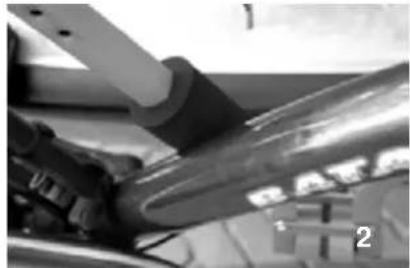
natural_image
Close-up of a mechanical component with no visible text or symbols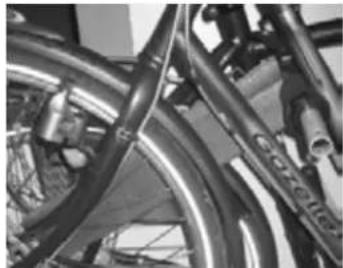
natural_image
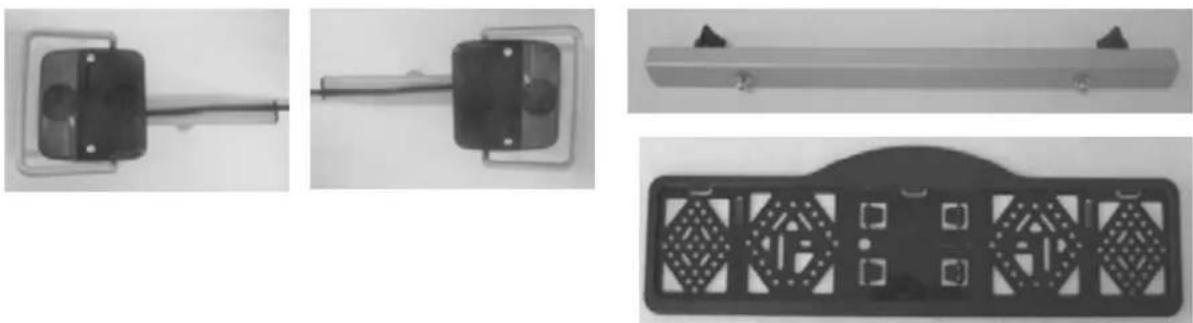
Close-up of bicycle wheels and suspension components (no visible text or symbols)1) The frame is protected by the foam rubber on the arms
2) The "legs" of the carrier have two foam rubber rolls that protect the bike frame on the side
3) Two rectangular foam rubber accessories can be placed in between the bikes (hanging on the arms).
Mounting of the bikes on the bike carrier: In principal, the frames of the bike are hanging on the horizontal arms.

Remove all parts from the bikes that could easily be lost (E-bike batteries, bike pumps, speedometers, baskets, panniers, bicycle seats etc.) during transport. These parts may become loose by the increased air resistance and vibration and put other road users at risk.
natural_image
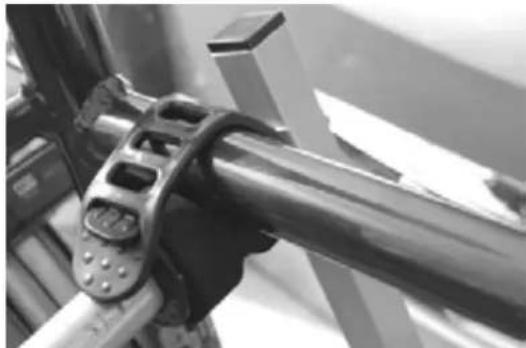
Close-up of a hand holding a metallic mechanical bracket with mounting holes (no visible text or symbols)The first (and heaviest, max 20kg) bike has to be placed in the rear foam holders (the one which are the nearest to the car) and must be secured with the integrated, flexible rubber strap.
natural_image
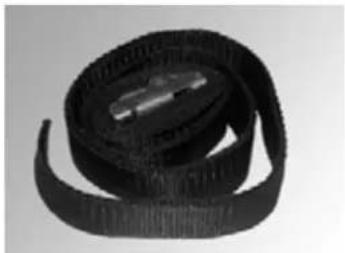
Close-up of a bicycle's front wheel and side brackets (no visible text or symbols)Next, the front wheel must be fastened with the supplied straps of 65cm. This to protect the wheel from moving/turning.
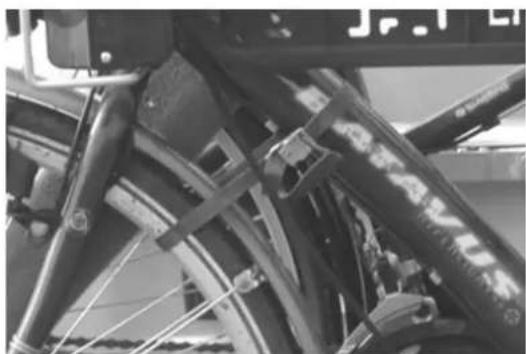
Place the second bike in opposite direction in the second foam holders and secure it with the integrated, flexible rubber strap.
Now secure the bikes using the long safety belt (supplied). Run the safety belt through the bike frame and around the bike carrier mainframe and tighten firmly.
natural_image
Close-up of a black knuckle strap with visible bands and a metallic clip (no text or symbols)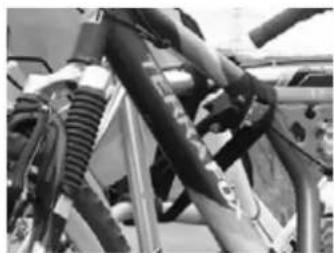
natural_image
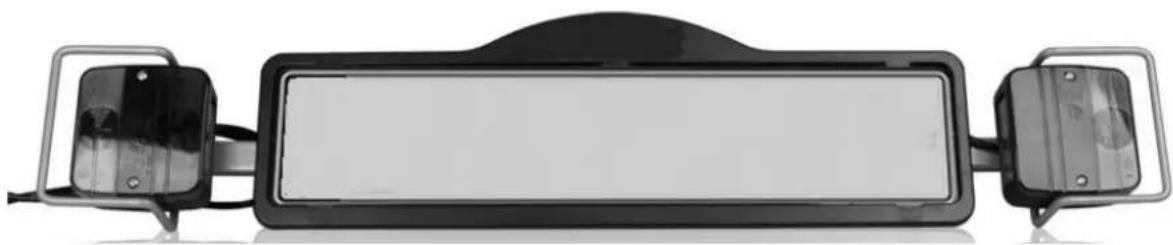
Close-up of mechanical components including hoses and springs (no visible text or symbols)If the bikes are firmly tight, the lighting can be mounted.
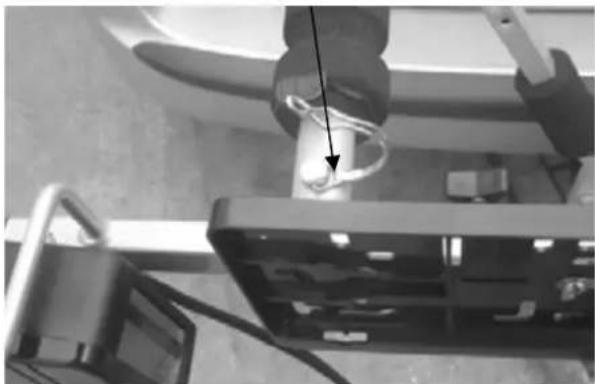
Slide the pre-mounted light frame with number plate into the ends of the arms (lamps are adjustable, so it should always fit). Secure the light frame with the two safety pins.
natural_image
Close-up of a hand holding a cable with a magnified inset showing a device (no visible text or symbols)Now connect the electric connector (7 or 13 pin) into socket of the car and check the lights for a proper operation.
ATTENTION: Driving the bike carrier without light frame (including license plate) is not allowed!
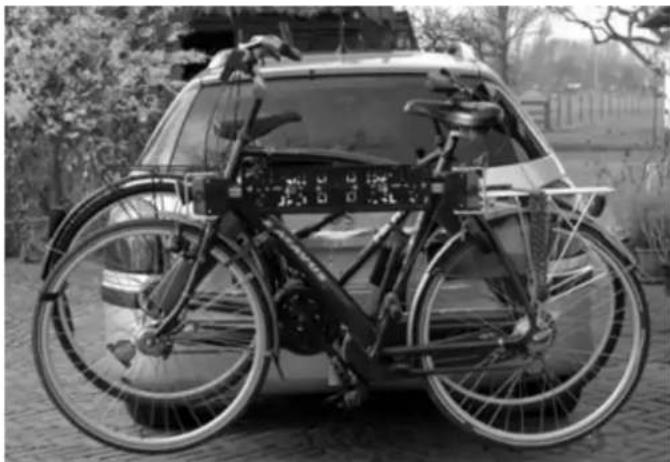
natural_image
Black-and-white photo of a bicycle parked in front of a vehicle, no visible text or symbolsTHE LICENSEPLATEHOLDER
The clips (2) to mount the license plate can be pressed out and are in the license plate holder (see picture).
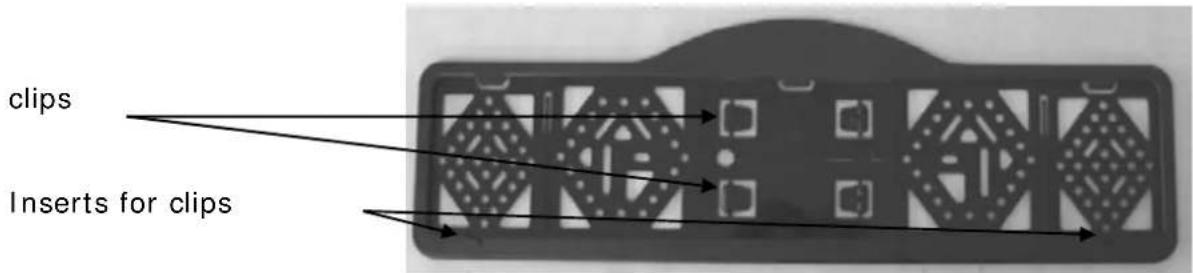
text_image
clips Inserts for clipsLIGHTING
This bike carrier is equipped with a lighting system. This system can be connected to the tow bar power socket of your car. Seeing that there are different kinds of sockets that require different
kinds of plugs, this carrier comes with the usual 7-pin plug and the 13-pin plug (Jaegers). As a result, the carrier can be used with any tow bar!
Both plugs are in one housing. Please cover the plug you don't use with the supplied cover.
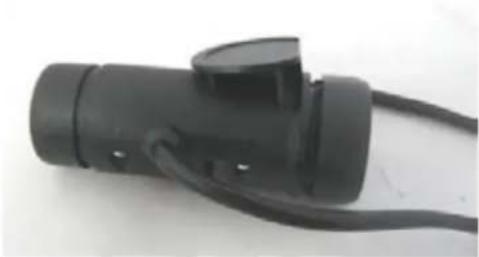
natural_image
Black electrical plug with attached cable, no visible text or symbolsUniversal system 7 pin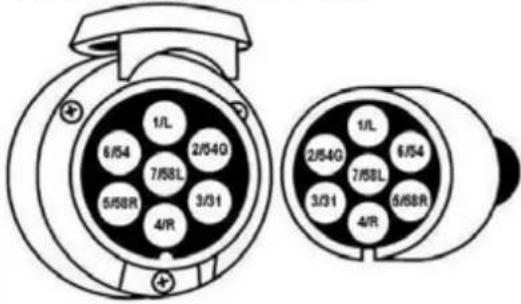 | 1/L2/54G3/314/R5/58R6/547/58L | Indicator leftNot usedGroundIndicator rightRear light rightStop lightsRear light left | yellowwhitegreenbrownredblack |
Jaegers system 13 pin(DIN 72.570)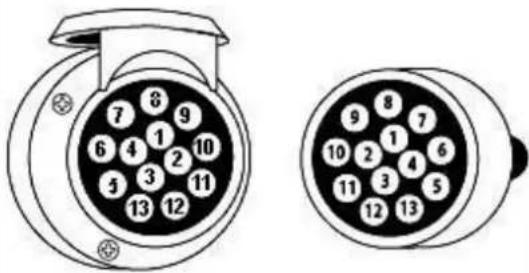 | 12345678910111213 | Indicator leftNot usedGroundIndicator rightRear light rightStop lightsRear light leftNot usedNot usedNot usedNot usedGroundNot used | yellowwhitegreenbrownredblack |
SAFETY REGULATIONS
Keep the tow ball clean and free of grease.
Check the bike carrier before use if there is any damage. Damaged or worn parts need to be replaced immediately. Only use original replacement parts.
Do not make any modifications on the bike carrier (mechanical or electronic) This can be very dangerous. Warranty claims will not be accepted and we can not guarantee the correct functionality of the bike carrier, if you done modifications. We are not responsible for damage caused as result of incorrect assembly, installation or modification.
Check the correct operation of the lighting at regularly.
Always make sure that the bikes are firmly fixed by using the belts.
Always use the extra safety belt, for extra protection of your bikes. Run the safety belt trough the U-frame and the frames of the bikes, and pull this firmly.
Make sure that no parts of the bike can get lost during driving (battery, pump, basket, saddlebags, etc.). Always remove these before driving!
Check regularly if all the belts, knobs and fixations are firmly secured and if necessary secure them again.
Do not cover the bikes with a cover while driving.
Driving with a bike carrier affects the performance of your car. Adjust your speed accordingly (max 120km/h). Try to avoid sudden braking and steering movements.
Please remember when driving in reverse that the car is longer than usual!

natural_image
Close-up of a mechanical lever mechanism with a knob and control panel (no visible text or symbols)In addition, pay attention to the regulatory requirements applicable to the transport of goods at the back of your vehicle.
When you have a vehicle with electronic parking sensors, an error message can come when the bike carrier is mounted. Switch off the parking system during the use of the bike carrier.
If the car is equipped with an automatic opening of the trunk, this must be switched off or only opened manually, if the bike carrier is mounted.
Take the bike carrier of the tow ball before using the carwash.
The bike carrier is not suitable for "off road" use.
Take the bike carrier of the tow ball if not used.
After use, the carrier can be easily stored in the boot of your car or at home, in the shed or garage. A practical carrier bag is supplied with the bike carrier, so everything can be stored away neatly.
In case of defects or problems please contact your Pro-User supplier.
MAINTENANCE
Always store the bike carrier clean and dry after use. If necessary spray with the water hose to remove mud and other filthy stuff.
Keep the tow ball of the car clean and free of grease.
Keep the connector of the bike carrier clean and free of grease.
Check the bike carrier regular if there is any damage. Damaged or worn parts need to be replaced immediately. Use only original replacement parts.
The nuts and bolts of the bike carrier need to be checked regular, if necessary tighten them again.
If there is a damage on the powder coating of the bike carrier this need to be treated with paint immediately.
Rotating and moving parts need to be oiled regularly.
GUARANTEE
This product is covered by a 2 year warranty. Please note that our guarantee covers reasonable use of the bike carrier, it does NOT cover any damage caused by misuse. This also applies to a malfunction or failure of the bike carrier that has been caused by poor or incorrect installation. To ensure the validity of the guarantee please carry out maintenance in accordance with the maintenance section. Warranty claim without proof of purchase is not possible. We reserve the right to make a call out and/or repair charge for any work required to be undertaken to rectify faults that are outside of the warranty i.e. incorrect or poor fitting, misuse, accidental damage, etc.
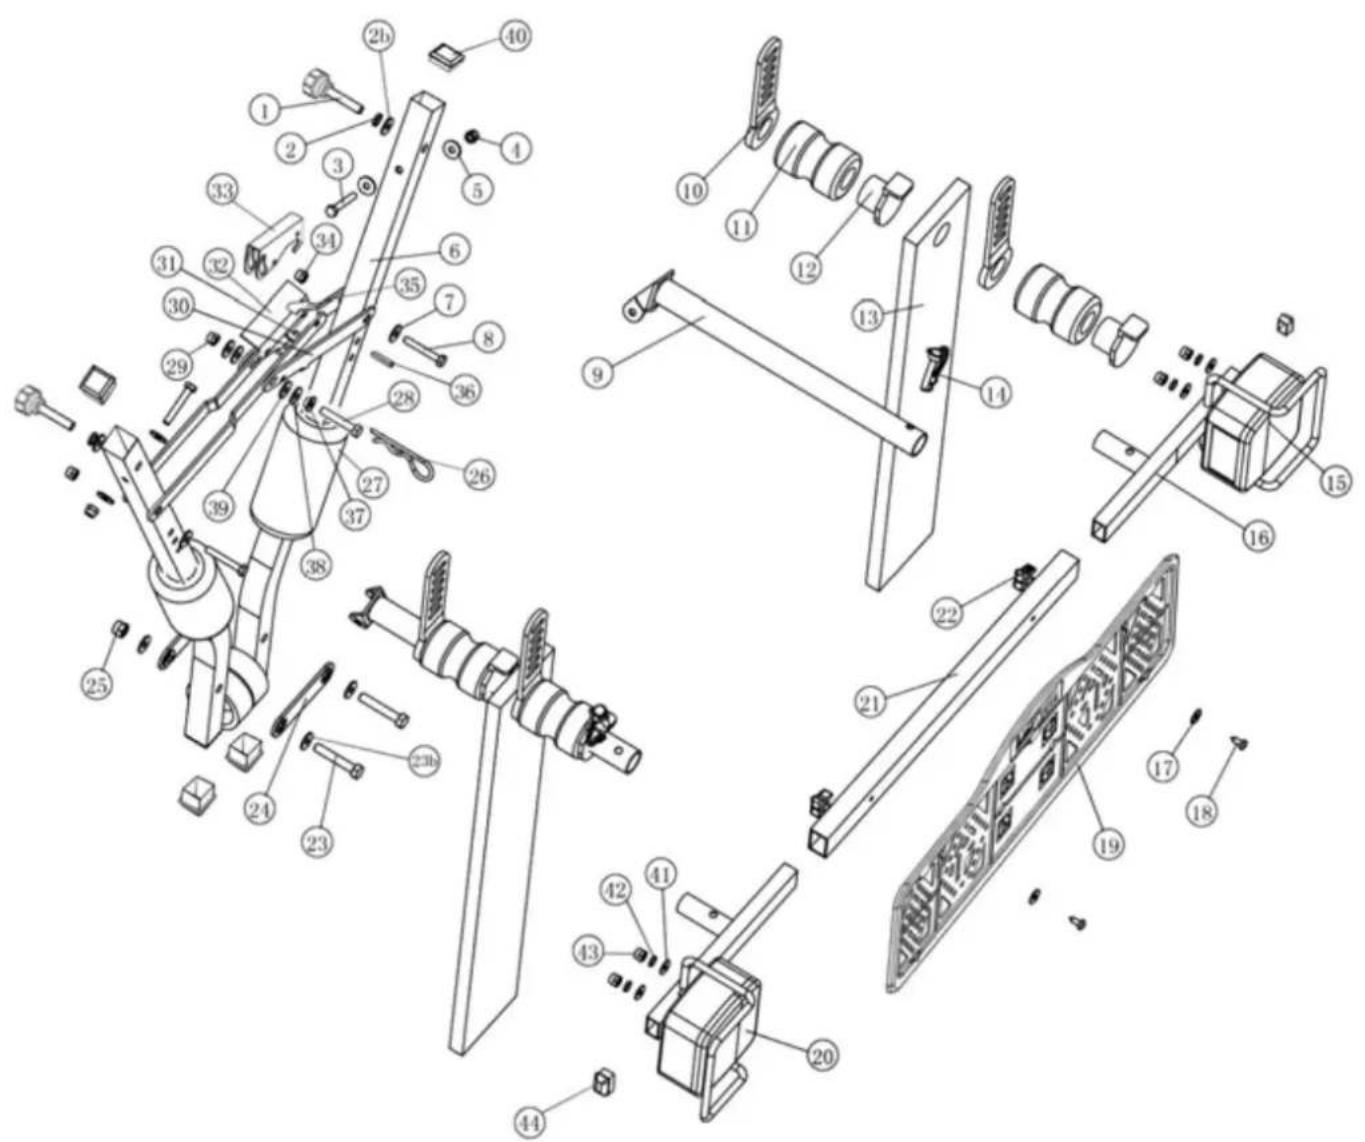
PART LIST
| Pos no. | Description | Number | Size |
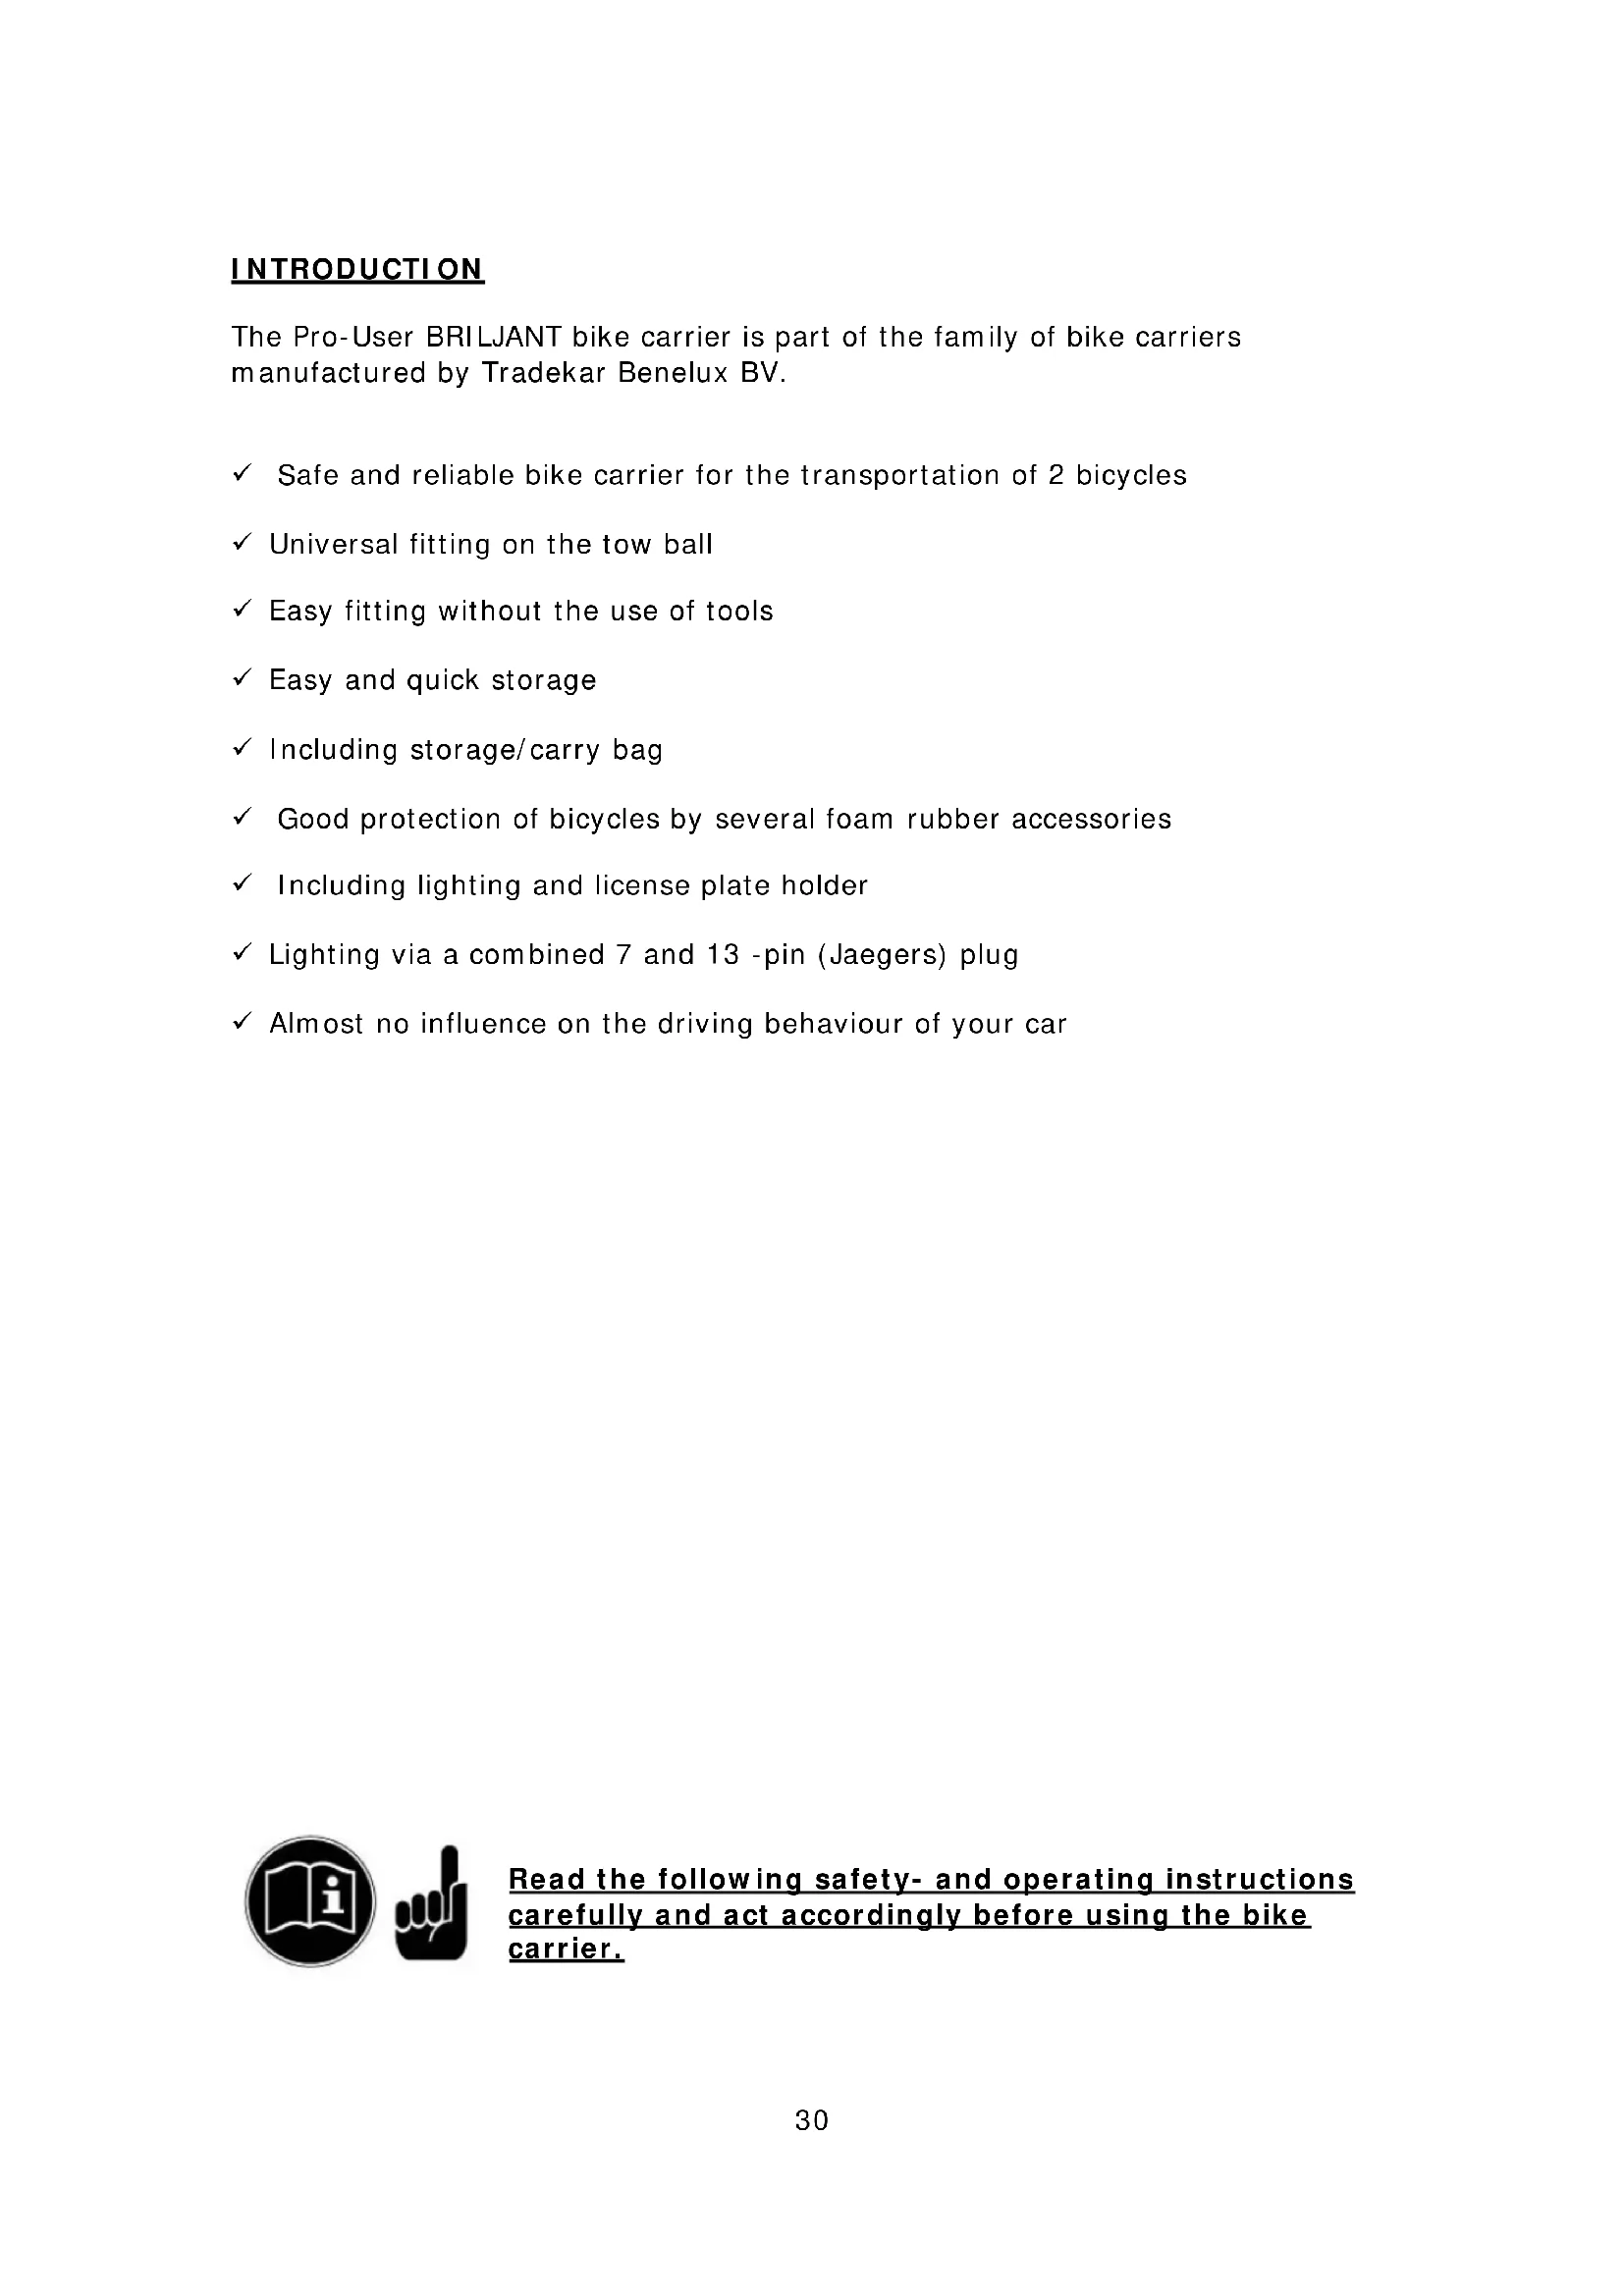
| 1 | Plastic knob 2 | M8 | |
| 2 | Spring washer 2 | M8 | |
| 2b | Washer 2 M8 | ||
| 3 | Hex head screw 2 | M6x40 | |
| 4 | Self-locking nut 2 | M6 | |
| 5 | Washer 4 M6 | ||
| 6 | Mainframe 1 | ||
| 7 | Washer 2 M8 | ||
| 8 | Hex head screw 2 | M8x40 | |
| 9 | Hinged arm 2 | ||
| 10 | Flexible rubber strap 4 | ||
| 11 | Foam rubber 4 | ||
| 12 | Plastic clip for rubber strap | 4 | |
| 13 | Rectangular foam rubber | 2 | |
| 14 | Safety pin | 2 | |
| 15 | Right rear light | 1 | |
| 16 | Light holder real (R/L) | 2 | |
| 17 | Washer 2 M5 | ||
| 18 | Screw | 2 | |
| 19 | License plate holder | 1 | |
| 20 | Left rear light | 1 | |
| 21 | Light holder rail | 1 | |
| 22 | Plastic knob | 2 | M6 |
| 23 | Hex head screw | 2 M8x45 | |
| 23b | Washer | 4 | M8 |
| 24 | Connection part | 2 | |
| 25 | Self-locking nut | 2 | M8 |
| 26 | Safety pin | 1 | |
| 27 | Foam rubber rolls | 2 | |
| 28 | Hex head screw | 1 M8x45 | |
| 29 | Self-locking nut | 1 | M8 |
| 30 | Locking handle right-part | 1 | |
| 31 | Rivet | 1 | |
| 32 | Locking handle left-part | 1 | |
| 33 | Handle for press | 1 | |
| 34 | Self-locking nut | 2 | M8 |
| 35 | Spring under handle | 1 | |
| 36 | Spring pin | 1 | |
| 37 | Bushing | 1 | |
| 38 | Washer 2 M8 | ||
| 39 | Nylon washer | 10 | M8 |
| 40 | End-cup 4 25X25 | ||
| 41 | Washer 4 M5 | ||
| 42 | Spring washer | 4 | M5 |
| 43 | Nut | 4 | M5 |
| 44 | End-cup 4 25X15 | ||
text_image
Exploded view diagram of a mechanical assembly with numbered parts for identificationINTRODUCTION
natural_image
Two metal clamping tools with black and gray components, no visible text or symbols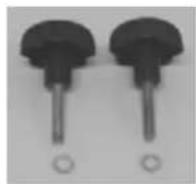
L'assemblage:
natural_image
Mechanical linkage device with articulated joints and mounting brackets (no text or symbols visible)Déplier 270°
natural_image
Close-up of a mechanical clamp tool with a curved arrow indicating rotation (no text or symbols visible)Bouton en pvc (M8)
Etape 2
Les éléments:
L'assemblage:
natural_image
Exterior view of a black rectangular device with metallic brackets and a flat top (no text or symbols visible)MONTAGE DU PORTE VELOS SUR L'ATTACHE-REMORQUE
natural_image
Top-down view of a car's rear bumper with attached mechanical arms and a small vehicle silhouette (no text or symbols visible)natural_image
Close-up of a robotic arm with articulated joints and a hand holding a small object, mounted on a metal frame (no visible text or symbols)natural_image
Top-down view of a car backrest with four articulated arms and a small vehicle on the roof (no visible text or symbols)natural_image
Close-up of a metal bracket with a hanging hook and handle, mounted on a paved surface (no text or symbols visible)natural_image
Top-down view of a car's backrest with two metal anchor legs and a small figurine on the side (no text or symbols visible)natural_image
Close-up of a metal bracket with a black arrow pointing to a small component, no visible text or symbolsnatural_image
Close-up of hands operating a metal mechanical fixture with arrows indicating movement (no text or symbols visible)natural_image
Close-up of a black and white handheld device with a rectangular lens and mechanical components (no visible text or symbols)INSTALLATION DES VÉLOS SUR LE PORTE-VÉLOS
natural_image
Close-up of a mechanical device with black clamps and a metallic lever (no visible text or symbols)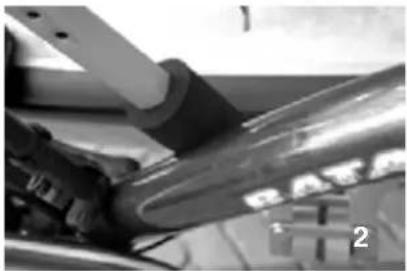
natural_image
Close-up of mechanical components with no visible text or symbols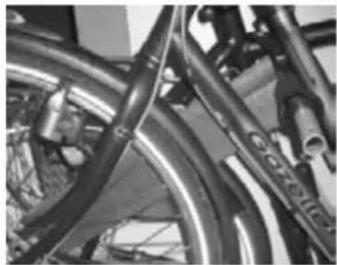
natural_image
Close-up of bicycle wheels and suspension components (no visible text or symbols)natural_image
Close-up of a hand holding a metallic mechanical bracket with bolts (no visible text or symbols)natural_image
Close-up of bicycle frame structure with visible levers and brackets (no text or symbols)natural_image
Black and white striped fabric with a small metallic object on top (no text or symbols visible)
natural_image
Close-up of bicycle suspension system components (no visible text or symbols)natural_image
Close-up of a hand holding a metallic object with a loop, next to a device (no visible text or symbols)natural_image
Black-and-white photo of a bicycle parked in front of a vehicle, no visible text or symbolsSUPPORT DE LA PLAQUE
natural_image
Black electrical plug with attached cable, no visible text or symbolsnatural_image
Close-up of a mechanical lever mechanism with a knob and control panel (no visible text or symbols)text_image
Exploded view diagram of a mechanical assembly with numbered parts for identification© Tradekar 91533/15A

text_image
PROUSER BIKE CARRIERS® USERTradekar Benelux BV
Staalweg 8 +31 (0)345-470990
4104 AT CULEMBORG info@tradekar.nl
The Netherlands www.pro-user.eu