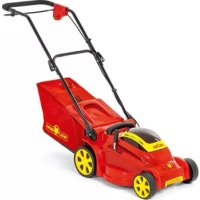
A 4072V - Lawn mower Wolf Garten - Free user manual and instructions
Find the device manual for free A 4072V Wolf Garten in PDF.



| Technical specifications | Wolf Garten A 4072V lawn mower, petrol engine, cutting width 40 cm, adjustable cutting height from 25 to 75 mm, 50 L collection box capacity. |
|---|---|
| Usage | Ideal for medium-sized gardens, cordless autonomous operation, easy to maneuver thanks to its light weight. |
| Maintenance and repair | Regular blade checks, clean the collection box after each use, maintain the engine according to the manufacturer\'s recommendations. |
| Safety | Personal protective equipment recommended, do not use in the rain, check for obstacles in the cutting area. |
| General information | 2-year warranty, spare parts available, user manual included. |
Frequently Asked Questions - A 4072V Wolf Garten
User questions about A 4072V Wolf Garten
0 question about this device. Answer the ones you know or ask your own.
Ask a new question about this device
Download the instructions for your Lawn mower in PDF format for free! Find your manual A 4072V - Wolf Garten and take your electronic device back in hand. On this page are published all the documents necessary for the use of your device. A 4072V by Wolf Garten.
USER MANUAL A 4072V Wolf Garten
Original operating instructions 12
natural_image
Diagram of a manual lawn mower with an inset showing a mechanical clamp or bracket (no text or symbols present)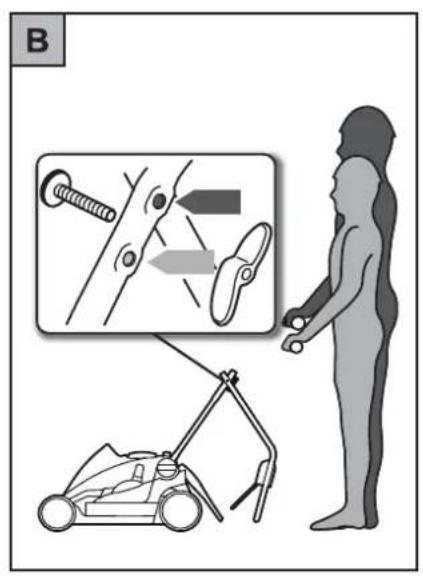
text_image
B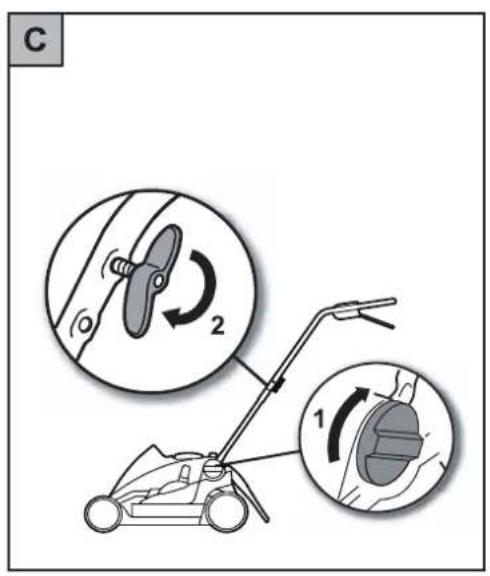
text_image
C 1 2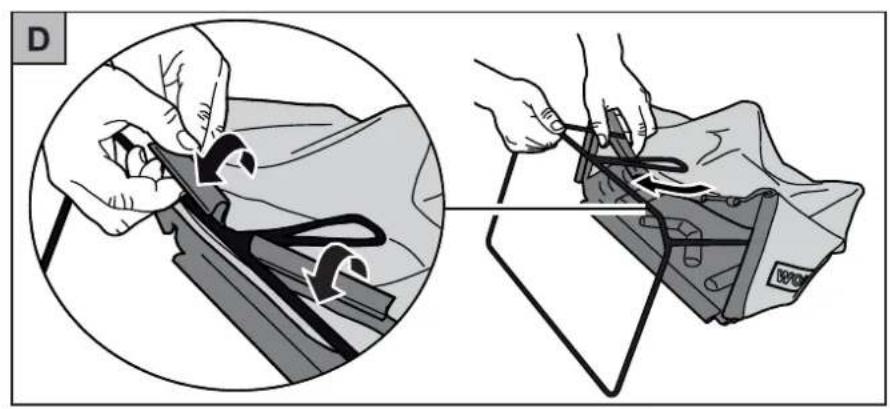
natural_image
Illustration showing two steps of a medical procedure: adding force to a patient's abdomen, then adjusting the device (no text or symbols present)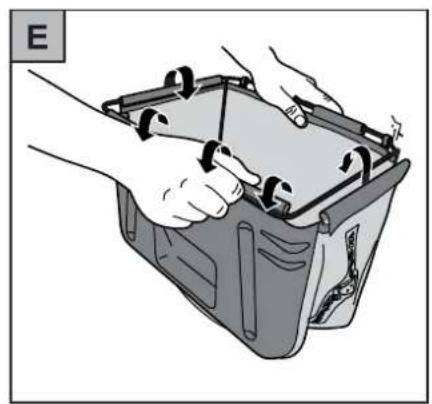
natural_image
Illustration of hands installing or adjusting a mechanical component with clips (no text or symbols)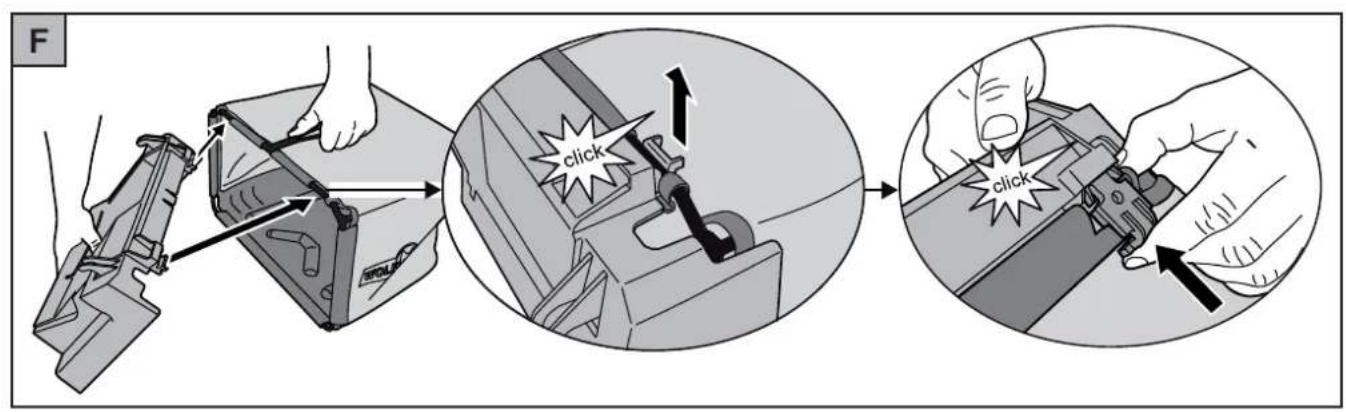
text_image
F click click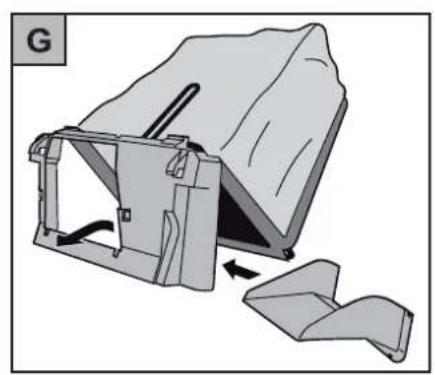
natural_image
Mechanical assembly diagram showing a folded component with a clamped part, no text or symbols present
natural_image
Diagram of a mechanical assembly with folded components and directional arrows (no text or symbols)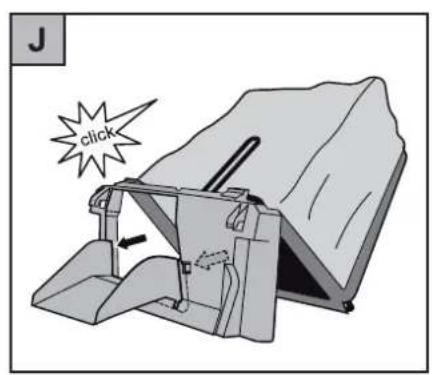
text_image
J click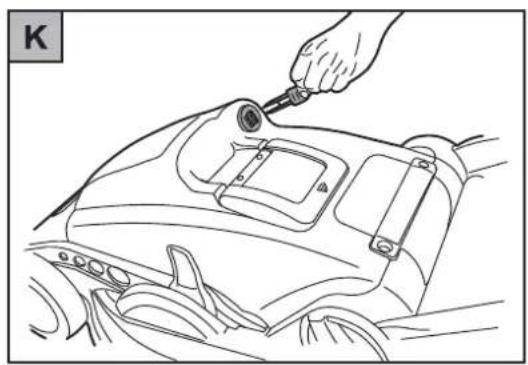
natural_image
Line drawing of a car interior with a hand adjusting a tool, no text or symbols present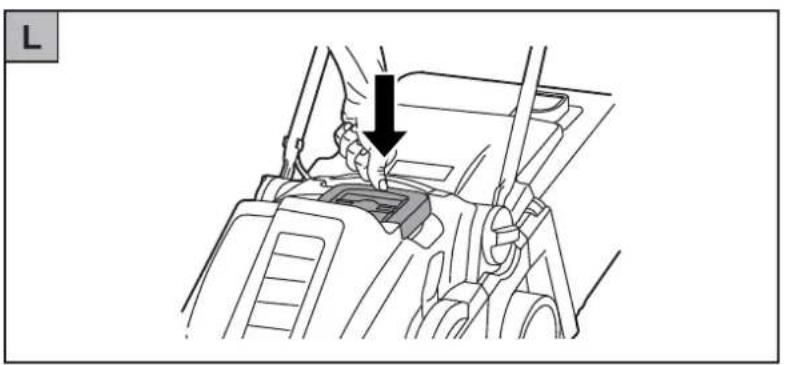
natural_image
Diagram of a car engine compartment with a hand operating the valve, showing a black arrow indicating force direction (no text or symbols present)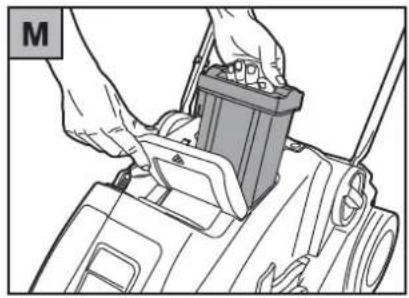
natural_image
Illustration of hands installing or adjusting a component on a mechanical assembly (no text or symbols visible)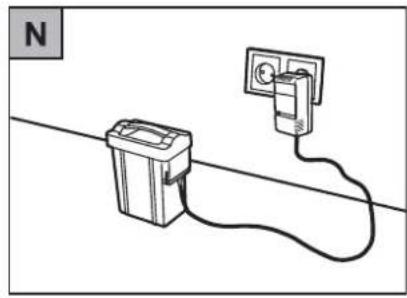
natural_image
Simple line drawing of a battery connected to an electrical outlet (no text or symbols)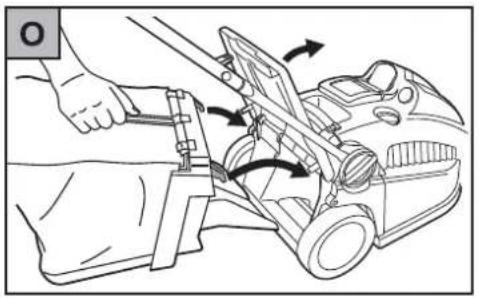
natural_image
Illustration of a person using a belt switch to adjust or install a vehicle (no text or symbols visible)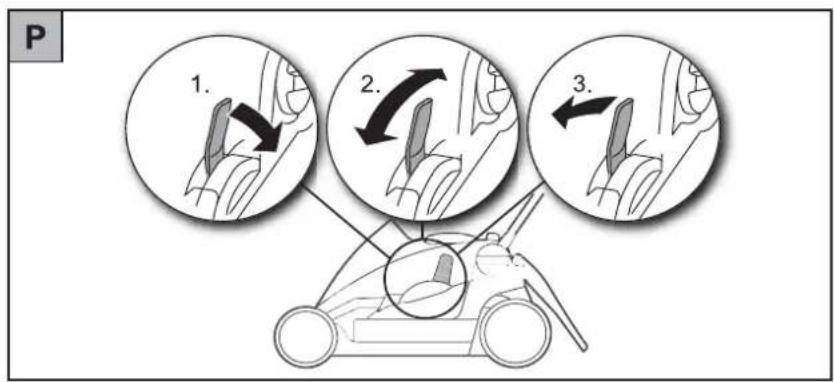
text_image
P 1. 2. 3.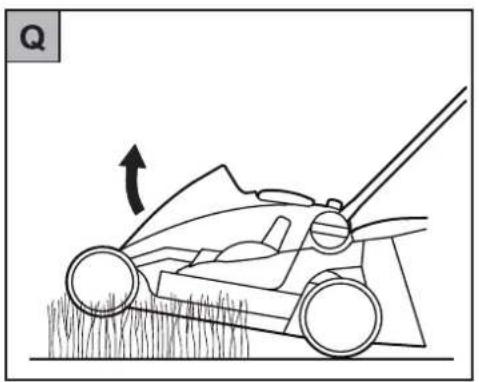
natural_image
Line drawing of a lawn mower with grass blades and a tool, showing motion direction (no text or symbols)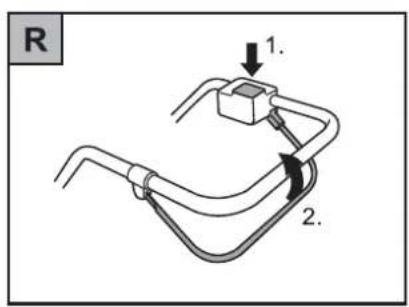
text_image
R 1. 2.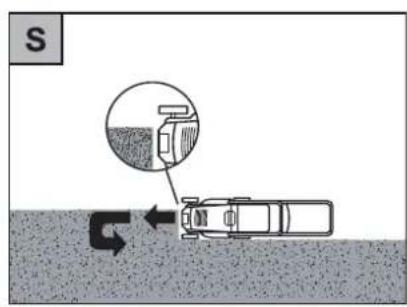
text_image
S
natural_image
Line drawing of a mopener with a magnified inset showing a square object (no text or symbols)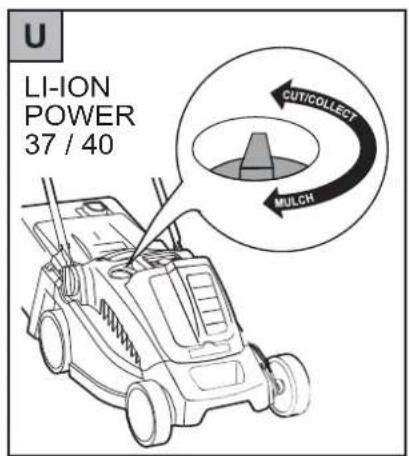
text_image
LI-ION POWER 37 / 40 CUT/COLLECT MULCH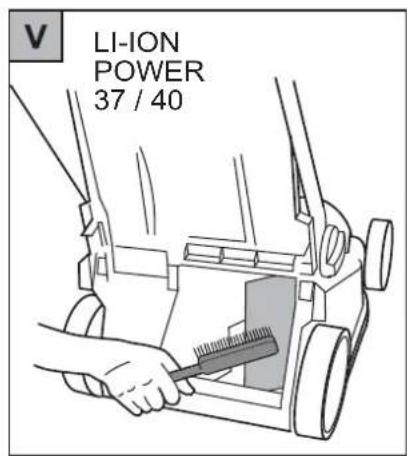
text_image
V LI-ION POWER 37 / 40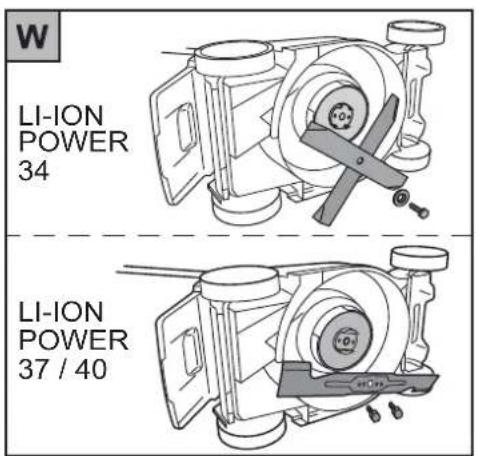
text_image
W LI-ION POWER 34 LI-ION POWER 37 / 40LI-ION POWER 34 - LI-ION POWER 37 - LI-ION POWER 40
D
1 Ein-/ Ausschalter
2 Sicherheitsbügel
3 Kabelknickschutz
4 Füllstandsanzeige
5 Grasfangsack
6 CCM-Schalter (cut-collect-mulch) LI-ION POWER 37, LI-ION POWER 40
7 Schutzklappe
8 Wechselakku
2 Operator presence bail arm
3 Cable anti-king protection
4 Filling indicator
5 Collector
6 CCM switch (cut-collect-mulch) LI-ION POWER 37, LI-ION POWER 40
7 Deflector plate
8 Exchangeable battery
9 Handle height adjustment
10 Height adjustment
11 Indicator to cutting
12 Charge status indicator
13 Contact key
F
1 Interrupteur
natural_image
Red and white toy car with wheels and visible exhaust pipes (no text or symbols)Congratulations on your purchase of a WOLF lawn mower

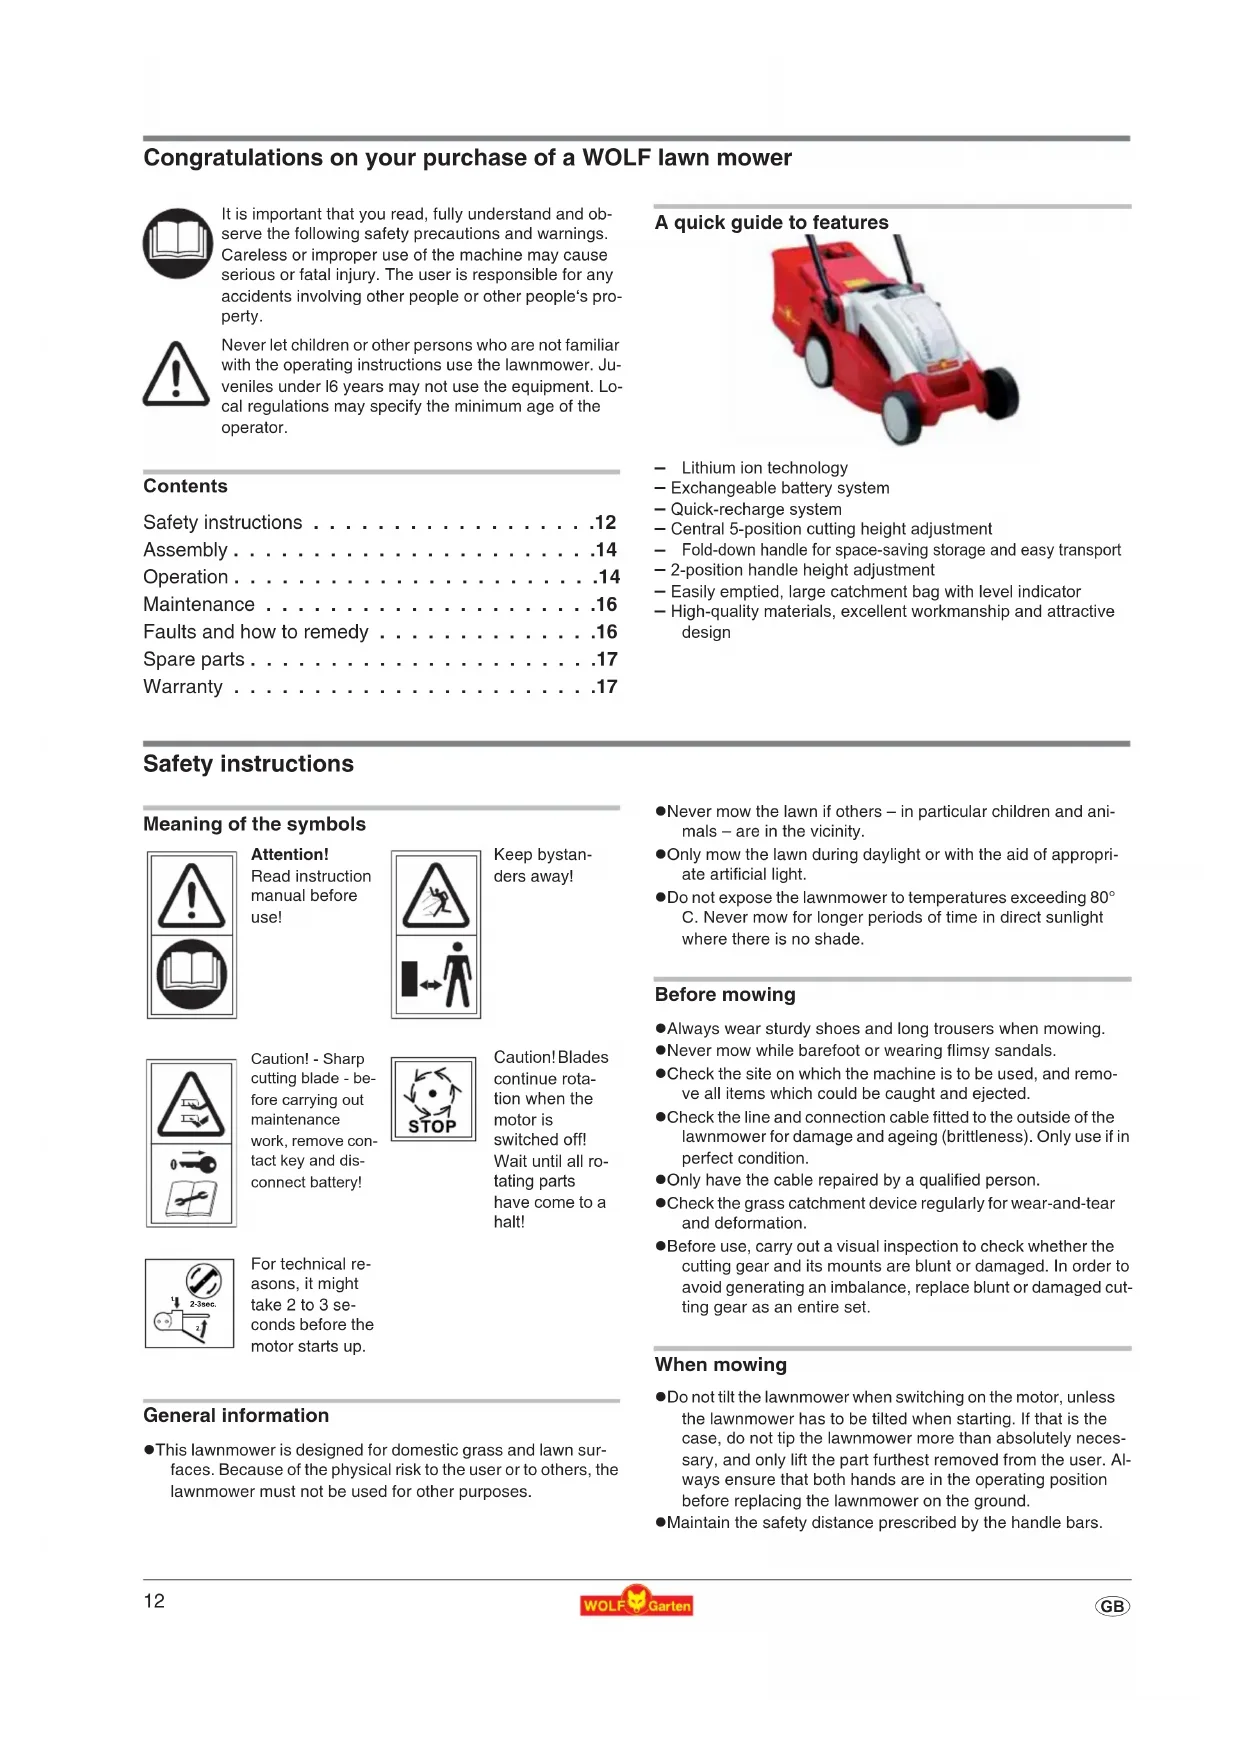
It is important that you read, fully understand and observe the following safety precautions and warnings. Careless or improper use of the machine may cause serious or fatal injury. The user is responsible for any accidents involving other people or other people's property.

Never let children or other persons who are not familiar with the operating instructions use the lawnmower. Juveniles under 16 years may not use the equipment. Local regulations may specify the minimum age of the operator.
Contents
Safety instructions .....12
Assembly....14
Operation....14
Maintenance .....16
Faults and how to remedy .....16
Spare parts....17
Warranty .....17
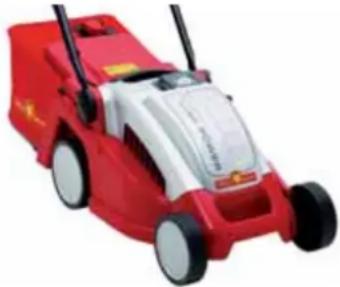
A quick guide to features
natural_image
Red and white toy car with wheels and visible exhaust pipes (no text or symbols)— Lithium ion technology
- Exchangeable battery system
- Quick-recharge system
— Central 5-position cutting height adjustment
— Fold-down handle for space-saving storage and easy transport
- 2-position handle height adjustment
— Easily emptied, large catchment bag with level indicator
– High-quality materials, excellent workmanship and attractive design
Safety instructions
Meaning of the symbols

Attention!
Read instruction manual before use!

Keep bystanders away!
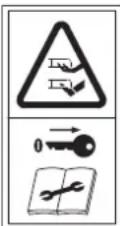
Caution! - Sharp cutting blade - before carrying out maintenance work, remove contact key and disconnect battery!
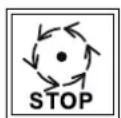
Caution! Blades continue rotation when the motor is switched off! Wait until all rotating parts have come to a halt!
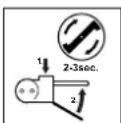
For technical re- asons, it might take 2 to 3 se- conds before the motor starts up.
General information
●This lawnmower is designed for domestic grass and lawn surfaces. Because of the physical risk to the user or to others, the lawnmower must not be used for other purposes.
- Never mow the lawn if others – in particular children and animals – are in the vicinity.
- Only mow the lawn during daylight or with the aid of appropriate artificial light.
- Do not expose the lawnmower to temperatures exceeding 80^ C. Never mow for longer periods of time in direct sunlight where there is no shade.
Before mowing
●Always wear sturdy shoes and long trousers when mowing.
●Never mow while barefoot or wearing flimsy sandals.
- Check the site on which the machine is to be used, and remove all items which could be caught and ejected.
- Check the line and connection cable fitted to the outside of the lawnmower for damage and ageing (brittleness). Only use if in perfect condition.
●Only have the cable repaired by a qualified person.
- Check the grass catchment device regularly for wear-and-tear and deformation.
●Before use, carry out a visual inspection to check whether the cutting gear and its mounts are blunt or damaged. In order to avoid generating an imbalance, replace blunt or damaged cutting gear as an entire set.
When mowing
-
Do not tilt the lawnmower when switching on the motor, unless the lawnmower has to be tilted when starting. If that is the case, do not tip the lawnmower more than absolutely necessary, and only lift the part furthest removed from the user. Always ensure that both hands are in the operating position before replacing the lawnmower on the ground.
●Maintain the safety distance prescribed by the handle bars. -
Only switch on the motor if your feet are at a safe distance from the cutting gear.
●Take care to ensure a safe and stable position, especially on slopes. Never run; always walk calmly forward.
●Mowing on inclines:
— Always mow at right angles to the incline, not up and down
— Take particular care when changing direction.
— Do not mow very steep ground - Be especially careful when mowing backwards and pulling the lawnmower towards you.
●Caution: do not touch running cutters. - Do not stand in front of the grass ejector opening.
●Never open the guard flap while the motor is still running. - Never drive across gravel while the motor is running – impacting stones!
●Avoid mowing wet grass where possible.
● In the following circumstances, the machine must be switched off, the contact key must be removed and the mowr must come to a standstill:
— When leaving the lawnmower
— When releasing a blocked blade
— When adjusting the cutting height
— When emptying the bag - After an obstacle has been hit (ensure that the mower or the cutting parts have not been damaged; in this case, first repair the damage)
- When the mower begins to vibrate heavily due to unbalance (switch off immediately and identify the cause)
— When the power line has been damaged during operation
— Before lifting the mower
— Before tilting the mower or transport it (e.g. from one lawn across a road to another)
Maintenance

Attention! Rotary cutter blade
Before all maintenance and cleaning work:
- Remove contact key and disconnect battery.
- Do not touch running blades.
● Regularly check and tighten all visible screws and nuts, especially those relating to the cutting bar, to ensure a firm fit.
●Never park your lawnmower in damp rooms.
●For safety reasons, replace worn or damaged parts.
- Only use original WOLF spare parts. Otherwise we can't guarantee that your mower conforms to the safety regulations.
Charger
●This charger should only be used with WOLF-Battery Mower LI-ION POWER 34.
- Do not store or use charger in humid or wet conditions but in dry room only.
- Disconnect charging units from mains socket by holding plug only. Do not pull on cable as this can cause damage to internal connections and make the unit unsafe.
●Never use the charger if the cable, plug or any part of the mower itself should be faulty. Any repair should be carried out by a qualified person.
- Ensure that the cooling of the charging unit is always guaranteed by keeping the cooling slots open and clean. Do not use it close to a radiator or other heating appliances.
●Never attempt opening the casing of the unit. If it does not function properly take it to a qualified service centre for inspection.
- To charge the battery, use only the specified WOLF changers. The use of other chargers might damage the machine or cause fire.
Battery
●As a result of incorrect use, fluid can leak from the rechargeable battery. Avoid contact with the fluid. In case of accidental contact, rinse with water. In case of fluid contact with the eyes, seek medical aid. Leaking battery fluid can cause irritation of the skin or burns.
●In the event of improper use of the battery pack, there is a risk of escaping hazardous vapours. Always ensure proper ventilation and immediately consult a doctor, if you feel unwell. The vapours might irritate the respiratory track.
Risk of fire!
●Never charge batteries near acids or flammable materials.
- Charge battery only at ambient temperatures between 0 and +40 °C. After heavy use, allow battery to cool down before charging it.
Risk of explosion!
Protect the battery against heat and fire!
- Do not place the battery on radiators. Avoid prolonged direct exposure to sunlight.
- Use battery only at ambient temperatures between 0 and +40 °C.
Risk of short circuit
- For disposal, transport or storage, pack the battery in a plastic bag or a cardboard box, or isolate the contacts with adhesive tape.
- Do not open the battery pack.
Dispose of batteries in an environmentally responsible manner

●WOLF batteries are Li-ION rechargeable batteries, and therefore must be disposed of in accordance with waste disposal regulations. Return defective batteries to your dealer for disposal. Batteries must be removed from the appliance before it is scrapped.
●WOLF batteries are best suited for battery-powered electric appliances, according to the state of the art. Li-ION batteries are harmful to the environment if disposed of with other household waste.
●WOLF Garten would like to encourage environmentally friendly consumer attitudes. Working together with you and WOLF dealers we guarantee the acceptance and recycling of used batteries.
Disposal
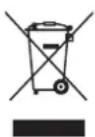
- Do not dispose of electrical equipment in domestic waste. Recycle equipment, accessories and packaging in an environment-friendly manner.
Assembly
Fasten
handle
Bar C

Caution!
The cable can be damaged while folding up or pulling out the handle bar.
●Inlay the cable in the bend protection . A
- When adjusting the handle height take care that the cable is not crimped B
- Fold the bottom part of the handle up and screw it tight with the two hand wheels Ⓐ1).
- Set the handle to the desired height . B
- Fold the upper part of the handle out and screw it tight with the wing nuts (2).
Mount the collecting bag D E F G H J
- See illustrations.
Operation
General
Contact key K

Caution! Rotating blade
Before carrying out any adjustments:
- Remove the contact key.
- Do not touch rotating blades.

The mower is only powered with electricity if the contact key is inserted.
Operating times
- Please check noise abatement regulations prevailing in your country.
Instructions for the use of WOLF battery-powered mowers

The area that can be mown by your battery-powered mower is dependent on various factors. These are: Type of lawn
Battery-powered lawnmowers are suitable for lawns the are mown frequently, normally, and, to a certain extent, for lawns that have not been cut for a while after holidays. The surface area that can be mown does however decrease in the order given above. Battery-powered mowers are not suitable for infrequently-mown meadows or similar.
Lawn structure
The area that can be mown decreases in proportion to the density of the grass. The mowing capability is lowest on extremely dense grass, e. g. golf greens.
Lawn condition
The condition of the lawn (dry, damp with dew, wet) has a major influence on the area of lawn which can be mowed. If the lawn is dry, this will give the maximum area which can be mowed. If the lawn is wet, more energy is required for the mowing and collection and thus this is the condition where the area which can be mowed is at a minimum.
Mowing/walking speed
The walking speed influences the duration of mowing and therefore the area that can be covered. We therefore recommend rapid mowing. The mowing path should not be covered twice if possible and the overlap of mowing tracks should be kept as minimal as possible. Frequently switching the mower on and off likewise decreases the battery's power.
Charging the battery

Caution! The charger must only be operated in dry rooms!

General charging instructions
To prolong the service life of the battery, observe the following instructions:
- Charge the battery before using the mower for the first time.
●For charging times, see page 128. -
If the battery voltage is too low, the lawnmower switches off automatically. In such a case, recharge the battery.
●The Lithium iron battery must also be recharged before prolonged periods of non-use, for example at the beginning of winter.
●The Lithium ion battery can be recharged at any charge level, and charging can be interrupted and resumed without any damage to the battery (no memory effect). -
Remove the contact key K
- Release the battery cover by pushing it down L.
- Remove the battery from the recess M.
- Connect the battery to the charger N.
- Connect the charger to the mains socket (230 V \~) N.

Instructions for the handling of the charger:
●Red LED is on: Battery is being charged
●Green LED is on: Charge process completed
- If the charger is connected to a power socket without a battery, the LEDs are off.
- In order to prolong the life the battery, it should not be charged for a period longer than two days.
i Instructions regarding the charge status indicators:

Green LED is on:
- Battery capacity =


Yellow LED is on:
- Battery capacity =


Red LED flashing (battery nearly flat):
- Battery capacity =

— The battery should be recharged

Red LED is continuously on (device switches off):
- Battery capacity =

or
- fault (e.g. battery too hot)
Hang up collection bag O

Attention! Rotary cutter blade
Undertake adjustments on the equipment only after the motor is switched off and the cutting tool has come to a standstill.
- Do not attach the collection bag until your feet are at a safe distance from the cutting tool.
- Lift the protective flap.
- Hang the grass bag in the chassis with the hooks in the recesses (see arrow).
- Replace the protective flap.
Set cut height P

Attention! Rotary cutter blade
Undertake work/adjustments on the equipment only after the motor is switched off and the cutting tool has come to a standstill.
●Switch off the motor and remove the contact key.
- Pull the lever out.
- Set the desired cutting height.
- Press the lever back in.
Selection of Cutting height
- If possible, mow when grass is dry in order to protect turf. Do not se cutting position too low when mowing very hight or wet grass.
●We recommend an average cutting height of 40-50 mm.
Starting and Stoping
●Switch on motor with mowerplaced on level and firm ground.
●not in high grass - alternatively tilt slightly . Q
Switch-on motor R
- Depress button and hold (1).
- Lift up bar (2).
- Release button (1).
Switch-off motor R
Release bar (2).
Tip for mowing:
To prevent strips of grass from being left unmowed, the cutting paths must always overlap a few centimeters S
Overload protection
In case of overload or blocking, the motor shuts down automatically!
Switch off the motor and remove the contact key.
●Overload: Cutting height is too low, or forward speed is too fast
●Blocking: Foreign object in cutting area (e.g. branches)
●The machine can be switched on again after about 5 min.
Emptying of Grassbox T
When the collection bag is full, the flap lowers by itself.
Attention! Rotary cutter blade
Undertake adjustments on the equipment only after the motor is switched off and the cutting tool has come to a standstill.
●Switch off the motor and remove the contact key.
● Empty collection bag.
- Remove potential blockages in the cutting space before starting.
i Instructions for level indicator:
For an efficient functioning of the level indicator, regularly clean the holes under the level indicator in the collection bag with a hand brush.
Cut / Collect (LI-ION POWER 37, LI-ION POWER 40)
Activate cut/collect function U
Attention! Rotary cutter blade
Undertake adjustments on the equipment only after the motor is switched off and the cutting tool has come to a standstill.
- Do not start the motor until your feet are at a safe distance from the cutting tool.
- Remove the grass collecting bag.
- Turn the switch to "CUT/COLLECT".
- Hang up the collection bag if necessary.
- Start the motor.
Mulch (LI-ION POWER 37, LI-ION POWER 40)
„Mulching“ is a process in which the grass is finely chopped by a special cutting system and then deposited on the ground. The result is that the grass does not have to be collected and disposed of. „Mulching“ also prevents the lawn from drying out.
i Instructions for mulching
We recommend:
- Depending on the growth of grass, mulch 1 – 2 x per week
●The grass should not be too high nor too wet!
●Go slow while mulching
●Take care that the blade channels do overlap.
●Do not cut grass more than 20 mm.

Note:
Mulching is not advisable in case of moss-affected or entangled grass, because the cut material stays on the moss surface and/or entanglement and thus cannot be absorbed by the ground.
● Regularly scarify and manure the lawn.
Activating the mulch function U

Attention! Rotary cutter blade
Undertake adjustments on the equipment only after the motor is switched off and the cutting tool has come to a standstill.
- Do not start the motor until your feet are at a safe distance from the cutting tool.
- Remove the grass collecting bag.
- Set the switch to „MULCH“.
- Start the motor.
Maintenance
General

Caution! Rotating blade
Before carrying out any maintenance or cleaning work:
- Remove the contact key.
- Remove the battery.
- Do not touch rotating blades.
Cleaning
●Clean mower thoroughly after each mowing with cloth or brush.
●Never spray the mower with water.
- Clean the mulch flap at regular intervals with a small broom (LI-ION POWER 37, LI-ION POWER 40). V
Winter Storage
●Clean mower thoroughly before storing away.
●Have your mower thoroughly checked once a year by an approved Service Centre.
●Do not store it in a wet or humid place.
●The Lithium iron battery must also be recharged before prolonged periods of non-use, for example at the beginning of winter.
Blade change W

Caution! Rotating blade
Before carrying out any maintenance or cleaning work:
- Remove the contact key.
- Remove the battery.
- Do not touch rotating blades.
●Wear protective gloves.

Attention!
An unbalance can develop after regrinding of the blade.
●Always regrind the blades in a specialist workshop, because an unbalance check should be undertaken according to the safety regulations.
●Always change blades in a specialist workshop. A torque spanner of 10 mm is mandatorily required. Fastening torque of the screws: 6 - 7 N-m (LI-ION POWER 34, LI-ION POWER 37).
●Always change blades in a specialist workshop. A torque spanner of 13 mm is mandatorily required. Fastening torque of the screws: 16-18 N-m (LI-ION POWER 40).
- Use only original WOLF spare parts.
Faults and how to remedy
| Problem Possible causes | Remedy | |
| Jerky run, machine heavily vibrating | • Blade damaged • Contact WOLF Service workshop | |
| • Blade loose | • See page 16 (Blade change) | |
| Motor fails to start | • Battery flat | • See page 14 (Charging the battery) |
| • Battery defective | • See page 17 (Spare parts) | |
| • Contact key not inserted | • See page 14 (General) | |
| Poor cutting/catching performance | • Blade blunt | • Contact WOLF Service workshop |
| • Bag blocked | • See page 15 (Emptying of Grassbox) | |
| • Incorrect cutting height | • See page 15 (Set cut height) | |
| • Battery defective | • See page 17 (Spare parts) | |
Spare parts
| Order no. Product Description | ||
| 4904 031 Grass bag, complete (LI-ION POWER 34) | ||
| 4907 031 Grass bag, complete (LI-ION POWER 37) | ||
| 4970 031 Grass bag, complete (LI-ION POWER 40) | ||
| 4908 096 | Vi 34 X | Blade bar 34 cm |
| 4939 096 | Vi 37 A | Blade bar 37 cm |
| 4949 096 | Vi 40 A | Blade bar 40 cm |
| 4919 096 LI-ION POWER Pack 2 Exchangeable battery | ||
| 4939 090 LI-ION POWER Pack 1 Exchangeable battery | ||
| 4939 072 Charger (standard) |
Warranty
The warranty rules issued by our company or the importer apply to every country. As part of the warranty, we remedy malfunctions on your appliance free of charge provided that this malfunction is caused by a material or manufacturing defect. In the event of a warranty claim, please turn to your dealer or the nearest branch office.
natural_image
Red and white toy car with wheels and visible exhaust pipes (no text or symbols)●Voir illustrations.
Fonctionnement
Général
Clé de contact K

natural_image
Red and white toy car with wheels and visible exhaust pipes (no text or symbols)natural_image
Red and white toy car with wheels and visible engine components (no text or symbols)Vangzak montered E F G H J
- Zie afbeeldingen.
Gebruik
Algemeen
Contactsleutel K

natural_image
Red and white toy car with wheels and visible exhaust pipes (no text or symbols)natural_image
Red and white toy car with wheels and visible exhaust pipes (no text or symbols)natural_image
Red and white toy car with wheels and visible engine components (no text or symbols)- Lithium-ion-teknologi
- Vekselakku-system
- Hurtigladesystem
natural_image
Red and white toy car with wheels and visible exhaust pipes (no text or symbols)natural_image
Red and white toy car with wheels and visible exhaust pipes (no text or symbols)- Technologie Li-ion
natural_image
Red and white toy car with wheels and visible exhaust pipes (no text or symbols)- Lítium-ion technológia
natural_image
Red and white toy car with wheels and visible exhaust pipes (no text or symbols)natural_image
Red and white toy car with wheels and visible exhaust pipes (no text or symbols)— Litij-ionska tehnologija
– Sustav zamjenskog akumulatora
- Sustav za brzo punjenje
— središnje podešavanje visine rezanja, peterostruko
- Preklapajuća ručka za čuvanje na malom prostoru i jednostavan transport
— Podešavanje visine ručke, dvostruko
- Velika vrećica koja se lako prazni, s pokazivačem stanja napunjenosti
- Visoko kvalitetni materijali, izvanredna obrada i atraktivan dizajn
Sigurnosne upute
Značenje simbola

Upozorenje! Prije puštanja u pogon pročitati upute za upotrebu!

● Regularly scarify and manure the lawn.
Aktiviranje funkcije kompostiranja U

natural_image
Red and white toy car with wheels and visible engine components (no text or symbols)- Lítiovo-iónová technológia
natural_image
Red and white toy car with wheels and a transparent cover (no visible text or symbols)natural_image
Red and white toy car with wheels and visible exhaust pipes (no text or symbols)natural_image
Red and white toy lawn mower with visible wheels and front-mounted screens (no text or symbols)natural_image
Red and white toy lawn mower with black wheels and white frame (no visible text or symbols)- tehnologie litiu-ioni
- sistem cu accumulator de schimb
natural_image
Red and white toy lawn mower with visible wheels and front-mounted sensors (no text or symbols)natural_image
Red and white toy lawn mower with visible wheels and front panel (no text or symbols)(Head of R & D / Product Manage-
ment / Quality Management)
(Product Standard Compliance)

| BG-Kocachka; CZ-Sekačka trávy; DK-Plaeneklipper; D-Rasenmäher; GR-Koupeutikó; GB-Lawn mower; FIN-Polttomoottorikäyttöiset; F-Tondeuse à gazon; HR-Kosilica za travu; H-Pázsitnyirógép; I-Tosaerba; NL-Gazonmaaier; N-Gressklipper; PL-Kosiarka; RO-Cositoare de iarbá; RUS-Газонокосилка; SK-Sekačka trávy; SLO-Kosilnica; S-Gräsklippare; TR-Çim bicme makinesi | |
 | BG-Rabotna ширина; CZ-Pracovní záběr; DK-Arbejdsbredde; D-Arbeitsbreite; GR-Плátoc εργασίας; GB-Working width; FIN-Työleveys; F-Largeur opérationnelle; HR-Radna širina; H-Munkaszélesség; I-Larghezza di lavoro; NL-Werkbreedte; N-Arbejsbredde; PL-Szerokość pracy; RO-Látime de lucru; RU-Ширина обработки; SK-Pracovný záber; SLO-Delovnaširina; S-Arbetsredd; TR-Çalışma genişliği |
 | BG-Регулиране дължината на откосите; CZ-Nastavení výšky strmiště; DK-Indstilling af klippehøjde; D-Schnitthöhe einstellen; GR-Púθμιση του úψούς κοτής; GB-Set the cutting height; FIN-Leikkuukorkeuden säätő; F-Réglez la hauteur de coupe; HR-Podešavanje visine rezanja; H-A vágási magasság beállítása; I-Regolare l'altezza di taglio; NL-Maaihoogte instellen; N-Innstilling av snithøyden; PL-Nastawianie wysokości cięcia; RO-Reglarea ináltimii de täiere; RUS-Установка высоты срезания травы; SK-Nastavení výšky strniska; SLO-Nastavitev višine košenja; S-Inställning av klipphöjd; TR-Kesme seviyesinin ayarlanması |
| [Уэн8] | BG-Terго; CZ-Hmotnost; DK-Vægt; D-Gewicht; GR-Bápoç; GB-Weight; FIN-Paino; F-Poids; HR-Težina; H-Súly; I-Peso; NL-Gewicht; N-Vekt; PL-Ciężar; RO-Greutate; RUS-Macca; SK-Hmotnost; SLO-Teža; S-Vikt; TR-Ağırlık |
 | BG-обороти електромотор; CZ-otáčky elektromotoru; DK-omdrejningstal; D-Drehzahl; GR-Apíθμός στροφών ηλεκτροκινητήρα; GB-speed of electric motor; FIN-kierrosluku sähkömottori; F-Vitesse du moteur électrique; HR-Broj okretaja elektromotora; H-Elektromotor fordulatszáma; I-numero di giri motore elettrico; NL-toerental elektromotor; N-turtall elektromotor; PL-liczba obrotów silnika elektrycznego; RO-turație electromotor; RUS-Число оборотов двигателя; SK-otáčky elektromotora; SLO-Število vrtljajev elektromotorja; S-varvtal elmotor; TR-Devir sayısı, elektronik motor |
| [ST56] | BG-Hanprежение; CZ-Napětí; DK-Spænding; D-Voltage; GR-Xωρητικότητα; GB-electric trimmer; FIN-Jännite/nimellisvirta; F-Tension; HR-Napon; H-feszültség; I-Tensione; NL-Spanning; N-Spenning; PL-Napięcie; RO-Tensiune; RUS-Hanprężenie; SK-Napätie; SLO-Napetost; S-Spanning; TR-Ge-rilim |
 | BG-Kapaçitet / Макс. мощност на единица площ; CZ-Kapacita / max. plošný výkon; DK-Kapacitet / Maks. Fladeydelse; D-Kapazität / max. Flächenleistung; GR-ἀνώτα Χρόνος φόρτισης; GB-Capacity / max. area; FIN-Kapasiteetti / enimm. leikkuuala; F-Capacité / rendement de surface max.; HR-Kapacitet / maks. snaga po površini; H-kapacitás / max. területi teljesítmény; I-Tensione / max. corrente nominale; NL-Capaciteit / Max. Maaioppervlakte; N-Kapasitet / maks. flateeffekt; PL-Pojemność / max. wydajność powierzchniowa; RO-Capacitate / maximă randament pe suprafață; RUS-Производительность / макс. Мощность на единицу поверхности; SK-Kapacita / Max. Plošný výkon; SLO-Kapaciteta / maks. površinska zmogljivost; S-Kapacitet / max. yteffekt; TR-Kapasite / maks.Yüzey Kapasitesi |
 | BG-Bъншно зарядно устройство: Вход/Изход; CZ-Nabiječka: Vstup/Výstup; DK-ladeapparat: Input/Output; D-Ladegerät: Input/Output; GR-Εξωτερική συσκεύη φόρτισης; Eiśoδος λήψης/Εξοδος παροχής; GB-Charger: Input/Output; FIN-Latauslaite: Input/Output; F-Chargeur: Input/Output; HR-Vanjski punjač: Input/Output; H-külső töltökészülék: βemenet/kimenet; I-Caricabatterie: Input/Output; NL-Acculader: Input/Output; N-Ladeapparat: Input/Output; PL-Ladowarka: Zasilanie/Wyjście; RO-Incârcator: Input/Output; RUS-Bwешнее зарядное устройство: Вход / Выход; SK-Nabi-jacka: Vstup/Výstup; SLO-Zunanji polnilnik: Input/Output; S-Laddningsaggregat: Ineffekt/Uteffekt; TR-Harici şarj cihazı: Giriş/Çıkış |
 | BG-Bvreme за зареждане; CZ-Doba nabijeni; DK-Ladetid; D-Ladezeit; GR-Xρόνος φόρτισης; GB-electric trimmer; FIN-Lataausaika; F-Durée de chargement; HR-Vrijeme punjenja; H-töltesi iðó; I-Tempo di carica; NL-Oplaadtijd; N-Ladetid; PL-Czas ładowania; RO-Duratá de încârcare; RUS-Bvrema заряда; SK-Doba nabijania; SLO-Čas polnjenja; S-Laddningstid; TR-Şarj süresi |
 | BG-Tréppene – рамо/ръка; CZ-Vibrace přenăšené na ruce; DK-Hând-arm-svingninger; D-Hand- Arm-Schwingungen; GR-Krađaşuoí χεριού-βροχίονα; GB-Hand/arm vibrations; FIN-Käsiin ja käsivarsiin kohdistuva tärinä; F-Vibrations DKns les mains et les bras; HR-Vibracije šake i ruke; H-Kezet és kart érö rezgés; I-Vibrazioni su mano-braccio; NL-Hand- en armtrillingen; N-Hând arm svingninger; PL-Drgania przenoszone na dlonie i ręce; RO-Oscilaṭii-mână-brať; RUS-Уровень локальной вибрации; SK-Vibracie prenăšané na ruky; SLO-Tresljaji dlani in roke; S-Hand-arm-svängningar; TR-El, kol sallamalar |
 | BG-Измерена/гарантирана звукова мощност ( L_WA/L_WAG ); CZ-Změřený / zaručený akustický výkon ( L_WA/L_WAG ); DK-Mált / garanteret lydeffektniveau ( L_WA/L_WAG ); D-gemessene / garantierte Schalleistung ( L_WA/L_WAG ); GR-Metrņμένη / εγγυμένη πητητική ισχύς ( L_WA/L_WAG ); GB-Measured / guaranteed sound power ( L_WA/L_WAG ); FIN-Mittattu / taattu äänitehotaso ( L_WA/L_WAG ); F-Puisance sonore mesurée / garantie ( L_WA/L_WAG ); HR-Izmjerena / zajemčena jakost zvuka ( L_WA/L_WAG ); H-Mért / garantált hangteljesítmény ( L_WA/L_WAG ); I-Potenza acustica misurata / garantita ( L_WA/L_WAG ); NL-Gemeten/gegarandeerd geluidsniveau ( L_WA/L_WAG ); N-Mälte / garanterite lydeffekt ( L_WA/L_WAG ); PL-Zmierzony / gwarantowany poziom halasu ( L_WA/L_WAG ); RO-Putere sonoră măsurată / garantata ( L_WA/L_WAG ); RUS-Измеренный / Гарантированный уровень звуковой мощности ( L_WA/L_WAG ); SK-Nameraný / zaručený akustický výkon ( L_WA/L_WAG ); SLO-Izmerjena / zagotovljena akustična moć ( L_WA/L_WAG ); S-Uppmätt / garanterad bulléreffekt ( L_WA/L_WAG ); TR-Ölcülmüş / Garantie edilen ses güčů ( L_WA/L_WAG ) |
 | BG-Звуково налягане ( L_RA ); CZ-Akusticky tlak ( L_RA ); DK-Lydtryk ( L_RA ); D-Schaldruck ( L_RA ); GR-Akoustický tíešon ( L_RA ); GB-Sound pressure ( L_RA ); FIN-Äänenpainetaso ( L_RA ); F-Pression acoustique ( L_RA ); HR-Zvučni tlak ( L_RA ); H-Hangnyomás ( L_RA ); I-Pressione acustica ( L_RA ); NL-Geluidsdruk ( L_RA ); N-Lydtrykk ( L_RA ); PL-Cišnienie akustyczne ( L_RA ); RO-Presiunea sunetului ( L_RA ); RUS-Уровень звукового давления ( L_RA ); SK-Akusticky tlak ( L_RA ); SLO-Akustičnipriftisk ( L_RA ); S-Ljudtryck ( L_RA ); TR-Ses basınci ( L_RA ) |
 | BG-Техническа документация при; CZ-Technické dokumenty; DK-teknisk dokument for; D-Technische Unterlagen bei; GR-Τεχνική τεκηρίωση; GB-Technical documentation at; FIN-Tekniset asiakirjat; F-Dossier technique chez; HR-Tehničke dokumentacije na; H-Technikai dokumentáció...nál; I-Documentazione tecnica presso; NL-Technische gegevens bij; N-Tekniske dokumenter på; PL-Dokumentacja techniczna jest archiwowana i dostępna (w firmie); RO-Documente tehnice; RUS-Техническая документация в ...; SK-Technické podklady u; SLO-Tehnična Dokumenti; S-Tek-niska dokument; TR-'deki teknik belgeler |
WOLF Garten
natural_image
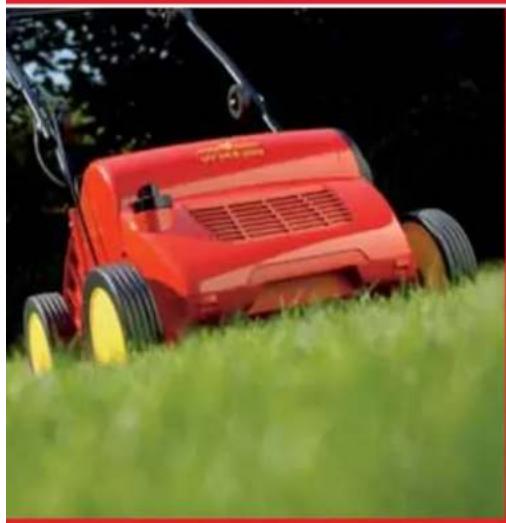
Red lawn mower on a grassy field, no visible text or symbols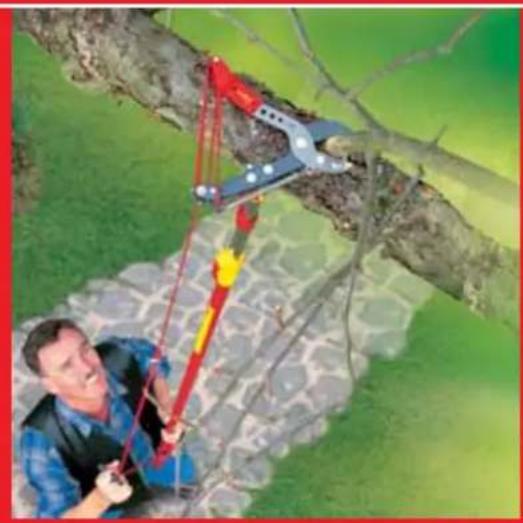
natural_image
Worker using a tree trawler to lift a tree branch, no visible text or symbols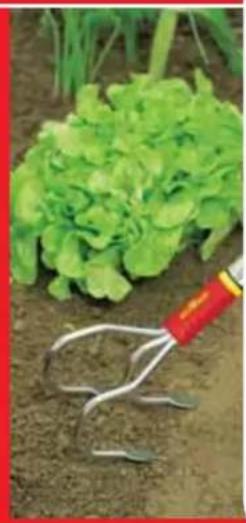
natural_image
A leafy green lettuce growing in soil with a red tool touching its stalk (no text or symbols visible)
text_image
4. 00926500000 MUSTER TYP: MUSTER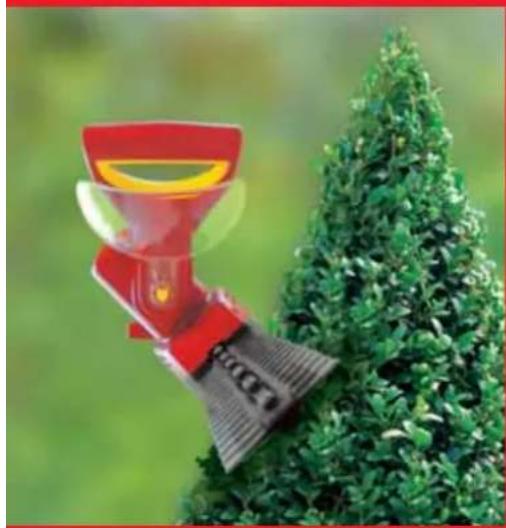
natural_image
Illustration of a red spray gun attached to a green hedgehog, no text or symbols visible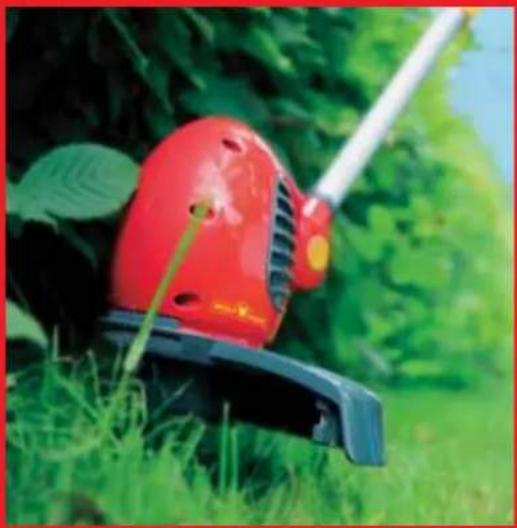
natural_image
Red and black lawn shaver in a grassy field with green foliage (no text or symbols visible)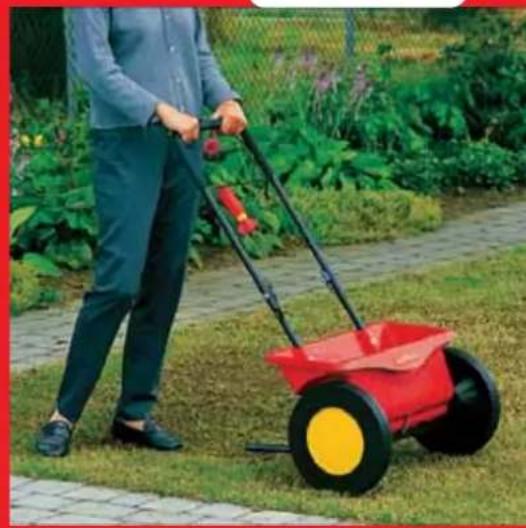
natural_image
Person using a red pushrower on a paved path in a garden setting (no visible text or symbols)
natural_image
Hand watering a red and yellow lawn tool in a grassy garden with flowers (no text or symbols visible)
natural_image
Red and white lawn mower in a grassy field with trees in the background (no visible text or symbols)