
ProPower HC7110 - Lawn mower REMINGTON - Free user manual and instructions
Find the device manual for free ProPower HC7110 REMINGTON in PDF.

| Product type | Cordless hair clipper |
| Brand | Remington |
| Model | ProPower HC7110 |
| Dimensions (L x W x H) | Approx. 16 x 4 x 5 cm |
| Weight | Approx. 200 g |
| Power supply | Mains adapter (100-240V) for charging, cordless battery operation |
| Battery type | Rechargeable Ni-MH battery |
| Charging time | 14 to 16 hours |
| Cordless runtime | Up to 40 minutes |
| Cutting guides | 2 adjustable guides: 1-21 mm (short lengths) and 24-42 mm (long lengths) |
| Blades | High quality steel blade set, removable for cleaning |
| Main features | Cordless cutting, adjustable guides, on/off switch, LED charge indicator |
| Maintenance and cleaning | Brush hair after use, oil blades, do not immerse in water |
| Safety | Do not use near water, unplug before cleaning, adult supervision required |
| Spare parts and repairability | Spare cord available via consumer service; removable blade |
| General information | Manual available in multiple languages, 128 pages |
Frequently Asked Questions - ProPower HC7110 REMINGTON
User questions about ProPower HC7110 REMINGTON
0 question about this device. Answer the ones you know or ask your own.
Ask a new question about this device
Download the instructions for your Lawn mower in PDF format for free! Find your manual ProPower HC7110 - REMINGTON and take your electronic device back in hand. On this page are published all the documents necessary for the use of your device. ProPower HC7110 by REMINGTON.
USER MANUAL ProPower HC7110 REMINGTON
Thank you for buying your new Remington® product. Please read these instructions carefully and keep them safe. Remove all packaging before use.

IMPORTANT SAFEGUARDS
- This appliance can be used by children aged from 8 years and above and persons with reduced physical, sensory or mental capabilities or lack of experience and knowledge if they have been supervised/instructed and understand the hazards involved. Children shall not play with the appliance. Cleaning and user maintenance shall not be done by children unless they are older than 8 and supervised. Keep the appliance and cable out of reach of children under 8 years.

Do not use this appliance near bathtubs, showers, basins or other vessels containing water.
- Do not use the product with a damaged cord. A replacement can be obtained via our International Service Centres.
- This product should only be used with the charging adaptor supplied.
WARNING: Keep the appliance dry. - The adaptor contains a transformer. Do not cut off the adaptor to replace it with another plug, as this causes a hazardous situation.
- Use this appliance only for its intended use as described in this manual. Do not use attachments not recommended by Remington.
- Do not use this product if it is not working correctly, if it has been dropped or damaged, or dropped in water.
- This appliance should never be left unattended when plugged into a power outlet, except when charging.
- Keep the power plug and cord away from heated surfaces.
- Do not plug or unplug the appliance with wet hands.
- Do not twist or kink the cable, or wrap it round the appliance.
- This appliance is not intended for commercial or salon use.
PARTS
- On / Off Switch
-
Blade set
-
Two attachment guide combs: 1 -21mm and 24-44mm (not shown)
GETTING STARTED
CHARGING YOUR APPLIANCE
- Ensure the product is switched off.
- Connect the charging adaptor to the product and then to the mains.
- If the product is not going to be used for an extended period of time (2 - 3 months), unplug it from the mains and store.
- Fully recharge your hairclipper when you would like to use it again.
- Allow 14-16 hours for a complete charge.
- When charging the LED indicator will be illuminated and will remain illuminated once the product is fully charged.
CORDED USE
Connect the charging adaptor to the product then to the mains.
CAUTION Extended mains only use will result in the reduction of the battery life.
CORDLESS USE
When the unit is switched on and fully charged, the product can be used in cordless mode for up to 40 minutes.
INSTRUCTIONS FOR USE
BEFORE STARTING THE CUT
- Inspect the clipper making sure that it is free from hair and dirt.
- Seat the person so that their head is approximately at your eye level.
- Before cutting, always comb the hair so it is tangle free and dry.
TO ATTACH A COMB
- Hold the comb with its teeth upward.
- To attach a comb, align the legs of the comb with the holes in the top of the clipper on each side of the blade and slide the legs into the trimmer until they click.
- To remove, firmly pull the comb straight up away from the clipper.
HAIR CLIPPER COMB SETTINGS
- The clipper comes with two adjustable combs, a short length adjustable comb (indicated by 1-21mm on the back of the comb) and a longer length adjustable comb (indicated by 24-44mm on the back of the comb).
- Please see table below for different cutting lengths available on each comb.
| Shorter Length Adjustable Comb Longer Length Adjustable Comb | |
| 1mm 24mm | |
| 3mm 26mm | |
| 6mm 29mm | |
| 9mm 32mm | |
| 12mm 35mm | |
| 15mm 38mm | |
| 18mm 41mm | |
| 21mm 44mm | |
- On the slide select switch there is a silver indicator which, when the short length adjustable comb is on the product, shows the corresponding length setting on the left of the slide select switch. On the other side of the slide select switch there is another silver indicator which shows the corresponding length setting when the longer length adjustable comb is on the product, on the right side of the slide select switch.
- To adjust the length settings, you must press the upper half of the slide select switch to release the locking mechanism, then apply force upwards on the slide select switch to increase the length setting. To decrease the length settings press the upper part of the slide select switch down and slide downwards.
- Use the clipper without any fixed combs for trimming hair close to the skin.
- This will trim hair to 1mm , holding the clipper so the blades are perpendicular to the skin will trim hair to 0.5mm .
INSTRUCTIONS FOR CUTTING HAIR
- To turn the product On or Off slide the switch. To locate the On/Off switch please refer to the key features section.
- For even cutting, allow the comb attachment/blade to cut its way through the hair. Do not force it through quickly. If you are cutting for the first time, start with the maximum comb attachment.
STEP 1 - Nape of the neck
- Set the comb to 3mm or 6mm.
- Hold the clipper with the blade teeth pointing upwards. Begin starting at the centre of the head at the base of the neck.
- Slowly lift the clipper, working upwards and outwards through the hair, trimming just a little at a time.
STEP 2 - Back of the head
- With the comb set at 12mm or 18mm , cut the hair at the back of the head.
STEP 3 - Side of the head
- With the comb set at 3mm or 6mm , trim sideburns. Then change to the longer 9mm guide comb and continue to cut the top of the head.
STEP 4 - Top of the head
- Use the longer length comb attachment and set it to 24mm or 27mm then cut hair on top of the head against the direction in which the hair normally grows.
- For longer hair on top, use the longer length comb attachment (24 - 44mm) to achieve the desired style.
Always work from the back of the head.
STEP 5 - The finishing touches
- Use the clipper without an attachment comb for close trimming around the base and sides of the neck.
- To produce a clean straight line at the sideburns, reverse the hair clipper.
- Place the reversed clipper at right angles to the head, tips of the blades lightly touching the skin and then work downwards.
CARE FOR YOUR HAIRCLIPPER
- Your clipper is fitted with high quality blades.
To ensure long lasting performance of your clipper, clean the blades and unit regularly. - Always keep the attachment guide comb on the trimmer blade.
AFTER EACH USE
- Ensure the appliance is switched off and unplugged from the mains before cleaning.
- Brush the accumulated hair from the blades and body of the clipper. Do not submerge the clipper in water.
- To clean unit, wipe with a damp cloth and dry immediately.
- Place a few drops of cutter or sewing machine oil onto the blades. Wipe off excess oil.
EVERY SIX MONTHS
- Remove the 2 screws retaining the fixed blade with a screwdriver.
- Remove the blade set.
- Brush out hairs from between the blades with a soft cleaning brush. Do not remove the lubricating grease from the blades. It is not necessary to remove the small moving blade from the unit.
- If the moving blade has been removed this can be re-fitted by slotting the moving blade holder over the pin in the centre of the interior product head.
- The groove on the moving blade just below the teeth should rest on the plastic pressure arm which rides inside the groove. The fixed blade should be assembled with the bevelled edge of the 2 screw holes facing outward and fixed with screws.
- Note that if the blades are not correctly aligned then cutting efficiency will be impaired.
CLEANING CAUTIONS
- Cleaning should only be done with a soft brush, such as the brush supplied with the product.
- Do not rinse under water.
- Do not use harsh or corrosive cleaners on the units or their blades.
- Ensure the appliance is switched off and unplug from the main outlet before cleaning.
REMOVING THE RECHARGEABLE BATTERY
We strongly recommend that a professional removes the rechargeable battery. Parts of the shaver case, and tools have sharp edges and may cause injury if not handled correctly.
- The rechargeable battery must be removed from the appliance before it is scrapped.
-
Disconnect the charging adapter before removing the battery.
-
Ensure that the battery is fully discharged. To do this, operate the trimmer until it stops.
- Remove the comb attachment.
- Remove the blade.
- Pry the decorative panel off the top housing to expose the internals and printed circuit board.
- Remove the assembly of battery and printed circuit board.
- Disconnect the battery from the circuit board.
- The battery must be disposed of at an appropriate official recycling/collection point.
- Do not attempt to operate the trimmer once you have opened it.
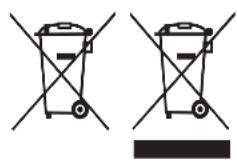
RECYCLING
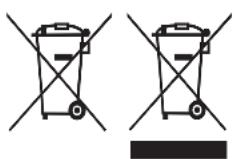
To avoid environmental and health problems due to hazardous substances, appliances and rechargeable and non-rechargeable batteries marked with one of these symbols must not be disposed of with unsorted municipal waste. Always dispose of electrical and electronic products and, where applicable, rechargeable and non-rechargeable batteries, at an appropriate official recycling/ collection point.
UW APPARAAT VERZORGEN
| Kort justerbar kam Lang justerbar kam | |
| 1mm 24mm | |
| 3mm 26mm | |
| 6mm 29mm | |
| 9mm 32mm | |
| 12mm 35mm | |
| 15mm 38mm | |
| 18mm 41mm | |
| 21mm 44mm | |

INNAN DU BÖRJAR KLIPPA
KAZDYCH SEST MESIACOV
- Ecni yctpoiCTBO BkIIOyeHO I NOJIHOCTbIO 3apJxKeHO, eO MOXHO IcNoIb3OBaTb B 6ecnpoBODHom peKmE do 40 MInHyT.
NHCTPYKUNIPO3KCPNYATAUIN
IPEEDCTPNUKKOJ
- OcmOTpuTe MaunHKy, y6eIntecb B OTCytCTBn Ha Hei BOLOc n rpa3n.
- Посади Te nepeД сбов человka тak,чTOбI erO rONOBa haxoДиЯсь ппблИЗnteьн Ho hypoBHe BaInx rIa3.
- Pered ctpnKoB Bcerda pauecbBaIe BOLOcbl, 106bl OHn 6bln HeCnyTabuMnscn CyxmN.
PNUKPEINJIeHNE HACAKN
- UdepKnBaIte HacaKy 3y6aMn BBepx

- UTo6bI HaJeTb HacAdKy, COBMeCTNTe HOxKn HacaIcN C OTBepCTnA Mn B BepXHe N MaunHKn, KOtOpBie paCNOJoxKeHbI NO OBe CTOpOHbI OT HOxKa, IN 3aDbuHbTe HOxKn B TpIMMep Do uenka.
-ДяСНТИнHасадК КрЕнКВОЗьMЛТecьзА HeeиCTaUNTe C MaUNHKN.
HACTPOIKN HACAOK JIЯ MAUNHKn
B KOMnIeK T MaunHKn BxOaT DBe perynpEmbIe HacaKn: perynpEma rpe6eHaata Ha cAdKa MAno dInhbl (06o3Naayetc SHeM TeKo Ha 3aHne CTOpOHe HacaKn) n perynpMa rpe6eHaata Ha cAdKa 6oJbWe dInhbl (06o3Naayetc KpaChO MeTKo Ha 3aHne CTOpOHe HacaKn).
B KOMPNEKT MaunHKn BXODT DBe perynpemybIe HacaDN: perynpyema rpe6eHataa HacaKa MaOn dInhbl (o6o3HaayetcMaTKo1-21 MM Ha 3aJHe CTOpOHe HacaDN) n perynpyemar rpe6eHataa HacaKa 60JIbWe NInHbI (o6o3HaayetcMaTKo1 24-44 MM Ha 3aJHe CTOpOHe HacaDN).
3HaueHnIy IINH IJI HacaOIK npBODaTcB Ta6NlCe HJKe:
| Pergunnyemaj rpe6eHuataj Hacadka majoДлины | Pergunnyemaj rpe6eHuataj Hacadka 6oJbWei Длины |
| 1mm 24mm | |
| 3mm 26mm | |
| 6mm 29mm | |
| 9mm 32mm | |
| 12mm 35mm | |
| 15mm 38mm | |
| 18mm 41mm | |
| 21mm 44mm |
Ha no3yHKOBom ceneKTopHom nepeKnIOaTeNe IMeETcpe6pncbI INHnKaTOp, KOToPbI yka3bIbae T COOTBeTCTByIOUHO HAcTPONky DnINHbICJeBOI CTOPoHbI NO3yHKOBOrO ceneKTopHO nepeKnIOaTeNa, KOrDa Ha yCTPONCTBO HaDeTa perynpyemar rpe6eHuaTae Hacadka MaOn dInHb. Cdpyro CTOPoHbI NO3yHKOBoro ceNEKTopHO nepeKnIOaTeNa IMeETcpe6pncbI INHnKaTOp, KOToPbI NOKa3bIbae T COOTBeTCTByIOUHO HAcTPONky DnINHbIC npaBOI CTOPoHbI NO3yHKOBoro ceneKTopHO nepeKnIOaTeNa, KOrDa Ha yCTPONCTBO YCTAHOBHeHa perynpyema rpe6eHuaTae Hacadka BoJIbWe nnHbI.
-ДянactpoикдпнblcneуET3aKaTbBepxHIOUcaCTbNon3yHKOBOrOcekeKTopHOrOppeKJIouateIg,HTObblOCBO6OuNTbMexaHn3M6ILOKNPOBKn,I3aTeM npINIOXITbycIIIneK NOJ3yHKOBOMy caleKTOPHOMypeekIooaTeIIO,HTObIpeMeCTtBeroBbIeN yBeJIuHTb HAcTpoIkydlnhbl.ДЯУMeNbSeHnHaCToPOnKdINHbI HaKMITEHaBepxHIOU qactbNoJ3yHKOBOrOcekeKTOPhoTeIgNoHaNPaBLeHIOBHN3NpepeMeCTnte erO HnKe.
Ha noI3yHKOBOM cIeKTopHOM nepeKIOUaTeNe IMeetc CINHn INDkaTOp, KOTopbI yKa3bIBaET, KOrDa Ha n3dEJIne HAdTa peRyIpyEma HacadKa, COOTBeTCTByOuOu HAcTPOIKy dInHbI. C npYroI cTOpOHbI OT noI3yHKOBoro ceJeKTopHORo nepeKIOUaTeJI NMeEtCk PacHbI INDkaTOp, KOToPbI NOKa3bIBaET COOTBeTCTByOuOu HAcTPOIKy dInHbI, KOrDa Ha n3dEJIne YctAHOBJIeHa peRyIpyEma HacadKa 6OJIbWeJ dInHbI.
-Дястпжк BOJOC 6Ли3К коже Испь3уITE Maшнky 6e3 KaKx-лбО
HacадOK-гpe6HeI.ТakIM O6pa3OM,ДИнha CTржкN COCTaBNT 1 MM,a ecIN DeprKaTb
MaшнHKY le3BnAMNперпенДИКУларно K KOжe,ДИнha CTржкN COCTaBNT 0,5 MM.
MHCTPYKUNI NO CTPNXKE BOJOC
- UTo6bI BkIIOUHTb NII NBKIIIOUHTb yCTPOIcTBO, nepeBnHbTe nepeKIOUaTeNb. PacnoIooJHe nepeKIOUaTeJI BKn./BbIK. yka3aHO B pa3JeIe ochOBhIx xapaKTePncTNIK.
-Дя paBHomepHOrO NOpaBnBaHnHa HacaKa-rpe6eHb nIe3Bne DoJxHbI npope3aTb nyTb cKBo3b BOLocbl. He npimeHnTe cnly, yTo6bl yckOpntb npouecc. Ppi nepBoi CTpIXke HaHHTe C MaKcMaJIbHOH HacaKn-rpe6Hn.
UAR1-3aHnYyacTbwei
- YctaHOBnTe HacaKy Ha 3 nnn 6 MM.
-Держinte Maшинку Дд CTPиЖКВОLOС 3y6цamN ЛeЗВЯ BVEрx.НaunHaite CTpnxKу NO ceHTpy rOIOBbl y OCHOBAHnAшen. - MeДлЕнно РОднмай Te Maшинку, образы вая ВОLOсы ворхи Наруху, сострURA
- HEMHOrO 3a OdnH pa3.
UAR2-3aTbIOK
- Bolocbi Ha 3aTbIke noDpe3aITe, yCTaHOBnB HacaIky Ha 12 MM nII 18 MM.
UAR3-6OKOBaYacTbTOJIOBbl
Bnckn npdpOBHnTe HacdkoN C dInHO 3 nnn 6 MM. 3aTeM cMeHnTe ee Ha 60nee dHHyIO Hacdky-rgpe6eHb 9 MM n npOdoJxnte cTpXkky BOIoc Ha MaKyuKe.
UAR4-BepxHyaCTb roJIOBbl
BocnoIb3yIeTcB dnnHnOH hacadko-rgpe6hem, yctaHOVB ee B noIOxKeHne 24 MM nnn 27 MM, dIra cTpIXKn BOLOC Ha BepXHeJ qACTN rOIOBbl.
- UTo6bI Ha MaKyUke OCTaBnTb 6OJIe IJINHbIe BOLOCbl, IcNoJIb3yIte HacaIky-pacYecky 6OJIbWei nnHbI (24 - 42 MM) n Co3dAbaIte JKeJaEMbl CTInb.
- CtpnKky Bcerda NaunHaTe c 3aHneu chaTn roJIObbl.
UAR5-PocleDnWtpnx
- Дя создань контура у ochobань и по 6okam when BocnoIb3yITeCb npnbopom 6e3 Hacadkn-rpe6Hn.
- Дя полуеня чеков ровон Линни на Виckх, nepeberpHTe MaunHky дястпжк. Прложнite NOBepHyTuO MaunHky dЯ STPnKKn NOД пямьIM yrIOM K roJIOBE, РИ ATOM KOHcbl Ne3Bn DOJIKHbI LIIb CJIeRka npNKacTaBcR K KOxE. ПODCTPNITe BOLOcbl CBepxu BHN3.

YXOD 3A MAUHHKÖДЛЯ CTPNKKN BOJOC
BRIGA O VAŠEM ŠIŠACU ZA KOSU
- Vaš šišac je opremljen visokokvalitetnim oštricama.
- Kako biste osigurali dugotrajnu učinkovitost Vašeg šišača, redovito Čistite ostrice i jedinicu.
NAKON SVAKE UPORABE
- Prie Čišćenja osigurajte da je urežaj isključen i iskopčan iz utićnice elektricne mreže.
- Očetkajte nakupljene dlacice iz ostrica i tijela šišača. Nemojte uranjati šišać u vodu.
Kako bistoe ocestili jedinicu, vlaznom krpom obrisite uredaj i odmah ga osu'site. - Stavite par kapi ulja za šišače ili šišać stejve na ostrice. Obrišite visak ulja.
SVAKIH SEST MJESECI
- Pomocu odvijača uklonite 2 vijka koji pridržavaju fiksnu oštricu.
- Skinite sklop ostrica.
- Uklonite mekanim kistom za cisćenje dlake izmedu ostrica. Ne uklanjajte s ostrica mast za podmazivanje. Nije potrebno skinuti malu pomicnu ostricu s ureda.
- Ako se pomična ostrica skine, ona se moze ponovno postaviti takdo se nosač pomične ostrice umetne u utor iznad igle koja se nalazi na sredini unutrašnje glave proizvoda. Žljeb na pomičnoj ostrici ispod zuba treba se nalaziti na plastićnom osloncu koji se kreće unutar Žljeba. Dvjte rupice za vijke trebaju biti okrenute prema vani kako biste postavili nepomičnu ostricu izmedu kosih rubova i učvrstili je vrijcima.
- Učinkovitost rada ce biti umanjena ako oštrice nisu pravilno poděsene.
UPOZORENJE TIJEKOM CISCENJA
-
Čiśćenje se treba vrsiti iskljucivo uz pomoć male mekane Četkice, poput Četkice koja se dobije uz kuplejeni proizvod.
-
Nemojte ispirati pod vodom.
- Ne koristite gruba ili abrazivna sredstva za ciscenje na jeginicama ili njihovim ostricama.
Prijcicenja osiguraje da je ureadaj iskljucen i iskopcan iz uticnice elektricne mreze.
UKLANJANE BATERIJE
3APJXKAHHI PNUCTPOIO
-ПepekoHaItecB TOMy, lo npucTpi BUMKHeHO.
-Пд'едаиTe 3apdHn aanTep Do npucTroO, nicra yoro yBIMKhitb adanTep y Mepeky XINBJIeHHa.
- YKso He nlaHcybC KOpNCTyBaTnC npNCtpoEM npOTaROM TpNBaIoro npOMixky aacy (2-3 mci), Ioro cIi BmKHyTu 3 MepeXi XNBneHH Ta cKnactu Dna 36epirAHn.
- Перахуним ВИКОПСТАНХМашINKДЯ CTРЖКВOLOCСI CJIД NOBHICTO nepezapdntN.
Для nobhoicHHoro 3apdkaHn npnctpoIO noTpi6Ho 14-16 roDInH.
Iiuc npoccy 3apJxHnCBiTtMeTbC CBITIOIDHn IHdkaTop.
Iicna3aKiHueHHaapKn iHnKaTOp 3apJxHaHHaannuTbcn iDCbUeHm.
BUKOPNCTAHH3I WHYPOM
-Пд' endаи Te 3apdHn aanTe pdo npctpo, nicra yoro yBIMKhitb adanTepy Mepeky KINBneHHa.
OBePEXHO HaMipHe BnKOpunctaHnI npncToIO B pexmI KnBneHnB iD MepeXi npn3BOAnTb Do 3MeHsEHHr TepmiHy BnKOpunctaHn8 6aTapei.
BUKOPNCTAHHЯBE3UHYPA
- YbIMKHeHn i3 NOBHM 3apAOM npncpti moKe BnKOpNCTOByBaTnca 6e3 NiKnIOueHHa shHypa XNBLeHHn npotrarom 40 XBUnn.
IHCTPYKZI3 EKCJIYATAU
IPEeI NOyATKOM CTPNJKN
- IpepeBipTe MaunHky Ha BiCyTHicTB 3aIIuKIB BOnocra Ta 6pyd.
- Iocaditb oc6y,ky notpi6Ho ctpnrtu,Tak,io6 iI roJoba po3TaOobyBaJacr npn6nn3HO ha pIBHi Baunx ouen.
Bolocmae6yTu cyxuMa Ta po3nnyTaHm.
ДЛ ПИКПINLEHн HACADKn
- TpimaiTe HacaKy IorOpn 3y6qamn.
- ьбуctahOBHTn Hacaiky, cymiCtItb hixKn Hacaikn 3 OTBopamn y Bepxhi YacTNHi MaunHKn Oba6iY ne3a Ta BCTaBTe hixKn B npnilad DO KlacaHna.
-ДяЗнгТЯнсakn i3 3ycnllm NOTaHITb II BiMaunHKn.

HAJATYBAHHH HACADKIMAUINHKU
- Do komnneKty pa30m i3 MaunHKoO BXoJrB dBi perynboBaHi HacadKn: perynboBaHa HacadKa-rpe6iHeu MaJeHbKOI DOBXHH (No3Haayetc CnHIM Ha 3aHni YactHi HacAdKn) Ta perynboBaHa HacadKa-rpe6iHeu BeNkoI DOBXHH (No3Haayetc YepBOHM Ha 3aHni YactHi HacadKn).
- Do komnlekty pa30m i3 MaunHkoBxOaTb DBi perynboBaHi HacadKn: perynboBaHa rpe6iHuacta Hacadka ManoI DOBXHH (no3HaayAcBcHanncom 1—21 MM Ha 3aHni YactHi HacadKn) Ta perynboBaHa rpe6iHuacta Hacadka 36InbWeHOJ DOBXHH (no3HaayAcTbC HANCOM 24—44 MM Ha 3aHni YactHi HacadKn).
IOBxHa CtpnKn IJI KoxHOHaCaKn HaBeDeHa B Ta6nCi HnXue:
| PereylnboBaHa hacaIka-rrpe6iHeuCb MaJIeHbKOÖДOBЖИHи | PereylnboBaHa hacaIka-rrpe6iHeuCb 36IbIbSeHоÖДOBЖИHи |
| 1mm 24mm | |
| 3mm 26mm | |
| 6mm 29mm | |
| 9mm 32mm | |
| 12mm 35mm | |
| 15mm 38mm | |
| 18mm 41mm | |
| 21mm 44mm |
Ha celenktophomy nepemkaui e cpi6nactni iHdkatop, 0o noka3yE BIDNOBIDHe HanaHTyBaHHa DOBXHH 3 IIBORO 6OKy celeKTopHO nepemkaay, KOJI BCTAHOBNEHO perynboHAHy hacaikyu manoi DOBXHH. 3 iHoro 6OKy celenktopHoro nepemkaaye IHsni cpi6nactni iHdkatop, 0o noka3yE BIDNOBIDHe HanaHTyBaHHa DOBXHH 3 npaboro 6OKy celenktopHoro nepemkaaya, KOJI Ha npicTpoi BCTAHOBNeHO perynboAHy hacaikyu 36ilbweHoI DOBXHH.
-Дя haJauTyBaHn IOBXuHn Heo6xIDHO 3aTnCHyTN BepXHIO qactHy cIeKTopHOrO nepemkaay, 06 3BilbHTm MexAHi3M 6NOKyBaHHa, a Notim 3aCTOCyBaTu 3ucnnla Do ceIeKtopHOrO nepemkaay, 06 nepemicntu Noro Bnue Ta 36ilbHTn HaJauSTyBaHHa DOBXuHn. JЯ 3MeHweHH HaJauSTyBaHH IOBXuHn HATNCiTB Ha BepXHIO qactHy ceIeKtopHOrO nepemkaay B Hanpamky DOHN3y Ta nepemicitib Noro HIXyue.
Ha pyxomomy nepemkaui cunii iHdkaTOp, 0n oka3ye BiDnOBiDne HanaStyBaHHa DOBXHN, KOJI BCTaHOBNeHO peryIbOBAHy HacaKDy MaJIeHbKOI DOBXHN. Ha iHOMy 6oCi pyxomoro nepemkaay e cepBOHni IHdkaTOp, 0n oka3ye BiDnOBiDne HalaSTyBaHHa DOBXHN, KOJI Ha npiladi BCTaHOBNeHO peryIbOBAHy HacaKDy 36IbWeHOI DOBXHN.
CTbIIKA 3 - CtpaHnUHa yact Ha rnaBaTa
C rpe6eH, HarnaceH ha 3mm nnn 6mm, ofoopMeTe 6aKeH6apnTe. CneT OBa cmeHeTe C no-DbIgna rpe6eH ha 9mm n npOdbIgKeTe da nocTpIrBaTe roPHaTa qact Ha rIaBaTa.
21-3 2 3 (On/off) /j
1 42-24
J
jiee
.
e 1
15 14 14 14 14 14 14 14 14 14 14 14 14 14 14 14 14 14
(2-3) 1
JolS11 jnss 16 14 nss
.
.
.
sLW
a_4 = 12
y 1
sui 1
40 40
puiuui Cai
.
.
i 1
biin
.
e 1
Jg
8y j 100
aaii aiaia bia i
1-21 cIc 1-24-44 cIc 1-24-44 cIc 1-24-44 cIc 1-24-44 cIc 1-24-44 cIc 1-24-44 cIc 1-24-44 cIc 1-24-44 cIc 1-24-44 cIc 1-24-44
b 15
I J I J J J J J J J J J J J J J J J J J J J J J J J J J J J J J J J J J J J J J J J J
i
Jai
aaiiiaai i 1y
(la)a 1-
.3
.
S OBC = S BOC + S_ BOC
2
18 12 12 12
-3
9 1011111111111111111111111111111111111
1
4-
gaiolj 27 g 24 1
J
.142-24) 1b1 b10
.
0g21 5
a 11 11 11 11 11 11 11 11 11 11 11 11
.
S OBC = S COD + S_ BOC
Jae Jae Jae Jae Jae Jae Jae Jae Jae Jae Jae Jae
J
J 1 J 1 J 1 J 1 J 1 J 1 J 1 J 1 J 1 J 1 J 1 J 1 J 1 J 1 J 1 J 1 J 1 J 1 J 1 J 1 J 1 J 1 J 1 J 1 J 1 J 1 J 1 J 1 J 1 J 1 J 1 J 1 J 1 J 1 J
.
.
.
a
.
.
.
a
.
1
2. 上
3
.4
.5
.6
y
Jn Jn Jn Jn Jn Jn Jn Jn Jn Jn Jn Jn Jn Jn Jn Jn Jn Jn Jn Jn Jn Jn Jn Jn Jn Jn Jn Jn Jn Jn Jn Jn Jn Jn Jn Jn Jn Jn Jn Jn Jn Jn Jn Jn Jn Jn Jn Jn Jn Jn Jn
1
AE


Model No. HC7110
Remington® is a Registered Trade Mark of Spectrum Brands, Inc.,
or one of its subsidiaries
VARTA Consumer Batteries GmbH & Co. KGaA, Alfred-Krupp-Str. 9, 73479 Ellwangen, Germany
www.remington-europe.com