
1LD4657 - Smartwatch CRIVIT - Free user manual and instructions
Find the device manual for free 1LD4657 CRIVIT in PDF.
| Product Type | LCD Sport Watch |
| Brand | CRIVIT |
| Model | 1LD4657 |
| Case Dimensions | 4,7 x 5,2 cm |
| Screen Dimensions | 2,9 x 2,2 cm |
| Weight | 54 g |
| Battery Type | CR2032 / 3V |
| Battery Life | Approximately 1 year |
| Water Resistance | Up to 3 bars (splashes, rain) |
| Operating Temperature Range | 0 °C to 50 °C |
| Display | LCD with backlight |
| Main Functions | Time (12/24h), dual time, alarm/snooze, timer (max 23:59:00), stopwatch (99 laps), compass with calibration, altimeter (-999 m to 9999 m), temperature, memory of last 8 hours |
| Power | CR2032 battery (included) |
| Case Material | Plastic |
| Warranty | 3 years |
| Care | Clean with a soft dry cloth |
| Repairability | Battery replacement possible by user; reset via buttons |
| Package Contents | Watch, user manual |
Frequently Asked Questions - 1LD4657 CRIVIT
User questions about 1LD4657 CRIVIT
0 question about this device. Answer the ones you know or ask your own.
Ask a new question about this device
Download the instructions for your Smartwatch in PDF format for free! Find your manual 1LD4657 - CRIVIT and take your electronic device back in hand. On this page are published all the documents necessary for the use of your device. 1LD4657 by CRIVIT.
USER MANUAL 1LD4657 CRIVIT
| 3 BAR | ✓ | × | × | × |
| 5 BAR | ✓ | ✓ | × | × |
| 10 BAR | ✓ | ✓ | ✓ | × |
| 20 BAR | ✓ | ✓ | ✓ | ✓ |
Reinigungshinweis
GB Usage and safety instructions
Table of contents
Table of contents. 21
Introduction. 23
Intended use 23
Technical specifications. 23
Important safety information for users important safety information for users. - 24 -
Important safety Information for the batteriesImportant safety information for batteries
Light 24
Important usage information regarding the sports watch - 25
Speed setting. 25
Setup of the sports watch. 25
Your watch has 4 feature modes. -26-
Time (TIME) 26
Second time zone -26-
Alarm (ALARM) -27-
Snooze feature 28
Timer (TIMER),{max. 23:59:00} -28-
Stop watch (CHRONO) -29-
Memory feature 29
Compass (COMP) 29
Calibrating the compass 30
Altimeter (ALTI) 32
Height. 32
Maximum altitude 33-
-21-

Minimum altitude 33-
Total altitude gain. 33
Total altitude loss. 33-
Number of hills -34-
Temperature. 34
Memory 34
Troubleshooting. 34
Replacing the batteries. 35-
Reset 35-
Water resistance. 35
Cleaning instructions. 36
Disposal of the electronic appliance 36
Disposal of the batteries. 36
digi-tech gmbh warranty 36
Warranty conditions. 37
Warranty period and defects liability 37
Scope of the warranty. 37
Warranty claim procedure 37
Service. 38
Supplier. 39
-22-

LCD Sports Watch
Introduction
Congratulations on the purchase of your new sports watch. You have chosen a high quality product. The instruction manual is part of the product- it contains important information about safety, use and disposal. Read the manual with all usage and safety notes before using the watch. Only use the watch in the intended way and for the intended applications. Please keep the packaging and the instruction manual for future reference.
Intended use
This sports watch is intended for time display and the described additional features. Any other use or modification of the sports watch does not comply with the intended uses. The manufacturer is not liable for damages caused by improper use or misuse. The device is not intended for commercial use.
Technical specifications
| Operating temperature | 0-50°C |
| Dimensions | 4,7 x 5,2 cm |
| Display | 2,9 x 2,2 cm |
| Weight | 54 g |
| Battery | CR 2032/3V |
-23-

Important safety information for users

WARNING! RISK OF INJURY!
This device may be used by persons (including children over 8 years of age) with reduced physical, sensory or mental abilities or lack of experience and knowledge, if they are supervised or instructed regarding the safe use of the device and understand the dangers that may arise. Children may not play with the device. Cleaning and user maintenance of the device may not be performed by children without supervision. Keep packaging films out of the hands of children. There is a danger of suffocation.
Important safety information for the batteries

WARNING!
HEALTH HAZARD! RISK OF EXPLOSION!
Keep batteries out of reach of small children. If a battery is swallowed, you must seek medical attention immediately. Batteries/rechargeable batteries must always be inserted in the correct polarity. If necessary, clean the battery and device contacts. Never attempt to recharge non-rechargeable batteries. Never short-circuit or attempt to open batteries. Never throw batteries into fire as they may explode. If the device will not be used for an extended time period, remove the battery and store the device in a dry and dust-free area. Improper use of the battery can lead to explosion or leakage. If the battery leaks, avoid contact with skin, eyes and mucous membranes. Use gloves. If you are exposed to battery acid, rinse the affected areas with plenty of clean water and immediately seek medical attention. Remove discharged batteries from the device as they present an increased risk of leakage.
Light
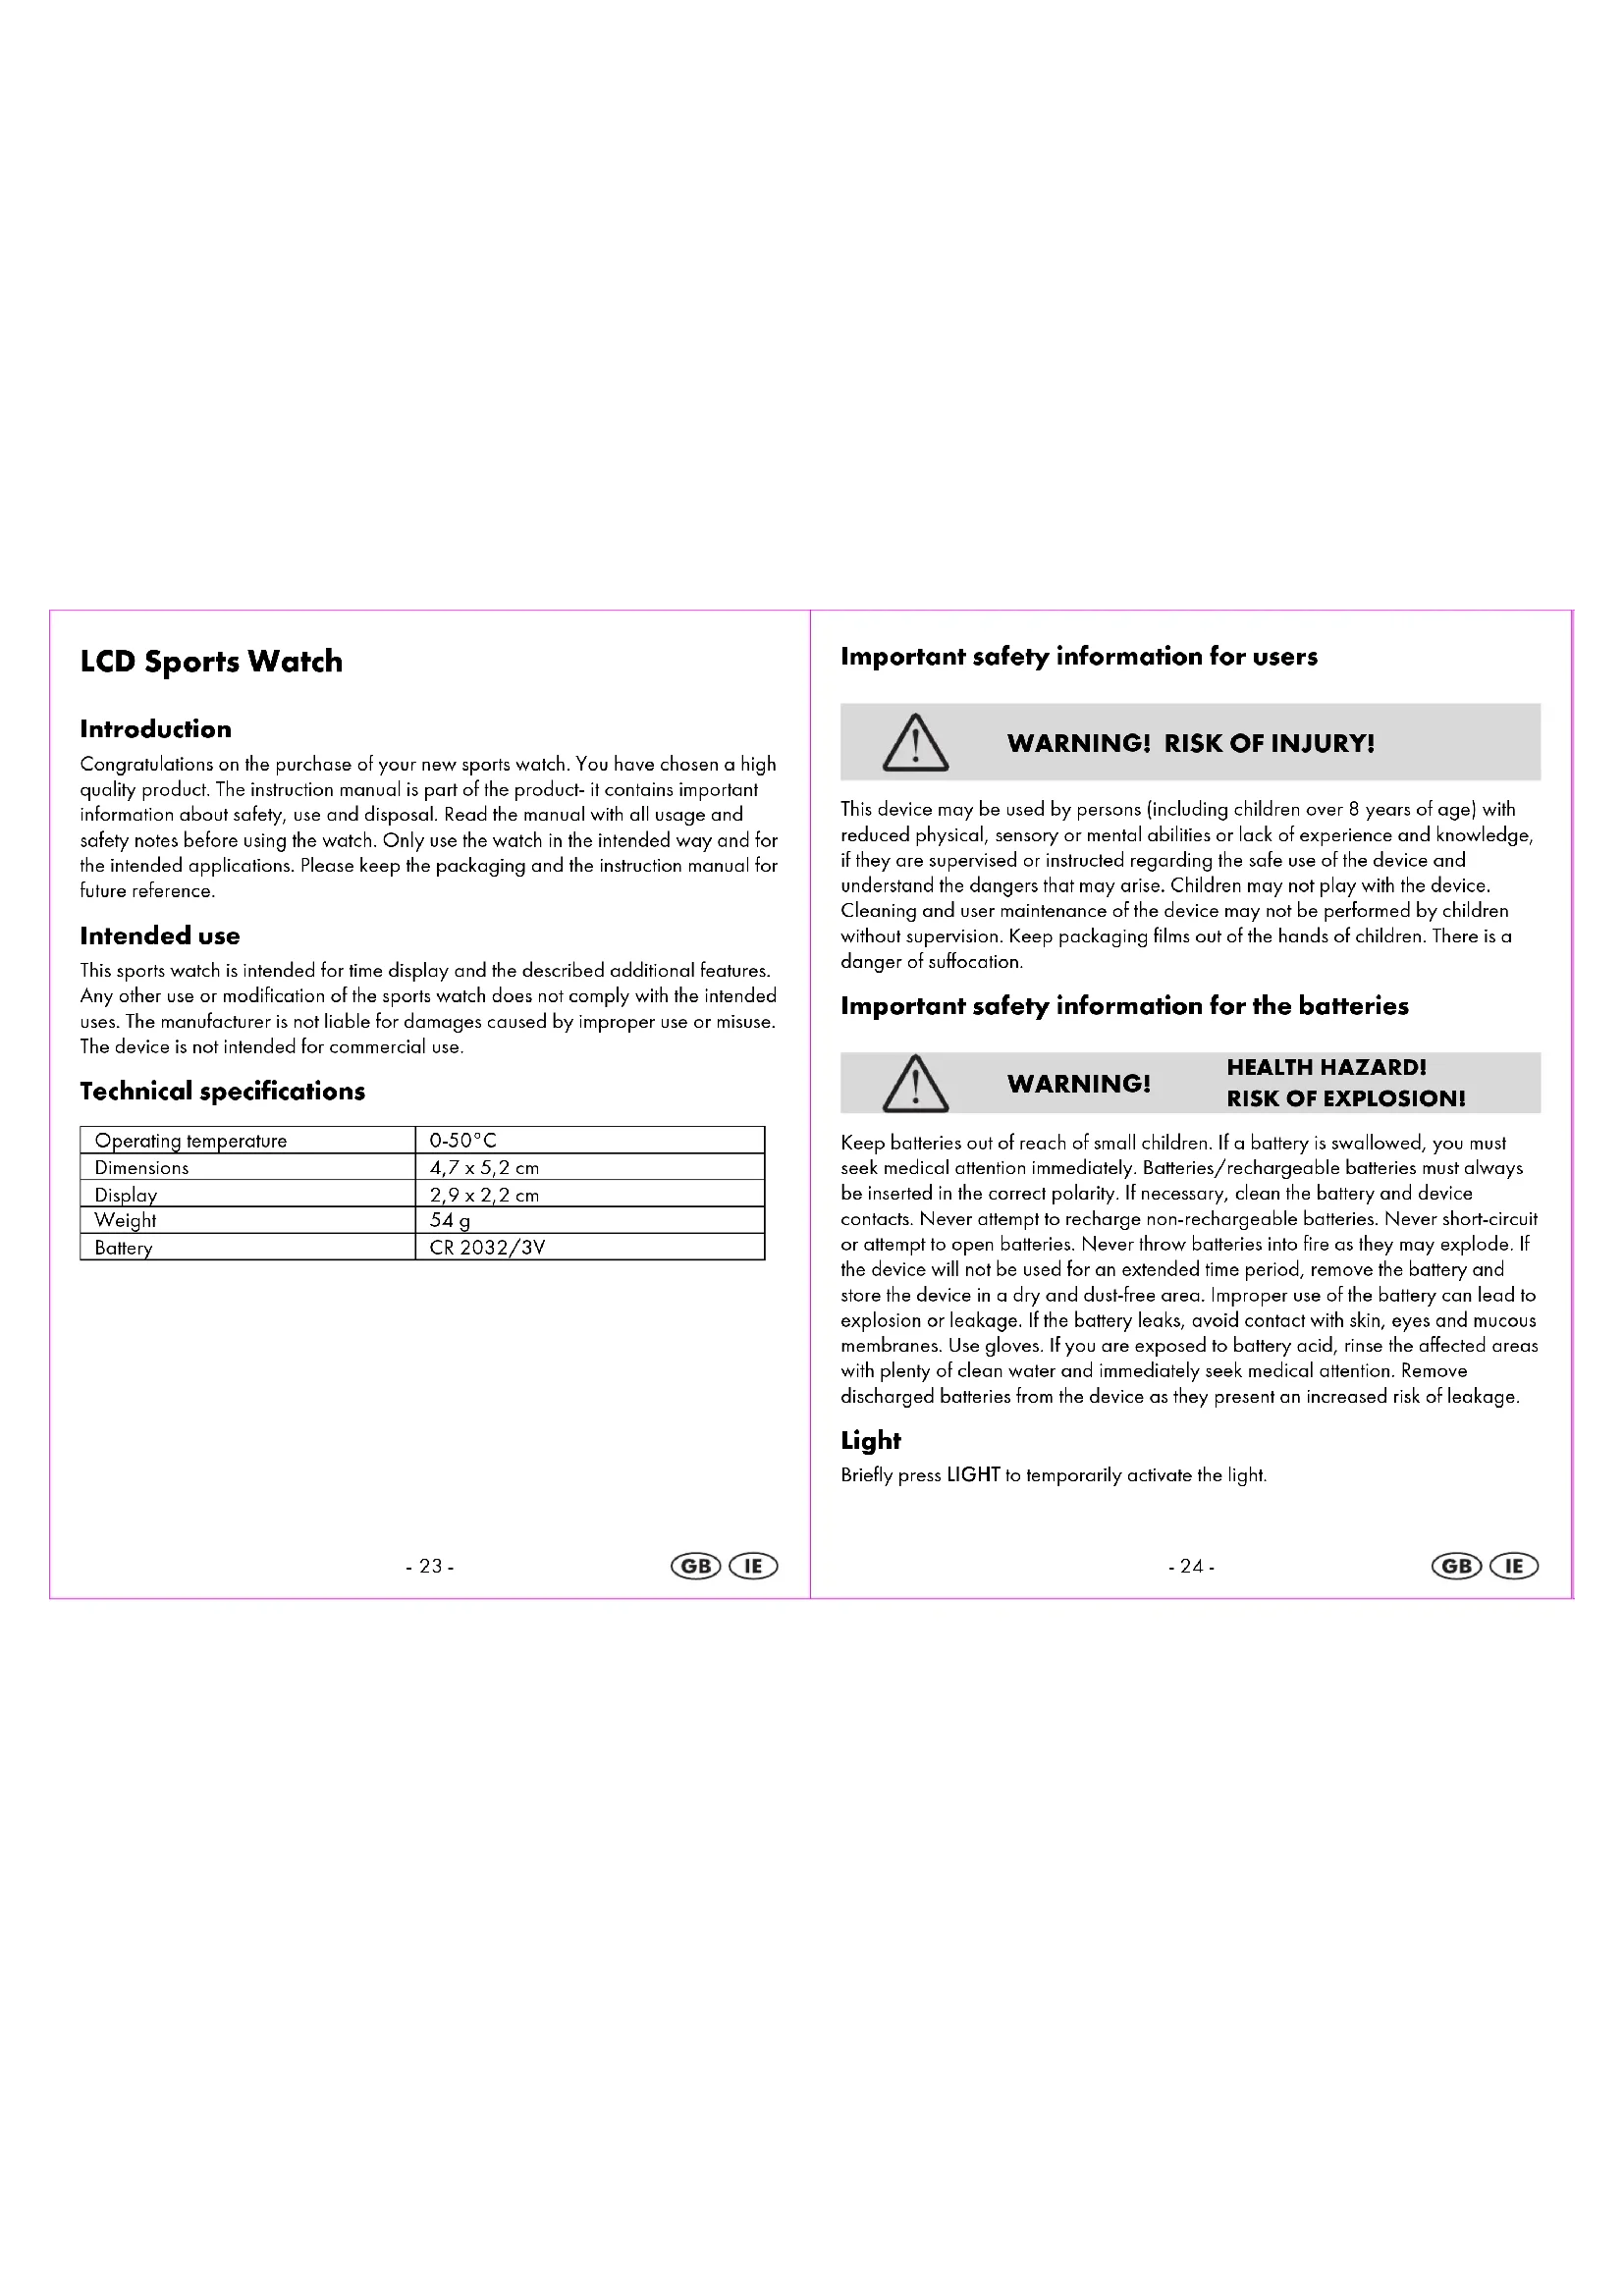
Briefly press LIGHT to temporarily activate the light.
-24-

Important usage information regarding the sports watch
Press MODE to select or end the feature mode of the watch. Press SEL to select your data and press SET to confirm your setting. Press MODE to go forward within the menu.
Speed setting
Press and hold SEL when setting numerical values to use the speed setting feature.
Setup of the sports watch
Remove the protective film from the display of the sports watch and press LIGHT, MODE, SEL or SET. You will now be guided through the basic settings menu. Press SEL to select the 12- or 24-hour hours display: confirm your selection by pressing SET. The seconds will now blink on the display. Press SEL to start the seconds at 00 and confirm your setting by pressing SET. The minutes will blink on the display. Press SEL to set the minutes and press SET to confirm your setting. Set the hours, year, month and day in the same way. Select the unit of measurement METRIC kilometres (KM) or IMPERIAL miles (M) in the same way. Exit setting mode by pressing MODE.
-25-

Your watch has 4 feature modes
Press MODE to select a feature mode. The order of the features is:
Time
(TIME)
Stop watch Compass
(CHRONO) (COMP)
Altimeter
(ALTI)

Each feature mode also has different sub-features.
The sub-features can always be reached by pressing SEL.
Time (TIME)
Select the feature mode first by pressing MODE. Press SEL to select the sub-features of the time mode.
Alarm, Timer, Time.
Press and hold SET for 3 seconds to enter setting mode. _HOLD TO SET, will appear on the display and the 12- or 24-hour time mode indicator will blink. Now complete the basic settings as described in the section "Setup of the sports watch".
Exit setting mode by pressing MODE.
Second time zone
Press and hold SEL for 3 seconds. The watch will now switch to the display for the second time zone and T2 will appear on the display. Press and hold SET to start the setting of the second time zone in the same manner as described in the section "Setup of the sports watch".
Press and hold SEL for 3 seconds to return to the normal time display T1.
-26-

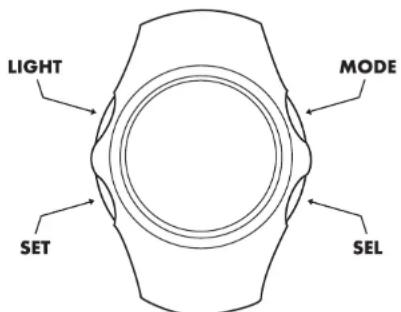
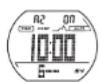
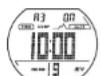
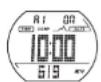
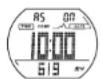
Alarm (ALARM)
Press SEL to select the alarm sub-feature. Press and hold SET for 3 seconds to enter setting mode. HOLD TO SET" will appear on the display followed by A1" and a blinking indicator - .Press SEL to activate the alarm ,ON" or to deactivate the alarm
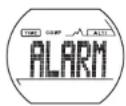
“- - ”. If the alarm is activated, the alarm symbol will appear on the display. Confirm your setting by pressing SET.
The minutes will blink on the display. Press SEL to set the minutes and press SET to confirm your setting. Set the hours in the same way.
The month and day can now also be set if necessary.
Press SET to select one of the 5 available alarms A1-A5 and set the alarm as described.
If neither the month nor the day is set, the alarm will sound daily.
If only the month is set, the alarm will sound on every day of the set month.
If only the day is set, the alarm will sound every month on the set day.
If both the month and the day are set, the alarm will sound only on the set date.
The hourly chime indicator will now blink on the display "CHIME". Press SEL to activate or deactivate the hourly chime (ON, OFF) and confirm your setting by pressing SET.
Exit setting mode by pressing MODE.
Press SET, SEL or MODE when the alarm sounds to stop the alarm.
Snoopze feature
If no button is pressed when the alarm sounds, the alarm will sound again after 30 seconds and the symbol will appear on the display. The alarm will now stop for approximately 90 seconds and then sound again. This process can be repeated 4 times.
Timer (TIMER),(max.23:59:00)
Press SEL to select the sub-feature. Press and hold SET for 3 seconds to enter setting mode. "HOLD TO SET" will appear on the display followed by the minutes of the timer time. Press SEL to set the minutes and confirm your setting by pressing SET. Set the hours in the same way. The additional setting for the timer follows. Press SEL to select the desired mode:
Cdr After the timer reaches 0:00 it will count the set time again.

Cd U After the time reaches 0:00 it will count forward

Cd S After reaching 0:00 the timer will stop

Exit setting mode by pressing MODE.
Press SET to start or stop the timer.
After the set time is counted a beep will sound.
Press and hold SET to reset the timer.
-28-

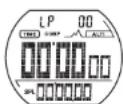
Stop watch (CHRONO)
Press MODE to select the feature mode. Press SET to start or stop the stop watch.
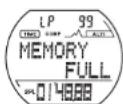
Press SEL while the stop watch is running to record a lap time. Up to 99 lap times can be recorded.
Press and hold SET to reset the stop watch.
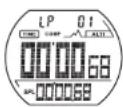
Memory feature
Press SEL while the stop watch is stopped to show the fastest lap (BEST-LAP) on the display. Press SET to show the other lap times.
Please note: The memory feature can only be used if at least one lap time was recorded.
Exit memory mode by pressing MODE.
Compass (COMP)
Repeatedly press MODE to select the feature mode.
Hold the compass on a level plane to enable a precise directional indication.
One of two display layouts can be selected:

Display layout with large digits:
Degrees/Cardinal direction
Compass status (OFF/ERROR)
Detailed layout:
Cardinal direction
( N) -shortest direction to north
Bearing / Cardinal direction
Compass status (OFF/ERROR), Degrees/Cardinal direction
Press SET to select the desired layout.
-29-

To save power the compass will deactivate itself - after 3 minutes in idle state and after 5 minutes during continuous use. Off will appear in the third row of the display.
Press SET to reactivate the compass.

Please note: The compass must not be used in the immediate vicinity of magnetic objects such as other compasses.
If the error message "ERROR" is shown continuously, the compass must be recalibrated.
Calibrating the compass
When must the compass be calibrated to correct external influences?
All compasses (analogue and digital) use the magnetic field of the earth and are sensitive to different types of interference from external influences such as the magnetic distortions caused by large metal objects, electrical and electronic appliances, computers, transformers and power lines.
To achieve precise results, the compass must be calibrated if
The error message "ERROR" (for magnetic distortions) appears continuously;
The numerical reading in degrees has an error of more than 10 degrees;
- The device is used within a vehicle for the first time. In this case the magnetic distortions cause by the vehicle must be compensated.
How is the compass calibrated?
Press and hold SEL to enter calibration mode. Press SET to start the calibration. The display will show two rotating arrows. Hold the watch on a level plane (in sufficient distance to metal objects, electrical or electronic devices, computers and power lines) and slowly turn it clockwise twice . The turns do not need to be perfect but should be performed at a constant speed. Each turn may not take less than 20 seconds and may not take longer than 60 seconds. Complete the calibration immediately after performing the turns by pressing SET.
-30-

Incorrectly performing the calibration can result in faulty measurements. When encountering "suspicious" or incorrect readings, the calibration should be repeated.
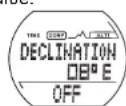
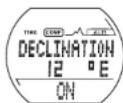
Entering the deviation (declination) to the geographical North Pole
This deviation results from the calculable difference between the magnetic North Pole and the geographical North Pole as used
on maps. The local deviation is printed on the border of geographical maps (the deviation depends on the latitude). It is shown as a positive east value (E) or a negative west value (W). When using the map to navigate to a target, the direction to the target must be adjusted on the map. This is done by subtracting the positive value or adding the negative value to the shown value.
Press and hold SET to enter the declination mode.
Immediately after entering the setting mode for the declination, the letter "E" (for east) will blink on the W (for west). Press SET to confirm your selection.
The degree digits will blink on the display. Press SEL to enter the declination and press SET to confirm your setting.
Because the entered values directly influence the directional indication, they must be activated by pressing SEL to select "ON" or "OFF". Confirm your selection by pressing SET.
Exit setting mode by pressing MODE.
The following examples may help to explain the effect of the deviation:
The direction shown on the display is N10^ (10 degrees north).
Entering an east deviation (E) of 30 degrees will change the directional indication to NE (north-east) 40 degrees.
Entering a west deviation (W) of 30 degrees will change the directional indication to NW (north-west) 340 degrees.
-31-

1
to select L or


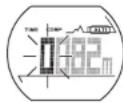
Altimeter (ALTI)
(-999 m - +9999 m / -2999 ft - +29999 ft)

Please note: Your altitude is determined by measuring atmospheric air pressure. The shown value can vary by up to 50m because of changing weather- regardless of a change in location.
We recommend that, before use, the altitude value should be set with the sports watch on your wrist. Then wait for a few minutes so that the value can stabilize.
Select the feature by pressing MODE repeatedly. Press SEL to select the different sub-features.
Altimeter (ALTI) > maximum altitude memory (HIGH) > minimum altitude memory (LOW) > total altitude gain (UP) > total altitude loss (DOWN) > number of hills (HILL) > memory (RECORD).
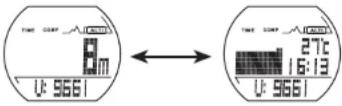
Height
Press SEL to select the sub-feature (ALTI).
Press and hold SET for 3 seconds to enter setting mode. Enter the desired value by pressing SEL and confirm your setting by pressing SET.
Exit setting mode by pressing MODE.
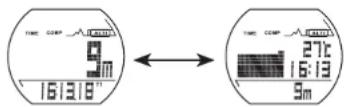
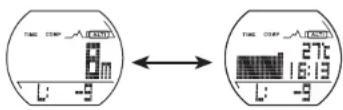
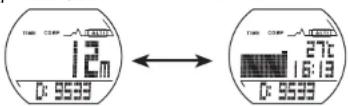
Press SET to select the display mode height/time or temperature/time/diagram/current altitude.
-32-

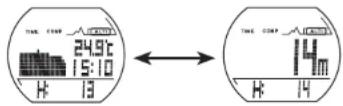
Maximum altitude
Press SEL to select the sub-feature (HIGH).
Press SET to show the current altitude/maximum altitude or
Temperature/time/diagram/maximum altitude.
Press and hold SET to reset the maximum altitude to the current altitude.
Minimum altitude
Press SEL to select the sub-feature (LOW). Press SET to show the current altitude/minimum altitude or temperature/time/diagram/minimum altitude.
Press and hold SET to reset the minimum altitude to the current altitude.
Total altitude gain
Press SEL to select the sub-feature (UP). Press SET to show the current altitude/total
altitude gain or
temperature/time/diagram/total altitude gain. Press and hold SET to reset the total altitude gain.
Total altitude loss
Press SEL to select the sub-feature (DOWN). Press SET to show the current
altitude/total altitude loss or temperature/time/diagram/total altitude loss. Press and hold SET to reset the total altitude loss.
-33-

Number of hills
Press SEL to select the sub-feature (HILL). Press SET to show the current altitude/hills or temperature/time/diagram/hills. Press and hold SET to reset the number of hills.
Temperature
The temperature measured by the watch in measured within the case of the watch. Please note that your body temperature can influence the reading.
To perform a temperature reading the watch should be removed from your arm and then exposed to the outside temperature for 15 to 30 minutes.
Avoid placing the watch in direct sunlight.
Memory
Press SEL to select the sub-feature (RECORD). The values for the last 8 hours can be shown on the display. Repeatedly press SET to show each value.
Press and hold SET to reset the memory.
Exit Memory mode by pressing MODE.

Troubleshooting
Incorrect compass reading
Incorrect calibration or external influences (change of location).
Calibrate the compass as described in this manual.
Error message "ERROR" when using the compass feature.
External magnetic influences (for example: metal objects, electronic or electrical devices, computers, transformers or power lines). Move to a different location and repeat calibration.
Display becomes weaker or shows incorrect values
Batteries weak or dirty/corroded contacts.
Replace the batteries and clean the contacts using a dry, lint-free cloth.
Black display
Outside temperature too high; possibly cause by prolonged and direct exposure to sunlight.
-34-

Display shows irregular values
Replace the batteries.
Replacing the batteries
The battery replacement can be performed by a watch maker in addition to a water resistance test.
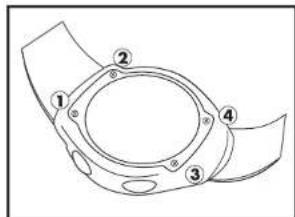
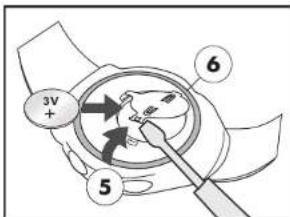
To replace the battery yourself, please read the following instructions first: Remove the screws (1, 2, 3 and 4) from the back side of the watch with a small Phillips screwdriver. Remove the caseback and the battery sticker.
Use a small, flat tool to open the latch (5) of the battery holder. Remove the battery and insert a fresh 3V CR2032 battery with the (+) terminal facing upwards. Ensure that the gasket (6) is seated correctly. Close the latch of the battery holder. Replace the battery sticker and the caseback and replace the screws.
Reset
Press and hold SET and SEL simultaneously to completely reset your watch. All stored information will be lost.
Set the watch as described in the section "Setup of the sports watch".
Water resistance
Water resistant up to 3 bar. The bar value specifies the atmospheric overpressure which is applied during testing (DIN 8310).
| 3 BAR | √ | × | × | × |
| 5 BAR | √ | √ | × | × |
| 10 BAR | √ | √ | √ | × |
| 20 BAR | √ | √ | √ | √ |
Cleaning instructions
Clean the sports watch with a soft, dry and lint-free cloth. A glasses cleaning cloth is ideal.
Disposal of the electronic appliance
This sports watch may not be disposed of with normal household waste. Disposc of the unit at an approved disposal facility or at your local recycling centre. Please observe the current rules and regulations when disposing of the appliance. Contact the disposal system if in doubt.

Disposal of the batteries
Please dispose of your batteries properly in containers especially set up at retailers. Batteries do not belong in household waste. Dispose of the batteries at an approved disposal facility or at your local recycling centre. Contact the disposal system if in doubt.
digi-tech gmbh warranty
This watch includes a 3 year warranty starting on the day of purchase. In case of defects of this sports watch you have, by law, certain rights regarding the vendor of the sports watch. These rights are not changed by the warranty which is described in the following paragraphs.
-35

-36-

Warranty conditions
The warranty duration starts on the date of purchase. Please keep the original receipt in a safe place. The receipt is needed as a proof of purchase. If a defect occurs in the sports watch within 3 years, the sports watch will be repaired or replaced (according to our choice) free of charge. This warranty requires that, within the 3 year warranty period, the watch and the receipt can be made available to us along with a short written description of the defect and when it occurred. If the defect is covered by the warranty, you will receive the repaired sports watch or a new sports watch. Repair or replacement does not cause the warranty period to restart.
Warranty period and defects liability
The warranty period is not increased by the defect liability. This also applies to repaired or replaced parts. If defects are noticed at the time of purchase they must be reported immediately upon unpacking the item. Paid repair may be available after the end of the warranty period.
Scope of the warranty
The sports watch was manufactured according to strict quality guidelines and was carefully inspected before delivery. The warranty does not include parts that experience normal wear and tear and can thus be seen as wear parts or fragile parts that are damaged. Examples include Switches, Batteries or parts made of glass. This warranty becomes void if the sports watch is damaged, is not used in the recommended way or is improperly repaired. For proper use of the sports watch all instructions in this manual must be adhered to exactly. Use of the sports watch in a way that is discouraged in the manual must be avoided.
The sports watch not intended for commercial use. Abusive or improper use, excessive force and changes that are made by non-authorized repair centers will void the warranty.
Warranty claim procedure
To ensure that your call is processed in a fast and efficient manner please note the following directions:
-37

- Have your receipt (as proof of purchase) and the article number (285498) handy.
- The article number can be found on the type label, an engraving, the front page of the manual (bottom left) or a sticker on the back side or bottom side of the case.
- In case defects occur, please first contact the service center (see below) by phone or email.

Visit www.lidl-service.com to download this and many other manuals, product videos and software.
Service
Please note that the following address is not a service address.
Please first contact the service address (see above).
Name: digi-tech gmbh
Street: Valterweg 27A
Town: DE-65817 Eppstein
Country:GERMANY

| 3 BAR | √ | × | × | × |
| 5 BAR | √ | √ | × | × |
| 10 BAR | √ | √ | √ | × |
| 20 BAR | √ | √ | √ | √ |
Snelle instelling. 67
Stopwatch (CHRONO) -71
Geheugenfunctie 71
Kompas (COMP) 72
| 3 BAR | ✓ | × | × | × |
| 5 BAR | ✓ | ✓ | × | × |
| 10 BAR | ✓ | ✓ | ✓ | × |
| 20 BAR | ✓ | ✓ | ✓ | ✓ |
Reinigings tips
| 3 BAR | √ | × | × | × |
| 5 BAR | √ | √ | × | × |
| 10 BAR | √ | √ | √ | × |
| 20 BAR | √ | √ | √ | √ |
Pokyny pro cistěné
Cistete mei tepeo frevence pouze suchym hladkym hadriikem, ktery se hodi napriklad na cisteni brylovych skel.
Reinicialization (Reset) -117-
No公共场所的指示。
No local regulations for the public places.
No signs of traffic.
No signs of traffic.


- Reinigungshinweis
- GB Usage and safety instructions
- Table of contents
- LCD Sports Watch
- Introduction
- Intended use
- Important safety information for users
- WARNING! RISK OF INJURY!
- Important safety information for the batteries
- WARNING!
- HEALTH HAZARD! RISK OF EXPLOSION!
- Light
- Important usage information regarding the sports watch
- Speed setting
- Setup of the sports watch
- Your watch has 4 feature modes
- Time (TIME)
- Second time zone
- Alarm (ALARM)
- Snoopze feature
- Timer (TIMER),(max.23:59:00)
- Stop watch (CHRONO)
- Memory feature
- Compass (COMP)
- Calibrating the compass
- How is the compass calibrated?
- Entering the deviation (declination) to the geographical North Pole
- The following examples may help to explain the effect of the deviation:
- Altimeter (ALTI)
- Height
- Maximum altitude
- Minimum altitude
- Total altitude gain
- Total altitude loss
- Number of hills
- Temperature
- Memory
- Troubleshooting
- Display becomes weaker or shows incorrect values
- Black display
- Replacing the batteries
- Reset
- Water resistance
- Cleaning instructions
- Disposal of the electronic appliance
- Disposal of the batteries
- digi-tech gmbh warranty
- Warranty conditions
- Warranty period and defects liability
- Scope of the warranty
- Warranty claim procedure
- Service
- Reinigings tips
- Pokyny pro cistěné
Brand : CRIVIT
Model : 1LD4657
Category : Smartwatch