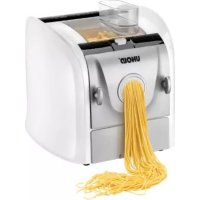
68860 - Pasta machine UNOLD - Free user manual and instructions
Find the device manual for free 68860 UNOLD in PDF.


Frequently Asked Questions - 68860 UNOLD
User questions about 68860 UNOLD
0 question about this device. Answer the ones you know or ask your own.
Ask a new question about this device
Download the instructions for your Pasta machine in PDF format for free! Find your manual 68860 - UNOLD and take your electronic device back in hand. On this page are published all the documents necessary for the use of your device. 68860 by UNOLD.
USER MANUAL 68860 UNOLD
natural_image
White manual kitchen machine with yellow pasta being processed, surrounded by food items (no text or symbols visible)NUDELMEISTER PASTA
Bedienungsanleitung
natural_image
Modern kitchen appliance with digital display and bucket, no visible text or symbols
natural_image
Illustration of a modern wheat bread machine with a metal bucket containing grain, accompanied by small kitchen utensils and glasses (no text or symbols visible)UNOLD®
Care + Style
natural_image
Product photo of a red and black electric toothbrush with a small brush attachment (no text or symbols visible)
natural_image
Pink hair dryer with black cord and earbuds, no visible text or symbolsUNOLD®
Fan + Heat
natural_image
Close-up of a metallic desktop fan with visible blades and base, no text or symbols present.
natural_image
Red electric fan with a circular grille and base-mounted power strip (no visible text or symbols)INHALTSVERZEICHNIS
Instructions for use Model 68860
Technical Specifications.... 33
Explanation of symbols.... 33
For your safety....33
Before using the appliance the first time... 35
Control panel.... 36
Assembly 36
Disassembly....37
Making pasta with the automatic program. 38
Making pasta in the manual program...... 39
Cleaning and care.... 41
Troubleshooting 42
Important information about
making pasta.... 42
Recipe ideas 44
Guarantee Conditions....50
Waste Disposal /
Environmental Protection 50
Service 32
11 Cleaning needle to clean the holes in the pasta dies
12 Cup for water
13 \$storage drawer for accessories
14 Control panel
IHRE NEUE NUDELMASCHINE
F Page 51
I Accessori standard:
1 Pasta die for wide sheets of pasta dough, e.g. for ravioli and cannelloni
2 Ravioli shaper
3 Pasta die for grissini o r shorust sticks
4 Pasta die for spaghetti alla chitarra (spaghetti with a square cross section)
5 Past a die Spä tzle
F
natural_image
Red fiber with circular holes, next to a white circular object (no text or symbols visible)
1
3
2
D
1 Spirelli
2 Tube-shaped pasta
3 Wavy ribb on pasta
4 Thin spa ghetti
F Accesso
ires siaux
kit 2 :
natural_image
Close-up of a mechanical component with a central circular recess and mounting holes (no visible text or symbols)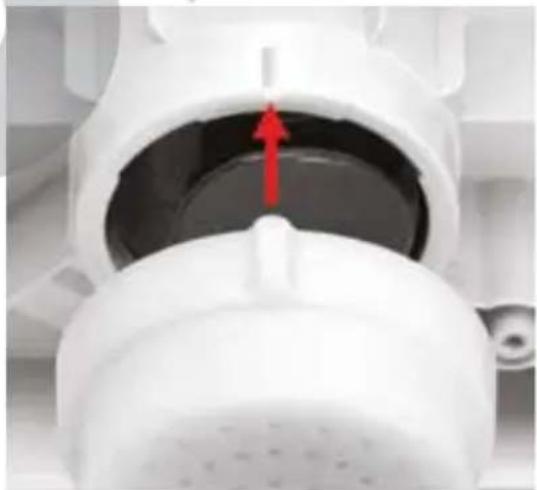
natural_image
Close-up of a white plastic mechanical component with a red arrow pointing to a central opening (no text or symbols visible)natural_image
Close-up of a small kitchen appliance with yellow tass being inserted (no visible text or symbols)
natural_image
Symbol of a trash bin with crossed lines indicating no waste or discharge (no text or labels)INFORMATIONEN FÜR DEN FACHHANDEL

Dimensions: approx. 30.0 x 34.7 x 30.5 cm (L/W/H)
Weight: approx. 8.6 kg
Power cord: approx. 100 cm
Features: Mixing container for max. 600 g dough, strong, robust motor, automatic mixing and kneading of ingredients, safety function, automatic dispensing of the pasta dough, cups for flour and liquids
Accessories: 5 pasta dies, 3 cups, cleaning set
Equipment features, technology, colours and design are subject to change without notice. Errors and omissions excepted
EXPLANATION OF SYMBOLS

This symbol denotes a possible hazard which could cause injury or damage to the appliance.
FOR YOUR SAFETY
Please read the following instructions and keep them on hand for later reference.
General safety instructions
- This appliance can be used by children 8 years and older, as well as by persons with reduced physical, sensory or mental abilities or with lack of experience and/or knowledge, if they are supervised or if they have been instructed with regard to safe use of the appliance and have understood the dangers that can result from use of the appliance.
- Children must not play with the appliance.
- Children are not allowed to perform cleaning and user maintenance, unless they are 8 years of age or older and are supervised.
-
Keep the appliance and the power cord out of the reach of children under 8 years of age.
-
Only connect the appliance to an AC power supply with voltage corresponding to the voltage specified on the rating plate.
- This appliance must not be operated with an external timer or a remote control system.
- Never immerse the appliance or the power cord in water or other liquids.
- The appliance is intended for household use only, or for similar areas of use, such as,
■ kitchenettes in businesses, offices or other workplaces,
■ for use by guests in hotels, motels or other lodgings,
■ in private guest houses or holiday homes.
-
Do not clean the appliance or power cord in a dishwasher.
-
Unplug the appliance from the electrical outlet before you disassemble and clean the appliance, remove or attach component parts or move the appliance to another location.
-
Never leave the appliance unattended, as long as it is connected to the mains supply.
- To avoid accidents caused by a power cord lying about, the appliance is equipped with a short power cord. Only use an extension cord in exceptional cases. Ensure that the extension cord is completely unwound, and comply with the capacity limits of the respective cable.
- Check the mains plug and the power cord regularly for wear or damage. If the power cord or other parts are damaged, send the appliance to our customer service department for inspection and repair. Unauthorised repairs can result in serious risks for the user and void the warranty.
Information on set-up and operation of the appliance
- The appliance is suitable for indoor use only.
- Do not touch the appliance or the power cord, if you have wet hands or are standing on a wet floor.
- Only unplug the appliance from the electrical outlet by pulling on the power plug. To prevent damage to the power cord never pull directly on the power cord.
- For safety reasons, never place the appliance on hot surfaces, a metal tray or a wet substrate. Do not place the appliance or power cord near open flames during operation.
-
Always use the pasta maker on a level, uncluttered surface.
-
Make sure that the power cord does not hang over the edge of the countertop or table, since this can cause accidents, for example if small children pull on the cord.
- Do not wrap the power cord around the appliance and avoid kinking of the power cord to prevent damage.
- Route the power cord so that there is no possibility of the cord being pulled or tripped over.
- To prevent injuries do not move the appliance as long as it is in operation.
- Do not use hot liquids.
- Use the appliance only after it has been properly assembled.
- Never operate the appliance with accessories of other appliances.
- The short operating time is 20 minutes. After this time let the appliance cool off completely, before continuing to make pasta.
- Caution: Avoid contact with moving parts of the appliance when it is in operation. Keep hands, hair or other objects away from the kneader: Danger of injury!

Caution: Avoid contact with moving parts of the appliance when it is in operation.
Never open the housing of the appliance. This can result in electric shock.
The manufacturer will not be liable in the event of incorrect assembly, improper or incorrect use or if repairs are carried out by unauthorized third parties.
BEFORE USING THE APPLIANCE THE FIRST TIME
- Remove all packaging materials and any transport safeguards. Keep packaging materials away from children - danger of suffocation!
- Check whether all parts are included. Some of the provided pasta dies are in the storage drawer in the appliance.
- Clean all parts with a damp cloth, as described in the section „Cleaning and care“.
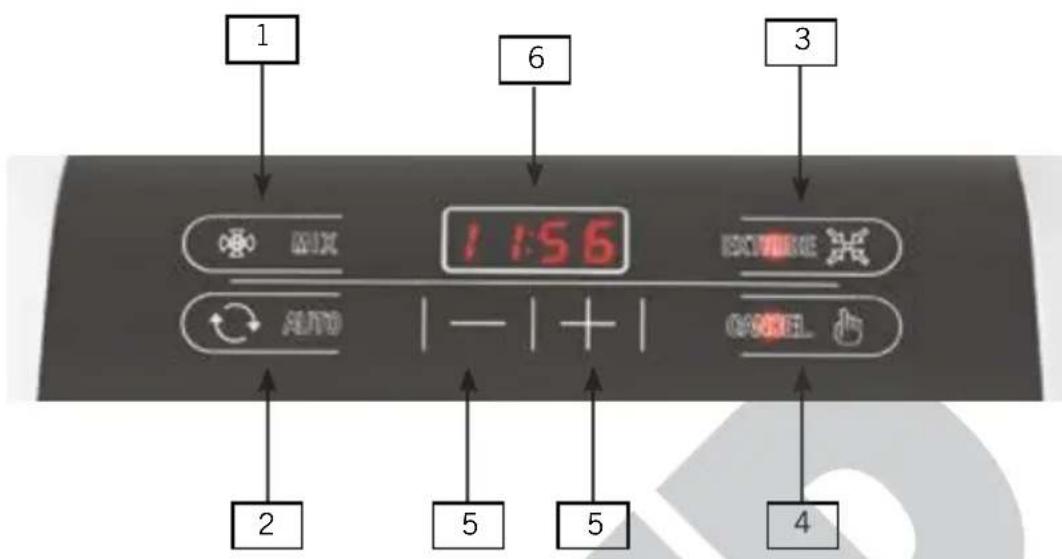
CONTROL PANEL
text_image
1 6 3 1:56 AUTO 2 5 5 41 | Button - Mix
2 Button Auto Starts th
3 Button - Extrude
4 Button - Cancel
5 Buttons +/- Exten
6 Display
Starts the manual program
mati are auto c progr
xtru Starts e astion of the p
e se Cancel program lected
orten the kneading time
for the manual program
ASSEMBLY
- Attention: The mains plug of the appliance must not be plugged into the electrical outlet, until the appliance is completely assembled!
- The appliance is equipped with a safety function. If the lid is opened in operation the appliance switches off.
- Place thehous ing ona solid, level and dry surface.
- Slide the kneading container into the housing. Ensure that the round opening is pointing to the front. The square opening of the kneading container must point upward.
- Slide the kneader through the round opening and completely into the kneading container. In this process the spiral of the kneader must point to the front. On the rear, in the appliance interior, there is a hole; the kneader must lock in place in this hole.
-
Slide the front cover through the screws left and right into the appliance, in this regard the “Öffnen” (Open) button must point upward.
-
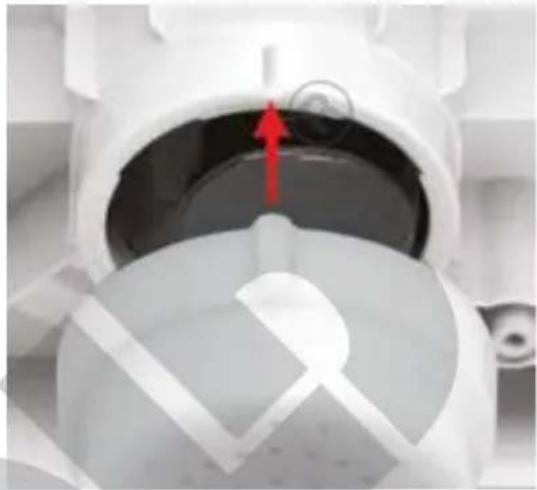
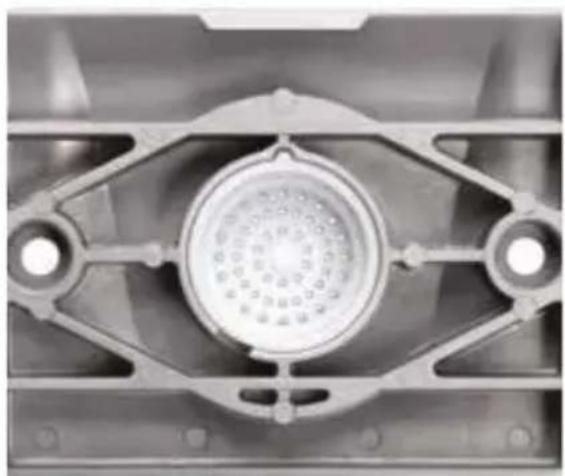
Select the desired pasta die and fasten it on the metal panel from the rear. In this process pay attention to the notch on the outlet. The groove of the die must be slid precisely into this notch.
natural_image
Close-up of a mechanical component with a central circular feature and mounting holes (no visible text or symbols)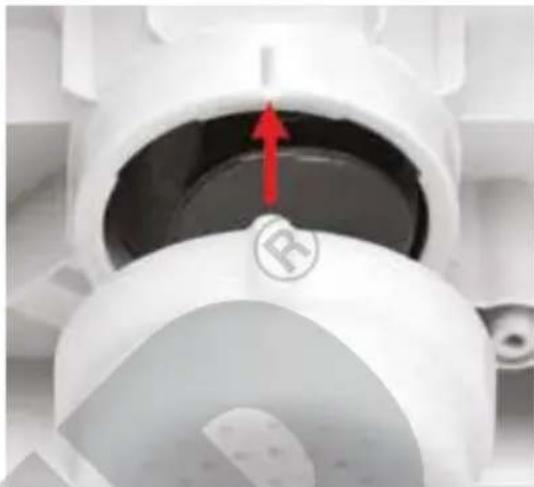
natural_image
Close-up of a white mechanical component with a red arrow pointing to a circular feature, no visible text or symbols.-
Now slide the metal panel onto the threaded pins that protrude from the front cover.
-
Firmly press the metal panel onto the front cover and then screw the wing screws clockwise onto the threaded pins. Note: Screwing the wing screws firmly onto the threaded pins is important, otherwise dough will escape between the front cover and metal panel.
-
Important note: For safety reasons the lid has a locking mechanism. To take off the lid, first press on the “Öffnen” (Open) button. The locking mechanism disengages, the lid can be removed.
DISASSEMBLY

Always unplug the appliance from the electrical outlet before you take the appliance apart.
- To take off the lid, first press on the “Öffnen” (Open) button. The locking mechanism disengages, the lid can be removed.
- Unscrew the wing screws of the panel by turning them anti-clockwise and take off the panel.
- Take off the metal panel and detach the pasta die. Now you can detach the front cover. Pull the kneader out of the kneading container.
MAKING PASTA WITH THE AUTOMATIC PROGRAM
Note: The short operating time is 20 minutes. After this time let the appliance cool off completely, before continuing to make pasta. You can use the wait time to cook the noodles you have already made or prepare them for storage.
- Ensure that the appliance is correctly assembled and that it contains the desired pasta die.
- Place a sufficiently large plate under the openings of the die.
- Measure or weigh the desired ingredients and have them on hand.
- Open the lid of the kneading container.
- Put flour or semolina or both as specified in the recipe into the kneading container.
Making egg noodles
-
In the rear area make a depression in the flour. Put the full egg (egg white and yolk) in a cup. If necessary, supplement with water or the liquid specified in the recipe, for the required quantity of liquid. Now carefully beat the egg mass in the cup. In this process, ensure that bubbles do not occur.
-
Pour the egg mass into the depression made in the flour.
-
Close the lid.
-
Plug the mains plug into an electrical outlet. The display lights up.
-
Press the “Auto” button. The display shows “10:6 1”. This runtime of 10 minutes is suitable for up to 300 g of pasta (250 g flour). After a few seconds the program sequence starts; the time in the display counts down to “0”.
-
If you want to use the runtime of 16 minutes for pasta up to 600 g (500 g flour) immediately press the “Auto” button again. The display shows “16:62”. After a few seconds the program sequence starts; the time in the display counts down to “O”.
-
The kneader starts to turn and the program runs for the specified time. The subsequent procedure is described starting from point 18.
Making noodles without egg
- Close the lid of the appliance.
- Plug the mains plug into an electrical outlet. The display lights up.
- Press the “Auto” button. The display shows “10:6 1”. This runtime of 10 minutes is suitable for up to 300 g of pasta (250 g flour). After a few seconds the program sequence starts; the time in the display counts down to “O”.
- If you want to use the runtime of 16 minutes for pasta up to 600 ~g (500 g flour) immediately press the "Auto" button again. The display shows "16:6
2". After a few seconds the program sequence starts; the time in the display counts down to "0".
- The kneader starts to turn. Now immediately pour the weighed water slowly into the kneading container through the opening in the lid. The subsequent procedure is described starting from point 18.
Automatic extrusion of the pasta
-
As soon as the dough has reached the right consistency, the appliance begins to extrude noodles. You can cut off the noodles at the desired length with the provided dough scraper or with a small, sharp knife
-
When pasta extrusion is concluded the signal tone sounds four times and the appliance stops extruding pasta.
-
When you stop making pasta, unplug the plug from the electrical outlet. The device is not safely switched off until after it has been unplugged from the electrical outlet.

Always unplug the appliance from the electrical outlet before disassembly and cleaning.
After you have finished making pasta, disassemble the pasta machine immediately and clean all the component parts. Dried dough can make it difficult or impossible to disassemble the machine.
MAKING PASTA IN THE MANUAL PROGRAM
Note: The short operating time is 20 minutes. After this time let the appliance cool off completely, before continuing to make pasta. You can use the wait time to cook the noodles you have already made or prepare them for storage.
- Ensure that the appliance is correctly assembled and that it contains the desired pasta die.
- Place a sufficiently large plate under the openings of the die.
- Measure or weigh the desired ingredients and have them on hand.
- Open the lid of the kneading container.
- Put flour or semolina or both as specified in the recipe into the kneading container.
Making egg noodles
-
In the rear area make a depression in the flour. Put the full egg (egg white and yolk) in a cup. If necessary, supplement with water or the liquid specified in the recipe, for the required quantity of liquid. Now carefully beat the egg mass in the cup. In this process, ensure that bubbles do not occur.
-
Pour the egg mass into the depression made in the flour.
-
Close the lid.
-
Plug the mains plug into an electrical outlet. The display lights up.
-
Press the "Mix" button.
-
The preset time of 4 minutes will be shown in the display. Press the “+” or “-” buttons, to adjust this time according to your desires. The time adjustment is possible as long as the numbers in the display are flashing.
-
Wait several seconds. The flashing stops and the kneader starts to turn. The kneader starts to turn. This program runs for the factory-set time of 4 minutes or for the duration of the time specified by the user. The time is appropriately shown in the display. The subsequent procedure is described starting from point 20.
Making noodles without egg
- Close the lid of the appliance.
- Plug the mains plug into an electrical outlet. The display lights up.
- Press the "Mix" button.
- The preset time of 4 minutes will be shown in the display. Press the “+” or “-” buttons, to adjust this time according to your desires. The time adjustment is possible as long as the numbers in the display are flashing.
- Wait several seconds. The flashing stops and the kneader starts to turn. This program runs for the factory-set time of 4 minutes or for the duration of the time specified by the user. The time is appropriately shown in the display.
- Immediately pour the weighed water slowly into the kneading container through the opening in the lid.
- The subsequent procedure is described starting from point 20.
Extruding pasta
- When the set time has elapsed, the kneader stops and a signal tone sounds three times.
- Now press the “Extrude” button. The appliance starts to extrude pasta. You can cut off the noodles at the desired length with the provided dough scraper or with a small, sharp knife
- When pasta extrusion is concluded the signal tone sounds four times and the appliance stops extruding pasta.
- When you stop making pasta, unplug the plug from the electrical outlet. The device is not safely switched off until after it has been unplugged from the electrical outlet.

Always unplug the appliance from the electrical outlet before disassembly and cleaning.
After you have finished making pasta, disassemble the pasta machine immediately and clean all the component parts. Dried dough can make it difficult or impossible to disassemble the machine.
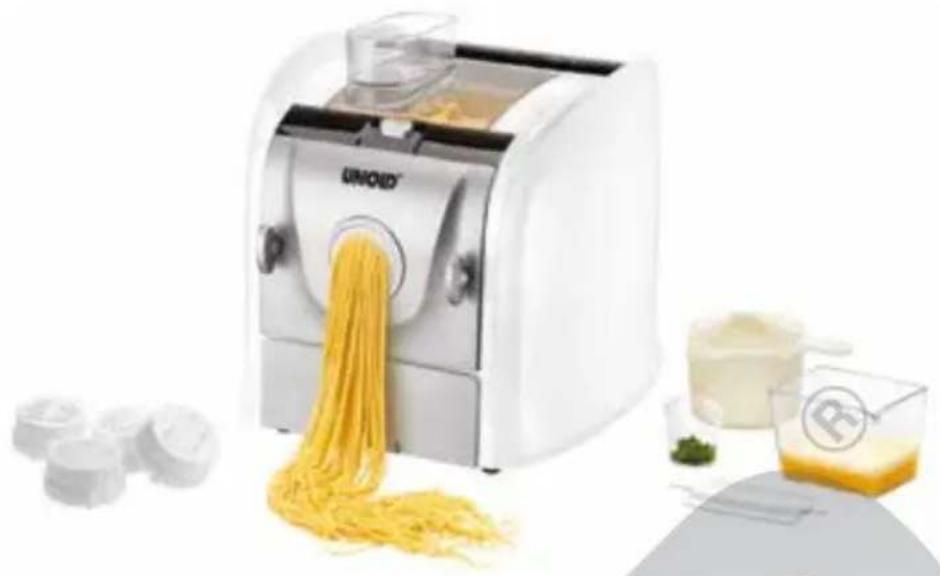
natural_image
White LiNOED French noodle machine with yellow yarn being processed, surrounded by food items (no text or symbols visible)CLEANING AND CARE

Always unplug the plug from the electrical outlet before cleaning.
- Take the appliance apart in the reverse sequence:
- For safety reasons the lid has a locking mechanism. To take off the lid, first press on the „Öffnen“ (Open) button. The locking mechanism disengages, the lid can be removed.
- Release the locking levers of the panel by turning them anti-clockwise and take off the panel.
- Take off the pasta die and unscrew the screws of the front cover.
- Pull the kneader out of the kneading container.
- Remove flour esid ues in the housing with a dry cloth.
- Kneading container, kneader, front attachment, panel, and the pasta dies can be cleaned in lukewarm rinsing water. If necessary let the parts soak in the rinsing water for a few minutes to soften dough residues for easier removal.
- Do not immersethe housing in water or other liquids.
- The appliance must be completely dry before it can be used again.
- When completely dry, store the appliance in a dry, safe place so that it is protected from dust, shocks, heat and moisture. Tip: Store the appliance in the original box.
- Tip: To save space the pasta dies can be stored in the drawer of the appliance.
Using the cleaning needle:
-
Carefully insert the cleaning needle into the openings of the respective die to remove dough residues. Tip: It is easier to remove dried-on dough residues.
-
Caution, the needle has a sharp point, danger of injury!
TROUBLESHOOTING
If the solutions provided below do not bring about the desired result, please contact our customer service department.
| Problem Solution | |
| The appliance cannot be switched on. | Check whether the lid is properly fitted on and is locked in place.Check whether the wing screws of the metal panel are screwed completely closed. |
| Dough cannot be extruded | The dough does not have the proper consistency. If the dough is too liquid, add more flour. If the dough is too solid, add more water. |
| Dough residues adhere on the accessories | It is easier to remove hard dough residues. Consequently, let the dough residues dry-on completely (approx. 30 minutes) then clean again. |
| The last dough residues are not automatically pulled in | Open the lid and carefully slide the dough residues forward in the direction of the auger. Close the lid and proceed as usual. |
IMPORTANT INFORMATION ABOUT MAKING PASTA
All ingredients are weighed. The quantity information always refers to grams. With the appliance you are processing natural ingredients that are subject to certain fluctuations in moisture absorption. Therefore the information concerning liquid refers to guide values. If need be the dough can be adjusted with several grams of flour or liquid.
In the automatic program the dough is kneaded for 4 minutes. After this time the kneader turns in the opposite direction and the dough is formed into pasta. Whole-grain flours, gluten-free flours and doughs without egg require a longer kneading time, and therefore should be prepared in the manual program.
The dough is ready to be shaped when it has the condition of cake streusel. If the dough adheres on the kneader and is not automatically pulled into the auger, the dough is too moist. In this case, please detach the dough from the kneader, add a little flour to the dough and let the flour be briefly worked into the dough.
When the dough has the consistency of fine streusel, after approx. 3 minutes of kneading time add a little water. Dose the water carefully, so that the dough does not become too moist. We recommend the addition in 10-gram increments. However, always bear in mind that the flour swells due to the liquid. This process takes time. Consequently, do not add addition liquid prematurely.
Adding salt withdraws the moisture from the pasta dough. Consequently, do not add salt if you want to dry and store the pasta.
Mixtures of semolina and type 405 flour or “double-coarse” type 405 flour are optimal for making pasta.
Attention: Hollow pasta, such as elbow pasta, cannot be dried, because in dried status the pasta is under tension and the break.
In the recipes below size L eggs are used. Naturally, however you can also use other sizes of eggs. In this case increase or reduce the liquid content accordingly.
The water used should be cold.
When the dough presses against the appliance lid and thus switches off the appliance, open the lid and press the dough downward. Put the lid back on and switch the appliance back on.
How to cook pasta properly
You can cook pasta fresh or dried. Cook pasta in boiling, salted water. Be sure there to use enough water; you should use 3 to 4 litres of water for 500 g of pasta. Pasta can also be cooked in a clear broth or milk. Drain the pasta and serve it with a sauce, if you like. The cooking time depends on the type of pasta and your personal preference. Freshly made pasta usually cooks faster than dried pasta. The freshly made pasta is done when it floats on the surface of the water.
Important note: Weigh the full egg (egg without shell) and add water, if necessary, until the required weight specification is reached.
RECIPE IDEAS
| Egg pasta | ||
| Half filling Whole filling | ||
| Wheat flour, type 405 250 g 500 g | ||
| Egg and water 100 g = 2 eggs plus water 200 g = 4 eggs plus water | ||
| Automatic program | ||
| Semolina pasta with egg 1 | ||
| Half filling Wh ng | ole filli | |
| Durum wheat semolina 200 g | 400 g | |
| Wheat flour, type 405 50 g 0 g | 10 | |
| Egg and water | 100 g = 2 eggs plus water | 200 g = 4 eggs plus water |
| Automatic program | ||
| Semolina pasta with egg 2 | ||
| Half filling lling | Whole fi | |
| Durum wheat semolina 25 500 g 0 g | ||
| Egg and water | 100 g = 2 eggs plus water | 200 g = 4 eggs plus water |
| Automatic program | ||
| Egg pasta, special | ||
| Half filling Whole filling | ||
| Wheat flour, type 405 "Double-coarse" (Spätzle flour) | 250 g 500 g | |
| Egg yolk, egg water Depending on the egg size, add water until the required weight is reached, or remove a little egg white. | 100 g = 6 egg yolks, 1 egg plus water | 200 g = 12 egg yolks, 1 egg plus water |
| Automatic program | ||
| Durum wheat semolina pasta with water | ||
| Half filling Whole filling | ||
| Durum wheat semolina 200 g 400 g | ||
| Wheat flour, type 405 50 g 100 g | ||
| Cold water 80 g 160 g | ||
| Oil 10 g 20 g | ||
| Manual program for 6-8 minutes | ||
| Carrot pasta | ||
| Half filling | Whole filling | |
| "Double-coarse" wheat flour, type 405 (Spätzle and pasta dough, coarse) | 250 g 0 g | 50 |
| Carrot juice and egg 95 g = 1 egg, plus c juice | arrot | 190 g = 2 eggs plus carrot juice |
| Manual program for 6-8 minutes | ||
| Red beet pasta | ||
| Half filling Whole filling | ||
| "Double-coarse" wheat flour, type 405 (Spätzle and pasta dough, coarse) | 250 g 500 g | |
| Red beet juice and egg | 95 plus red beet juice | 190 g = 2 eggs plus red beet juice |
| Manual program for 6-8 minutes | ||
| Spinach pasta | ||
| Half filling Whole filling | ||
| "Double-coarse" wheat flour, type 405 (Spätzle and pasta dough, coarse) | 250 g 500 g | |
| Spinach and eggFirst thaw frozen spinach, enhance with broth and puree | 110 g = frozen spinach and 1 egg | 220 g = frozen spinach and 2 eggs |
| Manual program for 6-8 minutes | ||
| Wild garlic pasta | ||
| Halbe Füllung Ganze Füllung | ||
| "Double-coarse" wheat flour, type 405 (Spätzle and pasta dough, coarse) | 250 g 500 g | |
| Wild garlic and eggSteam the garlic with a little water, then mix with the water | 110 g = 1 egg and wild garlic | 220 g = 2 eggs and wild garlic |
| Manual program for 6-8 minutes | ||
| Pizza pasta | ||
| Half filling | Whole filling | |
| Wheat flour, type 405 250 g | g | 500 |
| Egg and water | 100 g = 1 egg plus water | 200 g = 2 eggs plus water |
| Dried oregano 1 pinch 1 p nch | i | |
| Automatic program | ||
| Curry pasta | ||
| Half filling Whole filling | ||
| Wheat flour, type 405 250 500 | g g | |
| Egg and water | 100 g = 1 egg plus water | 200 g = 2 eggs plus water |
| Curry powder ng tsp | 2 heaping tsp (= 10 g) | |
| Automatic program | ||
| Sepia pasta (black pasta) | ||
| Half filling Whole filling | ||
| "Double-coarse" wheat flour, type 405 (Spätzle and pasta dough, coarse) | 250 g 500 g | |
| Egg and water 100 g = 1 egg plus water 200 g = 2 eggs plus water | ||
| Sepia (aromatic squid ink) is available in special shops for fish or Italian products or on the Internet | 3 tsp squid ink paste 6 tsp squid ink paste | |
| Manual program for 6-8 minutes | ||
| Whole-grain spelt flour pasta with egg | ||
| Half filling Whole filling | ||
| Whole-grain spelt flour 250 g 500 g | ||
| Egg and water 100 g = 1 egg plus water 200 g = 2 eggs plus water | ||
| Manual program for 6-8 minutes | ||
| Whole-grain spelt pasta with water | ||
| Half filling Whole fill ng | ||
| Whole-grain spelt flour 250 g 500 g | ||
| Cold water 120 ml | 240 ml | |
| Manual program for 6-8 minutes | ||
| Cornmeal pasta, gluten-free with egg | ||
| Half filling Whole fi | lling | |
| Cornmeal 250 g 0 | 50 g | |
| Guar flour 15 g | 30 g | |
| Egg and water | 100 g = 1 egg plus water | 200 g = 2 eggs plus water |
| Mix guar flour, egg and water in a cup with a hand blender, add directly to the flour do not fill over the lid! | ||
| Manual program for 6-8 minutes | ||
| Cornmeal pasta, gluten-free with egg | ||
| Half filling Whole filling | ||
| Chickpea flour 50 g 500 g | 2 | |
| Egg and water = 1 egg plus water | 190 g plus water | |
| Xanthan gum 3 g 6 g | ||
| Mix xanthan gum, egg and water in a cup with a hand blender, add directly to the flour do not fill over the lid! | ||
| Manual program for 6-8 minutes | ||
| Whole-grain wheat flour pasta | ||
| Half filling Whole filling | ||
| Whole-grain wheat flour 250 g 500 g | ||
| Egg and water 100 g = 1 egg plus | water 200 g = 2 eggs plus water | |
| Manual program for 6-8 minutes | ||
| Chickpea pasta, gluten-free, vegan | ||
| Half filling Whole filling | ||
| Chickpea flour 250 g 500 g | ||
| Water 100 g 200 g | ||
| Xanthan gum 3 g 6 g | ||
| Mix xanthan gum and water in a cup with a hand blender, add directly to the flour do not fill over the lid! | ||
| Manual program for 6-8 minutes | ||
| Buckwheat flour pasta, gluten-free | ||
| Half filling le filli | Who ng | |
| Buckwheat flour 250 g g | 500 | |
| Egg and water | 150 g = 1 egg plus water | 300 g = 1 egg and wild garlic |
| Locust bean gum 15 g 15 g | ||
| Mix locust bean gum, egg and water in a cup with a hand blender, add directly to the flour do not fill over the lid! | ||
| Manual program for 6-8 minutes | ||
| Almond flour pasta, low-carb, gluten-free | ||
| Half filling Whole filling | ||
| Almond flourAlmond flour contains only 4 gcarbohydrates per 100 g | 250 g 500 g | |
| Egg and water 150 g = 2 eggs plus water 300 g = 4 eggs plus water | ||
| Sprinkle guar flour on the flour | 15 g | 30 g |
| Manual program for 8 minutes | ||
| Rice pasta, gluten-free | ||
| Half filling Whole filling | ||
| Rice flour 250 g 500 g | ||
| Guar flour 15 g 30 g | ||
| Egg and water 150 g = 2 eggs plus water 300 g = 4 eggs plus water | ||
| Manual program for 8 minutes | ||
| Rice pasta must be prepared fresh immediately. Bring once to a boil in boiling salt water, then take the pasta out of the water immediately. Rice pasta cannot be dried; this causes it to crumble. | ||
| Savoury shortcrust sticksPasta die no. 11 for grissini and shortcrust sticks | ||
| Wheat flour, type 550 350 g | ||
| Instant dry yeast 1 P. | ||
| Warm milk 100 g | ||
| Melted butter 100 g | ||
| Vegetable broth powder 1 Tlsp | ||
| Automatic program | ||
| Also required: 1 egg and a little creamFill flour, vegetable broth and yeast into the kneading container. Mix butter and milk together and let it flow in through the lid opening. Cut the pasta strand to the desired length (e.g. 10 - 15 cm). Beat 1 egg with 1 tsp cream, brush the sticks with this mixture. Sprinkle with sesame seeds, poppy seeds, coarse salt or flax seed, as desired. Preheat oven to 200°C, place sticks on a greased baking sheet and bake at 200°C for approx. 15 minutes. | ||
The authors have thoroughly considered and tested the recipes included in these operating instructions. Nevertheless, a guarantee cannot be accepted. The authors, respectively UNOLD AG and their assignees shall not be liable for personal injuries, material damages and financial loss.
GUARANTEE CONDITIONS
We grant a 24 months guarantee, and in case of commercial use a 12 months guarantee, starting from the date of purchase for any damage demonstrably due to manufacturing defects and when the appliance has been used according to its intended use. Within the warranty period we will remedy defective materials or workmanship through repair or replacement, at our option. Our warranty terms apply only to appliances sold in Germany and Austria. For other countries, please contact the responsible importer. In the event of a claim for remedy of defects, please send the appliance to our after sales service, properly packaged and postage paid, together with a copy of the automatically generated sales receipt, which must show the date of purchase, and a description of the defect. If the defect is covered by the warranty, the customer will be reimbursed for the shipping costs only in Germany and Austria. The warranty does not cover damage from normal wear, improper handling and failure to comply with the maintenance and care instructions. The warranty is void if repairs or modifications are made to the appliance by third parties. Any claims of the end consumer vis-à-vis the retailer are not limited by this warranty.
WASTE DISPOSAL / ENVIRONMENTAL PROTECTION
Our appliances are produced on a high quality level for a long lifetime. Regular maintenance and expert repairs by our after-sales service can extend the useful life of the appliance. If an appliance is defective and repair is not possible we ask you to follow the following instructions for disposal. Do not dispose this appliance together with your standard household waste. Please bring this product to an approved collection point for recycling of electric and electronic products. By separate collection and disposal of waste products you help to protect natural resources and ensure, that the product is disposed in an adequate way to protect health and environment.
natural_image
Symbol of a trash bin crossed with no text or labels, representing waste sorting or disposal (no text present)The instruction booklet is also available for download: www.unold.de
NOTICE D'UTILISATION MODÈLE 68860
SPÉCIFICATION TECHNIQUE
natural_image
Close-up of a mechanical fan or vent component with central hub and mounting holes (no visible text or symbols)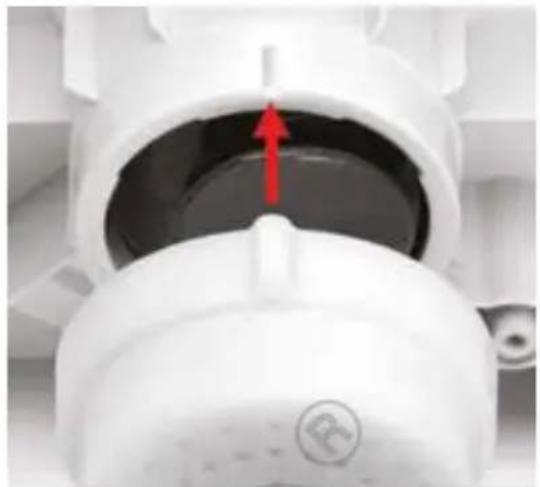
natural_image
Close-up of a white mechanical component with a red arrow pointing to a central opening, no visible text or symbols.natural_image
Illustration of a UNIQ food maker emitting noodles with a glass of juice and small glasses nearby (no text or symbols)NETTOYAGE ET ENTRETIEN

CONDITIONS DE GARANTIE
natural_image
Close-up of a mechanical component with a central circular feature and symmetrical mounting holes (no text or symbols visible)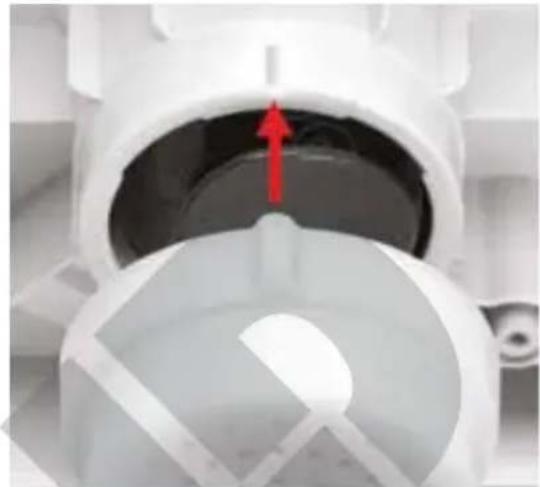
natural_image
Close-up of a white mechanical component with a red arrow pointing to a circular opening (no text or symbols visible)natural_image
Close-up of a mechanical component with a central circular feature and four mounting holes (no text or symbols visible)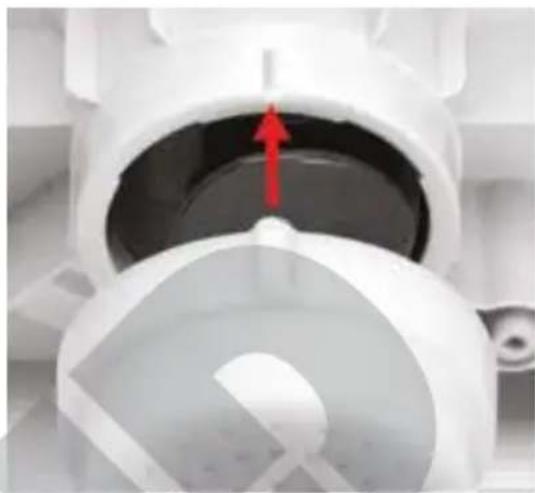
natural_image
Close-up of a white mechanical component with a red arrow pointing to a circular opening, no visible text or symbols.natural_image
Close-up of a mechanical component with a central circular feature and mounting holes (no visible text or symbols)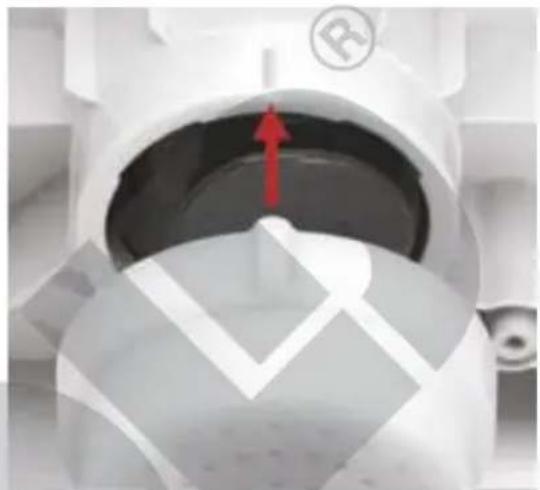
natural_image
Close-up of a white mechanical component with a red arrow pointing to a circular opening, no visible text or symbols.natural_image
Symbol of a trash bin with crossed lines indicating no waste or discharge (no text or labels)INSTRUKCJA OBSŁUGI MODEL 68860
DANE TECHNICZNE
natural_image
Close-up of a mechanical component with a central circular recess and four mounting holes (no visible text or symbols)