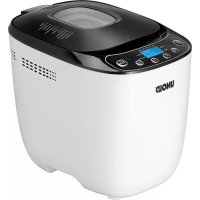
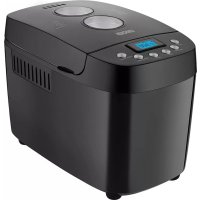
68425 - Bread maker UNOLD - Free user manual and instructions
Find the device manual for free 68425 UNOLD in PDF.


User questions about 68425 UNOLD
0 question about this device. Answer the ones you know or ask your own.
Ask a new question about this device
Download the instructions for your Bread maker in PDF format for free! Find your manual 68425 - UNOLD and take your electronic device back in hand. On this page are published all the documents necessary for the use of your device. 68425 by UNOLD.
USER MANUAL 68425 UNOLD
natural_image
Product display of a UNOLD watermelon-based kitchen with various bread slices, a microwave, and a sandwich (no visible text or symbols)BACKMEISTER KOMPAKT PLUS
Bedienungsanleitung
Instructions for use | Notice d'utilisation Gebruiksaanwijzing | Istruzioni per l'uso Instrucciones de uso | Návod k obsluze Instrukcja obsługi
Modell 68425

Instructions for use Model 68425
Technical Specifications....36
Explanation of symbols.... 36
Safety information 36
Preparing the appliance for operation 38
Quick start guide – the first loaf of bread 38
Explanation of the symbols 39
Display 40
The buttons.... 40
The functions of the breadmaker 43
The program process of the breadmaker....43
Cleaning and care....44
Timing process of the programs....45
Questions and answer concerning the
use of the breadmaker....49
Trouble shooting - appliance 51
Trouble shooting - recipes....52
Comments on baking 53
Bread recipes....55
Breads for persons with allergies....57
Bread mixtures....58
Cake recipe 58
Dough preparation 59
Preparation of jam and marmelade....60
Guarantee conditions 61
Waste disposal / environmental protection....61
Service 34
Preparation de pate 84
Preparation de confiture....84
Conditions de garantie 85
1 Kneader
2 Baking pan
3 Hook
4 Measuring spoon
5 Measuring cup
6 Control panel with display
F Page 62
natural_image
Two-panel photo showing hands cutting a block of bread with a knife, no text or symbols visibleDAS DISPLAY
Display-Anzeige
GRUNDEINSTELLUNG:
natural_image
Two-panel photo showing hands holding a baked bread roll, one cut open with a knife (no text or symbols visible)REINIGEN UND PFLEGEN

natural_image
Symbol of a trash bin with crossed lines indicating no waste or discharge (no text or labels)INFORMATIONEN FÜR DEN FACH HANDEL

Weight: approx. 7.3 kg
Capacity: 500 g – 1,000 g loaf weight
Power cord: ca. 85 cm, permanently attached
Housing: Stainless steel
Features: 12 stored programs, a user program for individual settings, level button for 3 different loaf weights, selector switch for degree of browning, timer switch can be pre-programmed up to 13 hours, automatic warming level
Accessories: Removable baking pan with W hitford® ceramic coating, kneader, measuring cup, measuring spoon, hook for removing kneader, operating instructions with recipes
Equipment features, technology, colours and design are subject to change without notice. Errors and omissions excepted.
EXPLANATION OF SYMBOLS

This symbol denotes a possible hazard which could cause injury or damage to the appliance.

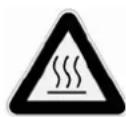
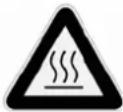
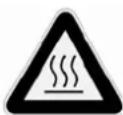
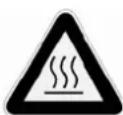
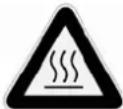
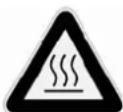
This symbol indicates a potential burning hazard. Please be especially careful at all times here.
SAFETY INFORMATION
Please read the following instructions and keep them on hand for later reference.
-
This appliance can be used by children aged from 8 years and above and persons with reduced physical, sensory or mental capabilities or lack of experience and knowledge if they have been given supervision or instruction concerning use of the appliance in a safe way and understand the hazards involved. Children shall not play with the appliance. Cleaning and user maintenance shall not be made by children without supervision.
-
Children of less than 3 years should be kept away unless continuously supervised.
-
Children aged from 3 years and less than 8 years shall only switch on/off the appliance provided that it has been placed or installed in its intended normal operating position and they have been given supervision or instruction concerning use of the appliance in a safe way and understand the hazards involved. Children aged from 3 years and less than 8 years shall not plug in, regulate and clean the appliance or perform user maintenance.
-
CAUTION – Some parts of this product can become very hot and cause burns. Particular attention has to be given where children and vulnerable people are present.
- Children should be supervised in order to ensure that they do not play with the appliance.
- Keep the appliance out of reach of children.
- Connect the appliance only to an AC power supply with the voltage indicated on the rating plate.
- Do not operate this appliance with an external timer or remote control system.
- Never immerse the appliance or the lead cable in water or other liquids.
- Always switch off and disconnect the power supply plug from the mains when the appliance is not being used and before it is cleaned.
- Do not use the breadmaker if the power supply cable is damaged, in the event of faulty performance or if the breadmaker itself is damaged. The breadmaker must only be examined and repaired by an authorised repair workshop. Do not attempt to repair the breadmaker yourself as the guarantee will then become null and void.
- The use of alien accessories that have not been approved by the manufacturer can damage the breadmaker, and which must only be used for its intended purpose.
- This appliance is intended for domestic and similar use such as:
■ staff kitchen areas in shops, offices and other working environments;
■ agriculturaterprises;
■ by clients in hotels, motels and other accommodation facilities;
■ bed and breakfast accommodations and holiday homes.
- Place the breadmaker on a surface in such a manner that it cannot slip, as can happen when kneading a stiff dough. This must be taken into account with advance programming when the breadmaker operates unattended. Use a thin rubber mat on a slippery surface so that the danger of slipping is prevented.
- The Backmeister must be operated at least 10 cm from other objects. The breadmaker must not be used outdoors!
-
Ensure that the power supply cable does not come into contact with hot surfaces, nor hang down from the worktop so that children cannot pull the cable.
-
Never place the breadmaker on a gas or electric hob or alongside a hot baking oven.
- Utmost care must be taken when moving the breadmaker when it contains hot liquids (jam).
- Never remove the baking tin during operation.
- Never fill the baking tin with more than the specified quantities, particularly with white bread. The bread will not be baked uniformly and the dough will overflow! Please refer to the instructions.
- Provide close supervision when testing new recipes. Before a certain type of bread is baked overnight, you should always try out the recipe first to confirm the correct mixing ratio of the individual ingredients, that the dough is not too stiff or thin, or that the quantity is not excessive and overflow.
- Never heart the appliance without properly placed bread pan filled with ingredients.
- Never beat the bread pan on a working top or edge to remove the pan. This may entail damages.
- Metal foils or other materials must not be inserted into the breadmaker as this can give rise to the risk of a fire or short circuit.
- Never cover the breadmaker with a towel or any other material. Heat and steam must escape freely. A fire can be caused if the breadmaker is covered by, or comes into contact with, combustible material, e.g. curtains.
- Never carry the appliance on the handle. The handle is designed exclusively for opening and closing the appliance.
- Before a certain type of bread is baked overnight, you should always try out the recipe first to confirm the correct mixing ratio of the individual ingredients, that the dough is not too stiff or thin, or that the quantity is not excessive and overflow.
- Check the appliance, the wall socket and the lead cable regularly for wear or damage. In case the lead cable or other parts appear damaged, please send the appliance or the base to our after sales service for inspection and repair. Unauthorised repairs can constitute serious risks for the user and void the warranty.
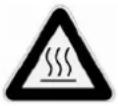
CAUTION:
The appliance becomes very hot during operation and maintains the heat during some time after disconnection!

Never open the housing of the appliance. This can result in electric shock.
The manufacturer will not be liable in the event of incorrect assembly, improper or incorrect use or if repairs are carried out by unauthorized third parties.
PREPARING THE APPLIANCE FOR OPERATION
- When unpacking the appliance, check to make sure that all parts are completely present and undamaged.
- Before using the appliance the first time, remove all packaging materials and all loose parts from the inside. Keep packaging materials away from children - danger of suffocation!
- Before the first use, rinse out the Backmeister ^® baking pan with warm water and mild dishwashing liquid and clean the kneader. To do this, open the lid of the Backmeister ^® and remove the baking pan (turn it to the left anti-clockwise).
-
Wipe off the outside of the appliance with a wrung-out damp cloth. Never immerse the appliance in water.
-
Dry all parts tho roughly. Insert the baking pan in the appliance.
- Now plug the appliance into the electrical outlet and switch the appliance on. Now the appliance is ready for operation.
- Since smoke can occur the first time the appliance heats up, we recommend that you allow the appliance to run through the BAKE program once with an empty baking pan (without kneader) to remove any residue on the heating elements.
- Allow the appliance to cool for a while.
- A afterwards you can start baking bread.
QUICK START GUIDE – THE FIRST LOAF OF BREAD
- Prepare the appliance as described in the section „Preparing the appliance for operation“.
- Open the lid of the Backm eister® and remove the baking pan (turn it to the left anti-clockwise).
- Generously apply heat-resistant margarine to the hole in the kneader to prevent the dough from baking on here during baking.
- Place the kneader on the drive shaft in the baking pan. Make sure to fit on the kneader right side up; otherwise the coating of the pan can be damaged.
- Place the ingredients in the baking pan as specified in the recipe. For optimal results when baking with heavy dough, reverse the order of the ingredients, i.e. first add the dry ingredients and then the liquid. When using the timer function, however, make sure that the yeast does not come into contact with the liquid too soon.
- Place the baking pan in the appliance, turning it clockwise until it locks into place.
- Close the lid of the Backmeister ^® .
- Plug the appliance into an electrical outlet.
- Select the desired program with the "MENU" button. Press this button until the desired program number
(e. .g. 1 for the basic program) appears on the display. Instructions for the individual programs are provided starting on page 40. For example, bread made from a standard bread mix turns out well with the “Basic” program.
-
Select the desired degree of browning with the "BROWNING" (Light - Medium - Dark) button. Please note that it is not possible to select the degree of browning with all programs. For more information, please see page 41.
-
Select the desired loaf size with the "LOAF SIZE" button. Please note that it is not possible to select the loaf size with all programs. For more information, please see page 41.
-
Once you have made all the desired settings, press the START/STOP button. Caution: If you want to cancel the program, you can do this via the START/STOP button. In this case the START/STOP button responds with a time delay, for safety reasons. Consequently, it is normal that the appliance does not immediately respond after pressing the button, but rather after several seconds. Please wait until button activation is confirmed
through a signal tone (after approx. 3 seconds). Please do not press the button multiple times.
- When your bread has finished baking, the Backmeister® beeps several times to signal that the bread can be removed. If you wish to remove the bread before the end of the keep-warm time, press the START/STOP button and hold it down until a tone sounds to signal that the program has been interrupted.
- Remove the baking pan carefully. To prevent burns, please use suitable potholders. Turn the baking pan upside down and allow the bread to slide out onto a wire rack for cooling. If the bread does not come out right away, turn the kneading mechanism on the bottom of the pan back and forth until the bread comes out. Be aware that the kneading mechanism could still be hot. Here again you should use suitable potholders. Never strike the baking pan against a table edge or worktop. This could cause dents in the baking pan.
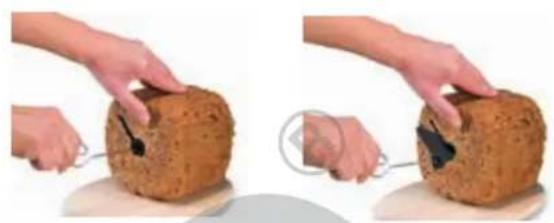
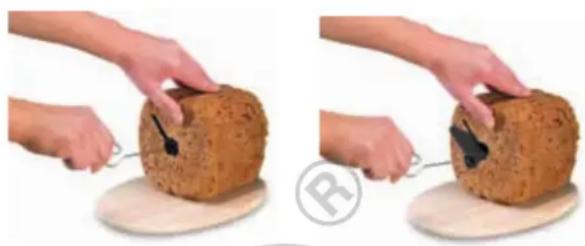
- If the kneader remains in the bread, you can pull it out with the included hook. Insert hook at the bottom of the warm loaf into the opening in the kneader and
allow it to catch on the bottom edge of the kneader, preferably at the point where the blade of the kneader is located. Now carefully pull the kneader out of the bread. As you pull, you will see where the blade of the kneader is located in the bread and pull it out.
- Then clean the baking pan as described on page 44.
natural_image
Two-panel photo showing hands cutting a brown loaf of bread with a knife, no text or symbols visibleEXPLANATION OF THE SYMBOLS
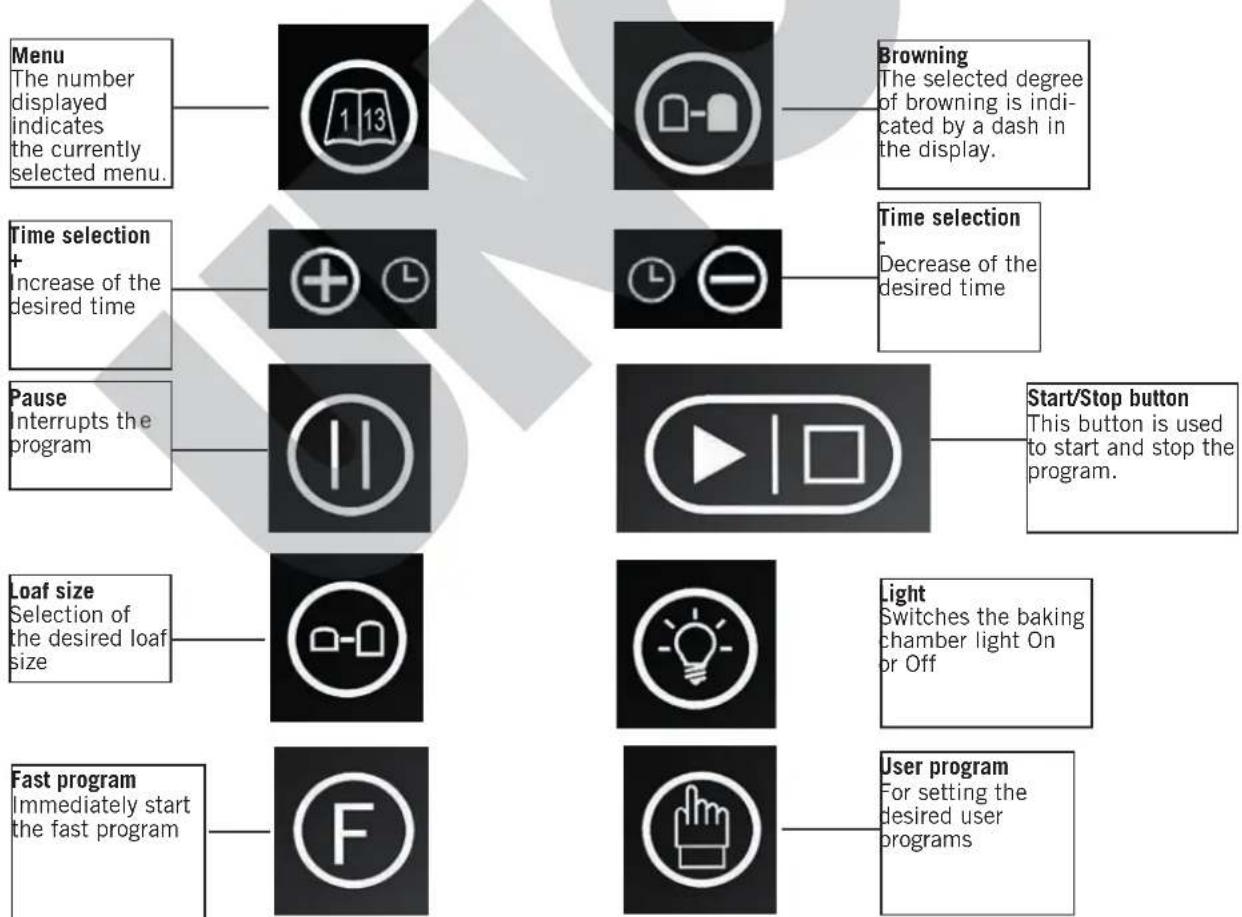
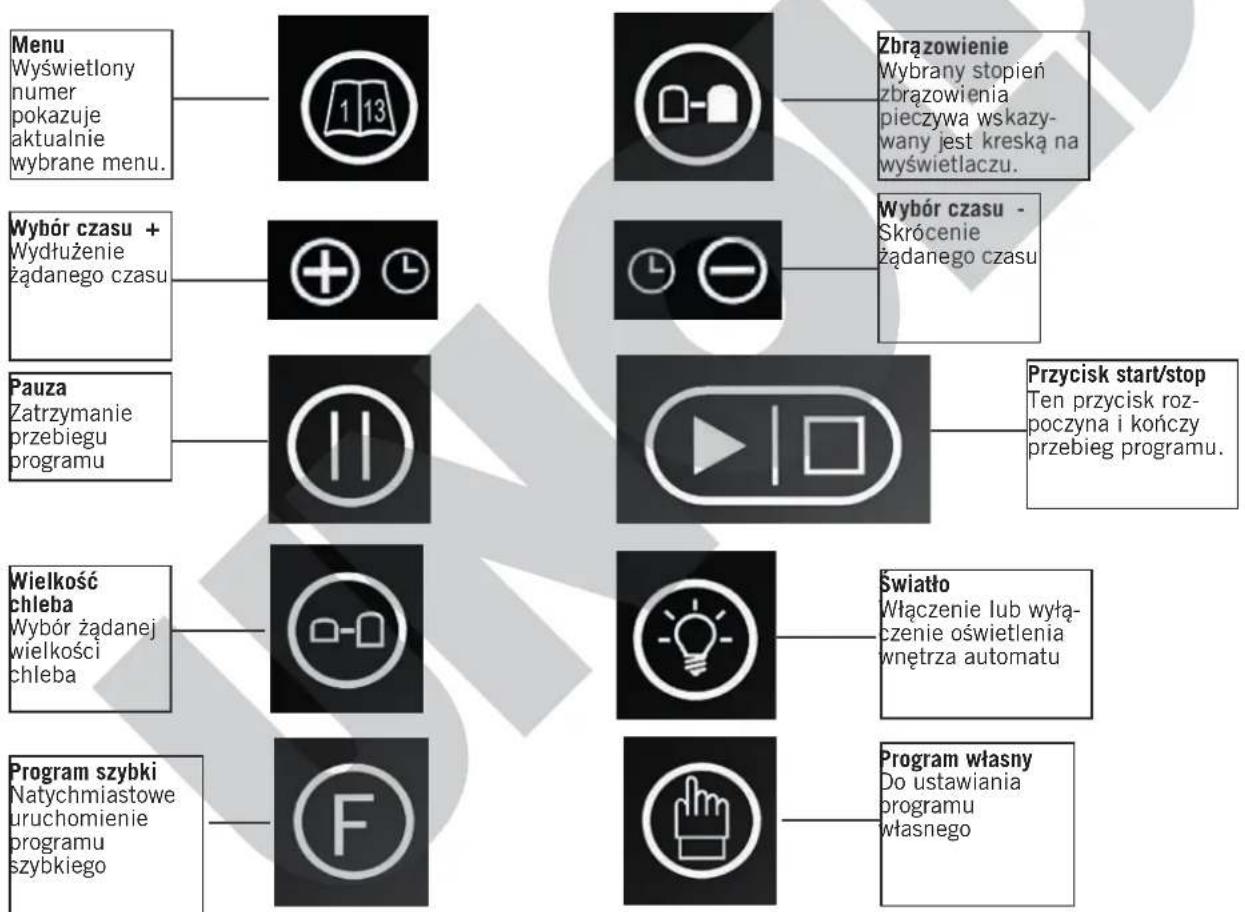
flowchart
graph TD
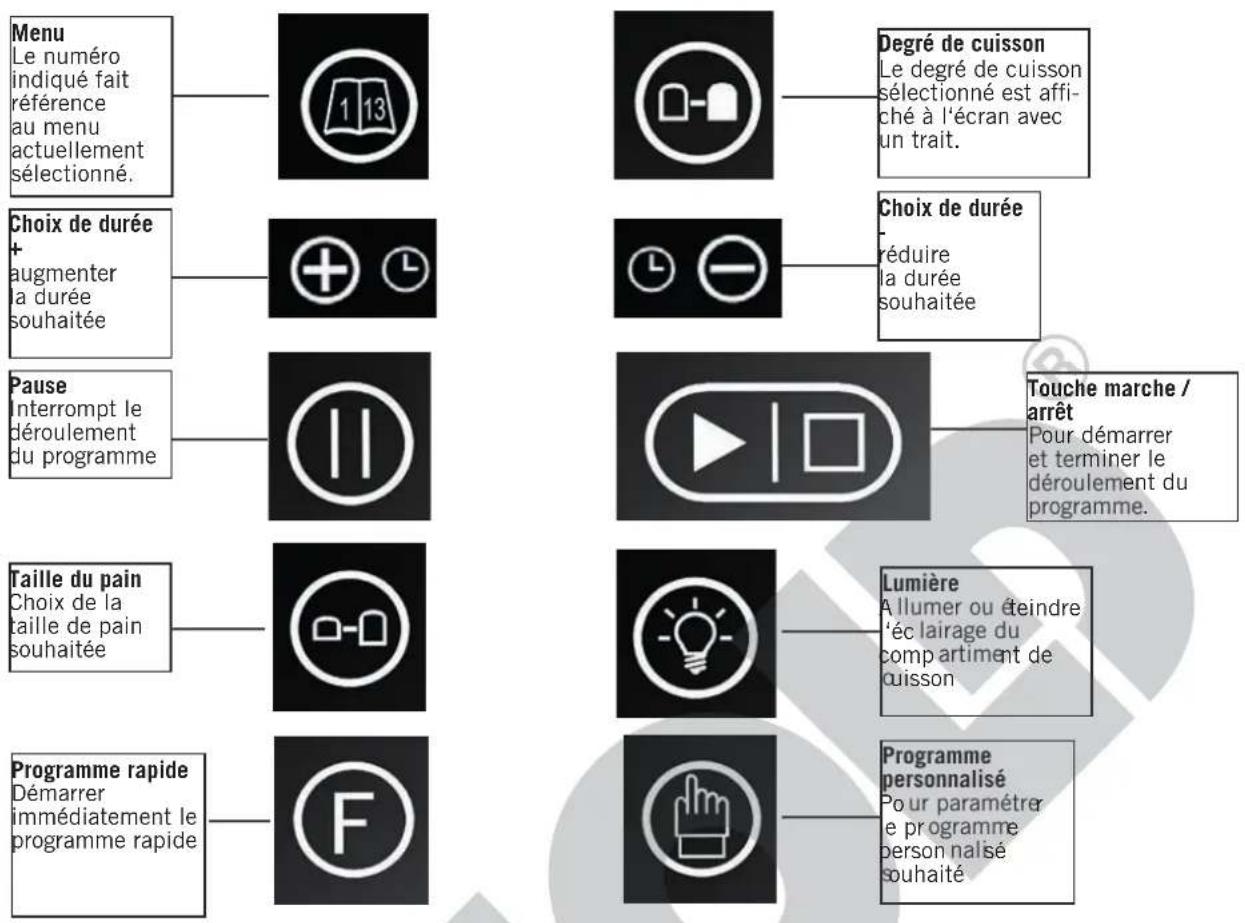
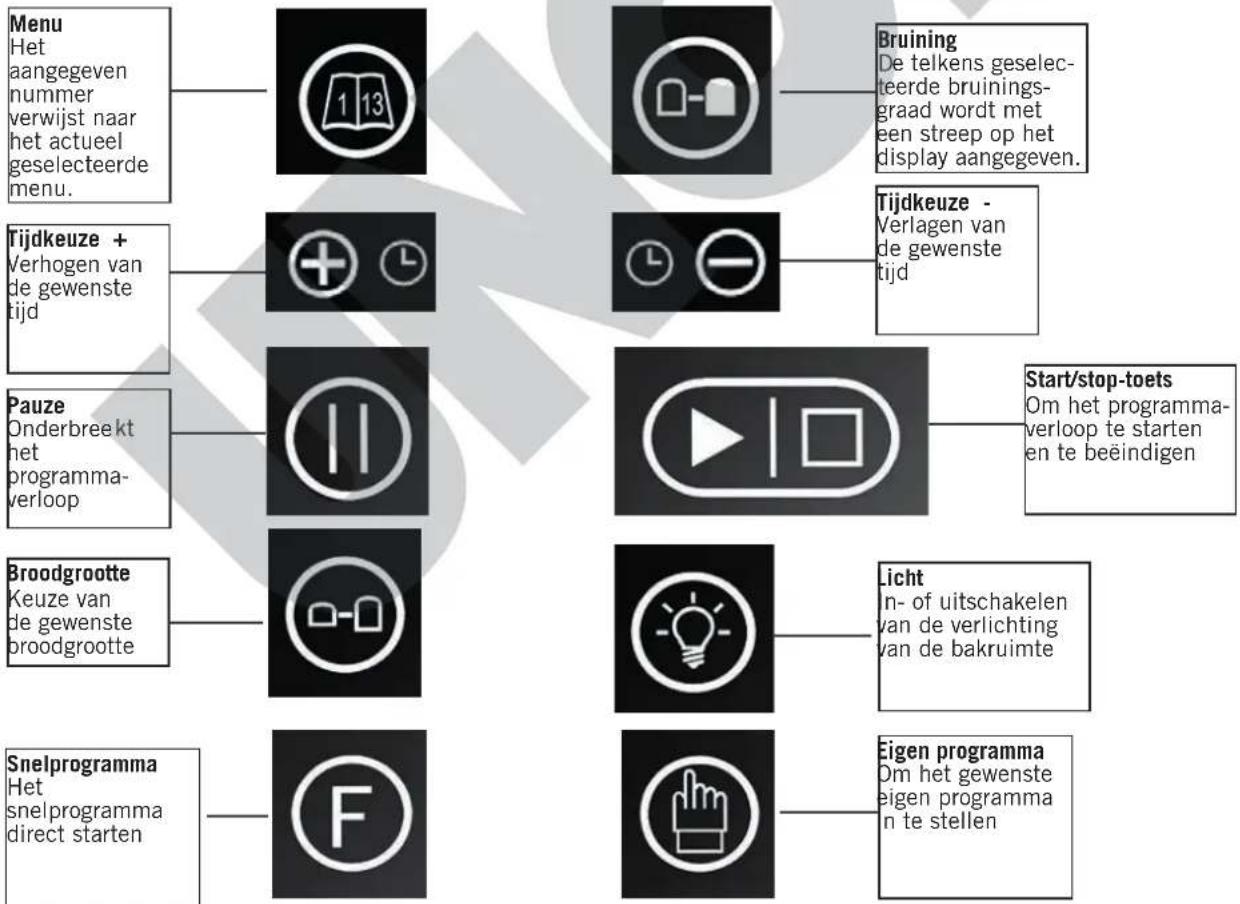
    A["Menu\nThe number displayed indicates the currently selected menu."] --> B["1 13"]
    C["Time selection\n+ Increase of the desired time"] --> D["+ 2 2"]
    E["Pause Interrupts the program"] --> F["||"]
    G["Loaf size\nSelection of the desired loaf size"] --> H["○-○"]
    I["Fast program\nImmediately start the fast program"] --> J["F"]
    K["Browning\nThe selected degree of browning is indicated by a dash in the display."] --> L["○-○"]
    M["Time selection\n- Decrease of the desired time"] --> N["○-○"]
    O["Start/Stop button\nThis button is used to start and stop the program."] --> P["○-○"]
    Q["Light\nSwitches the baking chamber light On or Off"] --> R["○-○"]
    S["User program\nFor setting the desired user programs"] --> T["○-○"]
DISPLAY
BASIC SETTING:
Appears as soon as the appliance is plugged into the electrical outlet. In the display, the information for program 1 (Basic) and the medium degree of browning are shown. During operation, the program status is indicated both by the time countdown and the symbols on the display. The following messages on the display indicate an error: HHH or LLL: This message indicates a defect in the temperature sensor. Please have the appliance inspected by our service department.
E EO and E E1:
If this appears after pressing the START/STOP button the appliance is still too hot from the last baking cycle. Open the lid and allow the appliance to cool for another 10 to 20 minutes.
THE BUTTONS
On/Off-Switch
To switch the appliance on or off. This switch is located at the lower side of the back of the housing. If you don't use the appliance, you should always switch it off in order to interrupt the power supply and then take the plug out of the receptacle. The programs can only be selected and started when the appliance has been switched on.
START/STOP button
This button is used to start and stop the program. With the START/STOP button you can cancel the program at any time. For safety reasons, this button responds with a slight delay; therefore, keep the button pressed until you hear a signal tone. The start position of the Basic program appears in the display. If you want to use a different program, select the appropriate program with the Menu button.
MENU
The Menu button is used to select the individual programs, which are described in detail in the „Program Sequence“ table. The number corresponding to the program appears on the display to indicate the selected program. Use the programs as described below:
| Programm-nummer | Programm-name | Verwendung |
| 1 BASIS | BASIC | The standard program for all breads, such as white breads and multi-grain breads |
| 2 WEISS- | BROTWHITEBREAD | For especially light white breads with longer rising times |
| 3 VOLLKORN | WHOLEGRAIN | For whole-grain breads |
| 4 SCHNELL | FAST | For faster baking of white and multi-grain breads |
| Programm-nummer | Programm-name | Verwendung |
| 5 HEF | E-TEIG YEAST DOUGH | For preparing sweet yeast dough |
| 6 | ULTRA-SCHNELL I ULTRA-FAST I | For all level I recipes that are baked in the programs Basic, White Bread, Toast bread or Fast. The dough rises for a significantly shorter period of time in the Ultra-Fast program and consequently the breads are more compact and not as loose. A time pre-select is not possible. Use lukewarm liquids with this program. |
| 7 ULTRA- | SCHNELL II ULTRA-FAST II | For all level II recipes that are baked in the programs Basic, White Bread, Fast or Toast Bread See Ultra fast I. |
| 8 TEIG | DOUGH | For preparing dough, without bake function |
| 9 KONFITÜRE JAM | For cooking jams and jellies. For for making jam, you should purchase a second baking pan which is used only for this purpose. | |
| 10 BACK- | PULVER BAKING POWDER | For baked goods baked with baking powder, such as batter cakes |
| 11 TOASTBRO TOAST | For preparing bread for toasting | |
| 12 BACKEN | BAKE | For baking of yeast or batter dough that has been prepared separately (either by hand or in the DOUGH program). This program is not suitable for pie dough or choux pastry dough, etc. Maximum baking time 60 minutes, can be reduced by pressing the TIME – button. |
| 13 EIGEN- | PROGRAMM USER PROGRAM | Individual adjustment of the program phases |
BROWNING
With this button you can set the degree of browning to LIGHT - MEDIUM - DARK. The selected setting is shown on the display.
This option can be selected in programs 8, 9, 10 and 11.
LOAF SIZE
With this button the loaf size can be set in different programs:
LEVEL I = for a medium loaf weight (approx. 500 g)
LEVEL II = for a medium loaf weight (approx. 750 g)
LEVEL III = for a heavy loaf weight (approx. 1,000 g)
Note: This is not possible in every program!
You will find our recommendations in this regard in the recipes. The selected setting is shown on the display.
You can also bake smaller loaves by reducing the quantities by one-half, e.g. for singles and small households. In this case, we recommend that you always use the BASIC program on LOAF SIZE I. Please be aware, that the loaf will be relatively flat in this case.
TIMER
Use the timer function only for recipes that you have already tried out under supervision; do not modify the recipe.
CAUTION: If there is too much dough in the baking pan, the dough can overflow and bake onto the heating element.
Most programs can be started with a time delay.
To the time specified in the respective program, you must also add the hours and minutes after which the preparation time should be started.
Add the ingredients to the baking pan in the specified order and then insert the pan in the appliance. In so doing, ensure that the yeast does not come into contact with the liquid.
Example:
It is 8:30 PM and you want to have freshly baked white bread at 7:00 AM the next morning, i.e. in 10 hours and 30 minutes.
Plug the appliance into the electrical outlet.
Select the desired program with the MENU button and the desired degree of browning with the BROWNING button. In the example we will use program 1 = Basic. The program ends at 7 AM. Then bread will be kept warm for one hour.
Therefore, in order to take out warm, fresh bread at 7:00 AM, in the evening around 8:30 PM you must increase the program time to 10 hours 30 minutes by repeatedly
pressing the TIME button. This is done by pressing the „TIME +“ and „TIME -“ buttons. You can preselect a maximum of 13 hours.
After the timer has been set, press the START/STOP button to start the time-delayed baking program. The time symbol flashes until the program starts. The time still remaining will be shown in the display.
To interrupt the time pre-select, press the START/STOP button for at least 3 seconds. You can then change the time pre-select as needed, or start immediately with the bread baking.
Please note:
When using the timer delay function, do not bake with perishable ingredients, such as milk, eggs, fruit, yogurt, onions, etc.
LIGHT
The Backmeister ^® is equipped with lighting for the baking compartment, so that you can assess status of the dough or of the bread without having to open the lid. The baking compartment is not lighted during the entire execution of the program. To check the status dough, press the LIGHT button to turn on the light in the baking compartment. After one minute, or as soon as you press the button again, the light goes out.
FAST button
The Backmeister® offers the possibility of directly starting the FAST program via this button. You just have to put the desired ingredients in the baking pan, plug in the appliance and press the FAST button, and your bread will be prepared.
Ensure that you only use this button to prepare breads that are suitable for FAST program. You will find suitable recipes in the recipe section.
PAUSE
The PAUSE button can be used to briefly interrupt the program, for example, to remove the kneader from the dough or to brush the surface of the bread with water or milk. Press the PAUSE button to interrupt the running program. As long as the time display is flashing, the program is in the pause function. Now, for example, you can remove the kneader or brush the surface of the bread as desired. Then close the lid. To end the pause, press the PAUSE button again. The time display stops flashing and the program continues.
Caution: Only interrupt the program briefly, for not more than approx. 5 minutes. Longer interruptions can affect the rising of the dough and ruin the bread.
USER PROGRAM
The BACKMEISTER® offers many programs, including a program that we call the USER PROGRAM, it gives you the opportunity to make your own program. You can change the basic time and program phase settings as programmed at the factory or leave out various program phases entirely. This allows you to develop your own individual program for baking bread or preparing dough. Below you will find a sample recipe.
First you should become familiar with the following information on the basic programming and use of the USER PROGRAM:
The program features the following options:
Browning adjustable
Timer adjustable
Levels I and II not adjustable
Proceed as follows:
Select the desired phase with the USER PROGRAM button. Knead 1 and the programmed time 0:12 for this phase appear on the display.
The set time can be adjusted with the buttons TIME + and TIME -. Press the buttons repeatedly until the desired time appears on the display.
Confirm the change with the USER PROGRAM button. Press this button again and the next program phase and the programmed time will appear on the display: „Rise 1“ = and 0:18.
If the adjacent maximum programmable time for the respective program phase is exceeded by pressing the buttons TIME + and TIME - „0“ appears in the display. This phase is then skipped during the program.
Every programmed setting must be saved by pressing the USER PROGRAM button, so that programming for the next program phase can be executed.
Once you have programmed all phases to suit your preferences, conclude the programming by pressing the START/STOP button. The programmed time for the user program appears on the display. The program then starts either immediately or after the time set via the timer function.
| Phase Pre-set Adjustable time frame | ||
| Total time 3:10 | hours | |
| 1st kneading 12 | minutes 1-14 minutes | |
| 1st rising 18 | minutes 0-100 minutes | |
| 2nd kneading 15 | minutes 0-15 minutes | |
| 2nd rising 85 | minutes 0-100 minutes | |
| 3rd rising OFF/AUS | 0-120 minutes | |
| Baking | 60 minutes 0-70 minutes | |
| Keeping warm | 60 minutes OFF/AUS/60 minutes | |
The following recipe has been tested successfully:
Quarkstollen (a Christmas specialty made with "quark" or curd cheese)
| Weight (approx.) | 700 g |
| Eggs | 1 |
| Curd cheese, 20% fat content | 125 g |
| Rum | 2 1⁄2 TBSP |
| Bitter almond oil | 2 drops |
| Lemon, juice and grated rind | 1⁄2 lemon |
| Butter, melted | 90 g |
| White flour (type 405) | 250 g |
| Raisins | 60 g |
| Almonds, ground | 60 g |
| Hazelnuts, ground | 60 g |
| Candied lemon peel | 20 g |
| baking powder | 3⁄4 envelope |
| Salt | 2 pinches |
| Vanilla sugar | 1⁄2 envelope |
| Sugar | 100 g |
| User program: Knead 1 = 14 minutes Knead 2 = 5 minutes Proceed as follows: Using the USER PROGRAM button, set the program phases as follows: KNEAD 1 to 14 KNEAD 2 to 5 RISE I - RISE III to minimum BAKE to OFF KEEP WARM to OFF. After kneading, remove the dough from the pan and shape it into the form of a „Stollen“ (fruit loaf). Bake in the oven at 180°C, in the convection oven at 160°C. | |

CAUTION: The appliance becomes very hot during operation and maintains the heat during some time after disconnection!
THE FUNCTIONS OF THE BREADMAKER
Alarm function
The alarm sounds:
further than the kneading phase when the break occurred. If the program was already in the last rising cycle when the
■ whenever the MENU or ZEIT/time buttons are pressed, power broke down and the interruption lasts over a longer
- when pressing the programme buttons to confirm time, the dough cannot be saved and the program has to each step, be started again.
■ during the second kneading process, to remind you
to add seeds, fruit, nuts or other ingredients. Please note that this function cannot be deactivated, e.g. in the time preset function,
- at the end of the baking process, the appliance beepof ingredients. During the rising and baking phase the lid often during the keep-warm phase, should never be opened, as the bread may sink down.
- at the end of the keep-warm phase several beeps If the temperature in the appliance, due to previous use, is remind you that the appliance is now switched off and the bread has to be taken out of the bread pan. Please note that this function cannot be deactivated, e.g. in the time preset function. alarm function cannot be inactivated.
The alarm function cannot be inactivated.
Repeat function after power outage
Should the electricity supply been cut off during the operation of the Breadmaker, the appliance will re-start, on re-instatement of the supply, automatically from the point arrived at when the cut-off occurred as long as the interruption is not longer than 20 minutes. If the interruption in the electricity supply lasts more than 20 minutes and the display shows the basic setting, the Breadmaker must be re-started. This is only practical if the dough was not
Please not that the breadmaker has no top heating for safety reasons, so the crust will be lighter on top and darker at the sides and bottom of the bread. For safety reasons an additional top heating is not allowed.
If after pressing START/STOP, E:EE is shown in the display, the temperature control is defective. In this case please send the appliance to our technical service.
THE PROGRAM PROCESS OF THE BREADMAKER
1. Inserting the Bread pan
Hold the non-stick bread pan with both hands and slide it slightly inclined on the socle inside the baking chamber. Turn the bread pan clockwise, until it clicks into position. Fill the holes of the kneading blade with heat resisting margarine before fitting it into the bread pan. This avoids that dough penetrates and bakes into the kneading blade.
2. Pouring in the ingredients
The ingredients must be poured into the pan in the order prescribed in the recipe.
In case of very heavy dough, e.g. with a high rye portion, we recommend to fill in first the liquid, then the flour and other ingredients and finally the yeast to ensure better kneading results. When using the time preset function, it must be ensured that no contact between the water and the yeast takes place before the program is started.
3. Selecting the program process
Select the required program process with the menu button. Select the stage appropriate for the program. Select the required browning. You can set a delay with the timing button. Press the START button. After pressing START further corrections are no more possible.
4. Mixing and kneading dough
The Breadmaker mixes and kneads the dough automatically as long as necessary to reach the proper consistency.
5. Pause
After each kneading process there is a pause to allow the liquid to slowly penetrate the yeast and the flour.
6. Dough raising
After each kneading phase the Breadmaker produces the optimal temperature for the rising of the dough.
7. Baking
The bread baking automatic regulates the baking temperature and the timing automatically.
8. Keeping warm
When the baking is over, a beep sound indicates that the bread or food can be removed. At the same time a keep-warm time of 1 hour starts. If you want to remove the bread before the keep-warm phase has ended, just press the STOP button and take out the bread.
9. End of the program process
After the end of the program process, take out the pan with the help of handcloths by turning it counter-clockwise. Stand it on end and, when the bread does not immediately fall onto the cooling wire, waggle the kneading drive from below until the bread falls out. Do not knock the bread pan on an edge or table, as the warm bread pan may be deformed.
If the kneader sticks in the bread, use the hook to remove it. Push it on the underside of the still-warm bread in the (almost) round opening of the kneader and fold it on the bottom edge of the kneader, ideally at the point where the kneader blade is. Then pull the kneader up with the hooked skewer. You can then see where the blade is in the bread.
natural_image
Two-step illustration showing hands cutting a loaf of bread on a wooden board, with a small black chip being cut (no text or symbols)CLEANING AND CARE

Always allow the breadmaker to cool down before it is cleaned and stored. Always switch off the appliances, disconnect the power supply plug from the mains, and allow the breadmaker to cool down, before it is cleaned.
- It takes approximately 30 minutes for the b readmater to cool down before it can be used again for baking and dough preparation.
- Before the Backmeister ^® is used for the first time, wash the baking container and kneader with warm water and a mild washing-up liquid.
- Always use a mild washing-up liquid. Never use chemical cleaners, benzine, oven cleaners and scouring agents.
- Remove all ingredients and crumbs from the lid, case and baking chamber with a moist cloth. Never immerse the breadmaker in water and never fill the baking chamber with water.
- Wipe the baking tin with a moist cloth. The inside of the tin can be rinsed with warm water and a washing-up liquid. Do not soak the tin in water for prolonged periods.
- Both the kneader and driving shaft should be cleaned immediately after use. The kneader may be difficult
to remove if it remains in the baking tin. In such an event fill the container with warm water and allow it to soak for approx. 30 minutes. The kneader can then be easily removed for cleaning.
- The bread pan is equipped with a high quality Whitford®-coating. Never use metal objects or scourers to clean the surface of the non-stick container. It is normal for the colour of the non-stick surface to change in the course of time. This does not influence the non-stick function.
- Condensation from the steam accumulates between the inside and outside lid during baking and flows off the lid when baking has been completed. This is normal. Any discolouration of the lid is of no consequence, but it can be removed with an appropriate cleaner.
- Before the breadmaker is packed away for storage ensure that it has completely cooled down, is clean and dry, and that the lid is closed.
TIMING PROCESS OF THE PROGRAMS
| 1 2 3 | ||||||||||
| BASIS WEISSBROT VOLLKORN | ||||||||||
| Select bread size ST. | ST. II ST. | III ST. I ST. | II ST. III | ST. I ST. II | ST. III | |||||
| Total time 2:53 | 3:00 3:07 | 3:40 3:50 | 4:00 3:32 | 3:40 3:48 | ||||||
| 1. Kneading | MotorON/OFF 2 2 2 | 2 2 2 2 2 | ||||||||
| MotorON/OFF 4 4 4 | 4 4 4 4 4 4 | |||||||||
| Kneading no intervals 3 4 5 | 10 12 14 3 4 5 | |||||||||
| 1. Rising | HeatingON/OFFno kneading 20 | 20 20 40 | 40 40 | 25 | 25 | 25 | ||||
| 2. Kneading | MotorON/OFF 5 5 5 | 2 2 2 | 5 Addingfruits | 5 Addingfruits | 5 Addingfruits | |||||
| Kneading no intervals | 4 Addingfruits | 5 Addingfruits | 6 Addingfruits | 12 Addingfruits | 15 Addingfruits | 18 Addingfruits | 8 0 12 | 1 | ||
| MotorON/OFFHeatingON/OFF | 5 5 5 5 | 5 5 5 | 5 | 5 | ||||||
| 2. Rising | HeatingON/OFF 20 20 | 2 20 | 20 20 20 20 | 0 | 20 | |||||
| Smoothen doughON/OFF | 0,5 | 0,5 | 0,5 | 0,5 | 0,5 | 0,5 | 0,5 | 0,5 | 0,5 | |
| HeatingON/OFF | 4,5 | 4,5 | 4,5 | 9,5 | 9,5 | 9,5 | 14,5 | 14,5 | 14,5 | |
| 3. Rising | HeatingON/OFFno kneading | 45 | 45 | 45 | 50 | 50 | 50 | 70 | 70 | 70 |
| Bake | HeatingON/OFF 60 65 | 70 65 70 | 75 55 60 65 | |||||||
| Keep warm | HeatingON/OFF | 60 60 60 | 60 60 60 | 60 60 60 | ||||||
| 4 | 5 | ||||
| SCHNELL H | EFEKUCHEN | ||||
| Select bread size | ST.I ST.II $T. III | ||||
| Total time | 1:40 2:50 2:55 3:00 | ||||
| 1. Kneading | Motor ON/OFF | 2 2 2 2 | |||
| Motor ON/OFF | 4 4 4 | ||||
| Kneading no intervals | 5 4 4 4 | ||||
| 1. Rising | Heating ON/OFF no kneading | 5 5 5 5 | |||
| 2. Kneading | Motor ON/OFF | ||||
| Kneading no intervals | 8 | 10 Adding fruits | 10 Adding fruits | 10 Adding fruits | |
| Motor ON/OFF Heating ON/OFF | 10 10 | 10 | |||
| 2. Rising | Heating ON/OFF | 20 | 20 | 20 | |
| Smoothen dough ON/OFF | 0,50 0,5 ,5 | ||||
| Heating ON/OFF | 9,5 9 | ,5 | 9,5 | ||
| 3. Rising | Heating ON/OFF no kneading | 55 55 | 55 | ||
| Bake | Heating ON/OFF | 80 55 60 | 50 | ||
| Keep warm | Heating ON/OFF | 60 60 60 60 | |||
| 6 7 8 9 10 11 12 | ||||||||||
| ULTRA-SCHNELL I | ULTRA-SCHNELL II | TEIG KONF | ITÜRE BACKF | ULVER TOASTB | BROT BACKEN | |||||
| Select bread size ST. | ST. II ST. I | ST. II ST. III | ||||||||
| Total time | 0:58 | 0:58 | 1:30 | 1:20 | 2:50 | 2:55 | 3:00 | 3:05 | 1:00 | |
| 1. Kneading | Motor ON/OFF | 2 | 1 | 2 | 2 | 3 | 3 | 3 | ||
| Motor ON/OFF | 4 | 3 | 4 | 4 | 2 | 2 | 2 | |||
| Kneading no intervals | 6 | 5 | 14 | 4 | 10 | 10 | 10 | |||
| 1. Rising | Heating ON/OFF no kneading | 15 Heating ON/OFF | 5 | 40 | 40 | 40 | ||||
| 2. Kneading | Motor ON/OFF | 5 Adding fruits | 1 Add. fruits | 1 Add. fruits | 1 Add. fruits | |||||
| Kneading no intervals | 15 | 2 | 2 | 2 | ||||||
| Motor ON/OFF | 2 | 2 | 2 | |||||||
| Heating ON/OFF | ||||||||||
| 2. Rising | Heating ON/OFF | 20 | 29 | 24 | 24 | 24 | ||||
| Smoothen dough ON/OFF | 0,5 | 0,5 | 0,5 | 0,5 | 0,5 | |||||
| Heating ON/OFF | 9,5 | 5,5 | 0,5 | 0,5 | 0,5 | |||||
| 3. Rising | Heating ON/OFF no kneading | 11 | 9 | 40 | 45 kneading on/ off Heating ON/OFF | 30 | 40 | 40 | 40 | |
| Bake | Heating ON/OFF | 35 | 40 | Rest 20 | 70 | 50 | 55 | 60 | 60 | |
| Keep warm | Heating ON/OFF | 60 | 60 | 60 | 60 | 60 | 60 | 60 | ||
natural_image
Modern kitchen bread oven with open lid and digital display, showing baked bread inside (no text or symbols visible)QUESTIONS AND ANSWER CONCERNING THE USE OF THE BREADMAKER
The bread sticks in the pan after baking
Allow the bread to cool off for approx. 10 minutes. Stand the pan on its head - if appropriate, lightly waggle the blade (kneider connection) at the underside of the bread pan. Before placing the kneading blade, fill the hole in it with heat-resisting margarine (full-fat), this avoids, that dough may penetrate between kneading blade and shaft and may bake there. Before baking is commenced, rub a little oil on the kneaders.
If you intend to make jam in the breadmaker we recommend to buy a second bread pan exclusively for making jam, as bread may stick in the pan of jam has been prepared in the same one before.
How can the holes in the bread from the kneader be avoided?
Before the last raising phase, you can remove the kneader with floured fingers (see the timing of the program process on the display.
Should you not wish to do that, after baking use the hooked skewer. If care is taken, larger holes are avoidable.
The dough flows over the bread pan
This may happen, when wheat flour is used, as wheat contains more gluten and thus rises more. In this case reduce the flour amount and adapt the other ingredients. The bread will nevertheless have the desired volume. add 1 tablespoon of liquid butter or margarine.
The bread rises, but sinks in the baking phase
If a "V"-formed channel appears in the bread flour gluten is missing, that means that the flour contains too little protein (occurs in rainy summers) or the flour is damp. Help:
■ Add to the flour 1 tablespoon of wheat gluten for every 500 g of flour.
■ Use a shorter programm, e.g. SCHNELL or ULTRA-SCHNELL.
If the bread sinks like a funnel in the middle then it could be that:
■ the water temperature was too high,
■ too much water was used.
■ flour gluten is missing.
When can the Breadmaker lid be opened during the baking process?
Basically it is always possible when the kneading is taking place. In this time, one can add small amounts of flour or liquid when applicable.
If the bread has to have a particular appearance after baking, take the following steps: before the last raising, carefully and shortly open the lid (see the program process
table), make a cut in the crust with a sharp pre-warmed knife, strew corns on the surface or spread a potato-flour and water mixture on the crust so that it shines after baking. This is the last phase in which the BREADMAKER lid can be opened, otherwise the bread will sink.
What is wholemeal flour?
Wholemeal flour can be made from all sorts of grain, even wheat. The designation whole meal means that the flour is ground from the whole grain and thus has more rough-age. Therefore wheat wholemeal flour is darker. Wholemeal bread is not necessarily darker as is often assumed.
What has to taken into account when using rye flour?
Rye flour does not contain any binding substances, thus bread made from it does not rise very much. To make it edible, a RYE WHOLEMEAL BREAD must be made with leaven dough.
The dough will only rise when using rye flour that contains no gluten, if at least 14 of the amount is replaced by wheat flour type 550.
What means binding substances in the flour?
The higher the type figure in the above schedule, the lower the contained binding substances. This means in general that flours with high type figures do not rise as much as flour with low type figures. The flour with the highest portion of binding substances is wheat flour of type 550.
Which are the different kind of flour and how are they used?
Corn, rice, potato flour
■ is ideal for persons suffering from a gluten allergy or from sprue or coeliakia. In the following you will find recipes as well as contact addresses of manufacturers for special allergy products.
Spelt flour
- is quite expensive, but completely free of chemical deposits, as spelt only grows on very poor ground and does not tolerate any fertilizers. Sprout flour is ideal for persons suffering from allergies. All recopies for flour types 405 – 550 – 1050 can also be prepared with spelt flour.
Hard wheat flour (durum/semolina)
■ is ideal for French baguette due to its consistency, but can be replaced by hard wheat semolina.
How can fresh bread be made more edible?
If a boiled mashed potato is added to the dough, the fresh bread is more edible.
In what proportion can one use rising substances?
It can be bought in various quantities, so the manufacturer's instructions on the packing have to be followed and the quantity set in relation to the amount of flour used, with both yeast and leaven dough. The rising capacity of yeast is depending on the freshness of the yeast as well as of the water quality. If the water is very soft, the yeast will rise much more, so it may become necessary to reduce the yeast by up to 25 % if you live in regions with soft water.
The bread tastes of yeast
If sugar is used, leave it out, but the bread will not be so brown.
Add to the water a quantity of spirits vinegar, for a small loaf = 1 tablespoon - for a large loaf 1.5 tablespoons.
Replace the water with buttermilk or kefir, which is possible with all recipes and is recommended due to the freshness of the bread.
Why has bread from the breadmaker another taste than out of the oven?
This is due to the different humidity. In an oven, the bread becomes more dry because of the larger space, in the breadmaker, the bread remains more humid.
What do the type figures mean with flour?
The lower the figure the less roughage is contained in the flour and the lighter it is and the more it rises because it contains a higher proportion of gluten.
Please find below a schedule with the different types for Germany, Austria, and Switzerland as well as some rough explanations
| Description German | Type No. | Austrian Type No. | Swiss Type No. | |
| Wheat flour | very fine, white, for cake 405 480 | 400 | ||
| white flour for bread 550 780 55 | 0 | |||
| medium flour 1050 100 | 1600 | 1 | ||
| wholemeal flour, rough 1600 | 1700 | 1900 | ||
| Rye flour | very fine 815 00 | 5 | 720 | |
| fine 99 960 | 7 | 1100 | ||
| medium 11 960 | 50 | 1100 | ||
| wholemeal, rough 174 500 | 0 | 2 | 1900 |
TROUBLE SHOOTING - APPLIANCE
| Default Cause Remedy | ||
| Smoke coming out of the baking chamber or vents | Ingredients sticking to baking chamber or on the outside of the baking tin | Switch off the machine, disconnect the mains plug; wait until cooled down, then clean the baking chamber and tin. |
| Bread has partly collapsed and is moist at the bottom | Bread remained too long in tin after being kept warm | Remove bread at the latest after end of keep-warm function, to allow the steam to escape. |
| Bread cannot be easily removed from the tin. | The loaf is sticking to the kneading knife. | Before baking the next bread, clean kneading knife and shaft after If necessary fill the tin with warm water and soak for 30 minutes. The kneading knife can then be easily removed |
| Ingredients have not been properly mixed or the bread has not been properly baked. | Incorrect program Ch d menu; set another program. | |
| START/STOP key was touched while breadmaker was operating | Discard ingredients and start anew | |
| The lid was opened several times during operation | The lid should only be opened when display reads more than 1:30. Ensure that the lid is properly closed after it has been opened. | |
| Prolonged power failure during operation | Discard ingredients and start anew. | |
| Kneader rotation is blocked. | Check neader is blocked by grains Remove tin and check whether catch rotates. If not send breadmaker for repair. | |
TROUBLE SHOOTING - RECIPES
Mistake Cause Remedy
| Bread rises too much. Too much yeast, too much flour not enough salt, or a combination of these causes | a/b | |
| Bread does not rise or only insufficiently | No or insufficient yeastOld yeast.Liquid too hotYeast came into contact with liquidWrong or old flour.Too much or insufficient liquid.Not enough sugar | a/be;deea/b/ga/b |
| Dough rises and flows over the baking tin. | Very soft water so that yeast fermentation is stronger.Too much milk has influenced yeast fermentation | f/kc |
| Bread has collapsed. Bread volume larger than the bread pan causing it to collapseToo early or too fast yeast fermentation due to warm water, warm baking chamber or high humidity level. | a/fc/h/i | |
| Bread is dented after baking. Not enough gluten in the flour.Too much liquid | la/b/h | |
| Stiff, lumpy texture Too much flour or insufficient liquidNot enough yeast or sugarToo much fruit, wholemeal or other ingredients.Old or poor quality flour | a/b/ga/bbe | |
| Not baked in the centre. Too much or insufficient liquid.High amount of moisture.Recipe with moist ingredients, e.g. yoghurt. | a/b/ghg | |
| Open, coarse texture or full of holes. | Too much water.No salt.High amount of moisture; water was too warm.Liquid was too hot. | gbh/ic |
| Mushroom-like surface that has not been baked properly | Bread volume larger than the tinToo much flour, particularly with white bread.Too much yeast or insufficient salt.Too much sugarSweet ingredients in addition to the sugar. | a/ffa/ba/bb |
| Unevenly sliced or lumpy bread. | Bread has not cooled down sufficiently.Flour was not properly kneaded in at the sides g/l | j |
Remedying the mistakes
a Measure the i ngredientor rectly.
b Match the quantity of ingredients accordingly and check whether an ingredient has been forgotten.
c Use another liquid or allow it too cool down to room temperature.
d Add the ingredients in the sequence listed in the recipe. Produce a small hole in the centre and immediately add the crumbled or dried yeast. Avoid direct contact between yeast and liquid.
e Only use fresh and properlyored ingredients.
f Reduce the overall quantity; do not use more that the specified quantity of flour. Reduce all ingredients by one third.
g Correct the amount of liquid. If moist ingredients are used then the amount of liquid must be reduced.
h Use 1-2 tablespoons less during wet weather.
Do not use the timing program in hot weather. Use cold liquids. Use the program SCHNELL or ULTRA-SCHNELL to shorten the rising phases.
j Immediately remove the bread from the tin after baking and allow it to cool down on a grid for at least 15 minutes before it is cut.
k Diminish the yeast or all ingredients by one quarter of the specified amount.
I Add one tablespoon of wheat gluten to the dough.
COMMENTS ON BAKING
1. Ingredients
As each ingredient has a particular role in the success of bread-making, the measuring is important as the correct order of adding ingredients.
The important ingredients, such as liquid, flour, salt, sugar and yeast (both dry and fresh yeast can be used) affect the successful results in the preparation of bread and dough. Therefore always use the appropriate quantities in the correct proportions to one another.
Use lukewarm ingredients if you are immediately starting to bake. If the TIME program is to be used, the ingredients must be cold so that the yeast does not ferment too soon.
Margarine, butter and milk only affect the taste of the bread.
Sugar can be reduced by 20 % so that the crust will be lighter and thinner without otherwise affecting the baking results. Should you prefer a softer and lighter crust, you can replace the sugar with honey.
Gluten, that is formed through kneading, provides the structure of the bread. The ideal flour mixture contains 40% wholemeal flour and 60% white flour.
Should you wish to add whole grains, soften them up overnight. Appropriately reduce the quantity of flour and liquid (up to 1/5 less).
Leaven is indispensable in the making of rye flour bread. It contains milk and vinegar acid bacteria that cause the bread to be light and slightly sour. Making it up oneself takes up quite some time. Therefore we use in the following recipes concentrated leaven-dough powder which comes in packs of 15 g (for 1 kg of flour). The quantities in the recipes ( 12 - 34 - 1 bag) must be adhered to cut down on bread crumbing.
If leaven-dough powder is used in other concentrations, (packs of 100 g for 1 kg flour), 1 kg flour must be reduced by 80 g or as appropriate to suit the recipe.
Liquid leaven dough, available packed in bags, can also be used well. As far as quantities are concerned adjust to the details on the packing. Fill the leaven dough into a measuring jug and add the appropriate quantity of liquid mentioned in the recipe.
Wheat leaven dough, that can also be bought dried, improves the dough quality, the freshness and the taste. It is milder than rye leaven dough.
Bake leaven bread in the BASIS or the VOLLKORN programs, so that it rises and bakes properly.
Wheat bran should be added to the dough when a particularly roughage-full and light bread is required. Use 1 ES for 500 g of flour and raise the quantity of liquid by 12 ES.
Wheat germ is a natural helper out of grain protein. It makes the bread lighter, gives a better volume, sinks less often and is more wholesome. This is particularly the case with wholemeal breads and pastries and those made from self-ground flour.
Colour malt, which we use in several recipes, is a dark-roasted barley malt. It is used to obtain a darker crumb and crust (such as black bread). A rye malt is also available and is not so dark. Such malts are available in whole food shops.
Bread seasoning can be added to all mixed breads. The quantity used depends on the taste and the information of the manufacturer.
Pure lecithin powder is a natural emulsion that raises the baking volume, makes the crumb tender and softer and prolongs the freshness.
All the above boldly-printed baking substances and ingredients are available in whole food, health food shops and the health food departments of grocery stores or from flour mills.
2. Adjusting the ingredients
In cases where certain ingredients are increased or reduced, ensure that the proportions in the original recipe are maintained. In order to achieve a perfect result, take note of the following basic rules on adjusting the ingredients:
Liquid/flour: The dough must be soft (not too soft), slightly sticky and not stringy. Light dough is in a ball, whereas with heavier dough, such as rye wholemeal or other wholemeal breads, this is not the case. Check the dough 5 minutes after the first kneading. Should it be too moist, add more flour until the correct consistency is achieved. If the dough is too dry, knead in spoonful by spoonful of water.
Replacing liquids: Should you replace ingredients in the recipes which contain liquid (such as cream-cheese, yoghurt, etc.), the appropriate liquid quantities must be adjusted accordingly. When using eggs, break then into the measuring jug and fill up with liquid to the required level. If you live high up (above 2,500 ft.), the dough rises more quickly. In such regions the amount of yeast can be re-
duced by 14 to 12 TS, to avoid excessive rising. The same is the case in regions where soft water is present.
3. Adding and measuring the ingredients and quantities
Always first add the liquid and then the yeast. Only in case of very heavy dough such as rye bread, we recommend to fill in first the flour and the dry yeast and to pour the liquid on top to ensure proper kneading. However, if this is combined with the TIME function, make sure, that any contact between yeast and liquid is avoided until the program starts.
In order to prevent the yeast from fermenting too soon (in particular using the time delay), contact between the yeast and the liquid must be avoided.
Always use the same units in measuring, which means that with the indication of tablespoon and teaspoons either use the measuring spoon supplied with baking automatic or spoons which are normally used in the household.
Weighing in grams is preferable due to their accuracy.
The supplied measuring jug can be used for millilitres measurements.
Abbreviations in the recipes mean:
$$ \begin{array}{l} \text { tbsp } = \text { tablespoon (or measuring spoon large) } \ \text { tsp. } = \text { level tea spoon (or measuring spoo n small) } \ g = \text { grams } \ \mathrm{ml} = \text { millilitres } \ \begin{array}{l} \text { bag } = \text { bag package dry yeast } \quad 7 \text { g co } \ 5 0 0 \text { g flour - corresponds to 20 g fresh yeast } \end{array} \ \end{array} $$
4. Adding of fruit, nuts or corn
Should you wish to include further ingredients, this can be done in all programs (except jams) as soon as the peep sound is heard. If the ingredients are added too soon, they can be ground up by the kneader.
Should there be no sizes mentioned in the recipes because they do not exist in the prescribed program, then the small and also the large quantities will be successful for the ap-
propriate type in the mentioned program. The programs without size selection are programmed appropriately.
5. Bread weights and volumes
In the following recipes you will find exact details of bread: However, you will see that the weights for pure white bread are less than those for wholemeal bread. This is because white flour rises more and therefore is somewhat limited. In spite of these exact weight details, certain differences may occur. The actual bread weight is very much dependant on the humidity in the air on preparation. All breads that have a high proportion of wheat will achieve a greater volume and in the highest weight class will rise above the pan edge after the last raising. Nevertheless, they do not overflow. The bread bulging over the pan edge will be somewhat lighter browned as the bread in the pan. It is recommended to use the FAST program for sweet breads, or the HEFEKUCHEN program; thus the bread will be lighter. Do not use more than the quantities of step I in this program.
6. Baking results
The baking results are in particular dependant upon the local situation (soft water, high humidity, great heights state of the ingredients, etc.). For this reason, the figures in the recipes are only clues and have to be adapted accordingly. If one or other recipe is not successful, do not give up, moreover try to find out the cause and try again, for example with alternative quantity proportions. Before you bake a bread overnight with the timer delay, we recommend that you make a trial bread so that, in certain circumstances, the recipe can be altered.
BREAD RECIPES
| Classical Whitebread | |||
| Step I Step II Step III | |||
| Bread weight, approx. | 500 g 750 g 1.000 g | ||
| Water 230 ml 350 ml | 460 ml | ||
| Salt 34 tsp 1 tsp 1 12 tsp | |||
| Sugar 34 tsp 1 tsp 1 12 tsp | |||
| Semolina 100 g 150 g | 200 g | ||
| Flour, type 550 230 g | 350 g 460 g | ||
| Dry yeast 12 bag. 34 bag. 1 bag. | |||
| Program: | SCHNELL or WEISSBROT | ||
| If the water is replaced by milk, you will get an toast bread. | |||
| Country bread | |||
| Step I Step II | Step III | ||
| Bread weight, approx. | 500 g | 750 g | 1.000 g |
| Milk | 180 ml 275 ml | 0 ml | 36 |
| Margarine/butter | 15 g 25 g | 35 g | |
| Salt 1/3 tsp | 1 tsp | 1 | 12 tsp |
| Sugar 1/3 tsp | 1 tsp | 112 | tsp |
| Flour type 1050 | 330 g | 500 g | 650 g |
| Dry yeast | 12 bag | 34 bag | 1 bag. |
| Program: | BASIS or WEISSBROT | ||
| Sultana bread | |||
| Step I p II | Ste | ||
| Bread weight, approx. | 560 g | 850 g | |
| Water | 180 ml 275 ml | ||
| Margarine/butter | 20 g 30 g | ||
| Salt | 1/3 tsp | 12 tsp | |
| Honey | 2/3 tblsp | 1 tblsp | |
| Flour type 405 | 330 g 500 g | ||
| Cinnamon | 12 tsp 34 tsp | ||
| Dry yeast | 12 bag | 34 bag | |
| Sultanas (or dried fruits) | 50 g 75 g | ||
| Program: | SCHNELL (Fast) or HEFEKUCHEN (Sweet) | ||
| Wholemeal bread | |||
| Step Step II | |||
| Bread weight, approx. | 570 g 860 g | ||
| Water 230 ml 350 ml | |||
| Margarine/butter 15 g | 25 g | ||
| Salt 2/3 tsp 1 tsp | |||
| Sugar 1/3 tsp 1 tsp | |||
| Flour type 1050 180 g | 270 g | ||
| Wholemeal flour 180 g | 270 g | ||
| Dry yeast 12 bag 34 bag | |||
| Program: SCHNELL / VOLLKORN | |||
| Leaven bread | ||
| Step I Step II | ||
| Bread weight, approx. 7 | 40 g 1050 g | |
| Dry leaven | 12 bag 34 bag | |
| Water 350 ml 450 ml | ||
| Bread spice | 12 tsp | 34 tsp |
| Salt 1 tsp 1 | 12 tsp | |
| Rye flour 250 g 340 g | ||
| Flour Typ 1050 | 250 g 340 | g |
| Dry yeast 1 bag | 112 b | ag |
| Program: BASIS | ||
| Fig-walnut bread | ||
| Step I | Step II | |
| Bread weight, approx. | 600 g 900 g | |
| Water | 230 ml ml | 350 |
| Wheat flour type 1050 | 170 g | 260 g |
| Rye flour | 260 g 400 g | |
| Salt | 2/3 tsp 1 tsp | |
| Figs, finely chopped | 30 g 50 g | |
| Walnuts, choppedt | 30 g 50 g | |
| Honey | 1 tsp | 1 1⁄2 tsp |
| Dry leaven | 1⁄2 bag 3⁄4 bag | |
| Dry yeast | 1⁄2 bag 3⁄4 bag | |
| Program: | BASIS | |
BREADS FOR PERSONS WITH ALLERGIES
Please note the following when preparing gluten-free breads:
■ Gluten-free flour needs more liquid than flour containing gluten (400-500 ml lukewarm liquid per 500 g flour).
- Gluten-free flours need a little oil or fat for successful baking. You can use vegetable oil, butter or margarine (10 to 20 g).
- When you bake bread from gluten-free flour, you cannot use the timer function. The program has to be started right away.
- Gluten-free bread from the breadmaker requires less yeast then bread baked in the oven. Use about 3.5 to 5g of dry yeast for a standard loaf.
- If the bread collapses in the middle during baking, reduce the amount of yeast by about 1 g. If the bread still collapses, beat on e egg in the measuring cup and then fill the cup with the amount of liquid stated in the recipe. Important: do not add the egg to the quantity of liquid!
- The crust of gluten-free breads does not brown as much as that of breads containing gluten. For safety reasons, breadmakers cannot be equipped with top heating elements, so the top side of the bread is lighter in color. To give the bread a more attractive color, you can whisk one egg yolk with 1 tsp of sweet cream and brush this on the bread when the display shows a remaining time of 1:15.
■ After about eight minutes of kneading, loosen the flour or dough from the edge of the baking pan with a silicone dough scraper. You can loosen the edge of the dough from the baking pan again when the remaining time is 1:15 for better results.
For persons who suffer from grain allergies or who have to follow strict diets, we have tested various flour mixes made with cornstarch, rice starch or potato starch in the Backmeister® with very good results. When using baking mixes, please follow the instructions on the package.
We have achieved good results with products from the Schär company and Hammermühle Diät GmbH. If you have questions about gluten-free products or intolerabilities, please contact these companies directly:
Hotline Fa. Schär
The necessary ingredients can be purchased in health food stores. Hammermühle products can be ordered directly from the manufacturer at the above number. All flour types listed are suitable for cakes and breads for special diets necessitated by affliction with sprue. Breads baked in the Backmeister® are also relatively compact when the quantity of yeast or cream of tartar is increased.
Add the ingredients to the baking pan. Select the following programs:
■ “BASIS” dark for a darker crust, “SCHNELL” dark for a lighter crust
■ for preparing dough not to be baked in the breadmaker: "TEIG" program
■ for preparing bread with baking powder or cream of tartar as the raising agent: "BAKING POWDER" program
| Chestnut bread | |
| Step 1 | |
| Lukewarm water 450 ml | |
| Vegetable oil 20 g | |
| Chestnut ,breadbaking mix | 500 g |
| Dry yeast 5 g | |
| Program: BASIS | |
| White bread | |
| Step I | |
| Lukewarm water 400 ml | |
| Butter 20 g | |
| White bread baking mix | 500 g |
| Dry yeast 4 g | |
| Program: BASIS | |
| Tip: With the Dough program you can also make dough for pizza with the white bread mix. Instead of the butter, use 40 g vegetable oil and 380 ml water. Bake the pizza with toppings for about 20 minutes at 200 °C.Dough for rolls can also be made with the white bread mix. Simply put the dough in greased muffin pans.Brush the top with melted butter and let rise another 20 minutes. Preheat oven to 200 °C and bake about 20 minutes. | |
| Nut bread | |
| Step I | |
| Water 480 ml | |
| Vegetable oil 10 g | |
| Nut bread baking mix 500 g | |
| Dry yeast 4 g | |
| Program: BASIS | |
| Tip: Add oil seeds or chopped nuts to the dispenser in the lid of the breadmaker. This will make the bread even heartier. | |
BREAD MIXTURES
As our recipes are based on products which are only available on the German market, we did not translate these recipes, but will give you some general information. You may use any bread mixtures available in your country for baking bread in the bread maker. Please note, that some mixtures contain already the necessary amount of dry yeast. Please follow the instructions of the respective manufacturer, in particular concerning the relation from flour to water, but do not exceed the following maximum quantity of 500 g flour mix and approx. 350 ml of liquid.
CAKE RECIPE
You may also prepare cake in the BACKMEISTER®. As it is equipped with kneading blades, the cake will not be as light as usual, but very delicious. The cake program cannot be preset. You may add different ingredients to the basic recipe. However, do not take more than the quantities below to ensure good baking results. After baking, take the container out of the machine and put it on a wet towel. Let the cake cool down for about 15 minutes in the mould before turning the mould to take out the cake.
| Ingredients for a weight of 700 g | |
| Egg | 3 |
| soft Butter 100 | g |
| Sugar 100 g | |
| Vanilla sugar | 1 bag |
| Flour type 405 | 300 g |
| Baking powder 1 bag | |
| grated nuts | 50 g |
| or: grated chocolate | 50 g |
| or: coconut flakes | 50 g |
| Or peleed an cubes apples | 50 g |
| Program: | BACKPULVER |
DOUGH PREPARATION
You may use your Backmeister® to prepare dough, which is formed and baked in the oven. Select the program TEIG (dough). Ingredients can be added after the beep during the second kneading. The program TEIG (dough) does not dispose of several bread sizes. However, we offer to amounts for different cake sizes:
| Christmas cake (German speciality) | |
| Weight 750 g | |
| Milk 100 ml | |
| Melted butter 100 g | |
| Egg 1 | |
| Rum 2 tblsp | |
| Flour type 405 375 g | |
| Sugar 75 g | |
| Candied lemon peel 40 g | |
| Candied orange peel 20 g | |
| Almonds, grated 40 g | |
| Sultanas | 750 g |
| Salt | 1 pinch |
| Cinnamon | 1 pinch |
| Dry yeast | 1.5 bags |
| Take dough out of the container, fill into a long mould (special German form) and bake at 180 °C about 1 to 1:15 hs | |
| Program: | TEIG |
| Pretzel | |
| Ingredients for 9-10 pcs. | |
| Water 200 ml | |
| Salt 1⁄4 tsp | |
| Flour type 405 360 g | |
| Sugar 1⁄2 tsp | |
| Dry yeast | 1⁄2 bag |
| Egg (beaten) to brush the surface | 1 |
| coarse salt to sprinkle on the surface | |
| Fill all ingredients except the egg and the salt into the container. Select the program: TEIG (dough)When the signal sounds an the display shows „0:00“, press Stop.Preheat the oven to 230 °C: Divide the dough in portions form thin rolls. Form pretzels and lay them on a greased baking plate: Brush the pretzels with beaten egg and sprinkle them with coarse salt.Bake in the preheated oven at 200 °C 12-15 minutes. | |
| Program: TEIG | |
| Teatime cake | |
| Ingredients for a form of 22 cm ∅ | |
| Milk | 170 ml |
| Salt | 14 tsp |
| Egg yolk | 1 |
| Butter/margarine | 10 g |
| Flour type 550 350 g | |
| Sugar | 35 g |
| Dry yeast | 12 bag |
| Program: TEIG | |
| Take the dough out of the machine, knead it again and roll it. Lay the dough plate into the mould and spread the following topping on the dough. | |
| Melted butter | 2 tblsp |
| Sugar 75 g | |
| Cinnamon | 1 tsp |
| Chopped nuts | 60 g |
| Sugar icing | |
| Spread butter on the dough. Mix sugar, cinnamon and nuts, spread and the butter. Let leave for 30 min. and bake. | |
| Wholemeal pizza | |
| Ingredients for 2 Pizzas | |
| Water 150 ml | |
| Salt 1⁄2 tsp | |
| Olive oil | 2 tblsp |
| Wholemeal flour | 300 g |
| Wheat sprouts | 1 tblsp |
| Dry yeast 1⁄2 bag | |
| Roll the dough, place it on a baking plate and let it leaven for 10 minutes.Distribute pizza sauce and the desired topping on the dough. Bake it about 20 minutes. | |
| Program: TEIG | |
PREPARATION OF JAM AND MARMELADE
Jam and marmelade can be prepared rapidly and easily in the Backmeister®. Even if you have never tried it before, you should do this now. You will get very delicious jam. Just process as follows:
- Wash fresh fruit. Peels apples, peaches, pears and other fruit with hard skin. Never take more than the prescribed quantities. Otherwise the fruit will cook too early and will overcook. Weight the fruit, cut hem into small pieces (max. 1 cm) or mash them with a handblender and fill them into the container.
- Add preserving sugar „2:1“ in the indicated amount. Never use standard sugar or preserving sugar “1:1”, as jam will be remain liquid. Mix fruit and sugar and start the program which will run fully automatically.
- After 1:20 hour the machine beeps and you may fill the jam into glasses and close them.
| Strawberry jam | |
| Fresh strawberries washed, cut or mashed | 600 g |
| Preserving sugar „2:1“ 400 g | |
| Lemon juice 1-2 tsp | |
| Mix all ingredients in the container with a rubber scraper. Select the program „KONFITÜRE“ (jam) and start.Remove sugar residues from the side by means of a rubber scraper.After the beep remove the container from the machine.Attention: HOT!Fill the jam into glasses and close them carefully. | |
| Program: KONFITÜRE | |
| Orange marmelade | |
| Fresh strawberries washed, cut or mashed | 600 g |
| Preserving sugar „2:1“ 400 | g |
| Peel oranges and cut them into small cubes.Add sugar and mix all ingredients in the container,.Select the program „KONFITÜRE“ (jam) and start.Remove sugar residues from the side withs of a rubber scraper.After the beep remove the container from the machine.Attention: HOT!Fill the jam into glasses and close them carefully. | |
| Program: KONFITÜRE | |
GUARANTEE CONDITIONS
We grant a 24 months guarantee, and in case of commercial use a 12 months guarantee, starting from the date of purchase for any damage demonstrably due to manufacturing defects and when the appliance has been used according to its intended use. Within the warranty period we will remedy defective materials or workmanship through repair or replacement, at our option. Our warranty terms apply only to appliances sold in Germany and Austria. For other countries, please contact the responsible importer. In the event of a claim for remedy of defects, please send the appliance to our after sales service, properly packaged and postage paid, together with a copy of the automatically generated sales receipt, which must show the date of purchase, and a description of the defect. If the defect is covered by the warranty, the customer will be reimbursed for the shipping costs only in Germany and Austria. The warranty does not cover damage from normal wear, improper handling and failure to comply with the maintenance and care instructions. The warranty is void if repairs or modifications are made to the appliance by third parties. Any claims of the end consumer vis-à-vis the retailer are not limited by this warranty.
WASTE DISPOSAL / ENVIRONMENTAL PROTECTION
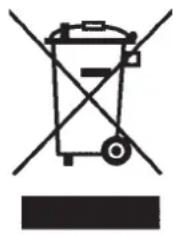
Our appliances are produced on a high quality level for a long lifetime. Regular maintenance and expert repairs by our after-sales service can extend the useful life of the appliance. If an appliance is defective and repair is not possible we ask you to follow the following instructions for disposal. Do not dispose this appliance together with your standard household waste. Please bring this product to an approved collection point for recycling of electric and electronic products. By separate collection and disposal of waste products you help to protect natural resources and ensure, that the product is disposed in an adequate way to protect health and environment.
natural_image
Symbol of a trash bin with crossed lines indicating no waste or discharge, and a solid black rectangle below (no text or labels)The authors have thoroughly considered and tested the recipes included in these operating instructions. Nevertheless, a guarantee cannot be accepted. The authors, respectively UNOLD AG and their assignees shall not be liable for personal injuries, material damages and financial loss.
NOTICE D'UTILISATION MODÈLE 68425
SPÉCIFICATION TECHNIQUE
Puissance : 460-545 W, 220–240 V\~, 50 Hz
Dimensions : env. 37,0 x 25,0 x 34,5 cm (L / l / h)
Poids : env. 7,3 kg
natural_image
Two-panel photo showing hands cutting a brown loaf of bread on a wooden board, with a knife inserted (no text or symbols visible)EXPLICATION DES SYMBOLES
natural_image
Two-panel photo showing hands cutting a loaf of bread on a wooden board, with one slice being cut (no text or symbols visible)NETTOYAGE ET ENTRETIEN

CONDITIONS DE GARANTIE
natural_image
Symbol of a trash bin with no text or labels, crossed by diagonal lines and a solid black rectangle below (no readable text or symbols)natural_image
Two-panel photo showing hands cutting a brown loaf of bread on a wooden board, with a knife inserted (no text or symbols visible)VERKLARING VAN DE SYMBOLEN
natural_image
Two-panel photo showing hands slicing a baked bread roll on a wooden board, no text or symbols visibleSCHOONMAKEN EN ONDERHOUD

FOUT AAN HET APPARAAT
Misure: circa 37,0 x 25,0 x 34,5 cm (lung./largh./alt.)
Peso: circa 7,3 kg
natural_image
Two-step illustration showing hands cutting a baked bread roll into a flatbread (no text or symbols visible)natural_image
Two-panel photo showing hands cutting a baked bread on a flat surface, with one slice being cut (no text or symbols visible)PULIZIA E CURA

natural_image
Symbol of a trash bin with no text or labels, crossed by diagonal lines and a solid rectangle below (no text or symbols present)Dimensiones: aprox. 37,0 x 25,0 x 34,5 cm (L/An/Al)
Peso: aprox. 7,3 kg
natural_image
Two-panel image showing hands cutting a loaf of bread on a wooden board, with one being cut and the other holding a knife (no text or symbols visible)natural_image
Simple white play button icon with play triangle and square buttons (no text or symbols)Tecla comenzar/ detener
natural_image
Two-panel image showing hands cutting a bread roll with a knife, no text or symbols visibleLIMPIEZA Y MANTENIMIENTO

natural_image
Symbol of a trash bin crossed with no text or numbers, representing waste sorting or disposal (no text present)natural_image
Close-up of hands cutting a brown block with a tool, no visible text or symbols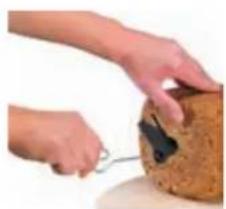
natural_image
Close-up of hands using a tool to cut a brown cake with a black lid (no text or symbols visible)VYSVĚTLENÍ SYMBOLŮ
Menu
natural_image
Simple play button icon with play triangle and square buttons (no text or symbols)Tlačítko Start/Stop
natural_image
Two-panel photo showing hands using a knife to cut a brown loaf of bread on a wooden board (no text or symbols visible)ČIŠTĚNÍ A ÚDRŽBA

natural_image
Symbol of a trash bin with no text or labels, crossed by diagonal lines and a solid rectangle below (no readable text or symbols)natural_image
Two-panel image showing hands using a knife to cut a rectangular food item on a wooden board, with no visible text or symbols.OBJAŚNIENIE SYMBOLI
natural_image
Two hands cutting a bread roll with a knife, showing the process (no text or symbols visible)CZYSZCZENIE I KONSERWACJA