
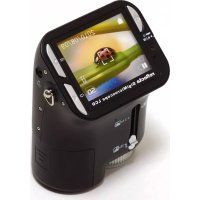
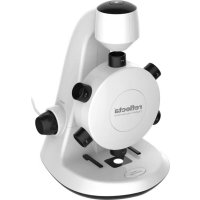
DigiEndoscope - Microscope Reflecta - Free user manual and instructions
Find the device manual for free DigiEndoscope Reflecta in PDF.
| Product type | Digital Microscope (DigiEndoscope) |
| Brand | Reflecta |
| Model | DigiEndoscope |
| Dimensions (L x D x H) | 1140 x 95 x 150 mm |
| Weight | 753 g |
| Power supply | 4 AA alkaline batteries 1.5 V |
| Display | 2.4" TFT-LCD screen (320x240 pixels resolution) |
| Image sensor | 1/4" VGA CMOS sensor |
| Lens | F 2.8; f = 4.3 mm, viewing angle 63-70° |
| Light source | 2 white LEDs with adjustable brightness |
| Internal storage | 32 MB built-in NAND flash memory |
| External storage | SD/MMC card (not included) |
| Image format | JPEG 640x480 pixels |
| Video format | AVI 640x480 pixels (20 fps) |
| Video output | NTSC/PAL via video cable |
| USB interface | USB 1.1 (mini USB type B) |
| Main functions | Photo, video, playback, delete, copy, slideshow, brightness adjustment, TV out, PC Cam mode |
| Waterproofing | Camera: IP4 (water splashing); probe head: IP7 (1 meter) |
| Included accessories | USB cable, video cable, user guide, mirror, magnet, hook |
| Included software | Arcsoft Media Impression 2, PC cam driver |
| Compatible operating systems | Windows 98 SE/2000/ME/XP/Vista/7 |
| Maintenance and cleaning | Clean the exterior with a soft, dry cloth; never open the device |
| Safety instructions | Do not overload sockets, avoid moisture and shocks, repairs only by authorized service center |
| Batteries | Use only 1.5 V alkaline batteries; do not use 1.2 V rechargeable batteries |
Frequently Asked Questions - DigiEndoscope Reflecta
User questions about DigiEndoscope Reflecta
0 question about this device. Answer the ones you know or ask your own.
Ask a new question about this device
Download the instructions for your Microscope in PDF format for free! Find your manual DigiEndoscope - Reflecta and take your electronic device back in hand. On this page are published all the documents necessary for the use of your device. DigiEndoscope by Reflecta.
USER MANUAL DigiEndoscope Reflecta
- Package Contents 1
2.Standard Equipment 2 - Display Information 3
-
Getting started 4
-
Installing Batteries (4 AA) 4
-
Inserting / removing SD/MMC Card
-
Using the camera 6
Saving a still picture 6
Saving a video clip 6
-
Retrieving saved still pictures or video clips
-
Playing back a video clip 7
- Showing stills (on display)
- Deleting saved pictures or video clips
-
Still picture and video settings 8
-
Picture display position 9
-
Specification 10
- Safety and Maintenance 11
WEEE Directive and disposal 12
1. Package Contents
Make sure that all of the items shown below are included with your DigiEndoscope.
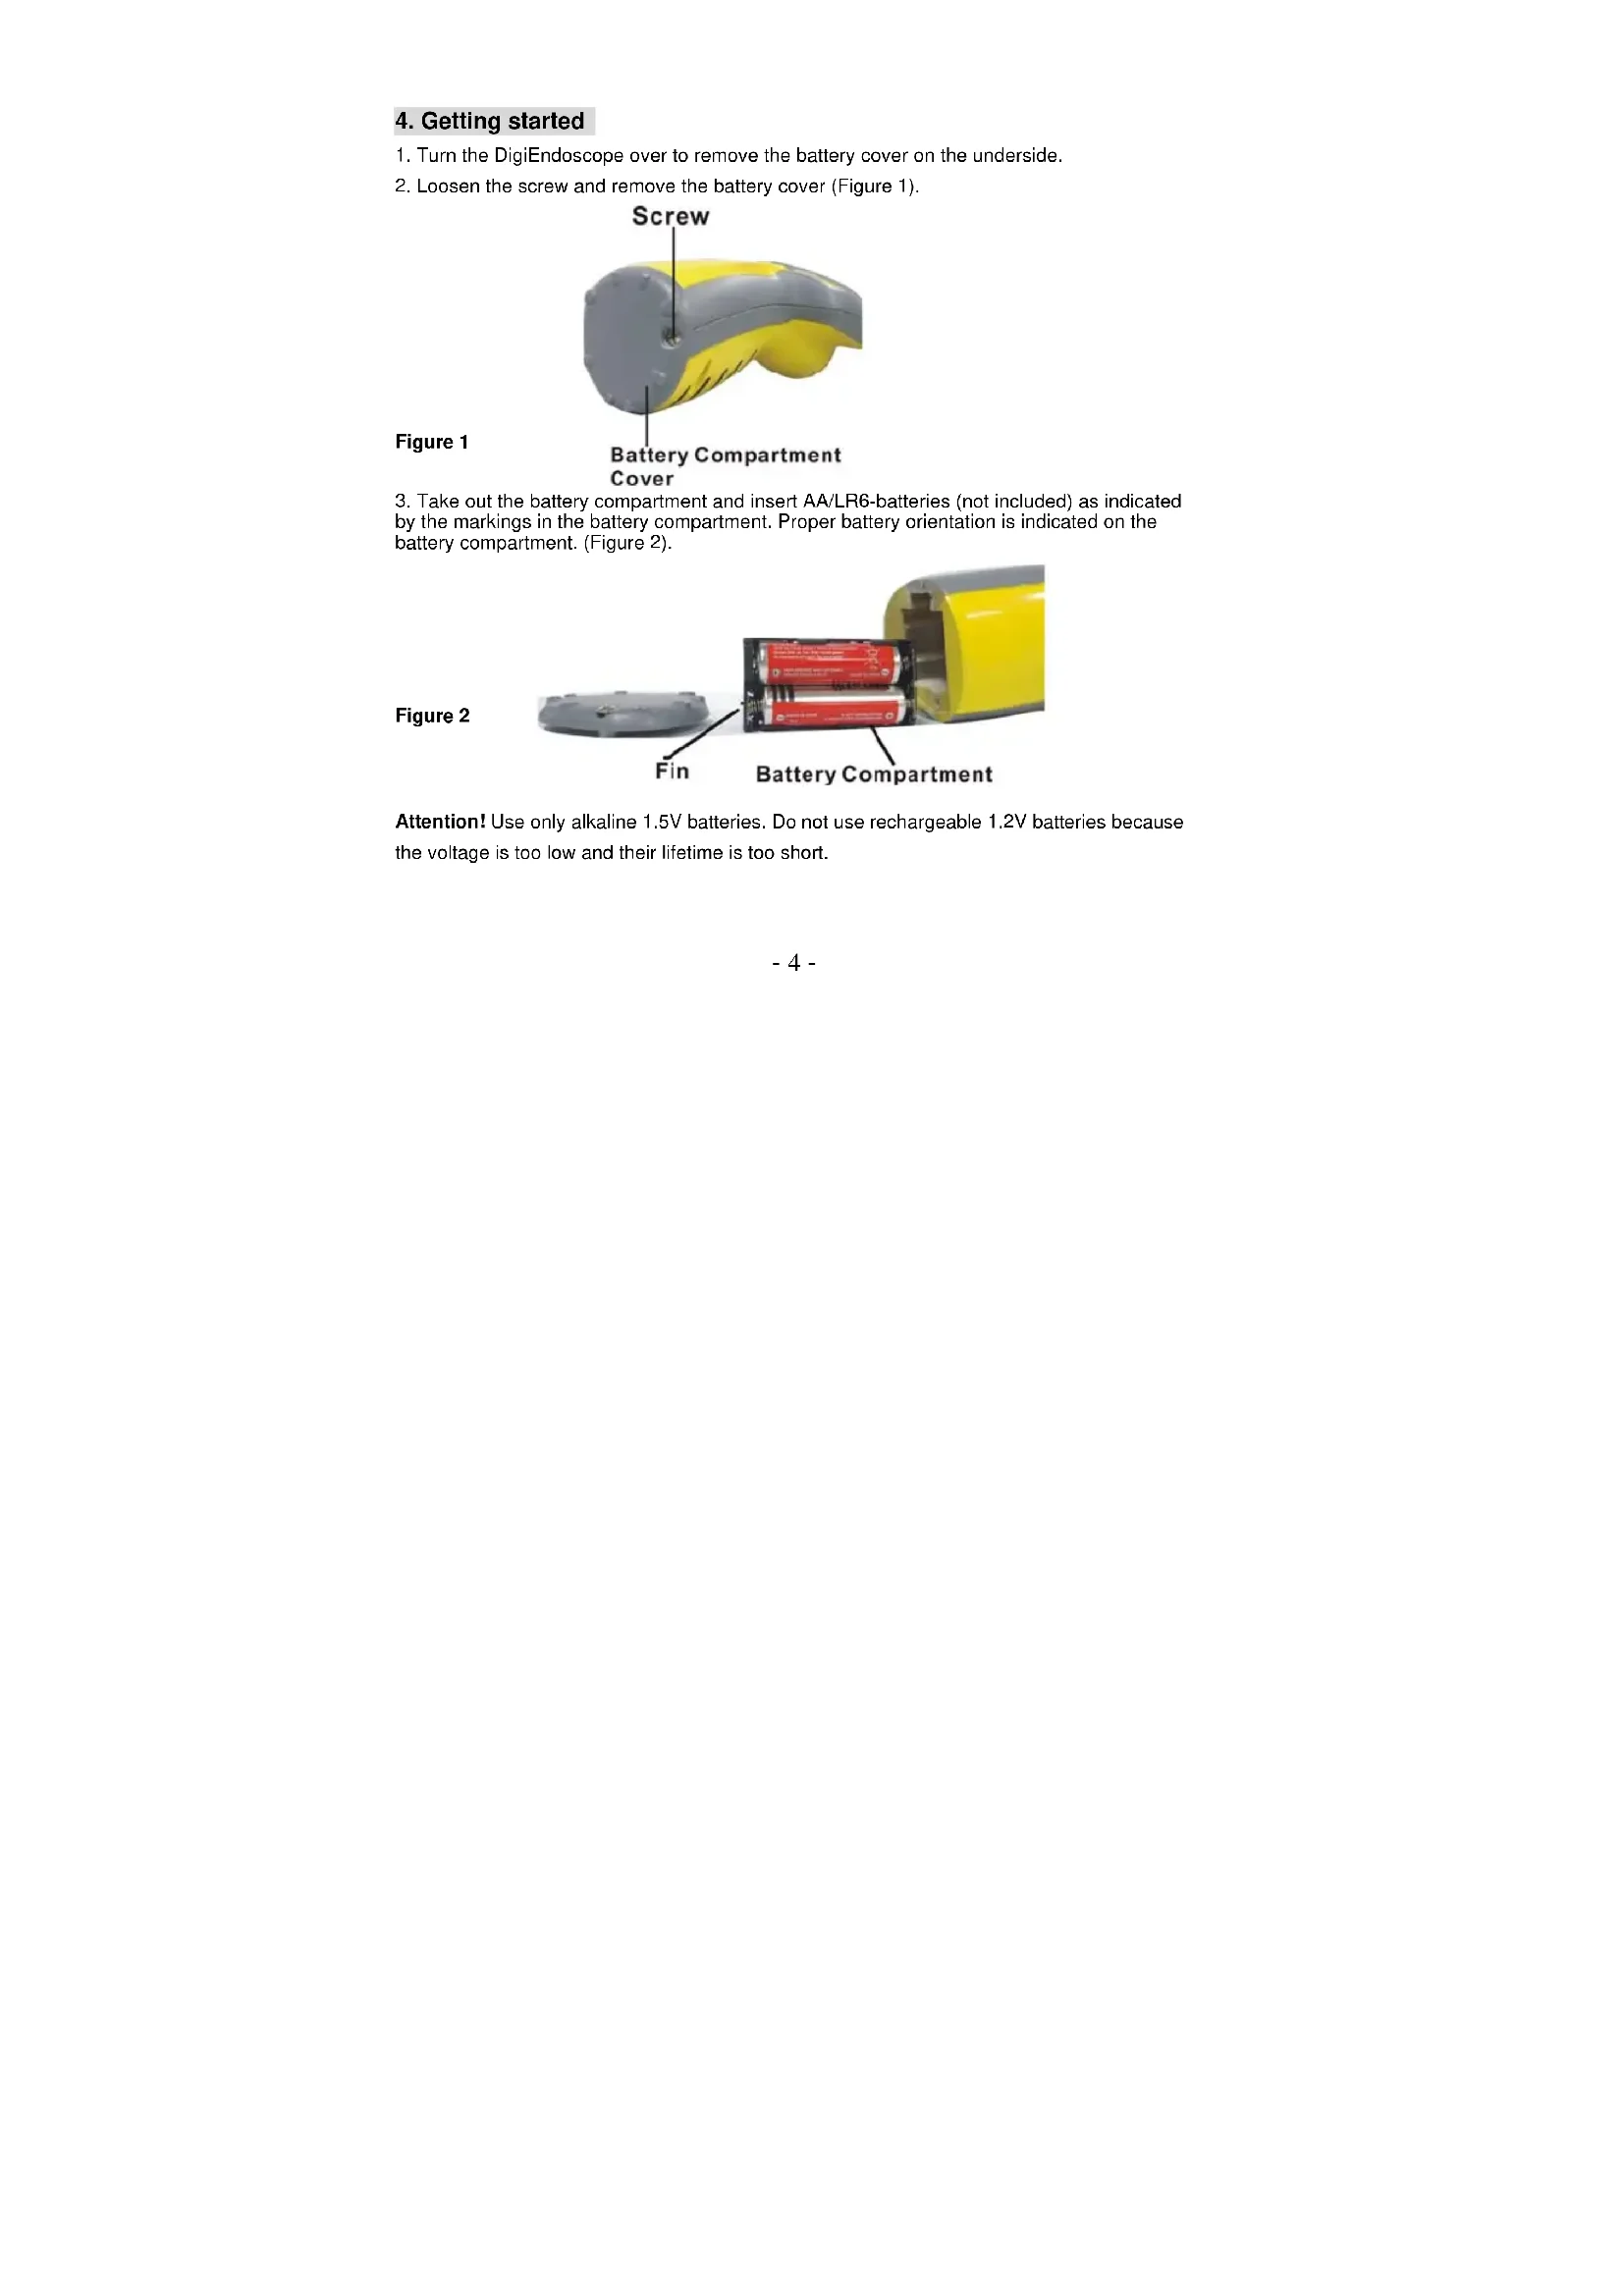
DigiEndoscope
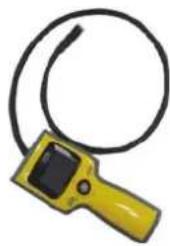
USB cable
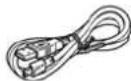
Video cable
-User's manual
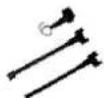
Mirror/ magnet/hook
2. Standard Equipment
The DigiEndoscope comes with the following items:
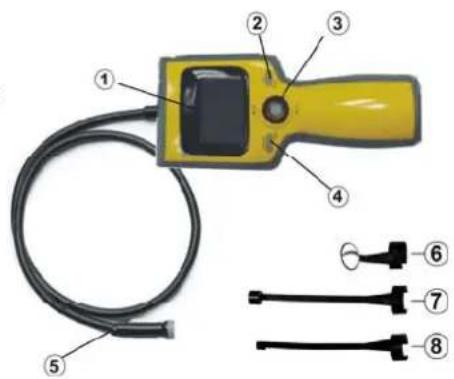
- LCD SCREEN
- OK BUTTON
3.JOYSTICK
LEFT BUTTON; RIGHT BUTTON;
UP BUTTON (MODE);
DOWN BUTTON (MENU)
4. POWER BUTTON
5. CAMERA HEAD AND SEESNAKE
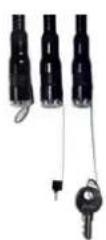
6.MIRROR
7. MAGNET
8.HOOK
Note:
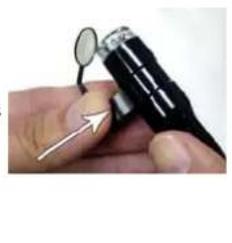
Item 6~8 can be attached to the camera for additional uses. Please refer to the left images as shown.

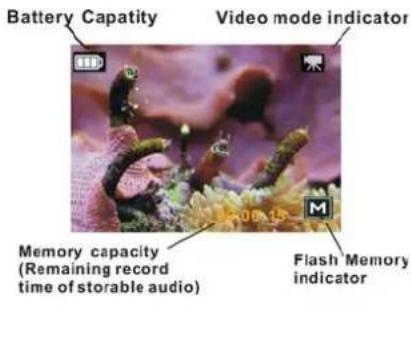
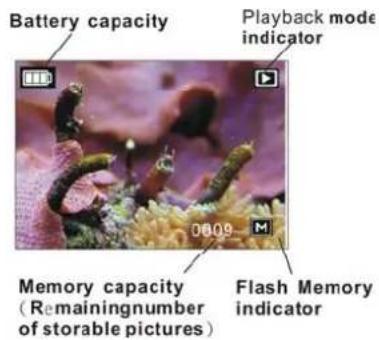
3. Display Information
Capture Function
4. Getting started
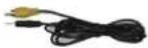
- Turn the DigiEndoscope over to remove the battery cover on the underside.
- Loosen the screw and remove the battery cover (Figure 1).
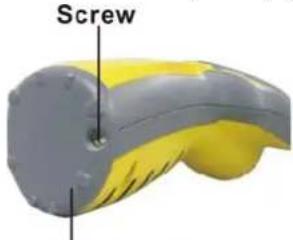
Figure 1
Battery Compartment Cover
- Take out the battery compartment and insert AA/LR6-batteries (not included) as indicated by the markings in the battery compartment. Proper battery orientation is indicated on the battery compartment. (Figure 2).
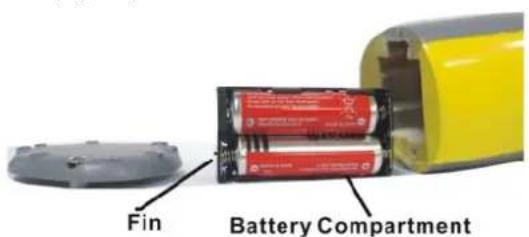
Figure 2
Attention! Use only alkaline 1.5V batteries. Do not use rechargeable 1.2V batteries because the voltage is too low and their lifetime is too short.
- Replace battery compartment, making sure it is correctly positioned with the broader edge facing the display.
- Put the battery cover back on and position it firmly in place.
- Insert SD/MMC memory card
The DigiEndoscope can save still pictures and/or video clips on the SD memory card. The number of pictures that can be stored depends on the size of the memory card.
Warning!
Position the memory card correctly and insert it carefully (it fits only one way).
Do not insert or remove memory card when camera is on.
- Switch off the DigiEndoscope
- Open the rubber cover.
- Turn the memory as shown in the Fig. and apply pressure to it carefully until it fits firmly into place.
- Removing the memory card
Apply slight pressure to loosen it and then pull it out.
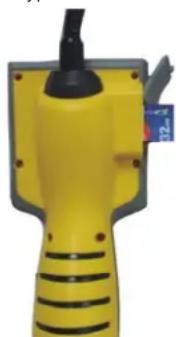
Note: When the memory card is full, the display shows "CARD FULL". The memory must then be replaced, deleted or formatted.
5. Using the DigiEndoscope
- Saving a still picture
- Turn on the DigiEndoscope with the power switch.
- Press the joystick upward (MODE) repeated until the "A" (symbol for still picture) appears in the top right corner.
- The camera image appears on the display.
- Aim the camera head at the object. Check that the image on the display is sharp and clear.
- The luminance of the LEDs on the camera head can be adjusted by pushing the joystick to the left (LEFT) or right (RIGHT)
- Hold the DigiEndoscope still and press (OK) to take a picture.
- Taking a Video clip
- Turn on the DigiEndoscope with the power switch.
- Press the joystick upward (MODE) repeated until video symbol appears in the upper right corner.
- The camera image appears on the display.
- Aim the camera head at the object. Check that the image on the display is sharp and clear.
- The luminance of the LEDs on the camera head can be adjusted by pushing the joystick to the left (LEFT) or right (RIGHT)
- Press (OK) to start video recording.
- As the video records, the elapsed time appears in the red texts at the bottom of the display.
- Press (OK) to stop recording.
Video recording stops automatically when the memory is full.
-
Retrieving saved still pictures or video clips
-
Turn on the DigiEndoscope with the power switch.
-
Press the joystick upward (MODE) repeatedly until the still picture appears in the upper right corner.
-
Playing back a video clip (on the display)
-
Press (OK) to start playback of the video clip.
-
Press (OK) to stop playback.
-
Showing stills (on display)
-
Press the joystick to (LEFT) or (LEFT) to select which image to show on the display.
-
The picture appears on the display
-
Skip back or forward through the photos by pushing (LEFT) or (RIGHT).
-
Push the joystick upward (MODE) to stop showing.
-
Deleting saved pictures or video clips
-
Press the joystick upward (MODE) repeatedly until the picture display symbol appears in the upper right corner.
- Press (LEFT) and (RIGHT) to select a picture or video clip to delete.
- Press the joystick (3) downward (MENU) to open menu.
- Select Delete - Execute
- Press (OK) and select Single to delete the picture being shown or select All to delete all images saved in the memory.
-
Press (OK) to confirm deletion.
-
Still picture and video settings
Press the joystick (3) downward (MENU) to open menu.
Format (formatting menu)
Press (OK) and select Cancel or Execute (confirms formatting)
Language (select menu language)
Press (OK) and select among: English, French, German and Dutch.
Auto Off (switches off automatically)
Press (OK) and select 1 Min, 3 Min, 5 Min or Off.
Sys Reset (restores factory settings)
Press (OK) and select Cancel or Execute (confirms setting).
TV Output (select output format for TV system)
Press (OK) and select NTSC or PAL (PAL is used in Europe).
Date Input
Press (OK) and select Off (date not saved with picture) or Set (enter year, month, and time to be saved with the image).
USB*
The camera can be used in windows directly with existing drivers when in the "Disk Drive" position.
If "PC Cam" position is used drivers must be installed from the accompanying CD disc before the camera is connected to the computer.
Press (OK) and select PC cam (transfers still/video to PC via USB-cable) or Disk Drive (saves images on SD-memory card).
*NOTE!
This setting must be in place before the DigiEndoscope is connected to PC.
- Settings: Picture display position
Press the joystick (3) downward (MENU) to open menu.
Delete (deletes picture)
- Press (OK) and select Single (deletes the image being shown) or All (deletes all images).
- Press (OK) and select Cancel or Execute (confirms deletion).
Copy to Card (copies images from internal memory to SD-memory card) Press (OK) and select Cancel or Execute (confirms copying)
Slideshow 9set interval for picture slideshow) Press (OK) and select 3 sec,5 Sec,or 10 Sec.
6. Specifications:
| Specifications | |
| Image Sensor VGA CMOS sensor. Sensor area 1/4" Lens Specification F 2.8, f=4.3 mm, View angle 63-70°, Visual Distance Range 20 mm-280 mm (recommend 100mm) Light Source 2 white LED light with adjustable light intensity Waterproof Camera unit: Water splash resistantant (IP4) Probe head: 1 meter deep waterproof (IP7) Display 2.4" TFT-LCD Screen (resolution 320*240 pixels) Power Supply By Alkaline Battery "AA"1.5V X 4 Image Mode 640*480 pixels Video Mode (non-audio) VGA 640*480 pixels (20fps) PC Cam Mode USB 1.1 Interface Compression JPEG file (still), AVI file (video) Storage Built-in 32MB and flash and SD card (SD card not included) TV output TV out and mini USB (B type) Output for NTSC / PAL Output TV out and mini USB (B type) Dimension (L x W x H) 1140*95*150mm Tube Length: 36 inches Weight (g) About 753 g | |
| Bundled Software Arcsoft Media Impression 2, PC cam driver | |
| O/S Microsoft Windows 98 SE / 2000 / ME / XP / Vista / 7 |
7. Safety and Maintenance Instruction:
- Make sure that all electric connections and connection cables meet the pertaining regulation and are in conformity with the operating instruction.
- Do not overload electrical outlets or extension cords, fire or electric shocks can be the result.
- Please contact an expert in case you have any doubts about the mode of operation, the safety of connecting the appliances.
- Keep all parts away from young children's reach.
- Do not store this item on wet, very cold or warm places, this can damage the electronic circuit boards.
- Avoid dropping or shocks, this can damage the electronic boards.
- Never replace damaged power cables yourself! In such a case, remove them from the net and take the devices to a workshop.
- Repairs or opening of this item may only be performed by an authorized workshop.
Maintenance
The devices are maintenance-free, so never open them. The guarantee becomes void when you open the appliance. Only clean the outside of the devices with a soft, dry cloth or a brush. Prior to cleaning, remove the devices from all voltage sources.
WEEE Directive & Product Disposal
At the end of its serviceable life, this product should not be treated as household or
general waste. It should be handed over to the applicable collection point for the
recycling of electrical and electronic equipment, or returned to the supplier for
disposal.
TOETS LINKS;
TOETS RECHTS;
TOETS OMHOOG (MODUS);
TOETS OMLAAG (MENU)
4.AAN/UIT TOETS
5. CAMERAKOP EN KIJKSLANG
6. SPieGEL
7. MAGNEET
8. HAAK
Opmerking:

- Package Contents
- Standard Equipment
- POWER BUTTON
- CAMERA HEAD AND SEESNAKE
- Getting started
- - Insert SD/MMC memory card
- Warning!
- - Removing the memory card
- Using the DigiEndoscope
- - Saving a still picture
- - Taking a Video clip
- Specifications:
- Safety and Maintenance Instruction:
- Maintenance
- WEEE Directive & Product Disposal
Brand : Reflecta
Model : DigiEndoscope
Category : Microscope