Set 600 - Baby products TOPCOM - Free user manual and instructions
Find the device manual for free Set 600 TOPCOM in PDF.
Frequently Asked Questions - Set 600 TOPCOM
User questions about Set 600 TOPCOM
0 question about this device. Answer the ones you know or ask your own.
Ask a new question about this device
Download the instructions for your Baby products in PDF format for free! Find your manual Set 600 - TOPCOM and take your electronic device back in hand. On this page are published all the documents necessary for the use of your device. Set 600 by TOPCOM.
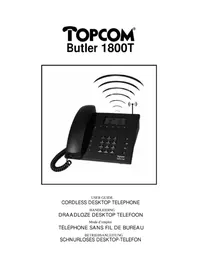
USER MANUAL Set 600 TOPCOM
text_image
TOPCOM® YOUR CHILDREN, OUR CONCERN KIDZZZ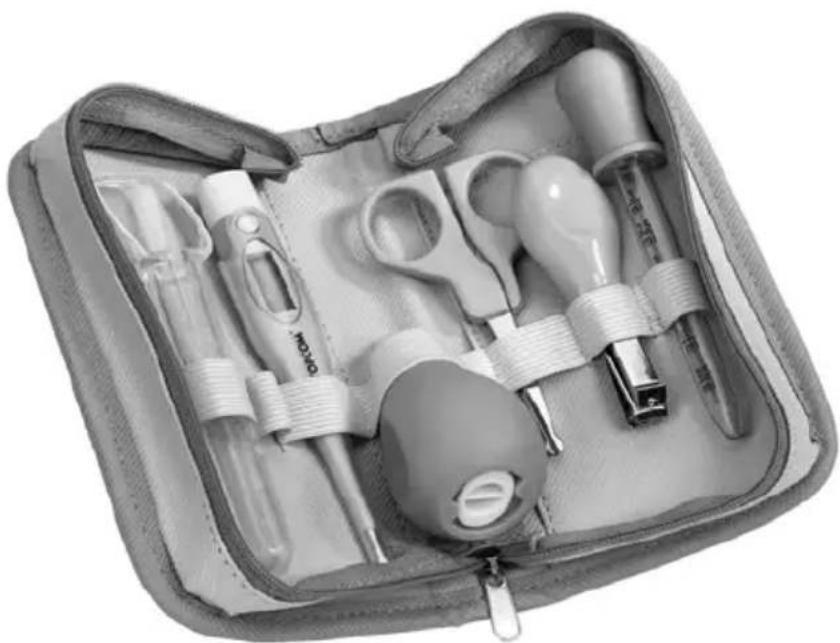
natural_image
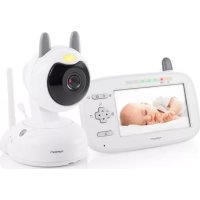
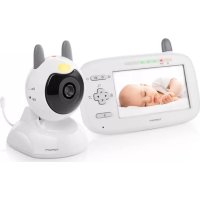
Medical kit with medical instruments and a cap, no visible text or symbolsBABY ESSENTIALS SET 600
USER GUIDE / HANDLEIDING / MANUEL D'UTILISATEUR / BEDIENUNGSANLEITUNG / MANUAL DE USUARIO / BRUKSANVISNING / BRUGERVEJLEDNING / ANVÄNDARHANDBOK / KÄYTTÖOHJE / MANUALE D'USO / MANUAL DO UTILIZADOR / UŽIVATELSKÁ PŘÍRUČKA / ODHΓIEΣ XPHΣΗΣ / HASZNÁLATI ÚTMUTATÓ / INSTRUKCJA OBSŁUGI / UŽÍVATEL'SKÝ MANUÁL
V1.2 - 06/09
C € 0123
UK The features described in this manual are published with reservation to modifications.
This product complies with the EC Directives and bears the CE Mark "CE 0123".
This product is in compliance with the essential requirements and other relevant provisions of the directive 93/42/EEC.
The declaration of conformity can be found on:
http://www.topcom.net/support/cedeclarations.php

TOPCOM Europe:
Research Park Haasrode
Grauwmeer 17
B-3001 Heverlee
BELGIUM

Global Treasure Industries Ltd.
Room.8, 5/F, Block 2, Nan Fung Ind. City,
No. 18 Tin Hau Road, Tuen Mun, N.T., Hong Kong
1 Important
Read this manual carefully before use. Put the user guide in a safe place for future reference. This product is not a toy and should be kept out of children's reach.
2 Content
• Digital thermometer
- Nasal aspirator
- Nail clippers
• Medicine spoon
• Medicine dropper
- Scissors
3 Thermometer
3.1 Safety notes
- Please read through the instruction manual before using the thermometer, as the applied technique is critical for taking accurate temperatures.
- Do not allow children to walk or run during temperature taking. The probe could present a hazard.
- This thermometer is intended for household use only. The use of this thermometer is not intended as a substitute for physician's consultation.
- When the temperature is higher than 38^ , means that the patient may have fever. Contact your doctor.
• High, prolonged fever requires medical attention especially for young children. - The thermometer is calibrated and does not need re-calibration if used according to the instructions.
• After a shower or exercise, the body temperature will rise. Please take a rest before taking temperature. - Keep out of reach of children.
- Do not expose to direct sunlight, high temperature, moisture or dirt.
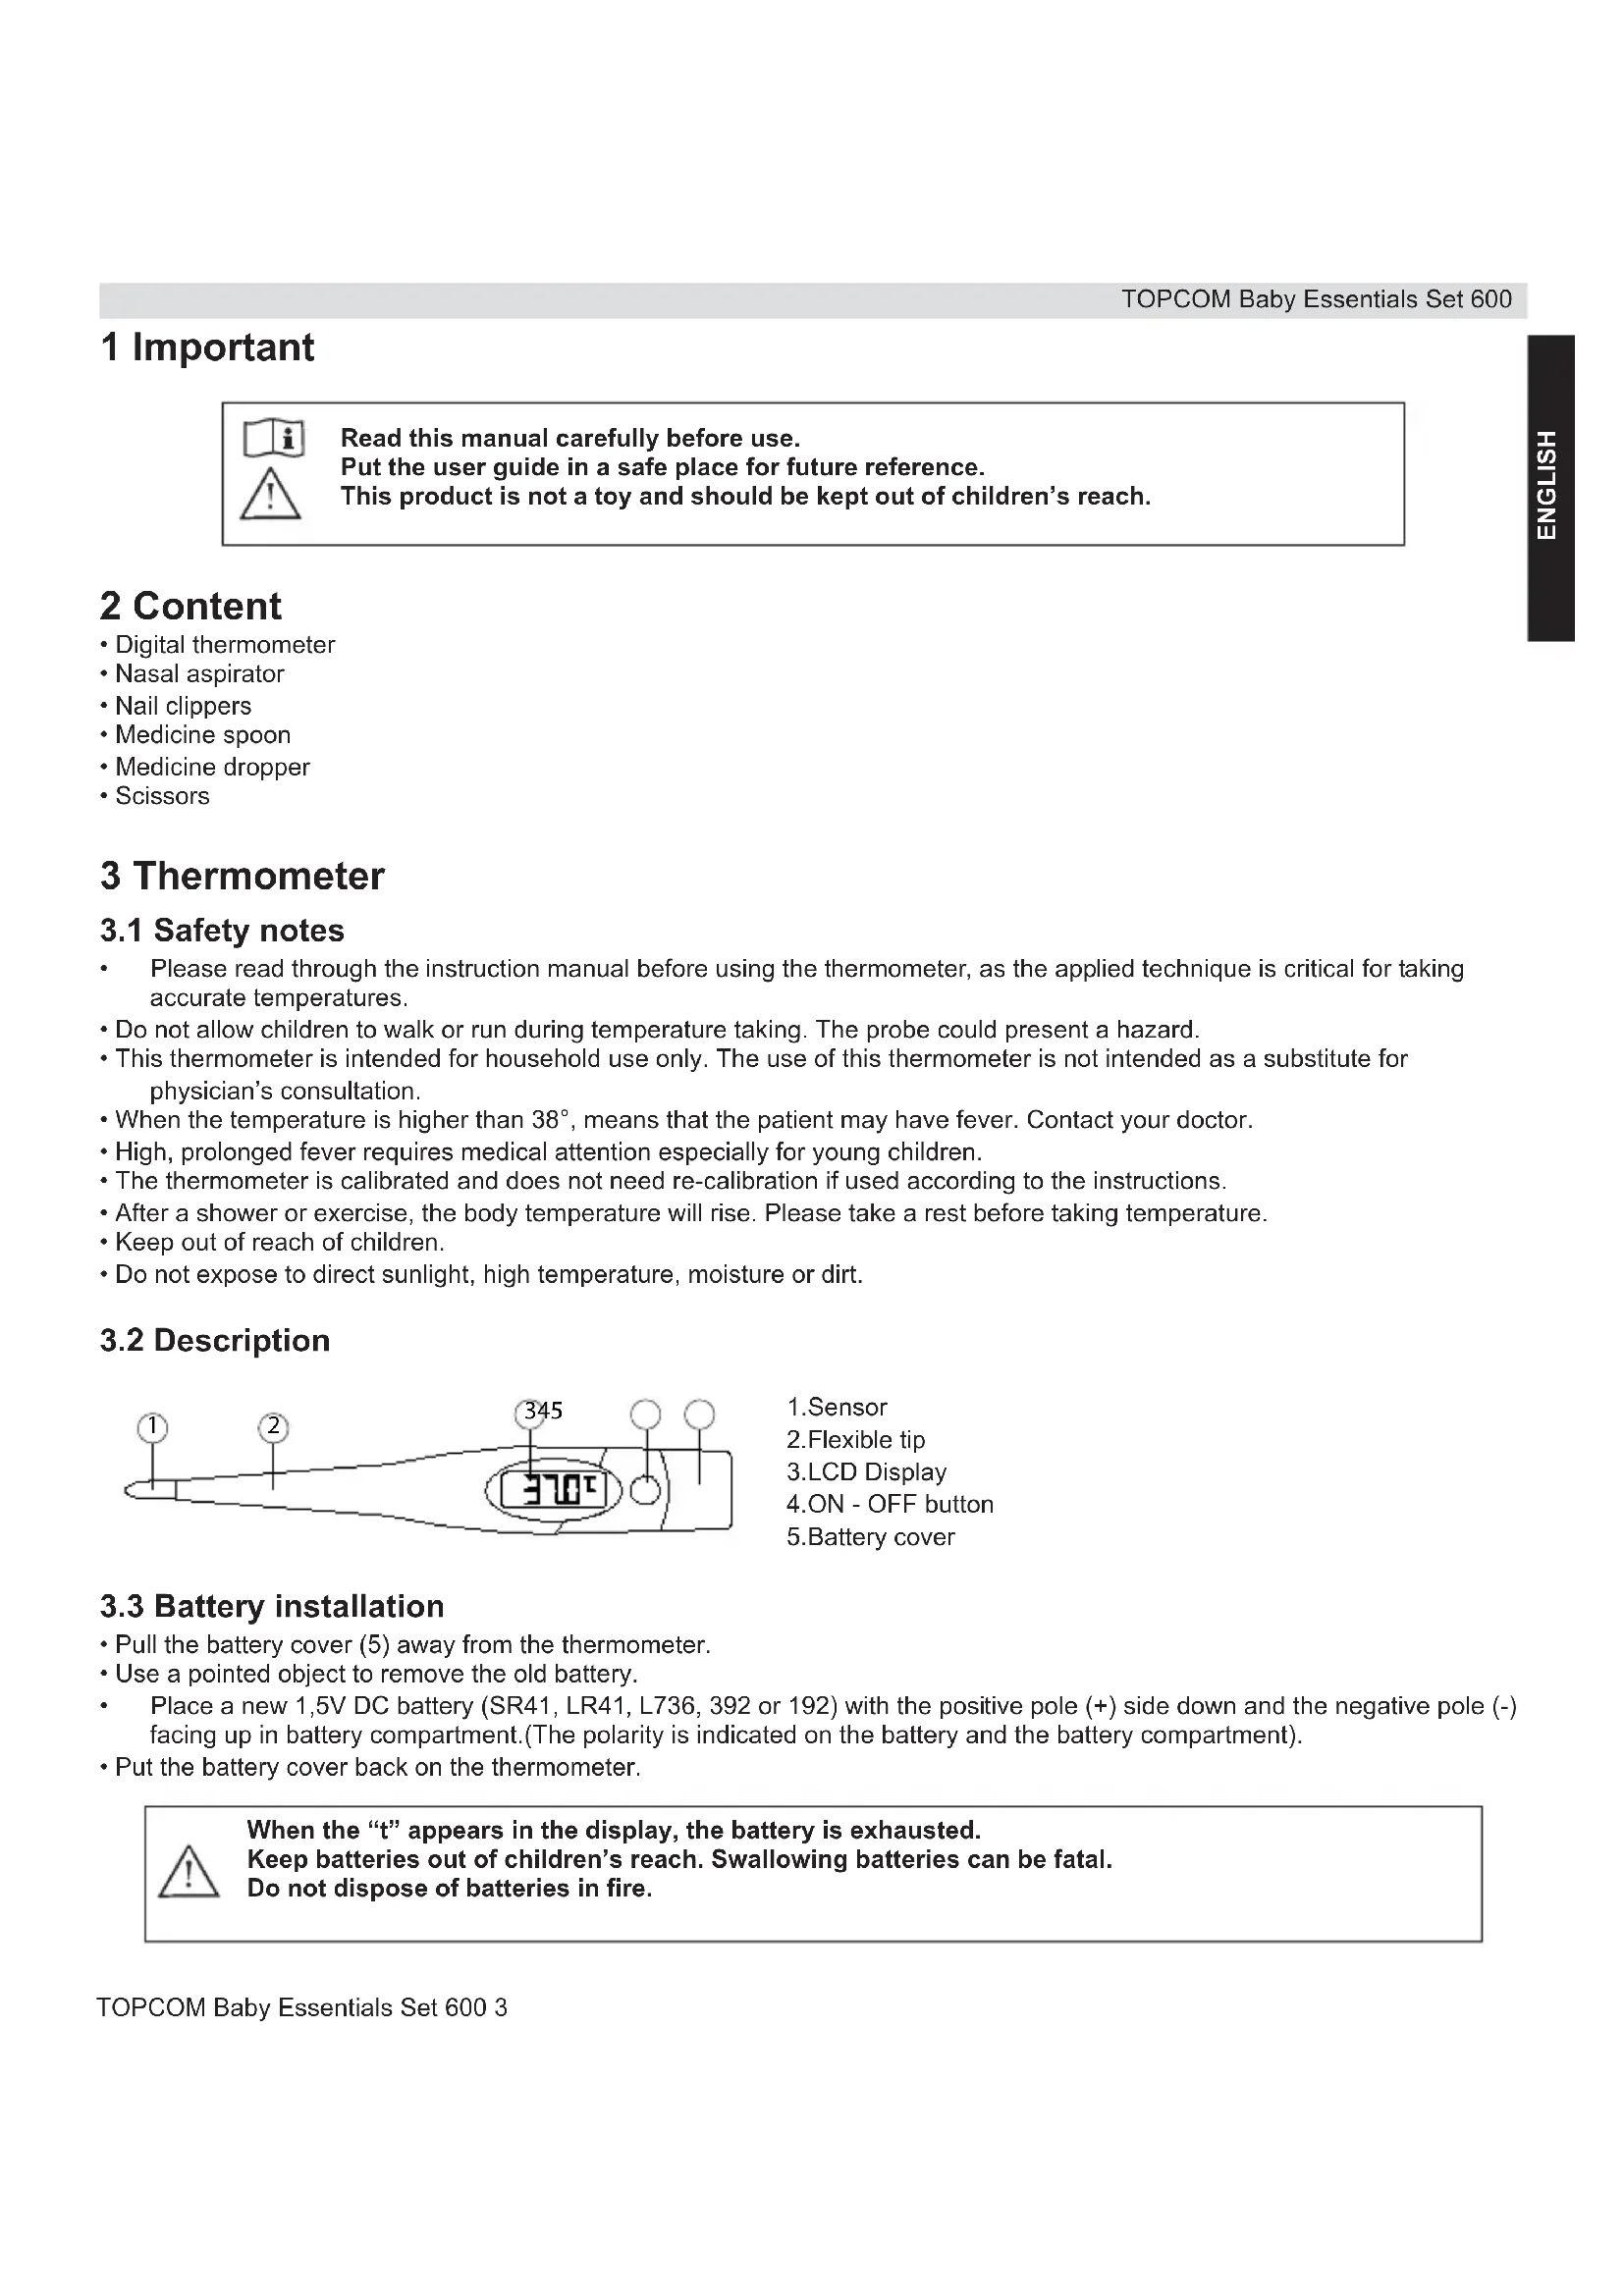
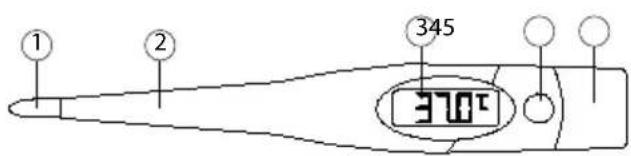
3.2 Description
text_image
① ② 345 370°1.Sensor
2.Flexible tip
3.LCD Display
4.ON - OFF button
5.Battery cover
3.3 Battery installation
- Pull the battery cover (5) away from the thermometer.
- Use a pointed object to remove the old battery.
- Place a new 1,5V DC battery (SR41, LR41, L736, 392 or 192) with the positive pole (+) side down and the negative pole (-) facing up in battery compartment.(The polarity is indicated on the battery and the battery compartment).
- Put the battery cover back on the thermometer.

When the "t" appears in the display, the battery is exhausted. Keep batteries out of children's reach. Swallowing batteries can be fatal. Do not dispose of batteries in fire.
3.4 Measurement
3.4.1 What is 'Normal' temperature
Normal human body temperature is a concept that depends on the place in the body at which the measurement is made. The value of 36.8 ^ ± 0.7 ^ is the common oral measurement. Rectal measurements, or measurements taken directly inside the body cavity are typically about a half degree Celsius higher. The body temperature of an individual also tends to vary during the day and with activity level, with the lowest value in the middle of the sleep cycle.

Oral, underarm and rectal temperatures vary by approximately 0.5^ C.
3.5 Rectal use:
Commonly used for babies, young children or when it is difficult to take an oral or underarm temperature.
- Clean your digital thermometer tip (1 and 2) by wiping it with soap and water or 70% isopropyl Alcohol before use.
- Lubricate the probe with water-solvable jelly. Do not use petroleum jelly like Vaseline for easier insertion.
- Press the ON/OFF button (4), the unit will beep and the screen will display for about 3 seconds.
- The screen will show the last measured temperature or Lo °C. The Lo with the flashing °C indicates that the thermometer is ready to use.
- Insert the probe in the rectum about 1 cm until the temperature stabilizes.
– Normal temperature is 37,6°C
- Measurement time usually takes approximately 10 seconds, but sometimes it takes longer, depending on the body size.
- When the peak temperature stabilizes you will hear a beep for 4 seconds to indicate the measurement is ready.
- The thermometer auto shuts-off after 10 minutes.

It is suggested that a rectal used thermometer is separated from an axillary or oral used thermometer because of hygienic reason.
3.6 Oral use
For children of 4 years and older.
Do not drink hot or cold fluids, exercise or perform other activities that will raise or lower temperature readings when compared to your normal, average temperature. The mouth should remain closed up to 5 minutes before attempting a reading.
- Press the ON/OFF button (4), the unit will beep and the screen will display for a 100 second.
- The screen will show the last measured temperature or Lo °C. The Lo with the flashing °C indicates that the thermometer is ready to use.
- Place the probe tip well under the tongue. Instruct children not to bite down on the probe.
- The peak temperature should be reached in approximately 10 seconds. Opening the mouth could result in a longer time for a reading.
– Normal temperature is 37^ C
3.7 Axillary use
- Press the ON/OFF button (4), the unit will beep and the screen will display for 200 seconds.
- The screen will show the last measured temperature or Lo °C. The Lo with the flashing °C indicates that the thermometer is ready to use.
- Wipe your armpit with a dry towel and place the probe under the armpit. The thermometer should be pointing upward in the same direction as your body if possible. Keep you arm closed until the temperature stabilizes.
- The peak temperature should be reached in approximately 10 seconds.
– Normal temperature is 36,6°C
3.8 Thermometer specifications
| Measuring range | 32,0 ~ 43°C |
| Accuracy | +/- 0,1°C (35,0 °C ~ 39°C) +/- 0,2°C (the rest) |
| Resolution | 0,1°C |
| Working conditions | Temp 0 ~ 50°C Hum 10 ~ 83% |
| Storage conditions | Temp -20 ~ 60°C Hum 10 ~ 83% |
| Battery | 1,5V DC Alkaline Manganese SR41, LR41, L736, 392 or 192 |
| Battery Life | Approx, 100 hours for continuous operation 18 months for 10 minutes per day |
| Power consumption | 0,15mW |
| Dimension | 152 x 21,5 x 14mm |
| Weight | Approx. 16,8 grams with battery inside |
3.9 How to care for this product
• The thermometer should be cleaned after each use.
- Clean the thermometer tip and probe using isopropyl alcohol or soap and water.
- Store the unit in the protective case while not in use.
- Do not store or keep in direct sunlight, or in high temperature areas
- Do not drop the thermometer, as this may damage the unit.
4 Nasal aspirator
Congestion due to colds is uncomfortable for a baby. The nasal aspirator will gently relieve baby's discomfort by removing excess mucus to help your baby breath easier.
4.1 Use
- Hold the baby upright.
- Squeeze bulb of the Aspirator to empty out the air.
• Gently place tip of the aspirator into baby's nose so that it points up or down, but not directly towards the centre of the nostril. - Slowly release the bulb and the suction will draw excess mucus from your baby's nasal passage.
- Repeat in other nostril.

Never push the Aspirator too far into the nostril. Wash always thoroughly after each use. Never use in baby's mouth or ears. When storing, keep away from heat and bright light.
4.2 Cleaning
- Clean before first use and after each use.
- Open the cap at the frontside of the aspirator.
- Rinse the bulb in warm, soapy water.
- Squeeze and release bulb several times to thoroughly wash interior of aspirator.
- Rinse in the same fashion with warm, clean water. Make certain that all of the water is drained during drying.
• Re-attach the cap securely.
5 Medicine spoon
5.1 Usage
- Hold the medicine spoon straight up and pour medicine to prescribed dosage.
- Make sure that the child is sitting in an upright position before giving medicine.
5.2 Cleaning
- Wash with warm, soapy water before first use and after each use.
- Rinse thoroughly.
6 Nail clippers
Baby's nails grow very fast and can become quite sharp. Because of this, it is very important to keep nails short and smooth so babies won't scratch themselves. The nail clippers are specially designed with curved edges for your baby's little nails.
6.1 Use
Sterilize by wiping edges with rubbing alcohol.
Clip nails straight across. Do not try to cut rounded edges.

It is best to trim after a bath when nails are soft, or at night when your baby is sleeping.
7 Medicine dropper
7.1 Use
- Squeeze the air out of dropper bulb.
- Insert dropper into the medicine bottle and slowly release pressure on the bulb until the medicine reaches the desired dosage marking.
- Remove the dropper from the medicine bottle.
- Administer medicine while child is in an upright sitting position. Point the tip of dropper inside your baby's cheek and gently squeeze the bulb.
7.2 Cleaning
- Remove the bulb from the pipette.
- Wash with warm, soapy water and rinse thoroughly before first use.
- Repeat after administering each dosage.
8 Disposal of the device (environment)
At the end of the product lifecycle, you should not throw this product into the normal household garbage but bring the product to a collection point for the recycling of electrical and electronic equipments. The symbol on the product, user guide and/or box indicate this.
Some of the product materials can be re-used if you bring them to a recycling point. By re-using some parts or raw materials from used products you make an important contribution to the protection of the environment. Please contact your local authorities in case you need more information on the collection points in your area.
1 Belangrijk
text_image
① ② ③45 370°text_image
① ② 345 370°text_image
① ② ③45 370°1.Føler
2.Fleksibel tupp
3.LCD-display
4.PÅ - AV-knapp
5.Batterideksel
3.3 Sette inn batterier
text_image
① ② ③ ④ ⑤ 370°Ctext_image
① ② ③ ④ ⑤ 370°text_image
① ② ③ ④ ⑤1.Čidlo
2.Pružná špička
3.LCD displej
4.Tlačitko ON/OFF (ZAP/VYP)
5.Kryt baterie
RETURN WITH YOUR DEFECT PRODUCT
(Original Proof of Purchase has to be attached to this return card to be valid for warranty)