
Sonicare ProtectiveClean 4300 HX6848 - Electric toothbrush PHILIPS - Free user manual and instructions
Find the device manual for free Sonicare ProtectiveClean 4300 HX6848 PHILIPS in PDF.
 FR
FR
 AZ
AZ
 BG
BG
 CS
CS
 DA
DA
 DE
DE
 EL
EL
 EN
EN
 ES
ES
 ET
ET
 FI
FI
 HE
HE
 HU
HU
 HY
HY
 IT
IT
 KA
KA
 KK
KK
 KY
KY
 LT
LT
 LV
LV
 MK
MK
 NL
NL
 NO
NO
 PL
PL
 PT
PT
 RO
RO
 RU
RU
 SK
SK
 SL
SL
 SQ
SQ
 SV
SV
 TG
TG
 TK
TK
 UK
UK
 UZ
UZ
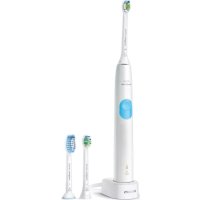
| Product Type | Sonic electric toothbrush |
| Brand | Philips |
| Model | Sonicare ProtectiveClean 4300 HX6848 |
| Brushing Technology | Sonic (vibrations up to 62,000 movements/min) |
| Brushing Modes | 1 mode: Clean |
| Adjustable Intensities | 2 levels: Low and High |
| Pressure Sensor | Yes: visual alert (orange flashing) and vibration change |
| QuadPacer Timer | Yes: divides mouth into 4 quadrants, 30 seconds each |
| Smartimer | Yes: automatic shut-off after 2 minutes of brushing |
| EasyStart | Yes: gradual power increase over first 14 brushings |
| BrushSync Technology | Yes: brush head replacement reminder (orange indicator) |
| Battery Life | Minimum 28 brushing sessions (14 days with twice-daily use) |
| Charge Time | Up to 24 hours for a full charge |
| Power Supply | Inductive charger (mains plug) or USB travel case (depending on accessories) |
| UV Sanitizer | Included (depending on version): 10-minute cleaning cycle |
| Smart Brush Head | Yes: compatible with BrushSync technology |
| Head Replacement Reminder | Orange indicator after wear, recommended every 3 months |
| Cleaning | Handle: damp cloth (do not immerse); Head: rinse after use; Charger: damp cloth |
| Warranty | International Philips warranty (excluding accessories and normal wear) |
| Included Accessories | 1 handle, 1 smart brush head, 1 charger, 1 travel case, 1 UV sanitizer (depending on version) |
Frequently Asked Questions - Sonicare ProtectiveClean 4300 HX6848 PHILIPS
User questions about Sonicare ProtectiveClean 4300 HX6848 PHILIPS
0 question about this device. Answer the ones you know or ask your own.
Ask a new question about this device
Download the instructions for your Electric toothbrush in PDF format for free! Find your manual Sonicare ProtectiveClean 4300 HX6848 - PHILIPS and take your electronic device back in hand. On this page are published all the documents necessary for the use of your device. Sonicare ProtectiveClean 4300 HX6848 by PHILIPS.
USER MANUAL Sonicare ProtectiveClean 4300 HX6848 PHILIPS
Welcome to the Philips Sonicare family!
This toothbrush enables you to obtain superior plaque removal, whiter teeth and healthier gums. Using
Sonicare's combination of gentle sonic technology and clinically developed and proven features, you can be confident that you're getting the very best clean, every time.
Further support and product registration are available to you at: www.philips.com/support
Important safety information
Only use the product for its intended purpose. Read this important information carefully before you use the product and its batteries and accessories, and save it for future reference. Misuse can lead to hazards or serious injuries.
Warnings
- Keep the chargers and UV sanitizer away from water.
- After cleaning, make sure the charger and/or sanitizer is completely dry before you connect it to the wall socket.
- This appliance can be used by children and persons with reduced physical, sensory or mental capabilities or lack of experience and knowledge if they have been given supervision or instruction concerning use of the appliance in a safe way and understand the hazards involved. Cleaning and user maintenance shall not be made by children without supervision.
- Children shall not play with the appliance.
- Only use original Philips accessories or consumables. Only use the charger provided with the product. If supplied, only use the original USB cable and USB power supply unit.
- This appliance contains no user-serviceable parts. If the appliance is damaged, stop using it and contact the Consumer Care Center in your country. Devices with cord only: If the cord is damaged, replace the charger with sanitizer with a new one.
- Do not use the charger and/or sanitizer outdoors or near heated surfaces.
- Do not clean any part of the product in the dishwasher.
- This appliance has only been designed for cleaning teeth, gums and tongue.
- Keep the sanitizer out of the reach of children at all times.
- Stop using the sanitizer if the UV light bulb remains on when the door is open. UV light can be harmful to the human eye and skin.
- Only operate the sanitizer with the protective screen in place.
- Do not touch the UV sanitizer's UV light bulb when it is hot.
- Stop using a brush head with crushed or bent bristles. Replace the brush head every 3 months or sooner if signs of wear appear.
- Avoid direct contact with products that contain essential oils or coconut oil. Contact may result in bristles dislodging.
- Stop using the appliance and consult your dentist/doctor if excessive bleeding occurs after use, if bleeding continues to occur after 1 week of use or if you experience discomfort or pain.
- If you have had oral or gum surgery in the previous 2 months, consult your dentist before you use this appliance.
- If you have a pacemaker or other implanted device, contact your doctor or the manufacturer of the implanted device prior to use.
- If you have medical concerns, consult your doctor before you use this appliance.
- This appliance is a personal care device and is not intended for use on multiple patients in a dental practice or institution.
Battery safety instructions
- This appliance contains batteries that are only to be removed by skilled persons
- Only use the product for its intended purpose. Read this information carefully before you use the product and its batteries and accessories, and save it for future reference. Misuse can lead to hazards or serious injuries. Accessories supplied may vary for different products.
- Only use original Philips accessories and consumables. Only use detachable supply unit TCBxxxx, HX6100, HX6110, HX6160 or WAAxxxx.
- Keep product and batteries away from fire and do not expose them to direct sunlight or high temperatures.
- If the product becomes abnormally hot or smelly, changes color or if charging takes longer than usual, stop using and charging the product and contact Philips.
- Do not place products and their batteries in microwave ovens or on induction cookers.
- Do not open, modify, pierce, damage or dismantle the product or battery to prevent batteries from heating up or releasing toxic or hazardous substances. Do not short-circuit, overcharge or reverse charge batteries.
- This appliance contains batteries that are non-replaceable. When the battery is at end of life, the appliance shall be properly disposed of, see section on recycling.
- If batteries are damaged or leaking, avoid contact with the skin or eyes. If this occurs, immediately rinse well with water and seek medical care.
- When you handle batteries, make sure that your hands, the product and the batteries are dry.
- To avoid accidental short-circuiting of batteries after removal, do not let battery terminals come into contact with metal object (e.g. coins, hairpins, rings). Do not wrap batteries in aluminium foil. Tape battery terminals or put batteries in a plastic bag before you discard them.
- Charge, use and store the product at a temperature between 0°C and 40°C (32°F and 104°F).
Storage and transportation conditions
Temperature: -10°C to 60°C (14°F to 140°F).
Electromagnetic fields (EMF)
This Philips appliance complies with all applicable standards and regulations regarding exposure to electromagnetic fields.
Radio Equipment Directive
Hereby, Philips declares that electric toothbrushes with radio equipment type (Bluetooth, NFC) are in compliance with Directive 2014/53/EU.
- The Bluetooth radio frequency interface in applicable products operates at 2.4 GHz.
- The maximum output power by the Bluetooth appliance is 3 dBm.
- The NFC radio frequency interface in applicable products operates at 13.56 MHz.
- The maximum RF power transmitted by the appliance is 30.16 dBm.
The full text of the EU declaration of conformity is available at the following internet address:
www.philips.com/support
Note: The features of different models may vary. Some models may not be equipped with Bluetooth or NFC.
The following symbols may appear on the product: Read Operator's Manual.

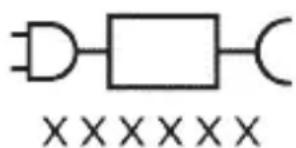
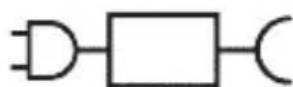
Detachable Power Supply Part: The "xxxxxx" indicates the model number of the approved chargers to be used. (TCBxxxx, HX6100, HX6110, HX6160 or WAAxxxx)
Intended use
ProtectiveClean power toothbrushes are intended to remove adherent plaque and food debris from the teeth to reduce tooth decay and improve and maintain oral
health. ProtectiveClean power toothbrushes are intended for personal use. Use by children should be with adult supervision.
Your Philips Sonicare (Fig 1.)
1 Handle 2 Power on/off button 3 Brush Head Replacement Reminder 4 Battery indicator
Accessories:
5 Brush head cap 6 Smart brush head(s) 7 Charging base 8 Travel case 9 UV sanitizer and charger
Note: Accessories included may vary based on the model purchased.
Getting started
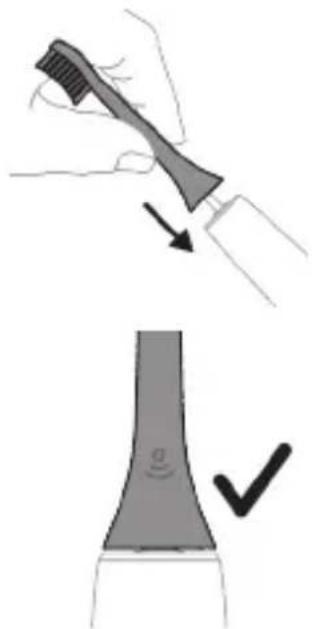
1 Align the brush head so the bristles point in the same direction as the front of the handle. 2 Firmly press the brush head down onto the metal shaft until it will not go any further.
Note: It is normal to see a slight gap between the brush head and the handle.
Using your Philips Sonicare toothbrush
If you are using your Sonicare toothbrush for the first time, it is normal to feel more vibration than when using a non-electric toothbrush. It is common for first-time users to apply too much pressure. Only apply gentle pressure and let the toothbrush do the brushing for you. Please follow the brushing instructions below for the best
experience.
For models without intensities
To help you transition to your new Sonicare power toothbrush, it comes with the EasyStart feature activated. This feature gently increases the power over the first 14 brushings to help you adapt to brushing with a Philips Sonicare toothbrush.
For models with intensities
To help you transition to your new Sonicare power toothbrush, use a lower setting for the first 1-2 weeks then transition to a higher setting.
Brushing instructions
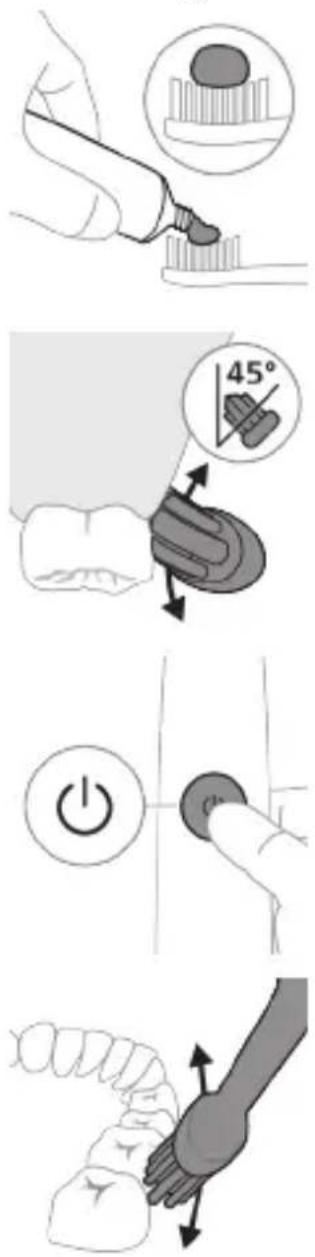
1 Wet the bristles and apply a small amount of toothpaste.
2 Place the toothbrush bristles against the teeth at a slight angle (45 degrees), pressing firmly to make the bristles reach the gumline or slightly beneath the gumline.
Note: Keep the center of the brush in contact with the teeth at all times.
3 Press the power on/off button to switch on the Philips Sonicare.
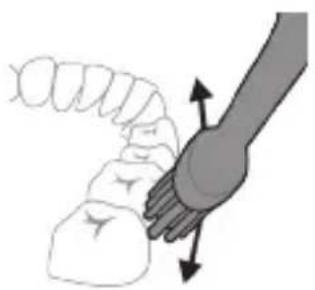
4 Gently keep the bristles placed on the teeth and in the gumline. Brush your teeth with small back and forth motion so the bristles reach between the teeth. Continue this motion throughout your brushing cycle.
Note: The bristles should slightly flare. It is not recommended to scrub as you would with a manual toothbrush.
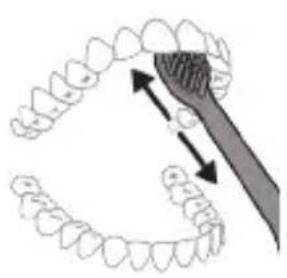
Note: If you apply too much pressure, you will be alerted by a change in vibration of the handle and the brush head replacement reminder flashing amber.
5 To clean the inside surfaces of the front teeth, tilt the brush handle semi-upright and make several vertical overlapping brushing strokes on each tooth. 6 After you have completed the brushing cycle, you can spend additional time brushing the chewing surfaces of your teeth and areas where staining occurs. You can also brush your tongue, with the toothbrush switched on or off, as you prefer.
Note: Your Philips Sonicare toothbrush is safe to use on braces (brush heads wear out sooner when used on braces) and dental restorations (fillings, crowns, veneers) if they are properly adhered and not compromised.
QuadPacer
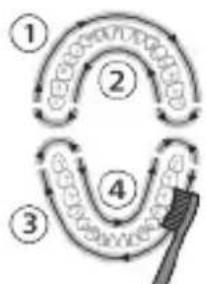
To make sure you brush evenly throughout the mouth, divide your mouth into 4 sections using the QuadPacer feature. The QuadPacer divides the brushing time into 4 equal segments and indicates when you should move to the next area. The segments are indicated with a brief pause in vibration. The toothbrush automatically stops at the end of the brushing session.
Modes
Your power toothbrush is equipped with Clean mode.
Clean
Benefit: For exceptional everyday clean
Recommended intensity level (specific models only)
High
Total brushing time: 2 minutes
How to brush: Brush each segment for 30 seconds.
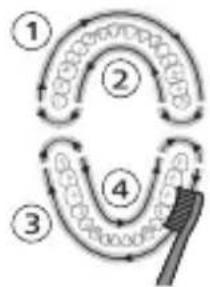
Intensities (specific models only)
Your power toothbrush comes with 2 different intensity settings:
- Low
- High
Note: When you use the toothbrush for the first time, the default intensity is low intensity.
To change intensity levels:
- Press the power on/off button once to turn on the toothbrush.
- Press a second time within 2 seconds to change the intensity.
- Press a third time within 2 seconds to pause.
- After 2 seconds of brushing, pressing the power on/off button again will also pause the toothbrush.
BrushSync technology
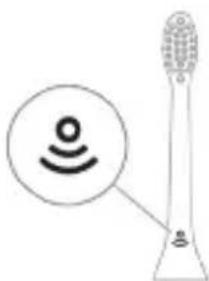
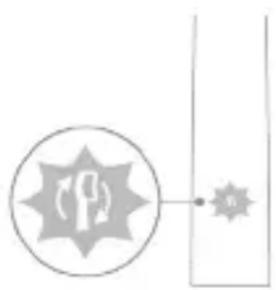
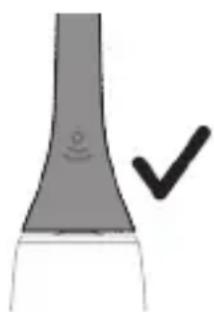
BrushSync technology enables your brush head to communicate with your handle using a microchip. The symbol at the bottom of the brush head indicates that the brush head is equipped with this technology. BrushSync technology enables:
Brush Head Replacement Reminder Philips Sonicare offers a wide range of smart brush heads, equipped with BrushSync technology. To explore our full range of toothbrush brush heads, and find the brush head that is best for you, go to
www.philips.com/toothbrush-heads for more information.
Features
- Pressure Sensor Feedback
- Quadpacer
- SmarTimer
- EasyStart
- Brush Head Replacement Reminder
Pressure Sensor Feedback
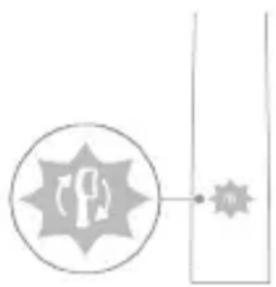
Your Sonicare toothbrush measures the pressure you apply while brushing, to protect your gums and teeth from damage.
If you apply excess pressure, the handle changes its vibration and the brush head replacement reminder icon flashes amber until you reduce the pressure.
Note: Your product comes with the Pressure Sensor activated. To deactivate this feature (see 'Activating or deactivating features').
Quadracker
The QuadPacer is an interval timer that helps you to brush evenly through the mouth by dividing your mouth into 4 sections. (see 'Brushing instructions')
SmarTimer
The SmarTimer indicates that your brushing cycle is complete by automatically switching off the toothbrush at the end of the brushing cycle.
Dental professionals recommend brushing no less than 2 minutes twice a day.
Note: If you press the power on/off button after you started the brushing cycle, the toothbrush pauses. After a pause of 30 seconds, the SmarTimer resets.
EasyStart
This Philips Sonicare model comes with the EasyStart feature activated (models without intensity options only, models with intensity options can activate the feature). The EasyStart feature gently increases the power over the first 14 brushings to help you get used to brushing with the Philips Sonicare.
Disclaimer
When the Philips Sonicare toothbrush is used in clinical studies, it must be used in clean mode at high intensity with the handle fully charged and the EasyStart feature deactivated.
To deactivate or activate EasyStart (see 'Activating or deactivating features').
Brush Head Replacement Reminder
Your Philips Sonicare is equipped with BrushSync technology that tracks the wear of your brush head.
Note: This feature only works with Philips Sonicare smart brush heads with BrushSync technology.
1 When you attach a new smart brush head for the first time, the handle recognizes that you have a Philips brush head with BrushSync technology and begins tracking brush head wear. 2 Over time, based on the pressure you apply and the total time the brush head has been used, the handle tracks brush head wear in order to determine the optimal time to replace your brush head. This feature guarantees the best cleaning and care of your teeth. 3 When the brush head replacement reminder indicator lights up amber, you should replace your brush head.
All smart brush heads come with the brush head replacement reminder feature activated. To deactivate the brush head replacement reminder see 'Activating or deactivating features'.
Activating or deactivating features
You can activate or deactivate the following features of your toothbrush:
- EasyStart
- Brush Head Replacement Reminder - Pressure Sensor Feedback
Note: You can only activate or deactivate the brush head replacement reminder when a smart brush head is on the handle.
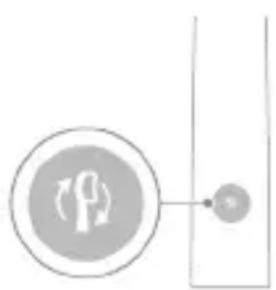
Step 1: Place the handle on the plugged in charger.
| Step 2: Press and hold power on/off button for: | ||
| EasyStart Brush Head | Pressure Sensor | |
| Replacement | Feedback | |
| Reminder | ||
| Up to 3 seconds Up to 5 seconds Up to 7 seconds | ||
| ↓ ↓ ↓ | ||
| Step 3: Let go of the power on/off button when you hear: | ||
| 1 beep 1 beep and then | 1 beep, 2 beeps and | |
| 2 beeps | then 3 beeps | |
| ↓ ↓ ↓ | ||
| If you see the battery indicator and the Brush Head Replacement Reminder light flash green 2 times and hear 3 tones from low to high, then the feature has been activated. | ||
| OR | ||
| If you see the battery indicator and Brush Head Replacement Reminder light flash amber 1 time and hear 3 tones high to low, then the feature has been deactivated. | ||
UV sanitizer
Note: Accessories included may vary based on the model purchased.
With the UV sanitizer you can clean your brush head after every use.
Unplug the sanitizer, discontinue use and call Consumer Care if:
- The UV light bulb remains on when the door is open.
- The window is broken or missing from the sanitizer.
- The sanitizer gives off smoke or a burning smell while it is operating.
Note: UV light can be harmful to the human eye and skin. This device should be kept out of reach of children at all times.
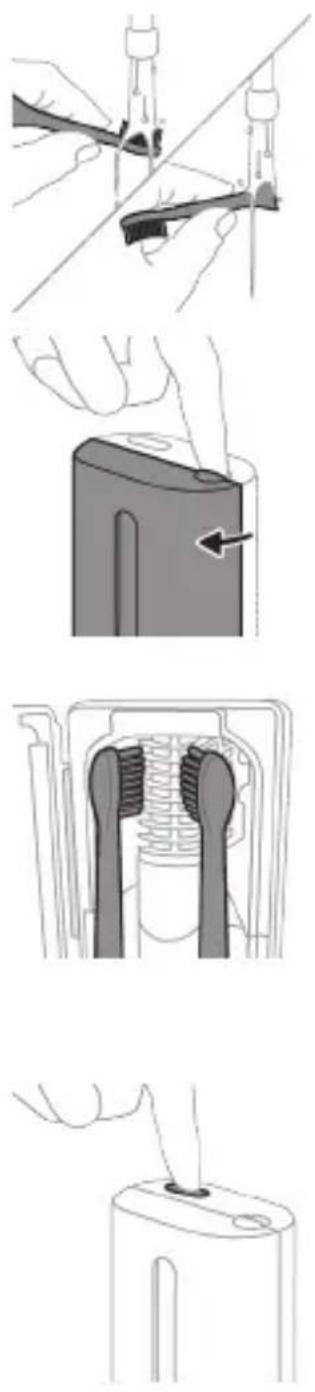
1. After brushing, rinse the brush head and shake off excess water.
Warning: Make sure that the brush head cap is not on the brush head when the brush head is being cleaned in the sanitizer.
2. Place your finger in the door recess on top of the sanitizer and pull open the door. 3. Place the brush head on one of the 2 pegs in the sanitizer with the bristles facing the light bulb.
Note: Only clean Philips Sonicare snap-on brush heads in the sanitizer.
Note: Do not clean Philips Sonicare for Kids brush heads in the sanitizer.
4. Make sure the sanitizer is plugged into a live outlet of appropriate voltage. 5. Close the door and press the green power on/off button once to select the UV clean cycle.
Note: You can only switch on the sanitizer if the door is properly closed.
Note: The sanitizer stops operating if you open the door during the sanitizer cycle.
Note: The sanitizer cycle takes approximately 10 minutes and then switches off automatically.
The sanitizer is in operation when the light glows through the window.
Charging and battery status
This Philips Sonicare toothbrush is designed to provide at least 28 brushing sessions, each session lasting 2 minutes (14 days if used twice per day) on a fully charged battery. The battery indicator shows the battery status when you complete the 2-minute brushing session, when you pause the toothbrush, or while it is charging.
Note: It can take up to 24 hours to fully charge the battery before first use, but you can use the Philips Sonicare toothbrush before it is fully charged.
Charging
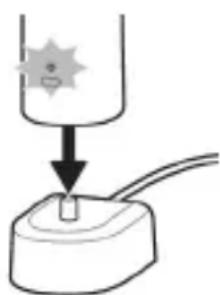
Charging on charger or UV Sanitizer
1 Plug the charger or sanitizer into an electrical outlet. 2 Place the handle on the charger or sanitizer.
- The handle emits 2 short beeps to confirm that the handle is placed properly.
- The flashing light of the battery indicator shows that the toothbrush is charging.
- When the handle is fully charged on the charger, the battery indicator lights up green for 30 seconds and then switches off.
Battery status
Battery status (handle on plugged-in charger)
When the handle is placed on the charger, the battery indicator shows the battery level.
Battery status (handle on plugged in charger/charging travel case)
When the handle is placed on the charger or in the charging travel case, the battery indicator shows the battery level.
Battery status Battery indicator
Charging Flashes green
Full Solid green for 30 seconds and then
switches off
Battery status (when handle is not placed on charger)
When the toothbrush is awake, the battery indicator at the bottom of the handle shows the battery level.
Battery status Battery indicator Sound
| Full Solid green - | |
| Partially full Flashes green - | |
| Low Flashes amber The handle emits 3 | beeps after brushing |
| Empty Flashes amber The handle emits 2 sets | of 5 beeps after brushing |
| Note: To save energy, the battery indicator will switch off when not in use. | |
| Note: When the battery is completely empty, the toothbrush switches off. Place the toothbrush on the charger to charge it. | |
| Note: To keep the battery fully charged at all times, you may keep your toothbrush on the charger when not in use. | |
| Battery status (when handle is not placed on charger/in charging travel case) | |
| When the toothbrush is awake, the battery indicator at the bottom of the handle shows the battery level. | |
| Battery status Battery indicator Sound | |
| Full Solid green - | |
| Partially full Flashes green - | |
| Low Flashes amber The handle emits 3 | beeps after brushing |
Battery status Battery indicator Sound
Empty Flashes amber The handle emits 2 sets
of 5 beeps after brushing
Note: To save energy, the battery indicator will switch off when not in use.
Note: When the battery is completely empty, the toothbrush switches off. Place the toothbrush on the charger or in the charging travel case to charge it.
Note: To keep the battery fully charged at all times, you may keep your toothbrush on the charger when not in use.
Cleaning
Toothbrush handle
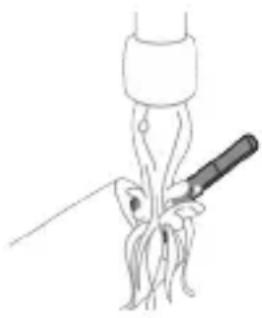
1 Remove the brush head and rinse the metal shaft area with warm water. Make sure you remove any residual toothpaste.
Caution: Do not push on the rubber seal on the metal shaft with sharp objects, as this may cause damage.
2 Wipe the entire surface of the handle with a damp cloth.
Note: Do not tap the handle on the sink to remove excess water.
Brush head
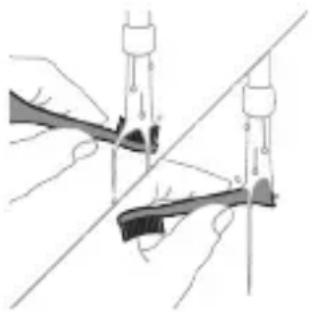
1 Rinse the brush head and bristles after each use. 2 Remove the brush head from the handle and rinse the brush head connection with warm water at least once a week. Rinse the travel cap as often as needed.
Charger
1 Unplug the charger before you clean it. 2 Wipe the surface of the charger with a damp cloth.
Travel case
Rinse with warm water and use a damp cloth to clean inside of travel case.
Cleaning the Sanitizer
Warning: Do not immerse the sanitizer in water or rinse it under the faucet.
Warning: Do not clean the sanitizer when the UV light bulb is hot.
For optimal effectiveness, it is recommended to clean your sanitizer weekly.
1 Unplug the sanitizer. 2 Pull the drip tray straight out. Rinse the drip tray and wipe it clean with a damp cloth. 3 Clean all interior surfaces with a damp cloth. 4 Remove the protective screen in front of the UV light bulb.
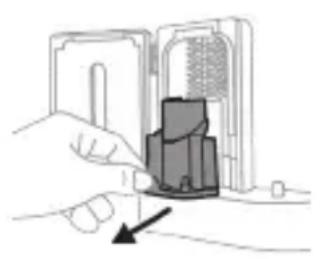
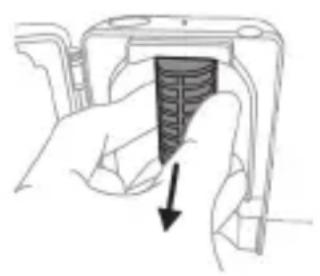
To remove the screen, grasp the edges next to the snaps, gently squeeze and pull out the protective screen.
5 Remove the UV light bulb.
To remove the light bulb, grasp it and pull it out of the metal clasp.
6 Clean the protective screen and the UV light bulb with a damp cloth. 7 Reinsert the UV light bulb.
To reinsert the light bulb, align the bottom of the light bulb with the metal clasp and push the bulb into the clasp.
8 Reinsert the protective screen. To reinsert the screen, align the pegs on the screen with the slots on the reflective surface near the UV light bulb. Push the screen straight into the slots on the sanitizer. 9 Place the drip tray back in the UV sanitizer. 10 After cleaning, make sure the sanitizer is completely dry before you connect it to the mains.
Storage
If you are not going to use the product for an extended period of time, unplug it from the electrical outlet, clean it and store it in a cool and dry place away from direct sunlight.
Replacement
Replace Philips Sonicare brush heads every 3 months to achieve optimal results. Use only Philips Sonicare replacement brush heads.
Locating the model number
Look on the bottom of the Philips Sonicare toothbrush handle for the model number (HX64XX, HX68XX).
Warranty and support
If you need information or support, please visit www.philips.com/support or read the international warranty leaflet.
Warranty exclusions
What is not covered under warranty:
- In mouth attachments including brush heads and nozzles.
- Damage caused by use of unauthorized replacement parts or unauthorized brush heads.
- Damage caused by misuse, abuse, neglect, alterations or unauthorized repair.
- Normal wear and tear, including chips, scratches, abrasions, discoloration or fading. UV light bulb.
Recycling
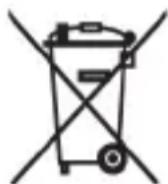
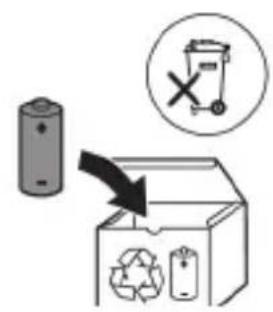
- This symbol means that electrical products and batteries shall not be disposed of with normal household waste.
- Follow your country's rules for the separate collection of electrical products and batteries.
- The UV light bulb of the sanitizer contains mercury. Do not throw the UV light bulb away with the normal household waste at the end of its life. Hand it in at an official collection point for recycling.
Removing the rechargeable battery
The built-in rechargeable battery must only be removed by a qualified professional when the appliance is discarded. Before removing the battery, make sure that the battery is completely empty.
Take any necessary safety precautions when you handle tools to open the appliance and when you dispose of the rechargeable battery. Be sure to protect your eyes, hands, fingers, and the surface on which you work.
When you handle batteries, make sure that your hands, the product and the batteries are dry.
To avoid accidental short-circuiting of batteries after removal, do not let battery terminals come into contact with metal objects (e.g. coins, hairpins, rings). Do not wrap batteries in aluminum foil. Tape battery terminals or put batteries in a plastic bag before you discard them.
To remove the rechargeable battery, you need a towel or cloth, a hammer and a flat-head (standard) screwdriver. Observe basic safety precautions when you follow the procedure outlined below.
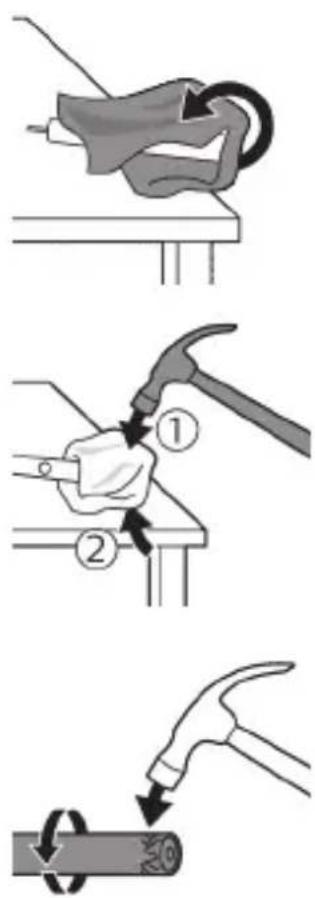
1 To deplete the rechargeable battery of any charge, remove the handle from the charger, turn on the toothbrush and let it run until it stops. Repeat this step until you can no longer turn on the toothbrush. 2 Remove and discard the brush head. Cover the entire handle with a towel or cloth.
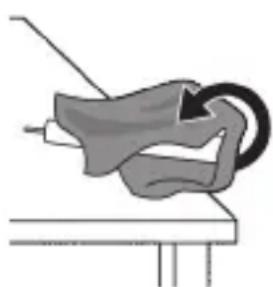
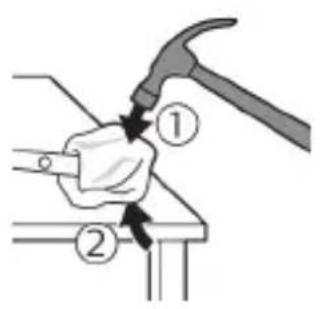
3 Hold the top of the handle with one hand and strike the handle housing 0.5 inch above the bottom end. Strike firmly with a hammer on all 4 sides to eject the end cap.
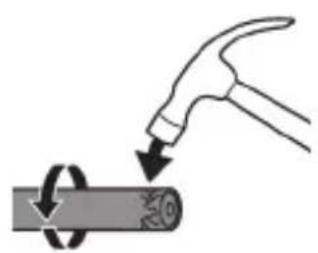
Note: You may have to hit on the end several times to break the internal snap connections.
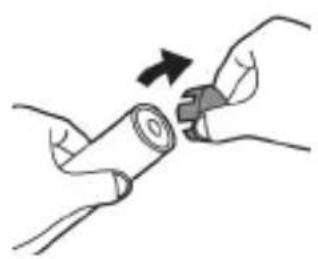
4 Remove the end cap from the toothbrush handle. If the end cap does not release easily from the housing, repeat step 3 until the end cap is released.
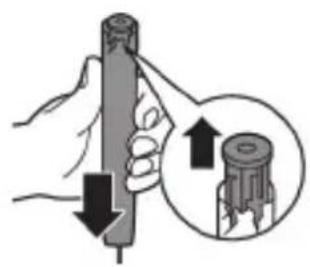
5 Holding the handle upside down, press the shaft down on a hard surface. If the internal components do not easily release from the housing, repeat step 3 until the internal components are released.
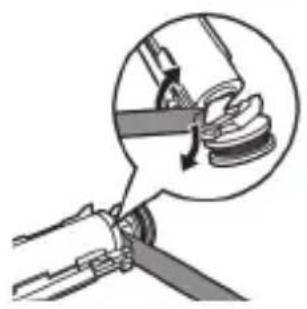
6 Wedge the screwdriver between the battery and the black frame at the bottom of the internal components. Then pry the screwdriver away from the battery to break the bottom of the black frame.
7 Insert the screwdriver between the bottom of the battery and the black frame to break the metal tab connecting the battery to the green printed circuit board. This will release the bottom end of the battery from the frame.
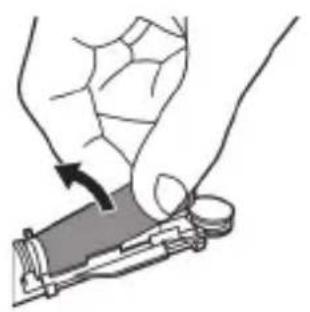
8 Grab the battery and pull it away from the internal components to break the second metal battery tab.
Caution: Be aware of the sharp edges of the battery tabs so as to avoid injury to your fingers.
9 Cover the battery contacts with tape to prevent any electrical short from residual battery charge.
The rechargeable battery can now be recycled and the rest of the product discarded appropriately.
Note: Do not throw away the appliance with the normal household waste at the end of its life, but hand it in at an official collection point for recycling. By doing this, you help to preserve the environment.
Introduction
www.philips.com/support
Note: Features may vary depending on the model. Some models may not be equipped with Bluetooth or NFC.
The following symbols may appear on the product:

Address: www.philips.com/support
www.philips.com/support
Model without intensity regulation
Model with intensity regulation
www.philips.com/support
www.philips.com/support
www.philips.com/toothbrush-heads.
Features
- Pressure sensor feedback
- QuadPacer
- SmarTimer
- EasyStart
- Brush head replacement reminder
Pressure sensor feedback
www.philips.com/support
www.philips.com/support
Note: Features may vary by model. Some models may not be equipped with Bluetooth or NFC.
The following symbols may appear on the product: Read the user manual.


Battery status Battery indicator
Battery status Battery indicator
www.philips.com/support
Website: www.philips.com/support
Using your Philips Sonicare toothpaste
If you are using Sonicare toothpaste for the first time, it is normal to feel more vibration than when using a non-electric toothbrush. First-time users often apply too much pressure. Press gently and let the toothbrush do the cleaning for you. For the best results, follow the brushing instructions.
For models without intensity settings
To help you transition to your new Sonicare power toothbrush, the EasyStart function is activated. This function gradually increases the power of the handle over the first 14 brushing sessions to help you get used to cleaning with the Philips Sonicare toothbrush.
For models with intensity settings
To help you transition to your new Sonicare power toothbrush, use a lower setting for the first 1-2 weeks, then switch to a higher setting.
Brushing instructions
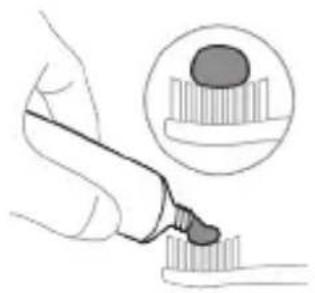
1. Wet the brush and apply a small amount of toothpaste.
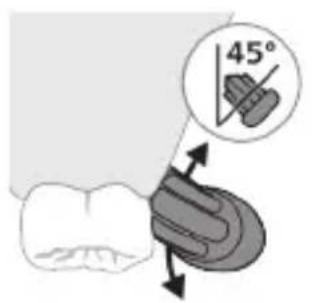
2. Hold the toothbrush at a small (45-degree) angle against the teeth and press firmly so the bristles reach the gum line or slightly below it.
Note: Keep the center of the brush in constant contact with the teeth.
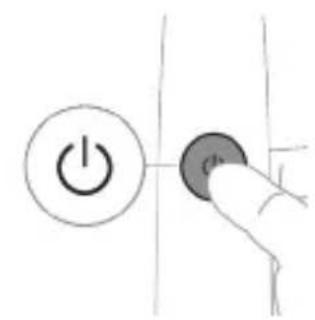
3 Press the on/off button to turn on the Philips Sonicare device.
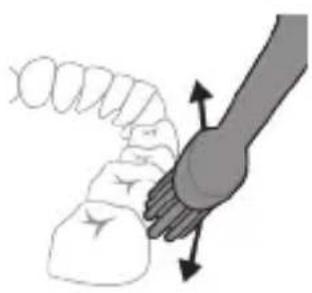
4 Hold the brush gently against the teeth and gum line. Clean your teeth with small back-and-forth movements so the bristles can reach between the teeth. Continue these movements until you have finished cleaning your teeth.
www.philips.com/support
www.philips.com/support
www.philips.com/support
Important safety information
www.philips.com/support
www.philips.com/support
Note: Functions may vary for different models. Some models may not be equipped with "Bluetooth" or "NFC".
www.philips.com/toothbrush-heads For more information.
Functions
- Pressure sensor alert
- Quadpacer
- SmarTimer
- EasyStart Brush head replacement reminder
Pressure sensor alert
Models with intensity levels
Changing the intensity level:
www.philips.com/support
www.philips.com/support
www.philips.com/toothbrush-heads.
Features
www.philips.com/support
Note: Different models may have different features. Some models may not be equipped with Bluetooth or NFC.
The product may contain the following symbols: Read the operator's manual.

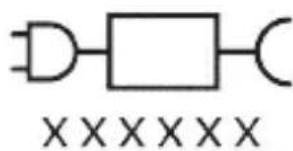
Detachable power supply: The model number indicates the chargers approved for use with "xxxxx". (TCBxxxx, HX6100, HX6110, HX6160 or WAAxxxx)
Intended use
ProtectiveClean electric toothbrushes are intended to reduce plaque and maintain oral health by removing dental plaque and food debris. ProtectiveClean electric toothbrushes are intended for personal use. Children should use them under adult supervision.
Your Philips Sonicare device (Fig. 1.)
1 Handle 2 On/off button 3 Brush head replacement reminder 4 Battery indicator
Explanation:
5 Brush head 6 Brush head(s) 7 Charging base 8 Travel cap 9 UV sanitizer and charger
Note: Accessories may vary depending on the model purchased.
Getting started
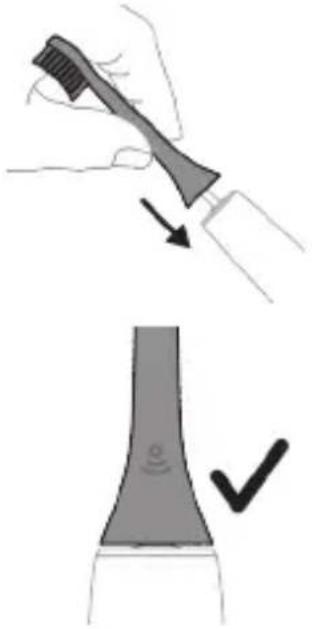
1 Align the brush head so that the bristles point in the same direction as the front of the handle. 2 Press the brush head firmly onto the metal shaft until it stops.
Note: It is normal to see a small gap between the brush head and the handle.
Using your Philips Sonicare toothbrush
If you are using your Sonicare toothbrush for the first time, you may notice more vibration than with a manual toothbrush; this is normal. It is also normal to press too hard when using it for the first time. Apply only light pressure and let the toothbrush do the brushing. For the best experience, follow the brushing instructions below.
For models without intensity settings
Gentle: For daily gentle cleaning
Recommended intensity: High (only on certain models)
Total brushing time: 2 minutes
Brushing method: Brush each segment for 30 seconds.
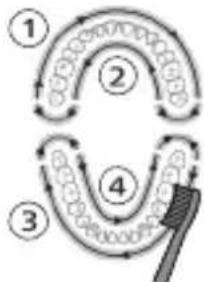
- Brush head replacement reminder
Philips Sonicare offers a wide range of smart brush heads with BrushSync technology. To browse the full assortment of brush heads and find the one that suits you best, please visit the additional
For more information, visit www.philips.com/toothbrushheads.
Features
- Pressure sensor feedback
- QuadPacer
- SmarTimer
- EasyStart
- Brush head replacement reminder
Brush head replacement reminder
Your Philips Sonicare is equipped with BrushSync technology that monitors the wear of the brush head.
Note: This feature works only with Philips Sonicare smart brush heads that have BrushSync technology.
1 When you attach a new smart brush head for the first time, the handle recognizes that you have a Philips BrushSync technology brush head and starts monitoring the wear of the brush head. 2 Over time, based on your brushing pressure and the total time you have used the brush head, the handle monitors its wear to determine the optimal time to replace the brush head. This feature ensures the best cleaning and care for your teeth. 3 When the brush head replacement reminder light turns yellow, you should replace the brush head.
All brush heads come with the brush head replacement reminder feature activated. To deactivate the brush head replacement reminder,
see the section "Activating or deactivating features".
Activating or deactivating features
You can activate or deactivate the following features of your toothbrush:
- EasyStart
- The attachment installation is complete.
- Pressure sensor response
Note: You can adjust or deactivate the attachment installation reminder via the smart attachment settings.
Step 1: Place the holder on the charging dock.
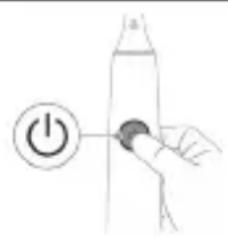
Step 2: Press and hold the on/off button for a while:
| EasyStart Nasadkany çalşyrmagy ýatladyş | Basyş sensory seslenmesi | |
| 3 sekunda çenli 5 sekunda çenli 7 sekunda çenli | ||
| ↓ ↓ ↓ | ||
| Adim 3: Şuny eşideninizde, ac/öçür Düwmesini goyberiñ: | ||
| 1 bipleme 1 bipleme we soñra 2 bipleme | 1 bipleme, 2 bipleme we soñra 3 bipleme | |
| ↓ ↓ ↓ | ||
| Eger batareña görkezijisiniñ we Nasadkany Çalşyrmagy yatladyş cyrasynyñ 2 gezek yüzyl reñkde yanyp sönenini gõrseñiz we caladan gata 3 signal eşitseñiz, onda ol aýratynlyk isjeñleşen bolyar. | ||
| YA-DA | ||
| Eger batareña görkezijisiniñ we Nasadkany Çalşyrmagy yatladyş cyrasynyñ 1 gezek sary reñkde yanyp sönenini gõrseñiz we gatydam cala 3 signal eşitseñiz, onda ol aýratynlyk deaktiwirlenen bolyar. | ||
Ultraviolet disinfectant
Note: The accessories may vary depending on the model purchased.
You can clean the brush heads with the ultraviolet cleaner after each use.
If the following situations occur, unplug the disinfectant, stop using it, and call customer service:
- The ultraviolet light stays on while the lid is open. - The disinfectant's window is broken or missing. - The disinfectant emits heat or a burning smell while operating.
Note: The ultraviolet light can be harmful to human eyes and skin. Always keep this device out of reach of children.
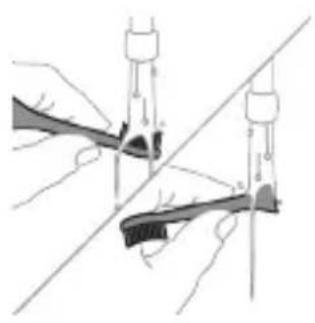
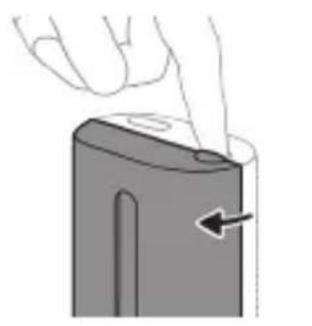
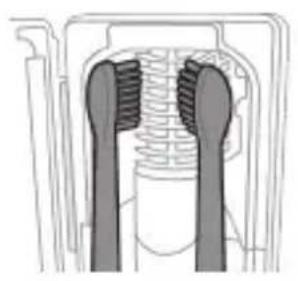
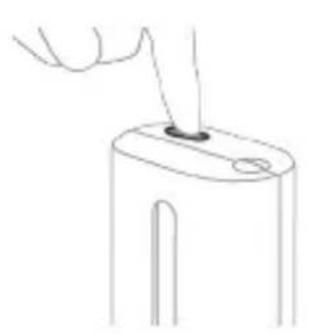
1 After brushing, rinse the brush head and shake off excess water.
Warning: While the attachment is being cleaned in the disinfectant, the attachment's cap (should be on the attachment) is not present.
2 Place your finger in the groove on the cleaner's lid and push to open.
Place the 2 brushes in the cleaning positions in the holder, with the brush heads facing the UV light.
Note: Only clean Philips Sonicare brush heads in the cleaner.
Note: Do not clean Philips Sonicare for Kids brush heads in the disinfectant.
4 Make sure the cleaner is placed on a stable surface and plugged into a working electrical outlet. 5 Close the lid and press the on/off button once to select the UV cleaning cycle.
Note: You can only operate the disinfectant when the lid is properly closed.
Note: If the lid is opened during the disinfection cycle, the disinfectant will stop working.
Note: The disinfection cycle lasts approximately 10 minutes and then turns off automatically.
The blue light visible through the window indicates that the cleaner is working.
Charging and battery status
This Philips Sonicare toothbrush is designed for at least 28 brushing sessions, with each session lasting 2 minutes on a full charge (if used twice
a day, that's 14 days). The battery indicator shows the battery status when you pick up the toothbrush or while it is charging after a 2-minute brushing session.
Note: Before first use, a full charge may take up to 24 hours, but you can use the Philips Sonicare toothbrush before it is fully charged.
Charging
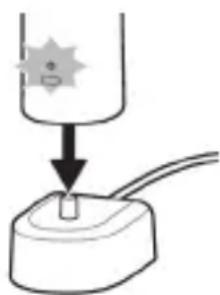
Charging in the charger or UV disinfectant
1 Plug the charger or disinfectant into an electrical outlet. 2 Place the toothbrush handle in the charger or disinfectant. - The handle beeps twice to confirm it is correctly placed in the charger. - The battery indicator light turns on to show that the handle is charging. - When the handle is fully charged in the charger, the battery indicator lights up green for 30 seconds and then turns off.
Battery status
Battery status (when the handset is placed on the charging cradle)
When placed on the charging cradle, the battery indicator shows the battery level.
Battery status (when the handset is connected to a charging cradle or travel charger)
When placed on the charging cradle or travel charger, the battery indicator shows the battery level.
Battery status Battery indicator
Charging Flashes green then turns off
Full Steady green for 30 seconds
then turns off
Battery status (when the handset is not on the charging cradle)
When the handset is idle, the battery indicator on the bottom of the handset shows the battery level.
Battery status Battery indicator Sound
| Doly İyanyp duran Yaşyl - | |
| Bölekleşin doly Yaşyl reşnde:yanyp sönyar | - |
| Pes Sary reşnde:yanyp sönyar | Tutawaç çotgalamadan soğ 3 bipleme sesini çykarýar |
| Boş Sary reşnde:yanyp sönyar | Tutawaç çotgalamadan soğ 2 tapgyr 5 bipleme sesini çykarýar |
| Bellik: Energiya tyşytlamak üçın, batareya gürkezijisi ulanylmayán wagty öçer. | |
| Bellik: Batare'yanyǔn zarŷende, disçotgasy öçýar. Disçotgasyny zarŷadnige yerleşdirip, zarŷad beriñ. | |
| Bellik: Batare'yanyǔn zarŷadny hemîşde doly saklamak üçın, disçotgañyzy ulanmayán wagtyñyz zarŷadnikde goþuñ. | |
| Batareya yagdaýy (tutawaç zarŷadnikde/syğahat ceholynda goþulmadyk wagty) | |
| Disçotgasy oýa wagty, tutawajyǔn asagyndaky batareya görkezijisi batare'yanyǔn derejesini gürkezýar. | |
| Batareya yagdaýy Batareya gürkezijisi Ses | |
| Doly İyanyp duran:yasyl - | |
| Bölekleşin doly Yaşl reşnde:yanyp sönyar | - |
Battery status Battery indicator Sound
| Pes Sary reñkde yányp | sönýär | Tutawaç çotgalamadan soñ 3 biplème sesini cykarýar |
| Boş Sary reñkde yányp | sönýär | Tutawaç çotgalamadan soñ 2 tapgyr 5 biplème sesini cykarýar |
| Bellik: Energiña tygşytlamak üçın, batareya gürkezijisi ulanylmayán wagty öçer. | ||
| Bellik: Batareýanyǔn zarþady doly;cokende, discotgasy öçýär. Discotgasyny zarþadnikde yá-da zarþad beris syýahat ceholynda goþup zarþad beriñ. | ||
| Bellik: Batareýanyǔn zarþadyny hemipse doly saklamak üçın, discotgañzy ulanmayán wagtyñyz zarþadnikde goþuñ. | ||
Cleaning
Handset of the base unit
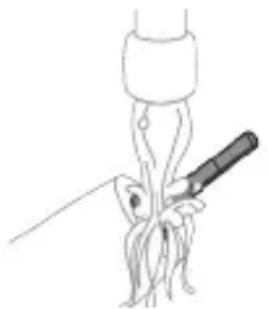
1 Rinse the attachment and the metal part under warm water after each use. Do not leave any toothpaste residue on the attachment. Be careful: Do not clean the rubber seal on the metal part with sharp objects, as this could damage it. 2 Wipe the entire surface of the handle with a damp cloth.
Note: Do not tap the handle against the sink to remove excess water.
Attachment
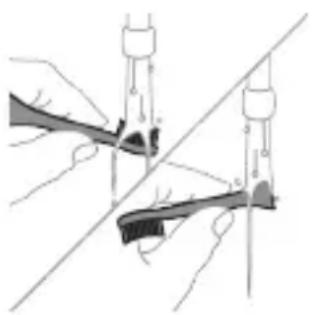
1 Rinse the attachment and the bristles after each use. 2 At least once a week, detach the attachment from the handle and rinse the connection point of the attachment under warm water. Rinse the travel cap as often as necessary.
Charger
1 Before cleaning the charger, unplug it from the power outlet. 2 Wipe the surface of the charger with a damp cloth.
Travel cap
3a MoDJIH 6e3 HnBa Ha nHTeH3NBHOCT
3a BaWe yIoo6CTBO npn npemHaBaHe KbM HOBaTa Bn yEtKa 3a 3b6n Sonicare, Tc ce npedlaRa cakTbnpaHa fynKznaEasyStart. FynKznaTa yBelenuaba nocTepeHNO
MOUHOCTTa Ha pa6oTa npn nbpBnte 14 ceaHca, 3a da BV NOMORHe Da npuBnKHeTe KbM ueTKaHTo C ueTKa 3a 3b6n Philips Sonicare.
3a MoDJIc HnBa Ha NHTeH3NBHOCT
HnBaHa nHTeH3INBHOCT (cAmO 3a onpeJeHmOdeJI)
Baшаразеелктуеска четka 3a 3b6и ce npedлага c 2 pa3лчн ИВа на ИНTeH3ИВHOCT:
- HUCKO
- Bucoko
3a6eJekka: Pn npBpTO n3noJ3BaHe Ha BaShaTa yeTk a 3b6n HacToKata no nOpa3bnpaHe e HnCKo HnBO Ha INnTeH3NBHOCT.
3aДа npOMeHnte HnBaTa Ha nHTeH3nBHOCT:
- HatncheTe BeHbX 6yToHa 3a BKJIIOUaHe/IN3KJIIOUaHe, 3a Da BKJIOUHiTe YeTKaTa 3a 3b6n.
- HaTnchHe T BTOpN nB T B paMKTe Ha 2 cekyHdN, 3a Da npOMeHnte HHTeH3NBHOCTTa.
- HaTnCHeTe TpeTn PbT B paMKInTe Ha 2 cekyHdN, 3a da NoCTaBInTe Ha nay3a.
- CnEi 2 cekyHn YeTKaHe NOBTOpHOTo HaTnCKaHe Ha 6byToHa 3a BKJIIOUaHe/IN3KJIIOUaHe NOCTABr YeTKaTa 3a 3b6n Ha nay3a.
Texholognia BrushSync
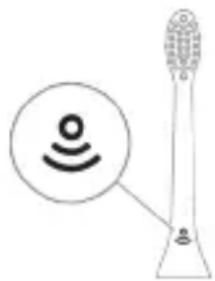
TexHOrnra BrushSync daBa Bb3MOxHOCT Ha rJaBnte HaYeTKnte Da n3npaat CnHaJI Ndo npBXKaTa NocpeiCTBOM MnkpouPi. CmBOJbT BdoJHaTa Yact Ha rJaBaTa Ha YeTKata NOKa3Ba, Ye rJaBaTa e Cha6deHa c Ta3N TexHOrnra.
TexHojornaBrushSyncdaBaBb3MOxHocT3a:
- Hanomnhe 3a smHa Ha rIaBaTa Ha yeTkata Philips Sonicare npedlaRa shIpoka rama ot INHeJIrEHTHn rIaBn HaYeTKn,ObOpyDbAHn C texHoJorRn BrushSync.3a da pa3rIeJaTe cJaIaTa Hn rama OT rIaBn Ha YeTKn Ida OTKpneTe rIaBaTa, KOrTo e Han-Do6pa 3a Bac,OTndeTe Ha
www.philips.com/toothbrush-heads 3a NOBueHΦOpMaζη.
Функции
- O6paTHa Bpb3ka OT daTUnka 3a HaTnCK
- QuadPacer
- SmarTimer
- EasyStart
- Warning: Do not replace the brush head while the handle is on.
Pressure sensor feedback
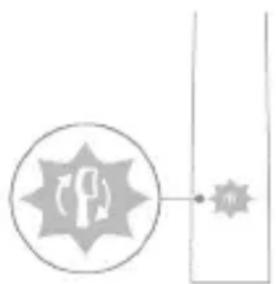
Your Sonicare toothbrush measures the pressure you apply while brushing, to protect your gums and teeth from damage.
If you press too hard, the handle will change vibration intensity and the reminder to replace the brush head will blink in the handle, until you reduce the pressure.
Note: Your product is shipped with the pressure sensor activated. To deactivate this function (see "Activating or deactivating functions").
QuadPacer
QuadPacer is an interval timer that helps you brush your teeth evenly by dividing your mouth into 4 zones. (See "Brushing instructions")
SmarTimer
The SmarTimer shows that your brushing cycle is complete by automatically turning off the toothbrush at the end.
Dentists recommend brushing your teeth for at least 2 minutes twice a day.
Note: If you press the power on/off button, the toothbrush pauses. After a pause of 30 seconds, the SmarTimer resets.
EasyStart
The Philips Sonicare toothbrush is supplied with the EasyStart function activated (only for models without an intensity setting; for models with an intensity setting, the function can be activated). The EasyStart function gradually increases the power of operation during the first 14 sessions, to help you get used to brushing with Philips Sonicare.
Disclaimer
When the Philips Sonicare toothbrush is used in clinical studies, it must be used in Clean mode with high intensity setting, which is the most recommended, and the EasyStart function must be deactivated.
To deactivate or activate EasyStart (see "Activating or deactivating functions").
Brush head replacement reminder
Your Philips Sonicare is equipped with BrushSync technology, which monitors the wear of the brush head.
Note: This function works only with Philips Sonicare smart brush heads with BrushSync technology.
1 When you attach a new smart brush head for the first time, the handle recognizes that you have a Philips brush head with BrushSync technology and starts monitoring the wear of the brush head.
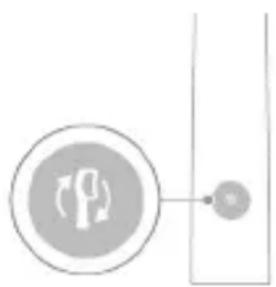
2 Over time, depending on the pressure applied and the total usage time of the brush head, the handle monitors the wear of the brush head to determine the optimal time for replacing the brush head. This function guarantees the best cleaning and care for your teeth. When the brush head replacement reminder light flashes in the handle, you should replace the brush head.
All new smart brush heads are delivered with the brush head replacement reminder function activated. To deactivate the brush head replacement reminder, see "Activating or deactivating functions".
Activating or deactivating functions
You can activate or deactivate the following functions of your toothbrush:
- EasyStart
- Brush head replacement reminder
- Pressure sensor feedback
Note: You may activate or deactivate the automatic switch-off of the appliance only when the appliance has an intelligent head.
Step 1: Place the brush in the charging device included in the contact.
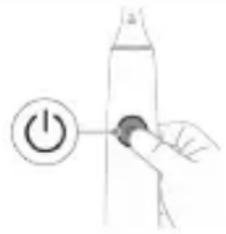
Step 2: Press and hold the button for on/off for:
Transit I or II
If you need information or support, visit www.philips.com/support or read the international warranty leaflet.
Removing the rechargeable battery
The rechargeable battery can only be removed by a qualified specialist when the device is discarded. Before removing the battery, make sure the battery is completely discharged.
Take all necessary safety measures when handling tools for discarding the device and when disposing of the rechargeable battery. Wear protective glasses, gloves, and apron, as well as the surface on which you work.
When handling batteries, make sure your hands, the product, and the batteries are dry.
To avoid accidental short-circuiting of the batteries after removal, do not let the battery terminals come into contact with metal objects (such as coins, nails, rings). Do not put batteries in an aluminum foil. Wrap the battery terminals and place the batteries in a plastic bag before disposing of them.
Removing the rechargeable battery
Discharge the rechargeable battery by running the appliance until it stops. Then remove the brush head and the brush. Use a screwdriver and a flat (standard) screwdriver. Follow the basic safety measures when performing the procedure described below.
1 To fully discharge the rechargeable battery, remove the brush from the charging device, turn on the appliance and let it run until it stops. Repeat this step until the appliance can no longer be turned on.
2 Remove and discard the brush head. Cover the brush with a cloth or a piece of plastic.
3 Hold the upper part of the brush with one hand and hit the body of the brush about 1 cm above the lower edge. Hit hard with a hammer on all 4 sides to remove the end cap.
3. Gently pull the handle away from the appliance to release the internal catches.
4. Pull the handle away from the body of the toothbrush. If it does not come off the body easily, repeat step 3 until it is released.
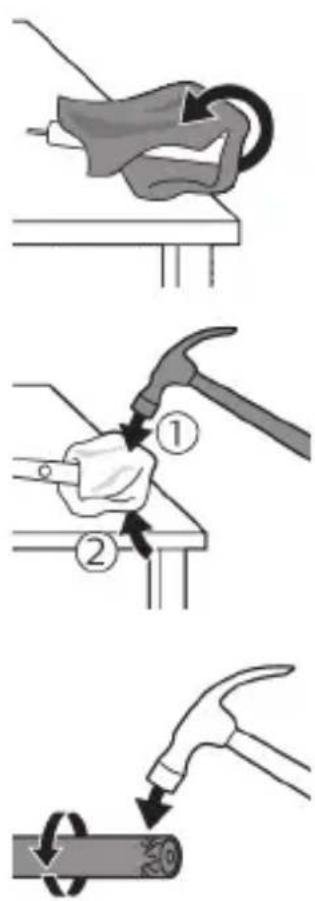
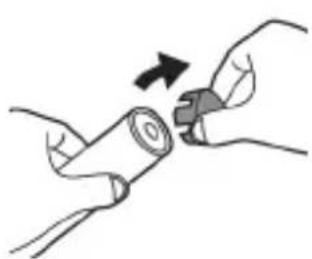
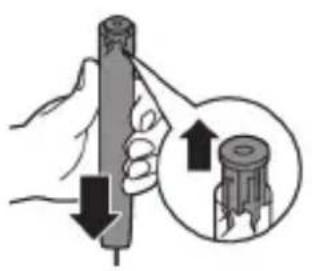
5. While holding the handle with the lower part facing up, press it against a hard surface. If the internal components do not release easily from the body, repeat step 3 until they are released.
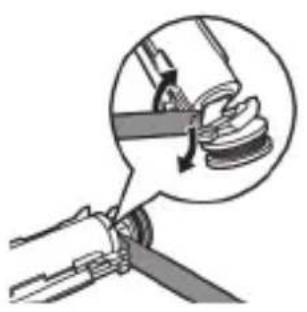
6. Insert the screwdriver between the battery and the black frame at the lower part of the internal components. Then pry the screwdriver away from the battery to lift the lower part of the black frame.
7. Insert the screwdriver between the lower part of the battery and the gray frame to lift the metal clamp connecting the battery to the green circuit board. This will release the lower end of the battery from the frame.
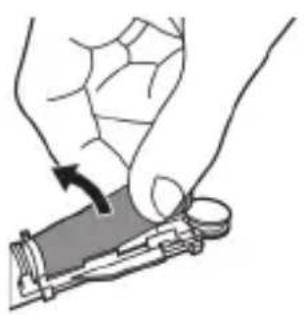
8. Grasp the battery and pull it out of the internal components to lift the second metal clamp of the battery.
Caution: Be careful of the sharp edges of the battery clamps to avoid cutting your fingers.
9. Cover the battery contacts with tape to prevent short circuits from residual battery charge.
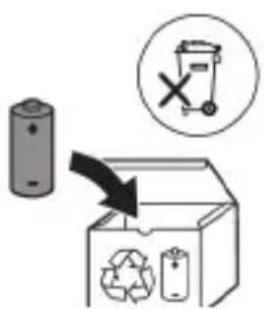
The rechargeable battery can be recycled, and the remaining part of the product can be disposed of properly.
Note: At the end of the product's lifespan, do not dispose of it with normal household waste, but take it to an official collection point for recycling. In this way, you help protect the environment.
Kyrgyz
Philips Sonicare electric toothbrush!
This toothbrush is designed to help remove plaque and improve gum health. Sonicare's unique sonic technology, combined with clinically proven oscillating movements, ensures effective cleaning and care for your teeth and gums.
For additional support, visit: www.philips.com/support
Product information
Use only the accessories supplied with the device. Use only the batteries and charging cables supplied with the device. Do not use the device if the power cord or plug is damaged. Using the device in a way not specified may cause a hazard.
Experts
- Keep the device away from water and disinfectants. Do not immerse the device in water or other liquids. Use a soft, dry cloth to clean the device.
- Children should be supervised to ensure that they do not play with the appliance. This appliance can be used by children aged from 8 years and above and persons with reduced physical, sensory or mental capabilities or lack of experience and knowledge if they have been given supervision or instruction concerning use of the appliance in a safe way and understand the hazards involved. Children shall not play with the appliance. Cleaning and user maintenance shall not be made by children without supervision.
- Only use the accessories and parts supplied with the Philips device. Only use the power adapter supplied with the device. If the power cord is damaged, it must be replaced by a Philips service center or a similarly qualified person.
- If the device is dropped, check it for damage. If the device is damaged, stop using it and contact the service center for inspection. Do not use the device if it has a cracked housing or if it has been exposed to moisture.
- Do not use the device near water or in a bathroom. Do not use the device with wet hands.
- Do not use the device if it has been dropped or damaged. The device is intended for household use only.
- Keep the device out of reach of children.
- If the lamp starts flashing, stop using the device. The UV light can be harmful to the eyes and skin.
- Use the device only with the original power adapter.
- Do not use the device if the UV lamp is broken.
- Stop using the device if the cord is damaged or frayed. Replace the damaged cord immediately or contact the service center.
- Do not use oil-based or coconut oil-based lubricants. They can damage the brush head and cause bristles to fall out. If the brush head becomes too hot, if it causes pain or discomfort, or if the bristles become deformed, stop using the brush and contact Philips. If you have had oral or gum surgery within the last 2 months, consult your doctor before using the brush. If you have a cardiac pacemaker or other implanted device, consult your doctor before using the brush.
- If you have any medical concerns, consult your doctor before using the brush. This brush is intended for cleaning teeth and is available at dental clinics and other locations.
Battery safety instructions
This brush is intended for use by adults. Read the instructions carefully before using the brush and its accessories. Improper use can cause injury. Accessories may be damaged or become unusable. Use only Philips Sonicare accessories and replacement parts. Use only the charging base model TCBxxxx, HX6100, HX6110, HX6160, or WAAxxx. Keep the brush and batteries away from heat and direct sunlight. If the brush becomes unusually hot, emits an odor, or changes color, stop using it and contact Philips. Do not place the brush or its batteries in a microwave or near a stove. Do not attempt to open, modify, or repair the brush or batteries. Keep batteries away from fire and do not dispose of them in fire. Do not short-circuit batteries.
- Batteries that are not rechargeable should be used. When the battery is depleted, it should be replaced in the proper manner. See the operating section.
- If batteries leak or are damaged, remove them immediately. In such cases, wash your hands and seek medical help if necessary.
- When inserting batteries, observe the correct polarity. Do not mix old and new batteries or different types of batteries. Avoid short-circuiting battery terminals with metal objects (such as coins, paper clips, keys). Do not wrap batteries in foil. Before disposing of batteries, cover the terminals with insulating tape or place them in a plastic bag.
- Use and store the device only at temperatures between 0°C and 40°C.
Storage and transport conditions
Temperature: -10°C to 60°C.
Electromagnetic fields (EMF)
Philips conforms to all applicable standards and regulations regarding exposure to electromagnetic fields.
Radio equipment directive
Hereby, Philips declares that the radio equipment (Bluetooth, NFC) complies with the essential requirements of Directive 2014/53/EU.
- The Bluetooth radio interface operates at 2.4 GHz. - The maximum transmit power for Bluetooth is 3 dBm. - The NFC radio interface operates at 13.56 MHz.
- The maximum transmit power of the device is 30.16 dBm.
The full text of the EU Declaration of Conformity is available at the following internet address:
www.philips.com/support
Note: The functions of each button may vary depending on the model. Some models may be equipped with Bluetooth and NFC.
The manufacturer is not responsible for damage caused by improper use.

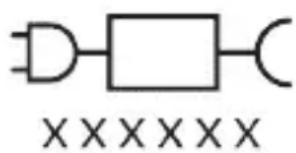
To activate the brush, press the button: "xxxx" until the indicator light turns on.
(TCBxxxx, HX6100, HX6110, HX6160 and WAAxxxx)
Brush activation
ProtectiveClean electric toothbrushes are designed to remove plaque and stains from teeth and to improve oral health and hygiene. ProtectiveClean electric toothbrushes are intended for personal use. Use the brush as directed in the instructions.
Philips Sonicare toothbrush (Fig. 1)
1 Brush head 2 Power on/off button 3 Handle 4 Charger 5 Brush head cap
6 Battery charge indicator 7 Charging base 8 Travel cap 9 UV sanitizer
Note: The contents may vary depending on the model purchased.
Getting started

1 Place the brush head on the handle, making sure the bristles are facing the same direction as the front of the handle. 2 Press the brush head onto the metal shaft until it clicks into place.
Note: It is normal for there to be a small gap between the brush head and the handle.
Using your Philips Sonicare toothbrush
If you are using your Sonicare toothbrush for the first time, it is normal to feel a slight vibration when you turn it on. The first few times you use it, you may experience a tingling sensation. This is normal and will disappear as you get used to the brush. For optimal oral health, follow the recommended brushing time.
For intensive cleaning
The Philips Sonicare toothbrush is designed for effective cleaning and has the EasyStart function. The Philips Sonicare toothbrush gradually increases the cleaning power over the first 14 uses to help you adapt to the brushing experience.
For intensive cleaning
The Philips Sonicare toothbrush is designed for effective cleaning. During the first 1-2 uses, the brushing time is shorter, then it gradually increases to the full brushing time.
Brushing instructions
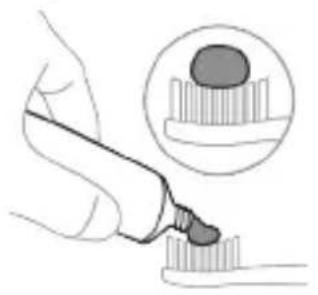
1. Wet the bristles and apply a small amount of toothpaste.
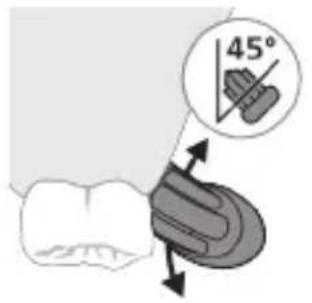
2. Place the toothbrush bristles against the teeth at a 45-degree angle, gently pressing and moving in a sweeping motion along the gumline.
Note: The toothbrush head should be placed at the gumline.
3. Turn on the Philips Sonicare toothbrush by pressing the power button.
4. Gently move the brush head across the teeth, ensuring it covers all surfaces. To clean the interdental spaces, tilt the brush head slightly and use gentle pressure. Do not press too hard.
Note: The brush head should be replaced every 3 months. Do not use the toothbrush if the bristles are worn or damaged.
Note: If you have sensitive teeth or gums, consult your dentist before using the toothbrush.
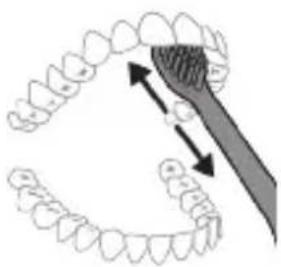
5. For optimal cleaning, keep the brush head in contact with each tooth for a few seconds, and gently move it to the next tooth. The toothbrush will automatically stop after the recommended brushing time. You can also turn it off manually.
Note: The Philips Sonicare toothbrush is compatible with all Philips Sonicare brush heads (except for the brush heads with the 'InterCare' label). It is also compatible with most dental restorations (fillings, crowns, veneers) and orthodontic appliances (braces).
QuadPacer
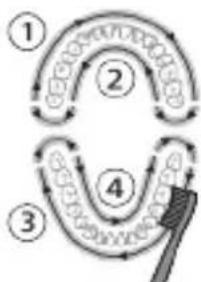
The QuadPacer function helps you brush more effectively by dividing your mouth into four sections. The QuadPacer signals you when it's time to move to the next section. It uses a short pause and a different vibration pattern. The toothbrush automatically turns off after the recommended brushing time.
Peximdep
3neKtp TnW 5eTkaHbI3da Ta3aNoo peXmN 6ap.
Clean
ApTbIKyblbIK 03rue KYHymdYk Ta3aJoo yuyH
CyHyUStaIraH INHTeHcNBdVYJyK DeHr3JI (aIpbIM MoJeIepde raHa)
Xoropky
Kannbl TnTn Ta3aNo0 y6aKtbicbl 2 MYHET
KaHTn TnSTn Ta3aNoo Kepek Ap 6np cerMeHTn 30 cekyHdaT a3aJaHbI3.
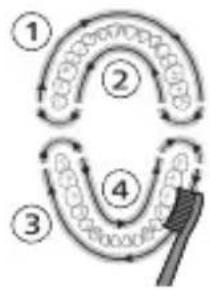
IHTeHcBdyyJyKTOp (aIpbIM yIgYJepDo raHa)
3JIeKTp TnI WtKaHbI 2 TypDyy INHTeHcNBdyyJyK XeHdOeJepy MeHeN KOwO bepnJeT:
- TEmOH
- Koropky
Tepe3eH KapbIK YbIbIN KaTca, caHHTaN3ep NwTeN KATKaH 6oJOT.
Ky6aTTOO JkaHa 6aTapeHbIn a6aJIbI
Philips Sonicare TnIu 10k tyk KybaTalbIn TyprHda ap 6n2 MyHtke co3ylnraH 28 tKaNoo ceahcbH (KemHne) KOpCtyyrApHaJrAn (KHyHHe 3Kn
Remove the charging base from the device and connect it to the power adapter. Place the handle on the charging base and ensure it is properly seated.
Note: The charging base can be connected to the power adapter for 24 hours continuously. However, for optimal charging, it is recommended to use the Philips Sonicare handle with the charging base.
Charging
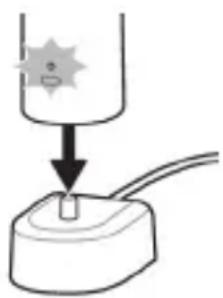
Charging and battery status
1 Plug the charging base into an electrical outlet. 2 Place the handle on the charging base or into the charging travel case. - The charging indicator light will blink for about 2 seconds. - The battery indicator will show the charging status. - When the handle is fully charged, the battery indicator will light up for 30 seconds and then turn off.
Battery status
Battery status (when handle is on charging base)
When the handle is placed on the charging base, the battery indicator will show the battery level.
Battery status (when handle is in charging travel case or when charging case is used)
When the handle is placed in the charging travel case or when the charging case is used, the battery indicator will show the battery level.
Battery status indicator
Charging is complete
Full charge lasts for 30 days
Charge fully, then use
Battery status (when handle is placed in charging travel case)
The battery is a rechargeable battery. The battery is connected to the battery indicator.
Battery indicator battery compartment
| Толук Туруктуу жашил - | ||
| Жарым-жарылай Толук | Жашил түстө бүлүдөн | - |
| Темен Кочкул capытүстө Бүлүдөн | Бүлүдөн | Шүлүмени Тазалагандан кийн Түлүдэн 3 сигнал чыгат |
| Бош Кочкул capытүстө Бүлүдөн | Бүлүдөн | Шүлүмени Тазалагандан кийн Түлүдэн 5ten 2 товом сигнал чыгат |
| Зскертым: Күлүнүм түрвахда оир滟ны унemдө Чун ватарейн fixapыгы чот. | ||
| Зскертым: Батарей түлүу мени в�ш бүлүдө, шпүкäүчot. Шүлүдэн Күштүл, Күштүл. | ||
| Зскертым: Батарей вор дай bim түлүк күшталган бүйдион karрman түручн,{Tш�шткалдь Күлүнүллүллүллүллүллүллүллүллүллүллүллүллүллүллүллүллүллүллүллүллүллүллүллүллүллүллүллүллүллүллүллүллүллүллэл. | ||
| Батарейн васалы (Түлк Күштагык/КүштTOOу саякт Күтсунд Жа�аштbingлбаган Ke3дe) | ||
| Тш�шцы ою ке3дe, Түлүн fixbн actындагы ватаря Индikatopy ватаря Deнгэлн корсетet. | ||
| Батарейн васалы ватаря корсетуч Добуху | ||
| Толук Туруктуу жашил - | ||
Battery indicator battery compartment
| Жарым-жарылай Толук | Жашил түстө 6үлүүдөийт | - |
| Темэн Кочкул capытүстө 6үлүүдөийт | Шүtte мени Тазалагандан кини Түүкадан 3 сигнал чыгат | |
| Бош Кочкул capытүстө 6үлүүдөийт | Шүtte мени Тазалагандан кини Түүкадан 5тен 2 толтOM сигнал чыгат | |
| Зскертох: КOLTонлбай түрганда знэргияны унemдө Чун SFATAPESHIN XAPBIRGII ChET. | ||
| Зскертох: Батаря толугу мени SFOTKANU, TИш Чүлүэ ChET. КБСТTOO YUH TИш ChETКАНы KБСТТАВИЧА Же КБСТTOOчсakat KUTSCUHa CAIbIHbI3. | ||
| Зскертох: Батаряны ap дайын толук КБСТТАВИ БОйdon karman түрү YUH, TИш ChETКАНы 3Ды КOLDOHBOGOHIO KБСТТАВИчta KapmaСАны 3 BOЛOT. |
Remove
Battery compartment cover
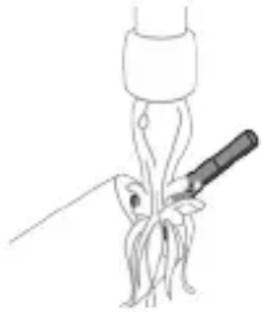
Remove the battery cover, then insert the battery with the correct polarity. Remove the battery contacts.
Do not dispose of the battery in fire. Do not short-circuit the battery. Keep it away from children.
2. Rinse the fabric thoroughly with clean water.
Note: To remove the soap, rinse the fabric thoroughly.
Fabric softener
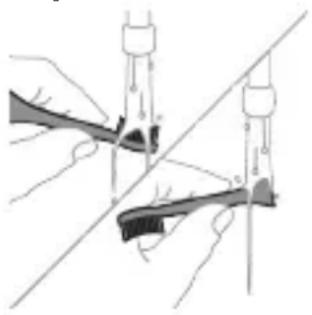
Rinsing
1. Add one capful of fabric softener to the final rinse cycle. 2. After rinsing, remove the fabric softener from the dispenser and rinse it with a small amount of water to prevent buildup.
1. Pour the liquid into the dispenser. 2. Rinse the dispenser thoroughly with clean water.
Drying instructions
For drying, place the item in a dryer on low heat, or hang to dry.
Cahnta3epn Ta3a1oo
3cKeptyy: CaHnTaI3epDn cyyra caIbI IN Jxpe aHbIKpaHdbIn acTbIHda yaiKa6aHbI3.
3ckepTyy: YK kapbIK IaMnacbl bIcbIK 60Jco, caHtai3epdN Ta3aIa6aHbI3.
OnTnMaJny HaTbIjXara XeTyy YUyH caHNTaJ3epn anTa caBbH Ta3aJaan Typyy CyHyuTaNat.
1 CaHnTaI3epDn aXbIpaTbIHbI3. 2 TaMbyI TOnTOruty cbiptKa TaPtbHb3. TaMbyI TOnTOruty yaKan, aHbI HbIMdyy Ke3deme MeHeH Ta3aJahb3. 3 YuKn 6eTTepHH 6aapbH HbIMdyy Ke3deme MeHeH Ta3aJahbl3. 4 Yuk Kapbik lamnaCbHbH aIdbIHdaRbI KoproOuy 3KpaHdbI aIbIn caIbIHbI3. 3KpaHdbI ybIapyy yUH ybIK 3TMeJIepIN H KaHbIHdaRbI yUTapbIH KapMa, akbipbH 6acbIn, KoproOuy 3KpaHdbI TapTBn YbIrapbIHbI3. 5 YK yapbIK lamnaCbIH ybirapbHbI3. XapbIK lamnaCbIH ybirapyy yuyn aHbI KapMaI, MetaJI NIMeKTePInHeH TapTbIHbI3.
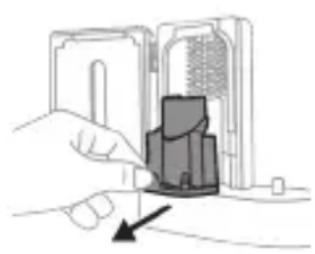
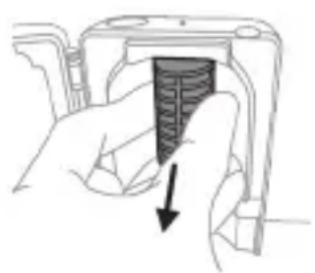
6 Koprooy 3KpaHbIH XaHa YK XapbIK JAmnacbIH HbIMdyy Ke3deme MeHeH Ta3aJahbI3. 7 Yuk Kapbik lamnacbih kaipadaH Knpn3nHn3. Kapbik lamnacbih kaipadaH Knpn3yy yuyH Kapbik lamnacbih Tsyh MeTaN NImekKe Tyypan, lamnaHBi NImekKe TypTuHy3. 8 Koproooy 3KpaHbIH KaipadaH Knpn3Hn3. 3KpaHdbI KaipadaH Knpn3yy yuyH 3KpaHdaBbl TnTepn YK XapbIK lamnaCbIH XaHbIHdaBbl YarblDbIPMa 6eTTerN OOKyAJaPra TyypalHaB3. 3KpaHdbI caHnta3epdern OOKyAJaPra Ty3 TyPTyHy3. 9 TaMbyI OryJIrkUy TY K caHnTaJ3epnHe kaipadaH KOIOHy3. 10 Ta3aIan, 3JIeKTp TapMaBbHa TyTaUThIpyydAn MpyH caHntaI3ep TOnyry MeHeN KypraRaHbIn TeKwepnHn3.
CaKTOO
3rep eHymdy KeIKe yeHH KOJIOHOBJ TpyraH 6OJCOHy3, aHbI 3JIeKtp p03eTKacbHaH aXbIPaTbIN, Ta3aJaan, TY3 TnIReH KYN HpyHaH aJIbIC 6OJROH caIKbIH JkaHa KypraK JepDe cAKTaHbI3.
aIMaUtblpyy
Оптималдуу кыиьнтблкарра кeТУ YУн Philips Sonicare шета бштабин 3 aи садын щмаштблрын Турунз. Philips Sonicare shaIMaHbINbH алmaштблрычу шETka bштабин raHa KOLDOHy3.
Ylrgy Homepn KepcToYIrgen Jep
YIy HomepnH (HX64XX, HX68XX) Philips Sonicare KapMaBbIBbIHbIH Tv6yHcH KapaHbI3.
Kenildk JkaHa Kojdoo
MaalbImat Xe KoIIOO aIbIHb3 KeIce, www.philips.com/support caTbHa eTyI Xe 3JI apaJIbIK KeIIJINK bapaKaacbIH OkHy3.
KenildkTeRn yeKToeJep
WARNING: Read the manual before use.
- Before using the device, read all safety instructions.
- Do not use the device if the battery is damaged or leaking. If the battery leaks, avoid contact with the liquid, and if contact occurs, rinse with water and seek medical advice.
- Keep the device away from water, moisture, and high temperatures.
- Dispose of the battery properly.
Battery replacement
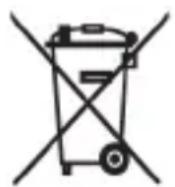
- This symbol indicates that the device and batteries must be disposed of separately from household waste.
- Do not dispose of the device or batteries in household waste; recycle them at designated collection points.
- The battery is included in the package. Dispose of the battery separately from household waste. Follow local regulations for proper disposal.
Charging the battery
Use only the specified charger to charge the battery.
Before charging, check the battery voltage and ensure it matches the charger specifications.
Do not charge the battery in damp or wet conditions, and do not use a damaged charger.
Keep the battery away from children and pets.
Do not disassemble the battery, and do not expose it to fire or high temperatures.
After removing the batteries from the device, do not touch the battery terminals with metal objects (e.g., coins, paper clips, keys). Wrap the batteries in aluminum foil or place them in a plastic bag before disposal.
To remove the battery, you will need a screwdriver and a dry, clean cloth (standard). Follow the procedure shown in the diagram carefully.
1 To remove the battery, first disconnect the battery connector by gently pulling it out, then remove the battery. Do not pull the wires. If the battery is stuck, use a small screwdriver to gently pry it out. 2 After removing the battery, dispose of it properly. Do not throw it in the trash; recycle it.
3 Use a screwdriver to gently pry the battery out of its compartment. If the battery is stuck, use a small screwdriver to gently pry it out. Do not use excessive force.
Note: You may need to use a few tools to remove the battery.
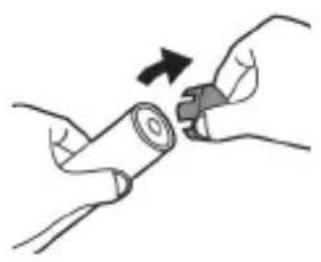
4 Remove the battery from the compartment. If the battery is stuck, use a small screwdriver to gently pry it out. Do not use excessive force.
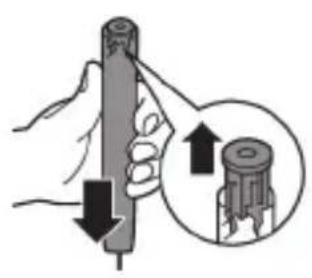
5 While holding the battery, gently pull it out. If the battery is stuck, use a small screwdriver to gently pry it out. Do not use excessive force.
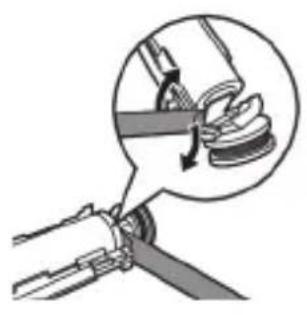
6 Insert the screwdriver into the slot between the battery and the compartment. Gently pry the battery out.
7 To remove the battery, insert the screwdriver into the slot between the battery and the compartment. Gently pry the battery out.
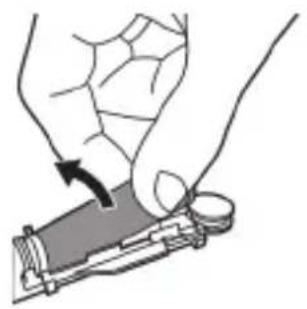
8 To remove the battery, gently pull it out of the compartment.
Warning: To avoid injury, do not touch the battery terminals with your hands.
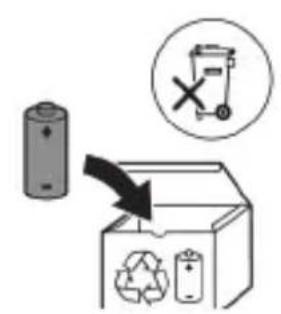
9 To remove the battery, gently pull it out of the compartment. If the battery is stuck, use a small screwdriver to gently pry it out. Do not use excessive force.
Note: If the battery is damaged, do not touch it with your hands. Dispose of it properly. If you need to remove it, use a screwdriver to gently pry it out. This will help you avoid injury.
Welcome to the Philips Sonicare family! This toothbrush is designed to provide superior plaque removal and whiter teeth. With Sonicare's unique sonic technology and clinically proven results, you can be confident you are getting the best clean possible.
Important safety information
Read this important information carefully before you use the appliance and its accessories and keep it for future reference. Misuse can lead to danger or serious injury.
Warning
- Keep the UV sterilizer away from water. - After cleaning, make sure the appliance and/or sterilizer are completely dry before use. - This appliance can be used by children aged 8 years and above and persons with reduced physical, sensory or mental capabilities or lack of experience and knowledge if they have been given supervision or instruction concerning use of the appliance in a safe way and understand the hazards involved. Children shall not play with the appliance. - Children shall not play with the appliance. - Use only original accessories or consumables from Philips. Use only the supplied or approved accessories. If provided, use only the original USB cable and USB adapter for charging.
- The appliance contains no user-serviceable parts. If the appliance is damaged, stop using it and contact the Consumer Care Center in your country. Corded appliances only: If the cord is damaged, replace it with a new one from the manufacturer or its service agent.
- Do not use the charger or sterilizer near or on hot surfaces.
- Do not immerse the appliance in water or any other liquid.
- This appliance is designed for cleaning baby bottles and accessories only. Keep the sterilizer out of reach of children at all times.
- The UV-C light remains on while the lid is open. The UV-C light can be harmful to eyes and skin.
- Handle the sterilizer only with the protective screen.
- Do not touch the UV-C lamp of the UV sterilizer while it is hot.
- Do not use the appliance with wet or damp hands. Replace the filter every 3 months or sooner if stains appear on the filter. Avoid direct contact with products containing essential oils or coconut oil. Contact can damage the filter.
- If you are using this product after recent oral surgery or bleeding, consult your dentist/doctor before use. If you have had oral surgery or an operation on your teeth in the previous 2 months, consult your dentist before using this product.
- If you have a pacemaker or other implanted device, contact your doctor or the manufacturer of the implanted device before use. - If you have a medical condition, consult your doctor before using this product. - This product is intended for cleaning teeth and is not intended for use by patients in dental clinics or institutions.
www.philips.com/support
Note: The functions of different models may vary. Some models may not be equipped with Bluetooth or NFC.
The following symbols may appear on the product:
Read the operator's manual.

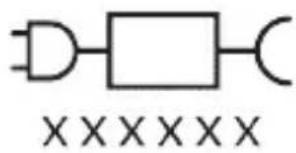
Your Philips Sonicare (fig. 1)
1 Handle 2 On/off button 3 Brush head replacement reminder 4 Battery indicator
Accessories:
5 Brush head cap 6 Brush head 7 Charging base 8 Travel case 9 UV sanitizer and charger
Note: The included accessories may vary depending on the model purchased.
Getting started

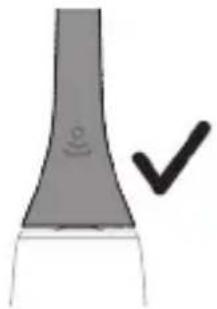
1 Place the brush head on the handle, making sure the bristles are aligned with the front of the handle.
2 Press the brush head firmly onto the metal shaft until it clicks into place, ensuring there is no gap.
Note: It is normal for there to be a small gap between the brush head and the handle.
The Philips Sonicare toothbrush starts working immediately.
If you use your Sonicare toothbrush for the first time, it is normal to feel more vibration than when using a manual toothbrush. It is normal for the first few days to have a slight tickling sensation. Apply only gentle pressure and let the toothbrush do the brushing for you. Follow the brushing instructions for the best results.
For those who prefer a gentle clean
To help you get used to your new electric Sonicare toothbrush, it comes with the EasyStart feature. This feature gradually increases the power over the first 14 brushings to help you adapt to brushing with the Philips Sonicare toothbrush.
For those who prefer a more intense clean
To help you get used to your new electric Sonicare toothbrush, use it on the low setting for the first 1-2 weeks, then switch to the high setting.
Brushing instructions
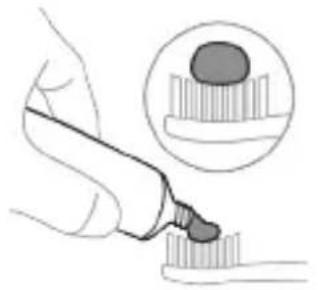
1 Wet the bristles and apply a small amount of toothpaste.
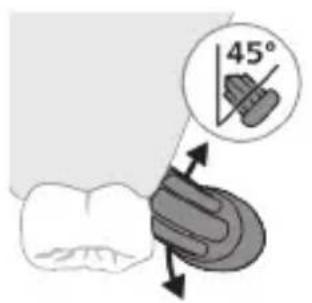
2 Place the bristles of the toothbrush against the teeth at a 45-degree angle, pressing gently so the bristles reach the gum line or slightly below the gum line.
Note: The bristles of the toothbrush must stay in contact with the teeth at all times.
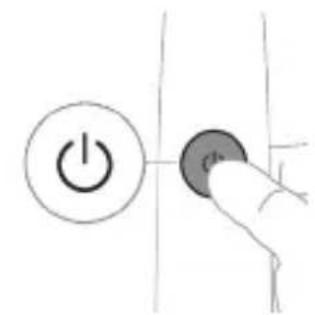
Press the on/off button to turn on the Philips Sonicare.
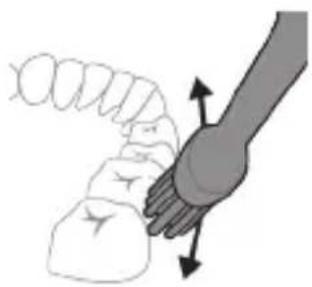
4 Gently move the bristles of the toothbrush over the teeth and gums. Brush the teeth with a slow back-and-forth motion, so the bristles of the toothbrush can reach between the teeth. Continue this motion for the entire brushing time.
Note: The bristles of the toothbrush should be slightly spread. It is not recommended to brush as you would with a manual toothbrush.
Note: If you apply too much pressure, you will be alerted by a change in the vibration of the handle and the replacement reminder light will flash in a different color.
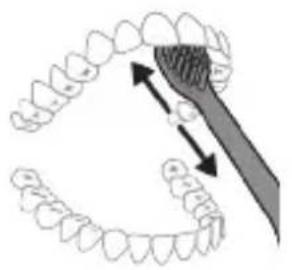
5 To clean the inner surfaces of the front teeth, tilt the handle of the toothbrush slightly and make a few vertical overlapping strokes on each tooth. 6 After you finish the brushing cycle, you can additionally brush the chewing surfaces of the teeth and the areas where stains occur. You can also brush your tongue, with the toothbrush on or off, as you prefer.
Warning: The Philips Sonicare toothbrush is intended for use on braces (the brush head wears out faster when used on braces) and on dental restorations (fillings, crowns, veneers) as long as they are properly attached and not compromised.
QuadPacer
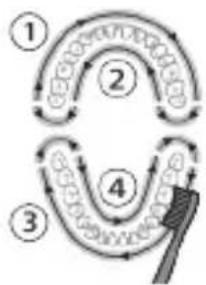
To ensure that you brush evenly throughout your mouth, divide your mouth into 4 sections using the QuadPacer function. The QuadPacer divides brushing time into 4 equal segments and signals when it is time to move to the next area. The segments are indicated by a brief pause in the vibrations. The toothbrush automatically stops at the end of the brushing session.
Brush head
Your Philips Sonicare toothbrush is equipped with the Clean brush head.
Clean
Accessory for an exceptional daily cleaning system
Recommended intensity level: High (only on specific models)
Total brushing time: 2 minutes
How to brush: Brush each segment for 30
seconds.
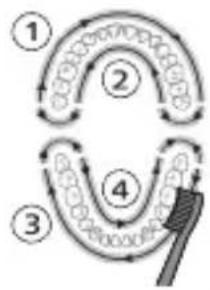
To activate or deactivate EasyStart (see "Activating or Deactivating Functions").
Brush head replacement reminder
Your Philips Sonicare toothbrush is equipped with BrushSync technology, which monitors the wear of the brush head.
Warning: This function works only with genuine Philips Sonicare brush heads with BrushSync technology.
1 The brush head replacement reminder helps you get the most out of your Philips Sonicare brush head with BrushSync technology. It automatically tracks the wear of your brush head. 2 Over time, based on the pressure you apply and the total time you use the brush head, the handle tracks the wear of the brush head to determine the optimal time to replace the brush head. This function guarantees the best cleaning and care for your teeth.
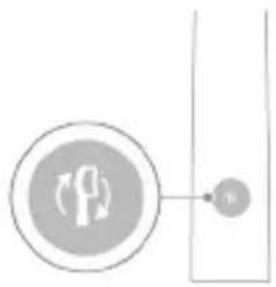
3 When the brush head replacement reminder indicator lights up in an orange color, you should replace the brush head.
All Philips Sonicare brush heads for teeth are equipped with an activated brush head replacement reminder function. To deactivate the brush head replacement reminder, see "Activating or deactivating functions".
Activating or deactivating functions
You can activate or deactivate specific functions of your toothbrush:
- EasyStart - Brush head replacement reminder - Pressure sensor information
Note: You can activate or deactivate the brush head replacement reminder when the handle is not in use.
Step 1: Place the handle on the charging base.
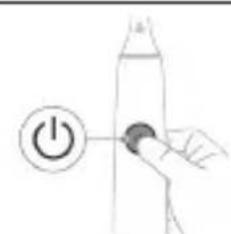
Step 2: Press and hold the on/off button:
Battery safety instructions
www.philips.com/support
Note: Functions of different models may vary. Some models may not be equipped with Bluetooth or NFC technology.
The following symbols may appear on the device:

Read the operator's manual.
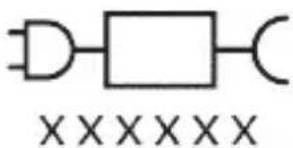
Removable power supply unit: "XXXXXX" indicates the model number of the charging device used. (TCBxxxx, HX6100, HX6110, HX6160 or WAAxxxx)
The ProtectiveClean toothbrush heads are intended for removing dental plaque and food debris from teeth, with the aim of reducing the risk of caries and improving the health of teeth and the oral cavity. The ProtectiveClean toothbrush heads are intended exclusively for personal use. Use by children is allowed only under the supervision of adults.
Philips Sonicare handle (fig. 1).
1 Handle 2 On/Off button 3 Replacement reminder 4 Battery charge level indicator
- Low charge - High
Changing the intensity level:
- Press the On/Off button once to turn on the toothbrush.
- Press the button again within 2 seconds to change the intensity.
- Press the button a third time within 2 seconds to stop the brush.
- If you press the button again after 2 seconds of brushing, the toothbrush will also stop.
BrushSync technology
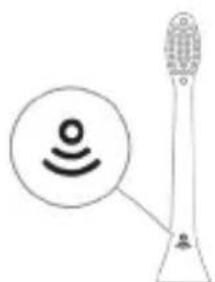
BrushSync technology allows the brush head to connect with the handle via microchips. The symbol on the lower part of the head indicates that the head is equipped with this technology. BrushSync technology features:
- Replacement reminder
Philips Sonicare offers a wide range of intelligent brush heads with BrushSync technology. To get acquainted with the full spectrum of our brush heads for toothbrushes and find the most convenient head for you, go to
www.philips.com/toothbrush-heads for more information.
Do 3 seconds, Do 5 seconds, Do 7 seconds
For 3. Turn the knob on/off when you hear:
The device will beep twice when the battery is low.
It emits three beeps after cleaning.
For more information, visit:
www.philips.com/support
Do not immerse in water.
Maximum operating time is 10 minutes.
If the device is not used for a long time, remove the batteries.
When the device is not in use, store it in a dry place.
Do not use the device if it is damaged. If the device is damaged,
contact the manufacturer or a qualified person for repair.
Keep out of reach of children.
Disposal
- Do not dispose of the device with household waste. - Follow local regulations for disposal.
6apkn n deBopn 6OBapn Xocnil Kyn
6apKnypkyHaHda Ba/ε caHntapn3aTOp nyppa XyshK
act.
-ДастROxMa3Kyppo KydaKoH Ba aushOce,Kn
KoBnJIyTn YmCMOH, XCoCn e aKn IopaH, e
Taupn6aBaIOnHsHaOpaH,MeTaBOHaH
nTnfoa bapan, arap OHxo TaXtn Ha3opat Eaactyp
Ond 6a nctnfoan daCTROX ondi bexatapn OMOda
Uya 6oShaN Ba XaTapXOn Map6yTpo NapK KyHaHJ.
To3akyH Ba HnroxybHH daCTRO,Ha6oJ a3 qOH6n
KydaKoH 6nDyHn Ha3OpaT aHcOM dOJa ShaBaJ.
- KýdakOH 6o dactroX ha6oRd 6o3KyHaHd.
-TaHxo IaBO3nMOT Ba MaBOiMaCpaΦnIacnIu Philips-po nCTnΦOda 6apeI.TaHxo 6apKnypKyuHaHdae,Kn 6o maxcylOT IoDa MeuBaI, nCTnΦOda 6apeI.Arap IoDa 7yda 6oSha,I TaHxo cIMNu acnIu USB Ba BoXiDn 6apKrnpu USB-po nCTnΦOda 6apeI. -ДаCTROxMa3Kyp KncmXoN a3 YOHN6n KOp6ap XnIMaTwaBaHda NaOpad. ArapДaCTROx BaIPOH Shyda 6Osha, nCTnΦOan OHpo KaTb KyHeD Ba 6a Mapka3n Hnroxy6uHn NCTeBMOJkyHaHdaRoH dap DaBlaATn XyD MyPoUHaT KyHeD.ДaCTROxOu TaHxo 6o cIm: Arap CnM BaIPOH Shyda 6Osha, 6apKnypKyHaHaDa 6O MaBOi TaH3mKyuHipo 6o DactROxHaB INBa3 KyHeD. -Баркпуркунда Ba/\'e caHITapn3aToppo 6epyH a3 6ино\'e yap Ha3ДиКи CaTXn TaФcoH nCTnФОda Na6apei. -XeayK KNCMn MaxcylOTpo daP MoHHN 3apfshy To3a HaKyHei. -ДастROxMa3Kyp TaHxo 6apOn To3a KapdaHn DaHDoH, MInk Ba 3a6oH neu6Hn H WydaacT. - CaHntapn3aToppo Xamea a3 daCTpacnn KydaKOH dyp HnroX,dopei. -Истюдан санитариЗаторpo KaTb KyHeД, arap чарои ултра6унафш Хангоми КшОда 6удан Дар фурун монад. Hypхон ултра6унафш MeTaBOHAнД 6a чашм ва пстп Ин coh зapap paCoHанД. - CaHntapn3aToppo TaHxo 6o 3KpaHn MyXoΦn3aTn DaP yOn xUd nCTnΦOda 6apei. -XaHromn ramp 6ydaHn yapOfn Hypn yItpa6yHaΦs 6a TaMn3KyuHaHdAn UV daCT hapacOHei. - Ictnfoan ytkapo xahromn capa kn kyttae xamnda uya 6ydaH, kaTb kynei. Capa kn ytkapo xap 3 mox e 3yntap nBa3 kynei, aarap Hnwohaxon fapcydaawB naIdo wabHd. - A3 tamocn Myctakm 60 maxcyloTe, KI dOpOn paBfahxON 3ΦnpiE paBfAHN KOKOC Me6oShaH, xHydopn HAmoeD. Tamoc metaBOHaD 6Oncn KaHda ShydaHn MyjAKXOn yTka rapdaI.
- Arap nac a3 nCTnΦoJa xyHpaBn a3 xaad 3nEpd yx dnxa, arap xyHpaBn nac a3 1 xaФtan nCTnΦoJa ndoma e6aJ e arap LMyMo HopoxaTb Ba daPd Xnc KyHei, nCTnΦoJa n daCTROxpo KaTb KyHei Ba 6a dYXTpyn DaHDoH MyPoynaT KyHei.
- Arap Lymo nap daBomn 2 mox n neu qappoxn nnaxOH mnilkn daHdoH doWta 60wei, neu a3 nCTnfoan nH ac6o6 6o duXtpyn daHDoH MaWBapat KyHei.
- If the device is used in a way not specified by the manufacturer, the protection provided by the device may be impaired. - If the device is used in a way not specified by the manufacturer, the protection provided by the device may be impaired. - This device is intended for personal use and is not intended for use in hospitals or by medical professionals in unapproved medical facilities.
Instructions for optimal use
- This device has a battery that can only be replaced by qualified personnel. - Use the product only for its intended purpose. Before using the product, read all instructions and warnings and keep them for future reference. Improper use may lead to hazards. It is necessary to ensure proper use of the product. - Use only original Philips accessories and consumables. Use only the following models: "TCBxxxx", "HX6100", "HX6110", "HX6160", and "WAAxxx". - Keep the product and battery away from fire and do not expose them to high temperatures.
- If the product is damaged or broken, stop using it, unplug it, and contact Philips for repair or replacement.
- Do not dispose of the product and its battery in household waste; dispose of them at an official collection point for electrical and electronic equipment.
- Do not disassemble the product or battery, do not puncture, crush, or burn it, to avoid the batteries heating up or causing hazardous or dangerous situations. Batteries must be kept away from heat and fire. Do not short-circuit the battery.
- This device contains a battery that cannot be replaced. When the battery's service life is exhausted, the device should be disposed of properly, see section "Disposal of used batteries".
- When the batteries are worn out or leaking, keep them away from eyes and mouth. If they come into contact with eyes, rinse with water and consult a doctor.
- When you work with batteries, make sure your hands, the product, and the batteries are dry.
To avoid short circuits after charging, do not place the adapters or charging bases in water or other liquids. Do not place the adapters or charging bases in water or other liquids. After charging, unplug the adapters and keep them away from water.
- Store the product at a temperature between 0°C and 40°C, and avoid exposure to direct sunlight.
Storage conditions
Temperature from -10°C to 60°C.
Electromagnetic fields (EMF)
This Philips appliance complies with all standards and regulations regarding exposure to electromagnetic fields.
www.philips.com/support
The model number can be found on the back of the device. Some models are equipped with Bluetooth and NFC.
The following accessories may be included with the product:
Access to the user manual.


Replacement parts: 'xxxxxx' indicates the part number for replacement parts, which may vary by model. (TCBxxx, HX6100, HX6110, HX6160, and WAAxxxx)
Using the device
The brush head with bristles is designed to remove plaque and food debris from teeth for better oral hygiene.
Oral health. The 'ProtectiveClean' brush head is designed for optimal oral hygiene. Use under adult supervision for children.
Your 'Philips Sonicare' (Fig. 1)
1. Attach the brush head to the handle. 2. Press the power button. 3. The brush head will rotate. 4. The indicator light will turn on.
Note:
5. The brush head rotates. 6. The brush head (head) rotates. 7. The brush head stops. 8. The battery is low. 9. The brush head is worn out.
Note: The brush head will stop automatically when the battery is low or when the brush head is worn out.
Accessories
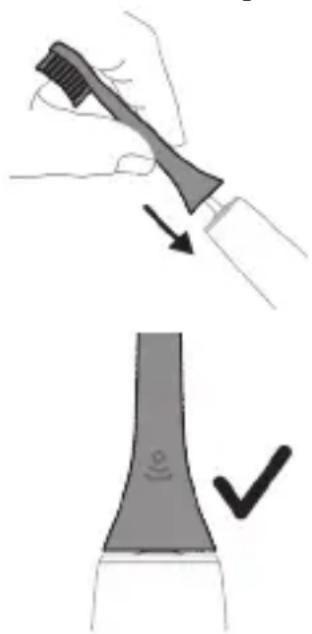
1. The brush head should be replaced every 3 months or when the bristles are worn out. 2. The brush head should be replaced if the metal part is damaged.
Note: The brush head and the handle should be cleaned regularly.
Changing the intensity:
- Press the power button to turn on the toothbrush.
- To change the intensity, press the button again after 2 seconds.
- To turn off the toothbrush, press the button three times within 2 seconds. - If you press the power button again after 2 seconds, the toothbrush will turn off.
BrushSync technology
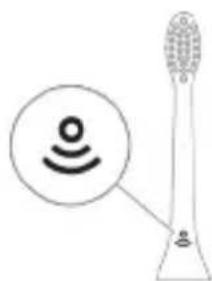
Thanks to BrushSync technology, the brush head communicates with the handle via a microchip. The symbol
on the bottom of the brush head indicates that it is equipped with BrushSync technology.
BrushSync technology has the following functions:
- Information about replacement heads for Philips Sonicare includes a wide selection of smart heads equipped with BrushSync technology. Familiarize yourself with the full range of heads for oral care and choose the optimal head for you at www.philips.com/toothbrushheads.
Specifications
- Pressure sensor feedback
- Quadpacer
- SmarTimer
- EasyStart
- Replacement head reminder
Pressure sensor connection;
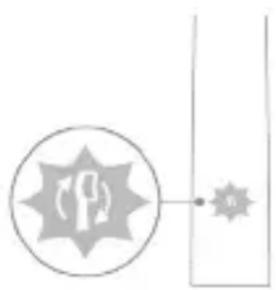
The Sonicare toothbrush is designed to apply pressure during brushing to protect teeth and gums from damage. If the pressure is excessive, the handle will change the vibration characteristics, and the indicator will remind you to reduce the pressure until you adjust it.
Note. This product is equipped with a pressure sensor. For details on how to disable this function (see "Enabling and Disabling Functions").
Quadpacer
QuadPacer is a timer for time intervals that helps to clean the oral cavity evenly, dividing the mouth into 4 sections. (See "Usage Instructions")
SmarTimer
SmarTimer indicates the end of the brushing cycle, automatically turning off the toothbrush. Dentists recommend brushing teeth for at least 2 minutes twice a day.
Step 2. Press and hold the "On/Off" button for the specified number of seconds.
EasyStart Haralybanna 3vorotni z'iedok vid "Legkyi start" pro zaminu datchnyka tysku nasadky
Up to 3 seconds Up to 5 seconds Up to 7 seconds
Step 3. Release the "On/Off" button when you hear:
1 sound signal
1 sound signal, then 2 sound signals
1 sound signal, then sequentially 2 sound signals and 3 sound signals


If the battery charge indicator and the nozzle replacement indicator flash green 2 times and the handle emits a tonal signal (from low to high), this means the function is enabled.
OR


If the battery charge indicator and the nozzle replacement indicator flash green 1 time and the handle emits a tonal signal (from high to low), this means the function is disabled.
Disinfection block with UV lamp
Note. Accessories included in the kit vary depending on the specific model.
With the help of the disinfection block with UV lamp, you can clean the nozzle after each use.
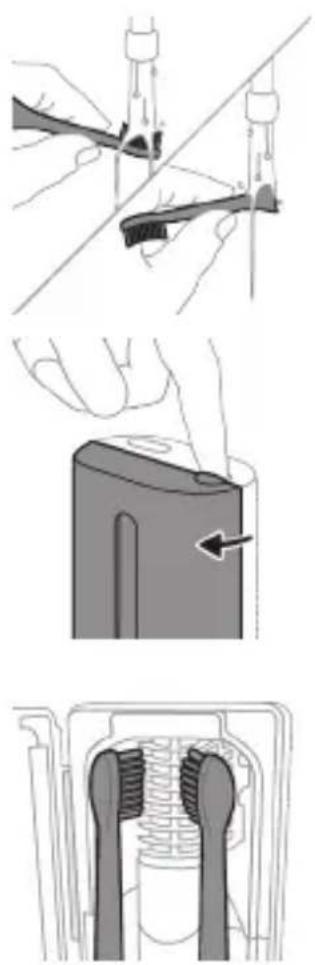
Remove the disinfection block from the electrical appliance, stop using it and return it to the customer service center if:
- the UV lamp continues to glow when the door is open; - the disinfection block is damaged or missing; - the disinfection block emits smoke or a burning smell when it is operating.
Note. UV light can be harmful to eyes and skin. Disinfection blocks should always be kept away from children.
1. Press the device and shake out the remaining drops.
Battery charge indicator status
Fully charged: green light
Partially charged: green light
Low battery: red light and audible beep
Signal after charging
Fully charged: red light and audible beep
2 series of 5
audible signals
Note: To preserve battery charge, the indicator turns off when the device is not in use.
Removing the battery
The built-in battery must be removed by a qualified professional after disposal of the device.
Before removing the battery, make sure it is completely discharged.
For support, visit: www.philips.com/support
This device is intended for household use only. Before using the device, its batteries, and accessories, please read this manual carefully and keep it for future reference. Improper use or use for other purposes may cause damage.
Experts
- Do not install chargers or disinfectors near water. - After cleaning, check that the plug is connected to the power outlet and that the charger and/or disinfector is dry before use. - This device may cause hazards if used improperly, and it can be dangerous if used by children or persons with reduced physical, sensory, or mental capabilities, or lack of experience and knowledge, unless they have been given supervision or instruction concerning use of the device in a safe way and understand the hazards involved. Children shall not play with the device. - Only use original Philips accessories or consumables. Use only the charger provided with the device. If the charger is damaged, use only the original USB cable and USB adapter to charge the device.
- This device is not intended for use by persons (including children) with reduced physical, sensory, or mental capabilities, or lack of experience and knowledge, unless they have been given supervision or instruction concerning use of the device by a person responsible for their safety. Children should be supervised to ensure that they do not play with the device. - If the device is damaged, stop using it and contact the service center. Only use the device with the original charger and disinfector. - Do not use the charger or disinfector if it is damaged or has a cracked housing.
- Do not use the device in a humid environment.
- This device is intended for cleaning teeth, gums, and tongue. - Do not store the disinfector where it can be reached by children.
- When the UV light is on, do not look directly at the UV light or the disinfector. The UV light may be harmful to eyes and skin. - Operate the disinfector only with the protective cover closed.
- Do not look directly at the UV light of the disinfector when it is on.
- Do not use the brush head if it is worn or has bent bristles. If the bristles are worn or bent, replace the brush head immediately.
- Do not use essential oils or coconut oil in the device. This may damage the device. - If the device becomes too hot, or if the device stops working or malfunctions, stop using it and contact the service center.
- Before using this device, if you have had surgery on your mouth, gums, or teeth, consult your doctor.
- If you have a pacemaker or other implanted device, consult your doctor or the manufacturer of the implanted device before using this device.
- If you have any problems with the device, contact the manufacturer before using the device. - This device is not intended for use by persons (including children) with reduced physical, sensory or mental capabilities, or lack of experience and knowledge, unless they have been given supervision or instruction concerning use of the appliance by a person responsible for their safety.
Battery safety warnings
- This device contains batteries that are non-replaceable.
- Use the device only for its intended purpose. Before using the device and its batteries and accessories, read this information carefully and keep it for future reference. Misuse or improper use may cause hazards. Improper use of accessories may cause damage to the device.
- Only use Philips accessories and consumables. Use only the following models: TCBxxxx, HX6100, HX6110, HX6160 or WAAxxxx.
- Keep the device and batteries away from fire and do not expose them to direct sunlight or high temperatures.
- If the device gets hot or emits smoke, changes color or has been dropped for a long time, stop using the device and contact Philips.
- Do not place the device and batteries in microwaves or induction cookers. Do not heat or expose the batteries to fire or water. Do not open, modify, puncture, or short-circuit the batteries. Do not charge the batteries in reverse polarity.
- This device contains batteries that are non-replaceable. When the battery life has ended, the device should be disposed of properly. Do not dispose of the device in fire or water. If this occurs, rinse with water and seek medical help.
- Do not touch the battery terminals, and do not short-circuit the battery terminals. To avoid short circuits, do not allow metal objects (such as coins, paper clips, keys, or nails) to come into contact with the battery terminals. Place the batteries in the correct orientation. When disposing of batteries, remove them or cover the battery terminals with insulating tape.
- Store, keep, and maintain at a temperature between 0-40°C.
Storage and Transportation Conditions
Temperature: -10°C to 60°C.
Electromagnetic Fields (EMF)
This Philips appliance complies with all applicable standards and regulations regarding exposure to electromagnetic fields.
Radio Equipment Directive
This appliance complies with the essential requirements of the 2014/53/EU Directive for electric toothbrushes with Bluetooth and NFC.
- The Bluetooth radio interface in this product operates at a frequency of 2.4 GHz.
- Maximum radio frequency power transmitted by Bluetooth: 3 dBm.
- The NFC radio interface in this product operates at a frequency of 13.56 MHz.
- Maximum radio frequency power transmitted: 30.16 dBm. The full declaration of conformity is available at the following internet address:
www.philips.com/support

Note: The features of different models may vary. Some models may not have Bluetooth or NFC functionality.
Specifications are subject to change without notice. Please read the user manual carefully.
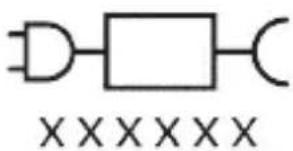
The Philips logo and the model designation: «xxxx» symbol indicates the approved model of the device. (TCBxxxx, HX6100, HX6110, HX6160 or WAxxxx)
Intended use
ProtectiveClean electric toothbrushes are designed to remove plaque and improve oral health by cleaning teeth. ProtectiveClean electric toothbrushes are also intended for use by children. Children should be supervised when using the device.
Philips Sonicare (Figure 1)
1 Handle 2 On/off button 3 Brush head replacement reminder 4 Battery indicator
Accessories:
5 Brush head cap 6 Start brush head release button 7 Charger base 8 Travel cap 9 UV sanitizer and charger
Note: Read the user manual before use.
Included accessories may vary.
Getting started
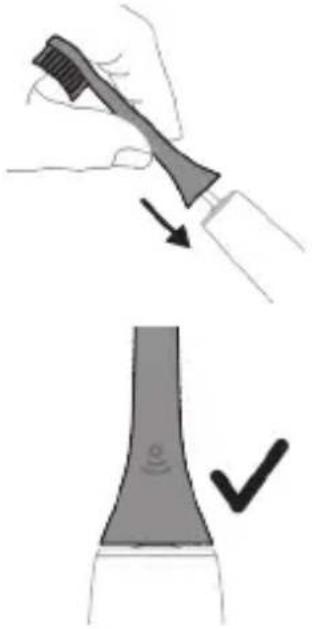
1 Attach the brush head to the handle by aligning the brush head with the handle and pressing it firmly.
2 Insert the brush head into the metal shaft until it clicks.
Note: There should be a small gap between the brush head and the handle.
Using your Philips Sonicare toothbrush
If you are new to Sonicare toothbrushes, you may experience a different sensation compared to a manual toothbrush. However, the brushing technique is important. With proper technique, you can achieve effective cleaning. For best results, follow the brushing instructions provided below.
For models with a handle, the Philips Sonicare electric toothbrush has an EasyStart function to help you get used to it. With the Philips Sonicare toothbrush, this feature gradually increases the brushing power over the first 14 brushing sessions.
For models with a handle
For the Philips Sonicare electric toothbrush, to help you get used to it, the initial parameters are set at a lower level for the first 1-2 weeks, then you can increase to higher parameters.
Brushing Instructions
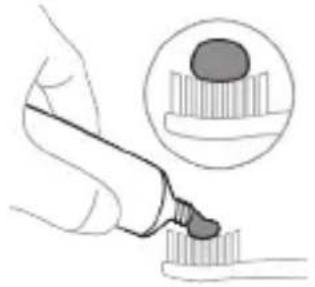
1. Wet the bristles and apply a small amount of toothpaste.
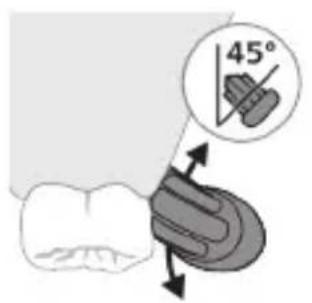
2. Place the toothbrush bristles against the teeth at a slight angle (45 degrees). Press the power button, and gently move the bristles back and forth across the teeth and gumline.
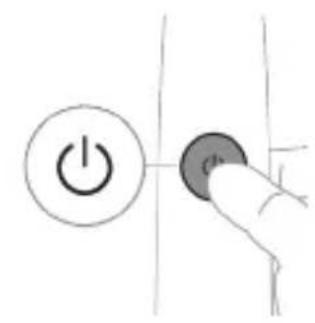
Note: The center of the brush should be placed against the teeth at a slight angle.
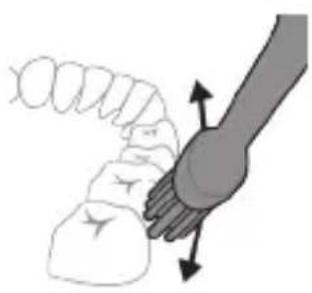
3. To turn off the Philips Sonicare, press the power button.
4. Place the brush bristles against the teeth and gums. Gently move the brush in a slow, circular motion to clean between teeth. Continue brushing for the recommended time.
Note: The bristles may wear out. It is not recommended to use the toothbrush with worn bristles.
Note: If you have sensitive teeth, gums, or orthodontic appliances, or if you are unsure about using the brush, consult your dentist or hygienist.
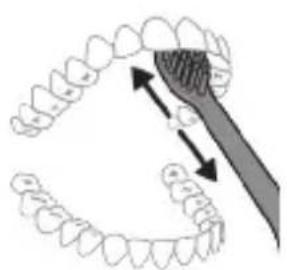
5. To clean the entire mouth, divide the mouth into four sections and brush each section for 30 seconds.
6. After the brushing cycle is complete, you can brush your teeth, tongue, and other areas as needed. You can also use the brush for additional cleaning if desired.
Note: If you have braces (where the brush head may get caught) or other dental appliances (such as implants, bridges, or crowns) that are not properly fitted, they may be damaged when using the Philips Sonicare toothbrush.
QuadPacer
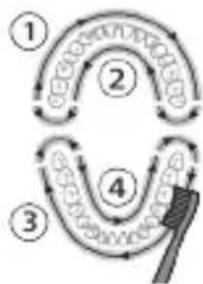
To use the QuadPacer, you can set the QuadPacer function to 4 or 6 laps. The QuadPacer function allows you to set the lap count to 4 or 6 laps, and then the segments are set accordingly. The segments are short and correspond to the lap count. At the end of the set lap count session, the timer stops automatically.
Timer
The timer is set with the lap function.
Clean
1 lap, 1 lap, then 1 lap, 2 laps, then 2 laps, then 3 laps


If the battery indicator and the brush head have been used and you have not cleaned them for 2 times, and if you have used them more than 3 times, then the brush head should be replaced.
REMOVE
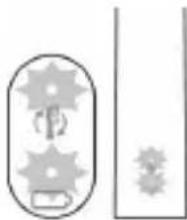
If the battery indicator and the brush head have been used and you have not cleaned them for 3 times, and if you have used them more than 3 times, then the brush head should be replaced.
UV sanitizer
Expert: Accessories that have been used with the device should be cleaned.
After each use, the brush head can be sanitized with the UV sanitizer.
When using the sanitizer, please note the following to avoid damage to the device:
- Do not use the sanitizer when the UV lamp is broken or cracked. - If the sanitizer's window is broken or cracked. - If the sanitizer is dropped or damaged.
Caution: The UV lamp may be harmful to eyes and skin. This device should be kept away from children and used with care.
1. Place the brush head on the handle and turn it clockwise until it locks into place.
Note: When the brush head is placed on the handle, make sure the bristles of the brush head are aligned with the front of the handle.
2. Press the power button on the top of the handle to turn it on.
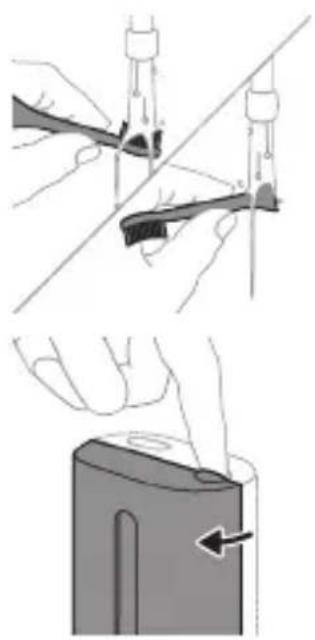
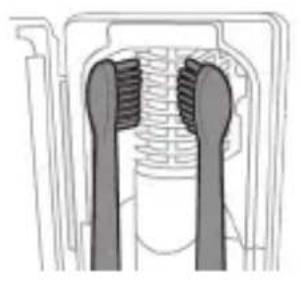
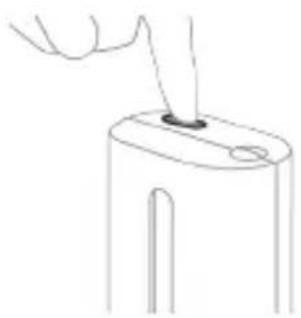
3. To remove the brush head from the handle, pull it off while twisting it slightly.
Note: Only use Philips Sonicare brush heads with this handle.
Note: Do not use Philips Sonicare for Kids brush heads with this handle.
4. Plug the charger base into an electrical outlet. 5. Place the handle on the charger base to charge it. The charging indicator light will blink until the battery is fully charged.
Note: If the handle is not placed correctly on the charger, it may not charge.
Note: If the handle is not charging, the charger base may be faulty.
Note: The charger base will automatically turn off after 10 minutes of continuous charging.
The charger base may become warm during charging.
Charging and Battery
This Philips Sonicare toothbrush is designed to provide up to 28 brushing sessions (if you brush twice a day, that's 14 days) with a full charge. The battery indicator will show the battery level when the toothbrush is turned on, when it is turned off, or when it is charging.
Note: It may take up to 24 hours to fully charge the battery for the first time, but you can use the Philips Sonicare toothbrush while it is charging.
Charging
Charging adapter for the Sonicare toothbrush
1 Connect the charging adapter to the electrical outlet.
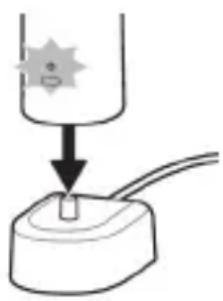
2 Place the toothbrush handle on the charging adapter.
- The charging indicator light will blink for 2 seconds to confirm the battery is charging. The battery indicator light will turn off when the battery is fully charged.
- When the toothbrush is placed on the charger, the battery indicator light will stay on for 30 seconds and then turn off.
Battery status
www.philips.com/support
With Bluetooth and NFC.

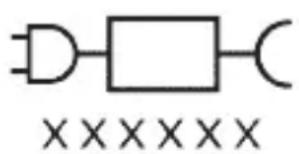
3 Philips Sonicare (by 1.)
5 58mnbnb3nbbygn 6 533n5n n3(0) 7 60g6n 60g6m 8s883mm60 9 UV b6n08gmoos gdoa30m
a6n36: 6000000000000000000000000000000000000000000000000000000000
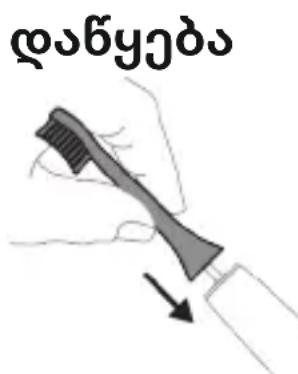
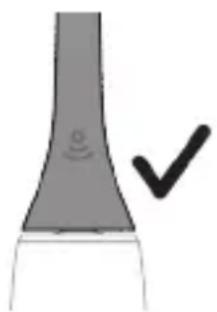
1 8ss6mmn 58mnnb n3n n, mda 8myu usbgmynu 6n6bmbndamngmonnybl. 2 000000000000000000000000000000000000000000000000000
a6b365: 6mmuymnns, mugmnb ms3us 0s sbmgmbl amnol agmng mgl a6b63m.
Philips Sonicare 3o0mnb 503nnb 3o3my6
mny 366b Sonicare 300mnu 58mnu 3m30mnu ny660n, 6mn4mnu mnu 90nm n 30mnu nnu 28nd60s, 30mnu 50mnu 30mnu 50mnu 30my60nb. 3m30mnu 4mabdmogomg onnu3n 80d0n 86mmnu 30amy60ds 860mnu 666n 680o oanjcnn 30omnu 50mnu buaym0s, md jonngon 8ognbmm. 0mbm, wnz3nn 33dmon amgygmn 8606nnu n6bmdn nn bn ngbm gadmgonnuon3n.
n60g6bn3m0g0nb 0gm6g amgogonb0n3nb
Sonicare 0m0mm 30nmb58 gob3moan gubbsnmo,goamny6 gogomnon gooogm 3moadm1-2 3nolsonnb dagooon agosongon oom 3moadm8.
b3n6b6dno
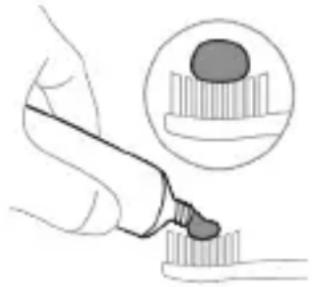
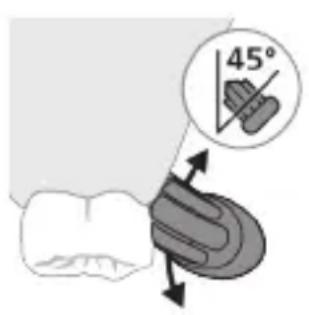
1 000b32mnn 508nngmnn 66ybu3nn a3nmg mnmg6mnn 3oangnub 3ufo.
2 200300000000000000000000000000000000000000000000000000000000000000000000000000000000000000000
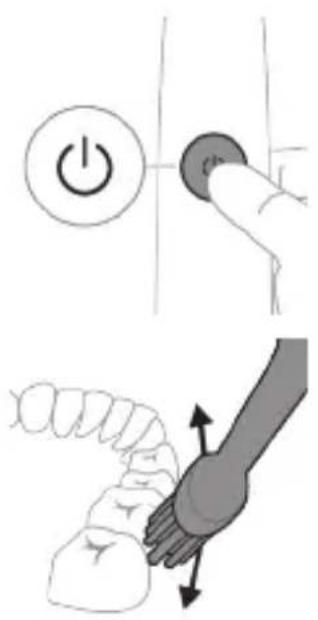
3 Philips Sonicare-nb hshmonsgo, gogn gn hmo3s/gdmnngn mns.
QuadPacer
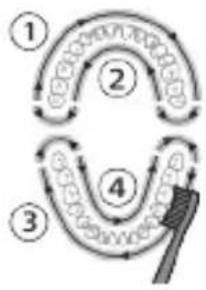
Clean
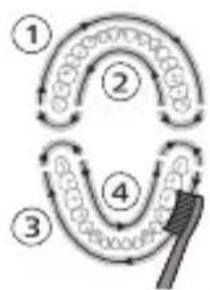
BrushSync technology: - Compatible with all Philips Sonicare brush heads, including DiamondClean and Sonicare. - BrushSync technology, which automatically selects the optimal brushing mode. - Easy to use, just press the button to switch between modes - 3 intensity levels for a personalized cleaning experience.
BrushSync
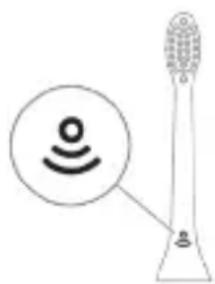
BrushSync technology uses a microchip in the brush head to communicate with the handle, automatically selecting the optimal brushing mode for you. The brush head remembers your preferred settings, so you can enjoy a consistent clean every time. BrushSync technology
- To use this feature, you need a Philips Sonicare brush head with BrushSync technology. For a list of compatible brush heads, visit www.philips.com/toothbrush-heads.
Features
- BrushSync technology - Quadpacer - SmartTimer - EasyStart - Pressure sensor
BrushSync technology
Your Sonicare toothbrush uses BrushSync technology to automatically select the optimal brushing mode for your needs, giving you a superior clean.

When you use a BrushSync-enabled brush head, the handle will automatically select the best mode for your brushing needs, ensuring a thorough clean every time.
Note: This feature is only available with specific brush heads. See "BrushSync technology" section.
Quadpacer
The Quadpacer feature uses a short interval signal to remind you to brush all four quadrants of your mouth equally. (See "BrushSync technology" section)
SmartTimer
The SmartTimer feature tracks your brushing time and ensures you brush for the recommended two minutes. It also provides a brief pause every 30 seconds to remind you to move to the next quadrant. Note: If you use the BrushSync feature, the SmartTimer will automatically adjust to the optimal brushing time for your selected mode.
EasyStart
Philips Sonicare's EasyStart feature helps you get used to the brushing sensation. It gradually increases the power over the first 14 brushings so you can adapt to the Philips Sonicare brushing experience.
Remove
To remove the Philips Sonicare brush head, twist it counterclockwise to release it, then pull it straight off the handle. To attach a new brush head, align it with the handle and twist it clockwise until it locks into place. The EasyStart feature is activated on the handle.
EasyStart activation (referred to as "activation mode 5")
Brush head replacement
Philips Sonicare uses BrushSync technology to automatically select the optimal brushing mode and intensity for your brush head.
Note: BrushSync technology is compatible with Philips Sonicare handles that have the BrushSync logo.
1. Place the brush head on the handle, ensuring it is securely attached. 2. Press the power button to turn on the toothbrush. The EasyStart feature will gradually increase the power over the first 14 brushings. After that, the toothbrush will operate at full power. To deactivate EasyStart, press and hold the power button for 3 seconds until you hear a beep.
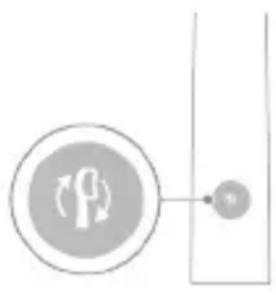
The toothbrush has a two-minute timer that encourages thorough brushing. The timer is indicated by a short pause in the brushing rhythm every 30 seconds, and a longer pause at the end of the two-minute cycle.
3. The toothbrush will automatically turn off after the two-minute brushing cycle.
Note: Do not use the Philips Sonicare brush head if it is damaged.
For children: Use the Philips Sonicare for Kids. It is designed to be safe and effective for children.
4. To charge the toothbrush, place it on the charging base. 5. The battery indicator light will flash when charging is needed. A full charge takes about 24 hours and provides up to two weeks of brushing.
Note: Battery level
Note: Do not immerse the handle in water or any other liquid.
a6n36s: 88606gjBnn 3mn ananb6mmo 56mmn 10 6nab 86d3mmosan gdsag 30mdyng nonad.
b6n8gnn aasmd, mmgbsbn6mmg g6fmc6 60amng.
gaaab03s gdsbshnab bdoyn
Philips Sonicare 600mnu 500mnu 300mnu, 100 mnu 28 600mnu 600mnu 600mnu 600mnu 600mnu 600mnu 600mnu 600mnu 600mnu 600mnu 600mnu 600mnu 600mnu 600mnu 600mnu 600mnu 600mnu 60
24 2000000000000000000000000000000000000000000000000000000000000000000
a3m3b
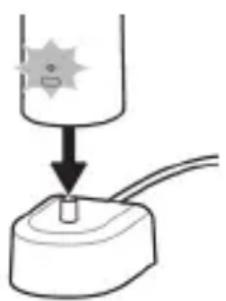
a308g a3b0s6 UV b6n8m
1 00000000000000000000000000000000000000000000000000000000000000000000 2 amoos3b0m 3ongmnb sbgmyn no aadybo38o 6 b6nfo8m8. - lsbgmynn 3aamlb3a2 2 am3mg bam36bna86mbl, mbsuolymd, mda bsgmynn bss6om sgnm8o. - 000000000000000000000000000000000000000000000000000000000000000000000 - mmgglb bsbommyn bnmyosos goadyboymn 68, dssmnl n6o3s0mnbl 6sonmyd 636g no 30 63nbl 66d3mmosan g 6dgg nonds.
aohmnbbghbn
dshmnb bfoybn (bbsmyn dgmnn 308)
mmuubmynn amn3bgymnns yadybo30m8o, duymnb 6n6gymn anononn ou smnlu ouybo3nuom6g.
Dshnubuohyun (bubymn jgman Bommym gddybo38/0oayb03mnu Ua8o3nm houogodn)
mmuubgmn amnu3ugymns gddb030m86 usag8s3mm Bubugdo, ofoymnub 56n6oymn anonnngbu ofoymnub gddb03nb gm68g.
Dooomnuboooybn ooohmnb 36
a3mmgabn 636g 3nag
| b636a0000- | |
| b636a0000- | |
| b636a0000- | |
| b636a0000- | |
| b636a0000- | |
| b636a0000- | |
| b636a0000- | |
| b636a0000- | |
| b636a0000- | |
| b636a0000- | |
| b636a0000- | |
| b636a0000- | |
| b636a0000- | |
| b636a0000- | |
| b636a0000- | |
| dsdshmnb dsdshmnb dsdshmnb dsdshmnb dsdshmnb dsdshmnb dsdshmnb dsdshmnb dsdshmnb dsdshmnb dsdshmnb dsdshmnb dsdshmnb dsdshmnb dsdshmnb dsdshmnb dsdshmnb dsdshmnb dsdshmnb dsdshmnb dsdshmnb dsdshnmb dsdshmnb dsdshmnb dsdshmnb dsdshmnb dsdshmnb dsdshmnb dsdshmnb dsdshmnb dsdshmnb dsdshmnb dsdshmnb dsdshmnb dsdshmnb dsdshmnb dsdshmnb dsdshmnb dsdshmnb dsdshmnb dsdshnmb dsdshmnb dsdshmnb dsdshnmb dsdshmnb dsdshmnb dsdshnmb dsdshmnb dsdshmnb dsdshnmb dsdshmnb dsdshmnb dsdshnmb dsdshmnb dsdshmnb dsdshnmb dsdshmnb dsdshmnb dsdshnmb dsdshnmb dsdshmnb dsdshnmb dsdshnmb dsdshmnb dsdshnmb dsdshnmb dsdshmnb dsdshnmb dsdshnmb dsdshmnb dsdshnmb dsdshnmb dsdshmnb dsdshnmb dsdshnmb dsdshmnb dsdshnmb dsdshnmb dsdSH360000000000000000000000000000000000000000000000000000000000000000000000000000000000000000000000000000 | |
| dsdshmnb dsdshmnb dsdshmnb dsdshmnb dsdshmnb dsdshmnb dsdshmnb dsdshmnb dsdshmnb dsdshmnb dsdshmnb dsdshmnb dsdshmnb dsdshmnb dsdshmnb dsdshmnb dsdshmnb dsdshmnb dsdshmnb dsdshmnb dsdshmnb dsdshmnb dsdshmnb dsdshmnb dsedshmnb dsdshmnb dsdshmnb dsdshmnb dsdshmnb dsdshmnb dsdshmnb dsdshmnb dsdshmnb dsdshmnb dsdshmnb dsdshmnb dsdshmnb dsdshmnb dsdshmnb dsdshmnb dsdshmnb dsdshmnb dsdshmnb dsidshmnb dsdshmnb dsdshmnb dsdshmnb dsdshmnb dsdshmnb dsdshmnb dsdshmnb dsdshmnb dsdshmnb dsdshmnb dsdshmnb dsdshmnb dsdshmnb dsdshmnb dsdshmnb dsdshmnb dsdshmnb dsdshmnb dsidshmnb dsdshmnb dsdshmnb dsdshmnb dsdshmnb dsdshmnb dsdshmnb dsdshmnb dsdshmnb dsdshmnb dsdshmnb dsdshmnb dsdshmnb dsdshmnb dsdshmnb dsdshmnb dsdshmnb dsdshmnb dsdshmnb dsidshmnb dsidshmnb dsdshmnb dsdshmnb dsdshmnb dsdshmnb dsdshmnb dsdshmnb dsdshmnb dsdshmnb dsdshmnb dsdshmnb dsdshmnb dsdshmnb dsdshmnb dsdshmnb dsdshmnb dsdshmnb dsdshmnb dsdchmnb dsdshmnb dsdshmnb dsdshmnb dsdshmnb dsdshmnb dsdshmnb dsdshmnb dsdshmnb dsdshmnb dsdshmnb dsdshmnb dsdshmnb dsdshmnb dsdshmnb dsdshmnb dsdshmnb dsdshmnb dsdshmnb dsdchmnb dsdshmnb dsdshmnb dsdshmnb dsdshmnb dsdshmnb dsdshmnb dsdshmnb dsdshmnb dsdshmnb dsdshmnb dsdshmnb dsdshmnb dsdshmnb dsdshmnb dsdshmnb dsdshmnb dcshmnb dsdshmnb dsdshmnb dsdshmnb dsdshmnb dsdshmnb dsdshmnb dsdshmnb dsdshmnb dsdshmnb dsdshmnb dsdshmnb dsdshmnb dsdshmnb dsdshmnb dsdshmnb dsdshmnb dsdshmnb dsdshmnb dsdchmnb dsidshmnb dsdshmnb dsdshmnb dsdshmnb dsdshmnb dsdshmnb dsdshmnb dsdshmnb dsdshmnb dsdshmnb dsdshmnb dsdshmnb dsdshmnb dsdshmnb dsdshmnb dsdshmnb dsdshmnb dsdshmnb dsdshmnb dsdeshmnb dsdshmnb dsdshmnb dsdshmnb dsdshmnb dsdshmnb dsdshmnb dsdshmnb dsdshmnb dsdshmnb dsdshmnb dsdshmnb dsdshmnb dsdshmnb dsdshmnb dsdshmnb dsdshmnb dsdshmnb dsdshmnb dsdishmnb dsdshmnb dsdshmnb dsdshmnb dsdshmnb dsdshmnb dsdshmnb dsdshmnb dsdshmnb dsdshmnb dsdshmnb dsdshmnb dsdshmnb dsdshmnb dsdshmnb dsdshmnb dsdshmnb dsdshmnb dsdshmnb dsdSH3600000000000000000000000000000000000000000000000000000000000000000000000000000000000000000000000 | |
3646
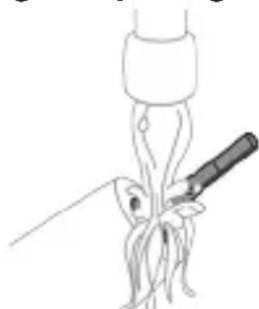
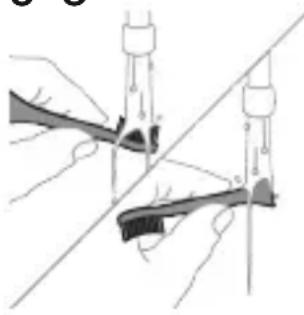
www.philips.com/support
Directive EU/2014/53 (Bluetooth, NFC)
2.4 GHz
B
.dBm 3
-7y19
.MHz 13.56-1
-
.dBm 30.16
TININ 7W NINNNN 7W X700170
www.philips.com/support:
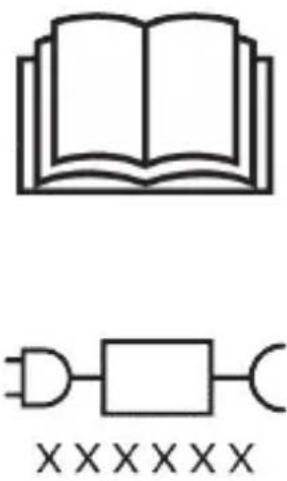
Jn"Jnun7 nuyu 7u nn:nuNFC IN Bluetooth- DIND NINON
7y97 7y7y7y7y7y7y7
7u 790n n | "Xxxxx" -n :77n 7n n 790,TCBxxx,HX6100,HX6110).wnn7 w n n n 790 (WAAxxx IN HX6160
TYPINW
NITyD ProtectiveClean 7u NITyunn D uynn NITyD Nvyn7 D uynn JTTN Xu Tn7 N7wnn D uynn Nynn .Nn Nxu 7u 7u7 T7u uynn .uX uynu7 NITyD ProtectiveClean 7u .
(.1 ネイNX) ユ Philips Sonicare
D7
1n7 2/ 3/ 477
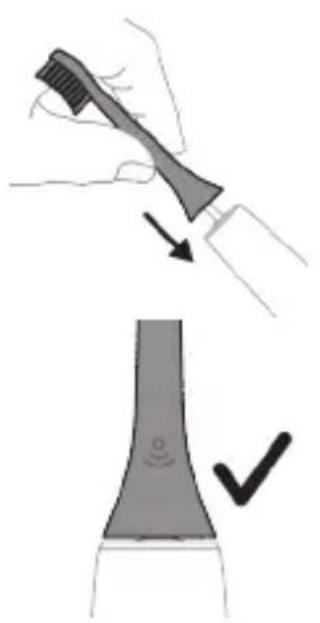
1
2
Philips Sonicare 1
Sonicare 1000000000000000000000000000000000000000000000000000
nynnn ninn nn 7v.nynnn n7v9 n. ninn nn nnn 77,
N77D7
7u nn n 7nn nn nn nn 7y7 y7 1n .Nv9n EasyStart nn nn nn ,Sonicare
nynnnn 14 nnnnnn nn nnnn nn nnnn nn nnnn nn nnnn nn nnnn nn nnnn nn nnnn nn nnnn nn nnnn nn nnnn nn nnnn nn nnnn nn
.Philips Sonicare
NINXIVD
7u nn n 7nn nn nn nn nn nn nn nn nn nn nn nn nn nn nn nn nn nn nn nn nn nn nn nn nn nn nn nn nn nn nn nn nn nn nn nn nn nn nn nn nn nn nn nn nn nn nn nn nn nn nn nn nn nn nn nn nn nn nn nn nn nn nn nn nn nn nn nn nn nn nn nn nn nn nn nn nn nn nn nn nn nn nn nn nn nn nn nn nn nn nn nn nn nn nn nn nn nn nn nn nn
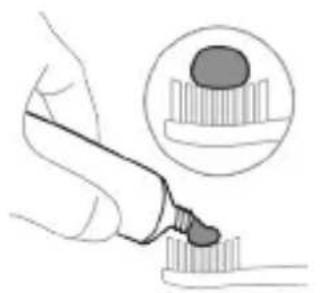
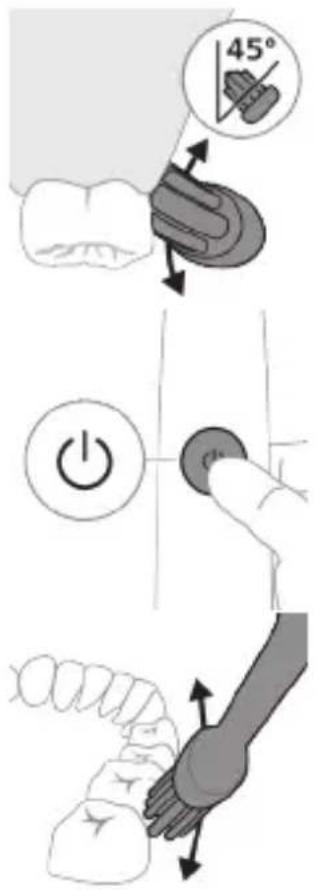
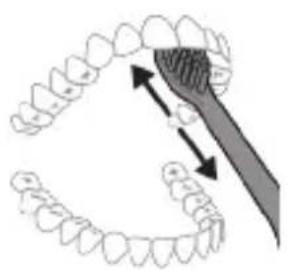
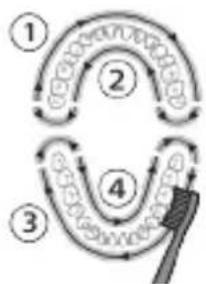
www.philips.com/toothbrush-heads
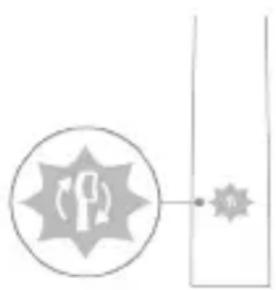
Quadpacer
The QuadPacer feature (interval timer) helps you keep track of the brushing time on each section of your mouth.
SmarTimer
SmarTimer - The SmarTimer is a feature that allows you to set a timer for your brushing session. It helps you brush for the recommended two minutes, with intervals every 30 seconds to remind you to move to the next quadrant of your mouth.
The SmarTimer is available on the Philips Sonicare EasyStart model.
EasyStart
EasyStart - The Philips Sonicare EasyStart is a model that features the EasyStart function, which gradually increases the brushing power over the first 14 uses to help you adapt to the Sonicare brushing experience.
#
Philips Sonicare - The Philips Sonicare is a brand of electric toothbrushes that use sonic technology to provide a superior clean. The EasyStart model is one of the many models available.
The EasyStart function is available on the Philips Sonicare EasyStart model.
The EasyStart function is available on the Philips Sonicare EasyStart model.
BrushSync - The BrushSync technology is a feature that allows the toothbrush to automatically select the optimal brushing mode and intensity for the brush head that is attached. It also reminds you when it's time to replace your brush head.
Philips Sonicare - The Philips Sonicare is a brand of electric toothbrushes that use sonic technology to provide a superior clean. The BrushSync technology is available on select Sonicare models.
The BrushSync technology is available on select Sonicare models. It automatically selects the optimal brushing mode and intensity for the brush head that is attached, and reminds you when it's time to replace your brush head.
1
The BrushSync technology is available on select Sonicare models. It automatically selects the optimal brushing mode and intensity for the brush head that is attached, and reminds you when it's time to replace your brush head.
2
3
77
.1y
y/7y9n7 77n7:2
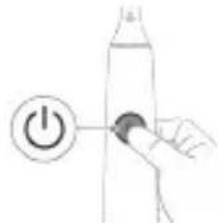
y7iunn nn7nn7 n
JUUN
777777773
ywnn/7ynn nn 3
37N1D9X2,19X
2TNI 1
19X
19X9X
77 77 77 77 77 77 77 77 77 77 77 77 77 77 77 77 77 77 77


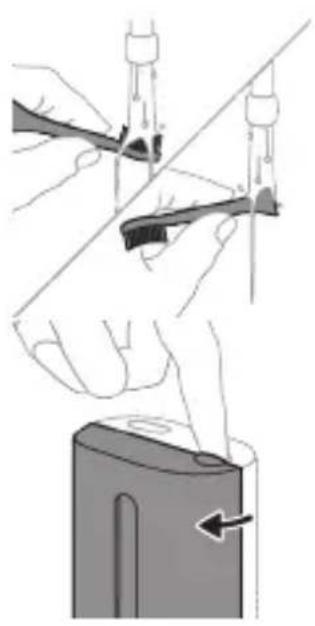
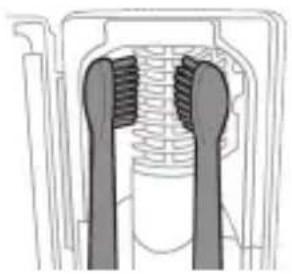
Philips Sonicare
Philips Sonicare 7
for Kids
JUNION
28 nin97 7907 nTVn Philips Sonicare 7w IT Dn
n7710 IINN.n77nnyo 7y (Dn Dny
27u nynn 71y9 nn 7un nn 77ion nn
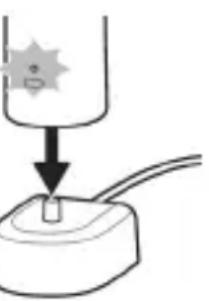
1 2
NIV017
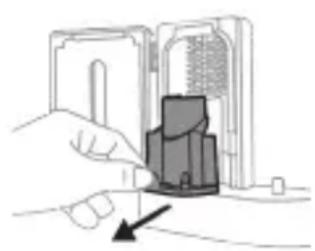
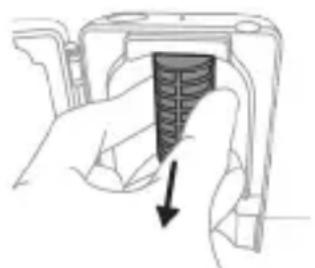
1
2
10
.7nun7
IONX
7n,nainnn 17n nn nnn7 7 |innn nn Dx D7n INX INX INX INX INX INX INX INX
.77
n97nn
DyTIN 3 Philips Sonicare 7u nn nnn
Nn7 77 nnun .NININ NININ
. Philipssonicare 7w n
DTH 900HIN
Philips Sonicare 7u nn nn nn nn nn nn nn
.(HX64XX, HX68XX) 0Tn 900
ninnnn
77777777n,nnn n77
.https://www.philips.co.il/c-w/support-home.html
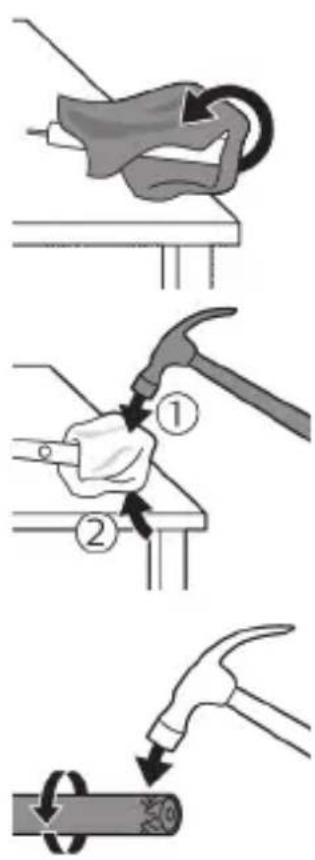
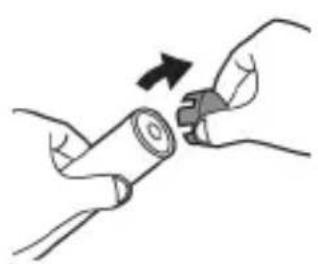
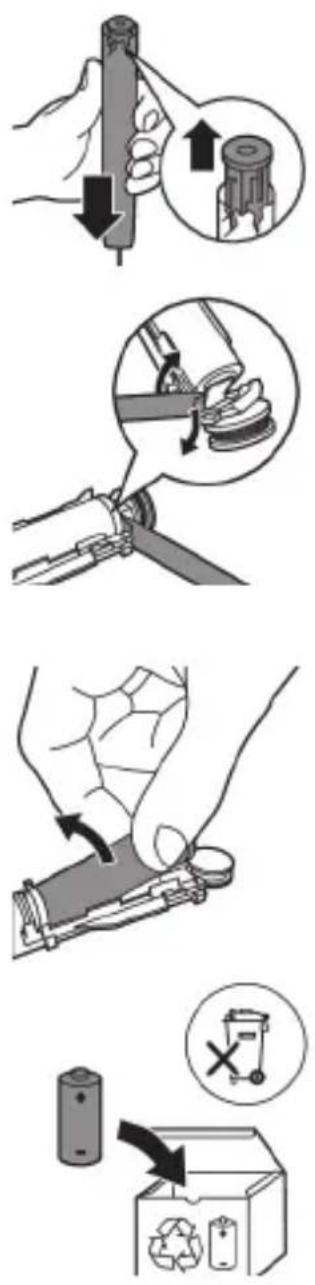
www.philips.com/Sonicare
© 2022 Koninklijke Philips N.V. (KPNV). All rights reserved. Philips and the Philips shield are trademarks of KPNV. Sonicare and the Sonicare logo are trademarks of Philips Oral Healthcare, LLC and/or KPNV.
300008263851 (07/12/2022)
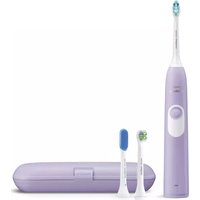


- IMPORTANT SAFETY INFORMATION
- WARNINGS
- BATTERY SAFETY INSTRUCTIONS
- STORAGE AND TRANSPORTATION CONDITIONS
- ELECTROMAGNETIC FIELDS (EMF)
- RADIO EQUIPMENT DIRECTIVE
- WWW.PHILIPS.COM/SUPPORT
- INTENDED USE
- YOUR PHILIPS SONICARE (FIG 1.)
- ACCESSORIES
- GETTING STARTED
- USING YOUR PHILIPS SONICARE TOOTHBRUSH
- FOR MODELS WITHOUT INTENSITIES
- FOR MODELS WITH INTENSITIES
- BRUSHING INSTRUCTIONS
- QUADPACER
- MODES
- CLEAN
- INTENSITIES (SPECIFIC MODELS ONLY)
- BRUSHSYNC TECHNOLOGY
- FEATURES
- PRESSURE SENSOR FEEDBACK
- QUADRACKER
- SMARTIMER
- EASYSTART
- DISCLAIMER
- BRUSH HEAD REPLACEMENT REMINDER
- ACTIVATING OR DEACTIVATING FEATURES
- UV SANITIZER
- CHARGING AND BATTERY STATUS
- CHARGING
- CHARGING ON CHARGER OR UV SANITIZER
- BATTERY STATUS
- BATTERY STATUS (HANDLE ON PLUGGED-IN CHARGER)
- BATTERY STATUS (HANDLE ON PLUGGED IN CHARGER/CHARGING TRAVEL CASE)
- BATTERY STATUS BATTERY INDICATOR
- BATTERY STATUS (WHEN HANDLE IS NOT PLACED ON CHARGER)
- BATTERY STATUS BATTERY INDICATOR SOUND
- CLEANING
- TOOTHBRUSH HANDLE
- BRUSH HEAD
- CHARGER
- TRAVEL CASE
- CLEANING THE SANITIZER
- STORAGE
- REPLACEMENT
- LOCATING THE MODEL NUMBER
- WARRANTY AND SUPPORT
- WARRANTY EXCLUSIONS
- RECYCLING
- REMOVING THE RECHARGEABLE BATTERY
- INTRODUCTION
- MODEL WITHOUT INTENSITY REGULATION
- MODEL WITH INTENSITY REGULATION
- USING YOUR PHILIPS SONICARE TOOTHPASTE
- FOR MODELS WITHOUT INTENSITY SETTINGS
- FOR MODELS WITH INTENSITY SETTINGS
- FUNCTIONS
- PRESSURE SENSOR ALERT
- MODELS WITH INTENSITY LEVELS
- YOUR PHILIPS SONICARE DEVICE (FIG. 1.)
- EXPLANATION
- ULTRAVIOLET DISINFECTANT
- CHARGING IN THE CHARGER OR UV DISINFECTANT
- BATTERY STATUS (WHEN THE HANDSET IS PLACED ON THE CHARGING CRADLE)
- BATTERY STATUS (WHEN THE HANDSET IS CONNECTED TO A CHARGING CRADLE OR TRAVEL CHARGER)
- BATTERY STATUS (WHEN THE HANDSET IS NOT ON THE CHARGING CRADLE)
- HANDSET OF THE BASE UNIT
- ATTACHMENT
- TRAVEL CAP
- A MODJIH 6E3 HNBA HA NHTEH3NBHOCT
- A MODJIC HNBA HA NHTEH3NBHOCT
- HNBAHA NHTEH3INBHOCT (CAMO 3A ONPEJEHMODEJI)
- TEXHOLOGNIA BRUSHSYNC
- ФУНКЦИИ
- ACTIVATING OR DEACTIVATING FUNCTIONS
- TRANSIT I OR II
- KYRGYZ
- PRODUCT INFORMATION
- EXPERTS
- STORAGE AND TRANSPORT CONDITIONS
- BRUSH ACTIVATION
- PHILIPS SONICARE TOOTHBRUSH (FIG. 1)
- FOR INTENSIVE CLEANING
- PEXIMDEP
- IHTEHCBDYYJYKTOP (AIPBIM YIGYJEPDO RAHA)
- KY6ATTOO JKAHA 6ATAPEHBIN A6AJIBI
- BATTERY STATUS (WHEN HANDLE IS ON CHARGING BASE)
- BATTERY STATUS INDICATOR
- BATTERY STATUS (WHEN HANDLE IS PLACED IN CHARGING TRAVEL CASE)
- BATTERY INDICATOR BATTERY COMPARTMENT
- REMOVE
- BATTERY COMPARTMENT COVER
- FABRIC SOFTENER
- RINSING
- DRYING INSTRUCTIONS
- CAHNTA3EPN TA3A1OO
- CAKTOO
- AIMAUTBLPYY
- YLRGY HOMEPN KEPCTOYIRGEN JEP
- KENILDK JKAHA KOJDOO
- KENILDKTERN YEKTOEJEP
- BATTERY REPLACEMENT
- CHARGING THE BATTERY
- WARNING
- YOUR PHILIPS SONICARE (FIG. 1)
- THE PHILIPS SONICARE TOOTHBRUSH STARTS WORKING IMMEDIATELY
- FOR THOSE WHO PREFER A GENTLE CLEAN
- FOR THOSE WHO PREFER A MORE INTENSE CLEAN
- PHILIPS SONICARE HANDLE (FIG. 1)
- DO NOT IMMERSE IN WATER
- DISPOSAL
- INSTRUCTIONS FOR OPTIMAL USE
- STORAGE CONDITIONS
- USING THE DEVICE
- YOUR 'PHILIPS SONICARE' (FIG. 1)
- NOTE
- SPECIFICATIONS
- PRESSURE SENSOR CONNECTION
- OR
- DISINFECTION BLOCK WITH UV LAMP
- BATTERY CHARGE INDICATOR STATUS
- REMOVING THE BATTERY
- BATTERY SAFETY WARNINGS
- PHILIPS SONICARE (FIGURE 1)
- FOR MODELS WITH A HANDLE
- TIMER
- CHARGING AND BATTERY
- CHARGING ADAPTER FOR THE SONICARE TOOTHBRUSH
- PHILIPS SONICARE (BY 1.)
- PHILIPS SONICARE 3O0MNB 503NNB 3O3MY
- N60G6BN3M0G0NB 0GM6G AMGOGONB0N3NB
- B3N6B6DNO
- BRUSHSYNC
- SMARTTIMER
- BRUSH HEAD REPLACEMENT
- GAAAB03S GDSBSHNAB BDOYN
- A3M3B
- A308G A3B0S6 UV B6N8M
- AOHMNBBGHBN
- DSHMNB BFOYBN (BBSMYN DGMNN 308)
- DOOOMNUBOOOYBN OOOHMNB
- TYPINW
- (.1 ネイNX) ユ PHILIPS SONICARE
- D
- PHILIPS SONICARE
- THE EASYSTART FUNCTION IS AVAILABLE ON THE PHILIPS SONICARE EASYSTART MODEL
- IONX
- N97NN
- DTH 900HIN
- NINNNN
Brand : PHILIPS
Model : Sonicare ProtectiveClean 4300 HX6848
Category : Electric toothbrush