KITCHENminis 04.1318.0012 - Kettle WMF - Free user manual and instructions
Find the device manual for free KITCHENminis 04.1318.0012 WMF in PDF.

| Product type | Electric kettle |
| Brand | WMF |
| Model | KITCHENminis 04.1318.0012 |
| Capacity | 200 ml to 1 000 ml |
| Power supply | 220-240 V ~ 50-60 Hz, 1 650-1 960 W |
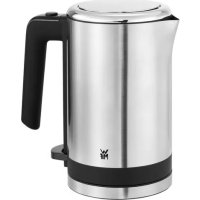
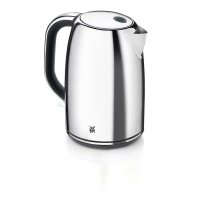
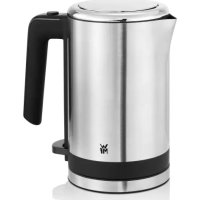
| Material | Cromargan® stainless steel and Schott DURAN® glass |
| Weight | Approximately 1 kg |
| Dimensions (approx.) | 20 × 20 × 25 cm |
| Safety | Automatic shut-off, dry-boil protection, dual thermostat, lockable lid |
| Temperature settings | 60 °C, 70 °C, 80 °C, 90 °C, 100 °C |
| Keep warm function | Yes, up to 20 minutes |
| Boil function | Yes (heats to 100 °C then cools to target temperature) |
| Descaling filter | Removable, dishwasher-safe |
| Tea strainer | Included, dishwasher-safe |
| Tea bag holder | Integrated into the lid|
| LED lighting | LED ring operating indicator |
| Cable length | With integrated cord wrap under the base |
| Care and cleaning | Wipe with damp cloth, descaling recommended, do not immerse |
| Spare parts | Descaling filter, tea strainer available via customer service |
| Repairability | Repairs by central customer service or qualified technician |
Frequently Asked Questions - KITCHENminis 04.1318.0012 WMF
User questions about KITCHENminis 04.1318.0012 WMF
0 question about this device. Answer the ones you know or ask your own.
Ask a new question about this device
Download the instructions for your Kettle in PDF format for free! Find your manual KITCHENminis 04.1318.0012 - WMF and take your electronic device back in hand. On this page are published all the documents necessary for the use of your device. KITCHENminis 04.1318.0012 by WMF.
USER MANUAL KITCHENminis 04.1318.0012 WMF
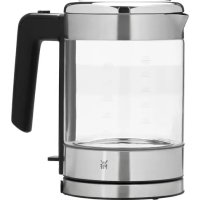
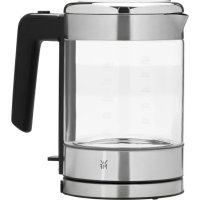
Parts of the Vario glass kettle
1 Scale filter
2 Lid
3 Teabag holder (inside the lid)
4 Tea strainer
5 Lid opening button
6 Glass kettle
7 LED ring
8 Base
9 Temperature selection buttons
10 Keep warm function
11 Start/Stop button
Important safety instructions
- These devices can be used by children older than eight years old as well as by persons with limited physical, sensory or mental capabilities, persons lacking experience and/or lacking knowledge if they are supervised or have received instructions regarding how the device is to be used safely and have understood the resulting risks. Children shall not play with the device. Cleaning and user maintenance shall not be made by children, unless they are older than 8 years old and supervised.
- Keep the device and its cord out of the reach of children under 8 years old.
- Only operate the electric kettle with the appropriate base.
- Boiling water may splash out if the device is overfilled or operated when the lid is not closed.
- Never use the appliance with open lid or without scale filter.
- Do not immerse the kettle and base in water.
- If the appliance's supply cord is damaged then it must be replaced by the manufacturer's central customer service department or by a similarly qualified person. Improper repairs may constitute a serious threat for users.
Take care not to spill water on the base. - Caution! Risk of burns! The temperature of accessible surfaces and tea strainer can become very hot. They also remain hot for some time after the appliance has been switched off.
- After using the appliance and accessories, clean all surfaces/parts that have come into contact with food. Follow the instructions in the "Cleaning and care" section.
- Always use the appliance in accordance with these instructions. Improper use can result in electric shocks and other hazards.
-
The appliance is designed for indoor household use only.
-
This device is intended to be used in household and similar applications, such as:
-
staff kitchen areas in shops, offices and other working environments;
- farm houses;
- by clients in hotels, motels and other residential type environments;
- bed and breakfast type environments.
The device is not intended for purely commercial use.
Prior to use
Read the operating manual carefully. It contains important information about the use, safety and maintenance of the appliance.
It should be kept in a safe place and passed on to further users if appropriate.
The device may only be used for the intended purpose according to these operating instructions.
Observe the safety instructions during use.
Technical Data
Rated voltage: 220 - 240V 50 - 60Hz
Power consumption: 1650 - 1960 W
Protection class: I
Safety instructions
- Only connect the device to properly installed earthed sockets. The wire and plug must be dry.
- Do not pull the connecting cable over sharp edges or clamp it. Do not let it hang down and protect it from heat and oil.
- Never disconnect the mains plug from the socket by the cord or with wet hands.
-
Stop using the appliance and/or disconnect it from the mains plug immediately if:
-
The appliance or mains cable is damaged;
-
the device is not leak-proof;
-
there is any suspicion of a fault after dropping the appliance or similar.
In such cases, send the appliance to be repaired.
- Do not place the kettle on hot surfaces, such as hot plates or similar, or near open flames. It could melt.
- Do not place the device on water-sensitive surfaces. Water spray may damage them.
- Do not operate the device under delicate furniture. Escaping steam from boiling could damage the furniture.
- Never operate the kettle unattended.
- Do not open the lid while water is boiling.
- Do not switch on the device without water.
Take the kettle for filling from the base. - Only fill with clean water, not milk, coffee, etc.
-
Do not move the device during operation and do not pull on the mains cable.
Caution: the device is hot. Risk of scalding from escaping steam. Only take hold of the hot kettle from the handle and do not open the lid when pouring. -
Always completely empty the kettle. Do not let any residual water remain in the device for a long period of time.
-
The mains plug is to be pulled:
-
if malfunctions occur during use,
- before cleaning and care,
-
after use.
-
No liability is accepted for any damages resulting from misuse, incorrect operation or improper repairs.
Claims under warranty are likewise excluded in such cases. - Packaging material, such as plastic film bags, do not belong in the hands of children.
Operating the appliance for the first time and general information
The kettle is made from stainless steel and original Schott DURAN® glass. It is heat resistant, stable, neutral tasting and easy to clean.
Thoroughly clean the inside of the kettle prior to the first use. (see the chapter entitled "Cleaning and care").
A strainer insert in the pour spout ensures that larger limescale particles are kept back when pouring.
The unnecessary length of the connecting cable can be wound at the bottom of the base part.
Connect the mains plug to an earthed socket.
Add the desired amount of water (min. 200 ml, max. 1,000 ml).
Note: If you use too little water, the dry-run protection (overheating protection)
automatically switches the heating element off. If there is too much water then hot water may boil over, which can cause serious injury or burns.
The lid (2) must audibly lock into place; only in this way does the automatic boil stop work reliably.
Place the kettle on the base in any position.
Do not use the water from the first boiling process for food preparation.
The following functions are available:
Boiling water
- Open the lid (2) by pressing the button on the handle (5) and remove the tea strainer (4).
- Fill the kettle with the desired amount of water (min. 200 ml, max. 1,000 ml).
- Close the lid (2) until it locks into place to enable the automatic boil stop to function reliably.
- Put the kettle back onto the base (8) in any position.
- Press the Start/Stop button . The most recently selected temperature button lights up (60^, 70^, 80^, 90^ or 100^) . If you want to change this, press the appropriate button for your desired temperature (9). Alternatively, you can also switch the kettle on by directly pressing the respective button for your desired temperature.
Note: If no key is pressed for 10 seconds, the kettle automatically switches itself off. The indicator lights go out and the power consumption is then less than 0.5 watts.
- Press the Start/Stop button to start heating. The Start/Stop button and the LED ring (7) inside the kettle lights up. You can interrupt the brewing process at any time by pressing the Start/Stop button again.
- As soon as the desired temperature has been reached, the appliance beeps (several times at certain intervals) and switches itself off automatically.
The button lighting and the LED ring (7) goes out.
Making tea with loose leaves
Follow steps 1 to 7 described above (see the chapter entitled "Boiling water") to heat the water up to the desired temperature.
Fill the tea strainer (4) and follow the instructions on the packaging when portioning out the tea. As a
rough guide, there should be one teaspoon of loose tea for each 250ml of water.
Place the tea strainer (4) in the kettle by pointing the Cromargan® label and the handle in the direction of the pour spout (Fig. A).
Leave the tea to infuse for the appropriate amount of time depending on the type of tea. Remove the tea strainer using the handle. Caution: The rising steam can cause burns and the tea strainer may become hot.
Making tea with teabags
As well as making tea using loose leaves, you can also use regular teabags.
Follow steps 1 to 7 described above (see the chapter entitled "Boiling water") to heat the water up to the desired temperature. Ensure that the tea strainer included (4) has been removed from the kettle. In the inside section of the lid, there is a holder which the teabag can be hooked onto (Fig. C).
Leave the tea to infuse for the appropriate amount of time depending on the type of tea.
Types of tea
The temperature of the water and the length of time you leave the tea to infuse plays a key role in making tea. Below you will find an overview to act as a guide: The temperature and infusion time can be adapted depending on the type of tea and your personal preferences.
| Temperature Type | of tea Infusion time | |
| 60°C | Japanese green tea 3-4 mins. | |
| 70°C | White tea 3-4 mins. | |
| Yellow tea 1-3 mins. | ||
| 80°C | Green tea 3-4 mins. | |
| Oolong tea 1-2 mins. | ||
| 90-100°C | Black tea 3-4 mins. | |
| Herbal tea, fruit tea 5-8 mins. |
Boil function
The kettle is equipped with a boil function. To activate it, press the appropriate temperature button twice when choosing the desired temperature (60^, 70^, 80^ or 90^) . The temperature button selected and the 100^ button light up.
Press the Start/Stop button to start boiling.
The Start/Stop button and the LED ring (7) inside the kettle also lights up.
Once the water has boiled, the 100^ button light goes out and the cooling process starts automatically. The Start/Stop button flashes.
When the target temperature is reached, the appliance beeps (several times at certain intervals) and the button lighting goes out.
Note: Please note that it takes several minutes for the water to cool down from 100^ to 60^ or 70^ .
Keep warm function
This function keeps the water at the selected temperature for up to 20 minutes after heating.
The keep warm function is activated by pressing the Keep Warm button (10). You can switch the keep warm function on and off at any time - even after heating water up.
As soon as the desired temperature has been reached, the appliance beeps (several times at certain intervals) and the keep warm function is activated automatically. The temperature button to be held down (9), the Keep Warm button (10) and the Start/Stop button light up. The function is automatically switched off as soon as the kettle is taken off the base (8) or 20 minutes have passed.
Note: The keep warm function cannot be activated when the water temperature is 100^
Safety system
A thermostat protects the kettle from overheating due to accidental operation without water by switching off the device.
It is essential to allow the kettle to cool down before filling with water.
Should the first thermostat malfunction due to improper use, an additional temperature limiter provides reliable protection.
Cleaning and care
Remove the mains plug and allow the appliance to cool down.
Do not immerse the appliance in water, but rather clean it using a damp cloth with a little washing-up liquid and then dry it.
Do not use harsh or abrasive cleaning agents.
The inside of the kettle should be cleaned with warm water and a washing-up brush. To do so, open the lid by pressing the button on the handle (5) and remove the tea strainer (4).
We recommend cleaning the glass container after each use to prevent tea deposits from forming.
You can descale the kettle for more stubborn stains or limescale build-up. (see the chapter entitled "Descaling").
CAUTION: Never clean the kettle under running water.
The scale filter (1) in the pour spout can be removed for cleaning when the lid (2) is open. To do this, press its clip downwards and remove the filter. To insert the scale filter (1), take it on the clip and position the underside of the filter in the inside, centred, of the pour spout. Finally, push it upwards (Fig. B).
The scale filter (1) and tea strainer (4) can also be cleaned in the dishwasher.
Dscaling
Limescale deposits lead to energy losses and impair the service life of the appliance. The appliance switches off prematurely if the layer of limescale is too thick. The limescale is then very difficult to remove. Therefore descale the appliance regularly.
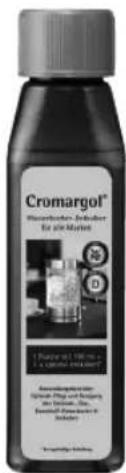
We recommend using Cromargol® kettle descaler. This product has been designed specifically for descending kettles and is extremely effective, food safe and has a neutral smell and taste. Thanks to the special care formula with two double additives, the Cromargol® kettle descaler does not damage the materials.
You can usually purchase Cromargol® from the store where you have purchased your appliance or from your chosen dealer.
-
Prior to descending, unplug the appliance from the mains and allow it to cool down.
-
Remove the strainer and place it inside the kettle. Replace the strainer after descaling has finished.
-
Shake the bottle of Cromargol® before using it. Fill the kettle with one portion (100 ml) of Cromargol® kettle descaler and leave for approximately five minutes to take effect. Then fill the appliance with cold tap water to cover the limescale ring on the wall and leave to stand for 30 minutes.
-
Then pour out the water and thoroughly rinse with cold tap water.
-
Measure out and use other descending agents according to the manufacturer's instructions.
Do not heat the solution during descaling.
Caution: the warranty does not cover damage caused by failure to observe the descending instructions.
Causes for malfunctions
- If the pouring behaviour worsens/diminishes:
check the strainer and descale/clean the strainer if necessary
Device switches off before boiling:
Bottom of the pot is too strongly calcified, it is not filled with enough water
Device does not switch off:
Lid is not closed
Device will not switch on:
The device has not sufficiently cooled down following operation with no or too little water.
If it is not possible to fix this problem, submit the device for repair.
For UK use only
- This product is supplied with a 13 A plug conforming to BS 1363 fitted to the mains lead. If the plug is unsuitable for your socket outlets or needs to be replaced, please note the following. If the plug is a non-rewireable one, cut it from the mains lead and immediately dispose of it. Never insert it into a socket outlet as there is a very great risk of an electric shock.
- The replacement of the plug at the mains lead has to be done according to the following instructions:
Warning - This appliance must be earthed
Important: The wires in this mains lead are coloured in accordance with the
following code:
green/yellow
Earth
blue Neutral
brown Live
As the colours of the wires in the mains lead of this appliance may not correspond with the coloured markings identifying the terminals in your plug, proceed as follows: As the colours of the wires in the mains lead of this appliance may not correspond with the coloured markings identifying the terminals in your plug, proceed as follows:
-
the wire which is coloured green and yellow must be connected to the terminal which is marked with the letter E or by the earth symbol 12 or coloured green or green and yellow,
-
the wire which is coloured blue must be connected to the terminal which is marked the letter N or coloured black,
-
the wire which is coloured brown must be connected to the terminal which is marked with the letter L or coloured red.
-
If a 13 A (BS 1363) plug is used it must be fitted with a 13 A fuse conforming to BS 1362 and be ASTA approved. If any other type of plug is used, the appliance must be protected by a 10 A fuse either in the plug or adapter or at the distribution board.
If in doubt - consult a qualified electrician.
- Never use the plug without closing the fuse cover.

The appliance complies with European directives 2014/35/EC, 2014/30/EC and 2009/125/EC.
At the end of its life, this product must not be disposed of in normal household waste but must instead be delivered to a collection point for recycling electric and electronic appliances.
The materials are recyclable in accordance with their labelling. The reuse, recycling or other use of old appliances makes an important contribution to protecting our environment.
Please ask your local administration for the appropriate disposal point.
Subject to alterations