DigiFrame 7040 - Digital photo frame BRAUN - Free user manual and instructions
Find the device manual for free DigiFrame 7040 BRAUN in PDF.
| Product type | Digital photo frame |
| Brand | Braun |
| Model | DigiFrame 7040 |
| Screen size | 7 inches (17.8 cm) TFT |
| Resolution | 800 x 600 pixels |
| Supported image format | JPEG |
| Memory card types | SD, SDHC, MMC, MS |
| USB port | USB 2.0 HOST |
| Power supply | 5 V / 1 A power adapter |
| Adapter input voltage | AC 100-240 V, 50/60 Hz |
| OSD languages | French, English, German, Italian, Spanish, Dutch, Portuguese, Swedish, Greek |
| Slideshow effects | More than 10 effects (random, split, venetian, etc.) |
| Display modes | Single, double, quadruple window |
| Display settings | Contrast, brightness, saturation, color |
| Built-in functions | Slideshow, calendar, clock, file copy/delete |
| Remote control | Included, CR2025 battery provided |
| Included accessories | Frame, power adapter, remote control, user manual |
| Screen cleaning | Soft cloth (e.g., lens cloth) with screen cleaning solution |
| Usage precautions | Do not expose to moisture, do not disassemble, turn off before inserting card or USB |
| Warranty | Warranty void if disassembled |
Frequently Asked Questions - DigiFrame 7040 BRAUN
User questions about DigiFrame 7040 BRAUN
0 question about this device. Answer the ones you know or ask your own.
Ask a new question about this device
Download the instructions for your Digital photo frame in PDF format for free! Find your manual DigiFrame 7040 - BRAUN and take your electronic device back in hand. On this page are published all the documents necessary for the use of your device. DigiFrame 7040 by BRAUN.
USER MANUAL DigiFrame 7040 BRAUN
This symbol on the product or in the instructions means that your electrical and electronic equipment should be disposed at the end of its life separately from your household waste. There are separate collection systems for recycling in the EU. For more information, please contact the local authority or your retailer where you purchased the product.
Design and specifications are subject to change without notice. During a period of time, the company may receive new customer requests.
1.1 Remote Control. 8
1.2 Structure and Interfaces 5
- Installing & Replacing the Battery.. 8
- Getting Started 9
- Operating Instruction 9
4.1 Card and USB 9
4.2 Picture Mode 9
- File 10
- Calendar 11
- Setup 11
- Troubleshooting Guide 12
- Technical Specifications.. 12
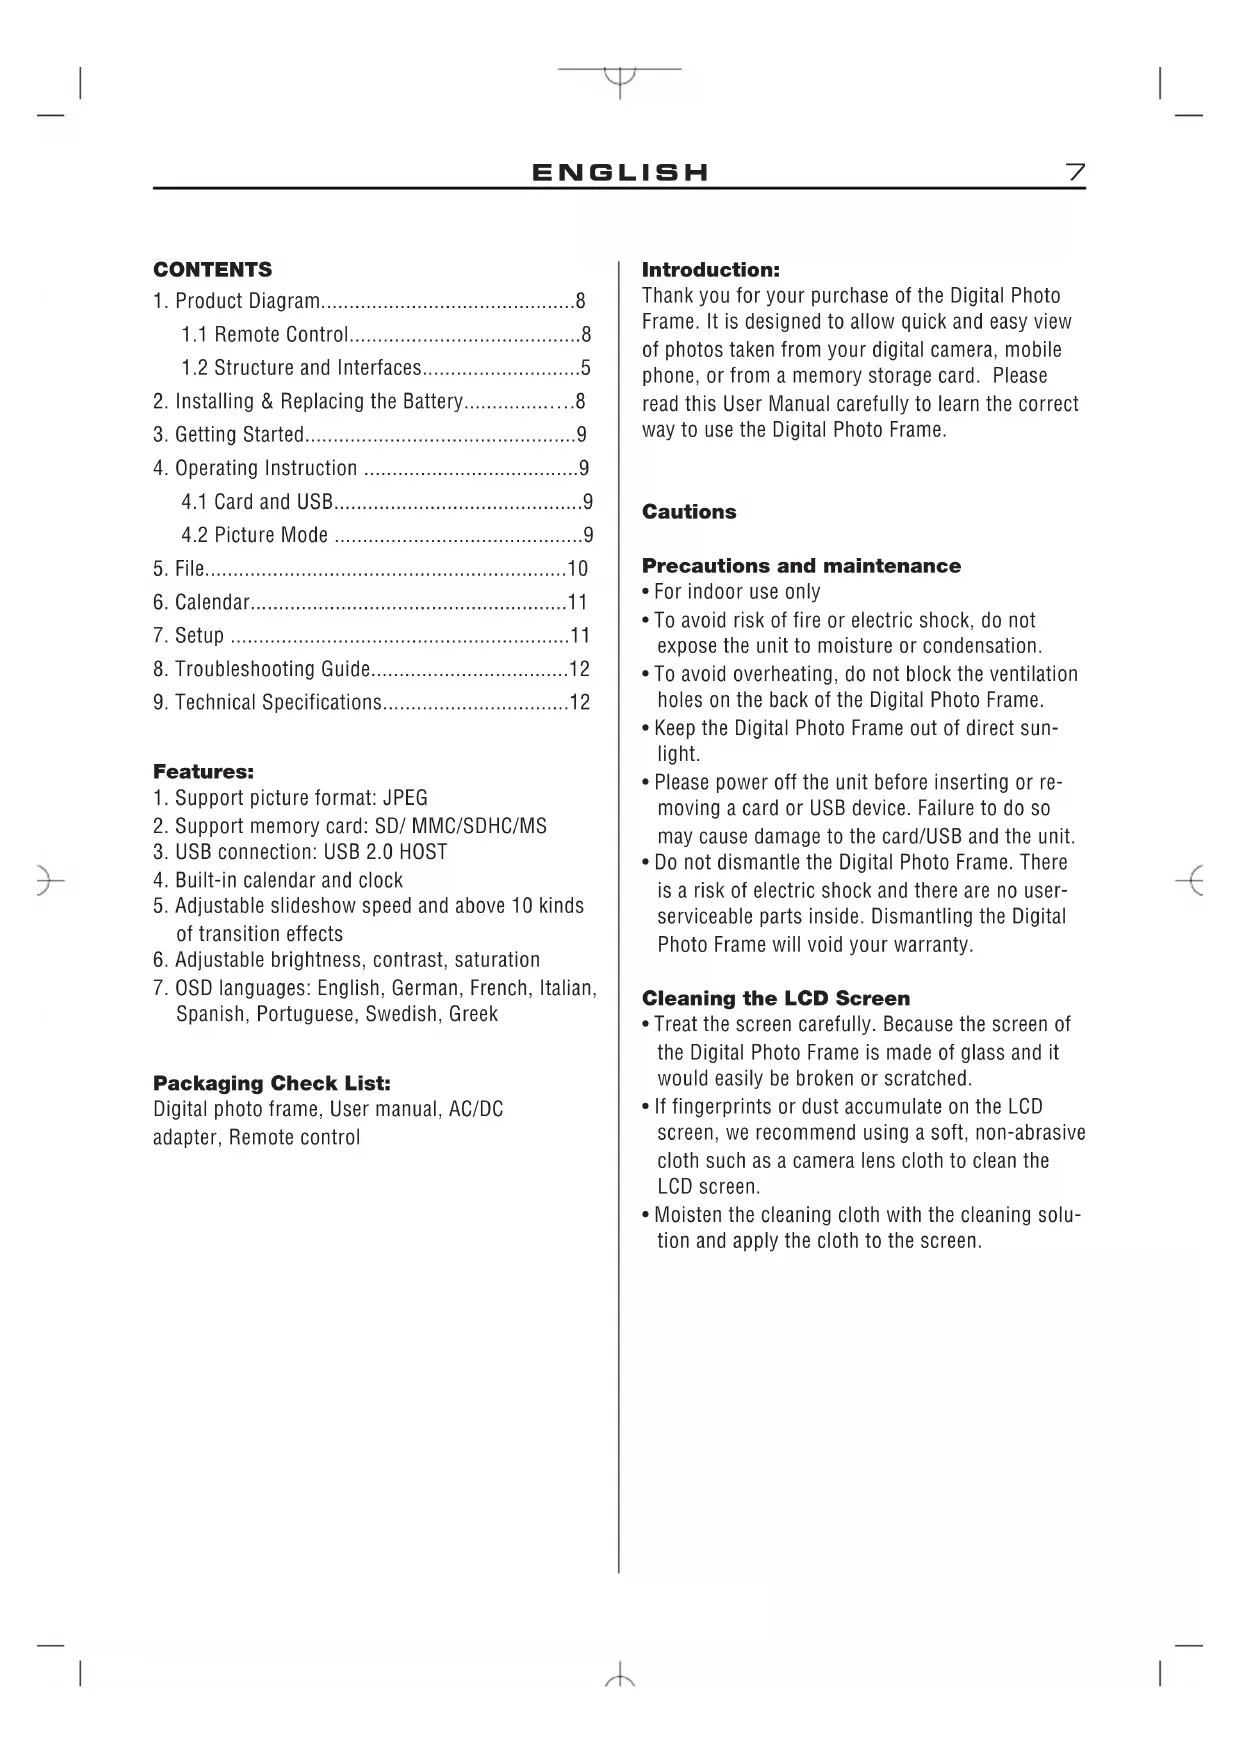
Features:
- Support picture format: JPEG
- Support memory card: SD/ MMC/SDHC/MS
- USB connection: USB 2.0 HOST
- Built-in calendar and clock
- Adjustable slideshow speed and above 10 kinds of transition effects
- Adjustable brightness, contrast, saturation
- OSD languages: English, German, French, Italian, Spanish, Portuguese, Swedish, Greek
Packaging Check List:
Digital photo frame, User manual, AC/DC adapter, Remote control
Introduction:
Thank you for your purchase of the Digital Photo Frame. It is designed to allow quick and easy view of photos taken from your digital camera, mobile phone, or from a memory storage card. Please read this User Manual carefully to learn the correct way to use the Digital Photo Frame.
Cautions
Precautions and maintenance
- For indoor use only
- To avoid risk of fire or electric shock, do not expose the unit to moisture or condensation.
- To avoid overheating, do not block the ventilation holes on the back of the Digital Photo Frame.
- Keep the Digital Photo Frame out of direct sunlight.
- Please power off the unit before inserting or removing a card or USB device. Failure to do so may cause damage to the card/USB and the unit.
- Do not dismantle the Digital Photo Frame. There is a risk of electric shock and there are no user-serviceable parts inside. Dismantling the Digital Photo Frame will void your warranty.
Cleaning the LCD Screen
- Treat the screen carefully. Because the screen of the Digital Photo Frame is made of glass and it would easily be broken or scratched.
- If fingerprints or dust accumulate on the LCD screen, we recommend using a soft, non-abrasive cloth such as a camera lens cloth to clean the LCD screen.
- Moisten the cleaning cloth with the cleaning solution and apply the cloth to the screen.
1 Product Diagram
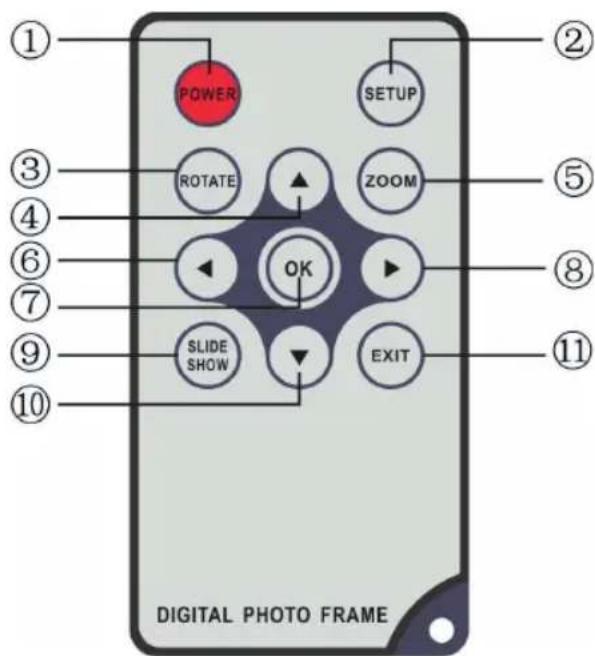
1.1 Remote Control
- POWER Switch On/Off
- SETUP_Enter copy & delete interface.
- Rotate _In the pause status of single picture, press ROTATE to revolve the picture 90^ in counterclockwise each time.
- Functional selection button - top cursor.
- Zoom_In the pause status of single picture, magnify picture display size.
- Functional selection button - left cursor
- OK_Press to confirm. Play/pause: In single picture mode, press it to start slideshow; In slideshow mode, Press it to pause, then repress it to play.
- Functional selection button - right cursor
- SLIDE SHOW_ Press to start slideshow directly
- Functional selection button - bottom cursor
- EXIT _ Press to return to upper page, or enter the main menu
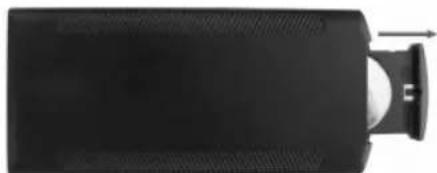
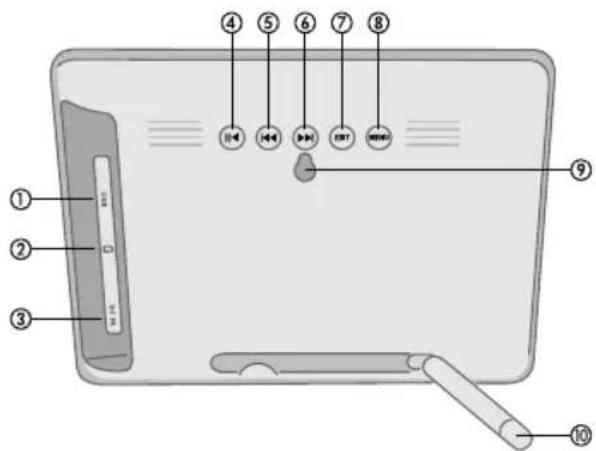
1.2 Structure and Interfaces

1 USB port
2 SD/SDHC, MMC, MS, MS pro card slot
3 DC in: 5V/1A
4 Play / Pause
5 Forward, Next
6 Back. Previous
7 Exit
8 Menu, Menu 2-3 sec -> POWER on/off
9 Wall mount
10 Stand
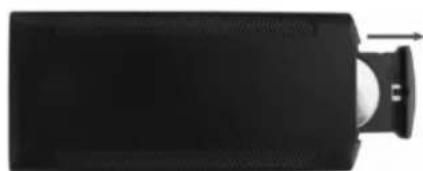
2. Installing & Replacing the Battery
Place the upside of the remote control down, press down on the ridged area of the battery cover and pull towards you to remove the tray. Place one CR2025 lithium button-cell battery on the tray with the positive "+"side facing you. Reinsert the tray.
3. Getting Started
3.1 Extend the digital photo frame bracket on the back of the frame to the widest position for greatest stability, and then plug one end of the included AC adapter into a standard 110-240V AC electrical outlet and the other end into the right side the frame.
3.2. Remove the protective film covering the LCD.
3.3. Remove the plastic battery insulator from the battery compartment and make sure the remote control has a battery inside. Please refer to "Installing & Replacing Battery" if you need a new battery.
3.4. Power on the unit by pressing the Power button on the remote control or at the backside of the unit (Press MENU button for a longer period).
4. Operating Instruction
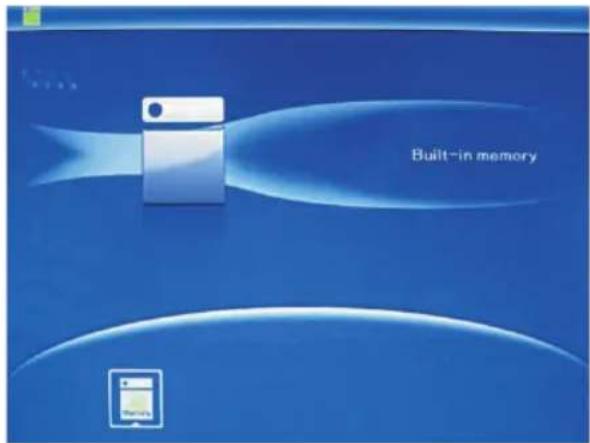
After turning on the unit, it will show the startup picture, press EXIT to get to the card select interface.
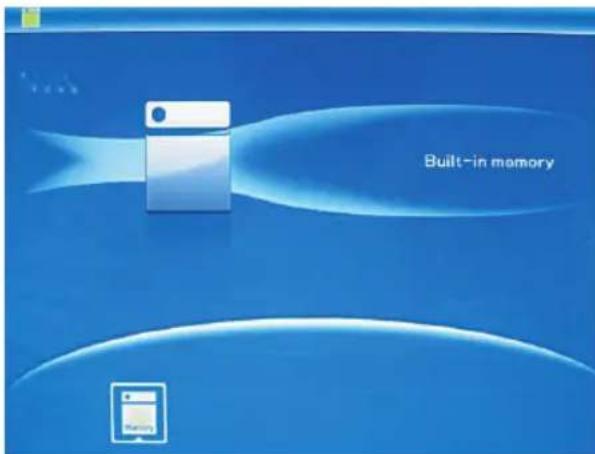
4.1 Card and USB
It supports SD/SDHC/MMC/MS and USB 2.0. After inserting a card or USB device, slideshow will play automatically, then press EXIT twice to access to photo, file, calendar and setup. Press OK to confirm.
Note:
Make sure there are supported picture files in the Card or USB device.
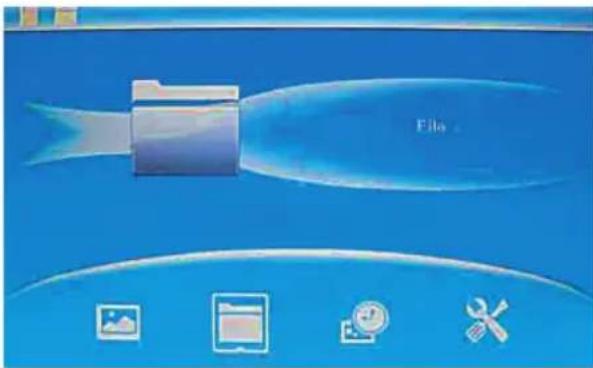
4.2 Picture Mode
Press EXIT to choose "MEMORY CARD" in the main menu. Highlight Photo, press OK to access to the nine-picture mode, use to choose the picture, press OK to play the picture in single window.
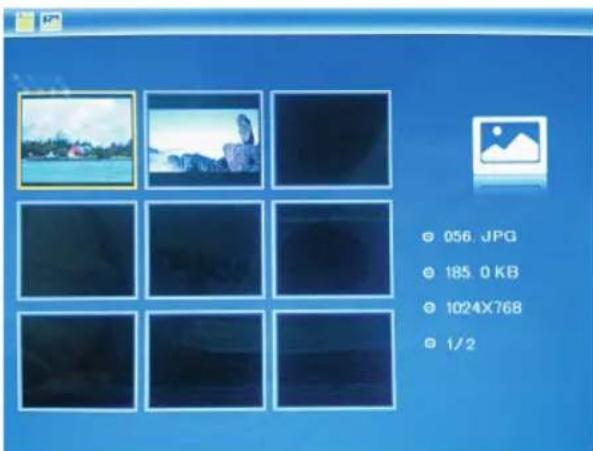
Press OK to start slideshow pictures in the selected slide mode.
Change slide mode as follows: press SETUP to choose SLIDE MODE (single /triple/ four windows), select with , press OK to confirm.

Copy & Delete function
In 9 - picture mode, use to select the picture you want to copy to the built-in memory, press OK to enter the single-picture mode, then press SETUP to enter copy interface, press OK to confirm.

In 9 - picture mode, use to select the picture you want to delete, then press SETUP to enter delete interface, press OK to confirm.

5. File
Press EXIT to choose "MEMORY CARD" in the main menu. Press File, then press OK to access to file interface. You can browse all the files in the memory card in this mode, and delete files in built-in memory or external device.
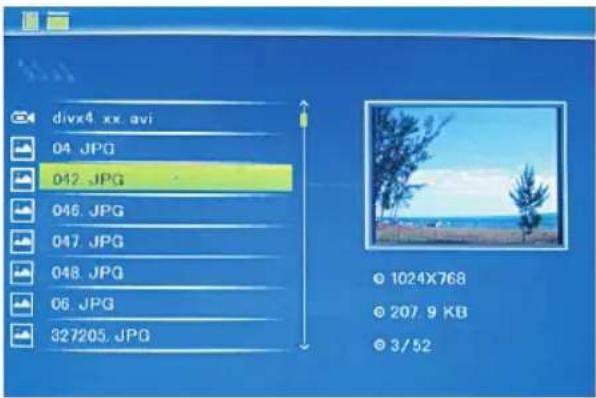
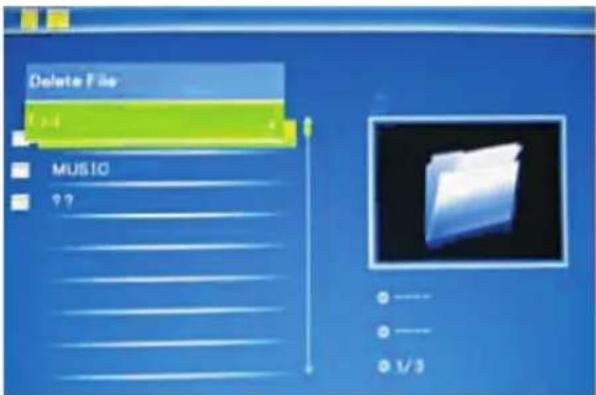
Delete function
Use to select the file you want to delete, then press SETUP to enter delete interface, press OK to confirm.
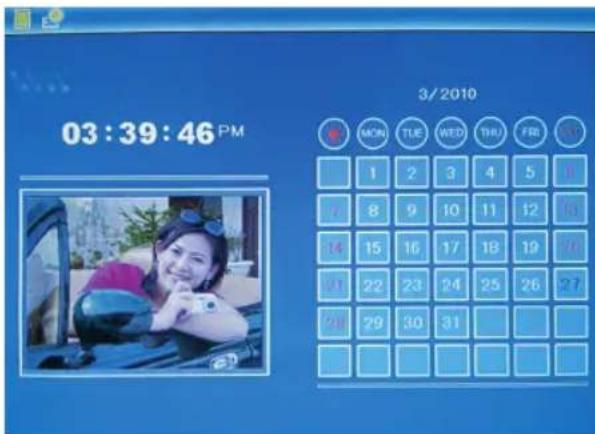
6. Calendar
Select Calendar from the main menu, press OK to enter. The time is displayed on the top of left side. under the time, the pictures in the memory card slide show automatically.
7. Setup
Select Setup from the main menu, and then press OK to access to Setup interface. Use to select the item you want to set up. Press OK to show the sub menu, select with , then press OK to confirm.

7.1 Language: English, French Italian, German, Spanish, Dutch, Portuguese, Swedish, Greek
7.2 Slide mode: Single window, Four windows, triple windows
7.3 Slide speed: 3/5/15/30seconds, 1/5/15/30minutes and 1hour
7.4 Photo effect: color, mono, sepia
7.5 Slide effect: random, Split Horizontal in/out, Jalousie, Split Vertical in/out, Radiation, Surround
7.6 Photo mode: Auto fit, Optional, Full
7.7 Display
Contrast: Use to select between 00 (lowest) and 40 (highest).
Brightness: Use to select between 00 (lowest) and 40 (highest).
Saturation: Use to select a point between 00(lowest) and 40(highest).
Tint: Use to select between 00(most color) to 40(least color).
7.8 Set time/date: Press OK, choose setup items with as follows: Year, Month, Date, Hour, Minute, Second, press OK, use to set, Press Save Time to confirm.
7.9 Set time format: 12/24, Press OK, select with , press OK, then use to set, press OK to confirm.
7.10 Format built-in memory: Press OK, choose No/Yes with , Press OK to confirm.
7.11 Reset setting: Press OK enter, use to select or unselect to reset all settings to default values, press OK to confirm.
7.12 Exit: Press to exit setup interface.
8. Troubleshooting Guide
If you are having problems with your player, please consult both this guide and manual. If you need further assistance, please contact Technical Support.
- No power:
Please check whether the plug is inserted correctly.
- Remote control no function:
Please check whether the battery has power (the battery can be used for half a year in normal conditions). Replace with new battery if necessary.
- Can not read the CARD or USB:
Please confirm whether there is storage in the card or USB device.
Empty devices cannot be read.
- Can not play the file:
Please confirm if the file format is compatible with the player.
- Display too bright or too dark:
Please adjust the brightness or contrast in the setup menu.
The color is light or no color:
Please adjust the color and contrast setup.
9. Technical Specifications
Adapter
Input: AC 100-240V 50/60HZ
Output: DC 5V/1A
Picture Formats:
JPEG
Memory Cards:
SD/SDHC/MMC/MS
USB:
USB Host 2.0
Screen Parameter:
Screen Size: 17.8 cm (7 inch) TFT
Aspect Ratio: 4:3
Resolution:800X600 Pixel
Table des matieres
1.2 Structure and Interfaces
1 USB port
2 SD/SDHC, MMC, MS, MS pro card slot
3 DC in: 5V/1A
4 Play / Pause
5 Forward, Next
6 Back, Previous
7 Exit
8 Menu, Menu 2-3 sec -> POWER om/off
9 Wall mount
10 Stand
2. Eioayyn & avikataoan twv mntapiw
TOTROETOTE TO TnAEXEIPIOI npio ME tvn avw
TTLEUPa TTPOs TA KATOW, TIEATE Nv auLakWmuEvN
TEPIOXn TOU KAULUMATOS MTATAPIAS TTPOCS TA
KATW KAI TPABNTE TO TTPOS TA EOAS, VIA VA
BYALETE TNY OKn. TOTTOETNE MIA
MTATAPIA-KOUPTI AIOIou CR2025 OTNV OKn,
EVW n OETIK NTLEUPA ^+ va DEixVEI TTPOCS TA
EOAC. EIOAYET TNY OKn TAI.
3. Npwa Bnmuata
3.1. TpaBnTe Touc BpaxioeC Otnv Tiaw
TLEUPaTOU yNphiAIOK KApOu WToypapiaoc
o0o TO Duvatov MaKputepao ToV Ev aTOV
ALLO, VIA VA EITUXETe TIV MEyALUTEPN
OtaepoNTa. EIOAYETe MTA IA Akpn TO
EOWKAEIOEvou METAOxNmuATn
EVAAAOsOEvou PEUMATO SE IIA NkTPIK
TIPICA EVAAASOsOEvou PEmauTOG 110-240V KAI
TNV AALN AKPN OTNV DEIgIANeUPaTO UAAIOU.
I: TIA TNY BAON TOU yNphiAIOK KApOu
WToypapias Unpoxouv Diapopec TheeIs
DIIbEoiues. NapakaAoupe avatpeTE OTIC
3.2. ATOPAKPUVE TIV PPOATEUTIKI
biaqveia, n otioia kALUTTE TIV oOvN
EvEIEeW UYPw KpuTAAWv.
3.3.ByaTEnV TAAOTIK Movwn MTatapiac aTo TnV tNtATAPIAC KAI BepaiWBeITE,OTI Bpioketai OTo TNExeipiotnpio ia pTatapia.Av XpeiaZcTe PIA KAIVOUPYIA MTatapia,avatpeTe Tnapakaloume oTo Eiaaywn & AvTKataoTaan Tuv mTatapiwV
3.4.Eepyoioane Tyn oukeun,ue to va Tiieote to nAnktpo Aeioupyia OTo tnaExepiopnpio n otny mptpoata nEupa Tns oukeunc.
4.Obnyies xpns
Metá TnV EVEpyoToinon Tns OuaKeunsg EapaviCetai n apxikn oOovn. NIEATE EEOAOs Tpeis φopés, yia va exTe TpObaon OTNV EOATEPIKn Vnμn.
4.1 Kapta kal USB
YTOOtnpioovtai SD/SDHC/MS/MMC/MS kai USB 2.0.Meta tvv Eiaaywyn iaç kaptac n iaç oukeunc USB avattapayetai autouata ia napouiaon. NIEOTE tote duo opecs EEOAOs, yia va katalnese Ota mevo, wtoypapiec, TXT, eboevo, npoloyio kai puthetaicis. NIEOTE OK yia va etiBebaiwoete.