
GX4 - Compressor Xblitz - Free user manual and instructions
Find the device manual for free GX4 Xblitz in PDF.
| Product type | Cordless portable air compressor |
| Brand | Xblitz |
| Model | GX4 |
| Power supply | Lithium-ion battery 4000 mAh (7.4 V / 14.8 Wh) |
| Output pressure | 2 to 150 PSI (0.1 to 10.3 BAR) |
| Air flow rate | 25 L/min |
| Charging time | Approximately 3 hours |
| Runtime | Approximately 25 minutes of continuous use |
| Operating modes | 5 modes (car, motorcycle, bicycle, balls, custom) |
| Auto shut-off | Yes, when target pressure is reached |
| Pressure gauge | Digital LED display |
| LED flashlight | Yes, with constant, flashing and SOS modes |
| Power bank function | Yes, USB-A output 5V 2A |
| Hose length | 15 cm |
| Dimensions | 68 x 48 x 154 mm |
| Weight | 450 g |
| Operating temperature | -10°C to 45°C |
| Maintenance and cleaning | Clean with a soft, dry cloth. Do not use abrasive products. |
| Safety | Auto shut-off, high temperature protection |
| After-sales service | https://xblitz.pl/gwarancja/ |
| Warranty | 24 months |
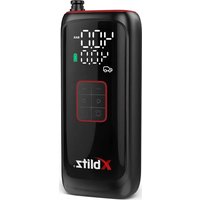
| Included accessories | USB-C cable, air nozzle adapter, Presta adapter, ball needle, storage case |
Frequently Asked Questions - GX4 Xblitz
User questions about GX4 Xblitz
0 question about this device. Answer the ones you know or ask your own.
Ask a new question about this device
Download the instructions for your Compressor in PDF format for free! Find your manual GX4 - Xblitz and take your electronic device back in hand. On this page are published all the documents necessary for the use of your device. GX4 by Xblitz.
USER MANUAL GX4 Xblitz
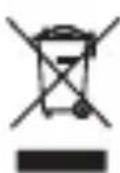
Thank you for purchasing the Xblitz AIRMASTER portable mini electric pump. The device will allow you to quickly inflate a variety of vehicle tyres, balls and other items, as well as check the pressure at any time thanks to the built-in pressure gauge. The compressor is equipped with a rechargeable battery which will allow you to conveniently pump wirelessly.
Please read the enclosed instructions and precautions before use to avoid product damage or danger
01.PRODUCT DESCRIPTION
SEE FIG.A
- Current pressure
- Pressure unit indicator
- Set pressure
- Battery charge indicator
- Operating mode
- Increase pressure button
- Pressure relief button
- Changing the operating mode
- Changing the operating mode
- Power/start button
-
LED torch/ pressure unit change button
-
Charging socket
- LED
- Air hose with Schrader coupling + storage compartment
- USB output (powerbank)
- Air hose connector
- Air hose storage
- USB-C cable
- Air nozzle adapter
- Presta adapter
- Ball needle
- Cover
02. ACTION
1. Switching on and off
Switching on: Press and hold the power button for 3 seconds to switch on.
Switching off: Press and hold the power button for 3 seconds to switch off.
2. Battery indicator
The different colours of the indicator on the battery indicator bar show the different levels of charge:
Green: 70% - 100%
Yellow: 30 - 70%
Red: 5% -30%
Red flashing (< 5%) - requires charging
3. Start/stop button
After switching on the power, press the Start/Stop button to start pumping. The unit will automatically stop pumping when the set pressure value is reached.
4. Charging
Type-C charging input 5V / 2A. Connect the charging cable to the pump and power supply to charge the device.
Battery indicator bar in charging state: indicator bar flashing: charging. When the indicator bar shines with a steady light: full.
Note: Do not use the pump while charging.
5. Installation of air hose and adapters
The product is equipped with an air hose with Schrader adapter, an additional Presta adapter, an air nozzle and a ball needle for ball inflation. Depending on the type of tyre or object you are pumping, you will need to select the appropriate adapter:
Schrader valve: to inflate a tyre with a Schrader valve you need to:
Connect the air hose with the Schrader adapter to the connector on the inflator and then connect it to the tyre valve.
Presta valve: to inflate a tyre with a Presta valve you need to:
I. Connect the air hose with a Schrader adapter to the connector on the pump and then fit a Presta adapter to it.
II. Unscrew the valve cap, then connect the hose with the adaptor to the tyre valve.
Balls/mattresses: use a ball needle or air nozzle when inflating balls, mattresses or other objects. To inflate you should:
I. Connect the air hose with a Schrader adapter to the connector on the pump and then fit a Presta adapter or air nozzle to it.
II. Push the needle or nozzle firmly into the bore of the ball or other object to be pumped.
6. Checking air pressure
When the pump is switched on, when connected to the object to be pumped, the number at the top of the pump display is the current pressure value while the number at the bottom of the display is the target set value.
7. Changing the operating mode
Press the change mode button (SEE FIG. A) to select from the five available modes: car, motorbike, bike, balls and individual settings.
8. Change of pressure unit
Press and hold the LED torch/change pressure unit button (SEE FIG. A) to change the pressure display unit. The unit conversion formula is as follows: 1PSI = 6.89KPA ; 1BAR = 14.5PSI / 100KPA ; 1Kg/cm^2 = 98KPA .
9. LED light
Briefly press the LED torch/pressure unit change button (SEE FIG. A) to switch the torch on, briefly press a second time to activate flashing mode, briefly press a third time to activate SOS mode, briefly press a fourth time to switch off.
10. Pressure sensor resetting and calibration
Switch on the pump, if the device is not connected to any object and the displayed pressure value is not 0.0 BAR/PSI, hold down the "+" and - "button for 2 seconds until the screen fully illuminates and the value returns to normal.
Please note: the pump will automatically switch off after 3 minutes of inactivity. The device is factory reset before shipment. Differences in altitude or sensors can cause measurement deviations - manual resetting improves accuracy. Calibration is not recommended at high temperatures.
11. Reference pressure values during pumping
To ensure safety, read the instruction manual to check the recommended air pressure for your item before pumping. Over-inflation can lead to explosions and injuries.
Tyres - the range of pressures they can withstand is indicated on the sidewall of the tyre. The pressure should be matched to the weight of the load. Sports balls (e.g. football, basketball, volleyball) - the recommended pressure is usually marked around the inflation valve. As with tyres, the pressure should be adapted to the conditions of use.
Reference pressures:
Car: 26-43 PSI
Motorbike: 30-45 PSI
Road bike: 100-120 PSI
Mountain bike: 38-55 PSI
- Sports balls: Basketball: 7-9 PSI; Football: 10-12 PSI; Volleyball: 4-6 PSI.
12. Precautions at high temperatures
When unscrewing the air valve, both the valve and the connector can reach a high temperature due to the long operation of the device.
Caution: Do not touch the cable and the air connector with your bare hands for an extended period of time!
03. TECHNICAL DATA
■ Battery: Li-Ion 4000mAh (7.4V/14.8Wh)■ Output pressure: 2~150PSI / 0.1~10.3BAR■ Airflow: 25 l/min■ Battery charge time: ~3h■ Run time: ~25min■ Air hose: 15cm■ Auto STOP■ Electronic pressure gauge with LED display■ 5 operating modes■ LED torch■ USB-A (powerbank) output: 5V 2A—■ USB Type C input: 5V 2A—■ Operating temperature: -10~45 °C■ Dimensions: 68x48x154mm■ Weight: 450g
04. PRECAUTIONS
- Do not leave the pump unattended while pumping.
- Do not place it near flammable or explosive materials.
- Avoid contact with moisture, dust and falls.
- Do not store the device in areas of extreme temperature and humidity.
5 The product contains a built-in lithium battery - do not dispose of it in a fire or in an uncontrolled manner. - Keep out of the reach of children.
05. SOLVING
| Problem Possible causes Method of solution | ||
| Slow pumping | 1. Low battery charge. Check the | charge level. |
| 2. Air leakage from hose. Check the air hose for leaks. | ||
| 3. Loose hose connections. | Check and tighten the connections at both ends of the air hose. | |
| 4. Air leakage from the pumped object. | Check that the item being pumped has no leaks. | |
| Unit is switched on but not pumping | 1. Low battery charge. Check the | charge level. |
| 2. the tyre pressure is higher than the set value. | Set a higher pressure value. | |
| The set pressure cannot be increased or decreased | Wrong pumping mode selected. | Select a custom mode to set a value from 2 to 150 PSI. |
| Pumping works, but pressure shows 0 | 1. Products with low pressure (e.g. balloons) are not within the measuring range. | Check that the object to be pumped is supported by the device. |
| 2. When the tyre is empty, the pressure value will only appear after a short inflation time. | Inflate the tyre for a while to read the pressure. | |
| When the nozzle is unscrewed, the device automatically switches off | The device has an automatic switch-off function after 3 minutes. | Press and hold the start button to restart. |
| Air leakage during hose connection | Leaky air hose connection. Tighten the air hose. | |
| The colour of the power indicator changes during pumping | In the process of discharging a lithium battery, there is a voltage drop, which leads to a change in the colour of the indicator. | This phenomenon is normal and does not indicate a fault. |
| Power indicator does not light up after charging | Incorrect charging cable or adapter. | Use a compatible charging cable and adapter. |
06. WARRANTY/COMPLAINT CARD
The product comes with a 24-month warranty. Warranty terms and conditions can be found at: https://xblitz.pl/gwarancja/
Claims should be made using the claim form found at: http://reklamacie.kgktrend.pl/ Details, contact and service address can be found at: www.xblitz.pl
Technical specifications and kit contents are subject to change without notice, we apologise for any inconvenience.
DE
01. PRODUKTA APRAKSTS
SKATIT A FIG.
- Pašreizējais spiediens
- Spiediena vienibas indicators
- lestatitais spiediens
- Akumuladora uzlades indicators
- Darba rezims
- Spiediena palielinašanas poga
- Spiediena samazinašanas poga
- Darbības režima maina
- Darbības režima maina
- Barosanas/startapoga
- LED lukturisa/spiediena vienibas mainas poga
-
Uzlades ligzda
-
LED
- Gaisa šlutene ar Schrader savienotāju + glabāsanas nodalijums
- USB izeja (powerbank)
- Gaisa šlūtenes savienotājs
- Gaisa šlūtenes glabāsanas nodalijums
- USB-C kabelis
- Gaisa sprauslas adapteris
- Presta adapteris
- Lodisuadata
- Väks
02. DARBIBA
1. leslegsana un izlegsana
leslēgsana: Lai ieslēgtos, nospiediet un turiet ieslēgsanas pogu 3 sekundes. Izslēgsana: Lai izslēgtos, nospiediet un turiet ieslēgsanas pogu 3 sekundes.
2. Akumulatora indicators
3. ByToH Ctrapt/CTon
CleД kaTo BkIIOUHTe 3axpaHbAHeto,HaTnCHte 6yToHa CTapr/CTon,3a Da cTaptnpATE n3NOMnBaHeto.YcTpoiCTBOTO aBTOMaTHuHO ue cnpe n3NOMnBaHeto, KOrato ce DoCTnHre 3aJaDeHaTa CTOHOCr Ha HalaRaHeto.
4. 3apeKdaHe
Bxod 3a 3apejdahe Type-C 5V / 2A. Cbpbjte Ka6eJa 3a 3apejdahe KbM NOMnata n 3axpaHbaHeTo, 3a Da 3apeiTe yCTPOIcTBOTO.
03. TEXHnueCKn DAHHN
The crossed out trash can symbol indicates that unusable electrical or electronic devices, its accessories (such as power supplies, cords) or components (for example batteries, if included) cannot be disposed of alongside with household waste. In order to dispose of the devices or its components (for example, batteries) deliver the device to the collection point, where it will be accepted free of Disposal is subject to the recast version of the WEEE Directive (19/EU) and the Directive on batteries and accumulators (2006/66 / proper disposal of the device prevents degradation of the natural environment. Information about the collection points of the facilities is by the competent local authorities. Incorrect disposal of waste is to penalties provided for by the law in force in the given area.
DE
KGK TREND Sp. z o.o.
ul. Ujastek 5b,
31-752 Kraków, Polska.
Wyprodukowano w PRC
Producer:
KGK TREND Sp. z o.o.
Ujastek 5b,
31-752 Cracow, Poland.
Made in PRC

- 01.PRODUCT DESCRIPTION
- SEE FIG.A
- ACTION
- Switching on and off
- Battery indicator
- Start/stop button
- Charging
- Installation of air hose and adapters
- Checking air pressure
- Changing the operating mode
- Change of pressure unit
- LED light
- Pressure sensor resetting and calibration
- Reference pressure values during pumping
- Reference pressures:
- Precautions at high temperatures
- TECHNICAL DATA
- PRECAUTIONS
- SOLVING
- WARRANTY/COMPLAINT CARD
- DE
- PRODUKTA APRAKSTS
- SKATIT A FIG.
- DARBIBA
- leslegsana un izlegsana
- Akumulatora indicators
- ByToH Ctrapt/CTon
- 3apeKdaHe
- TEXHnueCKn DAHHN
- Producer:
Brand : Xblitz
Model : GX4
Category : Compressor