William PL72 - Coffee grinder Lelit - Free user manual and instructions
Find the device manual for free William PL72 Lelit in PDF.
Frequently Asked Questions - William PL72 Lelit
User questions about William PL72 Lelit
0 question about this device. Answer the ones you know or ask your own.
Ask a new question about this device
Download the instructions for your Coffee grinder in PDF format for free! Find your manual William PL72 - Lelit and take your electronic device back in hand. On this page are published all the documents necessary for the use of your device. William PL72 by Lelit.
USER MANUAL William PL72 Lelit
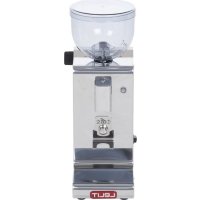
Bean hopper capacity:
350 g
Burrs diameter:
64 mm

THANK YOU FOR CHOOSING US
Careful design and choice of components are the secret of the excellent performance of all of our models.
We develop our products with technology applied only to the best professional machines.
The materials used meet very high standards of quality and reliability to provide you with durable, and long-lasting products.

Write down the serial number of your product
Serial number
Purchased from Date of purchase

For more information, please register your product on care.lelit.com
Index
Safety notes 4
Main specifications 8
Product overview 9
Instructions for use 10
Solving the most common problems 15
The art of Espresso coffee 16
Cleaning and maintenance 18
Warranty terms 20
IMPORTANT SAFEGUARDS
01.
Safety notes
Warnings - Please read all instructions carefully before use.
This grinder is recommended for grinding coffee beans. The controls on the front panel have easily understandable symbols. The machine is designed for home use and is not suitable for heavy duty professional use. The noise level of the appliance does not exceed 70 dB (A). The information and pictures provided may be changed without notice to improve the grinder performance.
Symbols used
It is absolutely essential to observe the following warnings and symbols:

Shock hazard. Failure to comply may cause electric shock with danger to life.

Caution. Failure to comply may cause damage to the appliance.

Please Note. This symbol indicates important advice and information for the user.
Numbers in brackets
The numbers in brackets refer to the key provided in the description of the appliance in Chapter 03 "Product overview" and to the pictures in the Quick start guide attached.
IMPORTANT SAFEGUARDS

General warnings
This manual is an integral and essential part of the product. Please read all these warnings carefully as they provide important information on safe installation, use and maintenance. These instructions should be carefully retained for future reference.
- Please read all instruction
- Store the packaging material (plastic bags, polystyrene, etc.) out of the reach of children.
- This manual warns you against improper use.
- The appliance is only designed for grinding coffee beans.
- This appliance is intended to be used in household and similar applications such as: staff kitchen areas in shops, offices and other working environments; communities; by clients in hotels, motels and other residential type environments; bed and breakfast
type environments. It's not indicated for a continuous, professional use.
- Close supervision is necessary when any appliance is used by or near children. Children should be supervised to ensure that they do not play with the appliance.
- Do not install the appliance in a zone where a water jet could be used.
- The appliance can be used by persons with reduced physical, sensory or mental capabilities or lack of experience and knowledge if they have been given supervision or instruction concerning use of the appliance in a safe way and understand the hazards involved.
- The appliance must be installed in an environment where it can be used only by people that have knowledge and experience of it, especially for what concerns security and hygiene.
- No liability is accepted for the manumission of any component.
- Cleaning and maintenance must not be done by children without supervision.
- Any use other than that described above is improper and could be hazardous; the manufacturer accepts no liability whatsoever for any damage arising from improper use of the appliance.
- No liability is accepted for the use of unauthorized spares and/or accessories.
- No liability is accepted for repairs not carried out by authorized service centers.
- The appliance must not be left unattended or used outdoors.
- The appliance must not be exposed to atmospheric agents (rain, sun, ice).
- To protect against risk of electrical shock do not put the product in water or other liquid.
- Avoid contacting moving parts.
- Before switching on, check the hopper for presence of foreign object.
In all the above cases the warranty will be void.

Essential safety warnings
As with all the electrical appliances, the risk of electric shock cannot be excluded, therefore, the following safety warnings should be carefully observed.
- Before switching on, ensure that the power supply voltage corresponds to that indicated on the plate on the base of the appliance and that the power supply is properly earthed.
- Do not tamper with the appliance. Contact an authorized technician or the nearest service center for any problem.
- Do not touch the appliance if your hands or feet are wet.
- Do not touch the plug with wet hands.
- Ensure that the electrical outlet is always freely accessible so that the plug can be easily removed when necessary.
- When removing the plug, always hold it directly. It should never be removed by pulling on the power cord, as this can cause damage.
- To disconnect the appliance, remove the plug from wall outlet.
- In the event of any fault or malfunction, do not attempt to carry out repairs. Switch the appliance off, remove the plug and contact the Service Center.
- In the event of damage to the plug or the power cord or after the appliance malfunctions, or is dropped or damaged in any manner, do not operate the appliance, these should be replaced only and exclusively by the Service Center.
- Do not use adapters, multiple sockets or extension cords. If their use is un- avoidable, use simple adapters or multiple sockets and extension cords that conform to current safety standards, taking care not to exceed the current limit marked on the simple adapter or extension cord, or the maximum capacity of the multiple socket.
- Turn the appliance OFF, then unplug from the outlet when not in use, before assembling or disassembling parts and before cleaning. To unplug, grasp the plug and pull from the outlet. Never pull from the power cord.
- To avoid injury risks, do not leave the power cord dangling from the table or next to hot surfaces, edges, sharp objects.
SAVE THESE INSTRUCTIONS
02.
Main specifications
We design our grinders based on our customers' needs.
We are sure that the features selected for this model will meet all your wishes, so you can get a perfect tasting coffee for yourself and your guests!

LCC (LELIT Control Center)
It allows to program the grinding time for 1 or 2 coffee shots.

Switch for additions
To manually decide for eventual coffee additions or stop the grinding before the programmed time.

Adjustable filterholder pin
With a simple operation it's possible to adjust the height of the pin so that your filterholder can automatically and firmly stay on the filterholder support.

Coffee chute
An innovative coffee chute that can be easily regulated in order to deliver the ground coffee with precision inside any filterholder.

Magnetic catch tray
Easily removable for perfect cleaning.

Tamper support
To have the chosen tamper always at hand.
03.
Product overview
Take your new grinder out of the box and have a look at the various components and accessories designed for you. The numbers refer to the pictures in the Quick start guide attached.
- Bean hopper cover.
- Bean hopper.
- Tamper support, micrometric regulation grinding wheel.
- Switch for adding coffee/stopping the grinding before the programmed time ∞
- On/off switch.
- Standby led light.
-
Grinding switch (PUSH).
-
Filterholder fork.
- LCC (LELIT Control Center)
- Adjustable coffee chute.
- Adjustable filterholder pin.
- Removable catch tray.
What's in the box
a. Power cord.
b. Hopper cover.
c. Removable catch tray.
d. Instruction manual.
04.
Instructions for use
To make a good cup of coffee, you must know how to use your grinder properly and will need a bit of practice. Follow the instructions carefully. You can also refer to the Quick start guide where you will find illustrated instructions.

Note. It is important to carefully follow these instructions the first time the order is started, to ensure that it works properly.

Open the packaging
A.1 Open the box, take out the grinder and remove all the bags and packing materials. Place the grinder on a flat surface to grant an optimal stability.

Caution. The unit weighs 6,6 kg.

Fill the hopper with coffee beans
B.1 Remove the cover (1).
B.2 Fill the hopper (2) with the chosen coffee beans.
B.3 Place the cover back in its seat.

Caution. Never use the grinder without the cover on the hopper.

Switch the grinder on

Caution. Ensure that the power supply voltage is the same as that cated on the information plate and that the supply system has an adequate suit breaker.
C.1 Connect one end of the power cord (a) to the socket on the back of the appliance and the other end (plug) into the wall socket.
C.2 Turn the grinder on by pressing the on/off switch (5). The standby led light (6) will blink for a short time, the LCC display (9) will show the LELIT logo, the software version and the grinder icon confirming the turning on.

Note. The led light (6) indicates both the ON/OFF mode as well as the ramming mode.
D Check the functioning
Note. Thanks to the pre-set parameters, the grinder is immediately ready to grind your coffee.
D.1 Position the filterholder, with the correct filter inserted, on the fork (8) to "hook" it with the pin (11).
Note. In case you can't insert your filterholder on the fork (8), you can change the position of the upper filterholder pin (11), loosening it with a screw-driver to lift or lower it. Once you found the optimal position, screw the pin back (11) to grant a secure support for your filterholder.
D.2 To grind 1 dose, press once the grinding switch (7) (PUSH), the LCC (9) display will show in sequence the image referring to the dose per 1 coffee, the grinding time programmed and the image of the grinder in action.
D.3 To grind 2 doses, press twice the grinding switch (7) (PUSH). The 2 impulses have to be within 2 seconds. The LCC (9) display will show in sequence the image referring to the dose per 2 coffees, the grinding time programmed and the image of the grinder in action.
E Grind the coffee
Note. The grinder has been equipped with 64 mm flat burrs, that grant a uniform and professional grinding.
E.1 Check that the hopper is filled with beans and that it has the cover (1).
E.2 Turn the grinder on by pressing the on/off switch (5). The standby led light (6) will blink for a short time, the LCC display (9) will show the grinder icon confirming the turning on.
E.3 Position the filterholder, with the correct filter inserted, on the fork (8) to "hook" it with the pin (11).
E.4 To grind 1 dose, press once the grinding switch (7) (PUSH), the LCC (9) display will show in sequence the image referring to the dose per 1 coffee, the grinding time programmed and the image of the grinder in action.
The grinder grinds the dose according to the set time. Wait until the grinding is over, the message “OK” and then the grinder icon will appear on the LCC (9) display. Remove the filterholder from the fork (8).
E.5 To grind 2 doses, press twice the grinding switch (7) (PUSH). The 2 presses have to be within 2 seconds, the LCC (9) display will show in sequence the im-
age referring to the dose per 2 coffees, the grinding time programmed and the image of the grinder in action.
The grinder grinds the dose according to the set time. Wait until the grinding is over, the message "OK" and then the grinder icon will appear on the LCC (9) display. Remove the filterholder from the fork (8).
E.6 To grind any quantity of coffee continuously, press the switch ∞ (4) and keep it pressed, the image referring to the “adding coffee” function will appear on the LCC (9) display.
E.7 Check the grinding and the quantity per dose.
Note. Once the grinding has started, you can stop it before the set time, pressing the switch (4).
Caution. The switch Ⓐ(4) is for: continuous grinding (keep it always pressed: maximum time 19 seconds); stopping the grinding once started before the set time; adding coffee once the grinding is over.
E.8 Eventual coffee rests can be removed from the removable catch tray (12) just pulling it. The tray (12) is fixed with magnets: removing and placing it back is really easy and practical!
F Regulate the chute
F.1 The grinder is equipped with an innovative adjustable coffee chute (10) that precisely directs the coffee into any filterholder. If the ground coffee is not delivered in the center of your filterholder, move the internal part of the chute backwards/onwards with your fingers in order to center the fall of the ground coffee into your filterholder.
G Regulate the grinding
Note. The factory setting of the grinder is a medium grinding size, ideal for the grinding of most types of coffee blends, available in the market.
Caution. Regulate the grinding ALWAYS and ONLY while the grinder is grinding.
G.1 Rotate the grinding wheel (3) to change the coffee granulometry. Rotate the wheel clock-wise (towards the small points) to obtain a finer grinding, anti-clock-wise for a coarser grinding.
Note. Micrometric regulation does not require any blockage.
Note. If the coffee flow in your espresso machine is very slow, the coffee grinding is too fine, if it's quick, the coffee grinding is too coarse. Many factors influence the coffee flow such as: the amount of coffee, its pressing, the espresso machine adjustments, how clean the filters are and also the climatic conditions.

Adjust the doses
Note. The grinder is fitted with the LCC (LELIT Control Center), which allows to program the grinding time for both doses.
Note. The factory pre-set parameters are 3,0 seconds for 1 dose and 5,5 seconds for 2 doses. The grinding time can vary from 2 seconds to 20 seconds.
H.1 To enter in the programming mode and change the grinding time for 1 dose, press once the “-” button, the display shows the icon and the time (3,0") for 1 dose.
H.2 To enter in the programming mode and change the grinding time for 2 doses, press twice the “-” button, the display shows the icon and the time (5,5") for 2 doses.
H.3 Press the “+” button to access, and then press the “-” or “+” button to decrease or increase the grinding time.
H.4 Three seconds after the last impulse of a button, LCC stores the data and exits from settings mode.

Reset the parameters
I.1 To reset the electronic card, turn the grinder off. Once off, keep the “+” button of the LCC pressed, and then turn on the grinder by pressing the switch (5), the “Preset done” message will appear on the LCC display to confirm that the reset has been completed. Turn off and turn on the grinder by pressing the switch (5).

Energy saving
J.1 When the grinder has not been used for 30 minutes, it enters the standby mode: the LCC display turns off and the led light (6) blinks every 3 seconds.
J2. To turn it back on, press the button (7) (PUSH) or the button (4) (adding coffee).
Note. To disable the standby function, turn the grinder off, by pressing the switch (5). Keep the button (4) (adding coffee) pressed and turn the grinder back on by pressing the switch (5), the led light (6) will remain off. Turn off and
turn on the grinder by pressing the switch (5).
Note. Every time the grinder is turned on, if the standby function is disabled, the led (6) will light for 1,5 seconds and then will remain off.
Note. To enable the standby function, turn the grinder off, by pressing the switch (5). Keep the button (4) (adding coffee) pressed and turn the grinder back on by pressing the switch (5), the led light (6) will start to blink. Turn off and turn on the grinder by pressing the switch (5).
Note. Every time the grinder is turned on, if the standby function is enabled, the led (6) will blink for a short time and then will remain off.
05.
Solving the most common problems
We advise you to read the following instructions carefully in order to solve the most common problems before calling the nearest service center.
1
The grinder does not grind coffee
| Dirty grinding burrs (oils and fats deposits of coffee residues) | Carry out the grinding burrs cleaning, see the user manual, (Cleaning of the burrs) for the operating instructions. |
| The grinding burrs are too closed, they are touching. | Adjust the setting to obtain a coarser grinding. |
| Grinding burrs worn. Contact the service center. | |
| Foreign object that blocks grinding burrs. Contact the service center. |
2
The grinder motor doesn't work
| The grinder has worked for a long time continuously, causing an overheating of the motor. | Wait until the motor cools down (15-30min.) before turning the grinder on again. |
| The grinder has exceeded the maximum time of grinding continuously. (20 seconds) | The following icon will appear on the display: After a waiting time of 100 seconds, the grinder will automatically reset. After a waiting time of 100 seconds, the grinder will automatically reset. |
The LCC does not work. Contact the service center.
06. The art of Espresso coffee
Contrary to what you might think, making the perfect Espresso is not that easy. It requires experience, ability, passion and a little bit of curiosity. In this paragraph we would like to share with you some of the basic rules for making the perfect cup of Espresso.
The "5 M"
If you want to make perfect Espressos, you should start by ensuring the five essential factors which turn a simple cup of coffee into an Espresso for connaisseurs! These are the "5 M's"; in Italian: miscela (blend), macinatura (grinding), macchina (machine), manualità (skill) and manutenzione (maintenance).
1 - Miscela (Blend)
Good Espressos are always made with a good blend of coffee. An Espresso with the right taste requires the blend of two types of coffee, Arabica and Robusta. The first gives coffee its delicate aroma and the right amount of acidity, while the second gives it its full taste, body and cream. The quantities depend on your own taste. Try out different combinations until you find the blend you like best!
2 - Macinatura (Grinding)
The grinder is a must for making good Espresso. Coffee should always be ground just before it is used so that it preserves its taste and aroma.
LELIT grinders let you adjust the grinding level to suit the coffee blend in order to establish the correct extraction time and amount of cream.
3 - Macchina (Espresso machine)
Choosing the right espresso machine is equally important. LELIT coffee machines are designed and built to let you adjust the water pressure and temperature to your requirements. The right balance of these two factors allows you to extract from the ground coffee not only the substances that provide its taste, but also the insoluble particles that give your coffee body and aroma.
Half of the result depends on how you use the machine. A passionate expert is an essential part of the Espresso production chain and can enhance the result to bring additional value to the final product. Passion and practice are, therefore, the secrets to learn how to use the machine. You can experiment with different blends of coffee, grinding, pressing, changing water temperature and pressure, not just to make Espresso, but also to make the perfect one for you.
Daily maintenance, scheduled maintenance as well as care of the machine will
ensure the quality of the beverage and the durability of the product you have purchased. A clean machine says a lot about your passion for coffee making.
Coffee varieties
The choice of the blend is an essential factor for making the ideal coffee for your taste. There are a lot of different varieties of coffee blends on the market to choose from. The differences in flavour, aroma and texture depend on the quantities of the two varieties of coffee that make the blend.
Arabica
This is a sweeter and more delicate variety of coffee, with a rich aroma and a very thin, dense and compact cream.

Arabica
It is grown between 900/2000 m Rich aroma.
Caffeine between 0.9 \~ 1.7%
Robusta
This variety is woody, bitter, full-bod ied and spicy, with little aroma. Its cream is frothier and greyer.

Robusta
It is grown between 200/600 m Spicy aroma.
Caffeine between 1.8 \~ 4%
The blend selection is important for creating the perfect coffee for your palate. There are many blends in the market. Differences in taste, perfume, consistency depend from the propor-
tions of the two main coffee varieties.
No variety of coffee alone can make the ideal Espresso.
The perfect Espresso has a top layer of cream 2-3 mm thick, a nut brown to dark brown colour, with reddish tinges and light streaks, a harmonious flavour, a strong, balanced aroma and a sweet, long-lasting aftertaste.
It has a strong aroma with notes of flowers, fruits, toast and chocolate.
These flavours can last just a moment or persist for a few minutes in your mouth. The taste is round and well structured. The acid and bitter perceptions are well balanced whereas there is little or no astringency.
The ideal parameters to obtain this type of coffee are:
7 ± 0,5 g. of ground coffee.
25 seconds to brew 30 ml.
88 / 92°C when brewing and 80°C in the cup.
8 /10 bar pressure during extraction.
Even Arabica blends often contain a small amount of Robusta, which is necessary to enhance the cream and add aroma and body to the espresso.
Blends made for bar coffees usually contain 20% Robusta but in southern Italy, where they prefer a stronger taste, the percentage can reach 40-50%.
At the end of the day, it's just a matter of taste...experiment until you find the blend you like best!
07.
Cleaning and maintenance
Cleaning and maintenance of the grinder are essential for the quality of the grinding and the durability of the appliance.
Cleaning
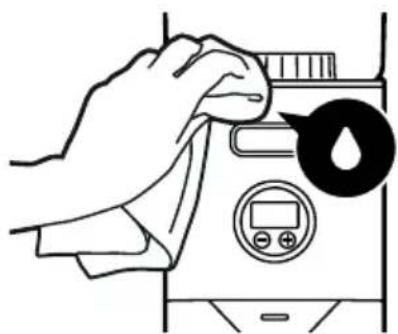
The grinder must be cleaned every 4 kg of ground coffee. Before starting, remove the plug from the electrical outlet.
natural_image
Illustration of a hand cleaning a washing machine with a water droplet symbol (no text or labels)Use a soft cloth, preferably microfiber, like the LELIT cloth (inserted in PLA9101 – not included with the unit), and moisten it with plain water. Do not use abrasive detergents and do not immerse the grinder in water.
Cleaning of the burrs
It's well known that the coarseness of the ground coffee affects the quality of the espresso in the cup.
During grinding, some coffee particles deposit between the teeth of the millstones reducing the distance between the discs, or between the cones and consequently also the size of the grains of coffee powder which come out of the grinder. These deposits, consisting of fats and oils, due to the high temperatures developed between the burrs, go rancid quickly and create molds that damage the ground coffee in an irreversible way.
The cleaning of the burrs and of the burr chamber becomes extremely important. This must be performed with a specific product (code PLA9202 – not included with the unit), i.e a powder formed by small crystals based on gluten-free food-grade starches with a very high absorbing power for oils and fats.
Passing through the burrs the crystals clean away the coffee deposits enabling the grinding of a coffee powder free of odors.
text_image
PLA9202Any possible residues do not contain harmful substances to the consumer or to the grinder.
Cleaning the burrs is very easy, just follow the following steps:
- Empty the bean hopper completely
(2).
- Press the grinding switch in order to get rid of the remaining coffee beans.
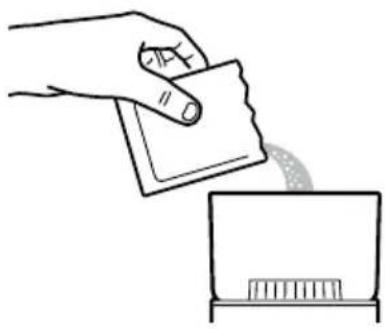
- Pour a pack of grinder detergent powder (PLA9202) into the hopper (2), paying attention to the fact that the powder must penetrate the burrs.
natural_image
Line drawing of a hand pressing down on a card into a small rectangular object (no text or symbols)- Press the switch (4) for about 5 seconds so that the powder penetrates completely through the burrs.
- Fill the hopper (2) with coffee beans.
- Throw the first couple of doses of ground coffee away.
- The cleaning is over.
Maintenance
We advise to replace the burrs periodically, once worn out.
Maintenance has to be fulfilled just by an authorized service center and with original spare parts.
08.
Warranty terms
LIMITED GUARANTEE
Depending on the place of purchase either the seller or LELIT guarantee this product for domestic use in specified territories for a limited time from the date of purchase against defects caused by faulty workmanship and materials.
During this guarantee period either the seller or LELIT will repair, replace or refund any defective product at their sole discretion. All legal warranty rights under applicable national legislation will be respected and will not be impaired by any written guarantee.
For Australian consumers, this product comes with guarantees that cannot be excluded under the Australian Consumer Law. You are entitled to a replacement or refund for a major failure and compensation for any other reasonably foreseeable loss or damage.
You are also entitled to have the goods repaired or replaced if the goods fail to be of acceptable quality and the failure does not amount to a major failure.
Important requirements as well as instructions on how to make a claim
can be found on the LELIT website in the full warranty terms and conditions.

IMPORTANT INFORMATION
For the correct disposal of the product in accordance with EU DIRECTIVE 2012/19/CE and with Legislative Decree no. 151 of 25 July 2005. At the end of its working life, the product must not be disposed of as urban waste. It must be taken to a special authorized differential waste collection center or to a dealer providing this service. Disposing of a household appliance separately avoids possible negative consequences for the environment and health caused by improper disposal and enables recovery of the materials it contains, with significant savings in energy and resources. The product is marked with a crossed-out wheelie bin as a reminder of the need to dispose of household appliances separately.
CE
EC DECLARATION OF CONFORMITY
LELIT srl a socio unico declares under its own responsibility that the product:
Grinder type: PL72
To which this declaration relates, conforms to the following standards:
EN 60335-2-14:2006 + A1:2008 + A11:2012;
EN 60335-1:2012 + AC:2014 + A11:2014;
EN 62233:2008; CISPR 14-1; CISPR 14-2;
NB: This declaration is null and void should the grinder be modified without our specific authorization.
Castegnato, 04/07/2022
Emanuele Epis
Legal rappresentative
text_image
LELIT srLa socio unico 25045 Casteguato (Bs)Manuale d'uso
per il modello:
William - PL72
Dimensioni:
14 x 22,5 x 38,5 cm
Peso netto:
6,6 kg
natural_image
Illustration of a hand cleaning a washing machine with a digital display and a droplet symbol (no text or labels)natural_image
Line drawing of a hand holding a card and a small object below (no text or symbols)natural_image
Illustration of a hand cleaning a washing machine with a water droplet symbol (no text or labels)natural_image
Line drawing of a hand pressing down on a card into a container (no text or symbols)DÉCLARATION DE CONFORMITÉ CE
Legal rappresentative
LELIT srl a socio unico
25045 Casteguato (Bs)
William - PL72
Maße:
14 x 22,5 x 38,5 cm
Nettogewicht:
6,6 kg