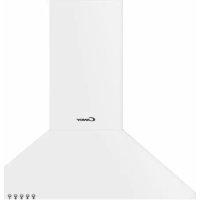
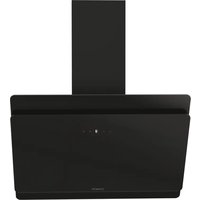
CCC 60W - Range hood CANDY - Free user manual and instructions
Find the device manual for free CCC 60W CANDY in PDF.



| Product type | Decorative hood |
| Brand | Candy |
| Model | CCC 60W |
| Annual energy consumption | 52.0 kWh/year |
| Energy efficiency index | 81.3 |
| Maximum airflow rate | 423 m³/h |
| Maximum air pressure | 152 Pa |
| Noise level | 70 dB |
| Lighting | LED 2.5 W, 61 lux |
| Number of speeds | 3 speeds (low, medium, high) |
| Filters | Metal grease filter + activated charcoal filter (optional) |
| Exhaust mode | External (duct 150 mm) or recirculation |
| Minimum distance from cooking surface | 70 cm (gas/electric), 80 cm (coal/oil) |
| Items supplied | Hood, duct, exhaust hose, wall bracket, mounting plates, screws, wall plugs, 2 charcoal filters |
| Grease filter maintenance | Monthly cleaning with detergent |
| Charcoal filter maintenance | Annual replacement |
| Bulb type | Replaceable LED 2.5 W |
| Safety | Engine stop, stop button; need to cut power before maintenance |
Frequently Asked Questions - CCC 60W CANDY
User questions about CCC 60W CANDY
0 question about this device. Answer the ones you know or ask your own.
Ask a new question about this device
Download the instructions for your Range hood in PDF format for free! Find your manual CCC 60W - CANDY and take your electronic device back in hand. On this page are published all the documents necessary for the use of your device. CCC 60W by CANDY.
USER MANUAL CCC 60W CANDY
ENGLISH----page 001
ITALIAN----page 016
FRENCH----page 032
SPANISH----page 047
PORTUGUESE----page 062
POLISH----page 078
CZECK (cs)----page 094
SLOVENIAN----page 109
SLOVAK (SK)----page 124
GREEK----page 139
HUNGARIAN----page 156
ROMANIAN----page 171
CROATIAN (hr)----page 186
RUSSIAN (ru)----page 201
UKRAINAN (UK)----page 217
CCC 60BA & CCC 60GH & CCC 60X & CCC 60N & CCC 60W
INSTALLATION AND USER'S MANUAL
INTRODUCTION
Thank you for choosing this cooker hood.
This instruction manual is designed to provide you with all required instructions related to the installation, use and maintenance of the appliance. In order to operate the unit correctly and safety, please read this instruction manual carefully before installation and usage.
SAFETY PRECAUTION
- Important! Always switch off the electricity supply at the mains during installation and maintenance such as light bulb replacement.
- The cooker hood must be installed in accordance with the installation instructions and all measurements followed.
● All installation work must be carried out by a competent person or qualified electrician. - Please dispose of the packing material carefully. Children are vulnerable to it.
● Pay attention to the sharp edges inside the cooker hood especially during installation and cleaning. - When the range hood is located above a gas appliance, the minimum distance between the supporting surface for the cooking vessels on the hob and the
lowest part of the range hood that distance must be:
Gas cookers: 70 cm
Electric cookers: 70 cm
Coal or oil cookers: 80 cm
● Make sure the ducting has no bends sharper than 90 degrees as this will reduce the efficiency of the cooker hood.
- Cooker hood is for domestic use only.
● Always put lids on pots and pans when cooking on a gas cooker.
- Do not try to use the cooker hood without the grease filters or if the filters are excessively greasy!
- When in extraction mode, air in the room is being removed by the cooker hood. Please make sure that proper ventilation measures are being observed. The cooker hood removes odours from room but not steam.
- There shall be adequate ventilation of the room when the range hood is used at the same time as appliances burning gas or other fuels
- Do not install above a cooker with a high level grill.
- Do not leave frying pans unattended during use because overheated fats or oils might catch fire.
- Never leave naked flames under the cooker hood.
- If the cooker hood is damaged, do not attempt to use.
- If the supply cord is damaged, it must be replaced by the manufacturer, its service agent or similarly qualified persons in order to avoid a hazard.
- This appliance can be used by children aged from 8 years and above and persons with reduced physical, sensory or mental capabilities or lack of experience and knowledge if they have been given supervision or instruction concerning use of the appliance in a safe way and understand the hazards involved.
Children shall not play with the appliance. Cleaning and user maintenance shall not be made by children without supervision.
- Caution: The appliance and its accessible parts can become hot during operation. Be careful to avoid touching the heating elements. Children younger than 8 years old should stay away unless they are under permanent supervision.
- There shall be adequate ventilation of the room when the range hood is used at the same time as appliances burning gas or other fuels
- There is a fire risk if cleaning is not carried out in accordance with the instructions
- Do not flambé under the cooker hood.
- CAUTION: Accessible parts may become hot when used with cooking appliances.
—The air must not be discharged into a flue that is used for exhausting fumes from appliances burning gas or other fuels.
—The minimum distance between the supporting surface for the cooking vessels on the hob and the lowest part of the range hood. (When the range hood is
located above a gas appliance, this distance shall be at least 70 cm –Regulations concerning the discharge of air have to be fulfilled.
- Clean your appliance periodically by following the method given in the chapter MAINTENANCE.
● Warning: Failure to install the screws or fixing device in accordance with these instructions may result in electrical hazards
- Regarding the instructions method of fixing for the fixed appliance and how the appliance is to be fixed to its support, thanks to refer to the section "INSTALLATION AND FIXING".
- Regarding the instructions for the bulb changing, thanks to refer to the section "bulb changing".
PARTS SUPPLIED
| Description | Illustration | Qty. | |
| Cooker hood | 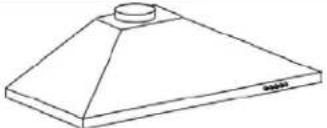 | 1 | |
| Chimney | 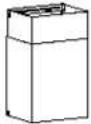 | 1 | |
| Exhaust Pipe(150mm diameter) | 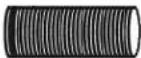 | 1 | |
| Wall bracket |  | 1 | |
| Plate I |  | 1 | |
| Plate II |  | 1 | |
| Screw(4mm x 40mm) | 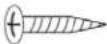 | 7 | |
| Screw(4mm x 30mm) | 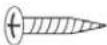 | 2 | |
| Wall plug | 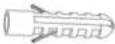 | 9 | |
| Screw(4mm x 8mm) |  | 6 | |
| Charcoal filter |  | 2 | |
INSTALLATION (VENT OUTSIDE)
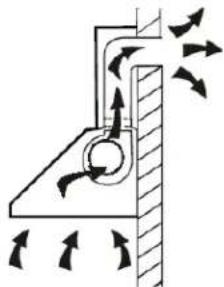
If you have an outlet to the outside, your cooker hood can be connected as below picture by means of an extraction duct (enamel, aluminum, flexible pipe or inflammable material with an interior diameter of 150mm)
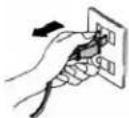
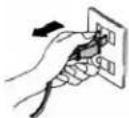
- Before installation, turn the unit off and unplug it from the outlet.
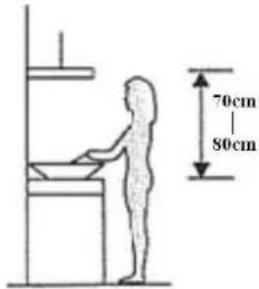
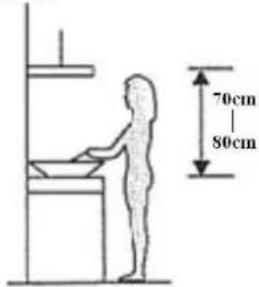
- The cooker hood should be placed at a distance of 70\~80cm above the cooking plane for best effect.
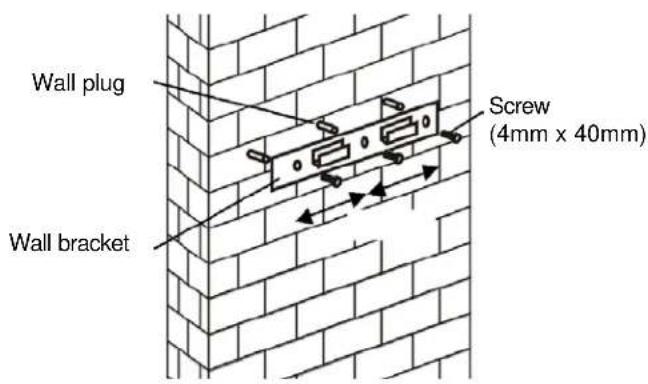
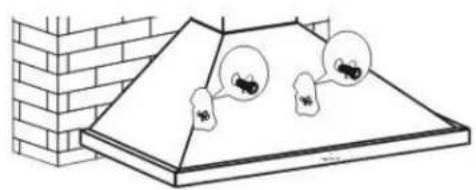
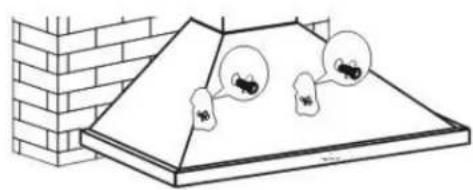
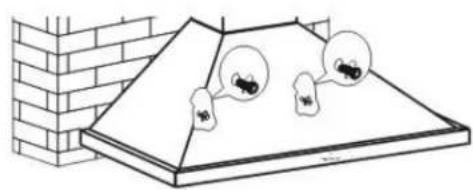
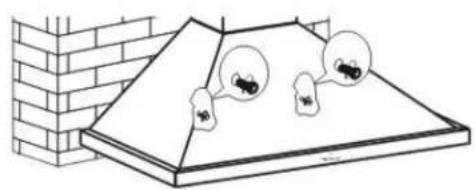
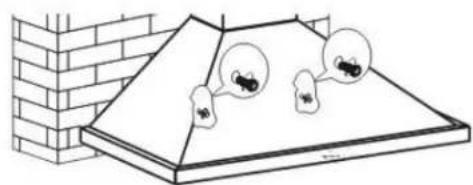
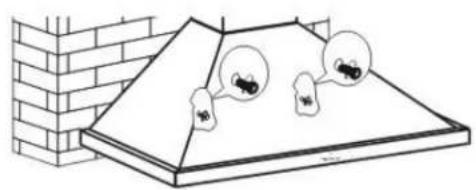
- Drill 3 holes to accommodate the wall bracket. Screw and tighten the wall bracket onto the wall with the screws (4mm x 40 mm) and wall plugs provided.
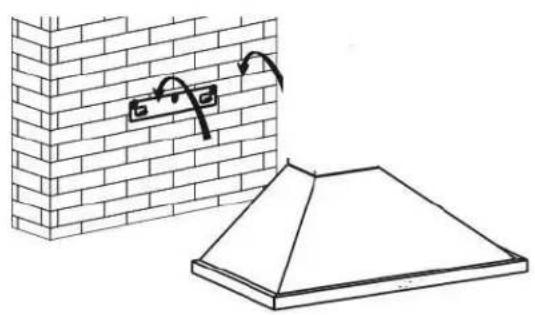
4 Hang the appliance onto the wall bracket hook and fix the appliance by the 2 screws (4mm x 30mm).
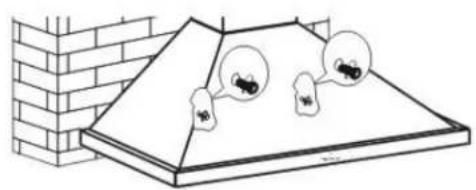
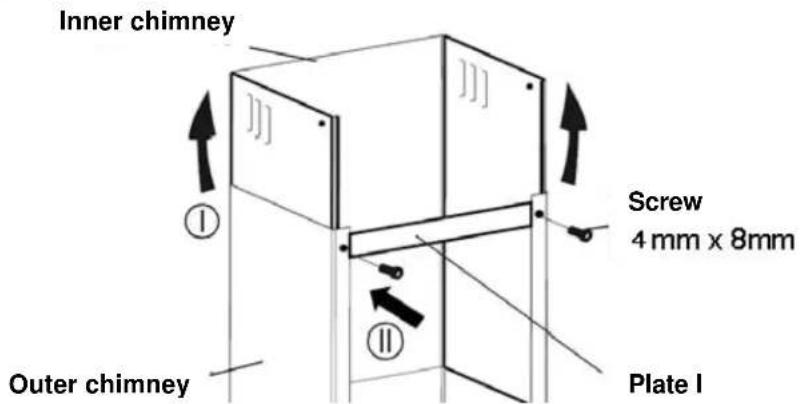
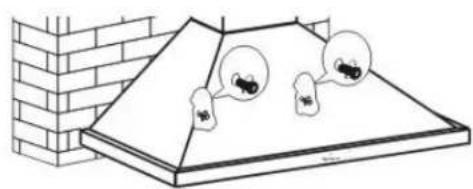
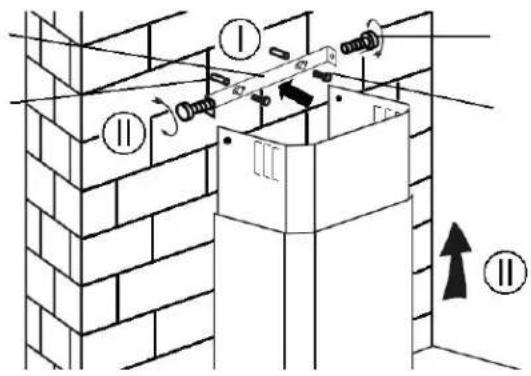
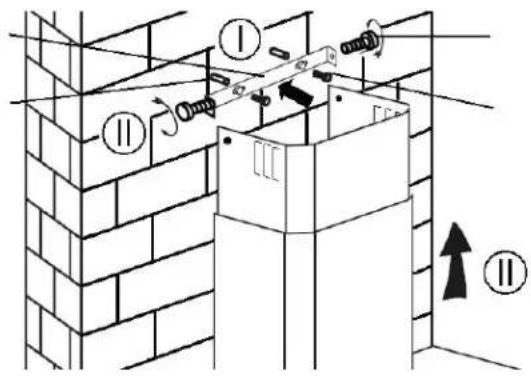
- Plate I and II are used to fix the chimney on he wall. Put the inner chimney on the outer chimney. Then pull the inner chimney upwards. Install plate I on the chimney by two screws (4 mm x 8mm).
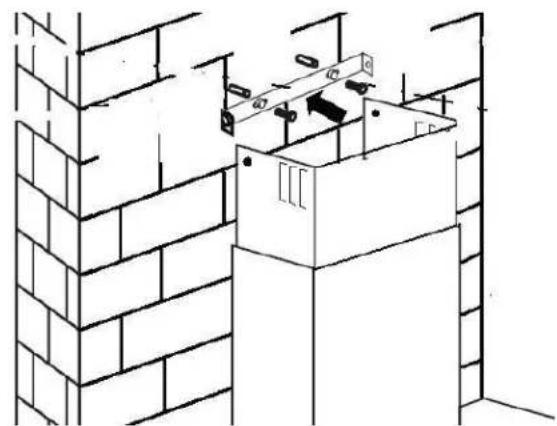
Place the chimney on the cooker hood and determine the location of plate I and II. Drill holes to accommodate plate I & II.
Fix plate II on the wall by two screws (4mm x 40mm) and wall plugs.
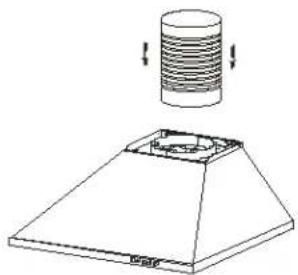
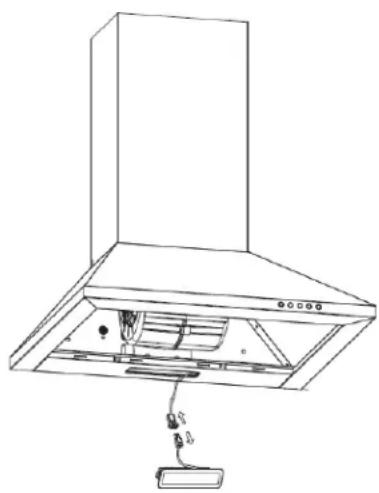
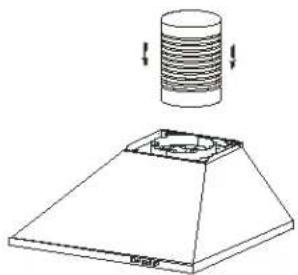
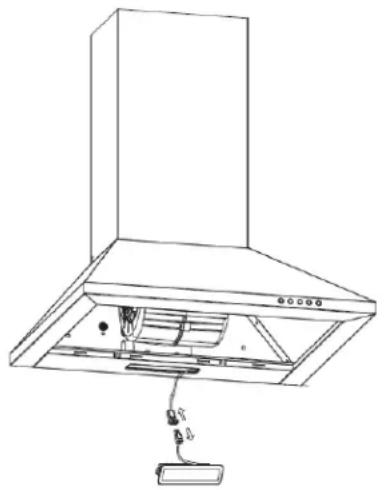
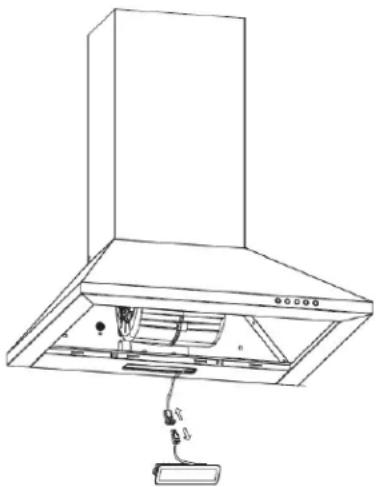
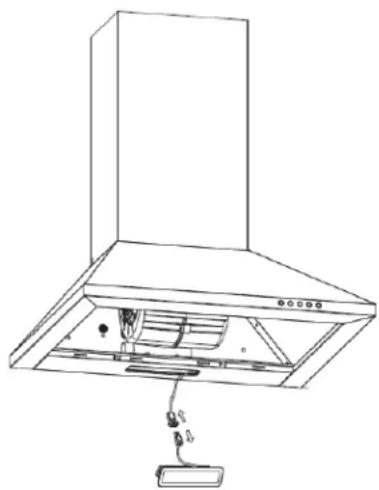
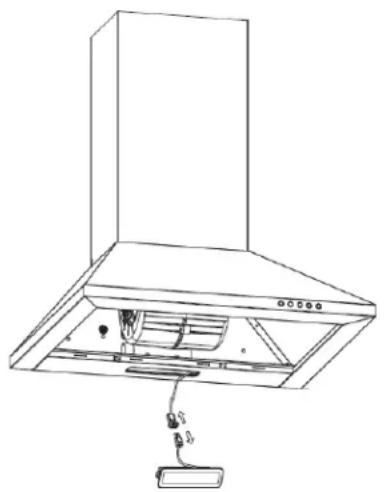
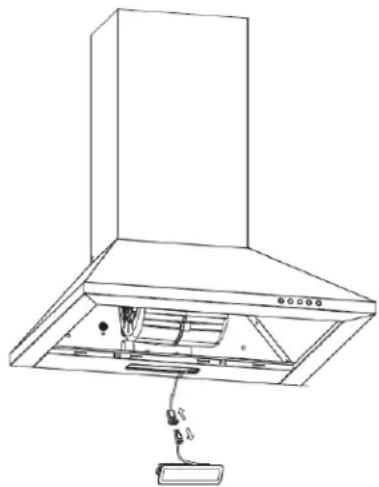
- Take out the chimney from the cooker hood Attach the exhaust pipe onto the one-way-valve as shown below.
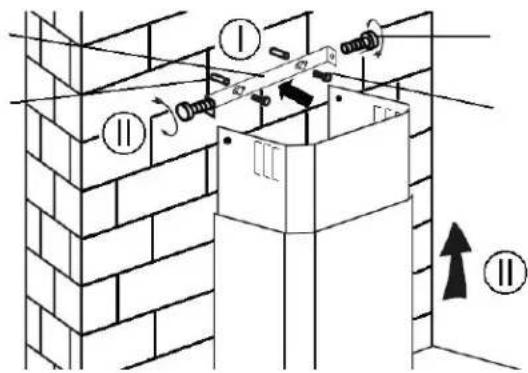
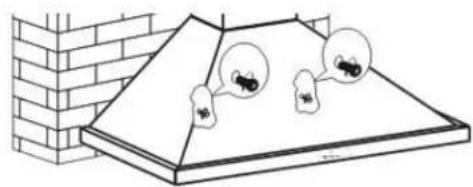
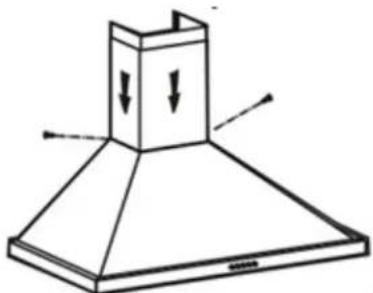
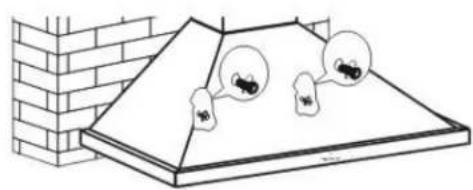
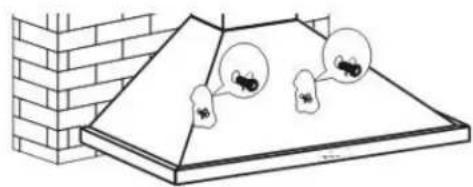
- Put the chimney back to the cooker hood. Before lifting the chimney on the desired height, fix plate I on the wall by two screws (4mm x 40mm) and wall plugs. Lift up the chimney to the desired height and fix the chimney on the plate II by 2 screws (4mm x 8mm)
Fix the lower chimney on the cooker hood by 2 screws (4x8mm)
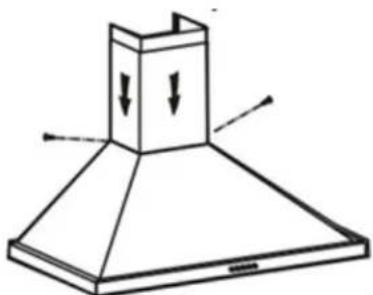
- Before usage, read all the instructions and make sure that the power rating of the cooker hood matches the power rating of the supply.
INSTALLATION (OPTIONAL FOR VENT INSIDE)
If you do not have an outlet to the outside, the exhaust pipe is not required and the installation is similar to the one shown in the “INSTALLATION (VENT OUTSIDE)” section
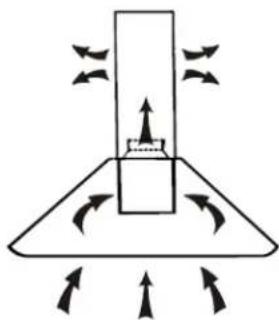
Carbon Filter
Activated carbon filter can be used to trap odors.
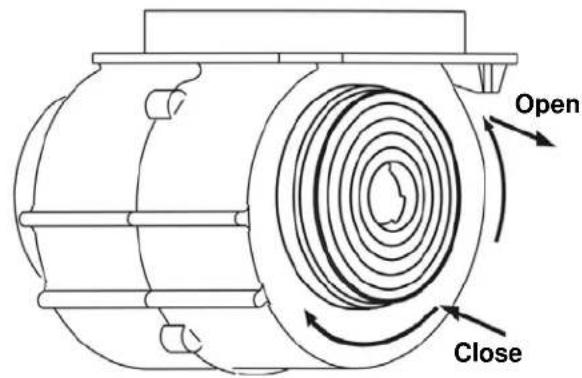
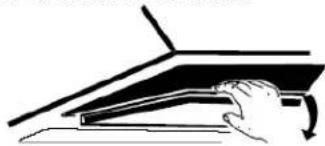
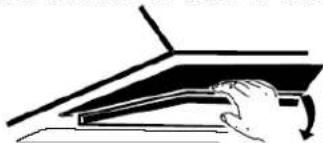
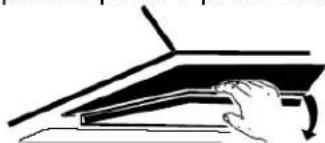
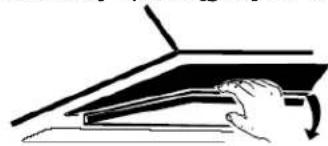
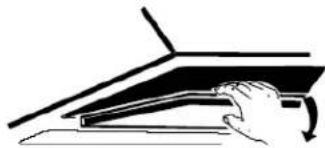
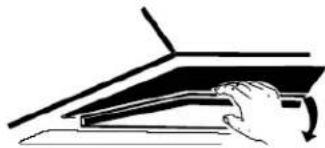
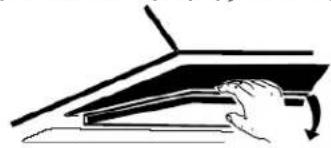
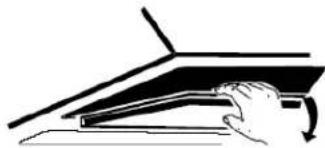
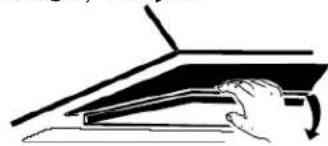
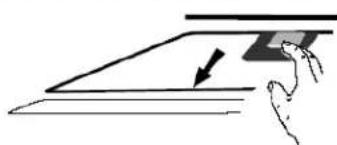
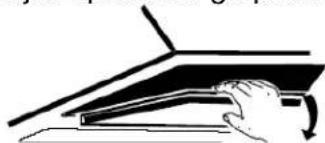
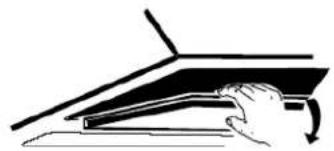
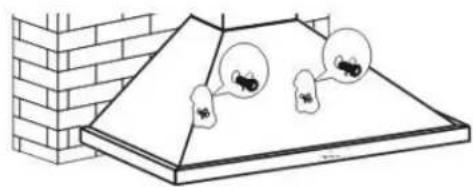
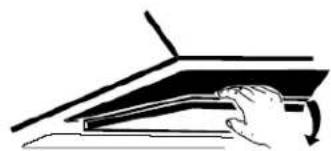
In order to install the activated carbon filter, the metallic anti-grease filter should be detached first. Press the lock and pull it downward.

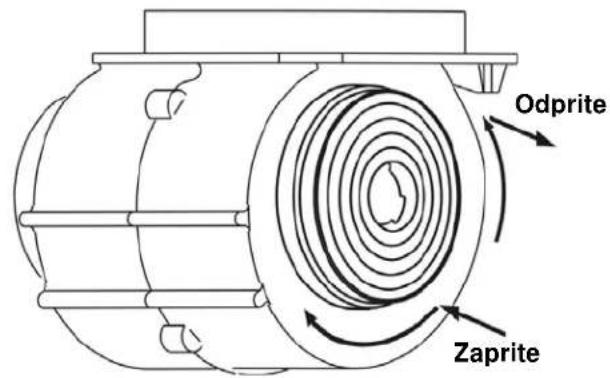
Put the activated carbon filter into the unit, fix it by turning it.
Repeat the same on the other side.
NOTE:
○ Make sure the filter is securely locked. Otherwise, it could loosen and cause damage to unit.
- When activated carbon filter attached, the suction power will be lowered.
OPERATION
Switch off button for motor 0
Press this button to stop the motor operation.
Low Speed button
Press this button to operate at low speed.
Medium Speed button
Press this button to operate at medium speed.
High Speed button
Press this button to operate at high speed.
Light button
Press once, the LED light will illuminate. Press again will turn light off.
MAINTENANCE
Before cleaning, switch the unit off and pull out the plug.
I. Regular Cleaning
Use a soft cloth moistened with hand-warm mildly soapy water or household cleaning detergent. Never use metal pads, chemical, abrasive material or stiff brush to clean the unit.
II. Monthly Cleaning for metallic anti-grease filter
ESSENTIAL: Clean the filter every month can prevent any risk of fire.
The filter collects grease, smoke and dust..... so the filter is directly affecting the efficiency of the cooker hood. If not cleaned, the grease residue (potential flammable) will saturate on the filter. Clean it with household cleaning detergent.
III. Annual Cleaning for Activated Carbon Filter
Apply SOLELY to unit that installed as a recirculation unit (not vented to the outside). This filter traps odours and must be replaced at least once a year depending on how frequent the cooker hood used.
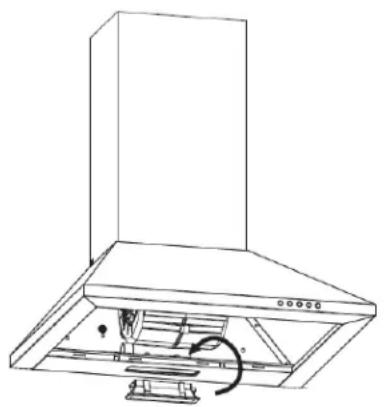
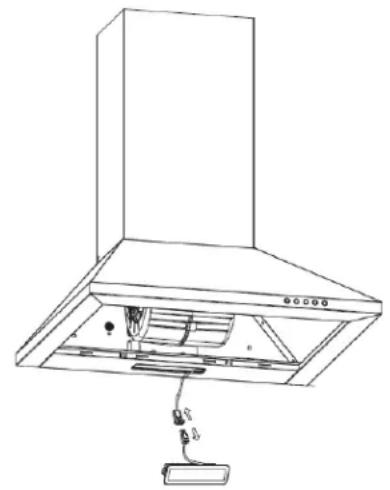
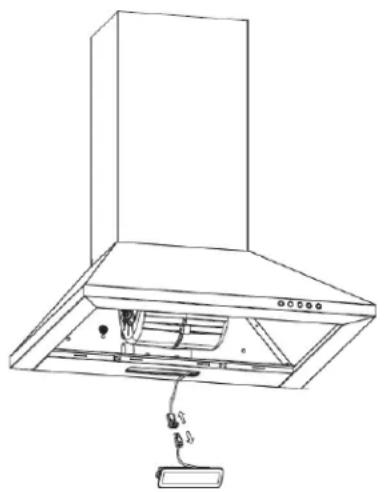
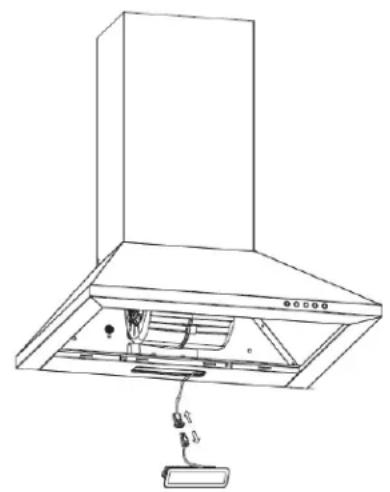
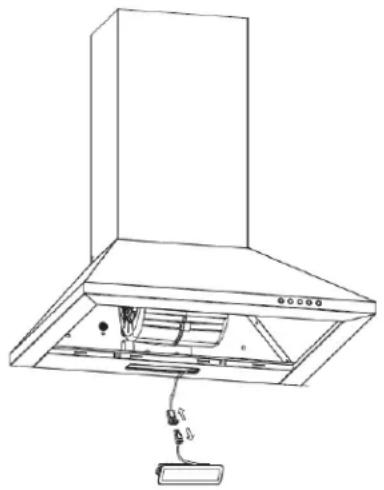
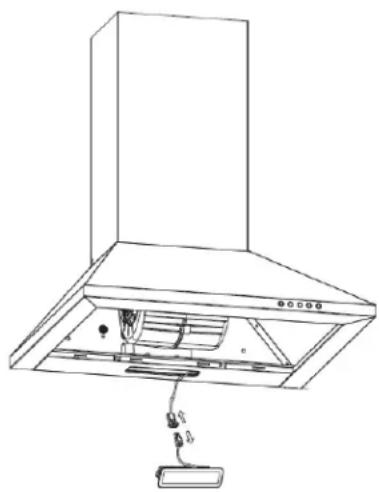
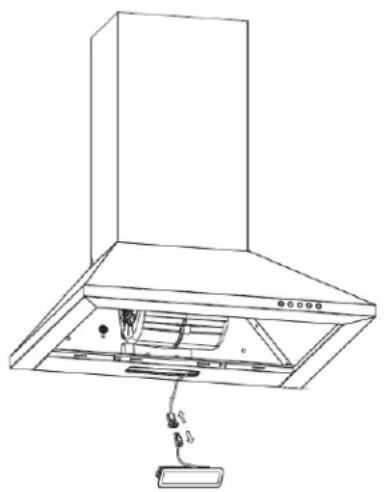
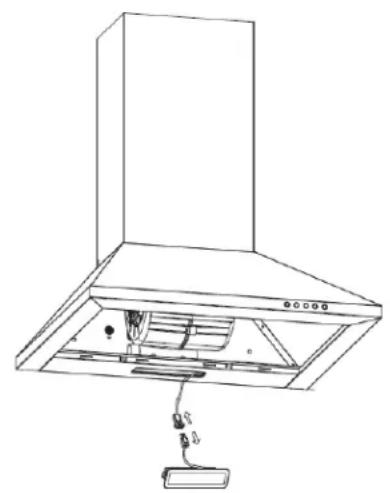
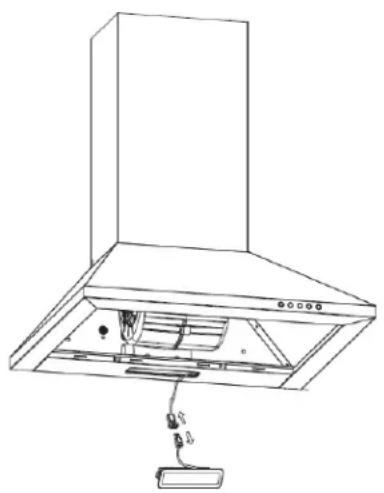
IV. Light Replacement
- Switch the unit off and pull out the plug first.
- Wait until the light is cooled down before replacement.
- Remove the metal anti-grease filters.
- Replace with the same type of bulb (2.5W LED light).
TROUBLESHOOTING
| Fault | Cause | Solution |
| Light on, but fan does not work | The fan blade is jammed. | Switch off the unit. Repair to carried out by qualified service personnel only. |
| The motor is damaged. | ||
| Both light and fan do not work | LED light burn. | Replace the light with correct rating. |
Information for cooker hood
| Symbol | Value | Unit | |
| Model identification | CCC 60BA & CCC 60GH & CCC 60X & CCC 60N & CCC 60W | ||
| Annual Energy Consumption | AEChood | 52,0 | kWh/a |
| Time increase factor | f 1,6 | ||
| Fluid Dynamic Efficiency | FDEhood 2 | ||
| Energy Efficiency Index | EEIhood 3 | ||
| Measured airflow rate at the best efficiency | QBEP 4 | m3/h | |
| Measured air pressure at best efficiency point | PBEP 2 Pa | ||
| Maximum airflow | Qmax | 423 | m3/h |
| Measured electric power input at best efficiency point | WBEP | 86 | W |
| Nominal power of the lighting system | WL2,5 | W | |
| Average illumination of the lighting system on the cooking surface | Emiddle | 61 | lux |
| Measured power consumption on standby mode | PS | - | W |
| Measured power consumption on off mode | PQ,00 | W | |
| Sound power level | LWA | 70 | dB |
The measurement and calculation method of the above table was done in accordance with commission regulation (EU) No 65/2014 & 66/2014.
ENVIRONMENTAL PROTECTION:
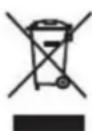
This product is marked with the symbol on the selective sorting of waste electronic equipment. This means that this product must not be disposed of with household waste but must be supported by a system of selective collection in accordance with Directive 2012/19/EC. It will
then be recycled or dismantled to minimize impacts on the environment, electrical and electronic products are potentially dangerous for the environment and human health due to the presence of hazardous substances.
For more information, please contact your local or regional authorities.
Note:
The following shows how to reduce total environmental impact (e.g. energy use) of the cooking process).
(1) Install the cooker hood in a proper place where there is efficient ventilation.
(2) Clean the cooker hood regularly so as not to block the airway.
(3) Remember to switch off the cooker hood light after cooking.
(4) Remember to switch off the cooker hood after cooking.
Information for dismantling
Do not dismantle the appliance in a way which is not shown in the user manual. The appliance could not be dismantled by user. At the end of life, the appliance should not be disposed of with household waste. Check with you Local Authority or retainer for recycling advice.
CCC 60BA & CCC 60GH & CCC 60X & CCC 60N & CCC 60W
INTRODUZIONE
INTRODUCTION
DÉPANNAGE
INTRODUCCIÓN
Filtro de carbón
INTRODUÇÃO
- Retire a chaminé do exaustor e fixe o tubo de exaustão à válvula de via única, como apresentado abaixo.
- Coloque a chaminé novamente no exaustor. Antes de levantar a chaminé para a altura pretendida, fixe a placa I à parede com 2 parafusos (4mm x 40mm) e fichas murais. Levante a chaminé para a altura pretendida e fixe-a à placa II com 2 parafusos (4 mm x 8 mm)
Fixe a chaminé inferior ao exaustor com 2 parafusos (4 x 8 mm)
Filtro de carvão
WSTEP
Filtr węglowy
ROZWIAZYWANIE PROBLEMÓW
ÚVOD
Uhlíkový filtr
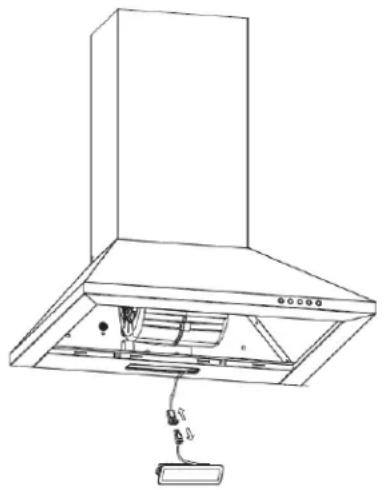
ŘEŠENÍ PROBLÉMŮ
UVOD
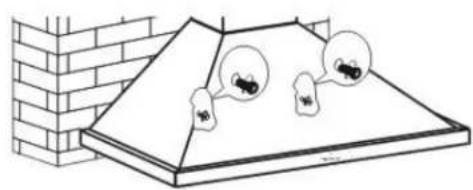
Ogleni filter
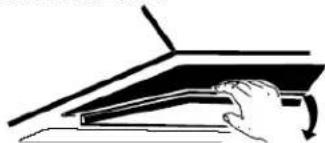
Vstavite filter z aktivnim ogljem v napravo, pritrdite tako, da ga zavrtite. Ponovite na drugi strani.
OPOMBA:
ODPRAVLJANJE TEŽAV
ÚVOD
- Komín položte spät' na digestor. Pred nadvihnutím komína na požadovanú výšku uchyt'te dosku I na stenu s pomocou 2 skrutiek (4 mm x 40 mm) a hmoždiniek. Komín nadvihnite do požadovanej výšky a upevnite ho na dosku II s 2 skrutkami (4 mm x 8 mm)
RIEŠENIE PROBLÉMOV
©
Φίλτρο άνθρακα
BEVEZETÉS
Szénszűrő
HIBAELHÁRÍTÁS
INTRODUCERE
Filtru de carbon
DEPANARE
UVOD
Zahvaljujemo na odabiru ove kuhinjske nape.
Svrha je ovog priručnika s uputama pružanje svih potrebnih uputa za ugradnju, uporabu i održavanje uređaja. Da biste ispravno i sigurno rukovali uređajem, prije ugradnje i uporabe pažljivo pročitajte ovaj priručnik s uputama.
SIGURNOSNE MJERE OPREZA
- Prije ugradnje, isključite uređaj i izvucite utikač iz utičnice.
- Kuhinjsku napu treba postaviti na udaljenost od 70 \~ 80 cm iznad površine za kuhanje da bi najuspješnije radila.
- Izbušite 3 rupe za zidni nosač. Pričvrstite i pritegnite zidni nosač na zid pomoću priloženih vijaka (4mm x 40 mm) i zidnih utikača.
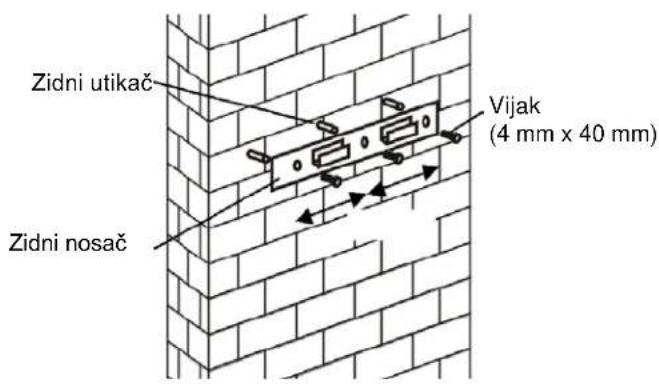
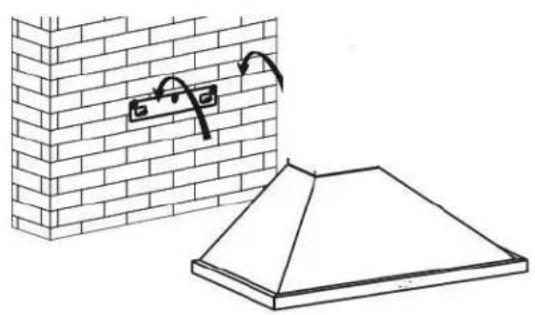
- Objesite uređaj na kuku zidnog nosača i pričvrstite ga pomoću 2 vijka (4 mm x 30 mm).
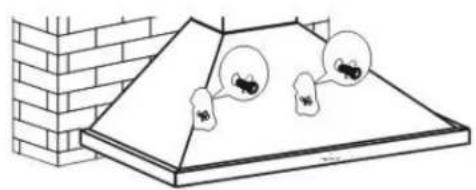
- Vratite dimnjak na kuhinjsku napu. Prije nego podignete dimnjak na željenu visinu, pričvrstite ploču I na zid pomoću dva vijka (4 mm x 40 mm) i zidnih utikača. Podignite dimnjak na željenu visinu i pričvrstite ga na ploču II pomoću dva vijka (4 mm x 8 mm).
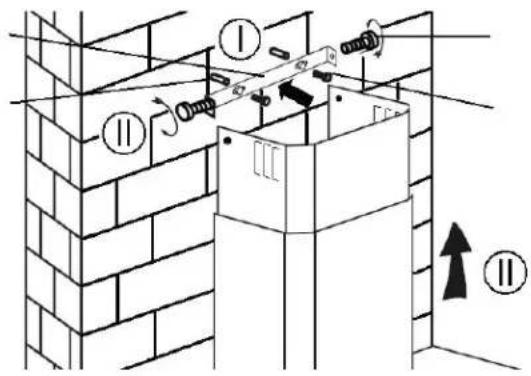
Pričvrstite donji dimnjak na kuhinjsku napu pomoću dva vijka (4 x 8 mm).
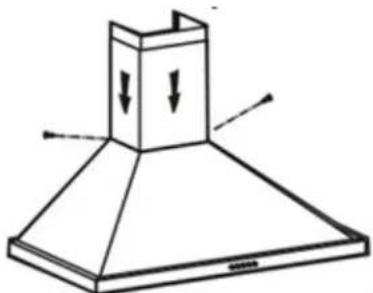
- Prije uporabe, pročitajte sve upute i pazite da se nazivna snaga kuhinjske nape podudara s nazivnom snagom dovoda.
UGRADNJA (NEOBAVEZNO ZA UNUTARNJI ODUŠNIK)
Ako nemate izlaz prema van, nije potrebna ispušna cijev i ugradnja je slična onoj prikazanoj u odjeljku „UGRADNJA (VANJSKI ODUŠNIK)“.
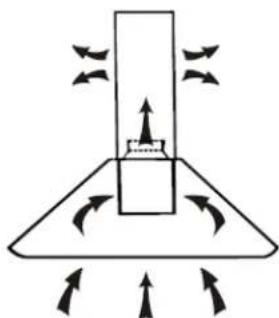
Filtar s umetkom od ugljena
Filtar s umetkom od aktivnog ugljena može se rabiti za zadržavanje neugodnih mirisa.
Da biste ugradili filtar s umetkom od aktivnog ugljena, prvo trebate odvojiti metalni filtar za odmašćivanje. Pritisnite zapinjač i povucite ga prema dolje.
RJEŠAVANJE PROBLEMA
ВВЕДЕНИЕ
Угольный фильтр
ВСТУП
Вугільний фільтр


- CCC 60BA & CCC 60GH & CCC 60X & CCC 60N & CCC 60W
- INTRODUCTION
- SAFETY PRECAUTION
- PARTS SUPPLIED
- INSTALLATION (VENT OUTSIDE)
- INSTALLATION (OPTIONAL FOR VENT INSIDE)
- CARBON FILTER
- NOTE
- OPERATION
- MAINTENANCE
- REGULAR CLEANING
- MONTHLY CLEANING FOR METALLIC ANTI-GREASE FILTER
- ANNUAL CLEANING FOR ACTIVATED CARBON FILTER
- LIGHT REPLACEMENT
- ENVIRONMENTAL PROTECTION
- INFORMATION FOR DISMANTLING
- INTRODUZIONE
- INTRODUCCIÓN
- FILTRO DE CARBÓN
- INTRODUÇÃO
- FILTRO DE CARVÃO
- WSTEP
- FILTR WĘGLOWY
- ÚVOD
- UHLÍKOVÝ FILTR
- UVOD
- OGLENI FILTER
- OPOMBA
- ΦΊΛΤΡΟ ΆΝΘΡΑΚΑ
- BEVEZETÉS
- SZÉNSZŰRŐ
- INTRODUCERE
- FILTRU DE CARBON
- SIGURNOSNE MJERE OPREZA
- UGRADNJA (NEOBAVEZNO ZA UNUTARNJI ODUŠNIK)
- FILTAR S UMETKOM OD UGLJENA
- ВВЕДЕНИЕ
- УГОЛЬНЫЙ ФИЛЬТР
- ВСТУП
- ВУГІЛЬНИЙ ФІЛЬТР
Brand : CANDY
Model : CCC 60W
Category : Range hood