S 30 - Boiler Clage - Free user manual and instructions
Find the device manual for free S 30 Clage in PDF.
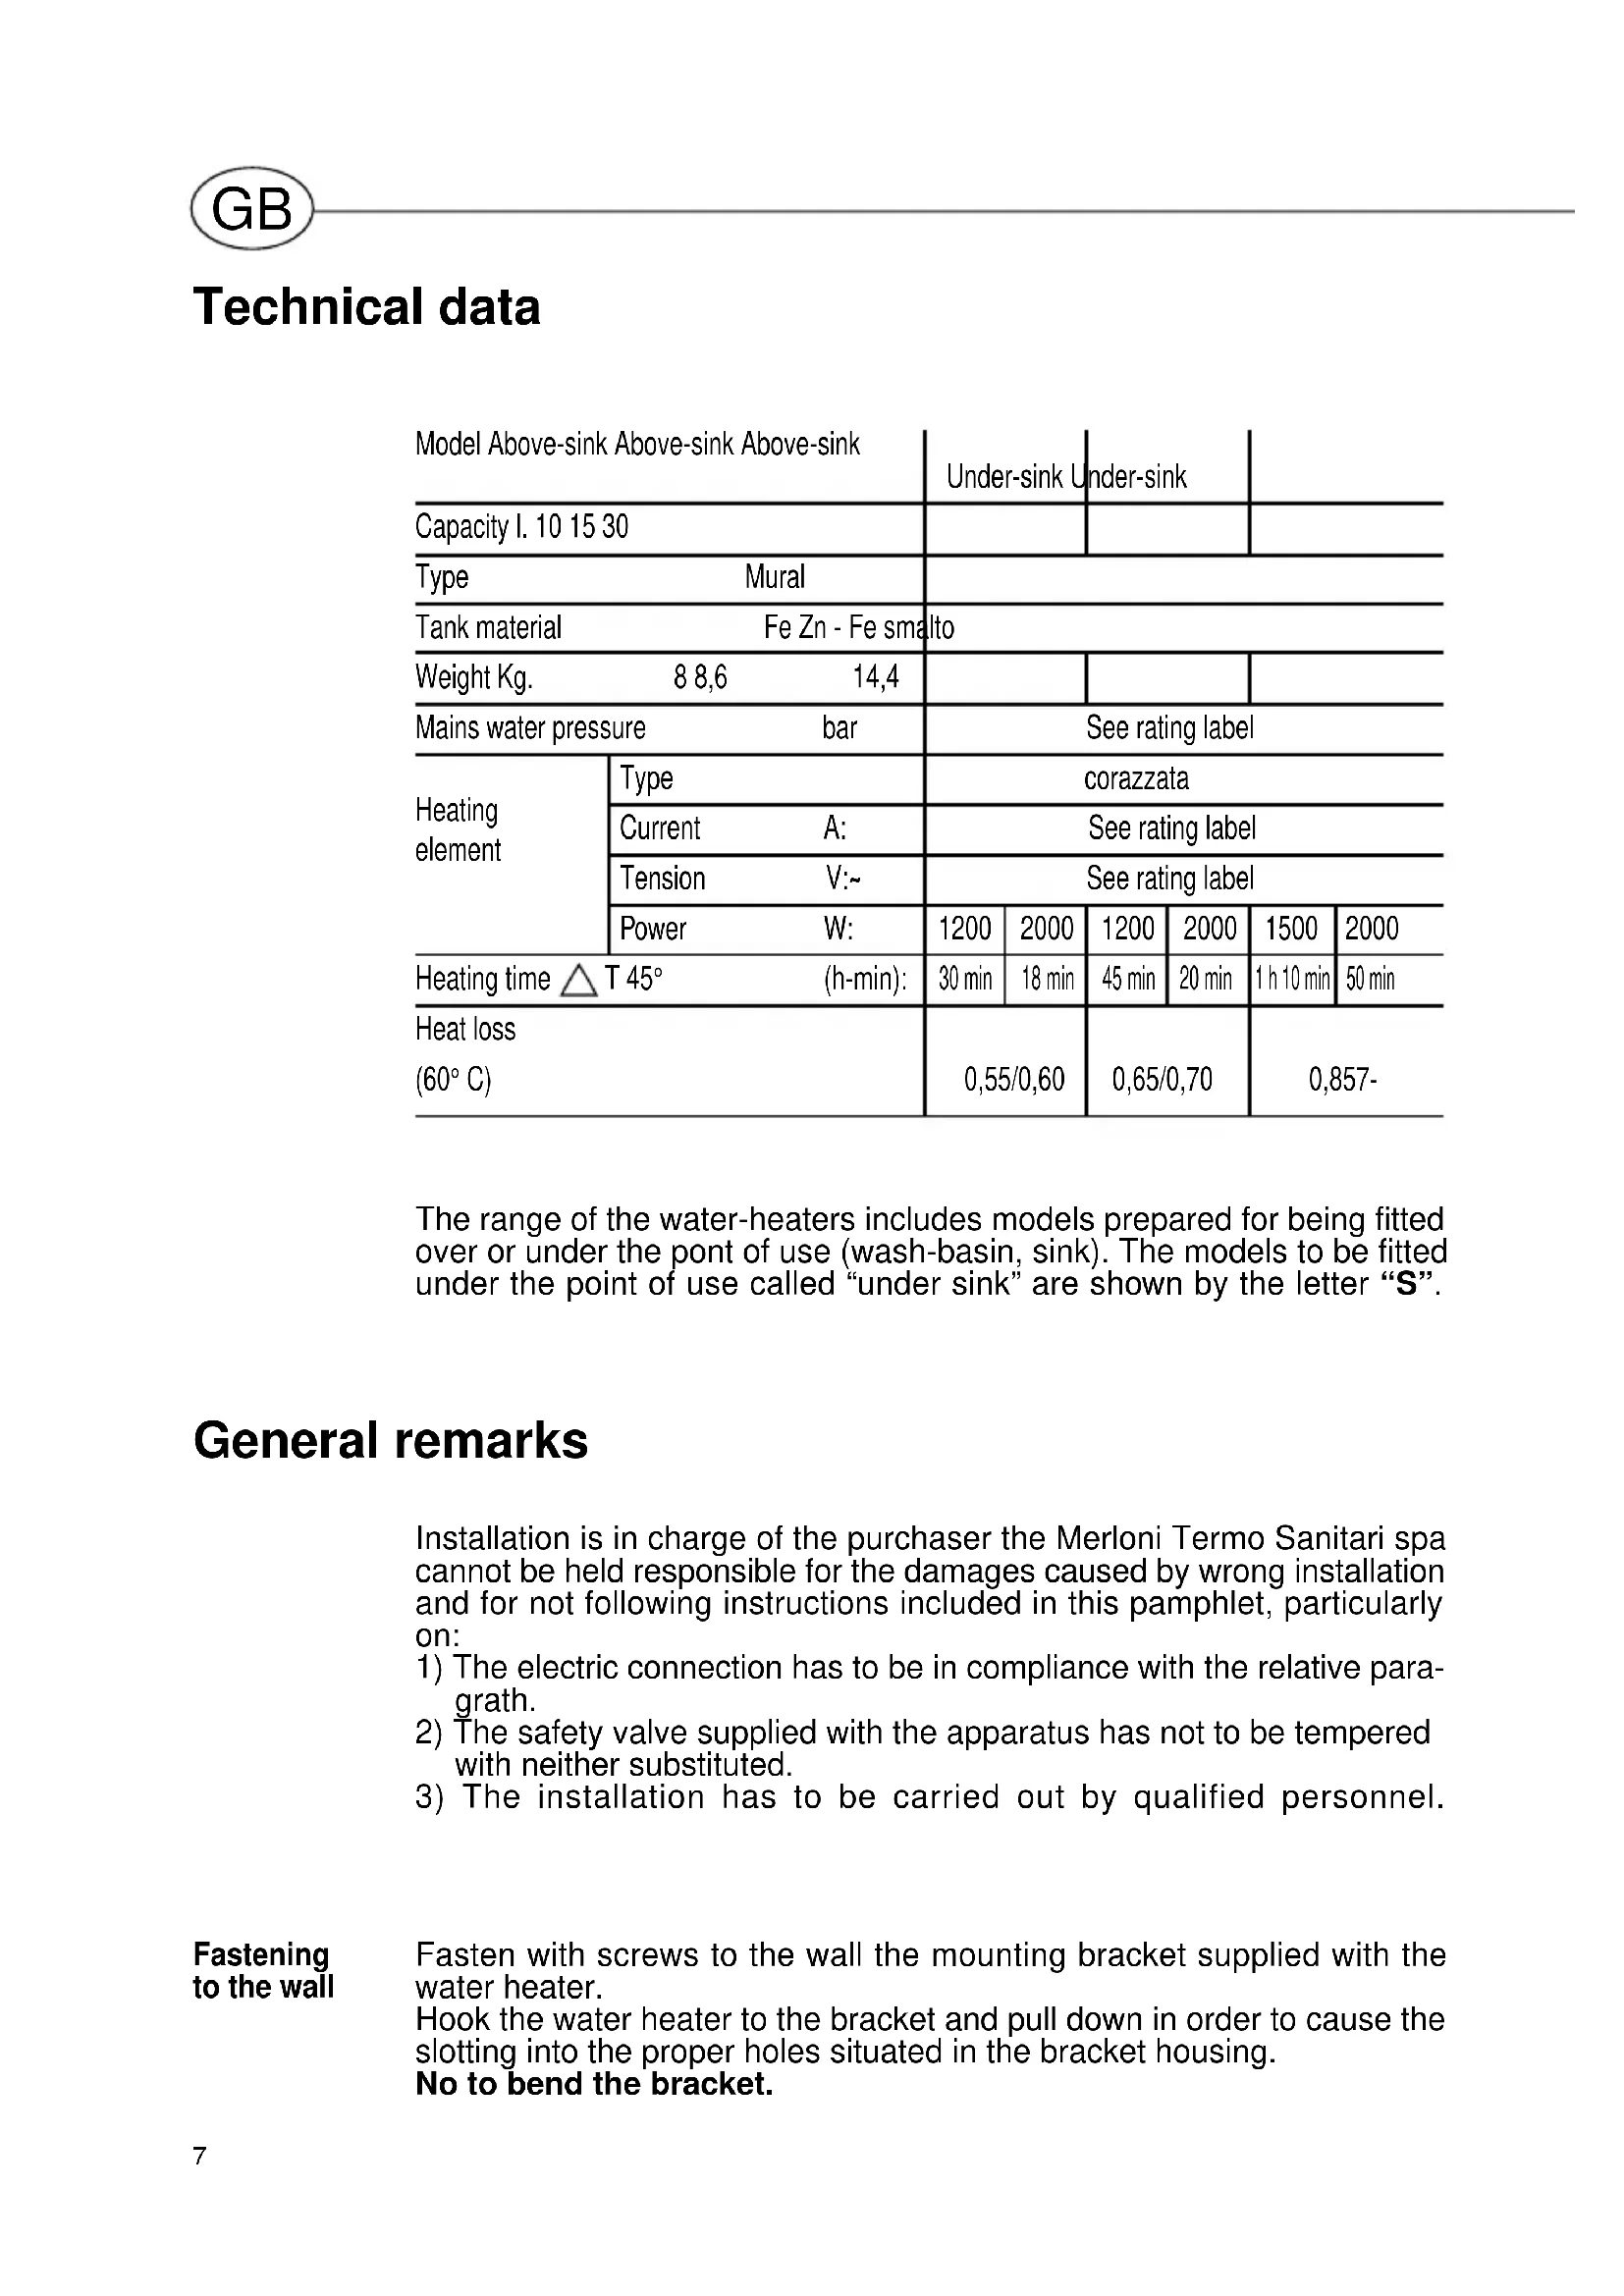
| Product type | Electric storage water heater |
| Brand | Clage |
| Model | S 30 |
| Installation type | Wall-mounted (above-sink or under-sink) |
| Capacity | 30 liters |
| Tank material | Enameled steel (Fe smalto) |
| Weight empty | 14.4 kg |
| Power | 1500 W or 2000 W depending on version |
| Supply voltage | 230 V ~ (check rating plate) |
| Maximum working pressure | 6 bar |
| Heating time (ΔT 45°C) | 1 h 10 min (1500 W) / 50 min (2000 W) |
| Energy consumption at 60°C | 0.85 kWh/24 h |
| Heating elements | Sheathed heating element |
| Thermostat | Adjustable with safety thermal switch |
| Indicator light | Yes (on during heating) |
| Hydraulic connections | Cold water inlet (blue collar), hot water outlet (red collar), 1/2" thread |
| Safety group required | Yes (not supplied, max pressure 6 bar) |
| Electrical protection | Fuses rated according to power |
| Recommended maintenance | Annual descaling, check of magnesium anode |
| Standards | EMC directive 89/336/EEC |
Frequently Asked Questions - S 30 Clage
User questions about S 30 Clage
0 question about this device. Answer the ones you know or ask your own.
Ask a new question about this device
Download the instructions for your Boiler in PDF format for free! Find your manual S 30 - Clage and take your electronic device back in hand. On this page are published all the documents necessary for the use of your device. S 30 by Clage.
USER MANUAL S 30 Clage
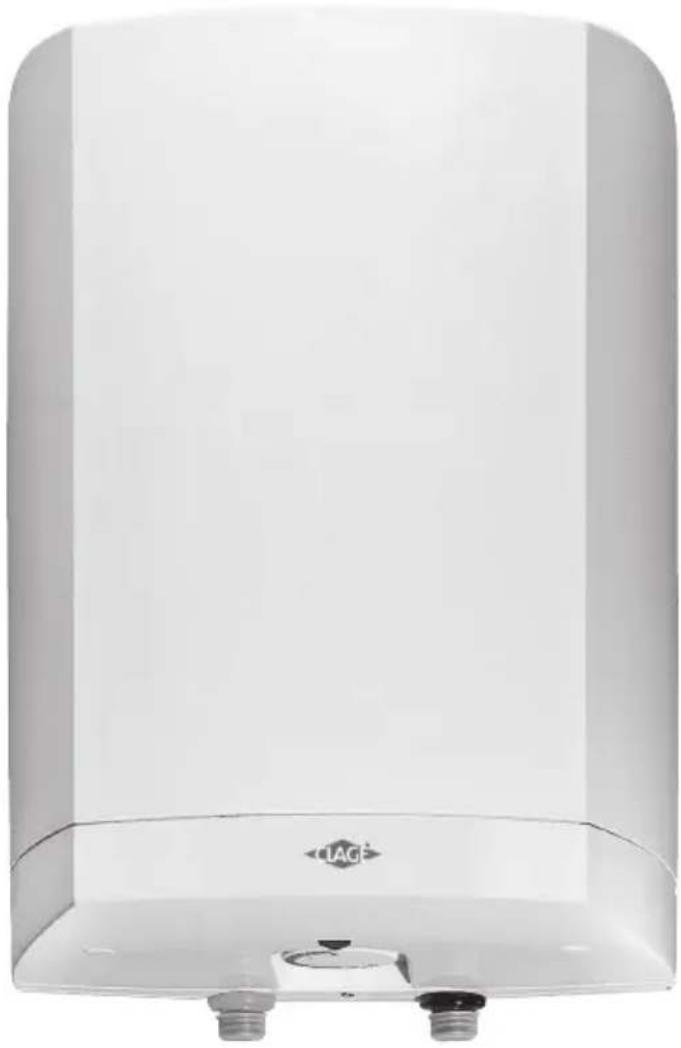
Water storage heater S 30 · Chauffe-eau S 30
natural_image
White rectangular water heater with a small logo and mounting base (no visible text or symbols)Technische Daten
The range of the water-heaters includes models prepared for being fitted over or under the pont of use (wash-basin, sink). The models to be fitted under the point of use called “under sink” are shown by the letter “S”.
General remarks
Installation is in charge of the purchaser the Merloni Termo Sanitari spa cannot be held responsible for the damages caused by wrong installation and for not following instructions included in this pamphlet, particularly on:
1) The electric connection has to be in compliance with the relative paragraph.
2) The safety valve supplied with the apparatus has not to be tempered with neither substituted.
3) The installation has to be carried out by qualified personnel.
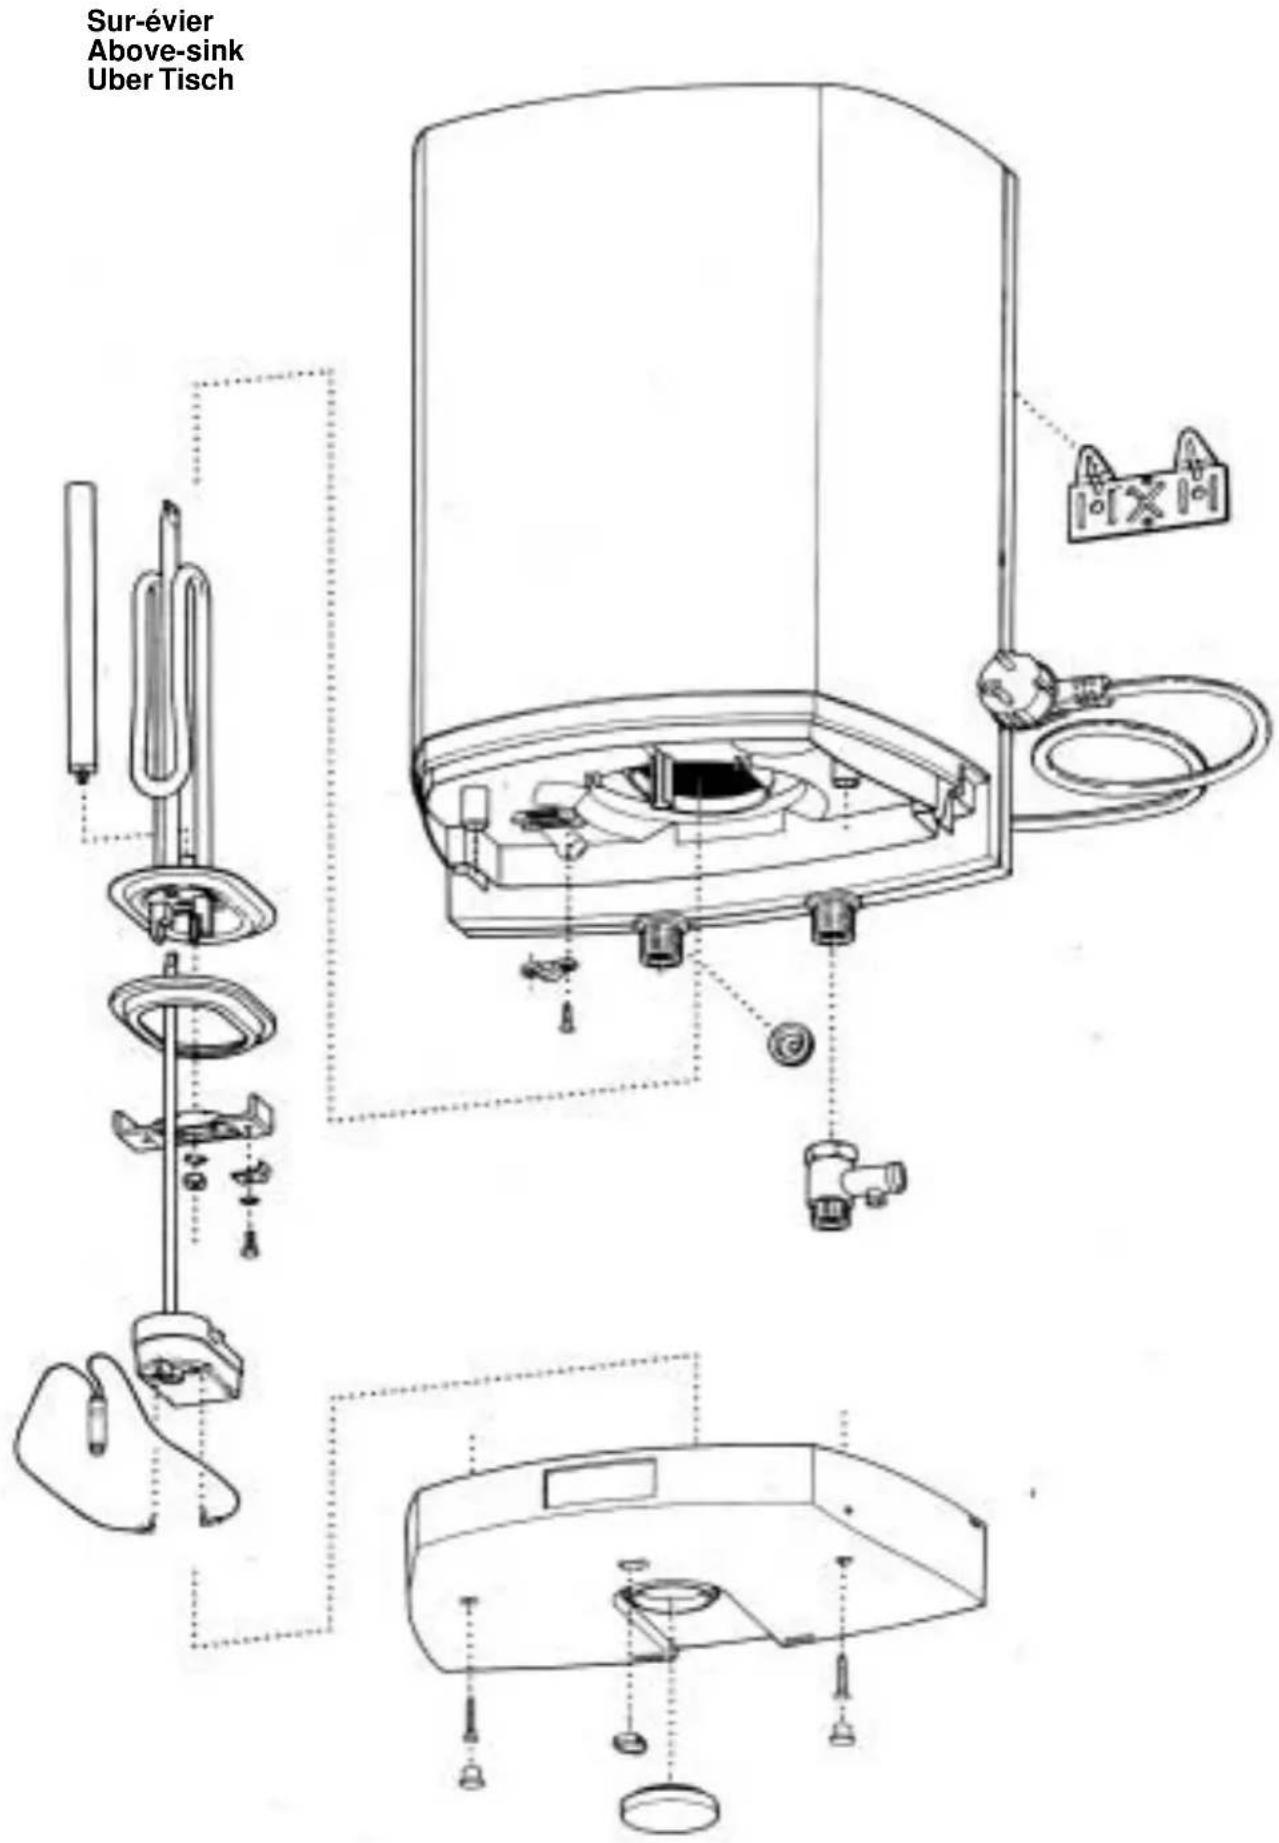
Fastening to the wall
Fasten with screws to the wall the mounting bracket supplied with the water heater.
Hook the water heater to the bracket and pull down in order to cause the slotting into the proper holes situated in the bracket housing.
No to bend the bracket.
Installation instructions
Before the installation of the various groups (taps or shower) make sure the pipe-line is clean of any impurity which might damage them.
Hydraulic connection
Connect the water heater's inlet and outlet with pipes or fittings that are resistant to the working pressure as well as to the temperature of the hot water that can usually reach and exceed 80^ C. We therefore advise against the use of materiales that do not resist such high temperatures. Screw to the entry-pipe (marked by a blue ring) the safety valve, supplied with the apparatus, and connect this to the water feeding pipe. The safety valve can be damaged because of excessive tightening. The safety valve has a calibration value of about 80 N/cm ^2 . A slight drip during the heating phase is quite normal; for this reason it is advisable to connect the valve to a little drain-pipe. In case of pressure on the network close to ,e calibration-values of the valve, it is needed to apply a pressure-reducer as far as possible from the boiler.
To use a service valve on the mains water pipe.
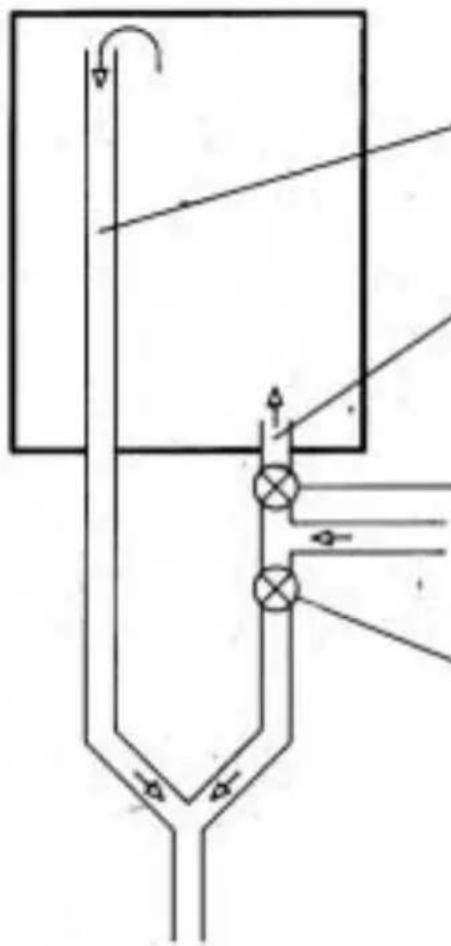
"Open outlet" connection
For this type of installation it is needed to utilise suitable watertaps and carry out the connection as shown in the scheme see “open outlet connection”. With this solution the water-heater can operate at any network pressure. The safety valve is not to be fitted.
Electrical connection
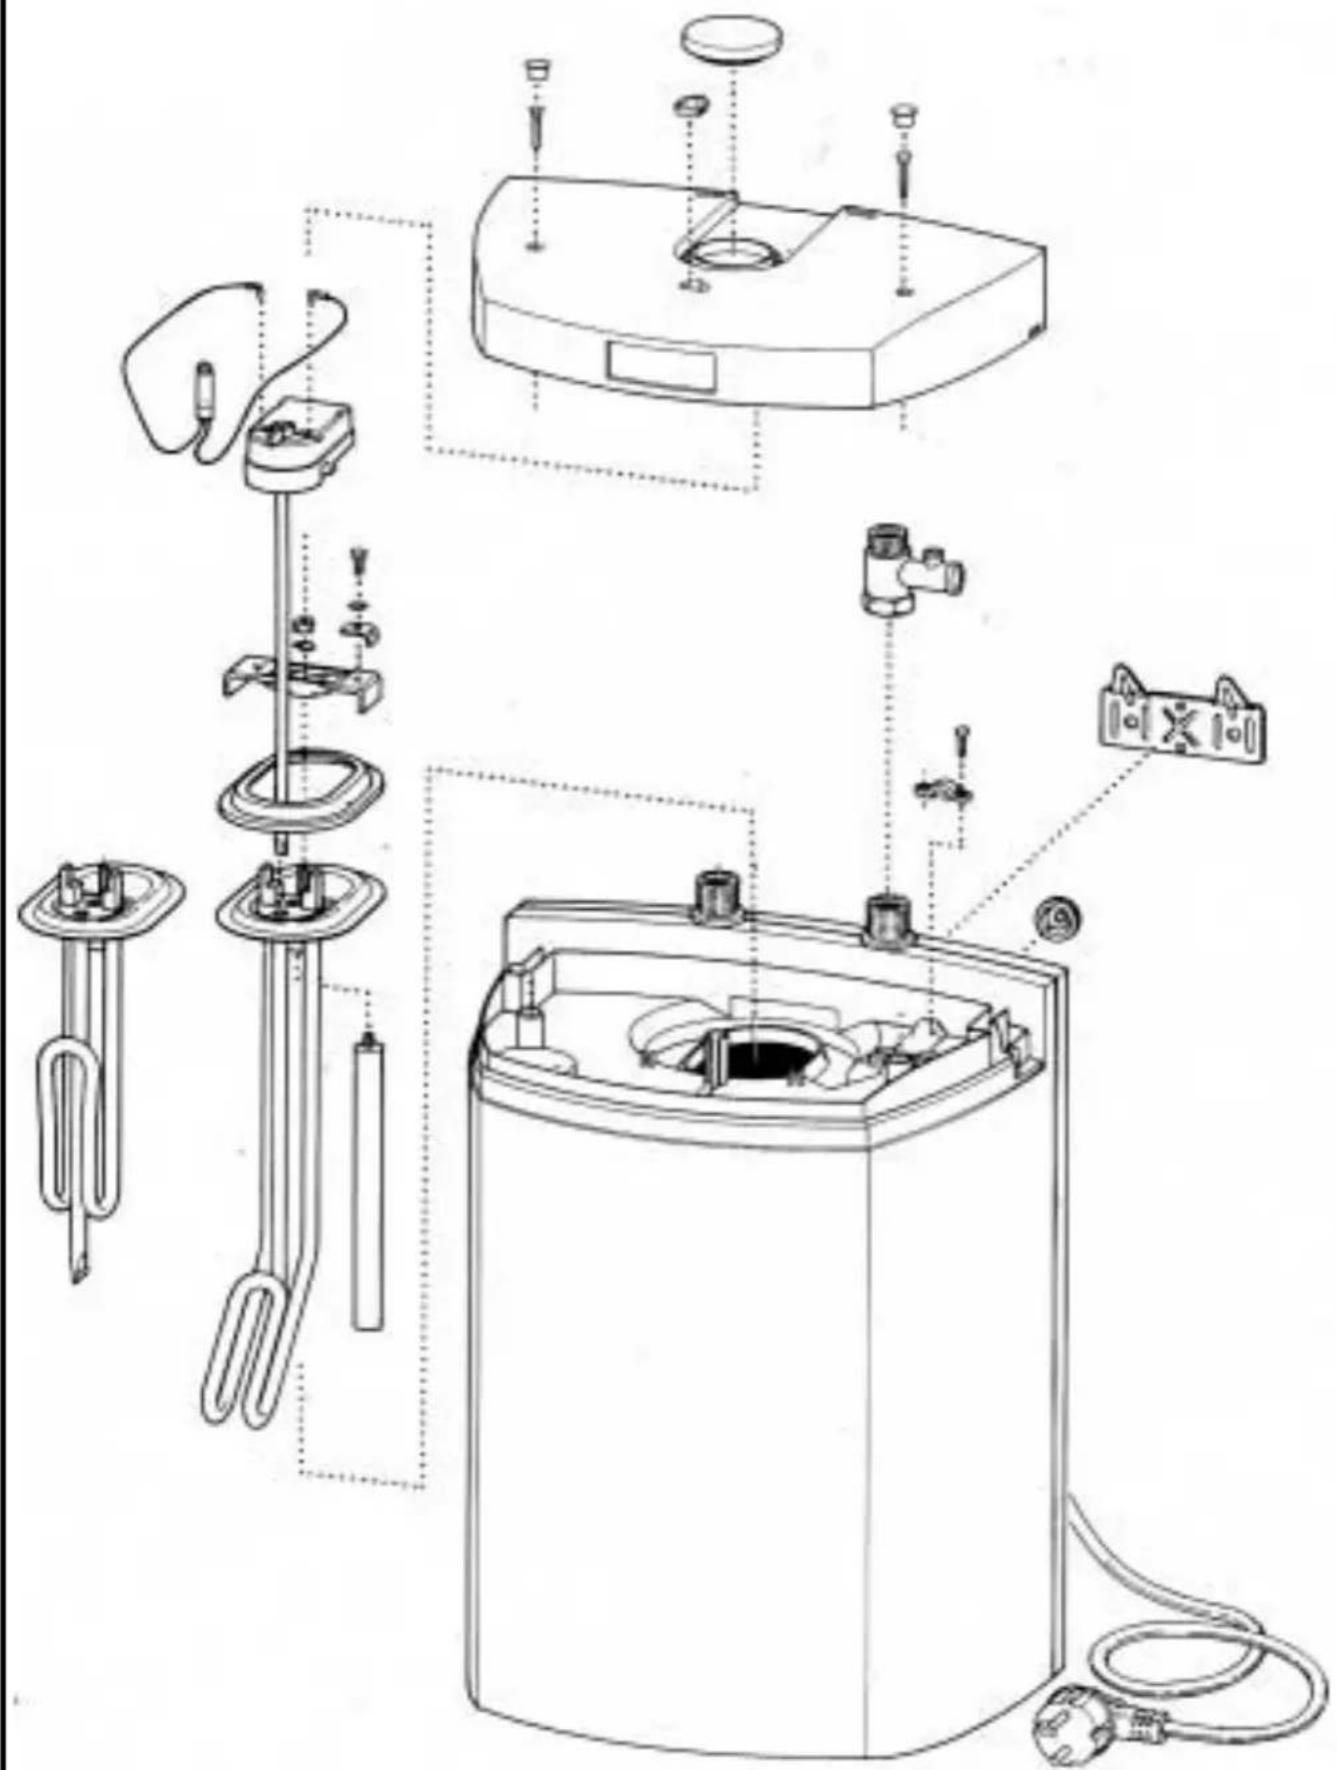
The feeding cable is to be inserted in the proper hole situated in the back of the apparatus and slide it until it reaches the housing slot near the thermostat.
The electric connection is carried out directly to the clamps of the thermostat. To disconnect the unit from the network use a bipolar, switch conform to IEC standards (contact opening at least 3 mm., better if equipped with fuses).
The appliance must be earthed and the earth cable (which must be yellow-green ain colour) is fixed to the terminal marked by the symbol ± . Before starting it working, make sure that the network tension is in compliance with the rated values of the apparatus.
If the feeding cable isn't supplied with the water heater to connect the appliance to thermostat clamps directly.
The lasta operation before connectin the voltage is to fill the boiler with water from the mains. Open the main water supply cock and the hot water tap to let all the air out of the boiler. Make a sight check for water leaks; make sure the surge tank flange is centered; if necessary, tighten the nut gently and then connect the voltage.
Instruction for use
Working
The warning light remains on only during heating phase. The thermostat will automatically disconnect the heating element when the selected operating temperature is reached.
Regulation of the operating temperature
The regulation of the temperature is carried on turning the handle in the centre of the cap: anticlock to increase temperature, clockwise wise to decrease it.
Position E is the ideal working temperature (55° - 60° C).
This temperature gets the optimum performance from the apparatus with a notable energy saving and longer life of the water heater.
Emptying the appliance
The appliance must be emptied if it is to be left unused in a room subject to freezing temperatures.
When necessary, empty the appliance as follows:
a) For above-the-sink models:
- shut off boiler current input
- close the stopcock
- open the hot water tap (wash basin or bath tub)
- remove the safety valve and the water will flow from the boiler through the sleeve coupling.
b) For below-the-sink models:
- 'shut off the boiler current input
- close the stopcock
- disconnect the appliance from the water supply
- empty by siphoning through boiler cold-water pipe.
Filling the appliance
See the chapter on "Water Connection".
Dripping safety unit
When heating is in progress, some dripping is normal. Make sure the valve drain hole is connected to a small emptying pipe. Never clog this hole. For this very reason, we recommend you connect this drain, leaving it always open, to a drain pipe installed inclined continuously downwards and place without condensation. If dripping is continuous throughout the heating phase or not, check the supply pressure and the safety unit for proper operation.
Operating problems
the water is cold: Make sure the electricity is connected. Make sure current reaches the thermostat terminals. Check the thermostat safety device. Check the electric resistor. The water is boiling: (steam issues from the faucets) Shut off the current immediately and slowly open the hot water cocks. Check the setting and operation of the thermostat. Insufficient hot water flow: Make sure the cold water supply pressure is not low.
Maintenances instructions
Do not attempt to repair the heater yourself, this will void the guarantee, call an approved installer.
Replacement of particulars
Before starting any maintenance work, disconnect the apparatus from the electricity mains.
In order to reach the electric parts (heating element, thermostat, warning light) one has to take away the screw fixing the cover and the cover itself. In order to operate on the heating element, which is welded to the flange, you have to empty the apparatus see emptying the appliance.
Disconnect the terminals of the signal lamp, of the earth and of the thermostat. Take out the thermostat unscrewing the nut; take off the bracket close-flange into the inside.
At this moment the flange can be taken away with a semicircular movement. During the reassembling phase, make sure that the positions of the gasket, of the flange and of the thermostat are the original ones.
Periodic maintenance
For the water heater's galvanic protection system to function properly. The permanent hardness of the water should not be less than 12^ fr. During the normal functioning of the appliance, the connections could become hot.
If one does not wish to use suitable acids, the operation can be cartied out by crumbling the limestone crust making sure not to damage the covering of the heating element.
To magnesium anode (for the models which have it), must be substituted every years.
To take it off dismantle the heating element and unscrew the anode from the braket.
Bipola safety reactivation
In case of abnormal water heating, a thermal safety switch, according to the IEC regulations, opens the circuit in both feeding phases to the heating element; in this case it is better to call the Technical Assistance.
Safety valve
In those models equipped with a safety valve with a lever, the latter can be used, by lifting it up, to:
- empty out the appliance, if necessary
- check on a regular basis (every month) that the valve is operating correctly.
This appliance complies with the requirements set forth in EMC directive 89/336/EEC concerning the electromagnetic compatibility.
THERMOSTAT THERMOSTAT THERMOSTAT

RÉSISTANCE HEATING ELEMENT HEIZKÖRPER

LAMPE TÉMOIN WARNING LIGHT BETRIEBSLAMPE
natural_image
Pure schematic diagram of a vertical pipe or vessel with internal components and directional arrows, no text or symbols present.TUYAU DE SORTIE D'EAU - WATER OUTLET - WARMWASSER AUSLAUF
TUYAU D'ALIMENTATION D'EAU - - COLD WATER INLET - KALTWASSER EINLAUF
ROBINET EAU CHAUDE HOT WATER TAP WARMWASSERHAHN
ROBINET EAU FROIDE COLD WATER TAP KALTWASSERHAHN
RACCORDEMENT "À ÉCOULEMENT LIBRE" "OPEN OUTLET" CONNECTION ANSCHLUSS "FREIER ABFLUSS"
text_image
Sur-évier Above-sink Uber TischSous-évier
Under-sink
Unter Tisch
text_image
Technical diagram of a water heater system with labeled components in Chinese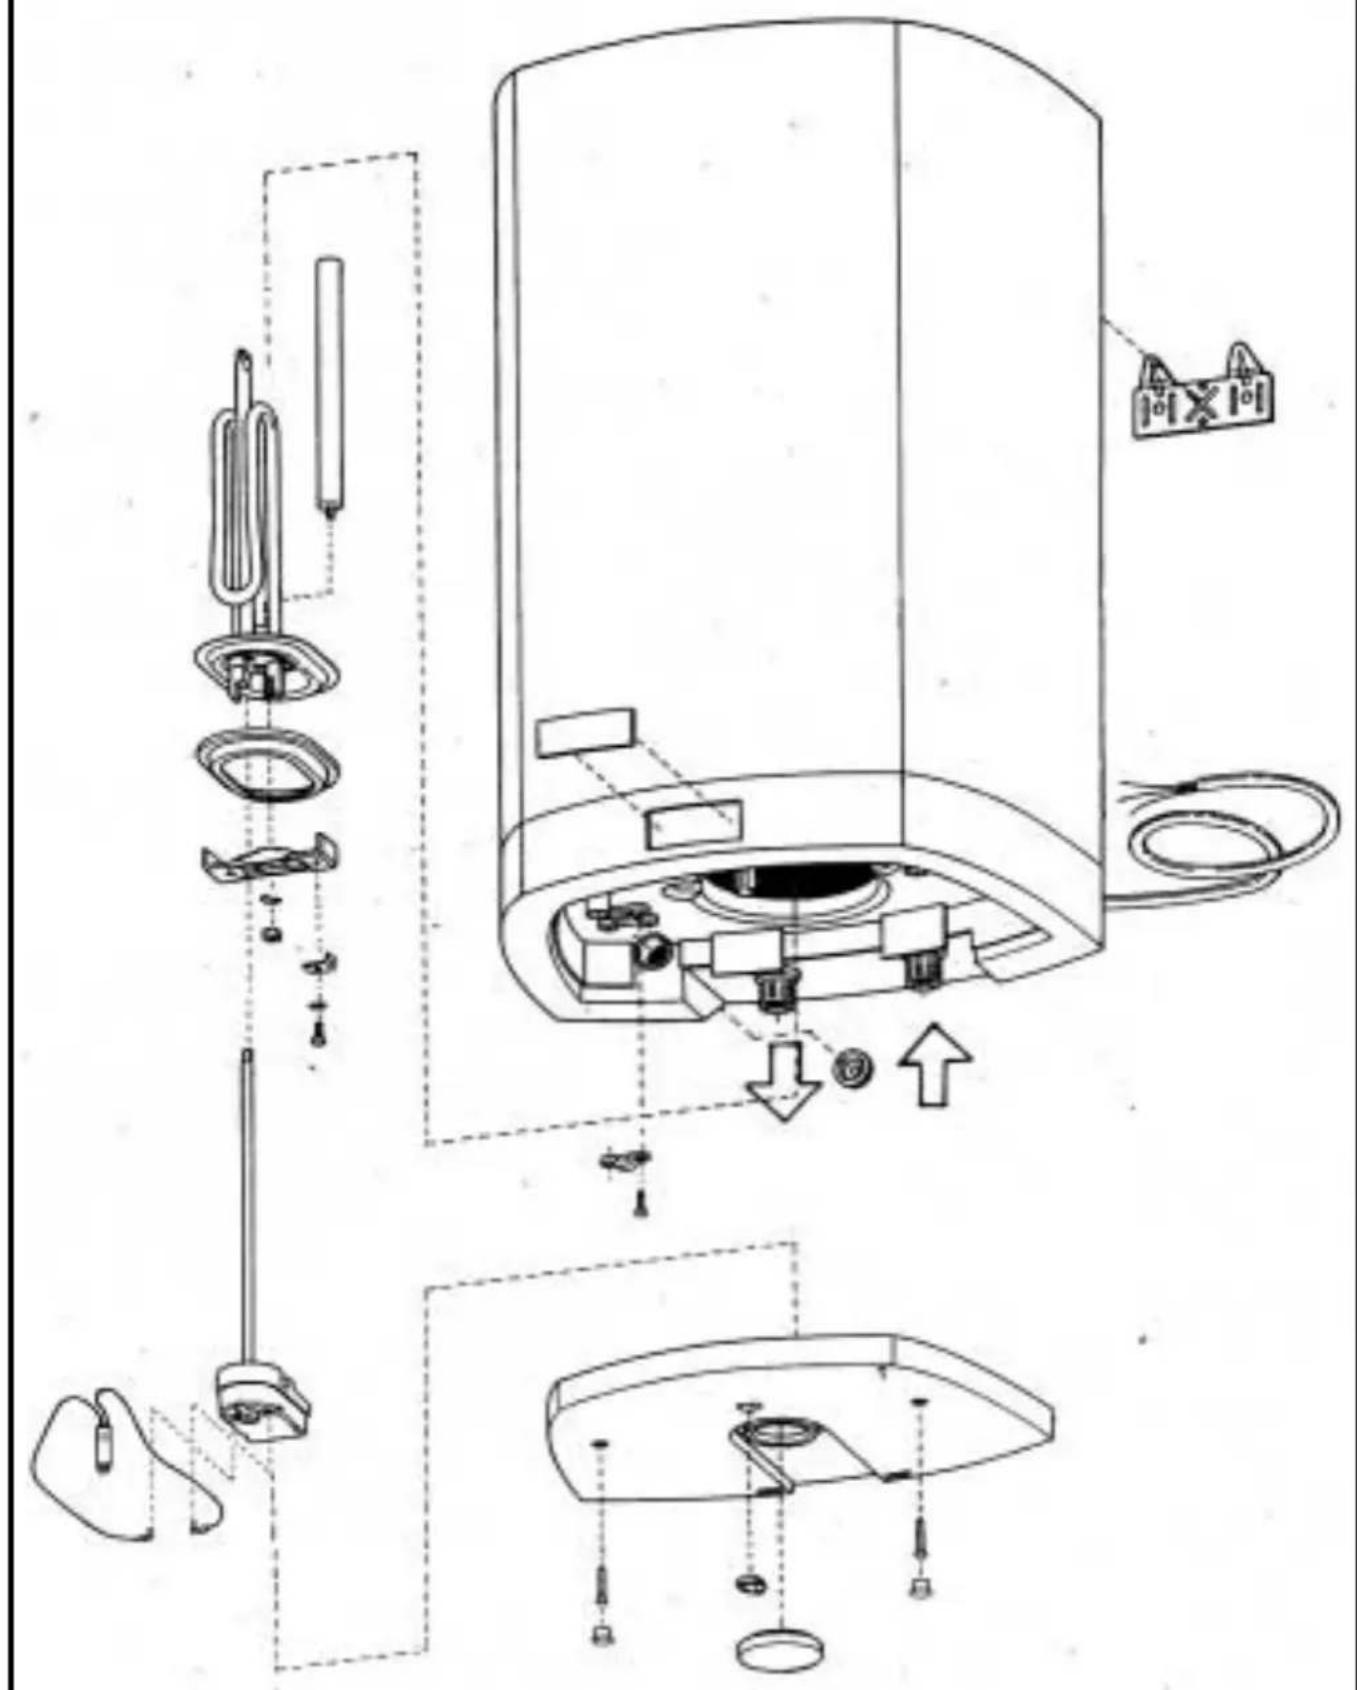
text_image
Technical diagram of a water heater with labeled components and assembly stepsCLAGE GmbH
Pirolweg 1–5
21337 Lüneburg
Fon: +49 (0) 41 31 - 89 01-0
Fax: +49 (0) 41 31 - 83 200