MagicSafe MS620 - Car alarm WAECO - Free user manual and instructions
Find the device manual for free MagicSafe MS620 WAECO in PDF.

Frequently Asked Questions - MagicSafe MS620 WAECO
User questions about MagicSafe MS620 WAECO
0 question about this device. Answer the ones you know or ask your own.
Ask a new question about this device
Download the instructions for your Car alarm in PDF format for free! Find your manual MagicSafe MS620 - WAECO and take your electronic device back in hand. On this page are published all the documents necessary for the use of your device. MagicSafe MS620 by WAECO.
USER MANUAL MagicSafe MS620 WAECO
A,B,CH,D,DK,E,F,FIN.GB
GR, I, IRL, L, NL, N, P, S
MagicSafe MS620
D 13 Auto-Alarmanlage
GB 47 Car alarm system
Installation and Operating Manual
We will be happy to provide you with further information about WAECO products. Please order our free catalogue with no obligation to buy on our homepage: www.waeco.com
F
Please read this manual carefully before installing and starting up and store it in a safe place. If the system is resold, this manual must be handed over to the purchaser along with the device.
Contents
1 Notes on using the instruction manual. 48
2 Safety and installation instructions 48
3 Scope of delivery 50
4 Proper use. 50
5 Technical description. 51
6 Installing MagicSafe. 53
7 Electrical connections 55
8 Testing functions 67
9 Using MagicSafe 68
10 Programming MagicSafe 75
11 Maintaining and cleaning MagicSafe. 78
12 Searching for errors. 79
13 Guarantee/repairs 79
14 Disposal. 79
15 Technical data 80
Notes on using the instruction manual MagicSafe MS620
1 Notes on using the instruction manual

Caution!
Safety instruction, failure to observe this instruction can cause material damage and impair the function of the device.
Caution!
Safety instruction, relating to a danger from electrical current or voltage. Failure to observe this instruction can cause material damage or personal injury and impair the function of the device.

Note
Supplementary information for operating the device.
Action: this symbol indicates that you need to do something. The required action is described step-by-step.
This symbol indicates the result of an action.
Please observe the following safety instructions.
2 Safety and installation instructions
Please observe the prescribed safety instructions and stipulations from the vehicle manufacturer and service workshops.

Caution!
WAECO International will not be held liable for claims for damage resulting from the following:
Installation errors
- Damage to the system resulting from mechanical influences and overvoltage
- Alterations to the device made without the explicit permission from WAECO International
- Usage for other purposes than those described in the installation manual.

Caution!
Do not enable the acoustic function confirmation (alarm siren acknowledgement tone).
If you enable the acoustic function confirmation, the alarm system will no longer conform to regulation 95/56/EC, and continued operation is therefore prohibited.
Warning!
To prevent short circuits, always disconnect the negative terminal of the vehicle's electrical system before working on it.
If the vehicle has an additional battery, its negative terminal should also be disconnected.
MagicSafe M5620 Safety and installation instructions
Warning!
Insufficient supply line connections could result in short circuits which
Cause cable fires
Trigger the airbags
- Damage electronic control devices
- Cause electric functions to fail (indicators, brake light, horn, ignition, light).
Please observe the following instructions:
-
When working on the following supply lines, only use insulated cable lugs, plugs and tab sleeves.
-
30 (direct supply from positive battery terminal),
- 15 (connected positive terminal, behind the battery),
- 31 (return line from the battery, earth),
-L (indicator lights left),
R (indicator lights right).
Do not use porcelain insulating clamps.
- Use a crimping tool (see fig. 3.11, page 4) to connect the cables.
For connections which are intended to be permanent, you can solder the cable ends together and then insulate them.
-
When connecting to supply line 31 (earth)
-
Screw the cable to the cable lug and gear disc to the vehicle's earth bolt or
- With a cable lug and a self-tapping screw to the bodywork sheet metal.
Ensure that there is a good earth connection.
When the negative terminal of the battery is disconnected, all volatile memories in the convenience electronics lose the stored data.
The following data must be set again, depending on vehicle equipment:
Radio code
- Vehicle clock
- T i m e r
- On-board computer
-Seat position
You can find instructions for making these settings in the appropriate operating instructions.
Observe the following instructions during installation:
- Secure the parts of the MagicSafe installed in the vehicle in such a way that they cannot become loose under any circumstances (sudden braking, accidents) and cause injuries to the occupants of the vehicle.
- When drilling, ensure that there is sufficient room for the drill head to emerge once the hole has been made to prevent damage (see Fig. 1, page 3).
Grind all drill holes and treat them with rust-protection agent.


Scope of delivery MagicSafe MS620
Observe the following instructions when working with electrical parts:
- When testing the voltage in electrical cables, only use a diode test lamp (see fig. 3.1, page 4) or a voltmeter (see fig. 3.2, page 4).
Test lamps (see fig. 3.3, page 4) with an illuminant take up voltages which are too high and which can damage the vehicle's electronic system.
-
When making electrical connections, ensure that
-
They are not kinked or twisted
- They do not rub on edges
They re not laid in sharp edged ducts without protection (see Fig. 2, page 3).
Insulate all connections.
- Secure the cables against mechanical wear with cable binders or insulating tape, for example to existing cables.
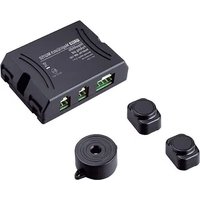
3 Scope of delivery
No. in Quan- Description Item number Fig. 4, page 5 tity
1.1 Control unit MS-620RX
21 Main cable tree (P1) MS-620KA1
3 1 Central lock for cable tree (P2) MS-620KA2
41 Status LED with cable and socket MS-650-SL (P3)
51 Alarm siren MS-620SI
6 1 Bonnet contact switch MS-650-KIT
72Remote control RC-100TX
82 Blocking diode 6A10
91 Shock sensor MS-620SS
10 1 Shock sensor cable (P4)
-- Securing and installation material
-2 Warning stickers MS-650WS
4 P r o p e r u s e
MagicSafe MS620 is an alarm system for passenger cars. It offers additional protection against the theft of your vehicle and its contents.
MagicSafe MS620 Technical description
5 Technical description
5.1 Functional description
MagicSafe MS620 is an alarm system which is equipped with a shock sensor and an alarm siren. MagicSafe offers many useful functions, some of which you may have to adapt to a system which is already installed in the vehicles.
MagicSafe MS620 offers the following functions:
- Integration in a central-locking system already installed in the vehicle The alarm system can operate an existing central-locking system.
- Programmable output for convenience functions. This enables you to use the remote control to close the sun roof and electrically operated windows, switch on the parking heater or main beam or to unlock the boot or petrol tank lid.
- Programmable input for connecting a contact switch to the engine bonnet, the boot or additional door contacts.
Automatic reactivation If you switch off the alarm and do not open a door or cover panel within 30 s, the alarm system activates itself again automatically.
Self-activation If you leave the car and do not open a door or panel within 30 s, the alarm system can activate itself automatically.
Service mode for inspections and repairs In service mode, all settings for the alarm system remain stored, even if the battery is disconnected. - Panic mode
- You can trigger the alarm via remote control, if you are attacked – to scare off the attacker.
- Vehicle search function
- You can use the alarm system to indicate the location of your vehicle optically and acoustically. The alarm siren sounds and the hazard lights flash.
Some functions have been installed as options and have to be configured or programmed during installation.
The microprocessor-controlled MagicSafe alarm system protects vehicles and their contents from theft. If the alarm system is activated, an alarm is triggered as soon as the door, boot or bonnet are opened, the ignition turned on or the shock sensor detects impacts or blows to the vehicle.
An ultrasonic module with sensors can be installed instead of the shock sensor for monitoring the interior of the vehicle. The device is available as an accessory.
The alarm system has been designed for vehicles with an on-board voltage of 12V . The input for the door contact switch can be used for both positively and negatively charged door contacts.

Technical description MagicSafe M5620
The programmable input can be connected to the bonnet contact switch, the boot contact switch or additional door contacts. This additional input can be programmed so that it does not trigger the complete alarm rather a short pre-alarm.
When MagicSafe is activated, it closes the central locking (if present), when it is deactivated, MagicSafe opens it again. MagicSafe signals this with a optical signal via the vehicle indicators, an acoustic signal via the siren and also switches a status LED on or off as a further indication.
MagicSafe is operated with a two-button remote control. If the batteries are empty or the remote control is lost or damaged, you can turn the alarm system off with your PIN code.
You can program new or additional remote control systems to the alarm system.
In addition to this you can alter the software functions of the remote control.
To ensure that a potential thief cannot read the deactivation code, the code transmitted by the remote control is generated anew using a random generation process after every activation.
5.2 Possible operating modes of MagicSafe
The alarm system has the following three operating modes:
- Stand-by
The alarm system is constantly on stand-by as soon as it is installed and correctly connected. It cannot trigger the alarm when in stand-by.
- Activated
If the alarm system is activated, it can trigger the alarm. This happens if someone breaks into the door or if the vehicle is rocked, for example. If you wish to drive off, you must first deactivate the alarm system. The system is then in stand-by mode.
- Alarm triggered
If the alarm is triggered, you can switch off the alarm and then either leave the alarm activated (activated mode) or deactivate it. The system is then in the stand-by mode.
5.3 Status displays
The status LED displays have the following meanings:
| Condition Status LED display |
| Activated Slow flashing |
| Deactivated Off |
| Being activated/alarm Quick flashing |
| Service mode Constant glow |
| PIN code alteration Flashing |
MagicSafe MS620 Installing MagicSafe
6 Installing MagicSafe

Note
If you do not have sufficient technical knowledge for installing and connecting the components in vehicles, you should have a specialist install the alarm system in your vehicle.
6.1 Tools required
For installation and assembly you require the following tools:
- Measuring ruler (see fig. 3.4, page 4)
- Centre punch (see fig. 3.5, page 4)
- Hammer (see fig. 3.6, page 4)
- Drill bit set (see fig. 3.7, page 4)
- Drill (see fig. 3.8, page 4)
- Screwdriver (see fig. 3.9, page 4)
For making and testing the electrical connection the following tools are required:
- Diode test lamp (see fig. 3.1, page 4) or Voltmeter (see fig. 3.2, page 4)
Insulating tape
Heat shrinking sleeve
Hot air blower (see fig. 3.10, page 4)
Crimping tool (see fig. 3.11, page 4) - Soldering iron if required (see fig. 3.12, page 4)
- Solder, if required (see fig. 3.13, page 4)
- Cable bushing sleeves, if required
To secure the receiver and the cables you may require additional screws and cable binders.
6.2 Installing the control device
Select a suitable installation location (see Fig. 5, page 6).
When selecting the installation location, observe the following instructions:

Install the control unit
In the vehicle interior
- With the main connection cable facing downwards
-Under the dashboard
Not in areas where strong electrical fields can interfere with it, e. g. ignition cables or central controller electronics
- Not directly at ventilator nozzles.
Where possible use existing drill holes in the vehicle.


Installing MagicSafe MagicSafe MS620
Screw the control device securely to the vehicle with the screws supplied or use double-sided adhesive tape.
6.3 Installing the status LED
Drill a hole with a diameter of 8mm in the dashboard or in a plastic cover already installed in the vehicle.
Guide the status LED cable through the drill hole and insert the status LED in the drill hole until it latches into place.
The status LED is secured against slipping out with a small hook.
Lay the cable to the control device and insert the plug in the two-pin P3 connection (see Fig. 6, page 6).
6.4 Installing the alarm siren
The alarm siren can be mounted in the engine compartment.

When mounting it, ensure that the installation location is
- Not in an area exposed to splashing water
- Not near the exhaust system
Cannot be accessed from underneath the vehicle, to ensure that it cannot be sabotaged.
Mount the alarm siren with the acoustic horn facing downwards.
Connect the black cable (negative wire) of the alarm siren to the negative terminal of the battery.
Connect the red cable (positive terminal) of the alarm siren to the brown cable of the P1 main cable tree.
6.5 Installing the shock sensor
Select a suitable installation location on the hinge pillar.
Screw the control device securely to the vehicle with the screws supplied or use double-sided adhesive tape.
6.6 Installing the bonnet contact switch
This switch need only be installed if the vehicle does not already have one.
Find a suitable location in the engine compartment and drill a hole with a diameter of 8 mm.
During installation ensure that the distance to the closed bonnet is a minimum of 22mm and a maximum of 27mm .
Use putty to check this distance.
You can further reduce the minimum distance by shortening the switch.
Test the switch function after installation.


MagicSafe MS620 Electrical connections
7 Electrical connections
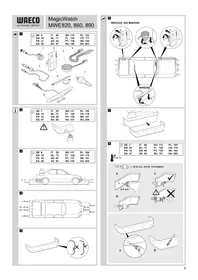
The complete circuit diagram for the alarm system can be found in Fig. 8, page 7.
| No. in Fig. 8, page 7 | Description |
| 1 Control unit | |
| 2 Shock sensor | |
| 3 Status LED | |
| 4 Drive-off block (optional) | |
| 5 Convenience output | |
| 6 Bonnet contact switch | |
| 7 Boot contact switch | |
| 8 Door contact switch | |
| 9 Indicator switch | |
| 10 Indicator | |
| 11 Alarm siren | |
All plugs are coded so that you cannot connect them incorrectly.
7.1 Laying cables
When laying electric connections, ensure that
They are not kinked or twisted
They do not rub on edges
They are not laid in sharp edged ducts without protection (see Fig. 2, page 3).

Caution!
Before making any drill holes, ensure that no electrical cables or other parts of the vehicle can be damaged by drilling, sawing and filing (see Fig. 1, page 3).
- When laying cables in the engine compartment or boot, use existing openings with rubber seals wherever possible.
Where there is no suitable opening, drill a hole with a diameter of approximately 13mm , and insert a cable duct sleeve.

Note
Pull the socket connector of the cables through the cable sleeve, before inserting the sleeve in the bodywork.
Lay out the cables in the motor or boot so that they cannot be damaged under any circumstance (e. g. by flying grit).
Insulate all unused cable ends.
7.2 Connecting the P1 main cable tree (see Fig. 6, page 6)
Plug the P1 cable tree into the corresponding connection on the control unit.
Electrical connections MagicSafe MS620
Green/brown (P1.7)
If the indicators are positively charged (the cables to the indicators conduct +12V , when the indicators are activated):
Connect this cable to +12V
If the indicators are negatively charged (the cables to the indicators conduct an earthed charge, when the indicators are activated):
Connect this cable to earth.
Undo the soldered connections for the two diodes (fig. 8.12, page 7) in the black/ white and black/green cables and reverse their position (polarity) and resolder them.
Black/white and black/green (P1.8)
Connect the black/white cable to the right indicator cable.
Connect the black/green cable to the left indicator cable.
Red (P1.9)
Connect this cable to a cable with a permanent +12V charge (terminal +30
Black (P1.10)
Connect this cable to earth (terminal -31).
Brown (P1.11)
Guide this cable through the splash-protection wall in the engine compartment.
Connect this cable to the red alarm siren cable.
Connect the negative pole of the alarm siren to earth.
Connecting the central locking
MagicSafe has a universal connection for central locking to enable standard central locking and engine-powered retrofitted central locking to be connected to the system.
You can find the cable colours and their functions in the following table:
Colour Plug Function
Blue/yellow P1.1 Open normally closed
Blue/red P1.2 Open together
Red/black P1.3 Open normally open
Grey/yellow P1.4 Closed normally closed
Grey/red P1.5 Close together
Red/yellow P1.6 Close normally open
Connecting to the central locking
Determine the switching function of the original central locking.
You require a circuit diagram of the central locking for this which you can obtain from your vehicle dealership.
MagicSafe MS620 Electrical connections
If no original circuit diagrams are available, you will need to determine the function of the control cables which run from the control device of the central locking to the vehicle doors.

Caution!
Only connect MagicSafe via the control cables of the central locking and not using other cables.
Connecting to other cables than the control cables or using an incorrect circuit plan can lead to defects in the central locking and the remote control.
Determine the control time of the central locking.
In some vehicles for example Mercedes, it may be the case that a control time of 0.5 s is not sufficient to completely activate the central locking. In such cases you need to set the control time with software function 4 (see "Software functions" chapter on page 75) to 4 s.
Connect MagicSafe in accordance with the appropriate circuit diagram:
- Vehicles without a servo motor in the driver's door (driver's door cannot be locked and unlocked from the passenger's door) or with pressure vacuum central locking without electrical control cables: see Fig. 10, page 8
In these cases you require an additional servo motor, WAECO type no. ML-11 for the driver's door.
- Two cables from negative to +12V : Fig. 11, page 9
Two +12 V pulse control cables: Fig. 12, page 9 - Two negative pulse control cables: Fig. 13, page 10
One open and negative pulse control cable: Fig. 14, page 10
One +12V and negative pulse control cable: Fig. 15, page 11
For the connection to the WAECO central locking ML-44(22) IR: Fig. 16, page 11 - Connection to the WAECO central locking ML-44(22): Fig. 17, page 12
Insulate any unconnected cables.
No. in fig. 11 to fig. 15
Description
1 Control device of the vehicle's own central locking


Electrical connections MagicSafe MS620
7.3 Connecting the P2 cable tree
Plug the P2 cable tree into the corresponding connection on the control unit.
Yellow (P2.2) and green (P2.3)
The connection of the yellow and green cable depends on the switching principle of the door contacts which are installed in the vehicle (interior lighting switch).
If the vehicle has a negatively connected interior lighting (the cable from the door switch is earthed when the door is opened), connect the green cable to the circuit cable of the interior lighting switch.
If the vehicle has a positively connected interior lighting (the cable from the door switch is carries +12V ), connect the yellow cable to the circuit cable of the interior lighting switch.
Caution!
With vehicles with interior lighting delays fitted as standard, program position 8 must be set to "ON" ("Software functions" chapter on page 75). This prevents you receiving three confirmation signals when the system is activated.
Orange (P2.4)
Connect this cable to a connection which is switched by the ignition (terminal 15).
Blue/black (P2.5)
The blue/black cable serves as an output for the convenience functions. The convenience output is earthed and can be charged with up to 350mA . The table in the "Using convenience functions" chapter on page 76 shows you which convenience functions you can use.
Connect this cable according to your requirements.
Grey (P2.6)
Guide this cable through the splash-protection wall to the bonnet contact switch.
Connect this cable to a cable which is earthed when the bonnet is opened. If you cannot find such a cable, install the bonnet contact switch included in the scope of delivery.
If you wish to use the grey cable not only to monitor the bonnet contact switch but also the boot switch, proceed as follows:
Connect two inverse diodes (see Fig. 9, page 8) to prevent interference between the bonnet contact switch and the boot lighting.
| No. in Fig. 9, page 8 | Description |
| 1 Boot light | |
| 2 Boot contact switch | |
| 3 Inverse diode | |
| 4 Bonnet contact switch | |
MagicSafe MS620 Electrical connections
Brown/white (P2.7)
Connect this cable if necessary to the optional start block relay.
The output switches to earth when the alarm system is activated and may conduct a maximum of 200mA .
7.4 Connecting the status LED (P3)
Insert the plug of the status LED into the P3 connection (see Fig. 6, page 6) in the control device.
7.5 Connecting the shock sensor (P4)
Insert one of the two plugs of the shock sensor cable (fig. 4.10, page 5) in the shock sensor connection.
Insert the other plug of the shock sensor cable (fig. 4.10, page 5) in the P4 connection (see Fig. 6, page 6) in the control device.
7.6 Vehicle specific data
Check the polarity before connecting.
The following table is not intended to be understood as being complete. You can obtain information on other vehicles on request from WAECO.
We reserve the right to make alterations.


| Vehicle | Indicator left, cable colour, position | Indicator right, cable colour, position | CL open cable colour, position | CL closed cable colour, position | Circuit diagram | Door contact, cable colour, position | Remarks |
| Audi 100 and A6 type C4, constr. date: 90-97 with theft protection | Black/white, cable strand left on the sill | Black/green, cable strand left on the sill | Brown/green, hinge pillar left, coming out of the driver's door | Brown/grey, hinge pillar left, coming out of the driver's door | fig. 13 B | Brown/yellow on the door contact front left on the A column, door contact is negatively charged. | |
| Audi 100 and A6 type C4, constr. date: 90-97 without theft protection | Black/white, cable strand left on the sill | Black/green, cable strand left on the sill | Green/blue, hinge pillar left, coming out of the driver's door | Green/blue, hinge pillar left, coming out of the driver's door | fig. 15 B | Brown/yellow on the door contact front left on the A column, door contact is negatively charged. | Blue/yellow control cable in the direction of the door - connect the grey/red cable in the direction of the CL pump |
| Audi 80 type 89 and B4, constr. date: 86-94 | Black/white, cable strand left on the sill | Black/green, cable strand left on the sill | Green/blue, hinge pillar left | Green/blue, hinge pillar left | fig. 15 B | Brown/white on the door contact front left on the hinge pillar, door contact is negatively charged. | Blue/yellow control cable in the direction of the door - connect the grey/red cable in the direction of the CL pump |
| Audi A3 type 8L, constr. year: 96-01 | Black/white, cable strand left on the sill | Black/green, cable strand left on the sill | Grey/black, hinge pillar left, coming out of the driver's door | Brown/red or grey, hinge pillar left, coming out of the driver's door | fig. 13 B | Brown/white on the door contact front left on the hinge pillar, door contact is negatively charged. | |
| Audi A4 type B5 constr. year: 94 - with theft protection | Black/white, cable strand left on the sill | Black/green, cable strand left on the sill | Grey/white, hinge pillar left, coming out of the driver's door | Brown/grey, hinge pillar left, coming out of the driver's door | fig. 13 B | Brown/white on the door contact front left on the hinge pillar, door contact is negatively charged. |
MaicSate M520 Electrical connections


| Vehicle | Indicator left, cable colour, position | Indicator right, cable colour, position | CL open cable colour, position | CL closed cable colour, position | Circuit diagram | Door contact, cable colour, position | Remarks |
| Audi A4 type B5, constr. year: 94 - without theft protection | Black/white, cable strand left on the sill | Black/green, cable strand left on the sill | Green/blue, hinge pillar left, coming out of the driver's door | Green/blue, hinge pillar left, coming out of the driver's door | fig. 15 Grey, on the door contact front left on the hinge pillar, door contact is negatively charged. | Blue/yellow control cable in the direction of the door - connect the grey/red cable in the direction of the CL pump | |
| BMW 3 series E30, constr. year: 82-90 | Green/blue 30 pin white plug under the dash-board | Green/black 30 pin white plug under the dash-board | Green/blue, CL central device pin 6 | Yellow/blue, CL central device pin 7 | fig. 13 Brown/yellow on the door contact front left on the hinge pillar, door contact is negatively charged. | CL control device is on the left side in the hinge pillar | |
| BMW 3 series E36, constr. year: 93- with alarm | Blue/green, cable strand left on the sill | Blue/brown, cable strand left on the sill | Pin 25, white 26-pin plug of the CL control device | Pin 19, white 26-pin plug of the CL control device | fig. 12 Brown/grey/yellow on the door contact front left on the B pillar, door contact is negatively charged. | A contact pin from BMW with the part no. 61131393704 may be required, CL control device is behind the glove compartment. | |
| BMW 3 series E36, constr. year: 91- | Blue/green, cable strand left on the sill | Blue/brown, cable strand left on the sill | Pin 4, yellow 26-pin plug of the CL control device | Pin 17, yellow 26-pin plug of the CL control device | fig. 12 Brown/grey/yellow on the door contact front left on the B pillar, door contact is negatively charged. | A contact pin from BMW with the part no. 61130005199 may be required, CL control device is behind the glove compartment. |
029sweswsswwsswwss


| Vehicle | Indicator left, cable colour, position | Indicator right, cable colour, position | CL open cable colour, position | CL closed cable colour, position | Circuit diagram | Door contact, cable colour, position | Remarks |
| BMW 3 series E36, constr. year: 91- | Blue/green, cable strand left on the sill | Blue/brown, cable strand left on the sill | Pin 25, white 26-pin plug of the CL control device | Pin 24, white 26-pin plug of the CL control device | fig. 12 B | Brown/grey/yellow on the door contact front left on the B pillar, door contact is negatively charged. | A contact pin from BMW with the part no. 61130005199 may be required, CL control device is behind the glove compartment. |
| BMW 5 series E34, constr. year: 88-95 | Blue/green, cable strand left on the sill | Blue/brown, cable strand left on the sill | Pin 16, yellow 26-pin plug of the CL control device | Pin 7, yellow 26-pin plug of the CL control device | fig. 12 B | Brown/violet, on the door contact left on the B pillar | A contact pin from BMW with the part no. 61131393704 may be required, CL control device is behind the rear seat. |
| BMW 5 series E34, constr. year: 88-95 | Blue/green, cable strand left on the sill | Blue/brown, cable strand left on the sill | (until 9/91) pin 2 or 6, white 26-pin plug of the CL control device (after 9/91) pin 25, white 26-pin plug of the CL control device | (until 9/91) pin 1, white 26-pin plug of the CL control device (after 9/91) pin 24, white 26-pin plug of the CL control device | fig. 12 B | Brown/violet on the door contact front left on the B pillar, door contact is negatively charged. | A contact pin from BMW with the part no. 61131393704 may be required, CL control device is behind the rear seat. |
| Mercedes 190 W201, constr. year: -94 | Black/white, cable strand left on the sill | Black/green, cable strand left on the sill | Blue, hinge pillar left, coming out of the driver's door | Blue, hinge pillar left, coming out of the driver's door | fig. 15 B | Brown/white on the door contact front left on the hinge pillar, door contact is negatively charged. | Blue/yellow control cable in the direction of the door & connect the grey/red cable in the direction of the CL pump |
suee eaeenee eee eee 0295


3
| Vehicle | Indicator left, cable colour, position | Indicator right, cable colour, position | CL open cable colour, position | CL closed cable colour, position | Circuit diagram | Door contact, cable colour, position | Remarks |
| Mercedes 200 W124, constr. year: -95 | Black/white, cable strand left on the sill | Black/green, cable strand left on the sill | Blue, hinge pil-lar left, coming out of the driver's door | Blue, hinge pil-lar left, coming out of the driver's door | fig. 15 Brown/white on the door contact front left on the hinge pil-lar, door contact is negatively charged. | Blue/yellow control cable in the direc-tion of the door & connect the grey/red cable in the direc-tion of the CL pump | |
| Mercedes C180 W202, con-str. year: 94- | Black/white, cable strand left on the sill | Black/green, cable strand left on the sill | Blue, hinge pil-lar left, coming out of the driver's door | Black, hinge pil-lar left, coming out of the driver's door | fig. 13 Brown/white on the door contact front left on the B pillar, door contact is nega-tively charged. | ||
| Opel Astra F and G, constr. year: 92- | Black/white, cable strand left on the sill | Green/black, cable strand left on the sill | Brown/white, hinge pillar left, coming out of the driver's door | Brown/red, hinge pillar left, coming out of the driver's door | fig. 13 Brown/white on the door contact front left on the hinge pil-lar, door contact is negatively charged. | ||
| Opel Cali-bra, constr. year: 90- | Black/white, cable strand left on the sill | Green/black, cable strand left on the sill | Brown/white, hinge pillar left, coming out of the driver's door | Brown/red, hinge pillar left, coming out of the driver's door | fig. 13 Grey on the door contact front left on the hinge pillar, door contact is negatively charged. | ||
| Opel Corsa A, B, con-str. year: 93-2000 | Black/white, cable strand left on the sill | Black/green, cable strand left on the sill | Brown/white, hinge pillar left, coming out of the driver's door | Brown/red, hinge pillar left, coming out of the driver's door | fig. 13 Grey on the door contact front left on the hinge pillar, door contact is negatively charged. |
0295waees


| Vehicle | Indicator left, cable colour, position | Indicator right, cable colour, position | CL open cable colour, position | CL closed cable colour, position | Circuit diagram | Door contact, cable colour, position | Remarks |
| Opel Kadett E, constr. year: 90- | Black/white, cable strand left on the sill | Black/green, cable strand left on the sill | Brown/white, hinge pillar left, coming out of the driver's door | Brown/red, hinge pillar left, coming out of the driver's door | fig. 13 | Green on the door contact front left on the hinge pillar, door contact is negatively charged. | |
| Opel Omega A and B, constr. year: 90- | Black/white, cable strand left on the sill | Black/green, cable strand left on the sill | Brown/white, hinge pillar left, coming out of the driver's door | Brown/red, hinge pillar left, coming out of the driver's door | fig. 13 | Grey on the door contact front left on the hinge pillar, door contact is negatively charged. | |
| Opel Vectra A and B | Black/white, cable strand left on the sill | Black/green, cable strand left on the sill | Brown/white, hinge pillar left, coming out of the driver's door | Brown/red, hinge pillar left, coming out of the driver's door | fig. 13 | Grey/white or brown/ white on the door contact front left on the hinge pillar, door contact is negatively charged. | |
| VW Golf III and Vento type 1HXO, constr. year: 91- | Black/white, cable strand left on the sill | Black/green, cable strand left on the sill | Green, hinge pillar left, coming out of the driver's door | Grey, hinge pillar left, coming out of the driver's door | fig. 12 | Brown/white on the door contact front left on the hinge pillar, door contact is negatively charged. | |
| VW Golf IV constr. year: 97- with electric window regulators | Black/white, cable strand left on the sill | Black/green, cable strand left on the sill | Yellow/green pin 24, on the door control device, driver's side | Yellow/blue pin 4, on the door control device, driver's side | fig. 13 | Brown/white on the door contact front left on the hinge pillar, door contact is negatively charged. | The door control device is on the win-dow regulator under-neth the door panel |
suee eae eae eae eae eae eae eae eae eae


G
| Vehicle | Indicator left, cable colour, position | Indicator right, cable colour, position | CL open cable colour, position | CL closed cable colour, position | Circuit diagram | Door contact, cable colour, position | Remarks |
| VW Golf IV constr. year: 97- without electric window regulators | Black/white, cable strand left on the sill | Black/green, cable strand left on the sill | Yellow/green, CL control device grey 24 pin plug underneath the dash-board | Yellow/blue or blue, CL control device grey 24 pin plug underneath the dash-board | fig. 13 B | Blue/grey on the CL control device on pin 18, door contact is negatively charged. | CL control device is on the left, next to the steering column, the cable colours can also be found on the hinge pillar |
| VW Lupo constr. year: 98- | Black/white, cable strand left on the sill | Black/green, cable strand left on the sill | Blue/violet, hinge pillar left, coming out of the driver's door | Grey/yellow, hinge pillar left, coming out of the driver's door | fig. 13 B | Brown/white in the cable duct of the hinge column, door contact is negatively charged. | |
| VW Passat 35i, constr. year: 88-92 | Black/white, cable strand left on the sill | Black/green, cable strand left on the sill | Black/white, hinge pillar left, coming out of the driver's door | Red/yellow, hinge pillar left, coming out of the driver's door | fig. 12 B | Brown/white on the door contact front left on the hinge pillar, door contact is negatively charged. | |
| VW Passat 35i, constr. year: 93-96 | Black/white, cable strand left on the sill | Black/green, cable strand left on the sill | Green, hinge pillar left, coming out of the driver's door | Grey, hinge pillar left, coming out of the driver's door | fig. 12 B | Brown/white on the door contact front left on the hinge pillar, door contact is negatively charged. | |
| VW Passat 3B, constr. year: 9/97- | Black/white, cable strand left on the sill | Black/green, cable strand left on the sill | Red/blue, pin 4 of the original CL control device | Brown/blue, pin 2 of the original CL control device | fig. 13 B | Brown/white in the cable duct of the hinge column, door contact is negatively charged. | Central locking is earth controlled. A 200 W resistor must be inserted in the blue/red cable, CL control device is in a black box in the driver's feet area under the carpet. |
Eeerrnne eeeeee


| Vehicle | Indicator left, cable colour, position | Indicator right, cable colour, position | CL open cable colour, position | CL closed cable colour, position | Circuit diagram | Door contact, cable colour, position | Remarks |
| VW Polo 6N, constr. year: 95- | Black/white, cable strand left on the sill | Black/green, cable strand left on the sill | Grey/black, hinge pillar left, coming out of the driver's door | Grey/red, hinge pillar left, coming out of the driver's door | fig. 12 B | Brown/white on the door contact front left on the hinge pillar, door contact is negatively charged. | |
| VW Sharan 7M, constr. year: 96- | Black/white, cable strand left on the sill | Black/green, cable strand left on the sill | Green, hinge pillar left, coming out of the driver's door | Grey, hinge pillar left, coming out of the driver's door | fig. 12 B | Brown/white in the cable duct of the hinge column, door contact is negatively charged. | |
| VW T4 constr. year: 93- | Black/white, cable strand left on the sill | Black/green, cable strand left on the sill | Yellow, hinge pillar left, coming out of the driver's door | White, hinge pillar left, coming out of the driver's door | fig. 12 B | Brown/white, behind the fuse box, door contact is negatively charged. |
suee eaeenee 1000000000000000000000000000000000000000000

MagicSafe MS620 Testing functions
8 Testing functions
8.1 Testing the shock sensor
The shock sensor is preset at the plant. Its sensitivity is correctly set if MagicSafe triggers the alarm in the event of a heavy impact against the vehicle.
Conduct the functional test as follows:
Activate the alarm system (see "Activating MagicSafe" chapter on page 69).
Shake the vehicle.
If the alarm is triggered by blows to the windows, the sensitivity must be reduced.
Altering the sensitivity
Turn the setting screw of the shock sensor in the - direction to reduce the sensitivity or ...
Turn the setting screw of the shock sensor in the + direction to increase the sensitivity.
If the shock sensor is set too sensitively, the alarm may be triggered by passing vehicles. For this reason set the sensitivity carefully and not too high.
8.2 Testing other alarm inputs
Test the function of the other alarm inputs in sequence by triggering an alarm.
Count the number of flashes on the status LED afterwards.
If the number of flashes does not correspond to the specified value, you need to check the connections and cables.
Number of flashes Alarm cause
2 Shock sensor
3 Doors
4 Bonnet/boot cover
5 Ignition
8.3 Checking the central locking
If you activate the alarm system (see "Activating MagicSafe" chapter on page 69), MagicSafe must lock the vehicle if it is equipped with central locking. When you deactivate the system (see "Deactivating MagicSafe" chapter on page 69), MagicSafe must unlock the vehicle.
If you have programmed software function 2 ("Locking/unlocking with ignition"), MagicSafe should lock the central locking approximately 10 s after the ignition is turned on when the doors are closed. After the ignition is turned off, MagicSafe opens the central locking again.
Using MagicSafe MagicSafe MS620
If the central locking is not working properly, proceed as follows:
Check the electrical connection to the central locking.
Check if your vehicle supports software function 4 ("Impulse duration of the door locking function").
Check which value has been set for software function 4 (see "Programming" chapter on page 76).
8.4 Testing optical and acoustic signals
During the alarm all indicators must be switched on and the alarm siren and the status LED must signal the alarm.
8.5 Testing the automatic reactivation
Activate the alarm and then deactivate it again.
Do not open a door or the bonnet or boot.
MagicSafe must activate itself after approx. 90 s, without locking the doors.
8.6 Testing the remote control
Test all of the switching functions with both remote controls.
If the system does not respond to a remote control unit, program the affected remote control unit (see "Programming a new remote control" chapter on page 78).

The range of the remote control can be limited by solid metal parts and strong electrical fields, it is usually between 10m to 20m .
9 Using MagicSafe
9.1 Operating the remote control
The two remote control units supplied have two buttons and one LED.
| No. in Fig. 7, page 6 | Description |
| 1 Button 1 | |
| 2 Button 2 | |
| 3 | LED |
The LED flashes when you press one button or both buttons simultaneously.
MagicSafe MS620 Using MagicSafe
9.2 Activating MagicSafe
To activate the alarm system manually, proceed as follows:
Switch the ignition off.
Get out of the vehicle.
Ensure that all doors and covers are closed.
Press button 1 on the remote control.
The alarm siren sounds a confirmation signal, if this function has been set to ON.
The hazard lights flash once.
The status LED starts flashing.
If the alarm system is connected to the central locking, all doors and covers are locked.
Silent activation and deactivation of the alarm system
You can switch the alarm so that the alarm siren does not sound any confirmation signal when the alarm is activated.
Proceed as follows:
Switch the ignition off.
Get out of the vehicle.
Ensure that all doors and covers are closed.
Press both buttons on the remote control simultaneously to activate the alarm.
The hazard lights flash once.
The status LED starts flashing.
If the alarm system is connected to the central locking, all doors and covers are locked.
Activating the alarm system so that the vehicle can remain occupied
You can set the alarm system so that the shock sensor does not trigger an alarm, e. g. to leave a pet in the vehicle.
Proceed as follows:
Press button 1 on the remote control.
The alarm siren sounds a signal, if this function has been set to ON.
The hazard lights flash once.
Press button 2 on the remote control within 3 seconds of pressing button 1.
The alarm siren sounds a signal, if this function has been set to ON.
The hazard lights flash once.
9.3 Deactivating MagicSafe
To deactivate the alarm system manually, proceed as follows:
Press button 1 on the remote control.
The alarm siren sounds two confirmation signals, if this function has been set to ON.
The hazard lights flash twice.
If the alarm system is connected to the central locking, all doors and covers are unlocked.
Using MagicSafe MagicSafe MS620
Get into the vehicle within 30 s.
Otherwise MagicSafe assumes that you did not wish to deactivate it and will activate itself automatically (software function 5, "Reactivate" set to "ON").
The doors may also be locked again (software function 6 "Locking on reactivation" set to "ON").
Deactivating MagicSafe silently
You can deactivate MagicSafe without the alarm siren giving a confirmation signal.
Proceed as follows:
Press both buttons on the remote control simultaneously to deactivate the alarm.
If the alarm system is connected to the central locking, all doors and covers are unlocked.
The hazard lights flash twice.
Deactivating MagicSafe when the alarm has been triggered
You can deactivate MagicSafe in two stages.
Proceed as follows:
Press button 1 on the remote control.
✓ The alarm is deactivated but the doors remain locked and the alarm system remains active.
Press button 1 on the remote control again.
The alarm is deactivated and the doors are unlocked.
Deactivating MagicSafe without the remote control
If you have misplaced the remote control or the batteries are empty or the remote control is damaged, you can deactivate the alarm system with your PIN code.
To do this, proceed as follows:
Switch the ignition on and off twice.
Switch on the ignition again within 7 s.
The status LED flashes quickly for 3 s.
Afterwards the status LED flashes once per second.
Count how often the status LED flashes and switch off the ignition when the number of flashes corresponds to your PIN code.
The alarm system is deactivated.

If you switch on the ignition too late or too early the PIN code is incorrect and the alarm system remains activated.
If the PIN code is entered incorrectly twice, the alarm system blocks further attempts for the next three minutes. This is indicated by the status LED which flashes at double speed.

The PIN code set at the plant is 1.
You can set your own PIN code to a number from 1 to 9 (see "Altering the PIN code" chapter on page 77).
MagicSafe MS620 Using MagicSafe
9.4 Setting the service mode
You can set the alarm to service mode if, for example the vehicle is to be handed over for repairs or inspection. In service mode, all settings for the alarm system remain stored, even if the battery is disconnected.
To do this, proceed as follows:
Deactivate the alarm system.
Switch the ignition on.
Press button 2 on the remote control and hold it down for 3 s.
The hazard lights flash three times.
The status LED glows constantly.
Switching off service mode
Switch the ignition on.
Press button 2 on the remote control.
The alarm siren sounds three times.
The service mode is switched off.
9.5 Using the panic mode
The alarm system has a panic mode. You can trigger the alarm via remote control, if you are attacked to scare off the attacker. The ignition must be switched off for this function.
To activate the panic mode, proceed as follows:
Press button 1 on the remote control and hold it down for 3s
The alarm siren is switched on.
The hazard lights flash.
The vehicle remains operational enabling you to drive away.
Switching off the panic mode
Press button 1 on the remote control.
The panic mode is switched off.
9.6 Using the vehicle search function
You can use MagicSafe to indicate the location of your vehicle optically and acoustically. The ignition must be switched off for this and MagicSafe must be activated.
Proceed as follows:
Press button 2 on the remote control.
The alarm siren sounds a signal.
The hazard lights flash six times.
Using MagicSafe MagicSafe MS620
9.7 Using the self-activation function
If you have set software function 1 ("Self-activation") to "ON", MagicSafe will activate itself as follows:
Switch the ignition off.
Open the door and get out of the vehicle.
Close the door again.
The hazard lights flash twice.
The status LED flashes quickly.
Do not open a door or cover for the next 30 s.
The alarm system activates itself.

If you have set the system to self-activate, the central locking does not lock the doors, to prevent you locking yourself out of the car by accident.
If the central locking is to be activated, you need to select software function 6 ("Locking on reactivation").
9.8 Controlling the central locking with MagicSafe
Automatic locking when the ignition is on
If you have selected this function, MagicSafe locks all doors automatically when you switch on the ignition. This function protects you against attacks.

If you open a door when the ignition is on, before the closing signal has been sent, the closing signal is no longer issued to prevent you from locking yourself out of the vehicle accidentally.
Locking/unlocking the vehicle from the interior
This function enables you to lock or unlock the doors when you are inside the vehicle. The ignition must be switched on for this.
Press button 1 on the remote control to lock the doors or ...
Press button 2 on the remote control to unlock the doors.

The doors are automatically locked if you switch the ignition off.
MagicSafe MS620 Using MagicSafe
9.9 Function table
The following table lists all of the functions and how you can activate them.
| Function Condition Button 1 Button 2 | ||
| Activating | Ignition | off |
| Activation with the shock sensor off | Ignition off ● 1 ● 2 | |
| Locking Ignition on ● | ||
| Silent activation | Ignition off | ●*)●*) |
| Deactivating | Ignition | off |
| Unlocking | Ignition on | ● |
| Silent deactivation | Ignition off | ●*)●*) |
| Panic mode | Ignition off | ●3s |
| Vehicle search function | Ignition off Alarm system activated | ● |
| Convenience output | Ignition off Alarm system deactivated | ●3s |
| Service mode | Ignition on | ●3s |
Press the appropriate button
3s Press the appropriate button and hold it down for 3 s
- Press the button twice in succession
^*) Press both buttons at once
-1 should be pressed first
2 should be pressed afterwards
Using MagicSafe MagicSafe MS620
9.10 Warning signals
The following tables lists all of the MagicSafe warning signals
| Action Warning signal Meaning | ||
| You are activating the alarm system. | The hazard lights flash three times. The alarm siren sounds three warning signals. | A door or a cover is not closed properly. Find which door or cover is open and close it. |
| You are deactivating the alarm system. | The hazard lights flash four times. The alarm siren sounds four warning signals. | Break-in alarm An alarm was triggered after you activated the alarm system. Check the vehicle for damage. |
| You are switching the ignition on. | The status LED gives warning signals. | The status LED displays which sensor triggered the alarm (see following table). |
The following table lists the meanings of the signals of the status LED:
| Number of warning signals Cause |
| 2 Shock sensor |
| 3 Doors |
| 4 Programmable input (if software function 9 “Programmable additional input” is set to “Engine bonnet”) |
| 5 Ignition |
MagicSafe MS620 Programming MagicSafe
10 Programming MagicSafe

Caution!
Do not enable the acoustic function confirmation (alarm siren acknowledgement tone). If you enable the acoustic function confirmation, the alarm system will no longer conform to regulation 95/56/EC, and continued operation is therefore prohibited.
10.1 Software functions
MagicSafe has various software functions which you can alter in accordance with the following table.
| No. | Software function | Plant setting | Value 1 | Value 2 |
| 1 | Self-activation Off On Off | |||
| 2 | Locking/unlocking with ignition Off On Off | |||
| 3 | Convenience function 1 1-5 | (see table in “Using conven-ience functions” chapter on page 76) | ||
| 4 | Signal duration of the door locking func-tion | 0.5 s | 0.5 s | 4 s |
| 5 | Reactivation | On On Off | ||
| 6 | Locking on reactivation | On | On | Off |
| 7 | Alarm duration | 30 s | 30 s | 60 s |
| 8 | Interior lighting delay Off On Off | |||
| 9 | Programmable additional input | Engine bonnet | Engine bonnet | Early warning |
| 10 | Alarm siren acknowledgement tone | Off | On | Off |
| 11 | Altering the PIN code | 1 1-9 | ||
| 12 | Deleting the programmed remote control | - | Press both simultaneously | |
| The most recently used remote control remains operational. | ||||
| 13 | Reset to ex-plant function | - | Press both simultaneously |
Programming MagicSafe MagicSafe MS620
10.2 Using convenience functions
Convenience functions
MagicSafe has an output for convenience functions which sends an earth signal when activated. You can use the following convenience functions:
No. Function
1 Convenience output
If you press button 2 when the alarm system is activated, MagicSafe switches on an earth signal for 1 s which can be a maximum of 350mA .
This enables you to operate additional functions, for example:
Closing electric windows and/or the sun roof
- Switching on the parking heating
- Switching on the main beam light
- Unlocking the boot or the fuel tank lid
2 Pager output (radio alarm pager)
If an alarm is triggered, a constant earth signal is output for the duration of the alarm.
3 Control signal for horn relay
If an alarm is triggered, a pulse earth signal is output for the duration of the alarm.
4 Automatic convenience output (window close)
After the alarm system is activated, an earth signal is sent for approx. 30 s.
5 Interior lighting delay
After the alarm system is deactivated or the vehicle is opened, an earth signal is sent for approx. 20 s.

You may require additional modules for some of these functions.
You can obtain further information on this from WAECO.
10.3 Programming

The PIN code set at the plant is 1.
Starting the programming mode
Switch the ignition on and off twice.
Switch on the ignition again within 7 s.
The status LED flashes for 3 s. Afterwards there is a pause of 1 s.
Count how often the status LED flashes and switch off the ignition when the number of flashes corresponds to your PIN code.

If the "Locking/unlocking with ignition" software function is active, MAGIC SAFE locks the central locking while the PIN is being entered.
Switch the ignition on again.
MagicSafe MS620 Programming MagicSafe
Press button 1 on the remote control once.
√ You will hear an audible signal.
Switch the ignition off and on again.
You will hear another audible signal.
Selecting a software function
Press button 1 on the remote control once, to activate software function 1.
Press button 1 again to select the next software function or... Press button 2 on the remote control to select the previous software function.
The alarm siren sounds a number of signals which correspond to the number of the software function: e. g. one signal for software function 1, two signals for software function 2, etc.
Selecting a setting
When you have selected the desired software function, you can assign a value to it (see table in "Software functions" chapter on page 75):
Press both buttons on the remote control together, to switch from one value to another.
The status LED displays which value has been selected:
- LED glows: value 1 has been selected
- LED does not glow: value 2 has been selected
If you alter software function 3 ("Convenience function"), the current setting is increased by one when both buttons are pressed; if both buttons are pressed when the value is 5, the value skips back to 1.
The status LED flashes to indicate the value selected, e. g. twice for a value of 2.
Acknowledging settings
When you have altered the desired functions, switch the ignition off.
Wait 10 s to save the setting, or ...
Switch the ignition on again before 10 s have elapsed, to make a new setting or to check the setting.
10.4 Altering the PIN code
You can alter the PIN code and set it to a number from 1 to 9. To do this, proceed as follows:
Select software function 9 ("Alter PIN code").
Press both buttons on the remote control at the same time once.
Press
- Button 1 on the remote control to increase the PIN code number by 1.
- Button 2 on the remote control to reduce the PIN code number by 1.
The status LED displays the actual PIN code by flashing.
Press both buttons on the remote control at the same time again, to save the selected PIN number.
Maintaining and cleaning MagicSafe MagicSafe MS620
10.5 Programming a new remote control
MagicSafe can be operated with up to four remote control units.
Proceed as follows to program a new remote control:
Switch the ignition on and off twice.
Switch on the ignition again within 7 s.
The status LED flashes for 3 s. Afterwards there is a pause of 1 s.
Count how often the status LED flashes and switch off the ignition when the number of flashes corresponds to your PIN code.
Switch the ignition on again.
Press button 1 (see Fig. 7, page 6) on the remote control to be programmed.
Switch the ignition off for 10 s, to exit the programming function or ...
Switch the ignition on again to program the software functions.
10.6 Registering a MS-650PIR movement sensor
MagicSafe can be operated with two optionally-available MS-650PIR movement sensors.
Observe the separate installation instructions for the MS-650PIR movement sensor.
To register a new MS-650PIR movement sensor, proceed as follows:
Open the lid on the bottom of the movement sensor.
Switch all of the mini-switches on the switch block to OFF.
Insert a 9 V battery (not included in the scope of delivery).
Switch the ignition on and off twice.
Switch on the ignition again within 7 s.
The status LED flashes for 3 s. Afterwards there is a pause of 1 s.
Count how often the status LED flashes and switch off the ignition when the number of flashes corresponds to your PIN code.
Switch the ignition on again.
Press the Learn button of the new movement sensor.
Switch the ignition off for 10s to exit the programming function or ...
Switch the ignition on again to program the software functions.
11 Maintaining and cleaning MagicSafe

Caution!
Do not use sharp or hard objects to clean the device as these may damage the components.
MagicSafe MS620 Searching for errors
12 Searching for errors
The range of the remote control is decreasing.
The batteries are flat.
You have lost the remote control or it has been damaged.
Switch the alarm system off using your PIN code (see "Deactivating MagicSafe without the remote control" chapter on page 70).
You will hear three signal tones/flashing signals instead of the usual indications when you switch the alarm on.
The alarm system is warning you that a door or the bonnet or boot is open.
Switch the alarm system off.
Rectify the cause of the error message.
Switch the alarm system on again.
Program software function 8 "Interior lighting delay" to "ON".
You hear four signal tones/flashing signals instead of the two signals when you switch the alarm off.
The alarm system has triggered an alarm.
Count the number of flashes on the status LED.
This indicates the sensor which has triggered the alarm (see corresponding table in
"Warning signals" chapter on page 74).
You switched off the alarm system a few minutes ago, but the alarm system has switched itself back on again.
The alarm system has possibly detected that you have not entered the vehicle and has therefore automatically switched itself on and locked all the doors if this option has been selected (software function 1 "Self-activation").
Leave a door or the bonnet/boot open to avoid this.
13 Guarantee/repairs
Our general guarantee conditions apply. If the product is defective, please send it back to the WAECO branch in your country (addresses on the back of the instruction manual) or to your specialist dealer. For repair and guarantee processing, the following documents must be sent along with the device:
- Copy of the receipt with purchasing date
- A reason for complaint or description of the fault
14 Disposal
Place the packaging material in the appropriate recycling waste bins wherever possible.
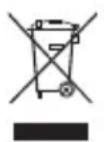
If you need to scrap the device, ask your local recycling centre or specialist dealer for details about how to do this in accordance with the applicable disposal regulations.
Technical data MagicSafe MS620
14.1 Disposing of remote control batteries

Protect the environment!
Do not dispose of empty batteries in general household waste.
Return empty batteries to your retailer or at collection points.
15 Technical data
Control unit
Operating voltage: 12 V DC
Power consumption: approx. 15 mA (activated) approx. 10 mA (deactivated)
Operating temperature: -20^ to +75^
Remote control
Frequency: 433 MHz with rolling code
Coding: changing code system
Operating voltage: 3 Volts
Range: up to 20 m
Battery type:GP Super GP Alkaline 23 A,12 V
Operating temperature: -20^ to +75^
Subject to changes due to technical progress and availability.
Approval
The device has e1 approval and R&TTE approval.
A-00 0365
Accessories
Movement sensor: MS-650PIR
Magnet contact switch for MS-650SW additional doors
Ultrasonic module (only to be MS-650US used without shock sensor)
MagicSafe MS620
MagicSafe MS620 Description technique
5 Description technique
Description technique MagicSafe MS620
MagicSafe MS620 Programar MagicSafe
10 Programar MagicSafe

Atencion!
Programar MagicSafe MagicSafe MS620
10.2 Utilizar unidades de comfort
MagicSafe MS620 Programar MagicSafe

Programar MagicSafe MagicSafe MS620
Mega Safe M520 Allcatisfaction electric


9
9.3 MagicSafe deactiveren
10.1 Softwarefunctions
MagicSafe MS620 Montering at MagicSafe
6 Montering af MagicSafe

Bemaerk
Rd/sort P1.3 Abner normalt aben
Rd/gul P1.6 Laser normalt aben
MagicSafe MS620 Anvendelse at MagicSafe
9 Anvendelse at MagicSafe
Anvendelse at MagicSafe MagicSafe MS620
9.3 Deaktivering at MagicSafe
MagicSafe MS620 Anvendelse of MagicSafe
Anvendelse at MagicSafe MagicSafe MS620
9.4 Indstilling af servicemodus
Du kan indstille den sakaldte servicemodus f.eks. for at aflevere koretoget til eftersyn ull reparation. I servicemodus bevares alle gele imstillinger, ogsa selv om batteriet afbrydes.
MagicSafe MS620 Anvendelse of MagicSafe
Slà taendingen fra.
Abn doren, og sta ud.
Luk dorenigen.
Advanselsblinkancaegget blinker to gange.
Statuslysdioden blinker hurtigt.
Abn化进程 30 sekunder.
Alarmanlageget aktiveres automatisk.

MagicSafe M5620 Anvendelse of MagicSafe
9.10 Advarselssignaler
10 Programming at MagicSafe

Vigtigt!
MagicSafe MS620 Programming at MagicSafe
3 Styresignal for hornets relae
MagicSafe MS620 Programming at MagicSafe
MagicSafe MS620 Garanti/reparation
13 Garanti/reparation
Batterity:GP Super GP Alkaline 23 A,12 V
Driftstemperatur: -20^ til +75^
MagicSafe MS620-systemets functorer:
- Integration i befintiga centralas.
Anvanda MagicSafe MagicSafe MS620
MagicSafe M5620 Anvanda MagicSafe
9.2 Aktivera MagicSafe
Manuell aktivering av larmsystemet:
9.3 Avaktivera MagicSafe
Anvanda MagicSafe MagicSafe MS620
Ga in i bilen inom 30 s.
MagicSafe MS620 Anvanda MagicSafe
9.4 Stalla in serviceläge
Anvanda MagicSafe MagicSafe MS620
9.7 Anvanda automatisk aktivering
MagicSafe M5620 Anvanda MagicSafe
9.9 Funktionstabell
Anvanda MagicSafe MagicSafe MS620
9.10 Varningssignaler
Blà/rɒd P1.2 Apner felles
Rd/svart P1.3 Åpen normaläpen
Grå/gul P1.4 Lukke normalt lukket
Grarod P1.5 Lukker celles
Rd/gul P1.6 Lukker normalt apen
Bruke MagicSafe MagicSafe MS620
MagicSafe MS620 Bruke MagicSafe
9.2 Aktivere MagicSafe
9.3 Deaktivere MagicSafe
Gåfram på folgende mate for a deaktivere alarmanlegget:
Trykk pa tast 1 pa fjernkontrollen.
Alarmsirenavgir tobekreftelsessignaler,hvisdenne funksjonen er PÅ.
Varselblinkanlegget blinker to ganger.
Hvis du har koblet alarmanlegget til sentrallasen, lases alle dorer opp.
Stiginnikjoretoyetilopetav30s.
Bruke MagicSafe MagicSafe MS620
MagicSafe MS620 Bruke MagicSafe
9.4 Stille inn servicemodus
Bruke MagicSafe MagicSafe MS620
Bruke MagicSafe MagicSafe MS620
9.10 Varselsignaler
I tabellen nedenfor finner du en liste over varselsignalene til MagicSafe:
| Handling Varselsignal Betydning | ||
| Du aktiverer alarmanleg-get. | Varselblinkanlegget blinker tre ganger.Alarmsirenen avgir tre varsel-signaler. | En dør erller et lokk er ikke skikkelig lukket.Fastslå hvilken dør erller hvilket lokk som er øpent, og lukkppe. |
| Du deaktiverer alarman-legget. | Varselblinkanlegget blinker fire ganger.Alarmsirenen avgir fire varsel-signaler. | InnbruddsalarmDet ble utløst en alarm fetter at du har aktivert alarmanlegget.Sjekk om kjoretøyet er skadet. |
| Du slår på tenningen. Status-LED avgir varsel-signaler. | Status-LED indikerer hvilken føler en alarm utløser (se følgende tabell). | |
I tabellen nedenfor finner du betydningen til signalene på status-LED:
| Antall varselsignaler Årsak | ||||
| 2 | S | t | Ø | |
| 3 Dører | ||||
| 4 Programmerbar ingang (så lenge programfunksjon 9, «Programmerbar ekstrainngang», stär på «Motorpanser») | ||||
| 5 Tenning | ||||
MagicSafe MS620 Programmere MagicSafe
10 Programmere MagicSafe

Merk!
Batterity:GP Super GP Alkaline 23 A,12 V
Driftstemperatur: -20^ til +75^
Overseas + Middle East
WAECO Pacific Pty. Ltd.
1 John Duncan Court
Varsity Lakes QLD 4227
Fon: +61 7 55076000
Fax: +61 7 55221003
E-Mail: sales@waeco.com.au
WAECO Impex Ltd.
Headquarters
Suites 3210-12·32/F·Tower
The Gateway·25 Canton Rd
Tsim Sha Tsui, Kowloon
Hong Kong
Fon: +852 24632750
Fax: +852 24639067
E-Mail: info@waeco.com.hk
ROC WAECO Impex Ltd.
Taipei Office
2 FL-3 No. 56 Tunhua South Rd, Sec 2
Taipei 106, Taiwan
Fon: +886 2 27014090
Fax: +886 2 27060119
E-Mail: marketing@waeco.com.tw
UAE WAECOM Middle East FZCO R/A 8,SD6 Jebel Ali, Dubai Fon: +971 4 8833858 Fax: +971 4 8833868 E-Mail:waeco@emirates.net.ae 78 10/2005
WAECO USA, Inc. 8 Heritage Park Road Clinton, CT 06413 Fon: +1 860 6644911 Fax: +1 860 6644912 E-Mail: customercare@waecousa.com

www.waeco.com