
Lactina - Breast pump MEDELA - Free user manual and instructions
Find the device manual for free Lactina MEDELA in PDF.
| Product type | Electric breast pump for hospital use and home rental |
| Brand | Medela |
| Model | Lactina |
| Dimensions (approx.) | 20 × 15 × 10 cm |
| Weight (approx.) | 1 kg |
| Power supply | Mains: 220-240 V, power cable included |
| Pumping type | Single or double (double pumping requires a second set of accessories) |
| Settings | Adjustable suction force (continuous); adjustable suction speed (Select model) |
| Main functions | Expressing and collecting breast milk; initiating and maintaining lactation; relieving engorgement |
| Included accessories | Breast shield (24 mm), valve, membrane, bottle 150 ml, stand, silicone tubing, cylinder, piston, rubber seal, suction regulator, cylinder holder, caps |
| Available breast shield sizes | PersonalFit™ in five sizes (sold separately) |
| Care and cleaning | Clean accessories after each use; disinfect and sterilize (autoclave, boiling water) for hospital use |
| Safety | Do not use if cable is damaged; do not immerse; use only original Medela accessories |
| Spare parts and repairability | No user-serviceable parts; 3-year warranty; Medela after-sales service |
| General information | Electric breast pump designed for frequent and long-term pumping; BPA, DEHP, and latex free |
Frequently Asked Questions - Lactina MEDELA
User questions about Lactina MEDELA
0 question about this device. Answer the ones you know or ask your own.
Ask a new question about this device
Download the instructions for your Breast pump in PDF format for free! Find your manual Lactina - MEDELA and take your electronic device back in hand. On this page are published all the documents necessary for the use of your device. Lactina by MEDELA.
USER MANUAL Lactina MEDELA
No. 1 choice of hospitals &mothers
EN Instructions for use
DE Gebrauchsanweisung
FR Mode d'emploi
IT Istruzioni per l'uso
NL Gebruiksaanwijzing
BPA
free
EN Parts List XIV
DE Teileliste XIV
FR List des pieces XIV
IT Elenco componenti XIV
NL Onderdelenlijst XIV


EN Instructions for use 4
DE Gebrauchsanweisung 18
FR Mode d'emploi 32
IT Istruzioni per l'uso 46
NL Gebruiksaanwijzing 60
EMC 74
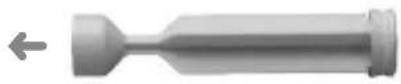
Lactina™ Breastpump
Mother's milk is the best nutrition for babies. Lactina gives you and your baby optimal support during the breastfeeding period. The attractive breastpump for hospitals and home rental is especially suitable for long-term and frequent pumping and encourages milk production in the long term, too.
Indications For Use
The Lactina Breastpump is a powered breastpump:
- To be used by lactating women to express and collect milk from their breast.
- To initiate and maintain a milk supply as well as collect breastmilk at work or during other absences from the baby.
- To initiate and maintain a milk supply if direct breastfeeding is not possible.
To relieve engorgement. - For use in hospitals or home rental.
Important Safeguards
When using electrical devices, basic safety precautions should always be followed, including the following:
Read all instructions before use.
- Use the product only for its intended use as described in this instruction manual.
- Only use the power cord that comes with the Lactina Breastpump.
- Make sure the voltage of the device is compatible with the power source.
Always unplug electrical devices immediately after using. - The product should never be left unattended when plugged into a power source.
- Separation from the mains is only assured through the disconnection of the power cord from the wall socket outlet.
- Keep the power cord away from heated surfaces.
- Never operate an electrical device if it has a damaged power cord or plug, if it is not working properly, if it has been dropped or damaged, or dropped into water.
Do not use outdoors. - Keep appliance dry and do not place in direct sunlight.
- Do not get the product wet.
- Do not use while bathing or showering.
- Do not place in or drop pump unit into water or other liquid.
-
Do not spray or pour liquid directly onto the pump.
-
Do not store or use this product where it can fall or be pulled into a tub or sink.
- Do not reach for any electrical device if it has fallen into water. Unplug immediately.
- Use Medela original accessories only.
- Check pump kit components for wear or damage.
- The pump kit is a personal care item and is not to be shared between mothers without proper sterilization to prevent the risk of cross-contamination.
- Pump only with the motor in an upright position.
- Do not use while sleeping or overly drowsy.
- Supervision is necessary when this product is used in the vicinity of children.
- If problems or pain occur, consult your lactation consultant or physician.
- Equipment not suitable for use in the presence of a flammable anaesthetic mixture with air or with oxygen or nitrous oxide.
- Portable and mobile radio frequency communications equipment can affect the Lactina Breastpump.
- The Lactina Breastpump needs special precautions regarding EMC (Electromagnetic compatibility) and needs to be installed and put into service according to the EMC information provided in these instructions for use.
- There are no user-serviceable parts inside the Lactina. Do not attempt to repair the Lactina Breastpump yourself.
SAVE THIS INSTRUCTION MANUAL
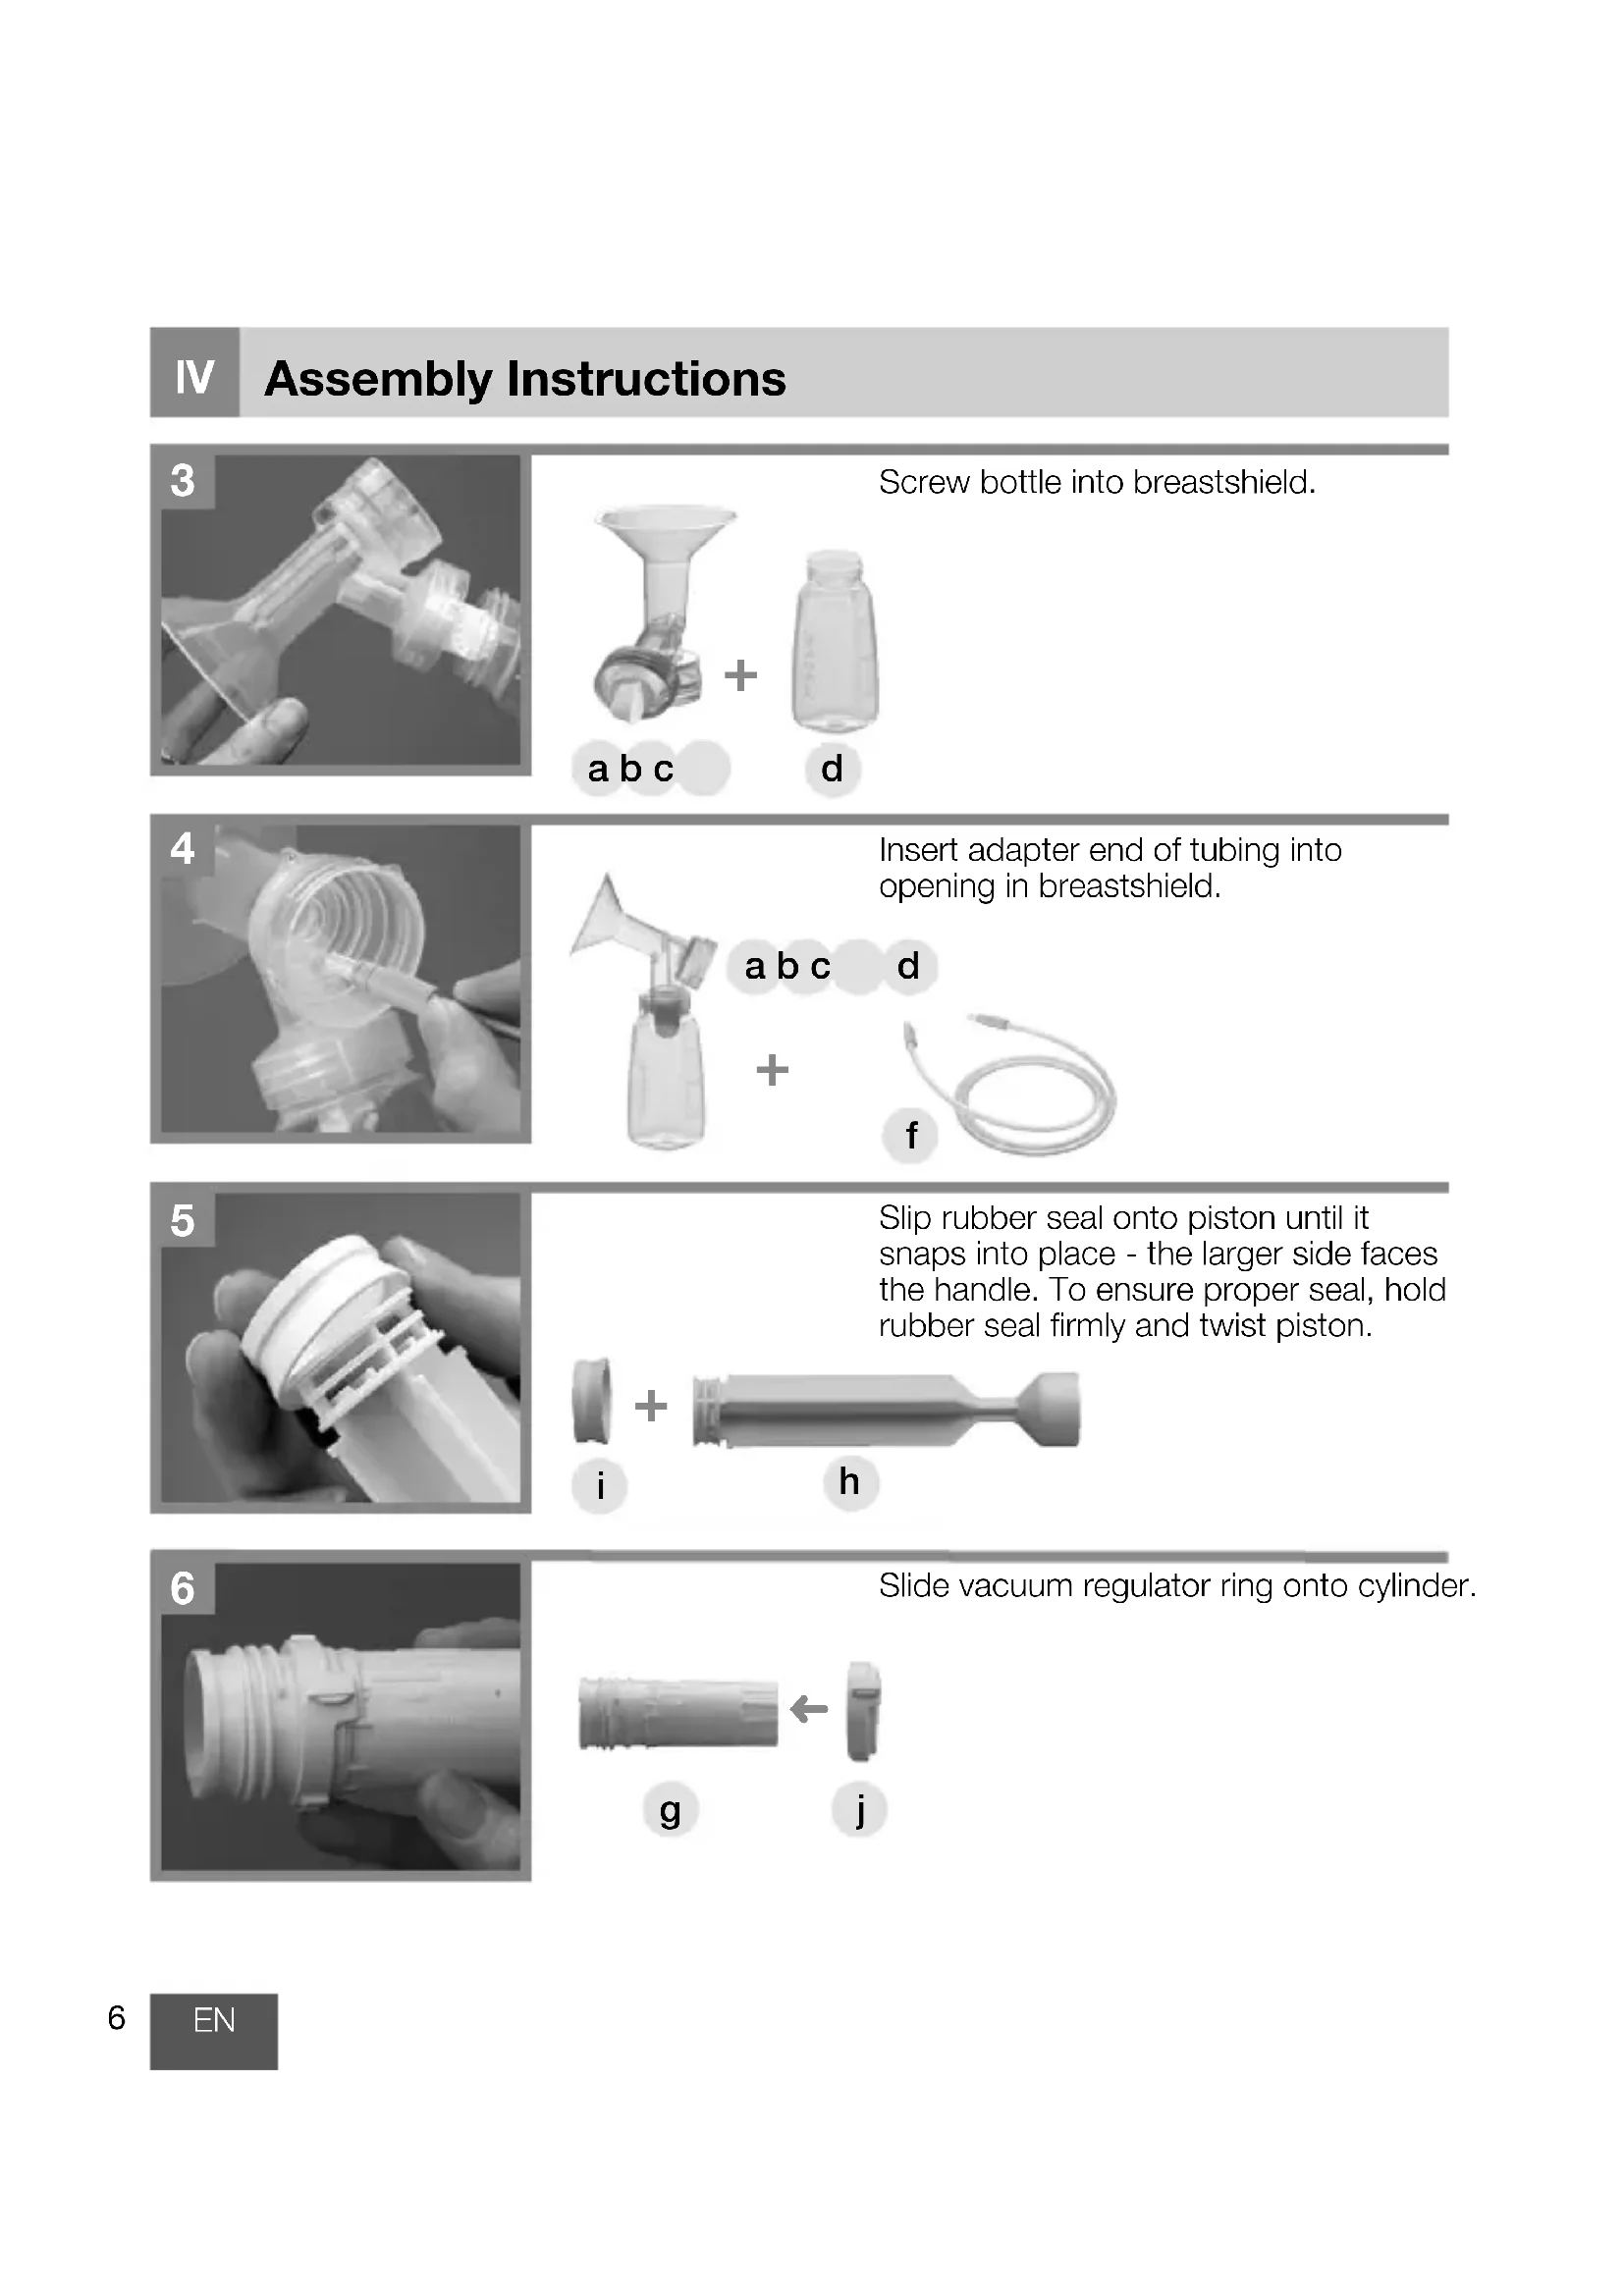
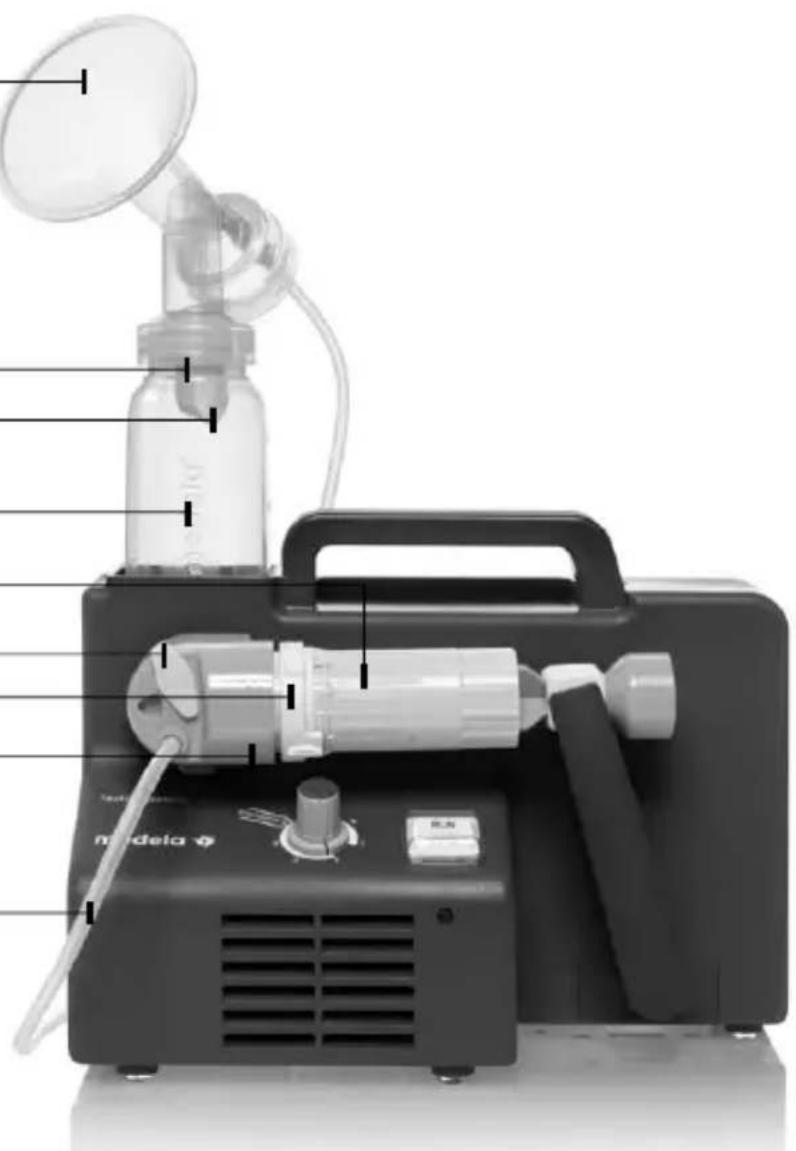
IV Assembly Instructions
b+c
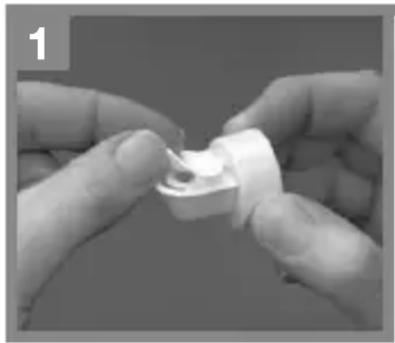
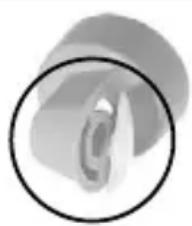
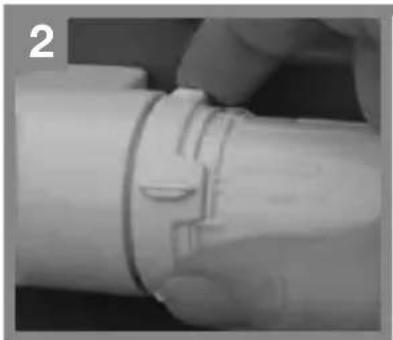
Snap membrane onto valve until membrane lies completely flat.
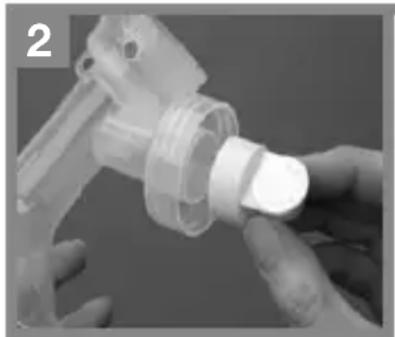
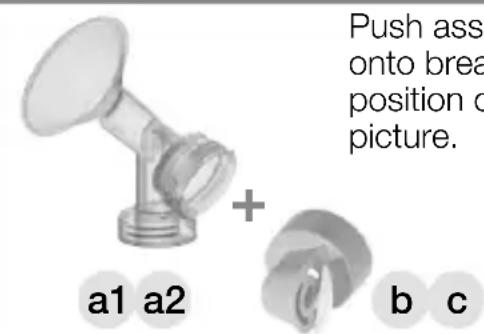
Push assembled valve and membrane onto breastshield. Ensure sidewise position of valve as indicated on picture.
IV Assembly Instructions
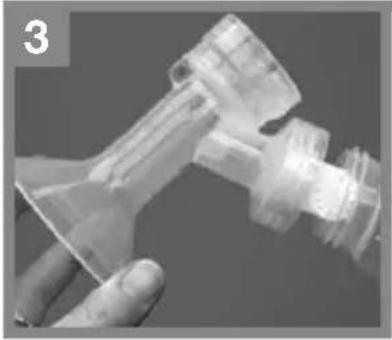
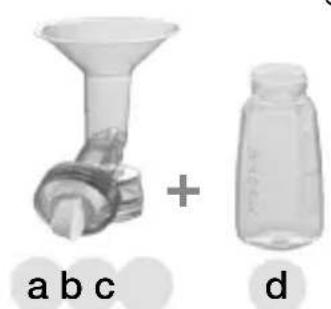
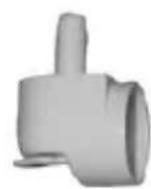
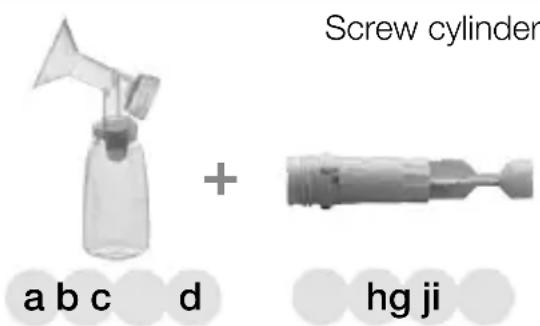
Screw bottle into breastshield.
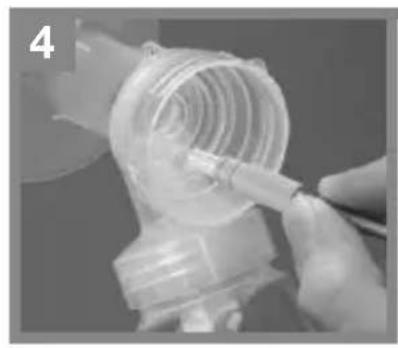
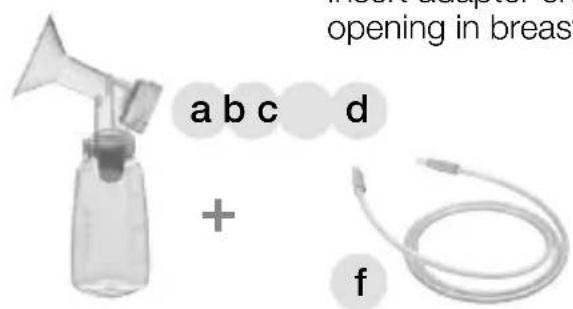
Insert adapter end of tubing into opening in breastshield.
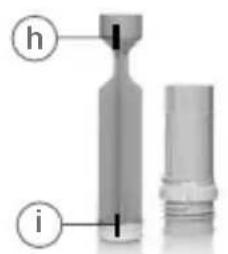
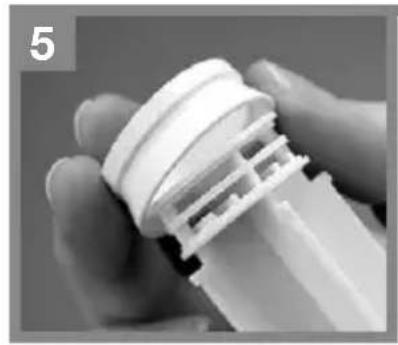
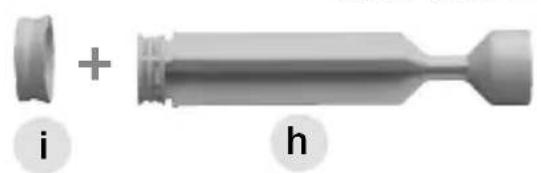
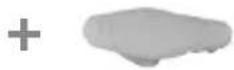
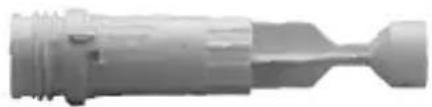
Slip rubber seal onto piston until it snaps into place - the larger side faces the handle. To ensure proper seal, hold rubber seal firmly and twist piston.
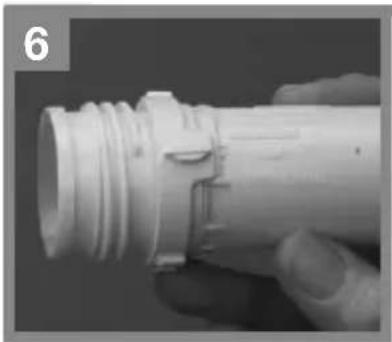
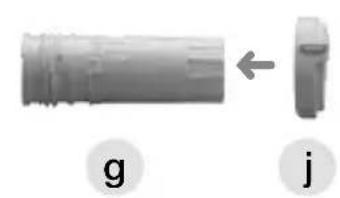
Slide vacuum regulator ring onto cylinder.
j g
i h
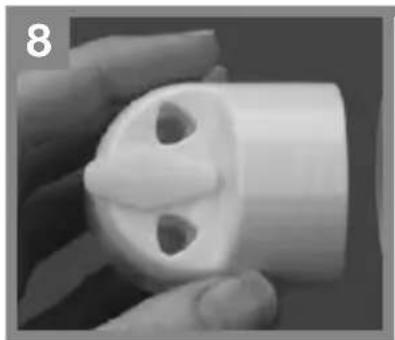
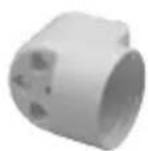
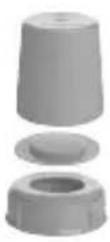
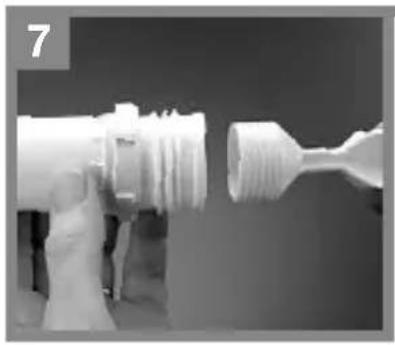
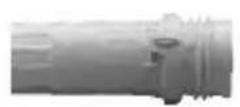
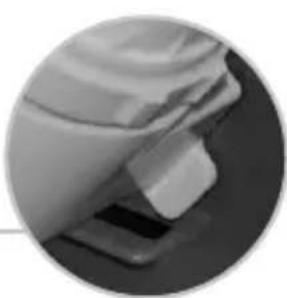
Snap port cap onto cylinder holder.
k
1
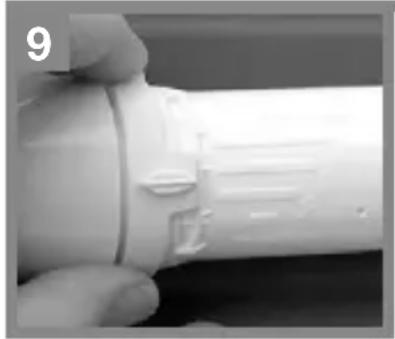
Screw piston/cylinder assembly tightly into cylinder holder.
k
+
hg ji

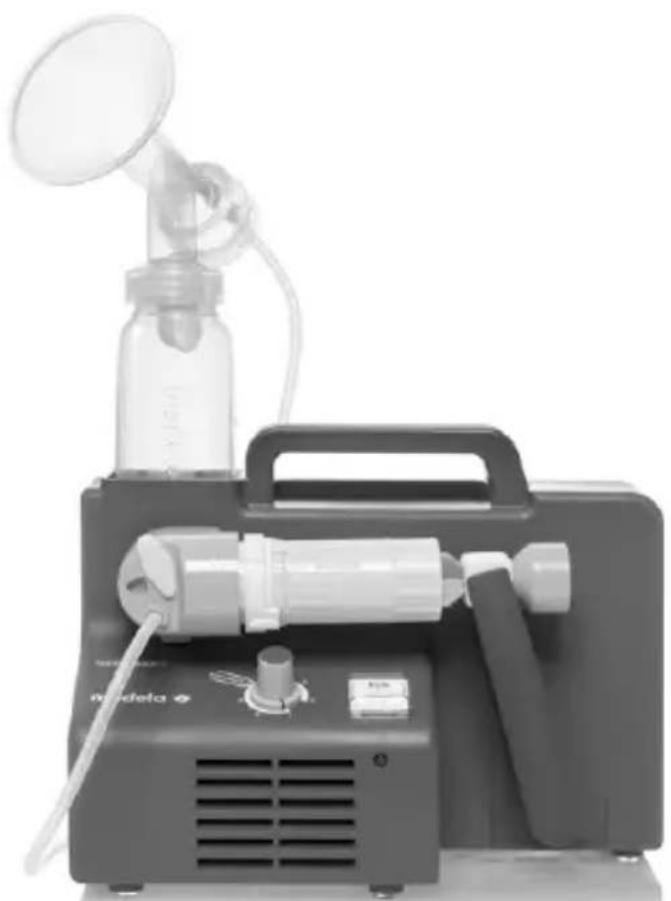
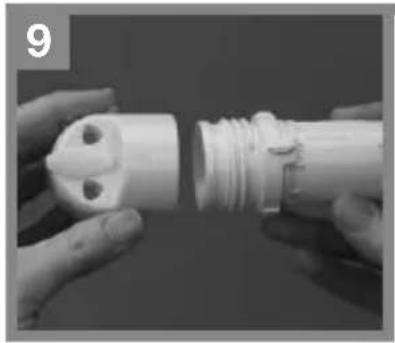
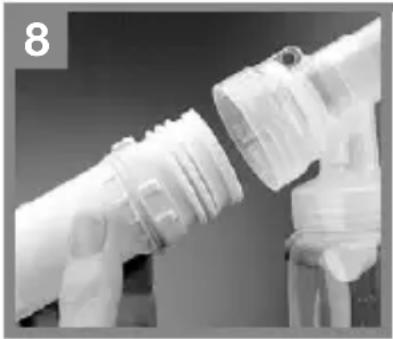
Insert plug at the back side of the cylinder holder into the hole on the front side of the Lactina. Rotate until tab of cylinder holder is securely placed in slit of Lactina.
IV Assembly Instructions

Push piston into rubber clamp of Lactina pumping arm until it snaps in.
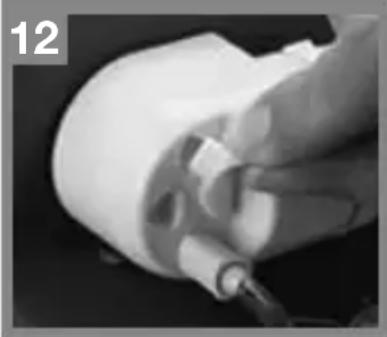
Push adapter end of tubing into opening on cylinder holder.
If single pumping, insert port cap into the unused opening of cylinder holder.
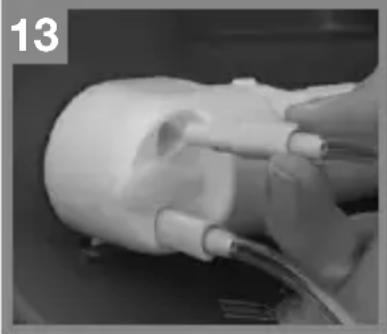
If double pumping, insert port cap into the hole in the middle of cylinder holder.
V Electrical Operation
Plug the power cord into a standard electrical outlet.
VI Pumping
Be comfortably seated and relax. Use a footrest, when pumping or when feeding your baby. Elevating your feet puts you into proper sitting position to avoid stress on the lower back and perineum.
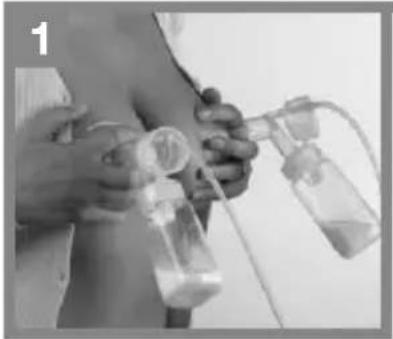
Center your breastshield over your nipple.
- Do not tilt or overfill bottles when pumping.
Take care not to kink tubing while pumping.
Set the vacuum regulator to minimum and switch on the breastpump.


Adjust the vacuum to your Maximum Comfort Vacuum™. This is the highest vacuum you can use and still feel comfortable (different for every mother). To find your Maximum Comfort Vacuum increase vacuum until pumping feels slightly uncomfortable (not painful), then decrease slightly.
Research has shown that you will pump more efficiently - meaning get more milk in less time - when pumping at Maximum Comfort Vacuum™.
Once finished pumping, switch off the breastpump, unplug it, and disassemble the pump kit items. Close the bottle and store it for later use.
Use bottle stand to prevent tip over.
VI Pumping
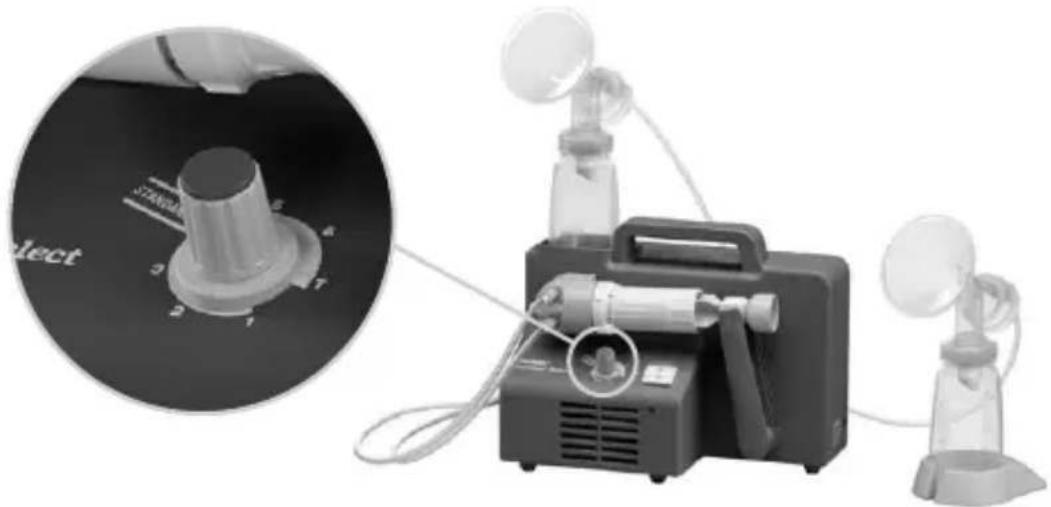
Lactina Select only
The Lactina Select features an additional knob to adjust the pumping speed. Choose a fast pumping rhythm to start your milk flowing (setting 7 corresponds to highest speed level). Once your milk starts to flow or you sense milk ejection you may adjust the rhythm by decreasing speed slightly (e.g. setting 4).
VII Breastshield Fitting
Choosing the right size of Breastshield
A correctly fitted breastshield avoids compression of any milk ducts during pumping to ensure optimal breast emptying and maximum milk output.
Your breastshield is the right size if your answer to the following questions is «Yes»:
Is your nipple moving freely in the tunnel?
Is minimal or no areolar tissue being pulled into the tunnel of the breastshield?
- Do you see a gentle, rhythmical motion in the breast with each cycle of the pump?
- Do you feel the breast emptying all over?
Is your nipple pain-free?
If your answer to any of the above questions is «No», try a larger (or smaller) breastshield.
Medela PersonalFit™ Breastshield: Available in five sizes - because one size does not fit all.
VIII Manual Pumping
Follow steps 1-7 (excluding step 4) on page 3/4/5
Set the vacuum regulator to minimum and start pumping. Adjust the vacuum to your Maximum Comfort Vacuum™. This is the highest vacuum you can use and still feel comfortable (different for every mother). To find your Maximum Comfort Vacuum increase vacuum until pumping feels slightly uncomfortable (not painful), then decrease slightly.
IX Cleaning and Hygiene
Important Use drinking water quality for any of the following described cleaning procedures.
- Clean parts immediately after use to avoid dry up of milk residues and to prevent from growth of bacteria.
- Disassemble all parts prior to cleaning. Especially be sure to remove the yellow valve head from the breastshield and separate the white valve membrane from the valve head.
IX Cleaning and Hygiene
Cleaning at home
Follow these cleaning instructions unless you are told otherwise by your healthcare professional.
Prior to first use and once daily
- Disassemble, wash and rinse all parts of your pump kit that come in contact with the breast and milk (a+b+c+d+m+n+o).
- Place parts in a saucepan of sufficient capacity.
- Fill with cold water until the parts are well covered. Optionally, a tea spoon of citric acid may be added to avoid a build-up of limescale.
- Heat it up and allow to boil for 5 minutes.
- Remove from stove and drain water off.
- Dry parts with a clean towel.
Alternatively, the disassembled parts can be sanitized in top rack of dishwasher, with the Medela Quick Clean microwave bags or with the B-Well steam sterilizer.
Note: Food colorings may discolor components which will not affect performance.
After each use
- Disassemble and handwash all parts of your pump kit that come in contact with the breast and milk (a+b+c+d+m+n+o) in warm, soapy water.
- Rinse in clear water.
- Dry parts with a clean towel.
Cleaning in hospitals
The following cleaning instructions are general recommendations and may individually be adjusted based on the hospital's specific directives and cleaning practices.
Important
It is recommended to provide each mother an own personal pump set and to clean, disinfect and sterilize (e.g. autoclave) all components after each use or, latest each time they are handed over to the next mother. Use by more than one mother without adequate sterilization may pose a health risk (e.g. risk of cross-contamination) and voids the warranty.
Cleaning
Disassemble and thoroughly wash all parts in warm, soapy water. Rinse in clear water.
Disinfecting
Disinfect all parts by washing in a thermic washing machine (at approx. 93^ C).
Sterilizing
Prior sterilizing visually check parts if clean and intact. Sterilize all parts by autoclaving at 134^ for 3 (or 18) minutes or at 125^ for 15 -20 minutes. Do not stack parts or apply external pressure to avoid damages. Alternatively, the parts can be EO-sterilized (Ethylene Oxide).
Tubing care
Inspect the tubing after each pumping session for condensation and/or milk.
If condensation appears in the tubing
Let the pump run after you have completed pumping with tubing attached for 1-2 minutes or until dry.
If milk gets into the tubing
If milk accidentally gets into the tubing turn off the pump and unplug from power source. Remove and clean the tubing according to the instructions «Prior to first use and once daily». Shake water droplets out and hang to air-dry. For faster drying, attach the tubing to pump and run for 1- 2 minutes or until dry.
Hints After cleaning, when parts are not in use, put in a clean zip lock bag or store in a container with lid. Alternatively, the parts can be wrapped in a clean paper or cloth towel.
Hygiene · Wash hands thoroughly with soap and water before touching the breast and pump parts.
- Avoid touching the inside of bottles and lids.
- Clean the breast and surrounding area with a damp cloth.
- Do not use soap or alcohol which can dry the skin and cause cracked nipples.
IX Cleaning and Hygiene
Breastpump care
Unplug breastpump prior to cleaning
At home Daily or when spills occur In hospitals Immediately when spills occur In between each mother and/or on a regular basis, e.g. daily
- Use a damp (not wet) cloth to wipe over the breastpump.
Optionally, soapy water or a non-abrasive detergent may be used. - Do not spray or pour liquid directly onto the pump.
- Do not immerse the pump unit in water.
X Storing / Thawing Breastmilk
Check with your hospital for specific instructions.
Breastmilk Storage (For Healthy Term Babies)
| Room Temperature | Refrigerator | Refrigerator Freezer Compartment | Deep Freezer | |
| Freshly expressed breastmilk | Do not leave at room temperature | 3 - 5 days at approx. 4°C | 6 months at approx. -16°C | 12 months at approx. -18°C |
| Thawed breastmilk (Previously frozen) | Do not store | 10 hours | Never refreeze | |
- When freezing do not fill bottles/bags more than 3/4 full to allow space for expansion.
- Label bottles/bags with the date of pumping.
- Do not store breastmilk in the door of the refrigerator.
- In order to preserve the components of the breastmilk, thaw in the refrigerator overnight or by holding the bottle/bag under running warm water (max. 37^ C).
Gently shake the bottle/bag to blend any fat that has separated. - Do not thaw frozen breastmilk in a microwave oven or in a pan of boiling water (danger of burning).
XI Troubleshooting
If the motor is not running
Check
- mains power is present
the device is switched on
If there is low or no suction
Make sure
- the breastshield forms a complete seal around the breast.
- all connections of the kit and breastpump are secure.
- the white valve membrane is laying flat against the yellow valve head. Check that the valve head and membrane are clean and not damaged. See «Assembly Instructions».
- the ends of the tubing are fit securely into the back of the breastshield and into the opening on cylinder holder.
- the rubber seal is correctly attached onto piston.
- the piston/cylinder is correctly attached onto cylinder holder or breastshield.
- the cylinder holder including piston/cylinder is assembled properly onto the Lactina.
- If single pumping, make sure the port cap is inserted into the unused opening of cylinder holder.
Take care not to kink or pinch tubing.
If there is an overflow
If milk accidentally gets into the tubing
- Turn off the pump and unplug from power source.
- Use a damp (not wet) cloth to wipe the pump.
Refer to cleaning instructions «Tubing care and Breastpump care». - If necessary clean the pump kit.
- When components are completely dry, reassemble breastpump and kit.
XII Warranty
3-year warranty for the unit from the date of purchase, excluding pump set and accessories. The manufacturer is not liable for any damage or consequential damage caused by incorrect operation, inappropriate usage or use by unauthorized persons. Routine checks and servicing may only be carried out by Medela authorized personnel.
XIII Disposal
The unit is made of various metal and plastics. Before disposal, the device is to be rendered unusable and it must not be disposed of as unsorted municipal waste in accordance with local regulations. Use your local return and collection system for waste electrical and electronic equipment. Improper disposal may have harmful effects in the environment and on public health.
XIV Parts List
Article numbers
a1 Breastshield (24 mm) 810.7084
a2 Connector 810.7088
b Valve head 810.0475
C Valve membrane 820.7013
d Bottle (150 ml) 811.0020
e Bottle stand 810.0462
Silicone tubing (105 cm) 800.0828
g Cylinder 810.0717
Piston 810.0494
i Rubber seal 200.2575
Vacuum regulator ring 200.2775
k Cylinder holder 810.0668
Port cap 820.0135
m Cap 810.0474
n Lid 810.7062
Disc 810.0473
Accessories (sold separately)
One-Day Pump Set for a limited number of uses 800.0830/200.0235
(max. 24 hours or 8 pumping sessions)
- Disposable bottles (80 ml/150 ml) for one-time 800.0835/200.1153
use only
Car adapter 928.7001
Does not contain Bisphenol-A, DEHP (Phthalate) or Latex.
Subject to change.
Content may vary from picture.
Lactina™ Milchpumper
Lactina Select uniquely
EMC / Technical Description
Electromagnetic Compatibility (EMC, IEC 60601-1-2:2001)
IEC 60601-1-2, Table 201
| Electromagnetic Emissions | ||
| The Lactina breastpump is intended for use in the electromagnetic environment specified below. The customer or the user of the Lactina breastpump should assure that it is used in such environment. | ||
| Emission Tests | Compliance | Electromagnetic environment - guidance |
| RF emissions CISPR 11 | Group 1 | The Lactina breastpump uses RF energy only for its internal function. Therefore, its RF emissions are very low and are not likely to cause any interference in nearby electronic equipment. |
| RF emissions CISPR 11 | Class B | The Lactina breastpump is suitable for use in all establishments, including domestic establishments and those directly connected to the public low-voltage power supply network that supplies buildings used for domestic purposes. |
| Harmonic emissions IEC 61000-3-2 | Class A | |
| Voltage fluctuations / flicker emissions IEC 60000-3-3 | Complies | |
Warning - The use of accessories and cables other than those specified may result in increased emissions or decreased immunity of the Lactina breastpump.
The Lactina breastpump should not be used adjacent to or stacked with other equipment. If adjacent or stacked use is necessary, the Lactina breastpump should be observed to verify normal operation in the configuration in which it will be used.
The Lactina breastpump was found to have no essential performance by a risk analysis and thus, was not tested for immunity to electromagnetic disturbances (IEC60601-1-2:2001, 6.8.3.201 i)
EN Technical specifications
DE Technische Daten
FR Caracteristiques techniques
IT Caratteristiche tecniche
NL Technische gegevens
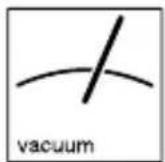
vacuum (approx.)
-100 ... -240 mmHg
-13.33 ... -32 kPa
Lactina Electric Plus 50 cpm
Lactina Select 40 - 60 cpm
100-240V
50/60 Hz
50 VA

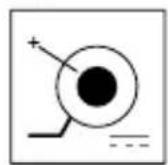
alternating current
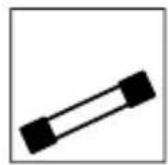
T 1.25 A / 6.3 x 32 / 250 V
12VDC
16
T 1.25 A

direct current
900 410 410 mm

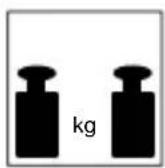
2.4 kg
Operation
Betrieb
En Service
Utilizzo
Gebruik
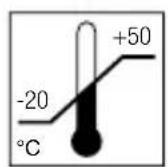
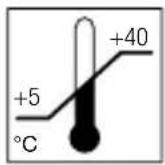
Transport/Storage
Transport / Stockage
Transport / Stockage
Please see accompanying papers /
6341 Baar, Switzerland
www.medela.com
INTERNATIONAL SALES
Medela AG
Lattichstrasse 4b
6341 Baar
Switzerland
Phone +41 (0)41 769 51 51
Fax +41 (0)41 769 51 00
ism@medela.ch
www.medela.com
FRANCE
Medela France Sarl
Northbank Industrial Park
Irlam, Manchester M44 5EG UK
Phone +44 (0)161 776 0400
Fax +44 (0)161 776 0444
info@medela.co.uk
www.medela.co.uk

- Lactina™ Breastpump
- Indications For Use
- Important Safeguards
- Read all instructions before use.
- IV Assembly Instructions
- V Electrical Operation
- VI Pumping
- Lactina Select only
- VII Breastshield Fitting
- Choosing the right size of Breastshield
- VIII Manual Pumping
- Follow steps 1-7 (excluding step 4) on page 3/4/5
- IX Cleaning and Hygiene
- Cleaning at home
- Prior to first use and once daily
- After each use
- Cleaning in hospitals
- Important
- Cleaning
- Disinfecting
- Sterilizing
- Tubing care
- Breastpump care
- Unplug breastpump prior to cleaning
- X Storing / Thawing Breastmilk
- Check with your hospital for specific instructions.
- Breastmilk Storage (For Healthy Term Babies)
- XI Troubleshooting
- If the motor is not running
- Check
- If there is low or no suction
- Make sure
- Take care not to kink or pinch tubing.
- If there is an overflow
- If milk accidentally gets into the tubing
- XII Warranty
- XIII Disposal
- XIV Parts List
- Accessories (sold separately)
- Lactina™ Milchpumper
- Lactina Select uniquely
- EMC / Technical Description
- INTERNATIONAL SALES
- FRANCE
Brand : MEDELA
Model : Lactina
Category : Breast pump