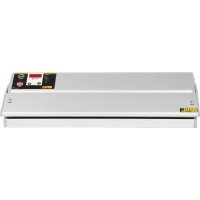
CC770 - Vacuum packaging machines BUFFALO - Free user manual and instructions
Find the device manual for free CC770 BUFFALO in PDF.
| Product Type | Vacuum Packaging Machine |
| Brand | BUFFALO |
| Model | CC770 |
| Dimensions (h x w x d) | 93 x 350 x 191 mm |
| Weight | 4.3 kg |
| Power Supply | 230 V ~ 50 Hz, 300 W, 1.3 A |
| Vacuum Pressure | 0.8 bar (approx.) |
| Maximum Bag Length | 300 mm |
| Package Contents | Machine, 10 bags (200 x 300 mm), instruction manual |
| Main Functions | Vacuum packaging, adjustable welding (M1, M2, M3), adjustable suction (max 90 s) |
| Sealing Time Adjustment | Via +/- buttons and preset memory (half-second precision) |
| Suction Time Adjustment | In 10 s increments (or 5 s with dot), max 90 s |
| Safety | Automatic safety interruption, auto standby after 4.5 min |
| Care and Cleaning | Clean with warm soapy water and damp cloth; do not immerse |
| Repairability | Replace fuse, Teflon cloth; refer to BUFFALO agent or qualified technician |
| Typical Shelf Life (examples) | Raw meat refrigerated 8-9 days, frozen 15-20 months; vegetables 7-10 days |
| Warranty and Compliance | CE, WEEE recycling, complies with BS EN, IEE standards |
| Recommended Use | Only with supplier-recommended bags; professional use |
Frequently Asked Questions - CC770 BUFFALO
User questions about CC770 BUFFALO
0 question about this device. Answer the ones you know or ask your own.
Ask a new question about this device
Download the instructions for your Vacuum packaging machines in PDF format for free! Find your manual CC770 - BUFFALO and take your electronic device back in hand. On this page are published all the documents necessary for the use of your device. CC770 by BUFFALO.
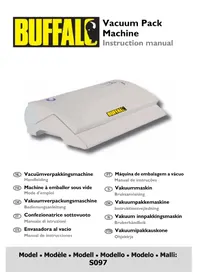
USER MANUAL CC770 BUFFALO
natural_image
Line drawing of a portable electronic device with control panel and power outlet (no text or symbols)Safety Tips ...... I
Introduction
Pack Contents ....I
Location of Controls 2
Operation 2
Setting the Sealing Time 2
Setting the Suction Time 3
Vacuum Packing Food 3
Safety Cut-out 3
Auto-Standby 3
Cleaning, Care & Maintenance 4
Technical Specifications 5
Compliance 6
NL
Inhoudsopgave
Veiligheidstips 7
Inleiding 7
Verpakkingsinhoud 7
- Position on a flat, stable surface.
- A service agent/qualified technician should carry out installation and any repairs if required. Do not remove any components on this product.
- Consult Local and National Standards to comply with the following:
• Health and Safety at Work Legislation
• BS EN Codes of Practice
- Fire Precautions
• IEE Wiring Regulations
• Building Regulations
• DO NOT immerse the appliance in water.
- The sealing bar becomes hot during use. DO NOT touch the sealing bar during or immediately after operation.
- Do not turn Off at the plug to halt operation: always use the Stop/Start button or On/Off switch.
- Do not use the appliance for anything other than its intended use.
- Only use bags recommended by the supplier/manufacturer with the appliance.
• Always switch off and disconnect the power supply to the appliance when not in use.
• Not suitable for outdoor use.
- This appliance must only be used in accordance with these instructions and by persons competent to do so.
• This appliance is not suitable for use by children.
- Keep all packaging away from children. Dispose of the packaging in accordance to the regulations of local authorities.
- If the power cord is damaged, it must be replaced by an BUFFALO agent or a recommended qualified technician in order to avoid a hazard.
Introduction
Please take a few moments to carefully read through this manual. Correct maintenance and operation of this machine will provide the best possible performance from your BUFFALO product.
Pack Contents
The following is included:
• BUFFALO Vacuum Pack Machine
• Instruction Manual
BUFFALO prides itself on quality and service, ensuring that at the time of packaging the contents are supplied fully functional and free of damage.
Should you find any damage as a result of transit, please contact your BUFFALO dealer immediately.
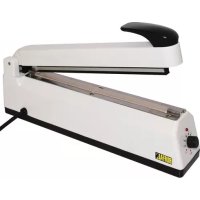
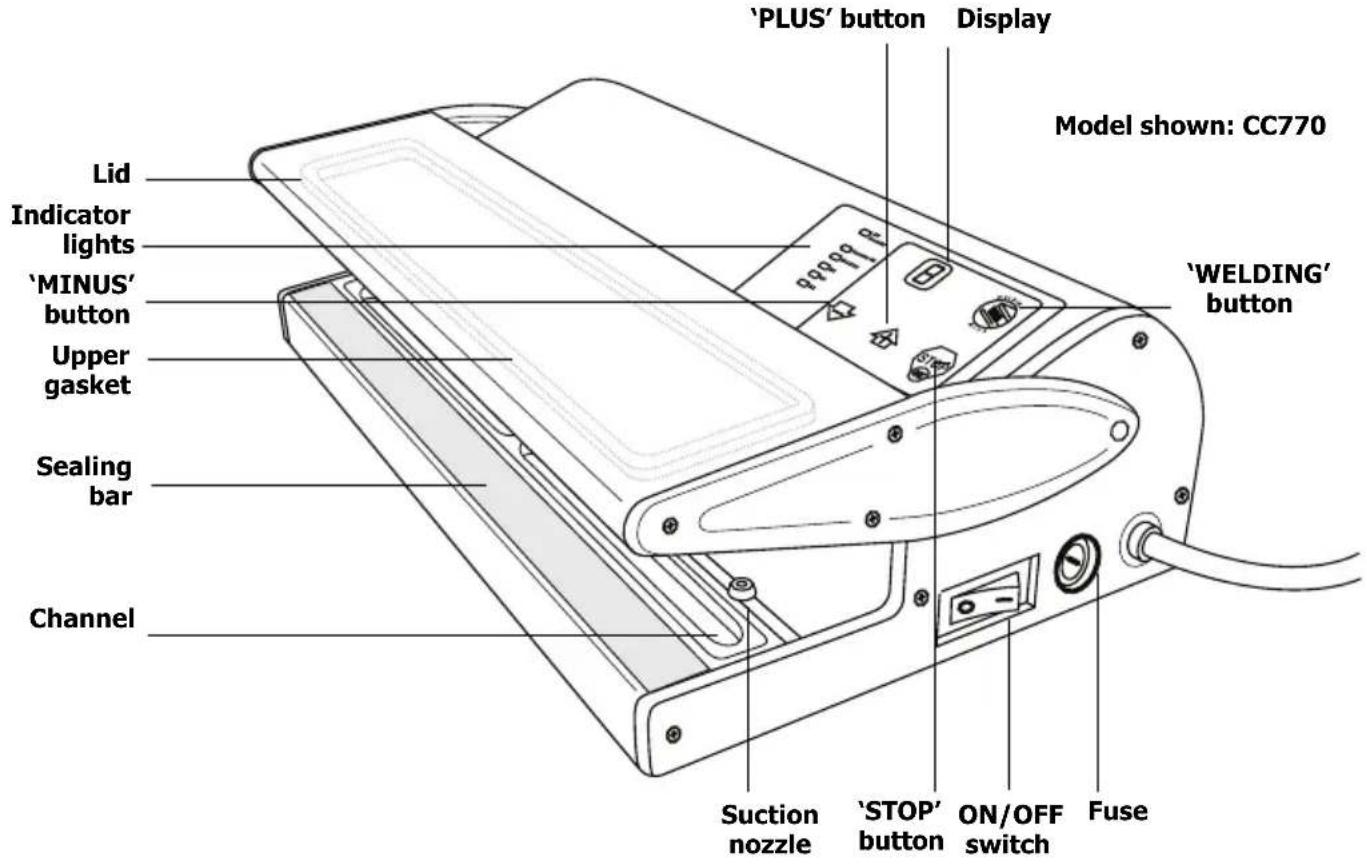
Location of Controls
text_image
Lid Indicator lights 'MINUS' button Upper gasket Sealing bar Channel 'Suction nozzle 'STOP' button ON/OFF switch Fuse Display 'PLUS' button Model shown: CC770 'WELDING' buttonOperation

Note: THIS APPLIANCE IS DESIGNED TO BE USED WITH THE BAGS SUPPLIED. OTHER BAGS MAY NOT SEAL CORRECTLY. CONTACT YOUR VACUUM PACK MACHINE SUPPLIER FOR SUITABLE REPLACEMENT BAGS.
Setting the Sealing Time
This appliance has three programmable sealing settings; M1-M3.
I. Connect the appliance to the mains power supply and turn the power switch On [I].
2. Raise the lid. This activates the appliance ready for use.
3. The value shown in the 'TIMER' display window is the default sealing time, shown in seconds.

Note: The default value (2 seconds) is suitable for the bags supplied by the appliance.
- Press and hold the WELDING button. The M1 indicator flashes on the panel.
- To adjust the sealing time, press and hold the ⭕ or ⏻ button until the required time is shown on the display.

Note: A period after the value (e.g. '4.') indicates an increment of half a second for more accurate timing.
- Repeat steps 4 and 5 for M2 and M3.
- Press and hold the WELDING button. All three indicators flash.
- Press and hold the WELDING button again to store the sealing time presets.
Setting the Suction Time
I. Press and hold the STOP STOP button for two seconds. The default suction time flashes on the display.

Note: The default value is 90 seconds (CC771 is 95 seconds).

Note: Each unit is equal to 10 seconds (e.g. 4 equals 40 seconds). A period after the value (e.g. '4.') indicates an increment of five seconds for more accurate timing.
-
To adjust the sealing time, press and hold the + or - buttons until the required time is shown on the display. Maximum programmable time is 90 seconds.
-
Press and hold the STOP STOP button to save the suction time and exit. The Sealing time is displayed.

WARNING: Constantly using excessive suction times time will shorten the operational life of the appliance.
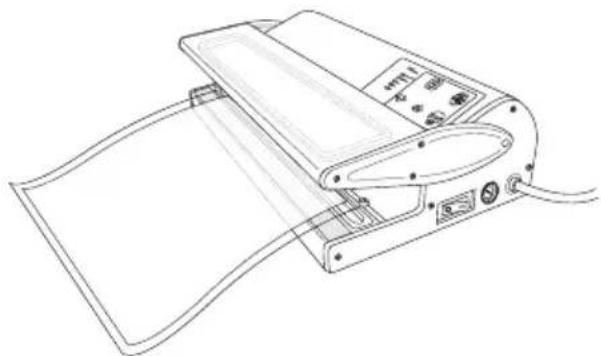
Vacuum Packing Food
I. Place the food inside in the bag and remove any excess liquid or food residue.
2. Lift the lid of the appliance. The lid will lock in place once lifted high enough.
3. Place the open end of the bag over the channel.
4. Lower the lid and press down gently to start the suction process. Maintain a firm pressure on the lid for best results.
natural_image
Line drawing of a medical or laboratory device with a sheet of paper and control panel (no text or symbols)
Note: The process can be stopped at any time by pressing the STOP STOP button.
- CC771 Only - The pressure within the bag is displayed before the sealing countdown begins.
- Once the programmed suction time is reached the sealing process begins.
- 'E' flashes on the display ('END' on CC771) when the appliance has finished sealing the bag. Lift the lid by the sides and remove the bag.

WARNING: Never lift the lid from underneath. The sealing bar remains hot.

Note: The lid may be hard to open for a few seconds after operation due to vacuum pressure. Allow the pressure to dissipate for the lid to open freely.
Safety Cut-out
This appliance is fitted with an automatic safety system to help prevent any damage from misuse.
If during suction the pressure gets too great (no air left in the bag), the appliance automatically switches to the sealing process.
Auto-Standby
The appliance will revert to standby mode if it is not used for a period of 4½ minutes.
Vacuum Packed Shelf Life
The following table shows the APPROXIMATE shelf life of produce once vacuum packed.

Note: Values are APPROXIMATE. Various factors including produce quality, best before dates and the quality of vacuum packing all affect shelf life.
| Foodstuff Storage | temperature Approximate shelf life | |
| Bread | -2°C to 25°C | 6-8 days |
| Pasta 12 months | ||
| Rice 12 months | ||
| Flour 12 months | ||
| Ground Coffee/Tea 12 months | ||
| Red Meat (raw) | -2°C to 5°C | 8-9 days |
| White Meat (raw) 6-9 days | ||
| Fish (raw/whole) 4-5 days | ||
| Game (raw) 5-7 days | ||
| Soft Cheese 14-20 days | ||
| Hard Cheese | 25-60 days | |
| Vegetables | 7-10 days | |
| Fruits | 14-20 days | |
| Pasta/Rice (cooked) | 6-8 days | |
| Meats (cooked) | 10-15 days | |
| Meats | Frozen (to -18°C) | 15-20 months |
| Fish | 10-12 months | |
| Vegetables | 18-24 months |
Cleaning, Care & Maintenance
• Always allow to cool before cleaning.
- Remove the channel and empty of any fluids after each use.
- Use warm, soapy water and a damp cloth to clean the appliance.
- Dry t h o r o u g h l y after cleaning.
- A BUFFALO dealer or qualified technician should carry out repairs if required.

WARNING: Do not allow any water to spill into the appliance when cleaning.
Troubleshooting
| Fault Probable Cause Action | ||
| The unit is not working The unit | is not switched on Check the unit | it is plugged in correctly and switched on |
| Plug and lead are damaged Call | BUFFALO agent or qualified technician | |
| Fuse in the plug has blown Rep | ace the plug fuse | |
| Power supply Check power supply | ||
| Internal wiring fault Call BUFFALO | agent or qualified technician | |
| The unit is not working - 'E' flashes on the display | Safety cut-out activated Allow appliance to rest for indicated time before using again | |
| The unit is not working - '0' flashes on the display | 'Lid closed' switch faulty Call BUFFALO | agent or qualified technician |
| Appliance does not remove all the air from the bag | Open end of bag not completely inserted | Open lid and reposition bag |
| Gaskets dirty Clean gaskets | ||
| Open end of bag is dirty Clean bag | ||
| Bag may be punctured | Replace bag | |
| Incorrect bags used Call Vacuum | Pack machine supplier | |
| Suction nozzle blocked Clear suction nozzle | ||
| Bags are not sealing correctly | Sealing bar is overheating | Open lid and allow sealing bar to cool down |
| Moisture in bag under the sealing bar | Ensure inside of bag is dry and free from moisture where it is to be sealed | |
| Incorrect Sealing Time set | Alter sealing time | |
| Bag too thick | Use thinner bag | |
| Incorrect bags used Call Vacuum | Pack machine supplier | |
| End of bag not placed above channel | Move end of bag over channel | |
| Indicator light comes on but there is no weld | Inspect heating element for breaks. Replace if necessary | |
| Imperfect weld | Inspect Teflon fabric heating element cover for breaks or damage. Replace if necessary | |
| Inspect silicon rubber pressure pad for damage. Replace if necessary | ||
| Inadequate "cooling time". Allow at least one second between operations | ||
| Eventually certain components such as the heater element and the Teflon fabric heater cover will require replacement through "normal wear and tear" | ||
| Inspect lower Teflon, replace if worn otherwise element will short out on body of machine | ||
To replace the Teflon fabric heater cover
Disconnect machine from mains supply. Remove the screws that locate the retaining plates. The Teflon fabric can be lifted clear and replaced by a new part and the retaining plate and screws replaced.
Technical Specifications
| Model | Voltage Power Current | Vacuum pressure (approx.) | Max. bag length | Dimensions h x w x d mm | Weight (kg) | ||
| CC770 | 230V 50Hz | 300W 1.3A | 0.8bar 300mm | 95 x 348 x 1 | 90 3.9 | ||
| CC771 | 230V 50Hz | 400W 1.7A | 0.8bar 400mm | 95 x 458 x 1 | 90 5.2 | ||
Electrical Wiring
This appliance is supplied with a 3 pin, moulded, BS1363 plug and lead, with a 13 amp fuse as standard.
The plug is to be connected to a suitable mains socket.
This appliance is wired as follows:
• Live wire (coloured brown) to terminal marked L
• Neutral wire (coloured blue) to terminal marked N
- Earth wire (coloured green/yellow) to terminal marked E
This appliance must be earthed, using a dedicated earthing circuit.
If in doubt consult a qualified electrician.
Electrical isolation points must be kept clear of any obstructions. In the event of any emergency disconnection being required they must be readily accessible.
Compliance
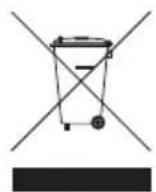
The WEEE logo on this product or its documentation indicates that the product must not be disposed of as household waste. To help prevent possible harm to human health and/or the environment, the product must be disposed of in an approved and environmentally safe recycling process. For further information on how to dispose of this product correctly, contact the product supplier, or the local authority responsible for waste disposal in your area.
BUFFALO parts have undergone strict product testing in order to comply with regulatory standards and specifications set by international, independent, and federal authorities.
BUFFALO products have been approved to carry the following symbol:

text_image
C€All rights reserved. No part of these instructions may be produced or transmitted in any form or by any means, electronic, mechanical, photocopying, recording or otherwise, without the prior written permission of BUFFALO. Every effort is made to ensure all details are correct at the time of going to press, however, BUFFALO reserve the right to change specifications without notice.
Veiligheidstips
natural_image
Line drawing of a medical or laboratory device with a sheet of paper and control panel (no text or symbols)
natural_image
Line drawing of a printer with paper sheet and control panel (no text or symbols)
natural_image
Line drawing of a medical device with a flexible band being inserted (no text or symbols)natural_image
Line drawing of a printer or scanner device with a paper sheet and control panel (no text or symbols)
natural_image
Line drawing of a printer or scanner device with a sheet of paper and control panel (no text or symbols)
natural_image
Line drawing of a printer or scanner device with a sheet of paper and control panel (no text or symbols visible)