KA 5743 - Coffee machine SEVERIN - Free user manual and instructions
Find the device manual for free KA 5743 SEVERIN in PDF.
Download the instructions for your Coffee machine in PDF format for free! Find your manual KA 5743 - SEVERIN and take your electronic device back in hand. On this page are published all the documents necessary for the use of your device. KA 5743 by SEVERIN.
USER MANUAL KA 5743 SEVERIN
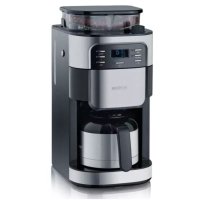
1. On/Off button with indicator light
2. Water reservoir lid
3. Fresh-water reservoir
7. Cable storage space (at the rear)
8. Heat-conserving carafe
9. Screw-in lid for heat-conserving carafe
10. Swing-out fi lter system with fi lter insert
11. Rating label (at the base)
Important safety instructions ∙ In order to avoid hazards, and to comply with safety requirements, repairs to this electrical appliance or its power cord must be carried out by our customer service. If repairs are needed, please send the appliance to our customer service department (see appendix). ∙ Before cleaning the appliance, ensure it is disconnected from the power supply and has cooled down completely. For detailed information on cleaning the appliance, please refer to the section Cleaning and care. ∙ To avoid the risk of electric shock, do not clean the appliance with liquids or immerse it. ∙ Caution: Any misuse can cause severe personal injury. ∙ Caution: The hot-plate heats up during operation and will remain hot for some time afterwards. ∙ This appliance is intended for domestic or similar GB11 applications, such as the - staff kitchens in shops, offi ces and other similar working environments, - agricultural working environments, - by customers in hotels, motels etc. and similar accommodation, - in bed-and breakfast type environments. ∙ This appliance may be used by children (at least 8 years of age) and by persons with reduced physical, sensory or mental capabilities, or lacking experience and knowledge, provided they have been given supervision or instruction concerning the use of the appliance and fully understand all dangers and safety precautions involved. ∙ Children must not be permitted to play with the appliance. ∙ Children must not be permitted to carry out any cleaning or maintenance work on the appliance unless they are supervised and at least 8 years of age. ∙ The appliance and its power cord must be kept well away from children under 8 at all times. ∙ Caution: Keep any packaging materials well away from children – such materials are a potential source of danger, e.g. of suffocation. ∙ Every time the appliance is used, the main body including the power cord as well as any attachment fi tted should be checked thoroughly for any defects. Should the appliance, for instance, have been dropped onto a hard surface, or if excessive force has been used to pull the power cord, it must no longer be used: even invisible damage may have adverse effects on the operational safety of the appliance. ∙ During operation, the coffee maker must be placed on a level, non-slip surface, impervious to splashes and stains. ∙ Do not allow the appliance or its power cord to touch hot surfaces or to come into contact with any heat sources. ∙ Do not leave the appliance unattended while in use. ∙ To prevent the danger of hot water or steam being emitted, always switch off the coffee maker and allow suffi cient12 time for the appliance to cool down before it is opened or any accessories or attachments are removed. ∙ Always remove the plug from the wall socket - in case of any malfunction, - after use, and also - before cleaning the appliance. ∙ When removing the plug from the wall socket, never pull on the power cord; always grip the plug itself. ∙ Do not allow the power cord to hang free; the cord must be kept well away from hot parts of the appliance. ∙ No responsibility will be accepted if damage results from improper use, or if these instructions are not complied with. ∙ Caution: The water reservoir heats up during operation. First use ∙ Before making coffee for the fi rst time, let the appliance go through two or three fi ltration cycles using the indicated maximum amount of cold water, but without using ground coffee. This should also be done if the appliance has not been used for an extended period of time, and after descaling. Making coffee ∙ Open the swing-out fi lter holder and take off the fi lter holder lid. ∙ Insert a size-4 paper fi lter into the fi lter insert, fi rst folding down the perforated sides of the fi lter. ∙ We recommend the use of fi ne-ground coffee: ∙ for normal-size cups use around 6 g (= 2 teaspoons) of ground coffee; ∙ for small cups use around 4g (= 1½ teaspoons. ∙ Depending on your personal taste, the actual quantity used may vary. ∙ Replace the fi lter holder lid and close the swing-out fi lter. ∙ Open the lid of the fresh-water container and fi ll it with the desired quantity of cold water, observing the minimum fi ll amount (2 cups). ∙ Two measuring scales on the valve unit help you to fi nd the correct amount of fresh water: ∙ left scale for normal-size cups (around 125 ml). ∙ right scale for small cups. ∙ Caution: To prevent boiling water from being forced out, be careful not to exceed the maximum water level of 8 medium- sized cups. ∙ Close the water reservoir lid. This is important as the Vapotronic system can only operate when the lid is closed ∙ Fit the aroma-protection lid on the carafe, and then place the carafe on the base plate. ∙ Press the On/Off button; the indicator light comes on and the heating process starts. With the water reservoir fi lled to its maximum, it will take about 5 minutes to bring the water to the boil. ∙ Once the optimum brewing temperature has been reached, the valve opens and the brewing cycle begins. ∙ The Vapotronic system will switch off the heating process automatically. ∙ The coffee starts fl owing through the fi lter into the heat-preserving carafe. ∙ The indicator light goes out once the fi ltration cycle is complete. ∙ To interrupt the brewing cycle, press the13 On/Off button again to turn the appliance off. ∙ Remove the carafe from the base plate. ∙ Take off the aroma-protection lid and replace it with the screw-in lid for the carafe. ∙ The freshly brewed coffee can be poured without having to remove the screw-in lid. ∙ To pour, simply rotate the screw-in lid anti- clockwise half a turn. Turn the lid back again after pouring. ∙ Should you wish to start several brewing cycles one after the other, allow the machine to cool down for at least 5 minutes with the reservoir lid open before re-using it. Use cold water only to refi ll the water reservoir.
Warning: Remember that the water
reservoir and its lid are still hot after the brewing cycle has been completed and hot steam may escape from the reservoir when opening the lid (danger of scalding). Heat-retaining carafe ∙ For technical reasons the screw-in lid does not close hermetically. Therefore, always hold the carafe in an upright position when fi lled with coffee. ∙ Keeping the coffee hot: A heat- conserving carafe accumulates heat energy. Therefore the carafe should preferably be fi lled to its maximum capacity. If it is only partly fi lled, the temperature will not be held as effi ciently. If you rinse out the carafe with hot water before use, the coffee will be kept warm for longer. Cable storage The cable storage compartment serves to store the cable, and to limit its length, if the lower cut-out in the opening is used. Cleaning and care ∙ Before cleaning the appliance, ensure it is disconnected from the power supply and has cooled down completely. ∙ To avoid the risk of electric shock do not immerse the coffee maker in water. The appliance may be cleaned with a slightly damp cloth, using a mild detergent. Wipe dry afterwards. To prevent the valve of the water reservoir from getting clogged, use a non-fl uffy cloth to clean the water reservoir and the glass jug. ∙ Do not use abrasives or harsh cleaning solutions. ∙ To remove the coffee grounds, open the swing-out fi lter, take off the lid and lift out the fi lter insert. Dispose of the coffee grounds; as a natural substance, it may be composted. ∙ Do not dismantle the carafe, do not wash in a dishwasher and do not immerse it in water. ∙ Rinse the inside of the carafe with water and wipe the outside with a clean damp cloth after use. ∙ To remove coffee deposits from the inside of the carafe, fi ll it with hot water and add a teaspoon of dishwasher detergent. Close the screw-in lid and leave the carafe for some hours. Rinse out thoroughly with water afterwards. ∙ The screw-in and aroma-protection lids, fi lter insert and fi lter holder lid can be cleaned with hot soapy water; rinse thoroughly afterwards under fresh tap water.14 Descaling ∙ Depending on the water quality (lime content) in your area as well as the frequency of use, all thermal household appliances using hot water need descaling (i.e. removal of lime deposits) on a regular basis to guarantee proper functioning. Any warranty claim will be null and void if the appliance malfunctions because of insuffi cient descaling. ∙ Descaling is needed when: ∙ the brewing cycle takes longer than normal, ∙ there is a visible build-up of deposits inside the water reservoir or around the valve unit, ∙ the valve of the water reservoir has become leaky. ∙ An excessive build-up of lime deposits is very diffi cult to remove, even when strong descaling agents are used. It may also cause the brewing system to leak. We therefore strongly recommend descaling the appliance after each 30 to 40 brewing cycles. For descaling, a vinegar solution may be used as follows. ∙ Mix 2-3 tablespoons of vinegar essence with 250 ml of cold water. ∙ Pour the descaling solution into the water container, insert a paper fi lter into the fi lter holder, without adding any coffee as described in section Making coffee, and let the appliance run through one fi ltration cycle. Repeat the process if necessary. During descaling, ensure suffi cient ventilation and do not inhale any vinegar vapours. ∙ To clean the appliance after descaling, let it run through 2-3 fi ltration cycles using clean water only. ∙ Do not pour descalers down enamel sinks. Disposal Devices marked with this symbol must be disposed of separately from your household waste, as they contain valuable materials that can be recycled. Proper disposal protects the environment and human health. Your local authority or retailer can provide information on the matter. Guarantee This product is guaranteed against defects in materials and workmanship for a period of fi ve years from the date of purchase. Under this guarantee the manufacturer undertakes to repair or replace any parts found to be defective, providing the product is returned to one of our authorised service centres. This guarantee is only valid if the appliance has been used in accordance with the instructions, and provided that it has not been modifi ed, repaired or interfered with by any unauthorised person, or damaged through misuse. This guarantee naturally does not cover wear and tear, nor breakables such as glass and ceramic items, bulbs etc. This guarantee does not affect your statutory rights, nor any legal rights you may have as a consumer under applicable national legislation governing the purchase of goods. If the product fails to operate and needs to be returned, pack it carefully, enclosing your name and address and the reason for return. If within the guarantee period, please also provide the guarantee card and proof of purchase.15 A fault occurs... … if the brewing cycle takes longer than normal, or … if the valve of the water reservoir has become leaky, or … if the appliance has accidentally been switched on without water in the reservoir the water reservoir needs to be descaled (see section Descaling). … if hot water is ejected through the reservoir lid, or … if the valve does not open although the boiling process is complete, the water reservoir (3 ) has been overfi lled. When fi lling the reservoir, be careful to observe the minimum/maximum water levels.16 Cafetière Chère cliente, Cher client, Avant d’utiliser cet appareil, veuillez lire soigneusement les instructions suivantes et conserver ce manuel pour future référence. L’appareil doit être utilisé exclusivement par des personnes familiarisées avec les présentes instructions. Branchement au secteur Cet appareil ne doit être branché que sur une prise de terre installée selon les normes en vigueur. Assurez-vous que la tension d’alimentation correspond à la tension indiquée sur la fi che signalétique de l’appareil. Ce produit est conforme à toutes les directives relatives au marquage “CE”. Familiarisez-vous avec votre appareil