
LM1541 - Monitor Emprex - Free user manual and instructions
Find the device manual for free LM1541 Emprex in PDF.

| Product Type | LCD TFT Monitor (active matrix) |
| Brand | Emprex |
| Model | LM1541 |
| Screen Size | 15.4 inches |
| Resolution | 1280 x 800 (WXGA) |
| Display Area | 331.2 mm x 207.0 mm |
| Pixel Pitch | 0.2588 mm (H) x 0.2588 mm (V) |
| Viewing Angle | Horizontal: 90°, Vertical: 50° |
| Brightness (typical) | 180 cd/m² |
| Contrast Ratio (typical) | 400:1 |
| Response Time (typical) | 16 ms |
| Number of Colors | 262 K |
| Video Input Connector | D-sub 15-pin (VGA) |
| Built-in Speakers | 2 x 2 W / 8 Ω |
| Power Consumption (normal) | 35 W (typical) |
| Power Consumption (standby) | < 3 W |
| Dimensions (W x D x H) | 435 mm x 145 mm x 310 mm |
| Tilt | 15° forward and backward |
| Operating Temperature | 0 °C to 50 °C |
| Operating Humidity | 25% to 90% RH |
| Standards | FCC, CE, VESA DPMS, Energy Star, Plug and Play DDC 1&2B |
| Maintenance and Cleaning | Unplug the power before cleaning. Use a soft dry cloth, do not spray liquid directly onto the screen. |
| Safety | Do not obstruct ventilation slots. Do not disassemble the monitor. Unplug if smoke or abnormal noise occurs. |
Frequently Asked Questions - LM1541 Emprex
User questions about LM1541 Emprex
0 question about this device. Answer the ones you know or ask your own.
Ask a new question about this device
Download the instructions for your Monitor in PDF format for free! Find your manual LM1541 - Emprex and take your electronic device back in hand. On this page are published all the documents necessary for the use of your device. LM1541 by Emprex.
USER MANUAL LM1541 Emprex
Color TFT LCD Monitor
User's Manual
※ Important Notice : Please read this manual carefully.
Contents
Precaution....2
Package Contents....2
English....3
Français....9
Deutsch....15
Italiano....21
Español....27
Nederlands....33
Polski....39
Portuguese....45
Precaution
Read all of these instructions and save this manual for later use. Follow all warnings and instructions on the product.
- Do not cover or block the ventilation holes in the case.
- Do not insert sharp objects or spill liquid into the LCD monitor through the cabinet slots; this may cause accidental fire, electric shock or failure.
- Unplug the unit when not in use for an extended period of time.
- Do not attempt to service this product yourself, as opening or removing the cover may expose you to potential electric shock. Only a qualified technician should service this product.
- Do not touch the screen directly with your fingers as it may damage the screen; the oil from your skin is difficult to remove.
- Do not apply pressure to the screen, the LCD is very delicate.
- Keep the monitor away from extreme heat, cold or humid places.
- Do not place directly under sunlight, dusty surroundings or near equipment, which may generate strong magnetic fields.
Product Description
For 15.4"LCD monitors: The native resolution of the LCD panel is 1280 X 800.
Package Contents
Please check the TFT-LCD Monitor Package to make sure it contains the following items:
LCD Monitor

natural_image
Line drawing of a flat-screen computer monitor with a circular base (no text or symbols)Power Cord
VGA Cable
Audio Cable
Users Manual
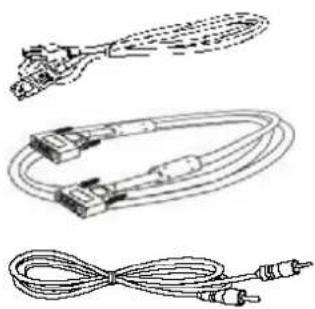
natural_image
Three types of cables with connectors and connectors, no text or symbols visible
INTRODUCTION
Thank you for purchasing this LCD monitor produced by our company. This monitor uses a TFT (thin film transistor) liquid crystal display (LCD) panel, and it's designed with high quality and highly efficient production technology to provide a more professional and consistent image quality to the user. Besides, this TFT LCD monitor is designed to save space and to offer different display positions, complying with the living space of modern age. Please read the instructions and precautions in this booklet before you start to use it.
Features
Uses TFT (thin film transistor) active matrix color LCD (liquid crystal display) panel. Offers high resolution image.
Elegant ultra-slender with small footprint saves more space for users.
Complies with the latest standard of European ergonomics.
15° forward and backward tilt flexibility lets you adjust to the most favorable angle.
Low power consumption, low heat and zero radiation emission protect the user.
Check Package Content
After you open the package, make sure the following items are included. If anything is missing or damaged, please contact your local dealer or supplier:
TFT LCD Monitor
User's Manual (including specifications)
Power Cord
VGA Cable
Audio Cable
Precautions
Please read the following instructions carefully first to prevent unnecessary hazards. This manual should be retained for future reference.
Before you clean or move this monitor, make sure it is power off and the AC power cord is unplugged, so as to avoid accidental injury to the monitor or human body.
Please keep the radiator at the back of the monitor unobstructed.
Keep the monitor away from any liquid.
Some of the components and parts carry high voltage. To avoid unnecessary danger, please don't disassemble the monitor yourself.
If smoke or cacophony comes out from the monitor, please disconnect the power immediately and get in touch with your local dealer.
Please don't apply pressure onto the screen panel to avoid permanent damage.
Before you clean this monitor, please make sure the AC power cord is removed first, and please don't spray liquid cleaner onto the unit directly. Clean the screen with a slightly dampened rag gently without applying excess pressure.
Installation of the Monitor
Please switch off the power supply to the computer and its peripheral equipments first.
-
Connect the power adaptor to the AC power input socket at the back of the unit, and connect the other end to the AC power socket.
-
Connect the VGA Analog Signal Cable to the 15-pin connecting port of the unit.
-
Turn on the screen and the power supply of the computer.
Front Control Panel :
Tilting and Swiveling of the Screen
You can tilt the panel up or down by 15^ .
OSD (On-Screen Display) Adjustment Control
Step 1: Press "menu" to activate the OSD on-screen display menu.
Step 2: Press “+” or “−” key to move the cursor to select the function.
Step 3: Press "auto" to choose the option to adjust
Quick Menu Functions
You can press "+"or"-"to adjust the volume
 | Brightness | To adjust the brightness of the background. |
 | Audio | To adjust the volume of the speakers. |
 | Color Temperatur | To adjusts the parameters for red, green and blue colors on the screen. |
 | Image Config | To adjust the vertical and horizontal positions of the screen. |
 | OSD Adjustment | To set the position of OSD display status automatically. |
 | Language | To select English, French, German, Italian, Spanish, and Traditional Chinese for OSD language display on your own preference. The user can select a preferred language. |
 | Exit | To quit from the OSD Menu. |
Secondary Menu Settings
4

| Function | Description | |
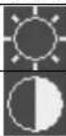 | Use “+” or “-” key to adjust the numerical level of brightness (0~100).Press “auto” key to save and menu key return to the previous page. | |
| Press “+” or “-” key to adjust the numerical value of contrast (0-100). Press“auto” key to save and menu key return to the previous page. | ||
 | Back to the previous menu. | |
Audio | To adjust the volume of the speakers.[IMAGE] | |
| Function | Description | |
 | Use “+” or “-” key to adjust the volume, and press “auto” key to save andmenu key return to the previous page. | |
 | Press “auto” key to turn the speaker on or off. | |
 | Back to the previous page. | |
| Temperature | Use “+” or “-” key to choose the function, and press “auto” key to makeadjustment.[IMAGE] | |
  | ||
  | Use “+” or “-” key to select a function, and press “auto” key to enter theadjustment menu. After the adjustment is finished, press “auto” key to saveand menu key exit.[IMAGE] | |
 | Press the “auto” key to adjust H/V positions, clock and phase automatically. | |
 | When there is distortion between characters, use “+” or“-” key to correct this problem. | |
 | Use “+”or “-” key to adjust the ADC sampling real image value. | |
 | Use “+”or “-” key to move the screen left or right. | |
 | Use “+”or “-” key to move the screen up or down. | |
 | Back to the previous menu. | |
OSD Display Adjustment | Use “+” or “-” key to select a function, and press “auto” to adjust. After the adjustment is done, press “auto” key to save and menu key to return to the previous page.[IMAGE] | |
| Function | Description | |
 | Use “+” or “-” key to move the OSD display position to the right or the left of the screen. | |
 | Use “+” or “-” key to move the OSD display position up or down the screen. | |
 | Use “+” or “-” key to set the OSD off time and press “auto” key to save it. | |
 | Sets the system to factory default value. | |
 | Back to the previous page. | |
Language | Use “+” or “-” key to select a language of OSD menu, and press “auto” key to confirm.[IMAGE] | |
OSD Display
Adjustment
Language
6
Power Saving Mode
This monitor meets the criterion of NUTEK/TCO and VESA DPMS mode for display power management. It has a effective built-in power management system that reduces power consumption automatically when the PC is not used.
Display Mode Support
Mode
Power Consumption (watts) LED Indicator
Normal
15.4" 35W (typical)
Green
Power Saving Mode
<3W
red
There are 7 preset modes for this monitor. The following modes are preset as factory defaults.
| No. | Description | H-Freq. (KHz) | V-Freq. (Hz) |
| 1. | VGA640×400 | 31.480 | 70.000 |
| 2. | VGA640×480 | 31.649 | 60.000 |
| 3. | VGA720×400 | 37.469 | 70.000 |
| 4. | VESA 800×600 | 35.156 | 56.250 |
| 5. | VESA 1024×768 | 48.363 | 60.000 |
| 6. | VESA 1024×768 | 56.476 | 70.000 |
| 7 | VESA 1280×800 | 49.702 | 59.810 |
Preliminary Troubleshooting
If the monitor does not run normally, please use the following table to resolve the most common and possible causes of the problem before you call the service personal. If the problems still can't be solved, please contact the local dealer for assistance.
| Symptom | Correct Action |
| No Display on Screen | 1. Check the connection of the VGA Signal Cable.2. Check to make sure the power is turned on, or that the power adaptor is on.3. Check whether the power cord of TFT LCD monitor is loose. |
| Fuzzy image. | 1. The power supply may not be stable.Try connect the unit to another power socket.2. Move the LCD monitor away from magnetic objects. |
| No sound from the speakers. | 1. Please check if the audio cable is plugged in.2. The speakers may have been muted or the volume adjusted to the minimum. Rectify the situation. |
Specifications
| Panel | 15.4" |
| Ultra-slender color TFT diagonal active matrix panel. | |
| Resolution | 1280 x 800 (WXGA) |
| Display Area (H x V) | 331.2 mm x 207.0 mm |
| Pixel Pitch | 0.2588 mm (Horizontal) x 0.2588 mm (Vertical) |
| View Angle | 50° Vertical / 90° Horizontal |
| Input Signals | Vertical Frequency: 31.47 to 80kHzHorizontal Frequency: 56 to 60 Hz |
| Analog RGB: 0.7 Vp-pSync: 5V (pos./net. Separate) | |
| Maximum Input Video Band Width | 135 MHz |
| Color Display | 262K colors |
| Signal System | D-sub |
| Luminance (typical) | 180 cd/m2 |
| Contrast (typical) | 400:1 |
| Response Time (typical) | 16 msec |
| Input Connectors | 15-pin D-sub Type, a power input socket and an earphone socket. |
| Audio Output | Built-in 2W/8ohmx2 Speakers. |
| Maxim Power Consumption | 35 watts (typical) |
| Power Management | VESA DPMS standard, EPA/Energy Star compliant |
| PnP Compatibility | VESA DDC 1& 2B standards compliant |
| EMI Ergonomics | FCC, CE(CISPR-II) |
| External Dimension | 435(L.)X145(W)X310.(H) |
| Temperature | Operating: 0°C to 50°C Storage: -20°C to 60°C |
| Humidity | Operating: 25% to 90% RH Storage: 0% to 90% RH |
INTRODUCTION
Stromsparmodus
Display Mode Support