Therapy Air ION PWC570 - Air purifier Zepter - Free user manual and instructions
Find the device manual for free Therapy Air ION PWC570 Zepter in PDF.
Frequently Asked Questions - Therapy Air ION PWC570 Zepter
User questions about Therapy Air ION PWC570 Zepter
0 question about this device. Answer the ones you know or ask your own.
Ask a new question about this device
Download the instructions for your Air purifier in PDF format for free! Find your manual Therapy Air ION PWC570 - Zepter and take your electronic device back in hand. On this page are published all the documents necessary for the use of your device. Therapy Air ION PWC570 by Zepter.
USER MANUAL Therapy Air ION PWC570 Zepter
Thank you for purchasing ZEPTER high-efficiency purification system Therapy Air iOn. 6-stage purification system including negative ion generator generating over 1 million negative ions eliminates a wide range of various pollutants and brings clean air to your home.
BREATHE SAFELY AND HEALTHY WITH THERAPY AIR ION
TherapyAir
CONTENTS
- About Instructions for Use 6
- Safety Instructions 6
3.Disposal 11
3.1 Packaging 11
4.Description of the Device 11
4.1 Packaging content 11
4.2 Device Description 12
4.3 Description of Programmes 14
- Operating Instructions 15
5.1 Indicators 15
5.2 Filters 16
5.3 Before First Use 18
5.4 Instructions for Use 19
6.Cleaning 22
7.Filter Replacement 24
8.Wall Mounting Option 27
9. Technical Data 28
9.1 Labels on the Device 29
10.Trouble Shooting Guide 30
11.Declaration of Conformity 31
12.Warranty 32
1. ABOUT INSTRUCTIONS FOR USE
Before using the appliance for the first time, read the Instructions for Use carefully and ensure that you comply with the safety instructions!
The appliance must only be used as described in these instructions. The manufacturer is not liable for damages arising from any use contrary to the intended purpose. Keep these instructions for future reference.
If you pass the appliance on to someone else, please include these instructions.
2. SAFETY INSTRUCTIONS
Warnings
The following warnings will be used in this operating instruction:

DANGER! Risk of electric shock!

CAUTION: Failure to observe this warning may result in an injury or material damage
NOTE: Circumstances and specifics that must be observed when handling the appliance

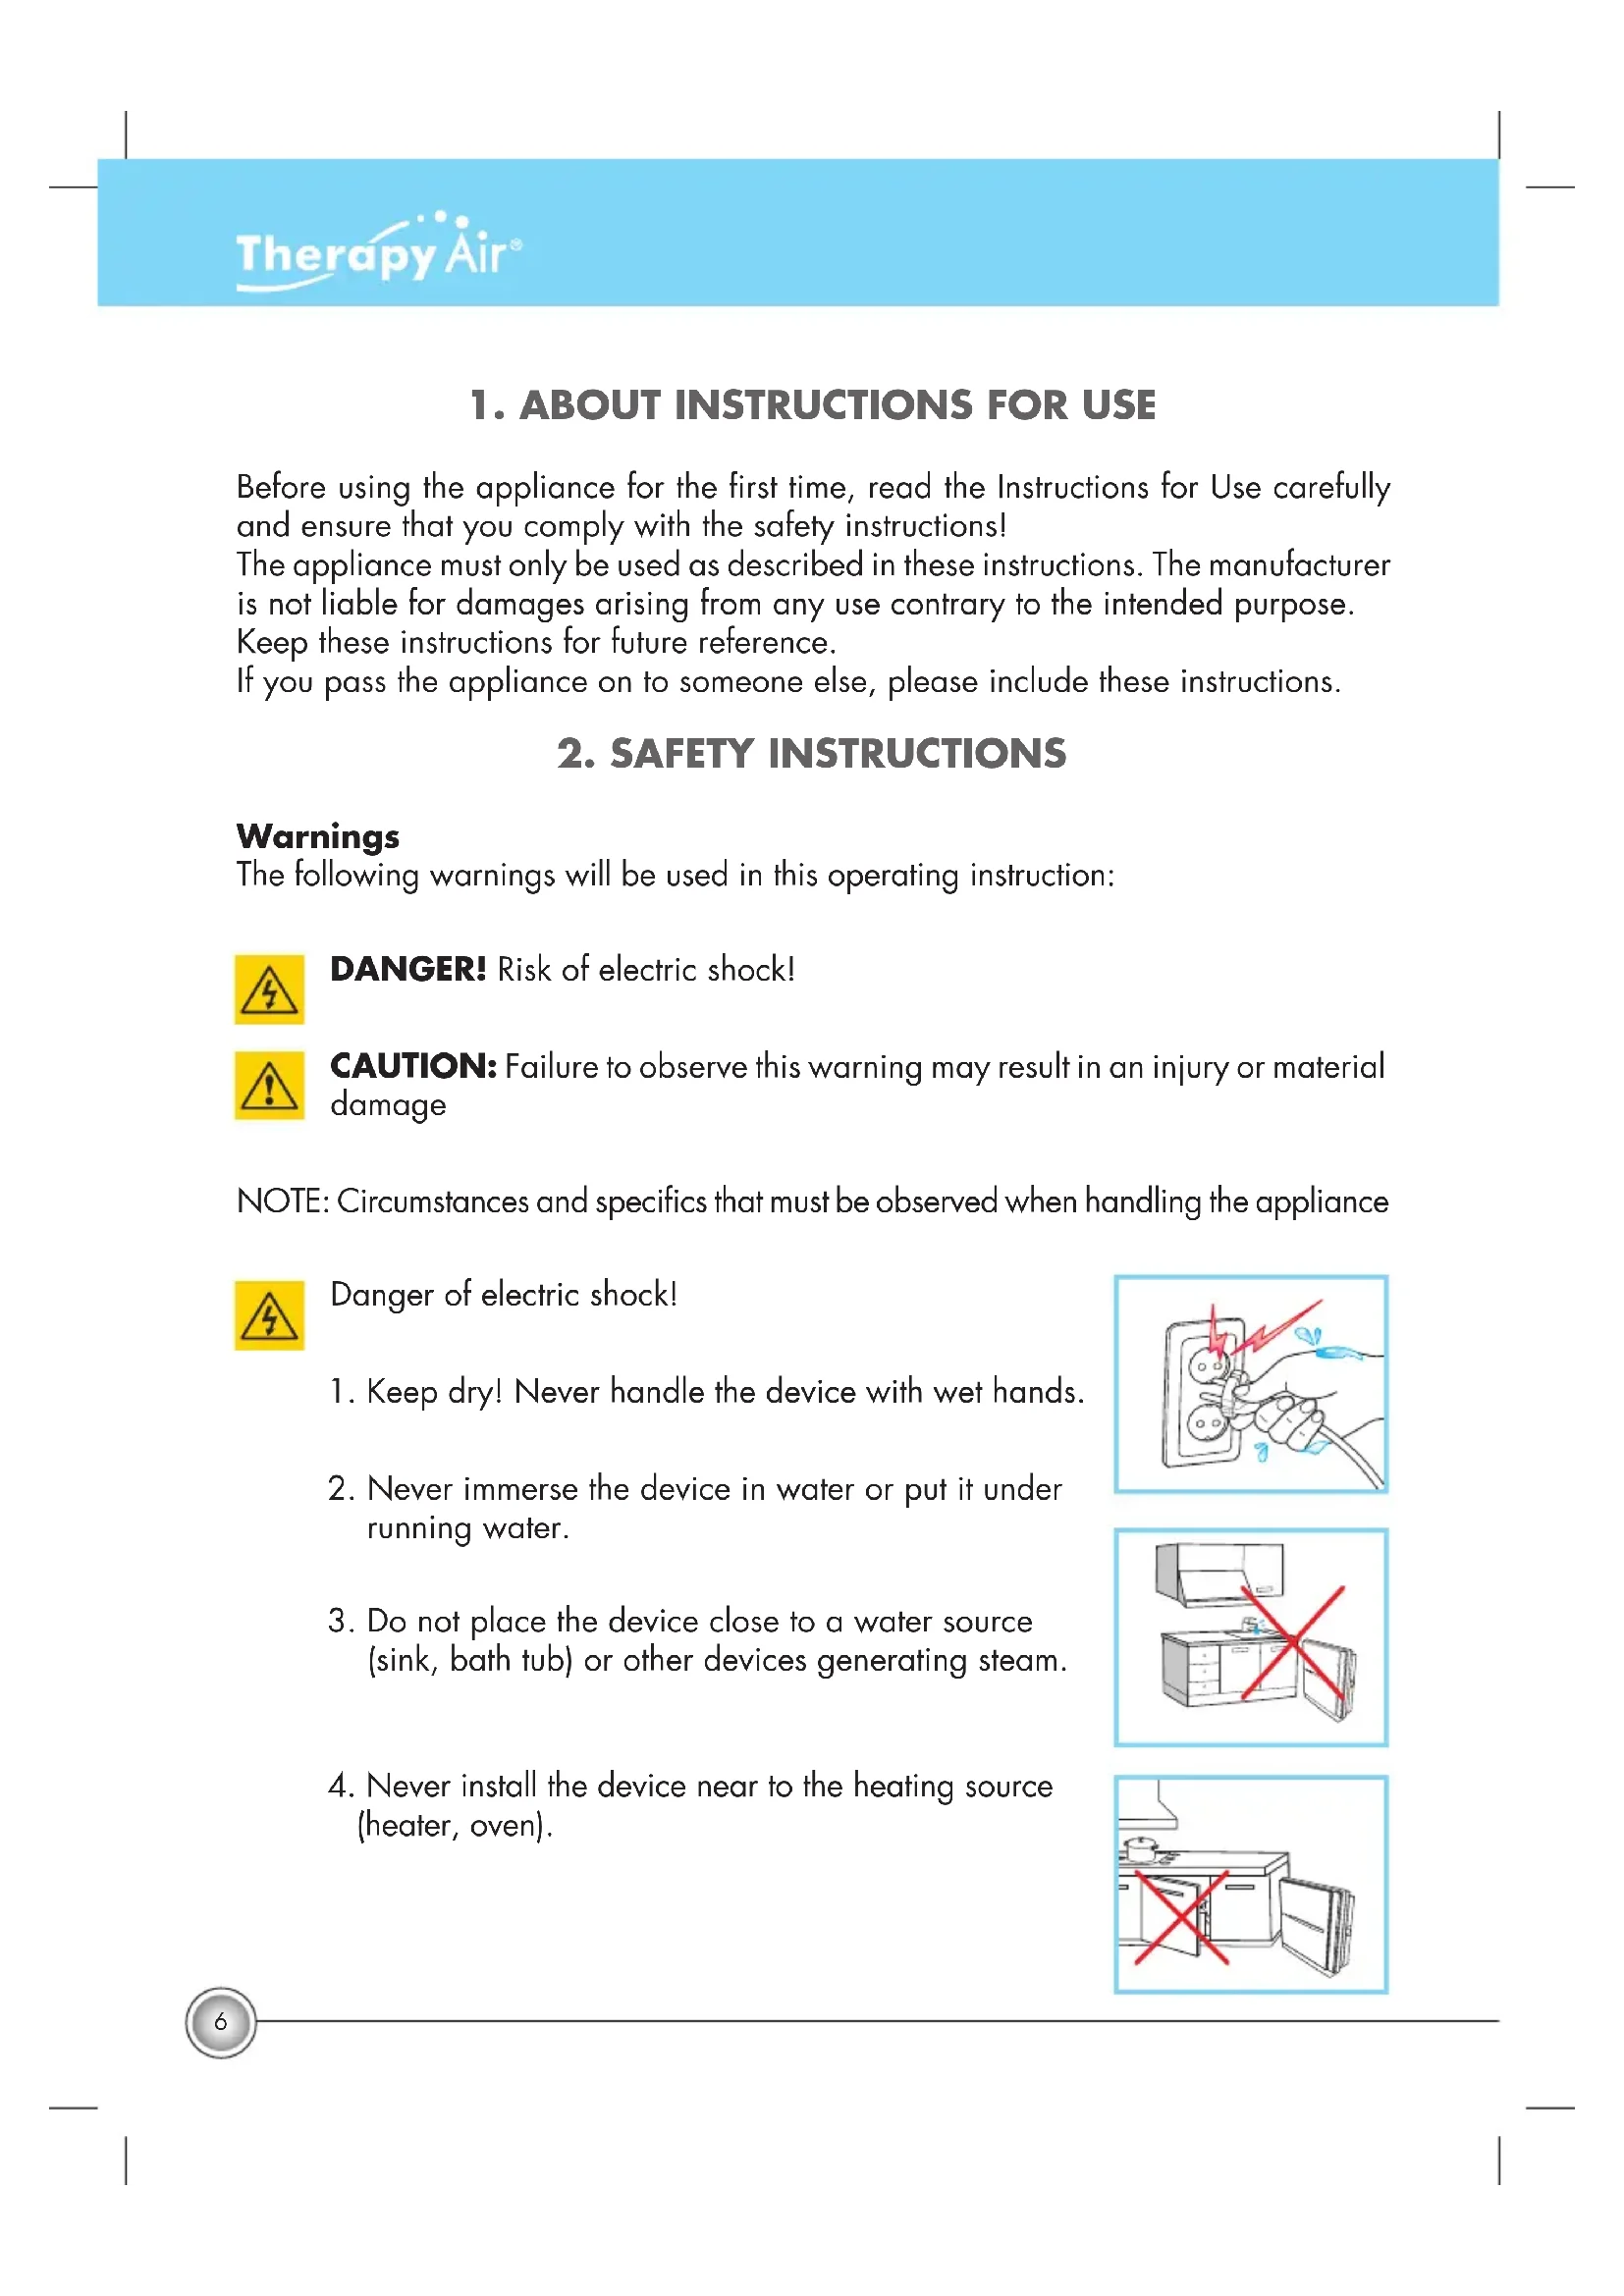
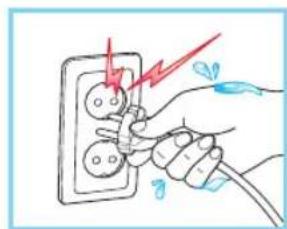
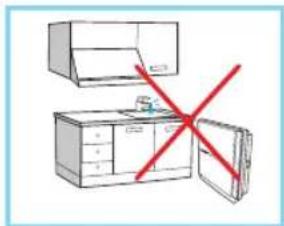
Danger of electric shock!
- Keep dry! Never handle the device with wet hands.
- Never immerse the device in water or put it under running water.
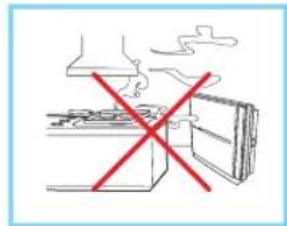
- Do not place the device close to a water source (sink, bath tub) or other devices generating steam.
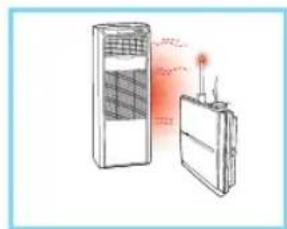
- Never install the device near to the heating source (heater, oven).
SAFETY INFORMATION
EN
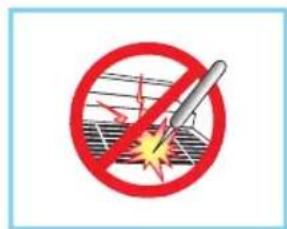
- Do not put candles, cigarettes or other flammable object on the device.
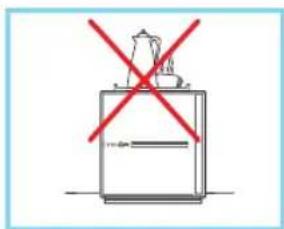
- Never place containers with water or metal or heavy objects on the top of the device.
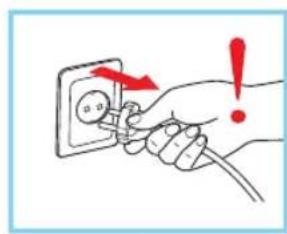
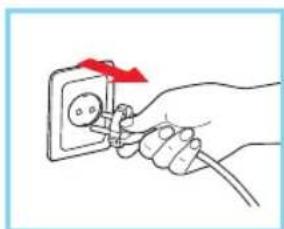
- Never pull on the power cord when unplugging the appliance.

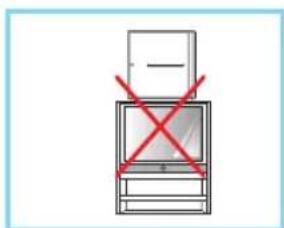
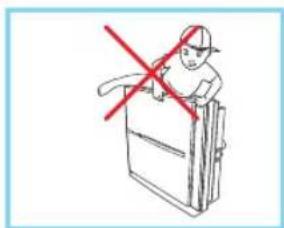
- Never place the device on the top of other electrical appliance e.g. TV set, heater.
- Do not place heavy objects on the power cord.
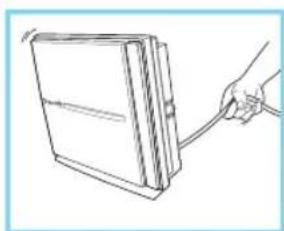
- Never lift the device by pulling the power cord.
TherapyAir
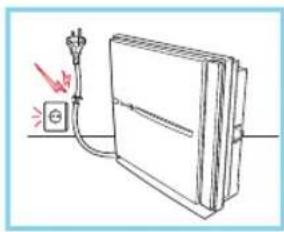
- The appliance is designed to work with alternating current only. Check that the voltage on your appliance's data plate corresponds to your domestic power supply.
- Always unplug the appliance from the power supply if you intend to leave it unattended and before assembling, dismantling and cleaning it.
- If the power cable is damaged, do not use the appliance. The power cable must be replaced by the Zepter authorised service centre to prevent all hazards.
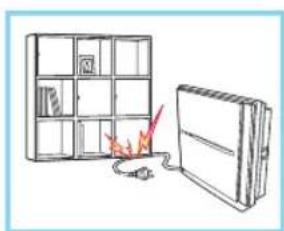
- The power cord must be kept out of the reach of children and must not be placed near or come into contact with the hot parts of the appliance, sources of heat or sharp edges.
- Never use the appliance outdoors. Avoid exposure to severe weather such as rain, hail or wind.
- This appliance may be used by children as long as they are at least 8 years old, they are properly supervised and have received instructions as to the safe use of the appliance, and as long as they understand the implicit risks.
- Children shall not play with the appliance.
- This appliance may be used by persons with reduced physical, sensory or mental capabilities, or by persons with little or no knowledge of the appliance, as long as they are under proper supervision and have received instructions as to the safe use of the appliance, and as long as they understand the implicit risks.

WARNING!
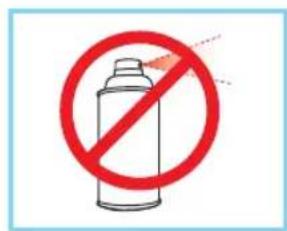
- Do not use the device in the presence of oily sprays.

- Do not spray flammable substances such as insecticide or perfumes onto appliance.
- Do not use the device in the presence of heavy smoke, acrid fumes or oils as it may break down.
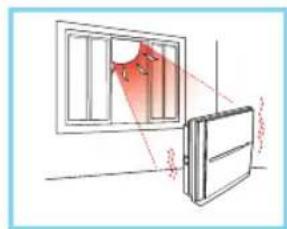
- Do not expose the device to the direct sunlight as it can cause discolouration or deformation of the plastic parts.
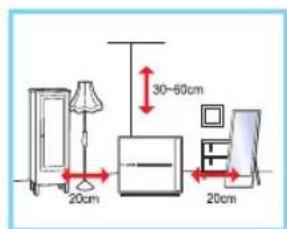
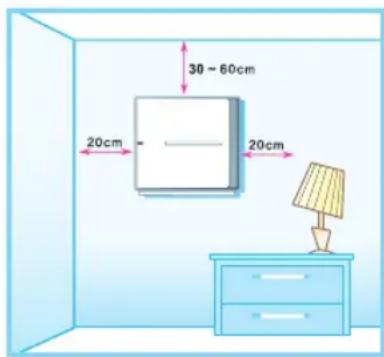
- Position the appliance 20~cm away from the side walls, cupboards or other object and 30-60 from the ceiling.

DANGER!
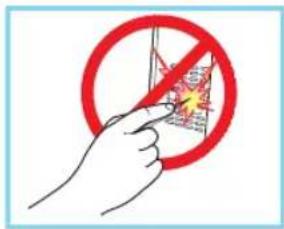
- Danger! Do not insert any object or fingers into air inlets and outlets.
- Do not insert any object or fingers into the dust sensor.
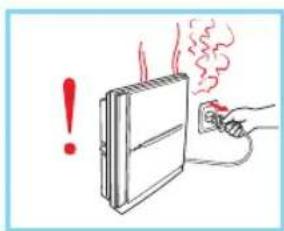
- Switch off the device immediately if you sense unusual smell or hear unusual noise. Immediately contact the Zepter Service Centre.
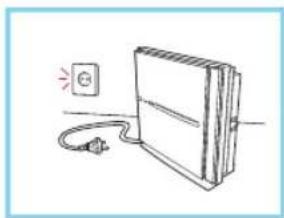
- If the device is not going to be used for a long time, unplug it from the mains.
- Unplug the device before cleaning or changing the filters.
3. DISPOSAL
At the end of the Therapy Air iOn lifetime, we recommend not to dispose of the appliance as ordinary waste, but leave it with personnel qualified to collect such material. In this way, it will be properly disposed of and recycled. This is a valuable aid for safeguarding our environment!
3.1 Packaging

If you want to dispose of the packaging, make sure you comply with the environmental regulations applicable in your country.
4. DESCRIPTION OF THE DEVICE
4.1 Packaging Content
The main device
The remote control (2 AAA batteries included)
- User manual
- 5 Filters - antistatic filter, antibacterial filter, Hepa H13 filter, antiallergic filter, activated-carbon filter.

CAUTION Filters are packed in protective polybags and the polybags must be removed before first use! If you do not do so, it can result in damage of the device.
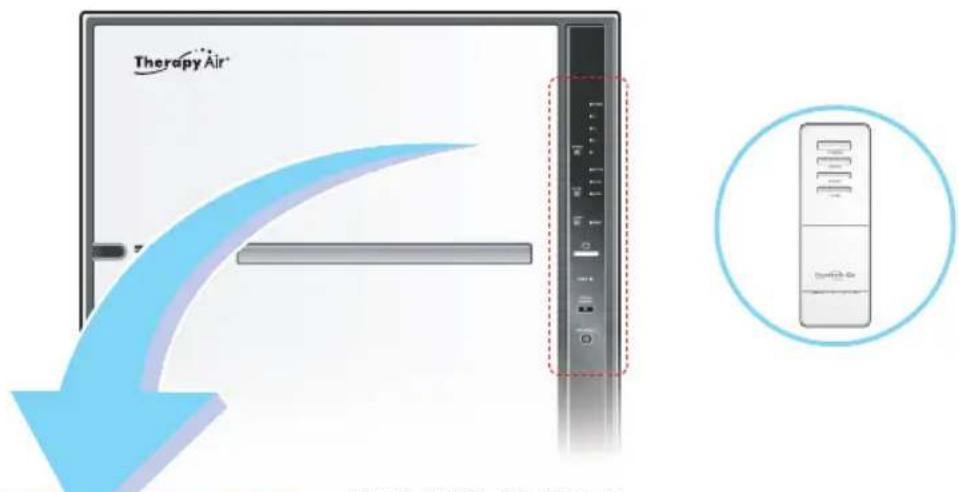
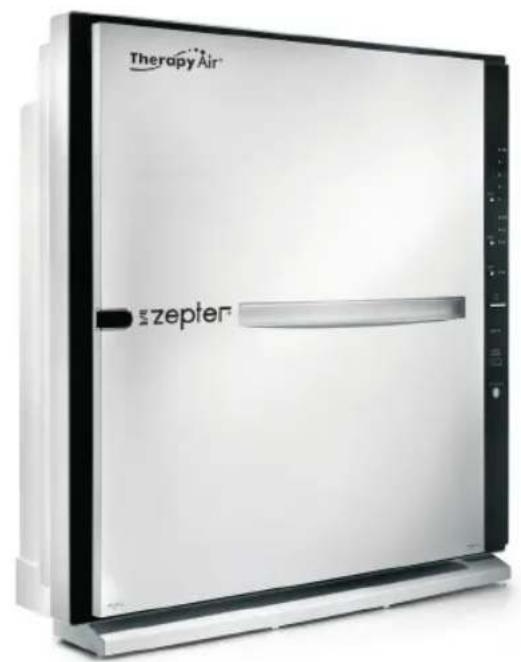
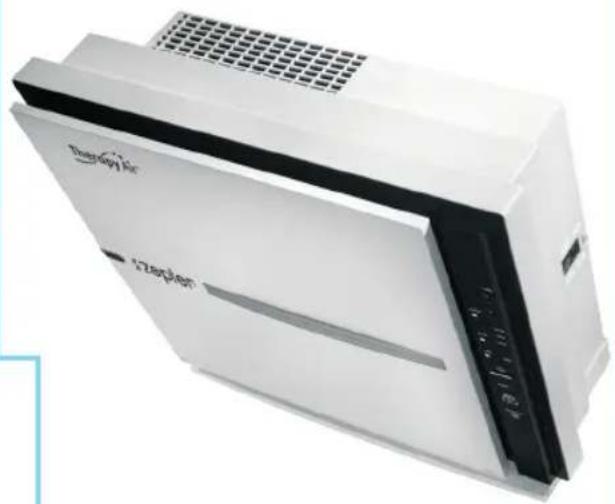
4.2 Device Description
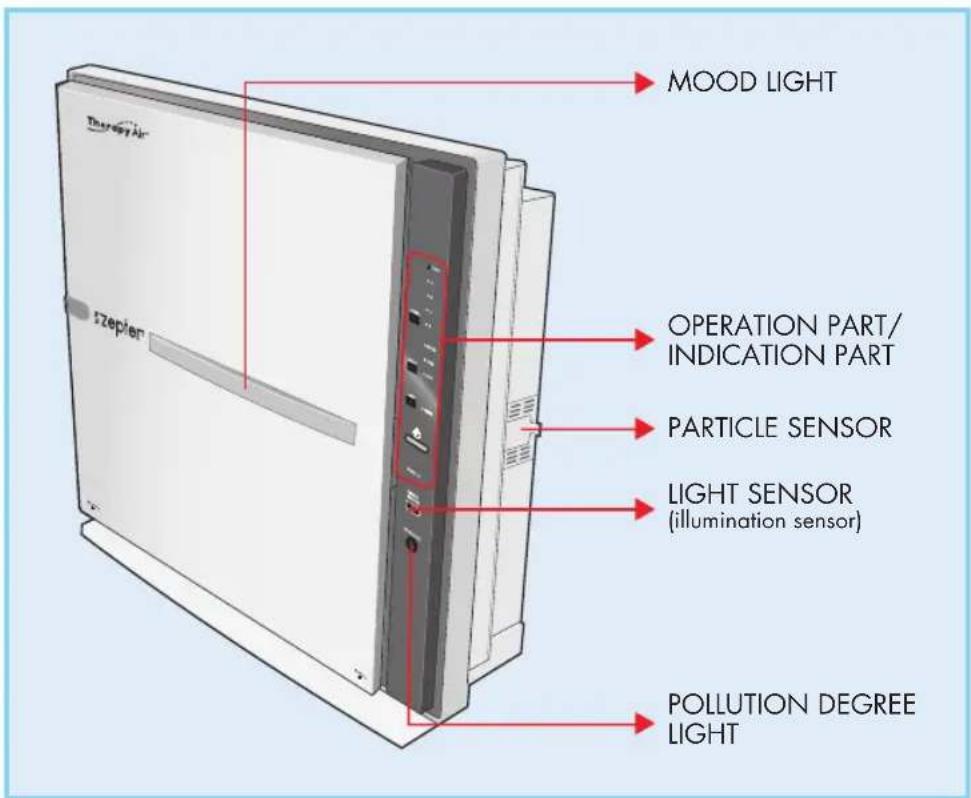
FRONT
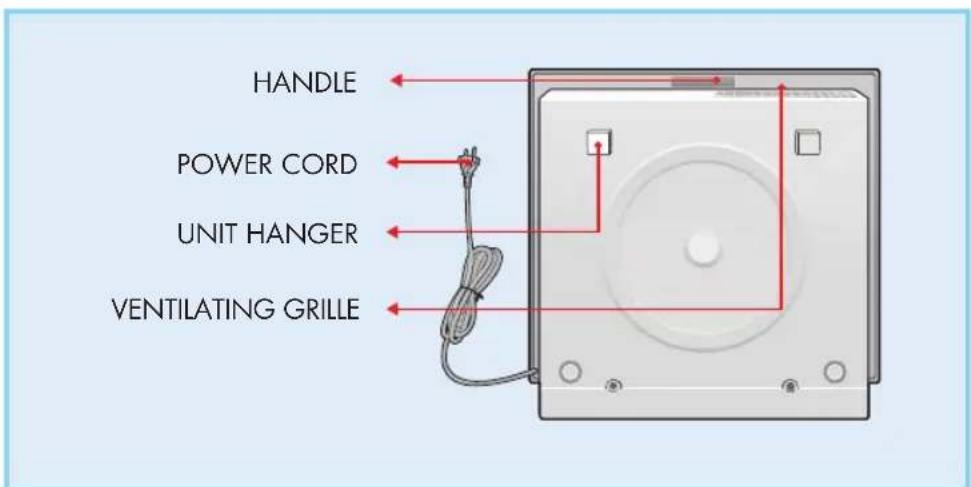
REAR
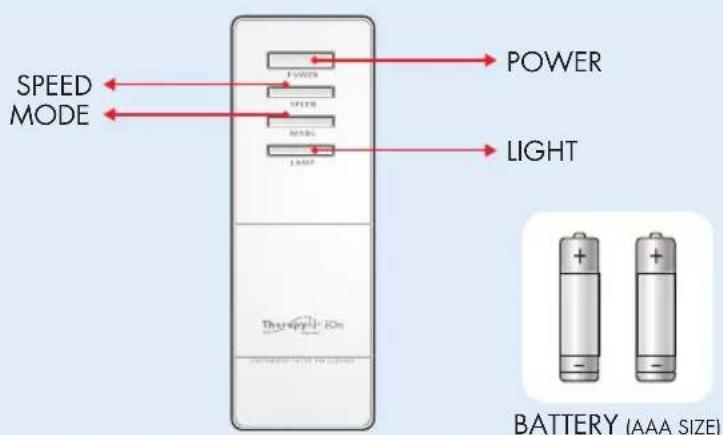
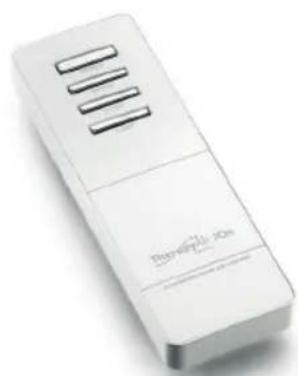
REMOTE CONTROL
4.3 Description of Programmes
TURNING ON/OFF
You can operate the appliance manually, by pressing the ON/OFF switch.
Initially, the appliance functions in the automatic mode. When you switch it off and then on manually, it will function in the last mode that you selected.
SPEED
By pressing this button, you set the air flow speed.
positions: 1 - 2 - 3 - 4 - turbo). Automatic mode and children's mode are available in SPEEDLEVELS from 1 to 4.
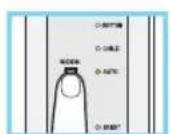
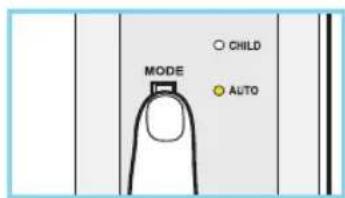
MODE
By pressing this button, you can select the operational mode:
Automatic mode;
Children's mode;
Rhythmic mode.
MOOD LIGHT
This light indicates the current operational mode. The light can be set manually. When the appliance is not working, the illumination and light are automatically set.
5. OPERATING INSTRUCTIONS
5.1 Indicators
Indicators (lights) enable you to follow and control the appliance's functions.
Air flow speed indicator (Speed Light)
The air flow speed is set automatically in the automatic mode/children's mode in positions 1 to 4, depending on the level of air pollution. You can manually set the speeds from 1 to TURBO. The light, the air flow speed indicator, indicates the volume of air running through the appliance.
BRIGHT - Illumination Light
If you select the night mode and the room is lit, the variable light will turn off. If the room is not lit, the intensity of the light emitted will be reduced by 50% . The light is always turned off when other operational modes are selected, but you can set the variable light manually.
RHYTHM - Rhythmic Cleaning Light
With rhythmic air cleaning, pollutants are removed efficiently and the air flow speed is controlled. The light changes:
Blue - pink - violet - red
- CHILD - Child Mode Light
When you select the operational mode, the air flow speed is set automatically. The volume of air is lower than usual and the light turns violet.
-
AUTO - Auto Mode Light indicates that the appliance is in the automatic operational mode and the light turns blue.
-
SLEEP - Sleep Light - This light indicates the night (quiet) mode.
-
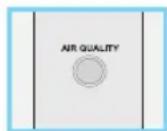
AIR QUALITY - Air Pollution Degree Light
This light indicates the current quality of the air in the room:
- Very clean - blue
- Clean - pink
- Normally clean - violet
Unclean-red
The Variable light (Mood Light) automatically turns on when you switch the appliance on and the colour changes depending on the operational mode.
Automatic / manual mode: blue
Children's mode: violet
- Rhythmic mode: blue - pink - violet - red
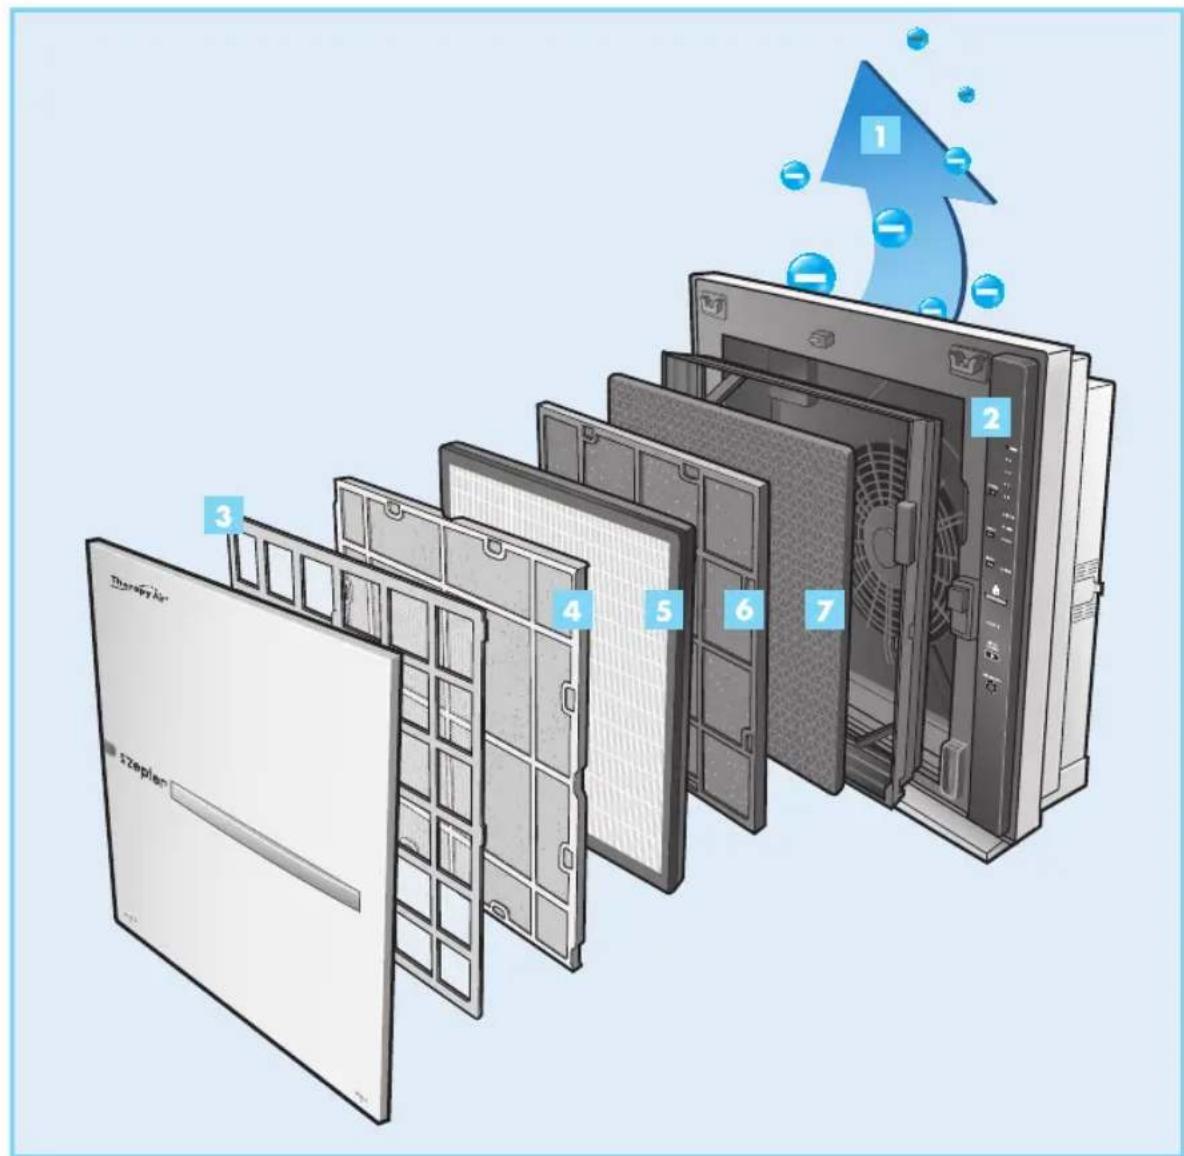
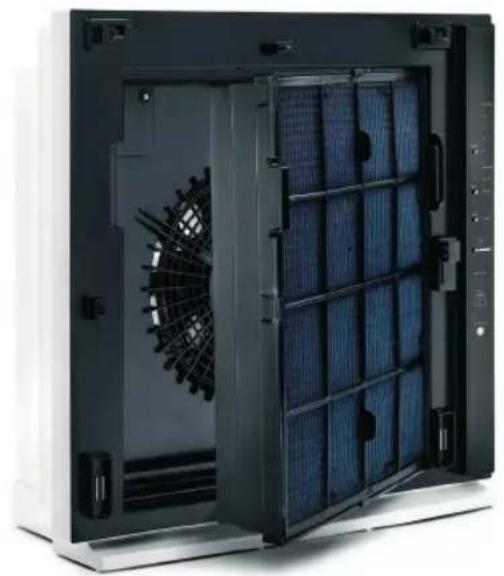
5.2 Filters
3
4
5
6
7
NEGATIVE ION
A negative ion generator produces a vast quantity of negative ions, letting you enjoy really fresh air.
2 FILTER CASE
Pre-Electrostatic, Medium, HEPA, AG Allergy, AC Deodorant filters are installed.
3 ANTISTATIC FILTER (Pre-Electrostatic Filter)
Removes large particles of dust, mold, hairs, dandruff, pet hairs, etc.
4 ANTIBACTERIAL FILTER (Medium Filter)
Removes the remaining, small particles of dust, bacteria bigger than 1 m (micron), pollen etc. Simultaneously it protects the HEPA filter, which is the next filter.
HEPA FILTER (HEPA Filter)
The class of our HEPA filter is H13, which removes 99.97% of airborne particulates like: dust, pollen, mold spores, and smoke particles, dust mite feces, and even off gas generated by fireplaces and automobiles.
6 ANTIALLERGIC FILTER (AG Allergy Filter)
A mixture of silver and apatite (a mineral) and an antibacterial agent that is especially effective in combating the bacteria Legionella (Legionella bacillus), which is particularly dangerous for babies. Inside the filter is an extract obtained from the leaves of ginkgo* which is used to eliminate the causes of allergies, flu viruses and bacteria.
(*Ginkgo biloba, the oldest known plant, has very great curative powers and is used for treating asthma, diseases of the lungs (bronchi) and also for improving circulation).
7 ACTIVATED-CARBON FILTER (AC Deodorant Filter)
Eliminates the smell of food, toxic gases and all odours on account of its tremendous absorbent capacity.
Only completely clean air can pass through the barrier which is impenetrable for the pollutants. Finally, the purified air enters the module containing the incorporated ion generator. There it will be further enriched with negative ions that will continue to fight all air pollutants and positive ions emitted by household appliances and other sources.
5.3 Before First Use
Therapy Air Ion is intended for home use only. It is strongly recommended to close the room where the air should be purified.
Place the device safely in the room where you want to purify air. Follow all safety precautions!

WARNING!
Filters are packed in protective polybags and the polybags must be removed before first use!


CAUTION!
Pay attention to the position of the anti-allergic filter. It must be positioned with the unwoven side towards the front side of the device.
- Pull the bottom of the front cover and lift it. Remove the filter unit.
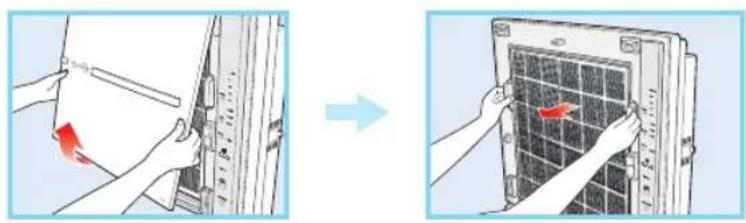
- Unpack the filters, remove the packaging. Insert the filters into the filter unit in the following order: Pre / Medium / HEPA / AG Allergy Shield / AC Deodorant

- Fix the frame first at the bottom of the appliance and then at the top. Put the front cover back into place on the appliance.
5.4 Instructions for Use
Automatic mode
When you turn the appliance on, the automatic operational indicator, a variable light, will begin to give off a blue light.
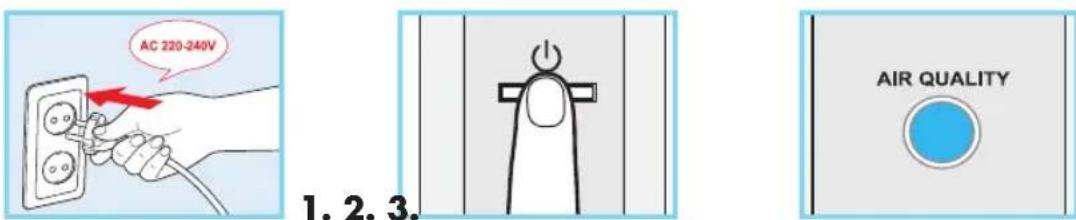
- Plug the appliance into a power socket with the appropriate voltage (220-240 V).
- Press the button to start the appliance.
- Depending on the quality of the air in the room, the air flow speed will change automatically from position 1 to position 4. The automatic operational indicator turns on and the variable light will give off a blue light. The appliance will initially operate automatically and then in the last mode selected.
Manual mode
Plug the appliance into a power socket with the appropriate voltage (220-240 V).

- Press the button to start the appliance and then the speed button; the variable light gives off a blue light.
TherapyAir
- Press the button to start the appliance. After you turn it on, the appliance will initially operate automatically and then in the last mode selected.
- Press the speed button. The appliance begins to operate in the manual mode.
- Select a speed by pressing the SPEED (air flow speed) button:
Position 1 - Position 2 - Position 3 - Position 4 - TURBO
Programming the operational mode
Plug the appliance into a socket with the appropriate voltage (220-240 V).

- Press the button to start the appliance (POWER) and the button for operational mode selection (MODE).
- Press the button to start the appliance and it will initially operate automatically (AUTO MODE), and then in the last mode selected.
- Select an operational mode by pressing the mode button (MODE): AUTO - CHILD - RHYTHM (automatic / children's mode / rhythmic cleaning).
What is the quiet night mode?
Select the "automatic/children's mode" (AUTO / CHILD).
The appliance switches to quiet operational mode if it is in the dark for more than three minutes. It lowers the operational speed and reduces electricity consumption. The appliance will return to the normal operation mode if the room is lit.
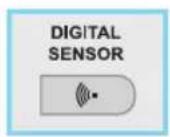
- The digital sensor (light sensor) detects the surrounding light and automatically switches the appliance to the quiet mode.
- The quiet operational mode is set when you select the "automatic /children's mode" (AUTO / CHILD) (not in the manual mode).

- The night indicator is activated as the quiet operational mode begins. If there is no lighting, the intensity of the variable light is reduced by 50% . The variable light ceases to shine, if the room is lit again.
Air pollution sensor
The air quality sensor is set at standard sensitivity. You may have to adjust the sensor sensitivity if the particle sensor indicates "UNCLEAN" even after two hours of functioning continuously, or "VERY CLEAN", although you feel that the surrounding air is unclean.
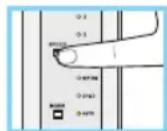
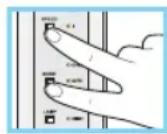
- Simultaneously press the speed button and the operational mode button (SPEED and MODE) and hold for more than two seconds.
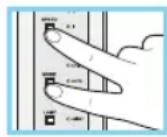
- The air pollution indicator (AIR POLLUTION LEVEL) will turn off. It will reactivate for a second and then turn off again.
- Press the speed button (SPEED) to select the sensor. The operational mode indicator (MODE) will be activated for a second and show the sensitivity levels from which you can choose:
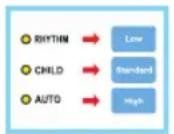
Rhythmic mode - low sensitivity (RHYTHM: LOW)
- Children's mode - standard sensitivity (CHILD: STANDARD)
- Automatic mode - high sensitivity (AUTO: HIGH)
Simultaneously press the speed button and the operational mode button (SPEED and MODE) and hold for more than two seconds to maintain the selected sensitivity.
- If no button is pressed for more than 10 seconds, the sensor sensitivity will be automatically retained.
Variable light (Mood Light)
This light changes colour and indicates the current operational mode.
- The mood light is automatically turned on when the appliance starts to operate. Press the mood light button to turn it on/off.
- Turn the light on/off (LIGHT: ON/OFF), when you select the quiet night mode.
- Press the mood light button and hold for 2 seconds. Then the light will turn on and the operational mode indicator (MODE) will turn off.

TherapyAir
- Press the light button and hold for 2 seconds.
- The light indicator is activated.
- Quiet night mode.
-
When the quiet night mode is set, the variable light (MOOD LIGHT) is automatically turned off.
-
Press the light button and hold for 2 seconds again. The light will turn off and the quiet night mode will continue.

- Press the light button and hold for 2 seconds.
- The light indicator is turned off.
- Quiet night mode.
-
When the quiet night mode is set, the intensity of the light emitted is reduced by 50% .
-
The mood light shines in different colours depending on the operational mode selected:
-
Automatic /manual - blue
- Children's mode - violet
- Rhythmic mode
- blue
- pink
- violet
- red
The mood light is reduced by 50% if the quiet night mode is selected.
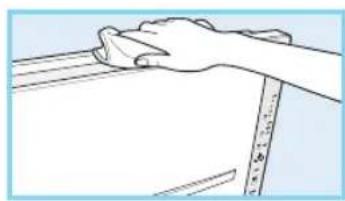
6. CLEANING

ATTENTION! Always unplug the appliance from the power socket before cleaning.
Cleaning the appliance casing
- Use a dry, soft cloth to clean the appliance.
If necessary, use a slightly damp cloth, but no polishing agents.
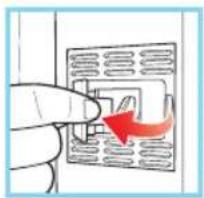
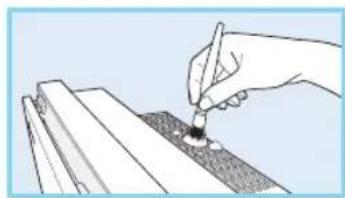
Cleaning the particle sensor
(once every two months)
- Open the cover of the particle sensor on the right side of the appliance. Use a slightly damp cotton bud (Q-tip) to clean the lens and collect any remaining moisture.
Cleaning the air inlets and outlets
Clean the air inlets and outlets with a soft brush. Take care not to drop the brush into the appliance.
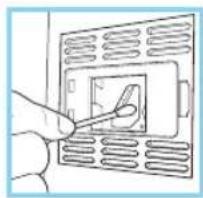
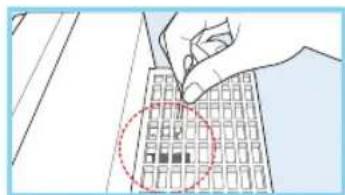
Cleaning the negative ion generator
(once every two months)
Use a dry cotton bud (Q-tip) to dust the tag.
Take care not to drop the cotton bud (Q-tip) into the appliance.
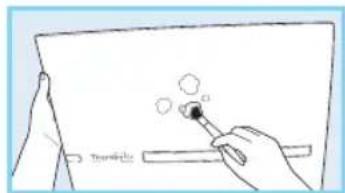
Cleaning the front cover
- Remove the front cover of the appliance and use a dry cloth or soft brush to dust it.
If necessary, use a slightly damp cloth, but no polishing agents.
Cleaning the lens on the back of the cover
(once every two months)
Remove the front cover of the appliance and use a dry cloth, a soft brush or a cotton bud (Q-tip) to dust the mood light on the back of the front cover. If necessary, use a slightly damp cloth, but no polishing agents.
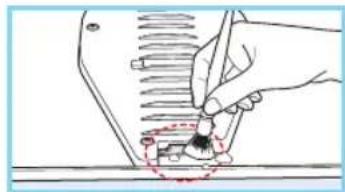
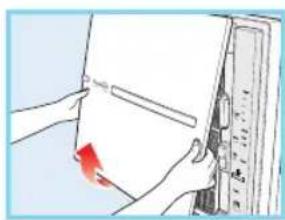
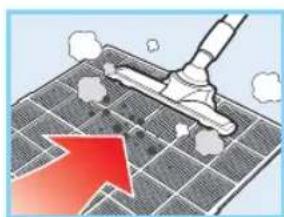
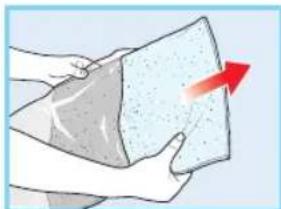
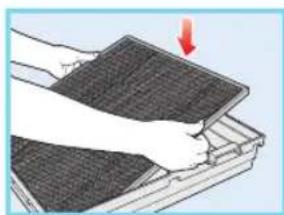
Cleaning the pre-electrostatic filter (once every 2-4 weeks)

1.2.3
TherapyAir
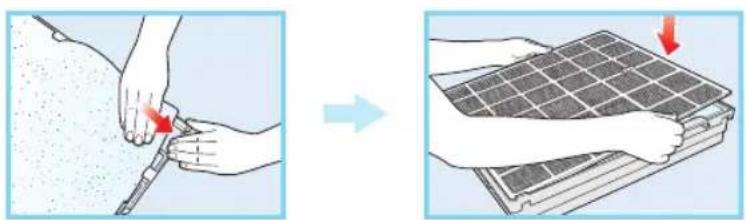
- Pull the lower end of the front cover to separate it from the appliance.
- Pull the filter out by the handle.
- Use a steam cleaner to dust the filter.
- Completely dry the filter before you insert it into the filter unit. Replace the unit in the appliance. Insert the independent filter into the filter unit by levelling the filter with the holders in the unit.
7. FILTER REPLACEMENT
The following filters have to be replaced regularly.
Therapy air filter set contains:
| FILTER SET | QUANTITY | FREQUENCY* ACTION | ||
| Antibacterial filter (Medium filter) | 2 pcs Every 6 months | Replacement | ||
| HEPA filter 1 pc Every 12 months | Replacement | |||
| Antiallergic filter (AG Allergy Filter) | 1 pc Every 12 months | Replacement | ||
| Activated-Carbon Filter (AC Deodorant filter) | 1 pc Every 12 months | Replacement | ||
- based on 24 hour/1 day automatic operation.

Antistatic filter (Pre-Electrostatic Filter) has to be cleaned once every 2 - 4 weeks. Please follow the cleaning instruction 6. CLEANING, Cleaning the Pre-Electrostatic filter.

Always unplug the appliance from the power socket before you clean and replace the filters.

The frequency with which filters need to be replaced will depend on the quantity of pollutants in the room.

Fix the unit first at the bottom of the appliance and then at the top.
The filters are positioned in the following order:
Pre-electrostatic - Medium - HEPA - AG antiallergic - AC activated-carbon filter
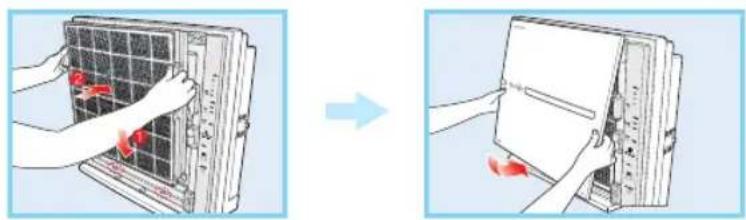
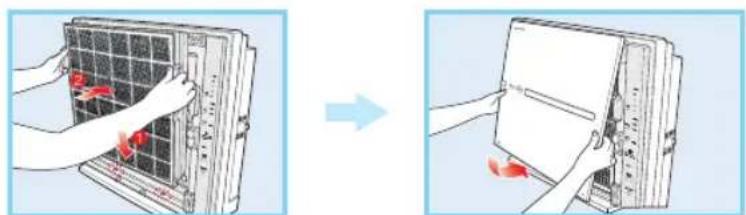
- Pull the bottom of the front cover and lift it. Remove the filter unit.
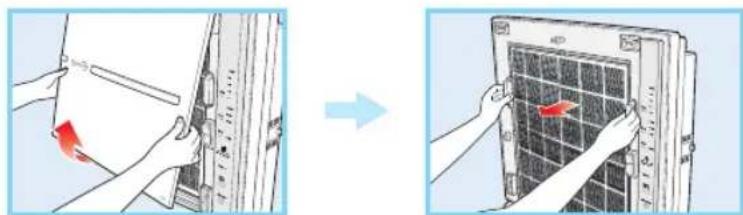
- Open the filter unit and replace used filters.

The Antibacterial filter (Medium Filter) / HEPA filter / Antiallergic filter (AG allergy Filter) / Activated-carbon filter (AC Deodorant Filter) are packed for transport and you need to remove all packaging before use.
ATTENTION! Medium (antibacterial) filter has to be changed once every 6 months depending on the quantity of pollutants
TherapyAir
Unpack the new filter and remove the packaging. Insert the new filter into the filter unit. Replace the medium unit in the filter unit and put the front cover back in place.

B. Changing the HEPA filter
Unpack the new HEPA filter and remove the packaging. Insert the new filter into the filter unit.
C. Changing the Antiallergic filter (AG Allergy filter)
Unpack the AG allergy filter and remove the packaging. Insert the new filter into the filter unit (the unwoven side of the AG allergy filter should face the front of the appliance).
D. Changing the Activated-Carbon filter (AC Deodorant Filter)
Unpack the new AC filter and remove the packaging. Insert the new filter into the filter unit. Replace the unit in the appliance and put the front cover back in place.
- Insert the new filters into the filter unit.
- Fix the frame first at the bottom of the appliance and then at the top. Put the front cover back into place on the appliance.
8. WALL MOUNTING OPTION
Mounting the appliance on a wall (optional)
If you wish to mount Therapy Air Ion on the wall, make sure that the appliance is positioned at the recommended distance from the walls and ceiling (see the picture). Use the additional hanging hoop. Tighten the screws on the hanging hoop to fix the appliance to the wall.
Attention:
- If the appliance is attached to a wall, the surrounding walls and ceiling can become stained quickly (as the negative ions magnetically attract the particles of dust).
- When changing the filters, be careful not to drop the front cover or the filter unit.
- Handle the power cord of the appliance carefully (never pull it).
9. TECHNICAL DATA
| Product Name Therapy Air iOn | |
| Product code PWC-570 | |
| Manufacturer Home Art and Sales Service, Sihlegsstrasse 23,8832 Wollerau, Switzerland | |
| Country of origin Korea | |
| Rated voltage (V) 220 - 240V, 50 Hz | |
| Power consumption (W) 47W | |
| Noise level Max. 60 dBA | |
| Negative ion generation 1,236,000 ions/cm | 3 |
| Air flow 6.05 m | 3/min |
| 363.3 m | 3/h |
| CADR (smoke) 154.2 cfm | |
| CADR (dust) 167.6 cfm | |
| CADR (pollen) 178.2 cfm | |
| Effective area | 26 m² (ACPH 5 times) |
| 130 m | 2 (ACPH 1 time) |
| Ozone generation | <0.002% |
| Gas removal efficiency | 99.97% |
| Deodorisation efficiency | 85% |
| Product dimensions (LxWxH) | 0.51x0.181x0.51 m |
| Product net weight (kg) | 8.8 kg |
9.1 Labels on the Device

Mark of conformity

Protection against electrical shock - class II
The device is intended for indoor use only
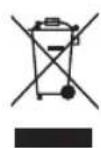
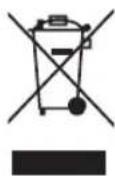
WEEE - the device must not be disposed as ordinary waste

Green dot - the carton packaging must be recycled

The device must be protected from moisture
10. TROUBLESHOOTING GUIDE
If problems occur when trying to operate the appliance, make sure that you have followed the Instructions for Use correctly. Before you ring Zepter Service Centre for help, please check the following:
| PROBLEM | CHECK | SOLUTION |
| No air is coming out | ·Is the appliance plugged into the electricity supply? ·Are the panel lights off? ·Is the appliance supplied with electricity? | Plug the appliance into the power socket 220-240 V. Press the button to turn on the appliance (POWER) and the operational mode button (MODE). Try to operate the appliance after it is connected to the electricity supply. |
| Air flow speed does not change | ·Is the automatic operational mode selected? ·Is the room too dark? | You cannot select a speed in the automatic operational mode (Normal). You cannot select a speed in the quiet night mode (Normal). |
| The particle sensor does not alter | ·Is there any dust on the sensor? ·Does it constantly indicate "unclean"? ·Does it constantly indicate "very clean"? | Clean the lens (follow the instructions). Reduce the sensor sensitivity (follow the instructions). Increase the sensor sensitivity (follow the instructions). |
| Operation speed too low | ·Have you cleaned or replaced a filter? | Check if the filters have been cleaned and replaced. |
| The air outlet emits an unpleasant odour | ·Have you cleaned or replaced the filter? | Check if the filters have been cleaned and replaced. |
| The particle sensor is blinking | ·Ring Zepter Service Centre | |
| Other problems | ·Turn the appliance off and ring Zepter Service Centre. |
If a problem persists after you have followed the procedures suggested in this table, please call Zepter Service Centre.
11. DECLARATION OF CONFORMITY
The Therapy Air iOn bears the CE mark and is compliant with applicable standards, directives and regulation in force.
12. WARRANTY
5 YEAR LIMITED WARRANTY
ZEPTER warrants that your Therapy Air iOn Purifier will be free from defects in material or workmanship at the time of its original purchase for a period of five (5) years. The limited 5 year warranty is related to the most essential parts of the device - the motor and the power board (the "Limited Warranty").
Exception: For the plastic housing and negative ion generator a warranty period of two (2) years shall apply.
Condition:
-
5 year limited warranty is valid,
-
If the filters are replaced with original Zepter filters according to the manufacturer recommended replacement schedule. The filters must be replaced minimum once a year.
We require the proof of purchase of the device as well as filters.
- The air purifier will not be considered defective in material or workmanship if it needs to be adapted, changed or adjusted in order to conform to the national or local technical or safety standards in any country other than the one which the product was originally designed and manufactured for.
- This 5 year limited warranty does not cover:
Periodic filter exchange
- Regular maintenance and repair or replacement of part due to normal wear and tear
- Damage of the product resulting from abuse or misuse, including but not limited to the use of the product for other than intended purpose (air purification)
- Any signs of tampering by the customer or the presence of non-original pieces
- Any damages to the product resulting from repairs and/or maintenance done by unauthorised repair center
- Accidents, act of God or any cause beyond the control of the company, including but not limited to lightning, water, fire, public disturbance.
- This warranty only covers Therapy Air iOn sold by an authorised sales agent or official distributor. The warranty claim must be done thorough authorised Zepter Service Centre.
- Zepter reserves the right to replace the Therapy Air iOn by a similar item in current portfolio.
This guarantee does not affect the consumer's statutory rights under applicable national legislation in force, nor the customer's rights against the retailer arising from the sales/purchase agreement. In the absence of applicable national legislation, this guarantee will be consumer's sole and exclusive legal remedy, and the manufacturer shall not be liable for any incidental or consequential damages for breach of any express of implied guarantee of this product. The liability of manufacturer is limited to and shall not exceed the purchase price of the product actually paid by the consumer.
EN
TherapyAir
Therapy Air iOn PWC-570
GEBRAUCHSANWEISUNG
9.1 Labels on the Device
Konformitätszeichen