USER MANUAL DUC252 MAKITA
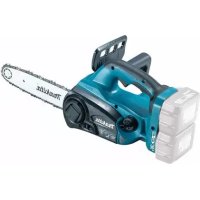
GB Cordless Chain Saw Instruction Manual
| 1 Lever |
| 2 Front hand guard |
| 3 Top handle |
| 4 Battery cartridge |
| 5 Carabinar (rope attachment point) |
| 6 Guide bar |
| 7 Saw chain |
| 8 Sprocket cover |
| 9 Adjusting dial |
| 10 Chain catcher |
| 11 Guide bar cover |
| 12 Lock-off button |
| 13 Switch trigger |
| 14 Front handle |
| 15 Spiked bumper |
| 16 Adjusting screw for oil pump (at the bottom) |
Explanation of general view
1 Red indicator
2 B u t t o n
3 Battery cartridge
4 Battery indicator
5 Indicator lamps
6 Check button
7 Lock-off button
8 Switch trigger
9 Front hand guard
10 Lock
11 Unlock
12 Adjusting screw
13 Sprocket
14 Adjusting pin
15 Hole
16 Guide bar
17 Sprocket cover
18 Lever
19 Adjusting dial
20 Loosen
21 Tighten
22 Saw chain
23 Oil tank cap
24 Oil inspection window (for refilling the tank with oil)
25 Oil inspection window
26 Spike bumper
27 Guide bar cover
28 Battery cover
29 Cutting length
30 Distance between cutting edge and depth gauge
31 Minimum 3 mm
32 Side plate angle
33 Slotted screwdriver
34 Locking ring
35 Limit mark
36 Brush holder cap
37 Screwdriver
SPECIFICATIONS
| Model DUC252 DUC302 | | |
| Standard guide bar | Guide bar length 250 mm 300 mm | |
| Cutting length 23 cm 24 cm | 28 cm | |
| Type | Sprocket nose bar | Carving bar | Sprocket nose bar |
| Standard saw chain | Type | 91PX / M43 | 25AP | 90PX / M41 |
| Pitch | 9.5 mm (3/8") | 6.35 mm (1/4") | 9.5 mm (3/8") |
| Gauge | 1.3 mm (0.05") | 1.3 mm (0.05") | 1.1 mm (0.043") |
| No. of drive links | 40 | 60 | 46 |
| Sprocket | Number of teeth | 6 | 9 | 6 |
| Pitch | 9.5 mm (3/8") | 6.35 mm (1/4") | 9.5 mm (3/8") |
| Overall length (without guide bar) | 316 mm |
| Net weight | *1 | 2.9 kg |
| *2 | 4.1 - 4.7 kg | 4.2 - 4.8 kg |
| Chain speed per minute | 8.3 m/s (500 m/min) |
| Chain oil tank volume | 85 cm³ |
| Rated voltage D.C. 36 V | D.C. 36 V | |
WARNING: Use appropriate combination of the guide bar and saw chain. Otherwise personal injury may result.
- Due to our continuing program of research and development, the specifications herein are subject to change without notice.
- Specifications may differ from country to country.
1: Weight, without the saw chain, guide bar, guide bar cover, oil and battery cartridge(s).
2: The lightest and heaviest combination of weight, according to EPTA-Procedure 01/2014. The weight may differ depending on the attachment(s), including the battery cartridge(s).
Applicable battery cartridge and charger
| Battery cartridge | BL1815N / BL1820B / BL1830B / BL1840B / BL1850B / BL1860B |
| Charger | DC18RC / DC18RD / DC18RE / DC18SD / DC18SE / DC18SF / DC18SH / DC18WC |
- Some of the battery cartridges and chargers listed above may not be available depending on your region of residence.
WARNING: Only use the battery cartridges and chargers listed above. Use of any other battery cartridges and chargers may cause injury and/or fire.
Recommended cord connected power source
| Battery adapter BAP182 | |
| ·The cord connected power source(s) listed above may not be available depending on your region of residence.
·Before using the cord connected power source, read instruction and cautionary markings on them. |
| Symbols
The followings show the symbols which may be used for the equipment. Be sure that you understand their meaning before use.
·Read instruction manual.
·Wear eye protection.
·Wear ear protection.
·Wear a helmet, goggles and ear protection.
·Use appropriate protection for foot-leg and hand-arm.
·WARNING - THIS CHAIN-SAW IS FOR USE BY TRAINED TREE SERVICE OPERATORS ONLY. USE WITHOUT PROPER TRAINING CAN RESULT IN SEVERE INJURIES.
·Do not expose to rain.
·Maximum permissible cut length.
·Direction of chain travel | ·Only for EU countries
Due to the presence of hazardous components in the equipment, waste electrical and electronic equipment, accumulators and batteries may have a negative impact on the environment and human health.
Do not dispose of electrical and electronic appliances or batteries with household waste!
In accordance with the European Directive on waste electrical and electronic equipment and on accumulators and batteries and waste accumulators and batteries, as well as their adaptation to national law, waste electrical equipment, batteries and accumulators should be stored separately and delivered to a separate collection point for municipal waste, operating in accordance with the regulations on environmental protection.
This is indicated by the symbol of the crossed-out wheeled bin placed on the equipment.
·Guaranteed sound power level according to EU Outdoor Noise Directive.
·Sound power level according to Australia NSW Noise Control Regulation.
ENE090-1 |
| ·Saw chain oil adjustment | The tool is intended for cutting branches / pruning trees.
It is also suitable for tree service. |
ENE090-1
Intended use
The tool is intended for cutting branches / pruning trees. It is also suitable for tree service.
GEA010-3
WARNING Read all safety warnings, instructions, illustrations and specifications provided with this power tool. Failure to follow all instructions listed below may result in electric shock, fire and/or serious injury.
Save all warnings and instructions for future reference.
The term "power tool" in the warnings refers to your mains-operated (cored) power tool or battery-operated (cordless) power tool.
Cordless Chain saw safety warnings
- Keep all parts of the body away from the saw chain when the chain saw is operating. Before you start the chain saw, make sure the saw chain is not contacting anything. A moment of inattention while operating chain saws may cause entanglement of your clothing or body with the saw chain.
- Always hold the chain saw with your right hand on the top handle and your left hand on the front handle. Holding the chain saw with a reversed hand configuration increases the risk of personal injury and should never be done.
- Hold the power tool by insulated gripping surfaces only, because the saw chain may contact hidden wiring. Saw chains contacting a "live" wire may make exposed metal parts of the power tool "live" and could give the operator an electric shock.
- Wear safety glasses and hearing protection. Further protective equipment for head, hands, legs and feet is recommended. Adequate protective clothing will reduce personal injury by flying debris or accidental contact with the saw chain.
- Always keep proper footing.
- When cutting a limb that is under tension be alert for spring back. When the tension in the wood fibres is released the spring loaded limb may strike the operator and/or throw the chain saw out of control.
- Use extreme caution when cutting brush and saplings. The slender material may catch the saw chain and be whipped toward you or pull you off balance.
- Carry the chain saw by the front handle with the chain saw switched off and away from your body. When transporting or storing the chain saw always fit the guide bar cover. Proper handling of the chain saw will reduce the likelihood of accidental contact with the moving saw chain.
- Follow instructions for lubricating, chain tensioning and changing accessories. Improperly tensioned or lubricated chain may either break or increase the chance for kickback.
- Keep handles dry, clean, and free from oil and grease. Greasy, oily handles are slippery causing loss of control.
11.Cut wood only. Do not use chain saw for purposes not intended. For example: do not use chain saw for cutting plastic, masonry or non-wood building materials. Use of the chain saw for operations different than intended could result in a hazardous situation.
12. Causes and operator prevention of kickback:
Kickback may occur when the nose or tip of the guide bar touches an object, or when the wood closes in and pinches the saw chain in the cut. Tip contact in some cases may cause a sudden reverse reaction, kicking the guide bar up and back towards the operator. Pinching the saw chain along the top of the guide bar may push the guide bar rapidly back towards the operator. Either of these reactions may cause you to lose control of the saw which could result in serious personal injury. Do not rely exclusively upon the safety devices built into your saw. As a chain saw user, you should take several steps to keep your cutting jobs free from accident or injury.
Kickback is the result of tool misuse and/or incorrect operating procedures or conditions and can be avoided by taking proper precautions as given below:
- Maintain a firm grip, with thumbs and fingers encircling the chain saw handles, with both hands on the saw and position your body and arm to allow you to resist kickback forces. Kickback forces can be controlled by the operator, if proper precautions are taken. Do not let go of the chain saw.

014673
- Do not overreach and do not cut above shoulder height. This helps prevent unintended tip contact and enables better control of the chain saw in unexpected situations.
- Only use replacement bars and chains specified by the manufacturer. Incorrect replacement bars and chains may cause chain breakage and/or kickback.
-
Follow the manufacturer's sharpening and maintenance instructions for the saw chain. Decreasing the depth gauge height can lead to increased kickback.
-
Before starting work, check that the chain saw is in proper working order and that its condition complies with the safety regulations. Check in particular that:
-
The chain brake is working properly;
- The run-down brake is working properly;
- The bar and the sprocket cover are fitted correctly;
-
The chain has been sharpened and tensioned in accordance with the regulations.
-
Do not start the chain saw with the chain cover being installed on it. Starting the chain saw with the chain cover being installed on it may cause the chain cover to thrown out forward resulting in personal injury and damage to objects around the operator.
Additional safety warnings:
- When using the tool with battery adapter, be careful not to trip over the cord during operation.
- When using the tool with battery adapter, keep the cord away from obstacles such as a workpiece and branches during operation. The cord caught by obstacles may cause serious injury.
- Keep bystanders or animals away from the work area during operation of the chain-saw.
Top handle chainsaw specific safety warnings
- This chain saw is designed especially for tree care and surgery. The chain saw is intended to be used by properly trained persons only. Observe all instructions, procedures and recommendations from the relevant professional organization. Otherwise fatal accidents may occur. It is recommend that always using a rising platform (cherry selector, lift) for sawing in trees. Rappelling techniques are extremely dangerous and require special training. The operators must be trained to become familiar with safety equipment usage and climbing techniques. Always use the appropriate belts, ropes and carabiners when working in trees. Always use restraining equipment for both the operator and the saw.
- Perform cleaning and maintenance before storage in accordance with the instruction manual.
- Ensure safe positioning of the chain saw during car transportation to avoid fuel or chain oil leakage, damage to the tool and personal injury.
- Regularly check the functionality of chain brake. This action reduces a risk of injury when kickback occurs.
- Do not fill the chain oil near fire. Never smoke when you fill the chain oil.
- National regulation may restrict the use of the chain saw.
- If the equipment gets heavy impact or fall, check the condition before continuing work. Check the controls and safety devices for malfunction. If there is any damage or doubt, ask our authorized service center for the inspection and repair.
- Always activate the chain brake before starting the chain saw.
- Hold the saw firmly in place to avoid skating (skid movement) or bouncing of the saw when starting a cut.
- At the end of the cut, be careful to keep your balance due to the "drop".
- Take into account the direction and speed of the wind. Avoid sawdust and chain oil mist.
Protective equipment
-
In order to avoid head, eye, hand or foot injuries as well as to protect your hearing the following protective equipment must be used during operation of the chain saw:
-
The kind of clothing should be appropriate, i.e. it should be tight-fitting but not be a hindrance. Do not wear jewelry or clothing which could become entangled with bushes or shrubs. If you have long hair, always wear a hairnet!
-
It is necessary to wear a protective helmet whenever working with the chain saw. The protective helmet is to be checked in regular intervals for damage and is to be replaced after 5 years at the latest. Use only approved protective helmets.
- The face shield of the protective helmet (or goggles) protects against sawdust and wood chips. During operation of the chain saw always wear a goggle or a face shield to prevent eye injuries.
- Wear adequate noise protection equipment (ear muffs, ear plugs, etc.)
- T h e protective jacket consists of 22 layers nylon and protects the operator against cuts. It is always to be worn when working from elevated platforms (cherry pickers, lifts), from platforms mounted on ladders or when climbing with ropes.
- T h e protective brace and bib overall is ma of a nylon fabric with 22 layers and protects against cuts. We strongly recommend its use.
- Protective gloves made of thick leather are part of the prescribed equipment and must always be worn during operation of the chain saw.
- During operation of the chain saw safety shoes or safety boots fitted with anti skid sole, steel toe caps and protection for the leg must always to be worn. Safety shoes equipped with a protective layer provide protection against cuts and ensure a secure footing. For working in trees the safety boots must be suitable for climbing techniques.
Vibration
- Individuals with poor circulation who are exposed to excessive vibration may experience injury to blood vessels or the nervous system. Vibration may cause the following symptoms to occur in the fingers, hands or wrists: "Falling asleep" (numbness), tingling, pain, stabbing sensation, alteration of skin colour or of the skin. If any of these symptoms occur, see a physician! To reduce the risk of "white finger disease", keep your hands warm during operation and well maintain the equipment and accessories.
SAVE THESE INSTRUCTIONS.
WARNING:
DO NOT let comfort or familiarity with product (gained from repeated use) replace strict adherence to safety rules for the subject product. MISUSE or failure to follow the safety rules stated in this instruction manual may cause serious personal injury.
ENC007-17
Important safety instructions for battery cartridge
- Before using battery cartridge, read all instructions and cautionary markings on (1) battery charger, (2) battery, and (3) product using battery.
-
Do not disassemble or tamper with the battery cartridge. It may result in a fire, excessive heat, or explosion.
-
If operating time has become excessively shorter, stop operating immediately. It may result in a risk of overheating, possible burns and even an explosion.
- If electrolyte gets into your eyes, rinse them out with clear water and seek medical attention right away. It may result in loss of your eyesight.
- Do not short the battery cartridge:
(1) Do not touch the terminals with any conductive material.
(2) Avoid storing battery cartridge in a container with other metal objects such as nails, coins, etc.
(3) Do not expose battery cartridge to water or rain.
A battery short can cause a large current flow, overheating, possible burns and even a breakdown.
- Do not store and use the tool and battery cartridge in locations where the temperature may reach or exceed 50^ (122°F).
- Do not incinerate the battery cartridge even if it is severely damaged or is completely worn out. The battery cartridge can explode in a fire.
- Do not nail, cut, crush, throw, drop the battery cartridge, or hit against a hard object to the battery cartridge. Such conduct may result in a fire, excessive heat, or explosion.
- Do not use a damaged battery.
- The contained lithium-ion batteries are subject to the Dangerous Goods Legislation requirements.
For commercial transports e.g. by third parties, forwarding agents, special requirement on packaging and labeling must be observed.
For preparation of the item being shipped, consulting an expert for hazardous material is required. Please also observe possibly more detailed national regulations.
Tape or mask off open contacts and pack up the battery in such a manner that it cannot move around in the packaging.
- When disposing the battery cartridge, remove it from the tool and dispose of it in a safe place. Follow your local regulations relating to disposal of battery.
- Use the batteries only with the products specified by Makita. Installing the batteries to noncompliant products may result in a fire, excessive heat, explosion, or leak of electrolyte.
- If the tool is not used for a long period of time, the battery must be removed from the tool.
- During and after use, the battery cartridge may take on heat which can cause burns or low temperature burns. Pay attention to the handling of hot battery cartridges.
- Do not touch the terminal of the tool immediately after use as it may get hot enough to cause burns.
-
Do not allow chips, dust, or soil stuck into the terminals, holes, and grooves of the battery cartridge. It may cause heating, catching fire, burst and malfunction of the tool or battery cartridge, resulting in burns or personal injury.
-
Unless the tool supports the use near high-voltage electrical power lines, do not use the battery cartridge near high-voltage electrical power lines. It may result in a malfunction or breakdown of the tool or battery cartridge.
- Keep the battery away from children.
SAVE THESE INSTRUCTIONS.
CAUTION:
Only use genuine Makita batteries. Use of nongenuine Makita batteries, or batteries that have been altered, may result in the battery bursting causing fires, personal injury and damage. It will also void the Makita warranty for the Makita tool and charger.
Tips for maintaining maximum battery life
- Charge the battery cartridge before completely discharged. Always stop tool operation and charge the battery cartridge when you notice less tool power.
- Never recharge a fully charged battery cartridge. Overcharging shortens the battery service life.
- Charge the battery cartridge with room temperature at 10^ - 40^ (50°F - 104°F). Let a hot battery cartridge cool down before charging it.
- When not using the battery cartridge, remove it from the tool or the charger.
- Charge the battery cartridge if you do not use it for a long period (more than six months).
FUNCTIONAL DESCRIPTION
CAUTION:
- Always be sure that the tool is switched off and the battery cartridge is removed before adjusting or checking function on the tool.
Installing or removing battery cartridge (Fig. 1)
CAUTION:
- Always switch off the tool before installing or removing of the battery cartridge.
- Hold the tool and the battery cartridge firmly when installing or removing battery cartridge.
Failure to hold the tool and the battery cartridge firmly may cause them to slip off your hands and result in damage to the tool and battery cartridge and a personal injury.
To remove the battery cartridge, slide it from the tool while sliding the button on the front of the cartridge.
To install the battery cartridge, align the tongue on the battery cartridge with the groove in the housing and slip it into place. Insert it all the way until it locks in place with a little click. If you can see the red indicator on the upper side of the button, it is not locked completely.
CAUTION:
- Always install the battery cartridge fully until the red indicator cannot be seen. If not, it may accidentally fall out of the tool, causing injury to you or someone around you.
- Do not install the battery cartridge forcibly. If the cartridge does not slide in easily, it is not being inserted correctly.
NOTE:
- The tool does not work with only one battery cartridge.
The tool is equipped with a tool/battery protection system. This system automatically cuts off power to the motor to extend tool and battery life.
The tool will automatically stop during operation if the tool or battery are placed under one of the following conditions. In some conditions, the indicators light up.
Overload protection
When the tool is operated in a manner that causes it to draw an abnormally high current, the tool automatically stops without any indication. In this situation, turn the tool off and stop the application that caused the tool to become overloaded. Then turn the tool on to restart.
When the battery/tool is overheated, the tool stops automatically without any indication. The tool does not start even if pulling the switch trigger. In this situation, let the battery/tool cool before turning the tool on again.
Overdischarge protection (Fig. 2)
When the remaining battery capacity gets low, the battery indicator blinks on the applicable battery side. By further use, the tool stops and the battery indicator lights up about 10 seconds. In this situation, charge the battery cartridge.
Indicating the remaining battery capacity (Fig. 3)
Only for battery cartridges with the indicator
Press the check button on the battery cartridge to indicate the remaining battery capacity. The indicator lamps light up for a few seconds.
| Indicator lamps | Remaining Capacity |
| Lighted Off Blinking | | |
| | | 75% to 100% |
| | | 50% to 75% |
| | | 25% to 50% |
| | | 0% to 25% |
| | | Charge the battery. |
| | | The battery may have malfunctioned. |
015658
NOTE:
-
Depending on the conditions of use and the ambient temperature, the indication may differ slightly from the actual capacity.
-
The first (far left) indicator lamp will blink when the battery protection system works.
Switch action (Fig. 4)
CAUTION:
- Before installing the battery cartridge into the tool, always check to see that the switch trigger actuates properly and returns to the "OFF" position when released.
To prevent the switch trigger from being accidentally pulled, a lock-off button is provided.
To start the tool, depress the lock-off button and pull the switch trigger. Release the switch trigger to stop.
Checking the chain brake (Fig. 5)
NOTE:
- If the chain saw fails to start, the chain brake must be released. Pull the front hand guard backwards firmly until you feel it engage.
Hold the chain saw with both hands when switching it on. Hold the top handle with your right hand, the front handle with your left. The bar and the chain must not be in contact with any object.
First press the lock-off button, then the switch trigger.
The saw chain starts immediately.
Press the front hand guard forwards using the back of your hand. The saw chain must come to an immediate standstill.
CAUTION:
- Should the saw chain not stop immediately when this test is performed, the saw may not be used under any circumstances. Consult a MAKITA specialist repair shop.
Checking the run-down brake
Switch on the chain saw.
Release the switch trigger completely. The saw chain must come to a standstill within one second.
CAUTION:
- Should the saw chain not come to a stop within one second when this test is performed, the saw must not be used. Consult a MAKITA specialist repair shop.
Adjusting the chain lubrication (Fig. 6)
You can adjust the oil pump feed rate with the adjusting screw. The amount of oil can be adjusted using the universal wrench.
Carabiner (rope attachment point) (Fig. 7)
Carabiner (Rope attachment point) is for use of tool hanging. Before using carabiner, pull it out and tie it with a rope.
ASSEMBLY
CAUTION:
- Always be sure that the tool is switched off and the battery cartridge is removed before carrying out any work on the tool.
Removing or installing saw chain (Fig. 8, 9, 10, 11, 12 & 13)
CAUTION:
- Always wear gloves when installing or removing the saw chain.
- The saw chain and the guide bar are still hot just after the operation. Let them cool down enough before carrying out any work on the tool.
To install the saw chain, perform the following steps:
- Make sure the direction of the chain. The arrow mark on the chain shows the direction of the chain.
- Fit in one end of the saw chain on the top of the guide bar and the other end of it around the sprocket.
- Rest the guide bar in place on the chain saw.
- Turn the adjusting dial to "—" direction to slide the adjusting pin in the direction of arrow.
- Place the sprocket cover on the chain saw so that the adjusting pin is positioned in a small hole in the guide bar.
- Turn the lever clockwise fully and a quarter turn back to keep looseness for adjusting chain tension.
- Turn the adjusting dial, and adjust the chain tension. (See the chapter on "Adjusting saw chain tension" for procedure.)
- Turn the lever clockwise to secure the sprocket cover.
- Press and return the lever to its original position.
To remove the saw chain, perform the following steps:
- Press and fully open the lever until it stops.
- Turn the adjusting dial to " - direction to release the saw chain tension.
- Turn the lever counterclockwise to loosen the sprocket cover until it comes off.
- Remove the sprocket cover.
- Remove the saw chain and guide bar from the chain saw.
Adjusting saw chain tension (Fig. 12, 14 & 11)
The saw chain may become loose after many hours of use. From time to time check the saw chain tension before use.
- Press and fully open the lever until it clicks. Turn it counterclockwise a little to loosen sprocket cover lightly.
- Lift up the guide bar tip slightly.
- Turn the adjusting dial to adjust the saw chain tension. Tighten the saw chain until the lower side of the saw chain fits in the guide bar rail (see circle in the figure).
- Keep holding the guide bar lightly and tighten the sprocket cover after adjusting the chain tension. Make sure that the saw chain does not loose at lower side.
- Press and return the lever to its original position.
Make sure the saw chain fits snugly against the lower side of the bar.

CAUTION:
- Do not tighten the saw chain too much. Excessively high tension of saw chain may cause breakage of saw chain, wear of the guide bar and breakage of the adjusting dial.
- A chain which is too loose can jump off the bar, and therefore presents an accident risk.
- Carry out the procedure of installing or removing saw chain in a clean place free from sawdust and the like.
Spiked bumper (optional accessory) (Fig. 15)
To install spike bumper, perform the following steps:
-
Remove the sprocket cover, saw chain and guide bar as described in this instruction manual.
-
Fit the holes of spike bumper along with the holes on the chainsaw.
- Tighten them firmly with screws.
OPERATION
CAUTION:
- Do not cover vents, or it may cause overheating and damage to the tool.
Lubrication (Fig. 16 & 17)
Saw chain is automatically lubricated when the tool is in operation.
Check the amount of remaining oil in the oil tank through the oil inspection window.
To refill the tank, remove the cap from the oil tank opening.
After refilling the tank, always screw the provided oil tank cap on the chain saw.
CAUTION:
- When filling the chain saw with chain oil for the first time, or refilling the tank after it has been completely emptied, add oil up to the bottom edge of the filler neck. The oil delivery may otherwise be impaired.
- As a saw chain oil, use oil exclusively for Makita chain saws or oil available in market.
- Never use oil including dust and particles or volatile oil.
- When pruning trees, use botanical oil. Mineral oil may harm trees.
- Never force the chain saw when pruning trees.
- Before cutting out, make sure that the provided oil tank cap is screwed in place.
Hold the chain saw away from the tree. Start it and wait until lubrication on saw chain is adequate.
Bring the spike bumper into contact with the branch to be cut before switching on. Otherwise it may cause the guide bar to wobble, resulting in injury to operator.
Saw the wood to be cut by just moving it down.
WORKING WITH THE CHAIN SAW
Pruning trees (Fig. 18, 19, 20 & 21)
CAUTION:
- Keep all parts of the body away from the saw chain when the motor is operating.
- Hold the chain saw firmly with both hands when the motor is running.
- Do not overreach. Keep proper footing and balance at all times.
Bring the spike bumper into contact with the branch to be cut before switching on. Cutting without bringing the spike bumper into contact with the branch may cause the guide bar to wobble, resulting in injury to operator.
When cutting thick branches, first make a shallow undercut and then make the finish cut from the top.
If you try to cut off thick branches from the bottom, the branch may close in and pinch the saw chain in the cut. If you try to cut off thick branches from the top without a shallow undercut, the branch may splinter.
If you cannot cut the timber right through with a single stroke:
Apply light pressure to the handle and continue sawing and draw the chain saw back a little; then apply the spike a little lower and finish the cut by raising the handle.
Always remove the battery cartridge from the tool and overlap the guide bar with the guide bar cover before carrying the tool. Also cover the battery cartridge with the battery cover.
MAINTENANCE

CAUTION:
- Always be sure that the tool is switched off and the battery cartridge is removed before attempting to perform inspection or maintenance.
- Always wear gloves when performing any inspection or maintenance.
- Never use gasoline, benzine, thinner, alcohol or the like. Discoloration, deformation or cracks may result.
Sharpening the saw chain (Fig. 23)

CAUTION:
- Always remove the battery cartridge and wear safety gloves when performing work on the saw chain.
Sharpen the saw chain when:
- Mealy sawdust is produced when damp wood is cut;
- The chain penetrates the wood with difficulty, even when heavy pressure is applied;
- The cutting edge is obviously damaged;
- The saw pulls to the left or right in the wood. The reason for this behaviour is uneven sharpening of the saw chain, or damage to one side only.
Sharpen the saw chain frequently, but remove only a little material each time.
Two or three strokes with a file are usually sufficient for routine resharpening. When the saw chain has been resharpened several times, have it sharpened in a MAKITA specialist repair shop.
Sharpening criteria: (Fig. 24 & 25)
- All cutter length must be equal. Cutters of differing length prevent the chain from running smoothly, and may cause the chain to break.
- Do not sharpen the chain once a minimum cutter length of 3mm has been reached. A new chain must then be fitted.
- The chip thickness is determined by the distance between the depth gauge (round nose) and the cutting edge.
- The best cutting results are obtained with following distance between cutting edge and depth gauge. Chain blade 90PX / 91PX / M41 / M43 / 25AP: 0.65 mm

WARNING:
An excessive distance increases the risk of kick-back.
- The sharpening angle of 30^ must be the same on all cutters. Differences in angle cause the chain to run roughly and unevenly, accelerate wear, and lead to chain breaks.
- The side plate angle of the cutter is determined by the depth of penetration of the round file. If the specified file is used properly, the correct side plate angle is produced automatically.
- Side plate angle for each saw chain are as follows: Chain blade 90PX / 91PX / M41 / M43 / 25AP: 55^
File and file guiding (Fig. 26, 27 & 28)
-
Use a special round file (optional accessory) for saw chains to sharpen the chain. Normal round files are not suitable.
-
Diameter of the round file for each saw chain is as follows:
Chain blade 90PX:4.5 mm
Chain blade 91PX / M41 / M43 / 25AP: 4.0 mm
- The file should only engage the cutter on the forward stroke. Lift the file off the cutter on the return stroke.
- Sharpen the shortest cutter first. Then the length of this shortest cutter becomes the standard for all other cutters on the saw chain.
- Guide the file as shown in the figure.
- The file can be guided more easily if a file holder (optional accessory) is employed. The file holder has markings for the correct sharpening angle of 30^ (align the markings parallel to the saw chain) and limits the depth of penetration (to 4/5 of the file diameter).
- After sharpening the chain, check the height of the depth gauge using the chain gauge tool (optional accessory).
- Remove any projecting material, however small, with a special flat file (optional accessory).
- Round off the front of the depth gauge again.
Cleaning guide bar (Fig. 29)
Chips and sawdust will build up in the guide bar groove, clogging it and impairing oil flow. Always clean out the chips and sawdust when sharpening or replacing the saw chain.
Cleaning the oil discharge hole (Fig. 30)
Small dust or particles may be built up in the oil discharge hole during operation.
Small dust or particles built up in the oil discharge hole may impair the oil discharge flow and cause an insufficient lubrication on the whole saw chain.
When a poor chain oil delivery occurs at the top of guide bar, clean the oil discharge hole as follows.
Remove the battery cartridge from the tool.
Remove the sprocket cover and saw chain from the tool. (Refer to the section titled "Installing or removing saw chain".)
Remove the small dust or particles using a slotted screwdriver with a slender shaft or the like.
Insert the battery cartridge into the tool.
Pull the switch trigger to flow built-up dust or particles off the oil discharge hole by discharging chain oil.
Remove the battery cartridge from the tool.
Reinstall the sprocket cover and saw chain on the tool.
Replacing the sprocket (Fig. 31 & 32)
Before fitting a new saw chain, check the condition of the sprocket.

CAUTION:
- A worn sprocket will damage a new saw chain. Have the sprocket replaced in this case. The sprocket needs to be installed so that it always faces as shown in the figure.
Always fit a new locking ring when replacing the sprocket.
Replacing carbon brushes (Fig. 33 & 34)
Remove and check the carbon brushes regularly. Replace when they wear down to the limit mark. Keep the carbon brushes clean and free to slip in the holders. Both carbon brushes should be replaced at the same time. Use only identical carbon brushes.
Use a screwdriver to remove the brush holder caps. Take out the worn carbon brushes, insert the new ones and secure the brush holder caps.
Clean the tool before storing. Remove any chips and sawdust from the tool after removing the sprocket cover. After cleaning the tool, run it under no load to lubricate the saw chain and guide bar.
Cover the guide bar with the guide bar cover.
Remove oil from the oil tank to empty it and place the chain saw.
To maintain product SAFETY and RELIABILITY, repairs, any other maintenance or adjustment should be performed by Makita Authorized Service Centers, always using Makita replacement parts.
Instructions for periodic maintenance
To ensure long life, prevent damage and ensure the full functioning of the safety features the following maintenance must be performed regularly.
Warranty claims can be recognized only if this work is performed regularly and properly. Failure to perform the prescribed maintenance work can lead to accidents!
The user of the chain saw must not perform maintenance work which is not described in the instruction manual. All such work must be carried out by authorized service centre.
| Item\Operating time | | Before operation | Everyday | Every week | Every 3 month | Annually | Before storage |
| Chain Saw | Inspection. | ○ | | | | | |
| Cleaning. | | ○ | | | | |
| Check at authorized service center. | | | | | ○ | ○ |
| Saw chain | Inspection. | ○ | | | | | |
| Sharpening if necessary. | | | | | | ○ |
| Guide bar | Inspection. | ○ | ○ | | | | |
| Remove from the chain saw. | | | | | | ○ |
| Chain brake | Check the function. | ○ | | | | | |
| Have it inspected regularly at authorized service center. | | | | ○ | | |
| Chain lubrication | Check the oil feed rate. | ○ | | | | | |
| Switch trigger Inspection. | ○ | | | | | |
| Lock-off button Inspection. | ○ | | | | | |
| Oil tank cap Check tightness. | ○ | | | | | |
| Chain catcher Inspection. | | | ○ | | | |
| Screws and nuts | Inspection. | | | ○ | | | |
014804
TROUBLE SHOOTING
Before asking for repairs, conduct your own inspection first. If you find a problem that is not explained in the manual, do not attempt to dismantle the tool. Instead, ask Makita Authorized Service Centers, always using Makita replacement parts for repairs.
| Malfunction status Cause Action | |
| Chain saw does not start. | Two battery cartridges are not installed. | Install the charged battery cartridges. |
| Battery problem (under voltage). | Recharge the battery cartridge. If recharging is not effective, replace battery cartridge. |
| Chain does not run. Chain brake activated. Release chain brake. | |
| Motor stops running after a little use. Battery's charge level is low. | Recharge the battery cartridge. If recharging is not effective, replace battery cartridge. |
| No oil on the chain. | Oil tank is empty. Fill the oil tank. | |
| Oil guide groove is dirty. Clean the groove. | |
| Oil delivery is not adjusted properly. Adjust amount of oil delivery. | |
| It does not reach maximum RPM. | Battery cartridge is installed improperly. | Install the battery cartridge as described in this manual. |
| Battery power is dropping. | Recharge the battery cartridge. If recharging is not effective, replace battery cartridge. |
| The drive system does not work correctly. | Ask your local authorized service center for repair. |
| Chain does not stop even the chain brake is activated: Stop the machine immediately! | Brake band worn down. | Ask your local authorized service center for repair. |
| Abnormal vibration: Stop the machine immediately! | Loose guide bar or saw chain. | Adjust the guide bar and saw chain tension. |
| Tool malfunction. | Ask your local authorized service center for repair. |
014805
OPTIONAL ACCESSORIES
CAUTION:
- These accessories or attachments are recommended for use with your Makita tool specified in this manual. The use of any other accessories or attachments might present a risk of injury to persons. Only use accessory or attachment for its stated purpose.
If you need any assistance for more details regarding these accessories, ask your local Makita Service Center.
- Makita genuine battery and charger
- Saw chain
Guide bar
- Guide bar cover
- File
- Tool bag
NOTE:
- Some items in the list may be included in the tool package as standard accessories. They may differ from country to country.
Noise
The typical A-weighted noise level determined according to EN62841-1 and EN ISO 11681-2 as applicable:
Model DUC252
Sound pressure level (LpA):83 dB(A) Sound power level (LWA):91 dB (A) Uncertainty (K):3 dB(A)
Model DUC302
Sound pressure level (L_pA):84 dB(A)
Sound power level (L_WA):92 dB (A)
Uncertainty (K): 3 dB(A)
NOTE:
- The declared noise emission value(s) has been measured in accordance with a standard test method and may be used for comparing one tool with another.
- The declared noise emission value(s) may also be used in a preliminary assessment of exposure.
WARNING:
- Wear ear protection.
-
The noise emission during actual use of the power tool can differ from the declared value(s) depending on the ways in which the tool is used especially what kind of workpiece is processed.
-
Be sure to identify safety measures to protect the operator that are based on an estimation of exposure in the actual conditions of use (taking account of all parts of the operating cycle such as the times when the tool is switched off and when it is running idle in addition to the trigger time).
Vibration
The vibration total value (tri-axial vector sum) determined according to EN62841-1 and EN ISO 11681-2 as applicable:
Model DUC252
Work mode: cutting wood
Vibration emission (a_hW):4.7m / s^2
Uncertainty (K): 1.5 m/s²
Model DUC302
Work mode: cutting wood
Vibration emission (a_hW):4.5m / s^2
Uncertainty (K): 1.5 m/s²
NOTE:
- The declared vibration total value(s) has been measured in accordance with a standard test method and may be used for comparing one tool with another.
- The declared vibration total value(s) may also be used in a preliminary assessment of exposure.

WARNING:
- The vibration emission during actual use of the power tool can differ from the declared value(s) depending on the ways in which the tool is used especially what kind of workpiece is processed.
- Be sure to identify safety measures to protect the operator that are based on an estimation of exposure in the actual conditions of use (taking account of all parts of the operating cycle such as the times when the tool is switched off and when it is running idle in addition to the trigger time).
For European countries only
The Declarations of conformity are included in Annex A to this instruction manual.
Descriptif
Lama catena 91PX/M41/M43/25AP:4,0mm
OPTIONELE ACCESSOIRES

LET OP:
EvieC TpoEioToiOneic aopaaiac yia to nEkTpiKo epyaeeio

IPOEIAOIOIHEN
AicβaTe
óλες
TIC
TPOEIDTOINIOEIC
ασφαλειας,
obnyie,
EIKOVyopaqnoeic kai TpOdiaypaqec Tou TApexovtai
mu auto to nAeKTPiKO epyaeeio. H un tnpon oawv twv
oyniw Tou avayapovtai katwtpew mTopei va
kataaene OE nAeKTPoTTnxi, TUPKayia n/Kai oBapo
tpauatio.
OuaTe oaes TIG PPOEIOIHOeIC KAI TIG Oanyies yia eAovtikn npaTouTNI.
TIOPOEIDOTIOINOEIC, O oOc K T P I K O EpyaIeio] avapeptai OE nAektpiok epyaIeio Tou TpofoDBTeiT aTTOV KUPia TAPoxn nAektpiKoU PEuMaTOc (Me nAektpiKO Kaawio) n OE nAektpiKO EpyaIeio Tou TPOPODBTeiT aTIO uTatapia (Xwpi c NkEETPIKO Kaawio).
ENB137-2
PpoEiOToiInoEic aOeAeiaG yia To oopnto aaouotpiovo
Aπiδαλuoiδαg90PX/91PX/M41/M43/
25AP:0,65 mm
IPOEIAOIOIHs
H utepboikn aiooataa angavei tov kivduvo kaotanmuotc.
Oloi oi konTec 0a TpEe i va exouv tnv idia ywia akoviauatoC twv 30^ .Eav unapxouv diaqopc otnyvia, n aluaiba kveita duokola kai avoioiOpopa, EITATXUVETAI n Otheta ka Tpokaetai OTAOIPO Tc aluaibac.
H ywia Tou Taaivou xeiouc Tou kottn kathetaetai aTo to baoos dieiouans tnc otpuyua nlauc. Eav xpnoiopoToinaTe owta tn ouykepiEvn laia, dnioupyeitai autouata n owatn ywiou Tou Taaivou xieiaouc.
H ywvia tou nlaivou xieiaouc ia kae aauiaa Tpiioviu eivai n Engs:
Aeipda aauoic90PX/91PX/M41/M43/
25AP: 55°
AipKaai Ka0o8nynan iipac (Eik. 26, 27 ka 28)
Na Xpnoiopoioeite EIDIKN OTPOyyuHn AIPA (TPOaipetiko EApntma) yia aAUoidec TPIovIOU YIA VA aKoviaTe TIV aAUoIDA. OI ouvnOIOpeveC OTPOyyuAe C AIEC DEV Eivai KATAAANAE.
H diαμετρος της στρογγυλής λιμας για καθε αλυσίδα πριονιό εἰναι η εξής:
AeTiaaIoo90PX:4,5mm
Aεπiδα αλuσiδας 91PX / M41 / M43 / 25AP: 4,0 mm
H iua 0a npente va epxetai oE tao n e ToV kOTTn mOvo kata Tnv eptpOoia kivnoA.AvaonKwote Tn Iiua aToTov KOTTN kata Tn diapOpun EITIOPTPOPns.
AkovioTE TpWToTov TIO KOVTo KOTTN. Meta, To MInKoC autou Tou TIO KOVtou KoTTN yivetai To TpOtuTO Yia oAouc Tou cAALouc KOTTEc OTNV aAUoiDa TpiovioU.
Na oynyeite tn Aima onwus utoekvuetai otnv EIKOVA.
H odynon nC iuaKaoiatai TIO EukoN, eav xpnoiopoieite ouykpatntnpa iua (TPOaipetikO agptna). O ouykpatntnpac nS iua diathetai evoeieicis yia tvn katalnn ywvia tpoixiaatoC 30^ (euouypapmuote Tc evoeieicis npaalna Tnv aluoida Tpiiovio) kai TepiopiEi to Baooc dieiooucn (OE 4/5 tnC diapTpou nS iuaC).
- Meta aTo To poxia Ta nca uaiidac, eEvTe to uwooc Tou puthetaTou Baoous Kottns xpnoioutoiwVtac To epyaleio tepnans aluaidac (TpoaipEtiko Eapntma).
ApaipoteTuXovPiOeExov uIKo,oouikpo kai av eiva,muEiokn Einnieonlambda (PPOaipetikoEgaptnma).
- AITOTeAIEIOWTe TO PooTIVo Eepoc Tou puOoiTn Baoouc kOtnc gavac.