
Giro GT - Exercise bike KETTLER - Free user manual and instructions
Find the device manual for free Giro GT KETTLER in PDF.

| Product type | Exercise bike |
| Brand | Kettler |
| Model | Giro GT |
| Power supply | Self-powered (generator + rechargeable battery); optional mains adapter |
| Display | LCD screen with zones: STOP, RPM/SPEED, program selection, bar chart (effort), and segments for TIME, DISTANCE, CALORIES, PULSE |
| Training programs | MANUAL (manual), PROGRAM (12 presets), USER (customizable), H.R.C. (target heart rate control) |
| Resistance levels | 32 levels (L01 to L32), represented by bars (1 bar = L01-L04, 8 bars = L29-L32) |
| Heart rate measurement | Integrated sensors in handlebars; options: ear clip and chest strap (not included) |
| Display functions | Time, distance (km), calories, speed (km/h), RPM, heart rate (bpm) |
| Heart rate measurement range | 30 to 230 beats per minute |
| Training goals | Individually adjustable for TIME, DISTANCE, CALORIES or PULSE |
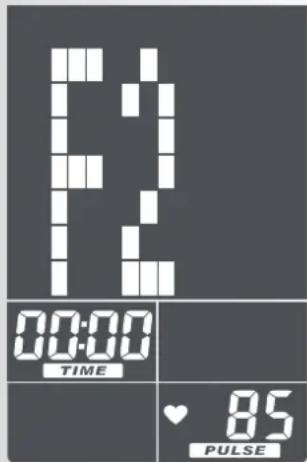
| RECOVERY function | Measures recovery heart rate over 1 minute; calculates a fitness rating from F1 (excellent) to F6 (insufficient) |
| Standby | Automatic after 4 minutes without activity or heart rate input |
| Installation | On a solid, level surface; check fixings after 6 days of use |
| Maintenance | Regularly check condition and tightness of parts; use only original Kettler spare parts |
| Cleaning | Clean with a soft, slightly damp cloth; avoid harsh products and excessive moisture |
| Safety | Consult a doctor before any training; do not use if malfunctioning; follow training instructions |
Frequently Asked Questions - Giro GT KETTLER
User questions about Giro GT KETTLER
0 question about this device. Answer the ones you know or ask your own.
Ask a new question about this device
Download the instructions for your Exercise bike in PDF format for free! Find your manual Giro GT - KETTLER and take your electronic device back in hand. On this page are published all the documents necessary for the use of your device. Giro GT by KETTLER.
USER MANUAL Giro GT KETTLER
MANUAL Manuelles Training
Training > MANUAL Manuelles Training
Functional area and buttons 22-23
- Display area 23-24
Quick start 25
For beginners 25
Function and operation 25
Display functions 26
- Stop 26
RPM/SPEED
General training program 26
MANUAL 26
PROGRAM 26
- USER 26
H.R.C. (target heart rate) 26
Target values
TIME Training time 27
- DISTANCE Training course 27
CALORIES Energy consumption 27
PULSE Heart rate 27
Personal training settings
·General 28
- Target value settings 28
Example: DISTANCE
- Sleep mode 29
- Stop or pause training 29
Training 30
Setting the training program 30
MANUAL 30
Manual training
PROGRAM 26
12 preset programs for training
- USER 31-32
Training program using user settings
H.R.C. (target heart rate) 32-33
Training using a target heart rate (THR)
RECOVERY 33
Recovery heart rate
General information 34
Calculation of fitness level 34
Formula 34
Information on pulse measurement 34 With an ear clip 34 With a hand pulse sensor 34 With a chest strap 34
Computer faults 34
Training instructions 35
Glossary 36

The use of this symbol in the instructions makes reference to the glossary. The respective term is explained in this glossary.
Safety information
Please observe the following points for your personal safety:
- The training machine must be assembled on an appropriate and solid surface.
- Ensure that the connections are secure before first putting the machine into operation and after approximately six days of use.
- In order to prevent injury as a result of incorrect use or overloading, the training machine may only be operated according to the instructions.
- A permanent installation of the machine in wet rooms is not recommended due to the formation of rust.
- Ensure that the training machine is in a perfect functioning and working order on a frequent basis.
- Safety checks are included under the obligations of the operator and must be carried out correctly and on a regular basis.
- Faults or damaged parts must be exchanged immediately.
Only original KETTLER spare parts may be used.
- The machine may not be used until repairs have been completed.
- The safety level of the machine can only be maintained on the condition that it is regularly checked for damage and wear and tear.
For your safety:
- Before starting to train, please consult your doctor to ensure that you are physically fit and able to train on this machine. The results from this examination should form the basis for the structuring of your training program. Incorrect or excessive training may pose potential risks to your health.
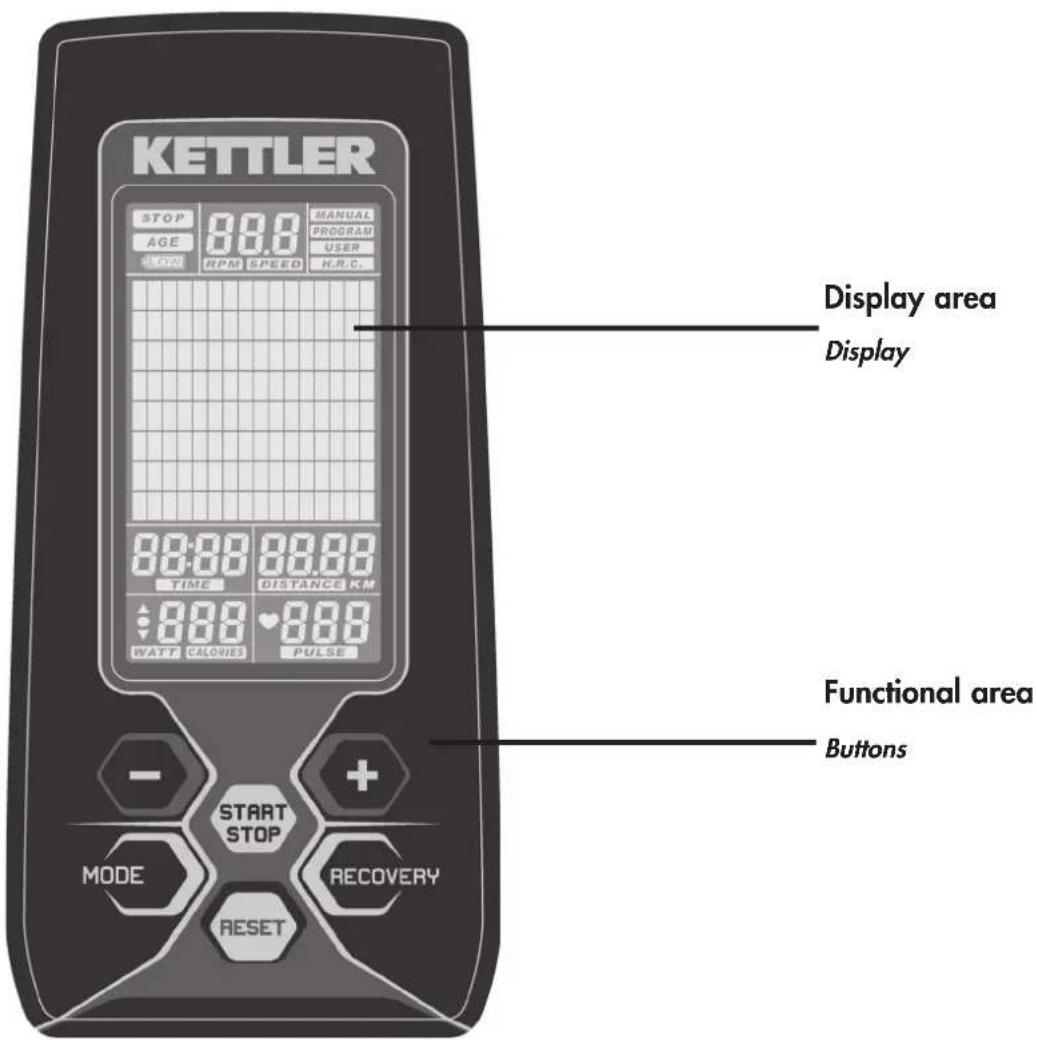
Brief description
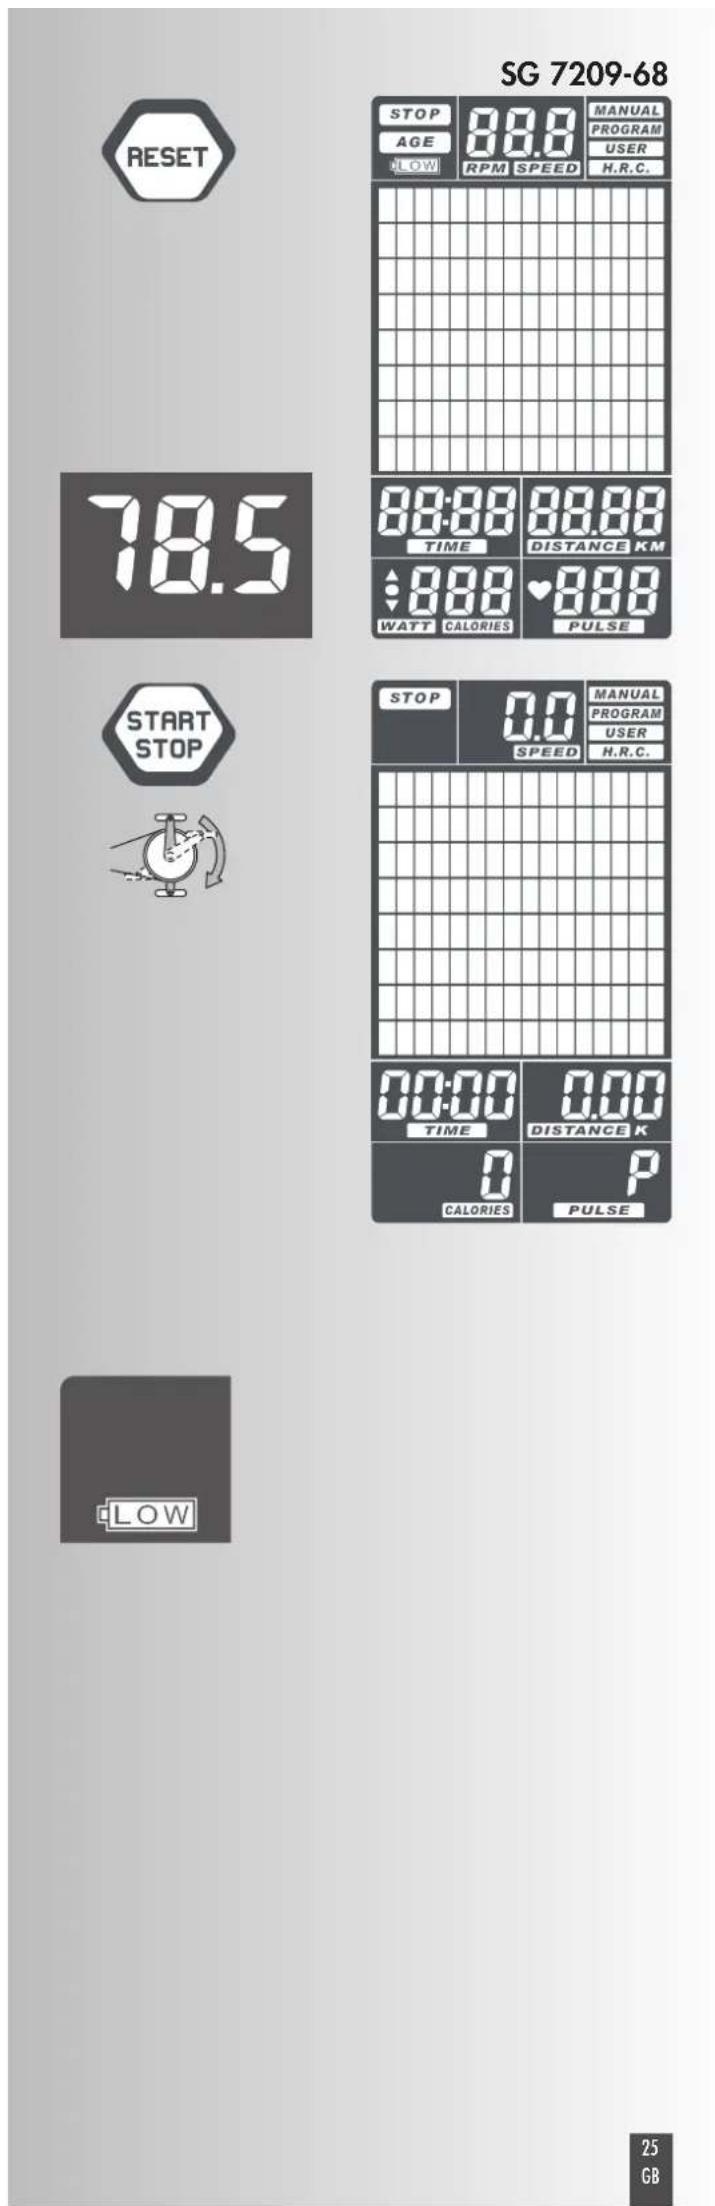
The machine is equipped with a functional area with buttons and a display area (display) with variable symbols and graphics.
Training and operating instructions


Brief instructions
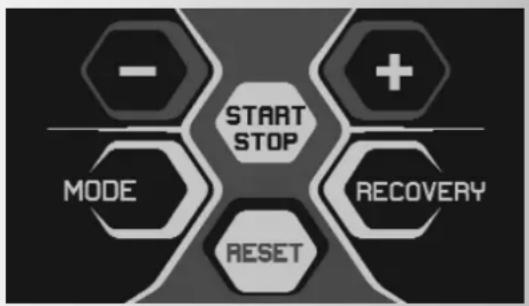
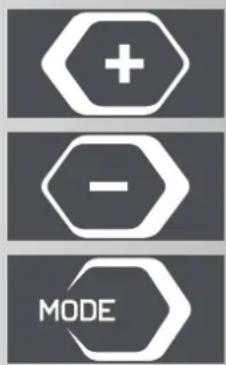
Functional area
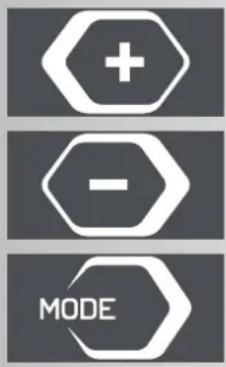
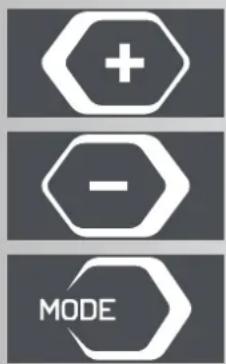
The buttons are briefly explained below.
The correct use of these buttons is explained in the individual chapters. The names of the functional buttons are also used in these descriptions as follows:
START/STOP
This button is used to start exercise without any pre-settings, or after entry of preset values, to select an automatic exercise program. When pressing this button again, the counting function of the computer will stop > the field STOP and the respective scan field (e.g. TIME) will flash. You can change settings without interrupting exercising. When pressing START again, the computer will continue counting with the new settings.
MODE
By shortly pressing the MODE button in STOP position, you can select the functions [TIME; DISTANCE, CALORIES and PULSE] for your personal settings.
$$ ^ {\prime \prime} - ^ {\prime \prime} / ^ {\prime \prime} + ^ {\prime \prime} $$
- The buttons "+" or "-" can be used to make pre-settings. For this, the device should be in STOP position > the top left STOP symbol flashes.
- In the exercise setting "MANUAL" the buttons "+" and "-" can be used to increase or decrease the load profile before or during exercise.
- During exercise, these buttons can be used to increase or decrease the currently displayed and flashing load level > graphic display.
Exercise program selection (MANUAL, PROGRAM, USER or H.R.C.) is also made using the buttons "+" and "-"
"-" Downward setting of pre-settings.
When shortly pressing the "--" button the set values of the various functions will be decreased > [TIME; DISTANCE, CALORIES and PULSE]. When pressing the "--" button for a longer time, the requested value can be set with larger value steps.
If a high value or function is to be set, then the "--" button can also be used to directly jump from the minimum value to the maximum value: e.g. from DISTANCE 0.00 to 99.90 K
^ +^ Upward setting of pre-settings.
When shortly pressing the "+" button the set values of the various functions will be increased > [TIME; DISTANCE, CALORIES and PULSE]. When pressing the "+" button for a longer time, the requested value can be set with larger value steps.
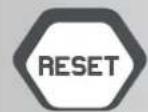
RESET
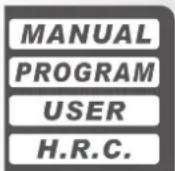
When shortly pressing the RESET button you can access the selection menu of the various exercise programs > upper bar in display [MANUAL; PROGRAM; USER; H.R.C.]. Long pressing of the RESET button will initiate restarting of the computer.
RECOVERY
Use the RECOVERY button to activate the recovery function after exercising.
Heart rate measurement
The heart rate measurement can be taken in 3 ways:
- Hand pulse sensor
- Ear clip (optional)
3.Chest strap (optional)
Display functions
General
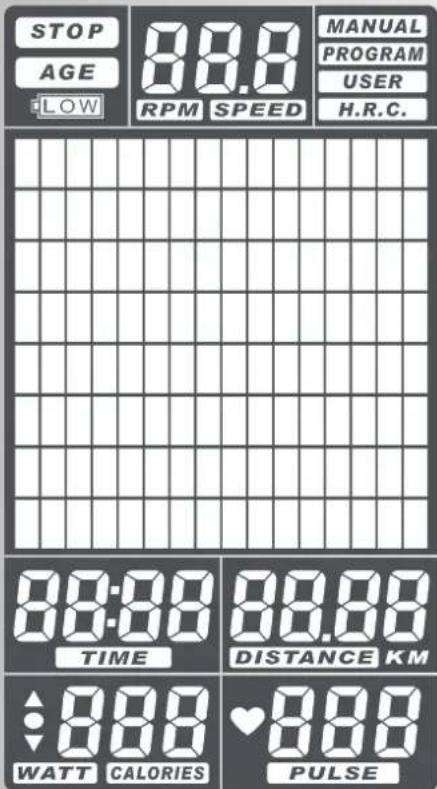
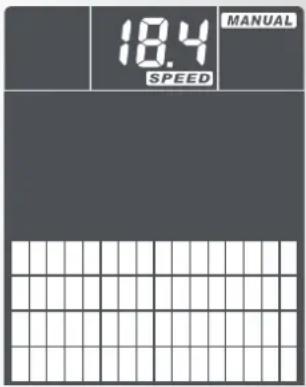
The display is separated into three display areas:
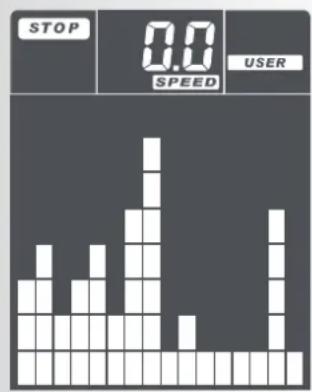
- The upper area includes the STOP field, the alternating display for RPM (revolutions per minute), and the display for status and/or selection of exercise programs.
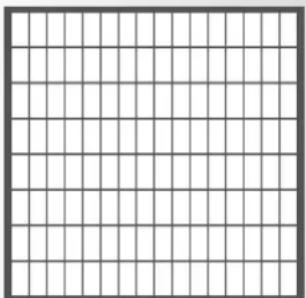
- The large display as graphic representation of the exercise scope (exercise profile) provides simple orientation within the progress of exercising. One bar segment = low load; eight bar segments on top of each other = maximum load. The exercise load levels are displayed as bars: one bar row corresponds to 4 load levels (L04) > 8 bar rows maximum = L32.
- The lower display area includes several segment displays showing the various exercise functions. When pre-setting these functions, the respective function name will flash > e.g. TIME.
Exercise data will be stored after end of exercise, and can be recalled when starting new exercise. The new data will then be added.


Training and operating instructions
Training program

Personal user data

Display of heart rate

Time / training time / start - stop


Energy consumption
Bar chart


Intensity profile 1 point (height) = 1 level 1 row = level 1
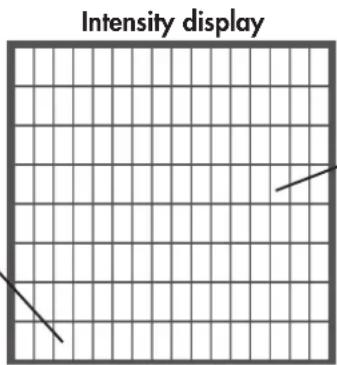
1 column corresponds to 1 minute for cross-trainers: 200m or 0.1 miles For exercise bikes: 400m or 0.2 miles
16 columns
Quick start (for beginners)
You can start training without previous experience. The different information will then be displayed on the screen. For an effective training session and to adjust your personal training settings, please read and follow these operating instructions.
Please also read the general information in the training instructions.
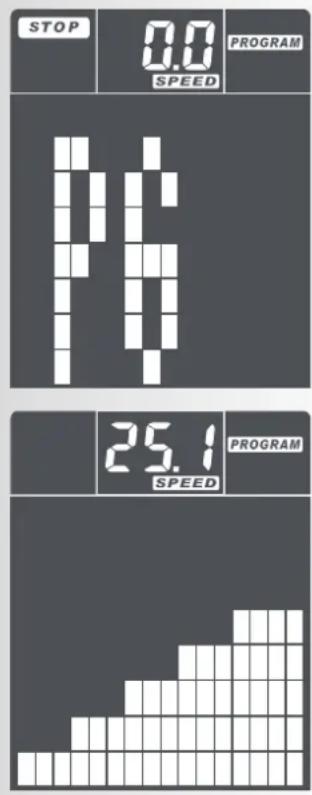
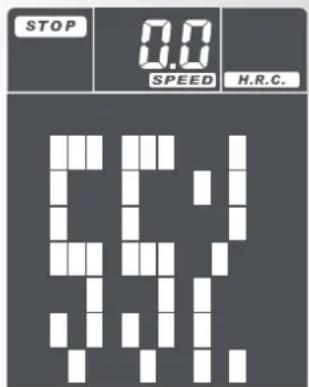
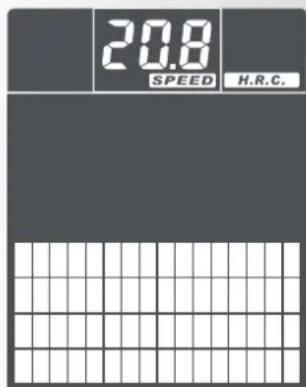
After the start of the workout or a RESET start, the full display image = Segment test with signal sound appears. Afterwards, the SPEED field shows the total amount of kilometres as a single display. Subsequently, the STOP field and the area of the 4 training programmes (MANUAL, PROGRAM, USER or H.R.C.) flash.
When starting exercising without pre-setting, press the START/STOP button and start pedaling. The values of the individual parameters will be counted upwards starting at >0< [TIME; DISTANCE, CALORIES and PULSE].
Function and operation
This device is not dependant on mains voltage. After approx. 30 pedal revolutions, the generator starts to generate voltage to supply electricity and charge a battery. If charge status is sufficient, the battery is used for voltage supply at resting state. If the battery is sufficiently charged, the display will light up. If the display does not light up or lights up only for a short time, then you should charge the battery by exercising. If no activity is present, the electronic system will switch off display after 90 seconds. A power supply unit for charging the battery is available as accessory part via our service.
Flashing display of STOP field means: counting mode of computer was stopped by pressing the START/STOP button.
RPM/SPEED Speed
This display shows -alternatingly (every 6 seconds)- pedal frequency as RPM (revolutions per minute) und SPEED in kph. Display area: min. 0.0 to max 99.9 kph
Exercise programs
The various exercise programs can be accessed by pressing RESET and selecting via the buttons ^ + ^ and - ;the button MODE is used to confirm selection. Differences of the programs are as follows:
MANUAL Manual exercising
This setting is used for a simple exercise sequence. The load profile remains linear and can be increased or decreased during exercising using the buttons "+" and "-". First, the set load level (L01 to L32) is displayed, and 2 seconds after no entry the set bar diagram will be displayed.
PROGRAM Preset exercise programs
Here, 12 pre-set exercise programs are available. The load profile shows the level of difficulty of the respective setting.
USER Exercise program set by the user
This program selection enables individual setting of the load profile. At least one pre-set value should be selected > [TIME, DISTANCE, CALORIES or PULSE].
H.R.C. Exercise based on a target heart rate (THR)
Here, the load is controlled as per the pre-set heart rate. For this it is required to measure pulse during exercising. See > Possibilities of pulse measuring
Lower display line
Pre-settings
The lower display area includes individual segment displays with the various pre-settings and units.
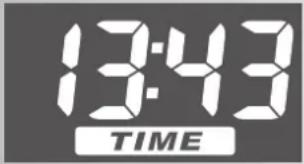
TIME Exercise time
This display measures exercise time in minutes and seconds. Display area: min. 00:00 to max. 99:00
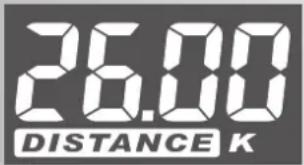
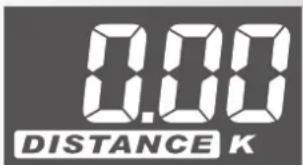
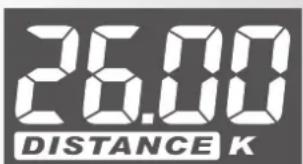
DISTANCE Exercise distance
The covered distance is measured in kilometers (km) Load counting starts at >0 < 1 and may display a maximum of 199.90~km . Counting is made in steps of O.01 km = 10 meters.
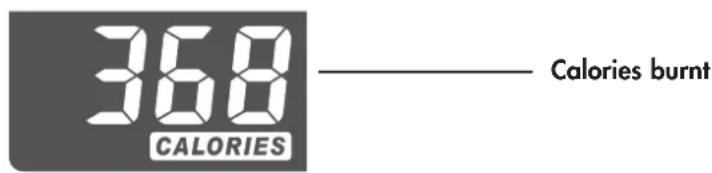
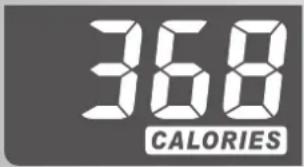
CALORIES Energy consumption
This display alternatingly (every 6 seconds) shows the calculated energy consumption in CALORIES. This value is calculated during exercising based on the set load and time measurements. Display area: min. 0 to max 990. The data are only a rough estimate of the several exercises and cannot be used for medical purposes.
PULSE (right) Pulse / heart rate
If pulse is measured during exercising, then the heart symbol in this segment display will flash and the pulse value will be displayed as heartbeats per minute. Display area: min. 30 to max 230.
If the target pulse value is reached during exercising, the computer will sound an alarm.

Training and operating instructions


Personal exercise settings
General
- Without any particular pre-settings, the values of the individual parameters will be counted upwards starting at >0< [TIME; DISTANCE, CALORIES and PULSE].
- For efficient exercising it is sufficient to set a target value for only one pre-setting [TIME; DISTANCE, CALORIES or PULSE].
- If a personal target value is set as exercise pre-setting, then the computer counts downwards starting at this value. When reaching the target value >0< an alarm will sound. If exercising is continued - without setting a new target value - then the computer will count downwards again in this mode - starting at the pre-set value - after pressing the START button.
- Set target values cannot be changed during exercising, but only after pressing the STOP button.
Pre-setting of target value
Setting of target values is the same with all parameters: e.g. DISTANCE
- Press the MODE button until the name >DISTANCE< flashes in the display segment.
- Short pressing of the button ^ 十 + ^ 一 increases the value, e.g. DISTANCE, in 0.1 km steps. When keeping the ^ 十 + ^ 一 button pressed, increasing steps will be larger. If a high value is to be set, then the ^ 一 - ^ 一 button can also be used to directly jump from the minimum value to the maximum value: e.g. from DISTANCE 0.00 to 99.90 K
- If you want to reduce the target value, press the - button (for a short or long time).
- When the target value is set, press the MODE button. The value is then stored, and you can access the next function, e.g. CALORIES.
- If possible, only enter one pre-set value, because otherwise the exercise targets may overlap, e.g. when reaching the pre-set time target earlier than the pre-set load target.
- The other parameters [TIME, CALORIES or PULSE] are also set as stated in 1-4 using the buttons SET, RESET and MODE.
After completion of all pre-settings, press the START/STOP button and start exercising.
During exercising all current values are displayed next to each other. The pre-set value is counted downwards to >0< .
SLEEP MODE
If no RPM or PULSE is detected and no manual setting is made within 4 minutes, then the device will switch to Sleep Mode.
Stop or pause training.
- If training is paused and no further settings are adjusted, the time will continue (TIME). Upon resuming the workout the other units will also continue to be counted (DISTANCE, CALORIES and PULSE).
If the workout is stopped using the STOP button and there is no further setting input, the time counter is also stopped. After pressing the START button and resuming the workout all units (TIME, DISTANCE, CALORIES and PULSE) will continue to be counted.
If the workout is stopped using the STOP button and there is a change of user, program or target value selection, all units (TIME, DISTANCE, CALORIES and PULSE) will then begin counting from the standard start value. IMPORTANT! In this case, the previous training values are not saved!
If the machine is removed from the mains or reconnected e.g. due to a change of location, all units will be counted (TIME, DISTANCE, CALORIES and PULSE) from the standard start value. IMPORTANT! In this case, the previous training values are not saved!
9:38


Training and operating instructions


Training
Setting the training program
After the start of the workout, the programme line in the upper area of the display flashes. You can enter this programme line by briefly pressing the button RESET without restarting the computer.
- Select the exercise program (MANUAL, PROGRAM, USER or H.R.C.) using the buttons " + " and - ", and confirm selection with the MODE button.
- If the selected exercise mode is MANUAL, PROGRAM or USER, and you pre-set a target value for heart rate, then the computer will make an optical and acoustic alert as soon as the current heart rate value reaches the target value.
Exercise > MANUAL Manual exercising
The load profile is equally displayed in a line. All pre- settings can be individually made. [TIME, DISTANCE, CALORIES, PULSE]. For efficient exercising it is sufficient to set a target value for only one pre-setting [TIME; DISTANCE, CALORIES or PULSE]. Start exercising by pressing the START button and active exercising.
Duration of manual exercising is determined by the time pre-setting under TIME.
The buttons ^ 十 + ^ 一 and " - " can be used to increase or decrease the load profile before or during exercise. Note! The load levels are respectively increased by 1 (L1, L2, L3 ...L32); bar increase is made in blocks of 4, i.e. L1-L4 = 1 bar, L5-L8 = 2 bars, L9-L12 = 3 bars, etc.
During exercising, the computer counts exercise progress using the vertical flashing bar in the load profile (bar diagram) from left to right. If the pre-set value [TIME, DISTANCE, CALORIES or PULSE] is reached, an acoustic signal will sound for 8 seconds. Exercise data in the bar diagram and in the counter units [TIME, DISTANCE, CALORIES, PULSE] are not counter further. You have reached the exercise target! When pressing the START button, you can restart exercising with the pre-set target or with a new setting [TIME, DISTANCE, CALORIES, PULSE].
Training > PROGRAM
Preset programs for your training
Preset exercise programs
In exercise mode PROGRAM you can select between 12 pre-set exercise programs with various load profiles.
Duration of the program is determined by the time pre-setting under TIME.
You can change between the programs by pressing the buttons "+" or "-" When pressing "-" at P1 you can directly access P12. The display will show the program number (P1-P12) for approx. 1 second; then the load profile will be displayed flashing. Press the button MODE to confirm your selection, or select another program by pressing "+" /""
After selecting a program, you can also set a pre-setting value [TIME, DISTANCE, CALORIES or PULSE]. For efficient exercising it is sufficient to set a target value for only one pre-setting [TIME; DISTANCE, CALORIES or PULSE]. Start exercising by pressing the START button and starting with active exercising. During exercise, the buttons "+" and "-" can be used to increase or decrease the currently displayed and flashing load level > graphic display.
During exercising, the computer counts exercise progress using the vertical flashing bar in the load profile (bar diagram) from left to right. If the pre-set value [TIME, DISTANCE, CALORIES or PULSE] is reached, an acoustic signal will sound for 8 seconds. Exercise data in the bar diagram and in the counter units [TIME, DISTANCE, CALORIES, PULSE] are not counter further. You have reached the exercise target! When pressing the START button, you can restart exercising with the pre-set target or with a new setting [TIME, DISTANCE, CALORIES, PULSE].
Training > USER
Training program using the user setting
Exercise program set by the user
In the exercise mode USER you can design an own load profile. Entry is made via the buttons "+" and "-" used to set profile heights. The next bar can be accessed by pressing the button MODE; then use again "+" and "-" for height adjustment etc. Set all 16 bars. Start exercising by pressing the START button and starting with active exercising.
After designing your own load profile, you can also set a pre-setting value [TIME, DISTANCE, CALORIES or PULSE]. For efficient exercising it is sufficient to set a target value for only one pre-setting [TIME; DISTANCE, CALORIES or PULSE]. Start exercising by pressing the START button and starting with active exercising. During exercise, the buttons "+" and "-" can be used to increase or decrease the currently displayed and used load level > graphic display.
During exercising, the computer counts exercise progress using the vertical flashing bar in the load profile (bar diagram) from left to right. If the pre-set value [TIME, DISTANCE, CALORIES or PULSE] is reached, an

Training and operating instructions


acoustic signal will sound for 8 seconds. Exercise data in the bar diagram and in the counter units [TIME, DISTANCE, CALORIES, PULSE] are not counter further. You have reached the exercise target! When pressing the START button, you can restart exercising with the preset target or with a new setting [TIME, DISTANCE, CALORIES, PULSE].
Training > H.R.C.
Training via target heart rate (THR)
In this exercise mode the load profile is automatically adapted based on the entered values (age and THR) and the measured heart rate. When selecting the exercise mode H.R.C. using the buttons RESET; + / - and MODE, a number will be displayed in the large display. This number is flashing, and A for age will be displayed on top of the line center. Enter your age using the buttons + and - and confirm with MODE. Then, the value 55% will be displayed in the large display. Now, you can select between 55%, 75% or 90% as individual settings of the target heart rate. The percentages 55%, 75% and 90% refer to the maximum pulse frequency (220 less age) and represent 3 general exercise intensities for fitness exercises.
After selection of the H.R.C. value press MODE to confirm; you will then be forwarded to parameter setting. Start exercising by pressing the START button and starting with active exercising.
- 55% of max. heart rate (220 less age) correspond to the entry range of general fat burning exercising. This value can also be manually increased to 65% .
- 75% of max. heart rate (220 less age) correspond to the range of general exercising.
- 90% of max. heart rate (220 less age) are only suitable for shorter submaximal load intervals for load increases with interval exercising.
- Additionally, you can enter a target pulse value under H.R.C. In this exercise mode it is not possible to set a PULSE value. All other parameters can be set. [TIME, DISTANCE or CALORIES].
- The computer follows your currently measured heart rate number compared to the pre-set target value and adapts the load level during exercising.
- If the current heart rate is below the target value, then the load level is increased by one step every 30 seconds until the maximum of resistance of the set heart rate is reached.
- If the heart rate is above the target value, then the load level is reduced automatically. It is reduced by one step every 15 seconds until the set heart rate is reached.
- If the load level is at 1 and the heart rate is above the target value for 1 minute, then the computer will stop und an acoustic alarm will sound as warning.
-
The computer uses the set exercise time [TIME] to count exercise progress using the vertical flashing bar in the load profile (bar diagram) from left to right.
-
If the pre-set value [TIME, DISTANCE or CALORIES] is reached, an acoustic signal will sound for 8 seconds. The exercise data will not be counted further. You have reached the exercise target! When pressing the START button, you can also continue exercising.
RECOVERY Recovery pulse stage
The RECOVERY function can be used after each exercise program.
The RECOVERY button is used to initiate recovery pulse measurement at the end of exercising. Initial and final pulse during one minute are used to calculate deviation and a fitness score. In case of equal exercising, improvement of such score is a measurement for increase of fitness.
When reaching the target values, end exercising and press the RECOVERY button; then, leave your hands at the hand pulse sensors. In case of previous pulse measurement, the display shows 00:60 for time, and the PULSE display shows the current pulse value (flashing). The countdown starts at 00:60. Leave your hands at the hand pulse sensors until the countdown reaches >0< . The display will show on its right a value between F1 and F6. F1 is the best status; F6 is the worst status. The function can be ended by pressing again RECOVERY.

Training and operating instructions
General information
Calculation of fitness score
The computer calculates and assess the difference between the training and recovery heart rate and the resulting "fitness score" according to the following formula:
$$ \text {S c o r e (F)} = 6 - \left(\frac {1 0 \times (P 1 - P 2)}{P 1}\right) ^ {2} $$
P1 = Training pulse P2 = Recovery pulse
Score 1 = very good Score 6 = poor
A comparison of the training and recovery heart rate is a quick and easy way in which to determine physical fitness. The fitness score is an orientation value to assess your recovering ability after physical exercise. Before pressing the recovery heart rate button and determining your fitness score, you should train at your own level of intensity for a significant period of time e.g. 10 minutes. For regular cardiovascular training you will discover that your "fitness score" improves.
Possibilities for Pulse Measurement
The pulse measurement starts as soon as the heart in the display blinks in time with your pulse beat.
With hand pulse
An extra-low voltage caused by the contractions of your heart is registered by the hand sensors and evaluated by the electronics assembly of the device.
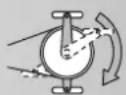
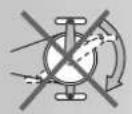
Always grab the contact faces with both hands.
- Avoid jerky grasping.
- Hold your hands calmly and avoid contractions and rubbing on the contact faces.
With ear clip
The pulse sensor works with infrared light and measures the variations in translucence in your skin, which are produced by your pulse beat. Rub your ear ten times strongly to activate the blood circulation before attaching the pulse sensor to your earlobe.
Avoid disturbing pulses.
- Attach the ear clip properly to your earlobe and look for the best point for the measurement (heart symbol blinks without interruption).
- Do not train directly under strong incidence of light, e.g. neon light, halogen light, spotlight, sun light.
- Completely eliminate any shocks or bounces of the ear sensor and the cable. Always attach the cable with a clip at your clothing or, even better, at your headband.
Pulse recording with chest strap
If a chest strap should be used optionally, the connection between the chest strap and the training computer must be established by using a plug-in receiver. Chest strap and plug-in receiver can be ordered subsequently.
Comment:
Only one way of pulse measurement is possible: either with ear clip or with hand pulse or with breast belt. If no ear clip is located in the pulse plug, hand pulse measurement is activated. If you insert an ear clip in the pulse plug, hand pulse measurement is automatically deactivated. It is not necessary to disconnect the plug of the hand pulse measurement.
Faults in the Training Computer
If the computer display is not functioning correctly, please remove the power supply and switch off the machine.
| √ | |
| optional | |
| optional |
For Your Safety:
Before beginning your program of exercise, consult your doctor to ensure that you are fit enough to use the equipment. Base your program of exercise on the advice given by your doctor. Incorrect or excessive exercise may damage your health.
Training Instructions
This device has particularly been designed and developed for leisure time sportsmen. It is excellently suited for cardiovascular training.
The training methodically has to be organised on the principles of stamina training. This will predominantly cause changes and adaptations of the cardiovascular system. This includes the reduction of the resting pulse frequency and of the load pulse.
This gives the heart more time for filling the ventricles and for the blood circulation of the cardiac musculature (through the coronary vessels). Moreover, depth of breathing and the volume of air that can be breathed in (vital capacity) are increased. Further positive changes take place in the metabolic system. In order to achieve these positive changes, the training has to be planned according to certain guidelines.
Planning and control of your training
The basis for your training planning is your current physical fitness condition. Your family doctor can diagnose your personal fitness by means of an exercise tolerance test, which will constitute the basis for your training planning. If you have not undergone an exercise tolerance test, high training exertion and/or overstrainng must be avoided in all cases. The following rule should be considered in your planning: stamina training is controlled via the scope of exertion as well as via the level / intensity of exertion.
Regarding exertion intensity
The intensity of exertion should preferably be checked in your fitness training via your heart's pulse rate. The maximum heart rate per minute of >220 minus age must not be exceeded. The optimum training pulse is determined by age and training target.
Training target: fat burning/weight reduction
The optimum pulse frequency is calculated using the empirical formula (220 - age) × 0.65
Advice: fat burning for energy supply only gains significance after a minimum training period of 30 minutes.
Training target cardio-vascular fitness:
The optimum pulse frequency is calculated using the empirical formula (220 - age) × 0.75
The intensity is predetermined in your training by means of the braking levels, ranging from 1-16. As a beginner, you should avoid too high braking level settings for your training, as this will quickly lead to exceeding the recommended pulse rate range. Start by using a low braking level setting and then approach your optimum training pulse step by step. Do not forget to regularly check during your fitness training whether you still range within the intensity area according to the above stated recommendations.
Sports physicians consider the following load factors to be positive for fitness:
| Frequency | Duration | |
| daily | 10 min | |
| 2-3 times weekly | 20-30 | min |
| 1-2 times weekly | 30-60 | min |
Beginners should not start with training units of 30 to 60 minutes.
A beginner training could be organised as follows during the first four weeks:
| Training frequency | Extent of training session |
| 1st week | |
| 3 times a week | 2 minutes of trainingBreak of 1 minute for physical exercises2 minutes of trainingBreak of 1 minute for physical exercises2 minutes of training |
| 2nd week | |
| 3 times a week | 3 minutes of trainingBreak of 1 minute for physical exercises3 minutes of trainingBreak of 1 minute for physical exercises2 minutes of training |
| 3rd week | |
| 3 times a week | 4 minutes of trainingBreak of 1 minute for physical exercises4 minutes of trainingBreak of 1 minute for physical exercises3 minutes of training |
| 4th week | |
| 3 times a week | 5 minutes of trainingBreak of 1 minute for physical exercises4 minutes of trainingBreak of 1 minute for physical exercises4 minutes of training |
In order to have a personal training documentation, you can enter the training values achieved in the performance table.
Prior to and after every training unit gymnastic exercises lasting approx. 5 minutes serve the warming up and/or cooling down. There should be a day without training between two training units, if you later on prefer to train three times a week for 20 - 30 minutes each. Otherwise nothing can be said against a daily training.

Training and operating instructions
Glossary
Bar chart
Display area with 16 × 16 points for the display of intensity and pulse profiles as well as text and value symbols.
Recovery
Recovery heart rate measurement at the end of the workout. The difference between the start and end heart rate per minute is determined and a fitness score is determined. For regular training, the improvement of this score is a measure of increasing levels of fitness.
Programs
Training options that include manual or certain program intensities or target pulses.
Profiles
The change of intensity over time or a throughout course is displayed in the point field.
Units
Units for the display of km/h or mph, kjoules or kcal
Energy
Calculates the body's metabolic rate
Control
The electronic mechanisms regulate the intensity or the heart rate according to manually set or predefined values.
Pulse
Recording of heart beats per minute
Maximum pulse
Value calculated from 220 minus age
Target pulse
Manual or program-specific pulse value that should be reached.
Fat burn pulse
Value calculated from: 65% max. pulse
Fitness pulse
Value calculated from: 75% max. pulse
Manual
Value calculated from: 40 - 90% max. pulse
Age
Press here to calculate your maximum pulse.
Menu
Display in which values should be entered or selected.
Glossary
A list of explanations
Performance Table
| Date | Restpulse | Stress pulse | Recovery pulse | Slope | Time (min) (km) | Distance (Kcal) | Energy consumption | Fitness | Mark |
F
Table des matieres
Instructions succinctes
Zone fonctions
Training >MANUAL Entrainement manuel
Entrainement > H.R.C.
MANUAL manuele training
2-3 peer week 20-30 min
1-2 peer week 30-60 min

- MANUAL Manuelles Training
- Training > MANUAL Manuelles Training
- Quick start 25
- Function and operation 25
- Display functions 26
- General training program 26
- Target values
- Personal training settings
- Training 30
- Setting the training program 30
- General information 34
- Training instructions 35
- Glossary 36
- Safety information
- Please observe the following points for your personal safety:
- For your safety:
- Brief description
- Training and operating instructions
- Brief instructions
- Functional area
- START/STOP
- MODE
- RESET
- RECOVERY
- Heart rate measurement
- Display functions
- General
- Training program
- Personal user data
- Display of heart rate
- Time / training time / start - stop
- Energy consumption
- Bar chart
- Quick start (for beginners)
- Please also read the general information in the training instructions.
- Function and operation
- RPM/SPEED Speed
- Exercise programs
- MANUAL Manual exercising
- PROGRAM Preset exercise programs
- USER Exercise program set by the user
- H.R.C. Exercise based on a target heart rate (THR)
- Lower display line
- Pre-settings
- TIME Exercise time
- DISTANCE Exercise distance
- CALORIES Energy consumption
- PULSE (right) Pulse / heart rate
- Personal exercise settings
- Pre-setting of target value
- SLEEP MODE
- Stop or pause training.
- Training
- Setting the training program
- Exercise > MANUAL Manual exercising
- Training > PROGRAM
- Preset programs for your training
- Training > USER
- Training program using the user setting
- Training > H.R.C.
- Training via target heart rate (THR)
- RECOVERY Recovery pulse stage
- General information
- Calculation of fitness score
- Possibilities for Pulse Measurement
- With hand pulse
- With ear clip
- Pulse recording with chest strap
- Comment:
- Faults in the Training Computer
- Training Instructions
- Planning and control of your training
- Regarding exertion intensity
- Training target: fat burning/weight reduction
- Training target cardio-vascular fitness:
- Glossary
- Programs
- Profiles
- Units
- Energy
- Control
- Pulse
- Maximum pulse
- Target pulse
- Fat burn pulse
- Fitness pulse
- Manual
- Age
- Menu
- F
- Table des matieres
- Instructions succinctes
- Zone fonctions
- Training >MANUAL Entrainement manuel
- Entrainement > H.R.C.
- MANUAL manuele training
Brand : KETTLER
Model : Giro GT
Category : Exercise bike