
CB 957 - Vacuum Cleaner BOMANN - Free user manual and instructions
Find the device manual for free CB 957 BOMANN in PDF.
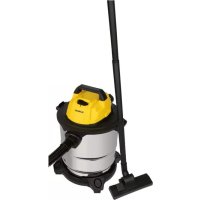
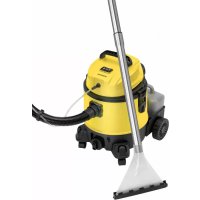
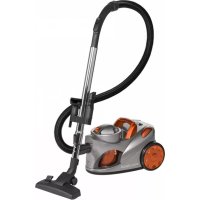
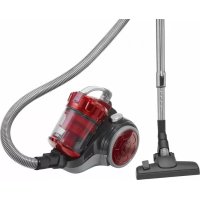
| Product type | Canister vacuum cleaner |
| Brand | Bomann |
| Model | CB 957 |
| Supply voltage | 230 V ~ 50 Hz |
| Nominal power | 1200 W |
| Cable length | 5 m |
| Dust bag capacity | 2.5 L |
| Filter type | Motor protection filter and exhaust filter, washable |
| Noise level | 75 dB |
| Weight | 4.5 kg |
| Dimensions (L x W x H) | 40 x 30 x 25 cm |
| Power control | Yes, 3 positions (low, medium, high) |
| Included nozzles | Floor nozzle, 2-in-1 crevice tool/brush, upholstery brush |
| Dust bag full indicator | Yes |
| Cable storage | Automatic cable rewinder with button |
| Telescopic tube | Yes, adjustable length |
| Use | Hard floors and carpets |
| Warranty | 24 months |
| Main material | Plastic |
| Adjustable suction power | Yes, via electronic control |
Frequently Asked Questions - CB 957 BOMANN
User questions about CB 957 BOMANN
0 question about this device. Answer the ones you know or ask your own.
Ask a new question about this device
Download the instructions for your Vacuum Cleaner in PDF format for free! Find your manual CB 957 - BOMANN and take your electronic device back in hand. On this page are published all the documents necessary for the use of your device. CB 957 by BOMANN.
USER MANUAL CB 957 BOMANN
General Safety Instructions
- Read the operating instructions carefully before putting the appliance into operation and keep the instructions including the warranty, the receipt and, if possible, the box with the internal packing.
- The appliance is designed exclusively for private use and for the envisaged purpose. This appliance is not fit for commercial use. Do not use it outdoors (except if it is designed to be used outdoors). Keep it away from sources of heat, direct sunlight, humidity (never dip it into any liquid) and sharp edges. Do not use the appliance with wet hands. If the appliance is humid or wet, unplug it immediately. Do not put it in water.
- When cleaning or putting it away, switch off the appliance and always pull out the plug from the socket (pull on the plug, not the cable) if the appliance is not being used and remove the attached accessories.
- Do not operate the machine without supervision. If you should leave the workplace, always switch the machine off or remove the plug from the socket (pull the plug itself, not the lead).
- To protect children from the dangers posed by electrical appliances, make sure that the cable is hanging low and that children do not have access to the appliance.
- Check the appliance and the cable for damage on a regular basis. Do not use the appliance if it is damaged.
- Do not try to repair the appliance on your own. Always contact an authorized technician. To avoid the exposure to danger, always have a faulty cable be replaced only by the manufacturer, by our customer service or by a qualified person and with a cable of the same type.
- Use only original spare parts.
- Pay careful attention to the following "Special Safety Instructions".
Special Safety Instructions
- Do not suck up liquids!
- Do not suck up hot ashes or pointed or sharp objects!
- Do not use the appliance in humid rooms!
- Never use without the filter. Check that the filter is inserted correctly!
- hair, clothing and body parts away from the vacuum nozzle during use!
- Keep the vacuum cleaner away from sources of heat like radiators, ovens, etc.!
GB
Start-up
Overview of the Components
1 Cable
11 Wheel
2 On/off switch
12 Connection tube
3 Vacuum power regulator
13 Floor nozzle
4 Handle
5 Cable-winding key
6 Compartment for additional nozzles
7 Dust bag filling display
8 Dust bag compartment
9 Hose connection
10 Button for opening the dust bag compartment
Not shown
"2-in-1" nozzle
(groove and brush nozzle)
Vacuum hose
- Upholstery nozzle
- Insert the vacuum hose in the opening in the dust bag compartment until it locks in mechanically.
- In order to release the hose again press the two clamps on the connection head inwards. Keep the clamps pressed and then pull the hose out.
- Insert the vacuum tube on the handle piece.
Using the Appliance
Telescopic Suction Tube:
- This makes it possible to adapt the height to your individual body size. Unlock the coupling by turning the wide section of the suction tube to the left.
- Move the suction tube as required. To lock the coupling, turn the wide suction tube to the right.
- Unwind the necessary length of cable
- Insert the plug in a duly installed 230V / 50Hz protective contact socket.
- Set the vacuum power with the vacuum power regulator.
- Vacuum at a steady speed. There is no need to exert pressure.
- Attention: pay attention to the range that can be covered with the cable length.
Vacuum power regulator
Low vacuum power: For curtains and delicate fabrics
Medium vacuum power: For long-pile velour carpets and textile flooring
High vacuum power: For sturdy rugs and floors
Cable winding device:
Pull out the cable up to the maximum length indicated with the yellow mark. Never pull the cable out up to the red mark as the cable winding can be damaged. Said damages are not covered by the warranty.
Winding
GB
Press the cable winding button and guide the cable. Hold the cable to avoid wrapping.
Nozzle accessories:
- If you wish to use the nozzle attachments, pull the flap on the upper section of the housing.
- Remove the desired nozzle:
Crevice nozzle/Brush nozzle: To vacuum corners and slits
"2-in-1" nozzle: When this is folded together (as stored in the compartment) it can be used as a groove nozzle. If you would like to use the brush nozzle, pull the brush section in the direction of the arrow until it locks in place.
Upholstery nozzle: To clean upholstery, curtains, etc.
Floor nozzle: To clean carpets or smooth surfaces.
Smooth floors:
Press down the lever with the brush symbol with your foot. The brush is now visible.
Carpets:
Press down the opposite lever.
Releasing the accessories: Pull them apart while turning slightly.
Damper
Open the damper on the hose handle to adjust the airflow or to release objects clinging to the nozzle.
Dust bag filling display
Hold the hose up into air. If the dust bag change display lights up, the bag is full. Please change it.
Changing the dust bag
- Pull the plug out of the socket.
- Press the button to open the lid of the dust bag compartment.
- Remove the dust bag holder and pull the dust bag out of the holder.
- Insert a new dust bag.
- Reinsert the dust bag holder.
- Close the cover so that it snaps into place.
Filter: Your appliance has two filters.
Motor protection filter (inlet filter):
- The inlet filter is located in the dust bag compartment.
GB
- Pull the button on the handle (10) upwards in order to open the housing.
- The filter is located vertically in the rear section of the dust housing.
- Remove the filter by pulling upwards. Clean the engine protection filter after 10 dust bag changes. If necessary, the filter can also be washed in warm water without any additives.
- Place it back into place only once it is completely dry!
Outlet filter:
- The appliance is also equipped with an outlet filter.
- It is located on the rear part of your appliance behind a ventilation grid.
- Open the ventilating grid by pressing the button on the underside of the grid.
- Pull the grid up and out. Remove the filter and clean as described above.
- Fit the filter back into place and close the ventilation grid by following the steps above in the opposite order.
Cleaning and storage
Cleaning
- Pull the plug out of the socket before cleaning!
- Clean the casing with a dry cloth.
- Clean the motor protection filter after each dust bag change. It is located behind the dust bag. Clean the filter in hot water without additives. Put it back into place only once it is completely dry.
Storage
- Wind the cable completely.
- Place the appliance vertically and put the vacuum pipe hook on the bottom.
This device has been tested according to all relevant current CE guidelines, such as electromagnetic compatibility and low voltage directives, and has been constructed in accordance with the latest safety regulations.
Subject to technical changes without prior notice!
Guarantee
The device supplied by our Company is covered by a 24 month guarantee starting on the date of purchase (receipt).
During the life of the guarantee any fault of the device or its accessories *) ascribable to material or manufacturing defects will be eliminated free of charge by repairing or, at our discretion, by replacing it. The guarantee services do not entail an extension of the life of the guarantee nor do they give rise to any right to a new guarantee!
Proof of the guarantee is provided by the proof of purchase. Without proof of purchase no free replacement or repair will be carried out.
If you wish to make a claim under the guarantee please return the entire machine in the original packaging to your dealer together with the receipt.
*) Damage to accessories does not mean automatic free replacement of the whole machine. In such cases please contact our hotline. Broken glass or breakage of plastic parts are always subject to a charge.
Defects to consumables or parts subject to wearing (e.g. motor pistons, kneading blades, drive shafts, spare remote control, spare toothbrushes, saw blades, etc.) as well as cleaning, maintenance or the replacement of said parts are not covered by the guarantee and hence are to be paid!
The guarantee lapses in case of unauthorized tampering.
After the expiry of the guarantee
After the expiry of the guarantee repairs can be carried by the competent dealer or repair service against the payment of the ensuing costs.
PL
Regulator sity ssania:
Niski stopien ssania: Do firanek, materiałów delikatnych.
HdNKaTop HanoJIHeHn MeIka- nblc6OpHnKa:
IobIMTe nbilecoCHyIO Tpy6y B BO3dyx. EcIn nHdkaTOp CMeHbI MeuKa- nblne6bOpnka CBETNTcra, TO OH noLOH. IoxaJyNCTa CmeHnte erO.
RUS
CmeHa MeuKa- nblnc6OpHnka:
- BbHbTe ceTeByIO BuJky n3 po3eTKn.
- OTKpoIte npn nOMOuN KHOJKN KpbIshKy OTceKa nbJIeSc6OpHnka.
- BbHbTe KOHTeHep nbIeC6OpHnKa HApxky N BBHbTe n3 HeRo nbIeC6OpHnK.
- BCTaBbTe HOBBI MEJOK.
- BCTaBbTe KOHTeHep 6paTHo.
- 3akpoIte KpbIuKy O6paTHO, IIO fHKcaUN.
ΦnIbTp: ΘeKtpoPnpO OShaUeH DByMa ΦnIbTppaMn.
3aunTHbIΦnJIbTp MOTopa(BXoHOnΦnJIbTp):
BxOHNHnJIbTp HaxoNTcB OTCeKe MeuKa-tnIec6OpHnka.
-ДяТOrOУTO6bIOTKpbITb KOpnyc BbITaHIne BBePx KONky OkOJpyuKN (10).
- Φιλβτρ pa3Meühen BepTnKaJIbHO B 3aДнeЧаСТИ KOpnyca nbIJIeCOca.
- BbIyHInTe fNJIbTp BBepx. IpoUHuaIe erO npIMepHo nocJe kaxdoi 10 CMeHb MeuKa-tnIEc6OpHnKa. Pn Heo6XoDMOCtN erO MOxHO npOMbITb B TeTIOB BOe, 6e3 IO6aBOK.
BCTabIyTe erO o6paTHo TOnbKO nocJe noHNo npocuKn!
BbIpyckHOHΦnJIbIrp:
- Kpome BCero 3JIeKTpOpi6Op OCHaUeH BbIyCKHbIM ΦJIbTpOM.
- 3TOT ΦильТр НхODИТСЯ Ha 3aДнЕЧАCTN Рпбopa 3a BEHTINLAQUHHO peшETКо.
- OTKpoIe BeHTnJIaIIOHHyIO peUeTKy, HaxkAB Ha KHOrKy OKOJIO ee HIXKHei KpOMKn.
- Nocne 3TOrO BbInbTe ee HapyKy, NotaHyB Ha ce6R. BbInbTe fNtBtp npouchnte erO, KaK 3To yKe 6bln OnncAoH.
BCTaBbTe fInIbTp 06paTHO n 3akpoTte BEHTnJIauHNOHHyIO peWetky B 06paTHo NocJeDoBaTeNbHOCTN.
Чinctka ихраенье
UncTka:
- Пара чисткоь Выньт ecTeByku Bnky n3 рo3etkn!
- PpOtpnte Kopnyc cyxO TpyNKoN.
- PpIM. nocIe kaKdoIro 10 noJIb3OBAHnE 3JIeKTpnpn6Opom Heo6xOIMO npOuIIaTb 3aUHTbI ΦNtBp MOTopa. OH haxOJITcR 3a MeUKOM- PbIIEc6OpHNkOM. IpPOMTe FnJIbTp B TeIIOB BoDE, 6e3 Do6aBOK. PocIe NOJHO RO BbICbIXaHnR BCTaBbTe erO O6paTHO.
XpaHeHne:
-ПОЛНOCТБСМOTаTe Ka6eBJ.
- UctaHOBITE 3JIeKTPoPn6Op B BepTkaJIbHOe NOLOXeHne N 3aKePInTe NblncOCHyIO Tpy6y, BCTaBb NKIOK, HaxOJaUIMcHa Hei, B 3aAnHOIO CTeHky.
3TO n3deJeHne npoJIO BCE Heo6xOaMbIe n aKTyaJIbHbIe npOBepKn, npEaNcAHbIe dIpeKTHBOI CE, K npM. Ha 3JIeKTpOMaHHTHyIO COBMeCTnMOCTb I COOTBeTCTBnE Tpe6oBaHnM K Hn3KOBoJbTHoI TEXHnke, OHO 6blIO TAKKe cKOHCTpyuPoBAHO INoCTpoEHO C yYeToM NOcJIeHNx Tpe6oBaHn IO TEXHnke 6e3OpacHoCTn.
Mbl octabnem 3a co6oI npaBO Ha TexHnueckne n3MeHeHnra!
TapaHTnHoe 06a3aTeIbCTBO
TapaHTnHbI cPOK Ha TeppntOpn PocCnCKo Fedepaun yCTaHbINBaETcnoJHOMOHyIMN IpeDCTaBtTeJIaM.
Kaccobbyuek yBnEeTcrapaHTnHbIM TaHOHom. Be3 Hero HeBO3MOXeH 6ecnlaTHbI peMOHT nIN 3aMeHa n3dJIIn.
B clyaee BO3HKnHOBXHn npTeH3n NO rapaHTn, npeIbYBNTe N3dJIne B IOnHOKOMnJIeKTAuIN, COpIRHaJIbHOy yNaKOBKOJ IN KACCObBIM YeKOM TOpROBOI TOKe, npOdaBWe 3TO n3dJIne.
*) Deфektы пинадлесхосте He служат почною Дя AVTOMATNUECKO 3amehb BCErO n3delen. B 3tOM clyuae no3BOHnTe Ham, noXaIyIcTa, no ropuey JINHN! Pa36ntbIe cTeKJIHHbIe I NOJOMaHbIe PIACTMaCCOBbIe DeTaN BO3MeUaIOTcToTbKO 3a DOJONHITeBHyIO ONlAty!
DeΦeKtBi N3HaUHbAembIX npInaIeXHOCTe INI TpyxxCg DeTalei (HaPnIMep KOHTaKTHbIE UeTKN MOTOPOB, CMEcNTeJIbHbIE KpIOKN, pINBODHbIE PEMHN, 3aNaCHbIe NylbTBI ynpabLeHnA, 3aNaChbIe 3y6HbIe UeTKN, NIIbHbIe NOJOTHa I T.D.), a TaKke YnCTKa, TexO6ClyXuBaHne INI 3aMeHa TpyxxCg DeTalei He IONaDAIOT NOI rapaHTNI, IN OToTMy nPoBOdYrC8a OTdeJIbHyIO ONIATy!
Fapantn TepaTc npB BckpbTn n3dJIy NOCTOpHHMn JIuamN.
После rapаHTи
Iocne OKOHuaHncaPoka rapaHTn,peMOHT n3deJn npOn3BOJNTc 3a ONlaTy COOTBeTCTBYUoUIMM MaCTepCKmN nnnyHKtAmC cepBnCHOO O6CnyKuBaHn.
Technische Daten
Modell: CB 957
- General Safety Instructions
- Special Safety Instructions
- GB
- Start-up
- Overview of the Components
- Not shown
- Using the Appliance
- Telescopic Suction Tube:
- Vacuum power regulator
- Cable winding device:
- Winding
- Nozzle accessories:
- Damper
- Dust bag filling display
- Changing the dust bag
- Outlet filter:
- Cleaning and storage
- Cleaning
- Storage
- Guarantee
- After the expiry of the guarantee
- PL
- Regulator sity ssania:
- HdNKaTop HanoJIHeHn MeIka- nblc6OpHnKa:
- RUS
- CmeHa MeuKa- nblnc6OpHnka:
- Чinctka ихраенье
- UncTka:
- XpaHeHne:
- TapaHTnHoe 06a3aTeIbCTBO
- После rapаHTи
- Technische Daten
Brand : BOMANN
Model : CB 957
Category : Vacuum Cleaner