PPA121 - Speaker JBSYSTEMS - Free user manual and instructions
Find the device manual for free PPA121 JBSYSTEMS in PDF.

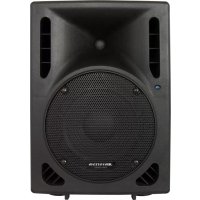
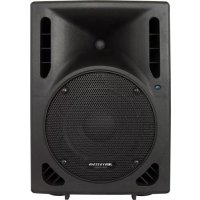
| Product type | Portable active speaker (PA system) |
| Brand | JBSYSTEMS |
| Model | PPA121 |
| Power | 250 W RMS (500 W peak music) |
| Woofer | 300 mm (12") |
| Tweeter | 35 mm (1.35") compression driver |
| Frequency response | 45 Hz - 20 kHz (+/-3 dB) |
| Total harmonic distortion | 0.12% (1 kHz/1 W) |
| Signal-to-noise ratio | 85 dB (mic off) |
| Line input sensitivity | 1 V |
| Microphone input sensitivity | 15 mV |
| Input impedance | 20 kOhms |
| Equalizer | Bass +/-12 dB at 100 Hz, treble +/-12 dB at 10 kHz |
| Built-in player | MP3/WMA via USB and SD/SD-HC (max 32 GB, FAT16/FAT32) |
| FM radio | 87.5 - 108 MHz, auto scan, internal antenna |
| Inputs | 2 mic (XLR/jack balanced/unbalanced), 1 line (XLR/RCA) |
| Output | Balanced line XLR |
| Power supply | 115 V/60 Hz or 230 V/50 Hz, selectable |
| Fuse | F5A/250V (5x20 mm) |
| Dimensions (WxHxD) | 372 x 580 x 315 mm |
| Weight | 15 kg |
| Enclosure | Durable polypropylene |
| Rigging | 4 M8 rigging points (eyebolts recommended) |
| Included accessories | Infrared remote control (CR2025 battery included) |
| Cooling | Natural (convection) |
Frequently Asked Questions - PPA121 JBSYSTEMS
User questions about PPA121 JBSYSTEMS
0 question about this device. Answer the ones you know or ask your own.
Ask a new question about this device
Download the instructions for your Speaker in PDF format for free! Find your manual PPA121 - JBSYSTEMS and take your electronic device back in hand. On this page are published all the documents necessary for the use of your device. PPA121 by JBSYSTEMS.
USER MANUAL PPA121 JBSYSTEMS
natural_image
Two black industrial audio equipment units, one front and one side, showing speaker grille and control panel (no visible text or symbols)Operation Manual EN
Mode d'emploi FR
natural_image
Abstract geometric shape with black and white lines forming a triangular form (no text or symbols)JBSYSTEMS


EN - DISPOSAL OF THE DEVICE
Dispose of the unit and used batteries in an environment friendly manner according to your country regulations.
FR - DÉCLASSER L'APPAREIL
Thank you for buying this JB Systems ^® product. To take full advantage of all possibilities, please read these operating instructions very carefully.
FEATURES
This unit is radio-interference suppressed. This appliance meets the requirements of the current European and national guidelines. Conformity has been established and the relevant statements and documents have been deposited by the manufacturer.
- A powerful portable PA-speaker with internal MP3-player (also plays WMA) + FM-radio combination
- The MP3-player accepts both USB-sticks and SD-HC memory cards up to 32GB
- The FM-radio has an internal antenna (no broken antennas) and automatic station preset programming
• Powerful 250Wrms amplifier (500W music)
- In addition to the internal player, you can also connect:
• 2 MIC inputs (bal + unbalanced)
• 1 LINE input (bal + unbalanced)
• LINE OUT (balanced) to connect extra speakers
- Treble / bass tone controls
• Heavy duty Polypropylene cabinet housing
• Built-in heavy duty carrying handle
• Built-in 35mm stand adapter
• Built-in Rigging points
• High power 12" Woofer
• High power 1.35" Compression Driver
BEFORE USE
- Before you start using this unit, please check if there's no transportation damage. Should there be any, do not use the device and consult your dealer first.
- Important: This device left our factory in perfect condition and well packaged. It is absolutely necessary for the user to strictly follow the safety instructions and warnings in this user manual. Any damage caused by mishandling is not subject to warranty. The dealer will not accept responsibility for any resulting defects or problems caused by disregarding this user manual.
- Keep this booklet in a safe place for future consultation. If you sell the fixture, be sure to add this user manual.
- To protect the environment, please try to recycle the packing material as much as possible.
Check the contents:
Check that the carton contains the following items:
- User mar
- PPA-121
- IR remote
SAFETY INSTRUCTIONS:

CAUTION
RISK OF ELECTRIC SHOCK DO NOT OPEN

CAUTION: To reduce the risk of electric shock, do not open. No user-serviceable parts inside. Refer servicing to qualified service personnel only.

The lightning flash with arrowhead symbol within the equilateral triangle is intended to alert the use or the presence of un-insulated “dangerous voltage” within the product’s enclosure that may be of sufficient magnitude to constitute a risk of electric shock.

The exclamation point within the equilateral triangle is intended to alert the user to the presence of important operation and maintenance (servicing) instructions in the literature accompanying this appliance.
This symbol means: indoor use only
This symbol means: Read instructions

This speaker can easily reproduce sound pressure levels (SPL) sufficient enough to cause severe and permanent hearing damage. Always protect your ears when you are exposed for a longer period to SPL in excess of 85dB!
- Even if the speaker cabinet is made of water resistant material, the woofer and tweeter are not protected against humid and rain. Therefore this speaker is intended for indoor use only, use of this product outdoors, in humid conditions, voids all warranties.
• Always mount this speaker in safe and stable matter. - Take special care when the cabinets are suspended. This is potentially dangerous and should only be carried out by technicians who have knowledge of the techniques and regulations of rigging speakers!
- To prevent fire or shock hazard, do not expose this appliance to rain or moisture.
- To avoid condensation to be formed inside, allow the unit to adapt to the surrounding temperatures when bringing it into a warm room after transport. Condense sometimes prevents the unit from working at full performance or may even cause damages.
- Don't place metal objects or spill liquid inside the unit. No objects filled with liquids, such as vases, shall be placed on this appliance. Electric shock or malfunction may result. If a foreign object enters the unit, immediately disconnect the mains power.
- No naked flame sources, such as lighted candles, should be placed on the appliance.
- Don't cover any ventilation openings as this may result in overheating.
- Prevent use in dusty environments and clean the unit regularly.
- Keep the unit away from children.
- Inexperienced persons should not operate this device.
- Maximum save ambient temperature is 40^ . Don't use this unit at higher ambient temperatures.
- Always unplug the unit when it is not used for a longer time or before you start servicing.
- The electrical installation should be carried out by qualified personal only, according to the regulations for electrical and mechanical safety in your country.
- Check that the available voltage is not higher than the one stated on the rear panel of the unit.
- The socket inlet shall remain operable for disconnection from the mains.
- The power cord should always be in perfect condition. Switch the unit immediately off when the power cord is squashed or damaged. It must be replaced by the manufacturer, its service agent or similarly qualified persons in order to avoid a hazard.
- Never let the power-cord come into contact with other cables!
- When the power switch is in OFF position, this unit is not completely disconnected from the mains!
- This appliance must be earthed to in order comply with safety regulations.
- In order to prevent electric shock, do not open. There are no user serviceable parts inside.
- Never repair a fuse or bypass the fuse holder. Always replace a damaged fuse with a fuse of the same type and electrical specifications!
- In the event of serious operating problems, stop using the appliance and contact your dealer immediately.
- Please use the original packing when the device is to be transported.
- Due to safety reasons it is prohibited to make unauthorized modifications to the unit.
FUNCTIONS
- USB-input: here you can connect a USB-stick. As soon as the memory device is inserted, the display shows "-- USB --", followed by the total number of songs detected.
Important note: the USB-memory should be formatted in FAT16 or FAT32. If a new USB-stick is not detected, please format it first using a Windows PC.
- SD-CARD input: here you can insert an SD or SDHC-card. Insert the card gently with the upper side (printed side) facing to the left. As soon as the memory device is inserted, the display shows “-- SD --”, followed by the total number of songs detected.
Important note: the SD-card should be formatted in FAT16 or FAT32. If a new SD-card is not detected, please format it first using a Windows PC.
-
LCD DISPLAY: shows valuable information about the played music or radio stations.
-
PLAY/PAUSE button:
Player operation:
- Press shortly: to start/pause the current audio track.
- Press longer: to enter folder select, use buttons (7) and (8) to browse the folders.
Radio mode:
- Press shortly: tuner scans the FM-band and programs the FM-preset stations automatically.
- SOURCE button: press this button to toggle between MP3-player and FM-tuner (radio).
- RANDOM button: press this button to choose one of the different random modes:
- REPEAT ONE: repeat the current track.
- REPEAT FOLDER: repeat current folder.
- REPEAT ALL: repeat all tracks on the USB-memory. This is the "standard" playback mode.
- REPEAT RANDOM: play all tracks in random order.
- PREVIOUS TRACK button:
Player operation:
- Press shortly:
• Normal playback: select previous track.
- Folder select: (see: 4): select previous folder.
- Press longer: reduce the volume of player. Standard the volume is set to maximum: we advice to keep it at maximum and use the rotary knob (10) to change the volume.
Radio mode:
- Press shortly: select the previous preset.
-
Press longer: reduce the volume of player. Standard the volume is set to maximum: we advice to keep it at maximum and use the rotary knob (10) to change the volume.
-
NEXT TRACK button:
Player operation:
- Press shortly:
• Normal playback: select next track.
- Folder select: (see: 4): select next folder.
- Press longer: increase the volume of player. Standard the volume is set to maximum: we advice to keep it at maximum and use the rotary knob (10) to change the volume.
Radio mode:
- Press shortly: select the next preset.
- Press longer: increase the volume of player. Standard the volume is set to maximum: we

advice to keep it at maximum and use the rotary knob (10) to change the volume.
- IR-RECEIVER: receives IR-signals from the remote control.
Important note for numbers 10+11+12+13: To prevent damage to the speakers of your speaker cabinet, please set all input levels always to zero before you switch the device on or connect a microphone / audio source. After this you can turn the level up to the desired level.
- RADIO/MP3-PLAYER VOLUME: used to adjust the volume of the internal player.
- MIC 1 INPUT + VOLUME: This input accepts both balanced and unbalanced microphones. You can use both 14 "jack and male 3pin-XLR connectors. First always set the volume knob to zero, after that turn it slowly up to the desired level.
- MIC 2 INPUT + VOLUME: same functionality as MIC 1, see: (11).
- LINE INPUT + VOLUME: This input accepts both balanced (3pin-XLR) and unbalanced (RCA, cinch) line level audio signals like for example: CD-player, tuner, MP3-player, ... First always set the volume knob to zero, after that turn it slowly up to the desired level.
- TONE CONTROLS: Used to adjust the treble and bass of the master signal.
- LINE OUTPUT: This balanced output (3pin-XLR) makes it possible to connect several speaker cabinets together, the line output is NOT influenced by the settings of the tone controls (14).
- CLIP LED: is lit when the amplifier is clipping (close to distortion). You are working on the limits of the amplifier, please turn the volume a little down.
- POWER LED: indicates that the amplifier is switched on.
- POWER SWITCH: Used to switch the internal amplifier on/off. The Power led (17) is lit while the cabinet is switched on.
- MAINS INPUT: Mains input with IEC socket and integrated fuse holder, connect the supplied mains cable here.
- VOLTAGE SELECTOR: used to select the mains input voltage, 115Vac or 230Vac. Check this switch BEFORE you connect the unit to the mains.
RIGGING
- Important: The installation must be carried out by qualified service personal only. Improper installation can result in serious injuries and/or damage to property. Overhead rigging requires extensive experience! Working load limits should be respected, certified installation materials should be used, the installed device should be inspected regularly for safety.
- Make sure the area below the installation place is free from unwanted persons during rigging, de-rigging and servicing.
- The cabinet should be installed out of reach of people and outside areas where persons may walk by or be seated.
- Before rigging make sure that the installation area can hold a minimum point load of 10 times the cabinet's weight.
- Always use a certified safety cable that can hold 12 times the weight of the cabinet while installing the unit. This secondary safety attachment should be installed in a way that no part of the installation can drop more than 20cm if the main attachment fails.
- The cabinet should be well fixed; a free-swinging mounting is dangerous and may not be considered!
- The operator has to make sure that the safety-relating and machine-technical installations are approved by an expert before using them for the first time. The installations should be inspected every year by a skilled person to be sure that safety is still optimal.
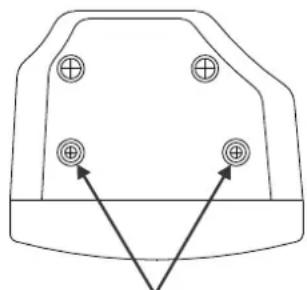
- The cabinet has 4 rigging points using M8 inserts. These can be used to suspend (fly) the cabinet in the air. For this purpose you can use heavy duty eyebolts with metric M8 thread. In most cases 2 cables will be attached to the top and one is used to pull up the back.
- Anyway always take special care when the cabinets are suspended. This is potentially dangerous and should only be carried out by technicians who have perfect knowledge of the techniques and regulations of rigging speakers!
natural_image
Simple line drawing of a vehicle front view with four circular components and two arrows pointing to the bottom section (no text or symbols)2 RIGGING POINTS M8 ON TOP AND BOTTOM
SPECIFICATIONS
PLAYER
USB-memory: <32GB – formatted FAT16 / FAT32
SD-card: SD + SDHC <32GB – formatted FAT16 / FAT32
Accepted audio files: WMA, MP3 (different sample rates, up to 320kbps)
FM Radio freq range: 87,5 to 108MHz
FM Radio tuning steps: 0,1MHz
IR-Remote replacement battery: CR2025 3V battery (included)
AMPLIFIER
Amplifier Power 250Wrms
Freq. Resp. (+/-3dB) 45 - 20.000Hz
THD (1kHz / 1W) 0,12%
Input Sensitivity line 1V
Input Sensitivity micro 15mV
Input impedance 20kohm
S/R ratio (mic off) >85dB
EQ low +/-12dB @ 100Hz
EQ high +/-12dB @ 10kHz
Cooling natural air cooling
Microphone input Bal/unbal XLR/Jack
Line input Bal/unbal XLR 3pin
Line output Bal/unbal XLR 3pin
Fuse (5x20mm) F5A / 250V
Power supply 115Vac/60Hz 230Vac/50Hz
Dimensions HxWxD 580 x 372 x 315 mm
Weight 15 kg
Every information is subject to change without prior notice
You can download the latest version of this user manual on our website: www.jb-systems.eu
GUIDE D'UTILISATION
natural_image
Simple line drawing of a vehicle front view with four circular symbols and two arrows pointing to the bottom section (no text or labels)2 RIGGING POINTS M8 ON TOP AND BOTTOM
SPÉCIFICATIONS
LECTEUR
Mémoire USB :
Carte SD :
natural_image
Pure diagram of a mechanical component with four circular holes and two arrows pointing to the base (no text or symbols)2 RIGGING POINTS M8 ON TOP AND BOTTOM
SPECIFICATIES
SPELER
USB-geheugen:
SD-kaart:
natural_image
Pure diagram of a mechanical component with four circular holes and two triangular heads, no text or symbols present.2 RIGGING POINTS M8 ON TOP AND BOTTOM
TECHNISCHE DATEN
PLAYER
natural_image
Pure diagram of a mechanical component with four circular holes and two arrows pointing to the base (no text or symbols)2 RIGGING POINTS M8 ON TOP AND BOTTOM
ESPECIFICACIONES
REPRODUCTOR
MANUAL DE INSTRUÇÕES
natural_image
Simple line drawing of a vehicle front view with four circular symbols and two arrows pointing to the bottom view (no text or labels)2 RIGGING POINTS M8 ON TOP AND BOTTOM
natural_image
Abstract geometric logo design with black and white shapes (no text or symbols)JBSYSTEMS
WWW.JB-SYSTEMS.EU
Copyright © 2014 by BEGLEC NV
't Hofveld 2C \~ B1702 Groot-Bijgaarden \~ Belgium
Reproduction or publication of the content in any manner, without express permission of the publisher, is prohibited.