PSA10 - Speaker JBSYSTEMS - Free user manual and instructions
Find the device manual for free PSA10 JBSYSTEMS in PDF.

User questions about PSA10 JBSYSTEMS
0 question about this device. Answer the ones you know or ask your own.
Ask a new question about this device
Download the instructions for your Speaker in PDF format for free! Find your manual PSA10 - JBSYSTEMS and take your electronic device back in hand. On this page are published all the documents necessary for the use of your device. PSA10 by JBSYSTEMS.
USER MANUAL PSA10 JBSYSTEMS
PSA-10 * PSA-12 * PSA-15
ACTIVE BI-AMPING SPEAKER CABINET

Operation Manual EN
Mode d'emploi FR
Dispose of the unit and used batteries in an environment friendly manner according to your country regulations.
FR-DECLASSES L'APPAREIL
Thank you for buying this JB Systems® product. To take full advantage of all possibilities, please read these operating instructions very carefully.
FEATURES
This unit is radio-interference suppressed. This appliance meets the requirements of the current European and national guidelines. Conformity has been established and the relevant statements and documents have been deposited by the manufacturer.
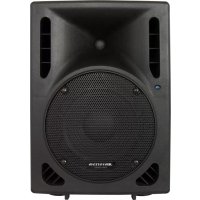
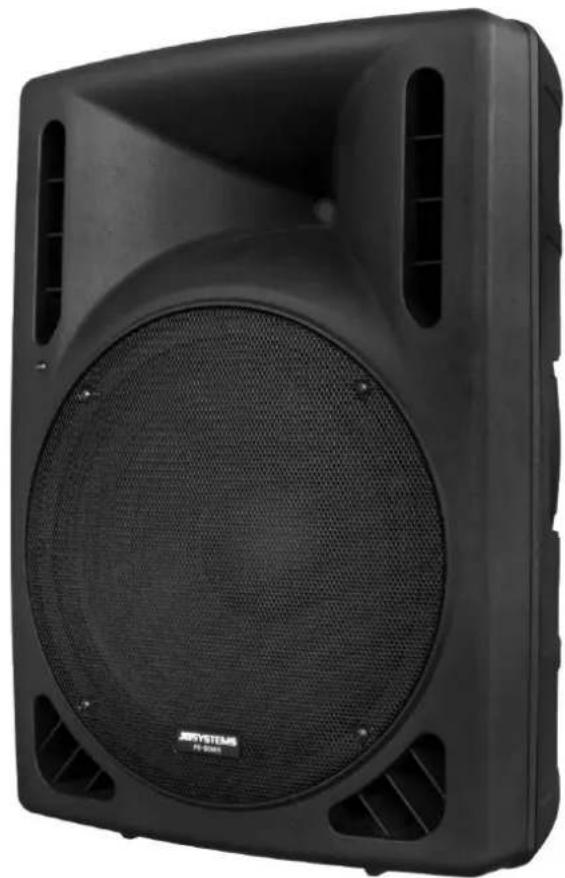
- Professional active speaker cabinet for a wide range of different applications.
- Heavy duty Polypropylene cabinet housing
-
Bi-Amping technology with separate amplifiers for woofer and tweeter for maximum impact:
-
PSA-10: woofer 130W + tweeter 30W RMS-power
- PSA-12: woofer 165W + tweeter 35W RMS-power
-
PSA-15: woofer 245W + tweeter 55W RMS-power
-
Fully tuned 6-Band parametric EQ for perfect sound
Active 2-way crossover - Perfect for both permanent installations and portable use (Rental, DJ, ...)
-
Equipped with high power woofer & compression driver:
-
PSA-10: 10^ woofer + 1.35" compression driver
- PSA-12: 12" woofer + 1.35" compression driver
-
PSA-15: 15" woofer + 1.75" compression driver
-
Balanced MIC + LINE inputs with level (PSA-15 has 2 mic inputs)
Balanced LINE output
- Treble + Bass controls + Master volume
- Blue „power“ LED on the front panel
Built-in M8 Rigging points
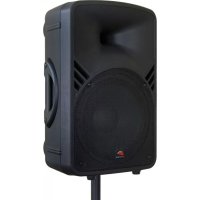
Built-in 35mm stand adapter
Monitor support stands included
Built-in heavy duty carrying handle
- Heavy duty rubber feet
BEFORE USE
- Before you start using this unit, please check if there's no transportation damage. Should there be any, do not use the device and consult your dealer first.
- Important: This device left our factory in perfect condition and well packaged. It is absolutely necessary for the user to strictly follow the safety instructions and warnings in this user manual. Any damage caused by mishandling is not subject to warranty. The dealer will not accept responsibility for any resulting defects or problems caused by disregarding this user manual.
- Keep this booklet in a safe place for future consultation. If you sell the fixture, be sure to add this user manual.
- To protect the environment, please try to recycle the packing material as much as possible.
Check the contents:
Check that the carton contains the following items:
- User manual
- PSA-10, PSA-12 or PSA-15 speaker cabinet
2 Monitor stands - Mains cable
SAFETY INSTRUCTIONS:

CAUTION
RISK OF ELECTRIC SHOCK DO NOT OPEN

CAUTION: To reduce the risk of electric shock, do not open. No user-serviceable parts inside. Refer servicing to qualified service personnel only.

The lightning flash with arrowhead symbol within the equilateral triangle is intended to alert the use or the presence of un-insulated "dangerous voltage" within the product's enclosure that may be of sufficient magnitude to constitute a risk of electric shock.

The exclamation point within the equilateral triangle is intended to alert the user to the presence of important operation and maintenance (servicing) instructions in the literature accompanying this appliance.

This symbol means: indoor use only
This symbol means: Read instructions

This speaker can easily reproduce sound pressure levels (SPL) sufficient enough to cause severe and permanent hearing damage. Always protect your ears when you are exposed for a longer period to SPL in excess of 85dB!
- Even if the speaker cabinet is made of water resistant material, the woofer and tweeter are not protected against humid and rain. Therefore this speaker is intended for indoor use only, use of this product outdoors, in humid conditions, voids all warranties.
- Always mount this speaker in safe and stable matter.
- Take special care when the cabinets are suspended. This is potentially dangerous and should only be carried out by technicians who have knowledge of the techniques and regulations of rigging speakers!
- To prevent fire or shock hazard, do not expose this appliance to rain or moisture.
- To avoid condensation to be formed inside, allow the unit to adapt to the surrounding temperatures when bringing it into a warm room after transport. Condense sometimes prevents the unit from working at full performance or may even cause damages.
- Don't place metal objects or spill liquid inside the unit. No objects filled with liquids, such as vases, shall be placed on this appliance. Electric shock or malfunction may result. If a foreign object enters the unit, immediately disconnect the mains power.
- No naked flame sources, such as lighted candles, should be placed on the appliance.
- Don't cover any ventilation openings as this may result in overheating.
- Prevent use in dusty environments and clean the unit regularly.
- Keep the unit away from children.
- Inexperienced persons should not operate this device.
Maximum save ambient temperature is 40^ . Don't use this unit at higher ambient temperatures. - Always unplug the unit when it is not used for a longer time or before you start servicing.
- The electrical installation should be carried out by qualified personal only, according to the regulations for electrical and mechanical safety in your country.
- Check that the available voltage is not higher than the one stated on the rear panel of the unit.
- The socket inlet shall remain operable for disconnection from the mains.
- The power cord should always be in perfect condition. Switch the unit immediately off when the power cord is squashed or damaged. It must be replaced by the manufacturer, its service agent or similarly qualified persons in order to avoid a hazard.
- Never let the power-cord come into contact with other cables!
- When the power switch is in OFF position, this unit is not completely disconnected from the mains!
- This appliance must be earthed to in order comply with safety regulations.
- In order to prevent electric shock, do not open. There are no user serviceable parts inside.
- Never repair a fuse or bypass the fuse holder. Always replace a damaged fuse with a fuse of the same type and electrical specifications!
- In the event of serious operating problems, stop using the appliance and contact your dealer immediately.
- Please use the original packing when the device is to be transported.
- Due to safety reasons it is prohibited to make unauthorized modifications to the unit.
FUNCTIONS AMPLIFIER
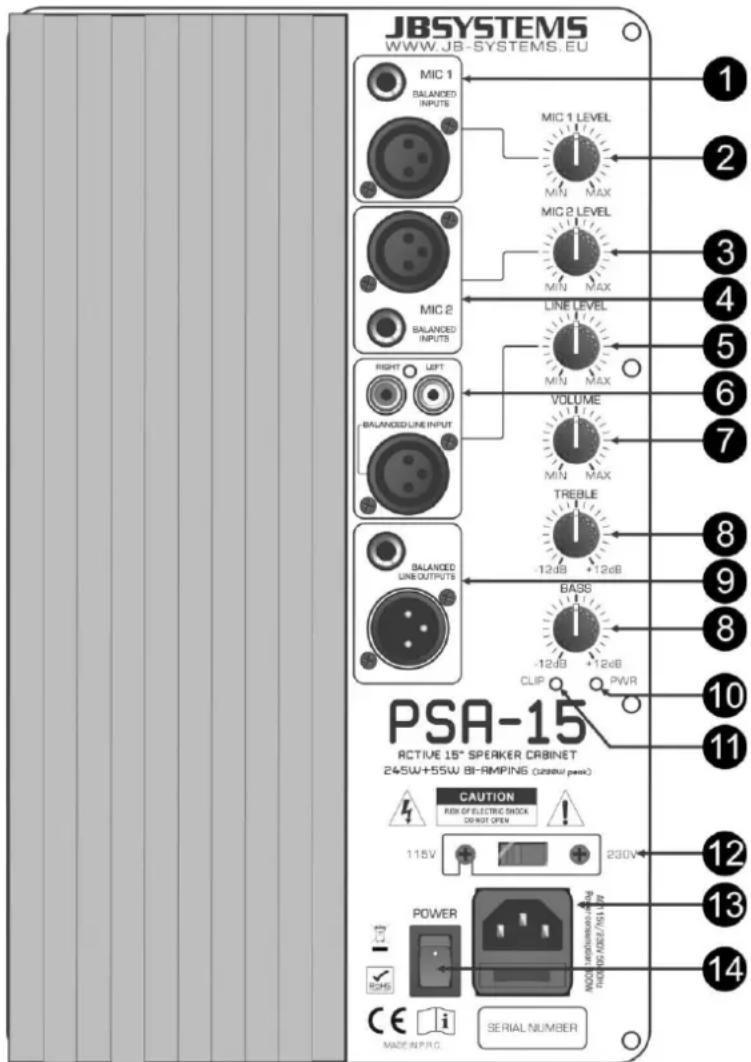
This is a combined user manual for PSA-10, PSA-12 and PSA-15. The control panel of the PSA-15 is shown, please note that some of the controls/inputs are not are not available on the PSA-10 & PSA-12.
- MIC 1 INPUT: This input accepts both balanced and unbalanced microphones. You can use both 14 jack and male 3pin-XLR connectors.
Attention: To prevent damage to the tweeters of your speaker cabinet, please set the micro input level (2 to zero before you connect the microphone.
Once connected you can turn the level up to the desired level.
- MIC 1 LEVEL: Used to set the input level of the microphone input (1).
- MIC 2 INPUT: (only available on PSA15) same functionality as MIC 1 input (1)
- MIC 2 LEVEL: (only available on PSA-15) same functionality as MIC 1 level (2)
- LINE LEVEL: Used to set the input level of the line input (6). Always set the control to minimum before connecting any audio source.
- LINE INPUT: This input accepts both balanced (3pin-XLR) and unbalanced (RCA, cinch) line level audio signals like for example: CD-player, tuner, MP3-player, ...
Attention: although the cinch input is stereo, the signal will be converted to mono inside the speaker.
- MASTER LEVEL: Used to set the overall volume of the amplifier. Always set the master level to zero when you switch the cabinet on, after this turn up the volume to the desired level.
- TONE CONTROLS: Used to adjust the treble and bass of the master signal.
- LINE OUTPUT: This balanced output (stereo jack 6.3mm and 3pin-XLR) makes it possible to connect several speaker cabinets together, the line output is NOT influenced by the settings for the master level (7) and tone controls (8).
- POWER LED: indicates that the amplifier is switched on, on the front panel you will find a second power led.
- CLIP LED: is lit when the amplifier is clipping (close to distortion). You are working on the limits of the amplifier, please turn the volume a little down.
- VOLTAGE SELECTOR: used to select the mains input voltage, 115Vac or 230Vac. Check this switch BEFORE you connect the unit to the mains.
- MAINS INPUT: Mains input with IEC socket and integrated fuse holder, connect the supplied mains cable here.
- POWER SWITCH: Used to switch the internal amplifier on/off. The Power led (10) is lit while the cabinet is switched on.
RIGGING
- Important: The installation must be carried out by qualified service personal only. Improper installation can result in serious injuries and/or damage to property. Overhead rigging requires extensive experience! Working load limits should be respected, certified installation materials should be used, the installed device should be inspected regularly for safety.
- Make sure the area below the installation place is free from unwanted persons during rigging, de-rigging and servicing.
- The cabinet should be installed out of reach of people and outside areas where persons may walk by or be seated.
- Before rigging make sure that the installation area can hold a minimum point load of 10 times the cabinet's weight.
- Always use a certified safety cable that can hold 12 times the weight of the cabinet while installing the unit. This secondary safety attachment should be installed in a way that no part of the installation can drop more than 20cm if the main attachment fails.
- The cabinet should be well fixed; a free-swinging mounting is dangerous and may not be considered!
- The operator has to make sure that the safety-relating and machine-technical installations are approved by an expert before using them for the first time. The installations should be inspected every year by a skilled person to be sure that safety is still optimal.
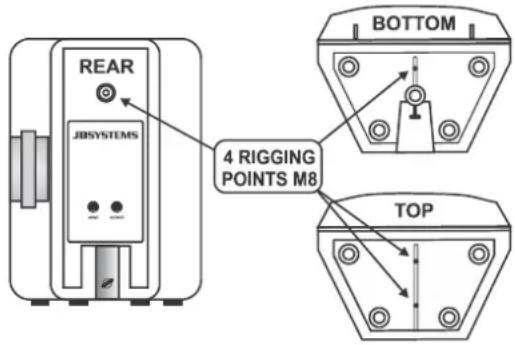
- The PSA-cabinets have 4 rigging points using M8 inserts. These can be used to suspend (fly) the cabinet in the air. For this purpose you can use heavy duty eyebolts with metric M8 thread. In most cases 2 cables will be attached to the top and one is used to pull up the back.
- Anyway always take special care when the cabinets are suspended. This is potentially dangerous and should only be carried out by technicians who have perfect knowledge of the techniques and regulations of rigging speakers!
SPECIFICATIONS
| MODEL | PSA-10 | PSA-12 | PSA-15 |
| Amplifier Tweeter | 30Wrms | 35Wrms | 55Wrms |
| Amplifier Woofer | 130Wrms | 165Wrms | 245Wrms |
| Tweeter | 1,35" | 1,35" | 1,75" |
| Woofer | 10" | 12" | 15" |
| Dispersion (HxV) | 90° x 60° | 90° x 60° | 90° x 60° |
| Freq. Resp. (+/-3dB) | 60 - 20.000Hz | 45 - 20.000Hz | 40 - 20.000Hz |
| THD (1kHz / 1W) | 0,10% | 0,10% | 0,10% |
| Input Sensitivity line | 1V | 1V | 1V |
| Input Sensitivity micro | 15mV | 15mV | 15mV |
| Input impedance | 20 kohm | 20 kohm | 20 kohm |
| S/R ratio (mic off) | >85dB | >85dB | >85dB |
| EQ low | +/-12dB @ 100Hz | +/-12dB @ 100Hz | +/-12dB @ 100Hz |
| EQ high | +/-12dB @ 10kHz | +/-12dB @ 10kHz | +/-12dB @ 10kHz |
| Cooling | natural air cooling | natural air cooling | natural air cooling |
| Microphone input | Bal/unbal XLR/Jack | Bal/unbal XLR/Jack | Bal/unbal XLR/Jack |
| Line input | Bal/unbal XLR 3pin | Bal/unbal XLR 3pin | Bal/unbal XLR 3pin |
| Line outputs | Bal/unbal XLR 3pin | Bal/unbal XLR 3pin | Bal/unbal XLR 3pin |
| Fuse (5x20mm) | F3,15A / 250V | F4A / 250V | F5A / 250V |
| Power supply | 115Vac/60Hz 230Vac/50Hz | 115Vac/60Hz 230Vac/50Hz | 115Vac/60Hz 230Vac/50Hz |
| Dimensions HxWxD (mm) | 500 x 361 x 280 | 588 x 431 x 310 | 680 x 470 x 400 |
| Weight (kg) | 11,6 | 17 | 23,3 |
Every information is subject to change without prior notice
You can download the latest version of this user manual on our website: www.jb-systems.eu
GUIDE D'UTILISATION
Copyright © 2014 by BEGLEC NV
t Hofveld 2C ~ B1702 Groot-Bijgaarden ~ Belgium
Reproduction or publication of the content in any manner, without express permission of the publisher, is prohibited.