MP3S1 - Mp3 player AIPTEK - Free user manual and instructions
Find the device manual for free MP3S1 AIPTEK in PDF.
| Product Type | MP3 Player |
| Brand | Aiptek |
| Model | MP3S1 |
| Dimensions (L x W x H) | 91 x 30 x 23 mm |
| Weight (with batteries) | 40 g |
| Power Supply | 2 AAA batteries |
| Playback Time | More than 14 hours |
| Display | Blue backlit LCD (27 x 10 mm) |
| Interface | USB 1.1 |
| Supported audio formats | MP3 (MPEG-1 Layer 3), WMA (5-192 kbps), WAV (32 kbps), ASF (6.3 kbps) |
| Internal memory | 128 MB (indicative capacity) |
| Audio output | 5 mW, 3.5 mm headphone jack |
| Frequency response | 20 Hz - 20 kHz |
| Voice recording | Digital (WAV 32 kbps or ASF 6.3 kbps), duration up to 8 hours |
| Main functions | MP3 playback, shuffle, repeat, equalizer (Normal, DBB, Jazz, Disco, Pop, Classic), A-B repeat, demo mode, playlist |
| Clock and alarm | 24-hour clock, alarm with modes Normal, Repeat, Off |
| Safety | Key lock; do not expose to water, high temperatures, direct sunlight; use only batteries of the same type |
| Maintenance | Clean with a dry cloth; remove batteries when not in use for extended periods |
| Display languages | English, German |
Frequently Asked Questions - MP3S1 AIPTEK
User questions about MP3S1 AIPTEK
0 question about this device. Answer the ones you know or ask your own.
Ask a new question about this device
Download the instructions for your Mp3 player in PDF format for free! Find your manual MP3S1 - AIPTEK and take your electronic device back in hand. On this page are published all the documents necessary for the use of your device. MP3S1 by AIPTEK.
USER MANUAL MP3S1 AIPTEK
Dear user, thanks for purchasing this product. Much investment in time and effort has gone into its development, and it is our hope that it will give you many years of trouble-free service. If you have any questions, please contact any AIPTEK office listed on the inside of the back cover.
CAUTION
- Do not drop, puncture or disassemble the product; otherwise the warranty will be voided.
- Avoid all contact with water and dry hands before using.
- Do not expose the product to high temperature or leave it in direct sunlight. Doing so may damage this product.
- Use this product with care. Avoid pressing hard on the product.
- For your own safety, avoid using this product when there is a storm or lightning.
- Avoid using batteries of different brands or types at the same time. There is potential for serious damage by using different cells.
- Remove the batteries during long periods between usage, as deteriorated batteries may affect the functionality of this product.
- Remove the batteries if they show signs of leaking or distortion.
- We suggest using only the accessories supplied by the manufacturer.


WELCOME 2
CAUTION 2
TABLE OF CONTENTS 3
OVERVIEW 5
Product Features 5
Package Contents 5
Parts and Controls 6
LCD Display 7
MENUsubdirectory 8
MENU Operation 8
GETTING STARTED 9
Inserting Batteries 9
Attaching the Strap 9
- Installing the USB driver (for Windows 98SE) 103
Connecting to your PC 10
Removing the Player 11
PLAYING AN MP3 FILE 12
- Basic Operation 123
Other Functions 13
A-B Repeat Play 13
E.Q.Mode 14
Starting Recording 15
How to play a voice file 15
How to delete the voice files 16
Selecting the Voice Format 16
SETTING THE ALARM CLOCK 17
Setting the Time 17
Setting ALARM Time 18
Selecting ALARM Mode 19
SYSTEM SETTING 20
Entering the Setting Mode 20
BRIGHTNESS 20
CONTRAST 21
AUTO OFF 21
LANGUAGE 21
MEMORY 21
Changing DEMO time 23
Play List 24
Setting the favorite tracks 24
Playing the favorite tracks 24
Deleting Tracks 25
Deleting one track 25
Deleting all tracks 25
Deleting MEMO track 26
OTHER INFORMATION 27
Batteries Level Indicator 27
Specifications 28
TROUBLESHOOTING 29

Product Features
MP3 player
USB disk
Digital voice recorder
Alarm clock

Package Contents
MP3 player
USB cable
Neck strap with arophone
2 x AAA alkaline batteries
USB driver installation CD (for Windows 98SE)
User's manual

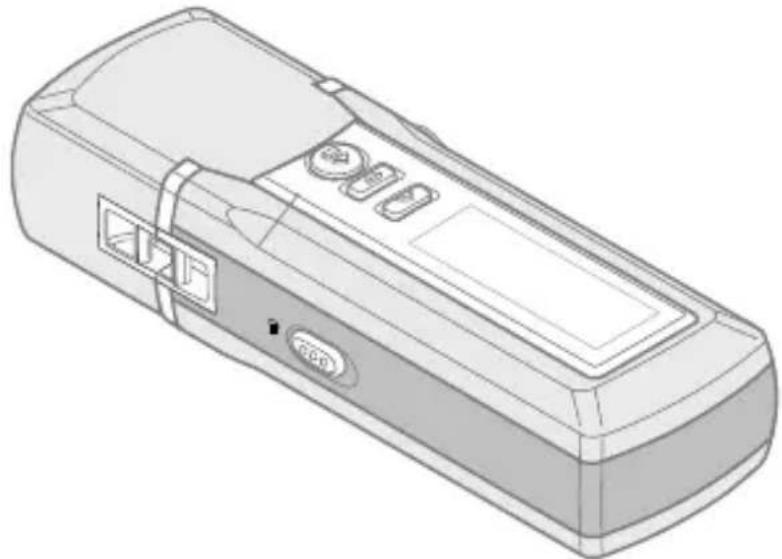
Parts and Controls
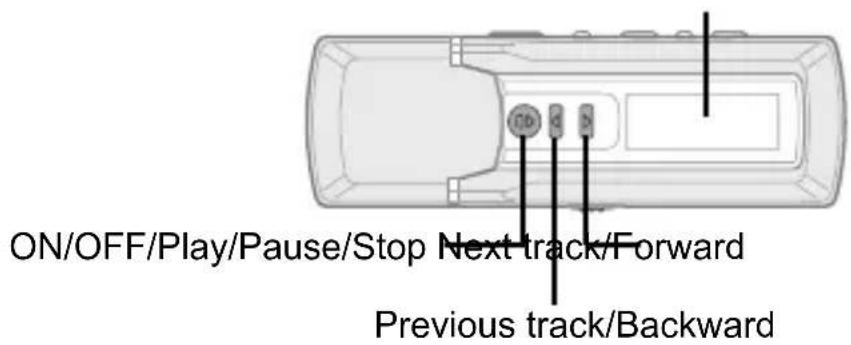
Front view:
LCD display
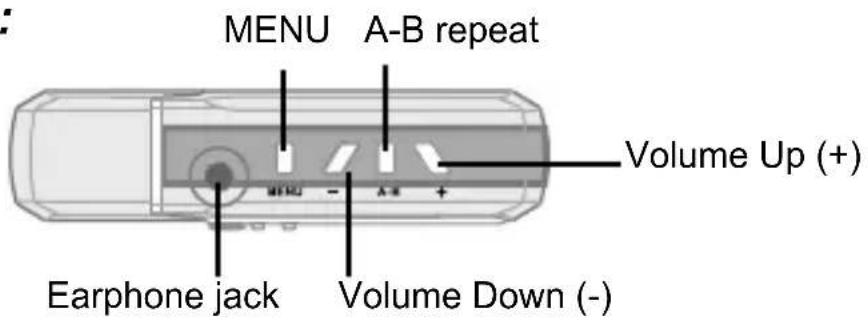
Top view:
Side view:
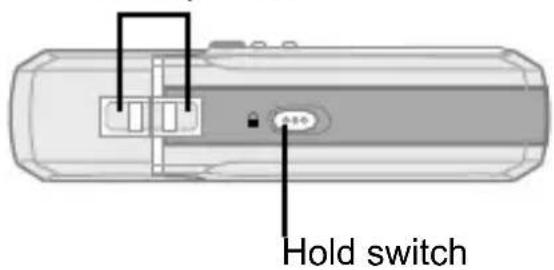
Neck Strap holes
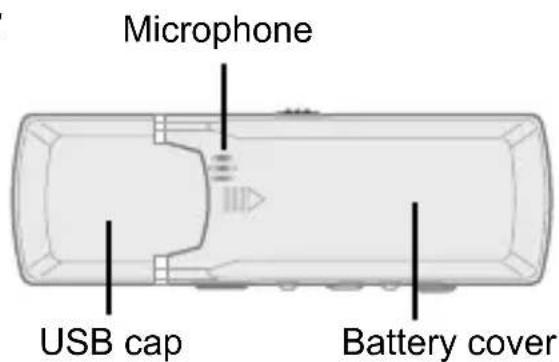
Rear view:

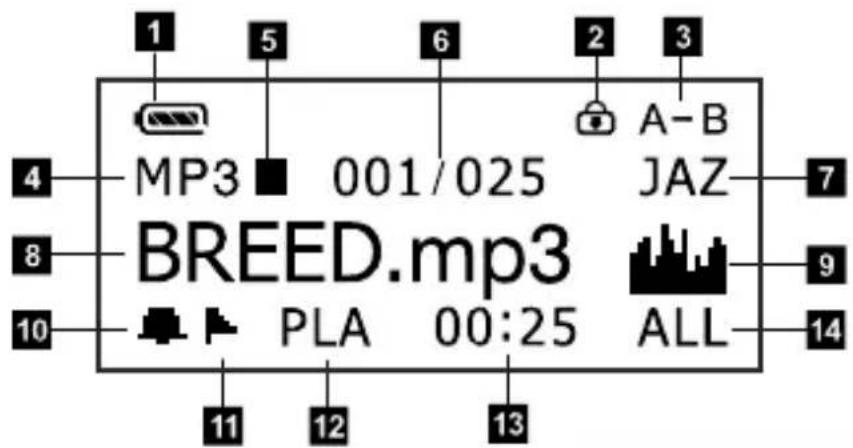
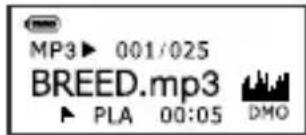
LCD Display
| Item | Icon Description | on |
| 1 | Battery level indicator. | |
| 2 | Lock indicator. | |
| 3 | A-B | A-B Repeat indicator. |
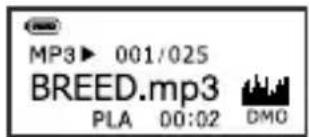
| 4 | MP3 | Function mode. [MP3(WMA), VOI(WAV, ASF), REC(WAV, ASF)] |
| 5 | ■ | Play status. (■■,▶▲) |
| 6 | 001/025 | Current file/Total files. |
| 7 | JAZ | E.Q. indicator. (NOR, DBB, JAZ, DIS, POP, CLA) |
| 8 | xxxx.mp3 | File name. |
| 9 | E.Q. spectrum. | |
| 10 | Alarm mark. | |
| 11 | File mark. | |
| 12 | PLA | Play LIST. (PLA, PLF) |
| 13 | 00:25 | Play time. |
| 14 | ALL | Repeat mode. (OFF, 1, ALL, RDM, DMO) |

MENUSubdirectory
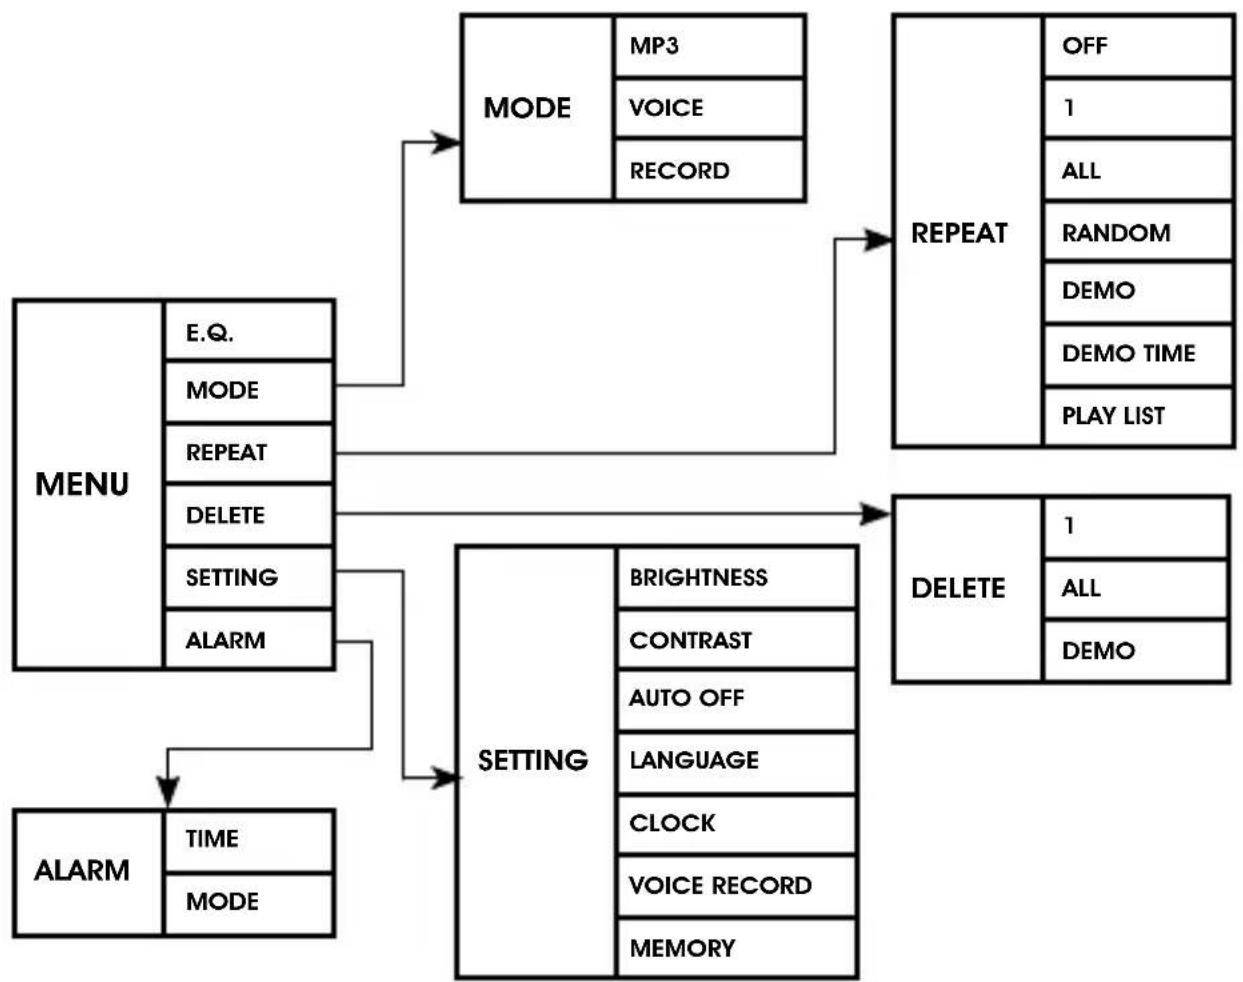

MENU Operation
To enter the subdirectory, press the MENU button.
To move to the upper directory, press the PLAY button.
To shift between items, press the l or button.
To confirm the item selection, press the MENU button.

Inserting Batteries
- Take off the cap.
- Slide open the battery cover.
- Place two AAA batteries in accordance with the anode (+) and cathode(-) marks.
- Replace the battery cover and cap.


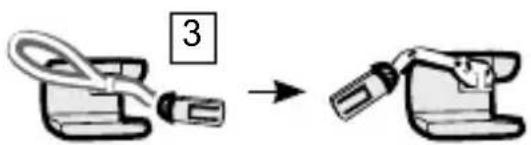
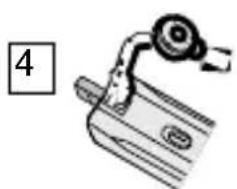
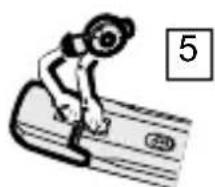
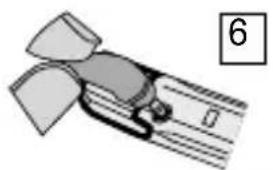
Attaching the Strap
- Press the button as indicated to disassemble the strap.
- Take off the cap.
- Bind the short strap to the cap through the strap hole.
- Bind the other strap to the MP3 player through the strap hole on the MP3 player.
- Combine the parts as indicated.
- Plug the earphone in the
earphone jack on the side of the
player.


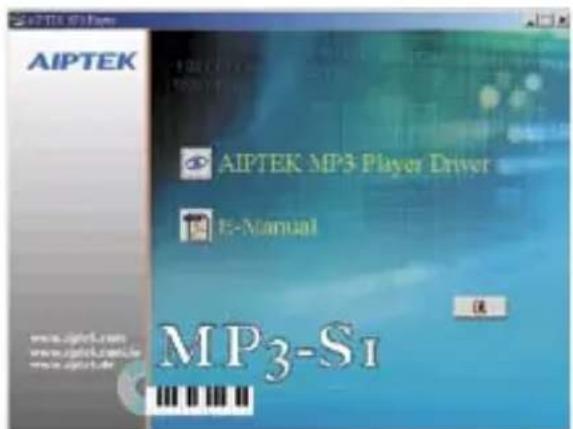
Installing the USB Driver (for Windows 98SE)
If you are running Windows ME, 2000, or XP on your PC, your player will be automatically detected as a "removable drive" and needs no installation.
If you are running Windows 98SE on your PC, you will need to install the driver with the supplied installation CD.
- Insert the installation CD into your CD-ROM player.
- Click on the icon to launch the installation of "AIPTEK MP3 Player Driver".
- Follow the installation instructions.

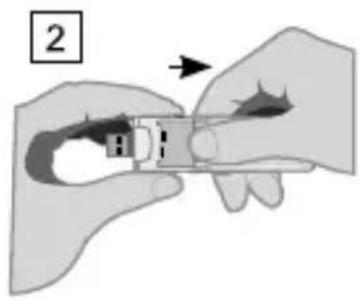
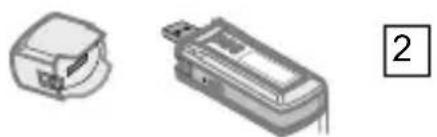
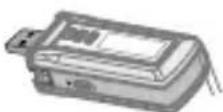
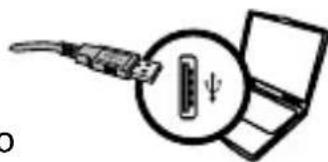
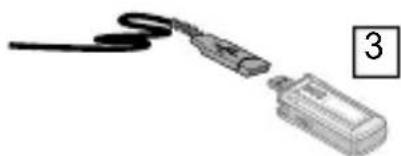
Connecting to Your PC
- Take off the cap.
- Connect the fl at USB end of the USB cable to the PC.
- Connect the other end of USB cable into the player.
- You may also plug the player directly in the USB port of the PC.
1
2

Now, you can download MP3 files to the player from the computer hard drive with the mouse.

Removing the Player
For Windows 98SE users:
Unplug the MP3 player from the USB port when file transferring is finished.
For Windows ME, 2000, or XP users:
- Double-click on the removable icon ( ) on the task bar to bring up the following message.

- Click "Stop". When the "Stop a Hardware device" message appears, click "OK" and unplug the player.

Do not remove the MP3 player from the USB port during file transferring.

Basic Operation

To Turn On the Player

ress and hold the button.

To Play

press the button when power is on.

To Pause

Press the button during playing.

To Stop

Press and hold the button during playing.

To Select the Next Track

Press the button to select the next track.

To Select the Previous Track

Press the button to select the previous track.

To Fast Forward

Press and hold the button to fast forward.

To Fast Backward

Press and hold the button to fast backward.

To Turn Off the Player

Press and hold the button when playback stops.

To Adjust the Volume
Press the Volume Up (+) button to raise the level.
Press the Volume Down (-) button to lower the level.

Other Functions

A-B Repeat Play
This feature allows you to listen to a specific section of a track repeatedly, makes the player an effective tool for language learning.
- Press the A-B button during playback to select the starting point of A-B Repeat.
- "A-" is displayed on the LCD display. Press the A-B button during playback to select the ending point of A-B Repeat.
- "A-B" appears on the LCD display and playback the A-B section repeatedly.
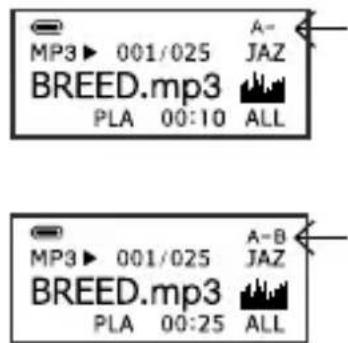

To cancel the A-B Repeat mode, press the A-B button again. "A-B" will disappear from the LCD display.
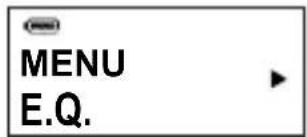
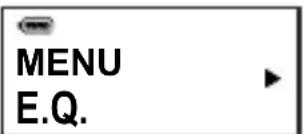
E.Q. mode
The E.Q. mode is only available when playing MP3.
- Press the MENU button to enter the MENU selection.

- Press the MENU button to enter the subdirectory.
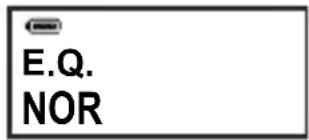
- Press the button to select the desired E.Q. mode.
NOR: For most of music.
DBB: Ultra Bass.
JAZ: For Jazz music.
DIS: For Disco music.
POP: For POP music.
CLA: For classical music.
- Press the MENU button to confirm.
- Press the PLAY button to exit.

- When the Hold switch is turned on, the buttons on the player will not respond.

- When connecting to PC, the Hold switch will function as the Write-Protection switch to prevent data from being accidentally erased.

Starting Recording
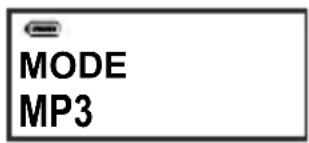
- Press the MENU button to enter the MENU selection. Then press the button to select MODE.
- Press the MENU button to enter the subdirectory.
- Press the button to select RECORD.
- Press the MENU button to start voice recording.


You can switch between pause and record by pressing the Play button during recording.
- Press and hold the PLAY button to stop recording.
The voice message will be recorded in the built-in memory in the order of REC_0001.WAV/ASF, REC_0002.WAV/ASF, ....

How to play a voice file
When the voice recording stops, the player will turn to VOICE mode automatically. You can press the PLAY button to playback the last recorded voice file.

- Operation of voice file playback is the same as illustrated in the chapter "PLAYING AN MP3 FILE".
- During voice recording, the A-B button will not function.
How to delete the voice files
Whenever you want to delete the voice files, please make sure the player is set to VOICE mode. Then follow the steps illustrated in the section "DELETING TRACKS" on page 26.

Selecting the Voice Format
- Press the MENU button to enter the MENU selection.
- Press the button to select SETTING.
- Press the MENU button to enter the subdirectory.
- Press the button to select VOICE REC.
- Press the MENU button to enter the subdirectory.
- Press the button to select WAV or ASF format. (WAV: 32Kbps; ASF: 6.3Kbps)
- Press the MENU button to confirm.


ASF format is not available in Windows Media Player 8.0 and previous versions. If your Windows Media Player 9.0 has problems playing ASF files, please connect to the internet first, and then the Windows Media Player will download the CODECs Pack automatically.

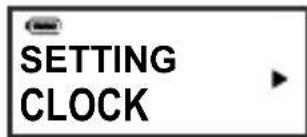
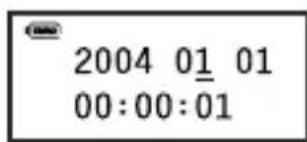
Setting the Time
This player provides a 24-hour clock.
- Press the MENU button to enter the MENU selection.
- Press the button to select SETTING.
- Press the MENU button to enter the subdirectory.
- Press the button to select CLOCK.
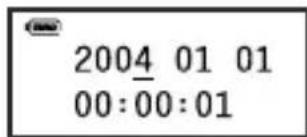
- Press the MENU button to enter the LCD DISPLAY.
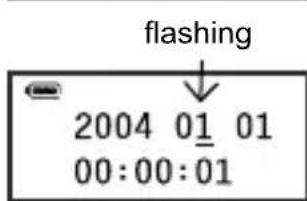
- Use the or button to move the tab to the item (year/month/date/hour/minute/second) you want to adjust.
- Press the MENU button to confirm. The tab below the item will flash.
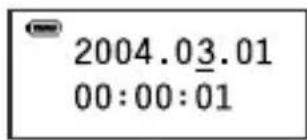
- Use the or button to select the "Month" item.
- Press the MENU button to confirm. The tab will stop flashing.
- Repeat steps 6-9 to complete the setting.


Setting ALARM Time
Please set the time of the player before setting the alarm clock.
- Press the MENU button to enter the MENU selection.
- Press the button to select ALARM.
- Press the MENU button to enter the subdirectory.
- Press the MENU button to confirm. The current setting will appear on the LCD display.
- Press the MENU button, the tab below the "Hour" indicator will flash.
- Use the or button to select the time. Press the MENU button to confirm.
- Use the or button to move the tab to the "Minute" item. Press the MENU button to confirm.
- Repeat steps 6-7 to complete the setting.
E.Q.
MENU ALARM
ALARM TIME
00:00:01
00 : 00 : 01 不等式
flashing
18:00:01
18:00:01
18:30:01

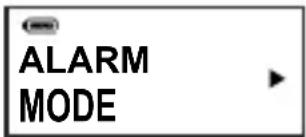
Selecting ALARM Mode
- Press the MENU button to enter the MENU selection.
- Press the button to select ALARM.
- Press the MENU button to enter the subdirectory.
- Press the button to select MODE.
- Press the MENU button to enter the subdirectory.
- Press the button to select from OFF, NORMAL, or REPEAT.


NORMAL: The alarm will beep for one minute and stop automatically. You may also press the PLAY button to stop it.
REPEAT: The alarm will beep for one minute and stop every 5 minutes until you press the PLAY button to stop it.
OFF: The alarm clock will be turned off.

- As the ALARM mode is enabled, the Alarm icon (will appear on the LCD display even if the power is off.
The PLAY button also functions as the Wake Up button. When the power is off, press the PLAY button to resume the LCD DISPLAY.
- Volume Up (+) and Volume Down (-) buttons will not function in ALARM mode.

Entering the Setting Mode
You can use various options provided in SETTING mode to suit your personal taste.
- Press the MENU button to enter the MENU selection.
- Press the button to select SETTING.
- Press the MENU button to enter the subdirectory.
E.Q.
MENUSETTING
SETTING BRIGHTNESS
After entering SETTING status, use the button to select the desired item. Then press the MENU button to confirm the selection. To adjust value of the item, use the or button to decrease/increase the value and then press the MENU button to confirm.

BRIGHTNESS
The backlight will turn on by clicking any key. You can turn off the backlight or adjust the time of automatically turn off.
BRIGHTNESS 5
| 5, 10, 20, 30, 60 (seconds) | Turns on the backlight according to the setting time. |
| PREM Turns on the backlight all the time. | |
| OFF Turns the backlight off. | |
CONTRAST
The LCD contrast can be adjusted for levels 0-5.
CONTRAST 3
AUTO OFF
This function allows the player to automatically turn off after a fixed time.
AUTO OFF OFF
| OFF AUTO OFF function is disabled. |
| 3, 5, 10, 30 (minutes) Sets the player to turn off when idle for over 3, 5, 10 or 30 minutes. |
LANGUAGE
ENGLISH and GERMAN are available in the MP3 player.
LANGUAGE ENGLISH
MEMORY
This option provides the information of the total and remaining memory of the MP3 player.
SETTING MEMORY
Total:128M Free:107M

REPEAT Setting
You can play tracks in the following repeat modes:
| OFF REPEAT mode is | disabled. All tracks will be played one time. |
| 1 Plays one track repeatedly. | |
| ALL Plays all tracks repeatedly. | |
| RANDOM Randomly plays all tracks repeatedly. | |
| DEMO Repeatedly plays all tracks in DEMO mode . |


- Press the MENU button to enter the MENU selection.
- Press the button to select REPEAT.
- Press the MENU button to enter the subdirectory.
- Press the button to select OFF, 1, ALL, RANDOM, or DEMO.
- Press the MENU button to confirm.

Please refer to the next page for details about the DEMO function.

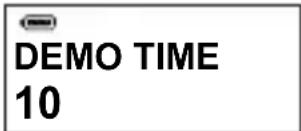
DEMO Function
This function will play the first 10, 20, or 30 seconds of each track, so that you can decide whether to include the tracks in the PLAY LIST or not.
Changing DEMO time
- Press the MENU button to enter the MENU selection.

- Press the button to select REPEAT.

- Press the MENU button.

- Press the button to select DEMO TIME.

- Press the MENU button to enter the subdirectory.
-
Press the 4 or 5 button to select the desired DEMO time (10, 20, or 30 seconds).
-
Press the MENU button to confirm. (Note: If no change is made, press the PLAY button to exit.)

- When DEMO function is enabled, the A-B Repeat Play function is disabled.
- Both DEMO function and PLAY LIST function can be enabled simultaneously.

Play List
When DEMO function is enabled, you can set the PLAY LIST which allows up to 32 favorite tracks. (for MP3 mode only)
Setting the favorite tracks
- Press the PLAY button in DEMO mode.
- During playback, press the A-B button to mark ( ) the favorite tracks.

To deselect the favorite track, press the A-B button during playback. The mark ( ) in front of the track will disappear.
Playing the favorite tracks
- Press the MENU button to enter the MENU selection.
- Press the button to select REPEAT.
- Press the MENU button to enter the subdirectory.
- Press the button to select PLAY LIST.
- Press the MENU button to enter the subdirectory.
- Press the button to select FAVORITE.
- Press the MENU button to confirm.


Deleting Tracks
You can delete tracks in DELETE mode:
- Press the MENU button to enter the MENU selection.
- Press the button to select DELETE.
- Press the MENU button to enter the subdirectory.
MENUDELETE
Deleting one track
- After entering DELETE mode, use the button to select 1.
- Press the MENU button to confirm.
- Use the or button to select the track, and press the A-B button to delete.
DELETE 1
002/025
xxxxxx.mp3
Deleting all tracks
- After entering DELETE mode, use the button to select ALL.
- Press the MENU button to confirm.
- Use the or button to switch from "Yes?" and "No?". (Yes: Delete; No: Exit to the upper directory.)
- Press the A-B button to confirm.
DELETE ALL
Yes?

No?

Del ...
Deleting DEMO track
- After entering DELETE mode, use the button to select DEMO. Press the MENU button to confirm.
- Use the or button to move to the next or previous track.
- Press the A-B button to confirm.
- Use the or button to switch from "Yes?" and "No?". (Yes: Delete; No: Exit to the upper directory.)
- Press the A-B button to confirm.
- After deleting the demo track, press and hold the PLAY button until playback stops to exit the DELETE mode.
DELETE DEMO


Batteries Level Indicator
The battery level indicator displays the power remaining with the following five symbols.
| The battery power is above 90%. | |
| The battery power is above 70%. | |
| The battery power is above 40%. | |
| The battery power is above 10%. Please change the batteries immediately. | |
| The battery power is very low. The icon will flash for 5~10 seconds then the power will turn off automatically. |

Specifications
| LCD display dimension 10mm (H) x 27mm (L) | |
| LCD display with blue Backlight | |
| Interface USB 1.1 compliant | |
| Music format MP3 (MPEG-1) | Layer 3) WMA (5Kbps ~ 192Kbps) |
| Multi-language supports English, German | |
| Digital voice record 6.3Kbps | (G723.1) 32Kbps (ADPCM) |
| Recording Quality: MIC (Mono) | 8kHz 6.3Kbps (ASF) 8kHz 32Kbps (WAV) |
| Recording time 8 hours/ 32Kbps (take 128M for example) | |
| Earphone jack φ3.5 mm | |
| Continuous play time | more than 14 hours |
| Audio output 5mW | |
| Output frequency range 20Hz ~ 20kHz | |
| Power source 2 x AAA batteries | |
| Dimension 91 x 30 x 23 mm | |
| Unit weight 40g (batteries excluded) | |
| FAT file system supports FAT16 | |
| Question Answer | |
| Power cannot be turned on. | Check if the batteries are installed correctly. |
| Check if the batteries are exhausted. | |
| Check if the HOLD switch is turned on. | |
| The MP3 player cannot play music/voice files. | Check if there are any MP3 files in the MP3 player. If not, connect the player to PC to download files. |
| Check if the sample rate of WMA format is below 192Kbps. | |
| The buttons don’t respond. | Check if the HOLD switch is turned on. |
| In ALARM mode, the Volume Up (+) and Volume Down (-) buttons will not function. | |
| After entering the MENU Subdirectory, the Volume Up (+) and Volume Down (-) buttons will not function. | |
| The track name displays messy code. | Make sure to select the right language. Please ignore the messy code. This problem might be caused by unrecognizable file names or ID3 tag information, for the player can only recognize English and German. |
| Can the player play music of files placed in the folder? | The player will playback files in the root directory and also the files placed in the folder. |
| LCD displays wrong message when turning on the power. | Make sure the file system type is “FAT16”. |
Bedienungsanleitung
< WILLKOMMEN>
Total:128M Free:107M

Total:128M Free:107M

IMPOSTAZIONE REPEAT (RIPETI)
Total:128M Free:107M

WELKOM 2
WAARSCHUWING 2
INHOUDSOPGAVE 3
OVERZICH 5
Total:128M Free:107M

HERHALEN
Eliminar as faixas 25
Eliminarumafaixa 25
Eliminar as faixas DEMO 26
OUTRAS INFORMAÇÉS 27
MP3 player
USB disk
Digital voice recorder
Relógio com alarme

Total:128M Free:107M

A FUNÇA O REPEAT (REPETIR)
47877 Willich, Germany
TEL +49 2154-923550
Fax +49 2154-923568
Http://www.ajptek.de
AIPTEK International Inc.
No. 19 Industry E. Rd. IV,
Hsinchu Science Park,
Hsin-Chu 300, Taiwan, R.O.C.
Tel: 886-3-5678138
Fax: 886-3-5678569
51 Discovery, Suite 100
Irvine, CA 92618, USA
TEL: 949-585-9600
FAX: 949-585-9345