
AromaMaster - Coffee machine WMF - Free user manual and instructions
Find the device manual for free AromaMaster WMF in PDF.
| Product type | Drip coffee machine |
| Brand | WMF |
| Model | AromaMaster |
| Power supply | 220-240 V, 50-60 Hz |
| Power | 900 W (model with glass carafe) / 1080 W (model with insulated carafe) |
| Water tank capacity | Approx. 1.2 L (10 cups) |
| Carafe type | Glass or Cromargan® insulated depending on version |
| Main functions | Coffee brewing, automatic keep warm (40 min), Aroma Perfection function for stronger coffee, auto shut-off |
| Aroma Perfection function | Can be activated for a more intense coffee, suitable for small quantities |
| Keep warm | Automatic for 40 minutes after brewing, can be deactivated |
| Auto shut-off | Yes (insulated carafe) or after 40 min (glass carafe) |
| Descaling indicator | Blue/white light indicator |
| Descaling program | Automatic, do not interrupt |
| Anti-drip system | Anti-drip valve in filter holder |
| Filter type | Paper (standard size, foldable) |
| Materials | Plastic, stainless steel (Cromargan®) for insulated carafe |
| Safety | Auto shut-off, hot surfaces (caution burn), do not use without water |
| Cleaning | Clean with a damp cloth, do not use abrasive products. Rinse carafe and filter |
| Descaling | Use a suitable descaling agent (Cromargol® recommended), automatic program |
| Dimensions (approx.) | 30 x 20 x 35 cm (approx.) |
| Weight (approx.) | 2.5 kg (approx.) |
Frequently Asked Questions - AromaMaster WMF
User questions about AromaMaster WMF
0 question about this device. Answer the ones you know or ask your own.
Ask a new question about this device
Download the instructions for your Coffee machine in PDF format for free! Find your manual AromaMaster - WMF and take your electronic device back in hand. On this page are published all the documents necessary for the use of your device. AromaMaster by WMF.
USER MANUAL AromaMaster WMF
Set-uppofpthepcoffeepmachine
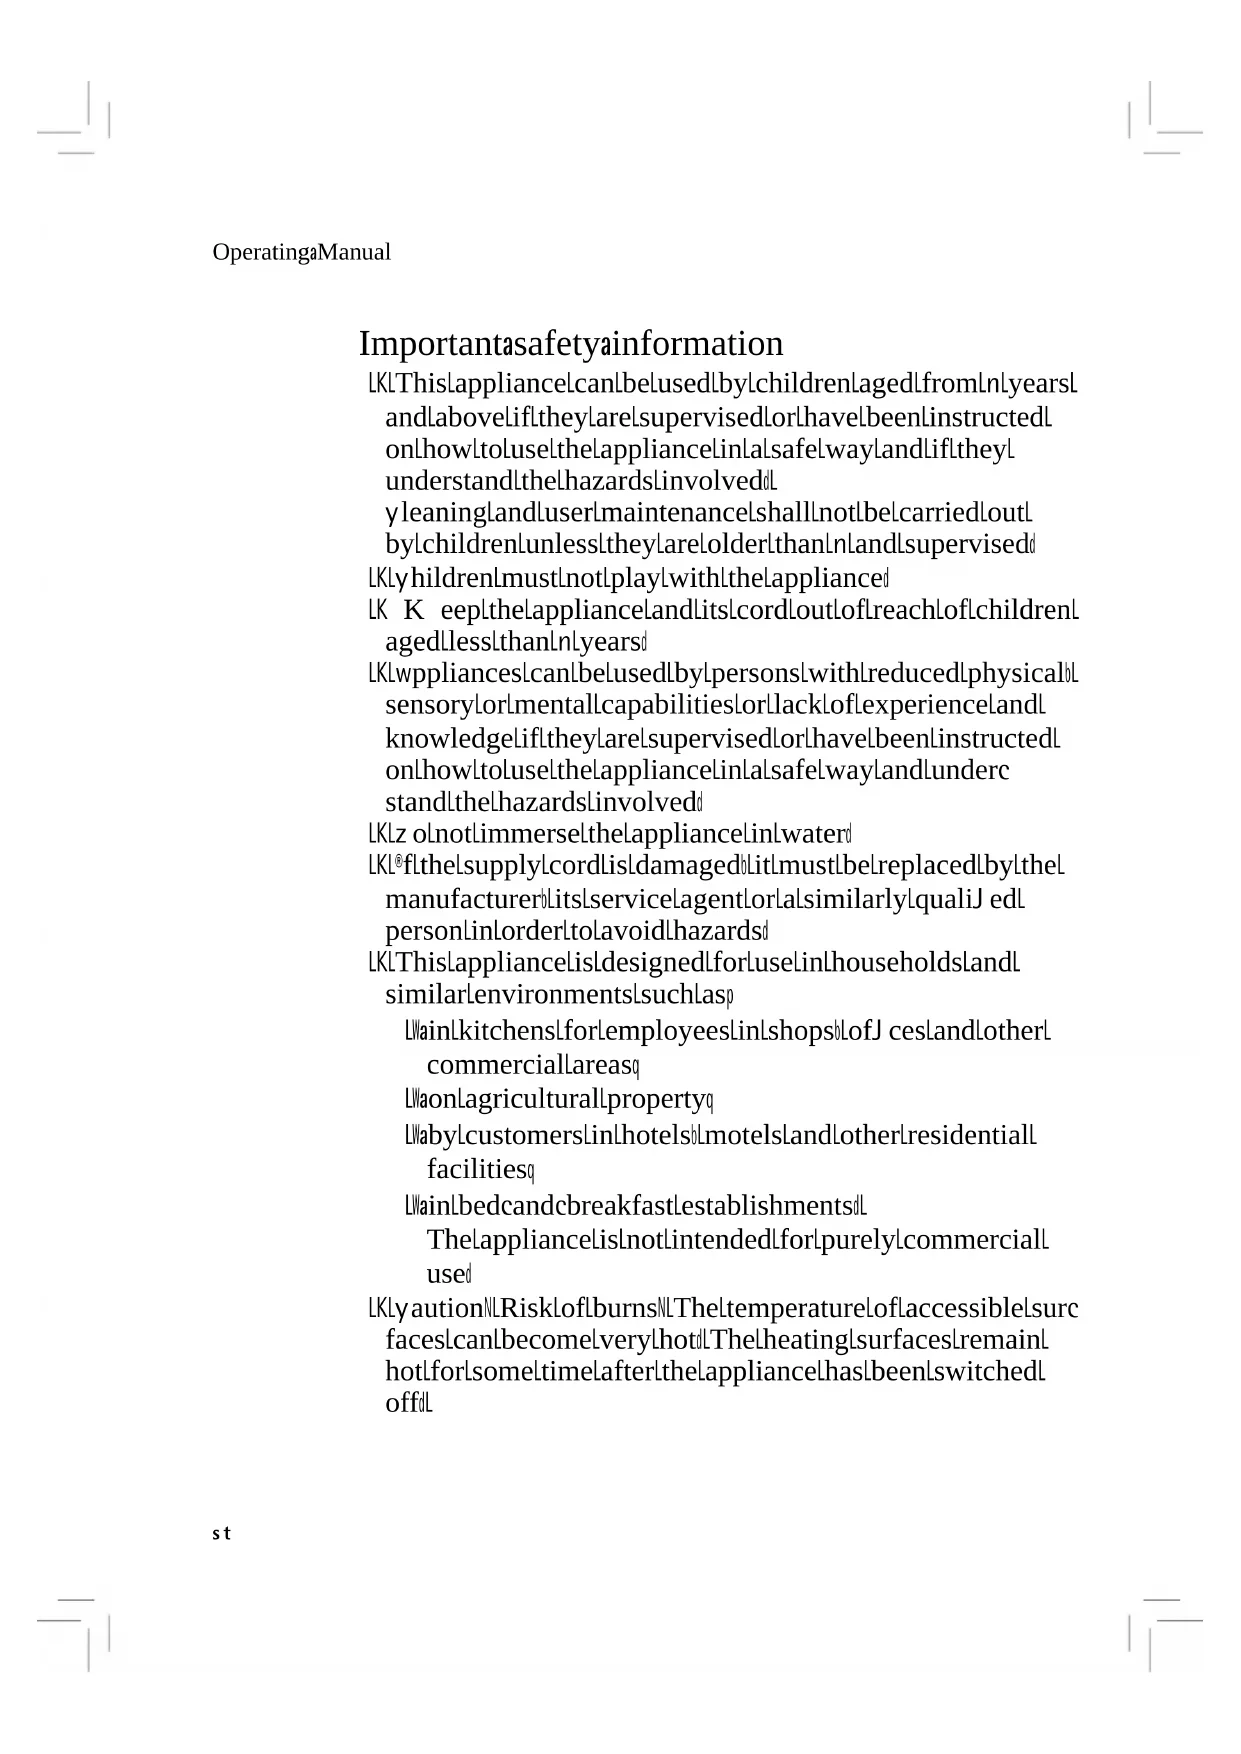
1ppStart//stop//button//with//ring//light
2ppè romàVlterwithdripl stop
3ppLidforaromaViter
LkyhildrenlmustlnotlplaylwththeLaplianced
LK K eepthelapplianceandlitslcordloutlofreachlofchildrenl agedlessthanlnlyearsd
LkLwpliancesIcanIbelusedIbyIpersonsIwithIreducedIphysicalI sensorylormentalIcapabilitieslorllacklofexperienceand I knowledgeliftheyarelsupervisedlorhavelbeenInstructed I onhowItoluseItheLapplancelinIalsafeLwayLandunderc standltelhazardsInvolved
LKLz olnotlimmerseltheLappliancelinlwaterd
LKL@flthelsupplylcordlisldamagedbLitlmustlbelreplacedbylthel manufacturerlitslserviceAgentloralsimilarlylqualifiedj edl personlinorderltolavoidhazardsd
LKLThisApplianclisdesigndforLuselinhouseholdsand similarenvironmentssuchlasp
Main kitchen for employees in shops of Lof J ces Landlotherl commercial areasq
LlaonLagriculturalpropertyq
LabylcustomersLinHotelsLmotelsLandlotherResidential facilitiesq
LainlbedcandcbreakfastestablishmentsdL
Thelapplianceisnotintendedlfortpurelylcommerciall used
LKlyautionNLRiskloflburnsNLTheltemperatureofLaccessiblelsurfc faceslcanlbecomeIveryIhotdThelheatinglsurfaceslremainI hotlforsomeltimelaftertheLappliancelhaslbeenlswitchedI offd
Beforeause
yongratulationslonlthelpurchaseelofyourccoffeelmachine
Thecoffeelmachinelmaylonlylbelusedlfortlslintendedlpurposepelaccordingltolthisl instructionlmanuallforthisreasonlpleaseledthelinstructionlmanualcarefullyl beforeluselaslitprovidesinstructionlfortusinglcleaninglandcaringlforttheLappliance WelacceptlnolliabilitylfortanyldamagescausedlifthislmanuallislnotobserveddKeepl theoperatingsmanuallinlalsafelplaceandlpasslitlontolanylsubsequentlusertogetherl withtheLappliance
Therelisnlnguaranteelforglassbreakaged
Observethelsafetylinformationduringlused
Technicaladata
RatedLvoltagepl L hhf-hj fLV\~lkf-I fL-z
Power consumption pLLgj mf Lwversionlwithglasspot
Power consumption pLLgj fflWlversionlwithLvacuumljug
Protectionclassp L L
Additionalasafetyinformation
LKOnlylconnectlthlapiancltolearthedllwallllocketslthathavelbeenInstalled pursuanttolregulationsThelsupplylcableandlplugmustlbeldry
Lkz olnotpullorclamptelconnectinglcablelovertsharpledgeslz olnotlleavelit. danglinglandlprotectlitfromtheatlandloild
LKOnlyluselAnextensionlcableletthatlinperfectcondition
LkNeverpullthelmainsplugoutofthesocketbythelcableorwithwethandse
Lkz olnotlcarrylthelapiancelbyltelcable
Lkz olnotplacelthelcoffeelmachinelonlhotlsurfacesLsuchlashotplatesIorsimilarlortnearopenll amestlashtelcasinglcouldmeltu
Lkz olnotlplacelthelapplianceonlwatesensitivelsurfacesWaterspraylcandamagelesuchlsurfaces
Lkz olnotswitchlonltheldeviceiwithoutwaterllfilllthelfreshlwaterltanklwwithcoldl waterlatmosttolthelmaximumlpossiblenumberloflcupsi
Lkz olnotputwaterlntolaldevicelet thatListswitchedLonlorListstillhoteLxeforeU lling withwater switchthelcoffeelmachinelofflandallowtolcoollforklminutesd
LkCautionlthelapplianceIgetsHotRisklofscaldingfromlescapinglsteamewaterl z uringltelbrewinglcycleIneverremoveltelarmalbrewerIspoutlandorU iterlor openthellid
LKOnlyLuseltheldevicewhenlallremovablepartslhaveIbeenattachedCorrectly
Lkfttheldevicelwilllnotlblusedllfortallongtimelpulloutlthelmainslplug
LKStoplusinglthelapplianceandcorlpulloutlthelmainslplugimmediatelylifp MathelapplianceorIpowerIcordlistdamaged
youlsuspectlthatthereisaldefectlafterthelappliancelhasfallenlorlsufferedLal similarlincident
nlsuchlcasesLarrangelforthelapplianceltolbelrepaired
LKThelappliancemustlbelsupervisedlwhenLinlused
Lkz escalethelapplianceregularly
LKThelthermosljuglisnotLsuitablelforthelmicrowave
LKThelglassjuglisnloitsuitableforluselinthelmicrowave
KL WelaccepInolliabilityIforldamagesLcausedLasIalresultlofmisuseiincorrectlorperactionlmproperlrepairslornonobservanceloftheldescalinginstructionslclaimsunderwarrantyarelikewisewexcludedlinlsuchlcases
Overviewaofaindicationalights
| Colouredaringalighta StartpStopbuttona | Actionaa coffeeamachine |
| Lightsaupawhite | yoffeelbeinglprepared |
| yoffeelbeinglprepareddlwithlaromal function | |
| Flashesawhite | wromalfunctionlselected |
| Flashesabluepwhite | Scalingindicator |
| Lightsaupablue | z escalatingprogrammelactive |
Startnup
PriortoltheU rstluselandlaftertheldevicehaslotbeloperatedlforlanextendedperiodU ofttimeLcarryloutalboilingIprocesswithlfreshwaterwithoutcoffeelgroundsToldol soJlltheltanktoltheNcupamarkWversionwithlgassajugorttolthelyncupamark Iversionwiththermosajuglasotherwiselthejuglcanloverl ow
Coffeapreparation
OpenthelwatertankVI WbyLremovinglthellidwKIMOnlyIpourlcoldwaterLintolthetankVI Thelwaterlevel indicatorlistforthelamountoffreshwaterthatisneededtolbrewlthedesiredlnumberloffcupslperlgklmllcoffeel
RemoveltellidLw WofthelaromaUIterVWtoladdtlthecoffeelpowderlPlacelalsizj L paperUIterlntoltheUIterVWtbutfoldtlthestampedeledgelbeforeldoingLsoTThelpaper JIterlshouldnotprotradelovertheledgeloftheUIterthereforeyoumustpushlitd downslightlywithyourhand
fillllwiththerequiredlamountlofcoffeelpowderlz epondinglonyourpersonaltasteL uselapproxikcmlglofmediumlgroundlcoffeelperlcupulflitlisgroundlttooJ nelyltthel JIterlcanloverl owI
PlacelthellidWi LontheUIterVHlandlplacelthisLonthelarmalglassljugelyromargan®Thermosljug
串 nserlthelmainslplugintolthelsocketlandLpushlthelStartletStoplbuttonLvgMThelRinglightllluminateslwhitelandlthelpreparationbeginsd
You can cancel the preparation at any time by pressing the Start button. Wait until all of the coffee has run into the chili jug. Remove the chili jug from the chili appliancel and take the J iterWlout of the chili jug. WldripcstopValveLintheJ iter preventsLcoffeel from dripping
Nowcloselthelpotwiththehild
Notepliftherelislnolwaterlinthelwaterltanklandalbrewinglprocesslhaslbeenlstartedbl anaudiblealararmlsounds
WMFaAromaaPerfection
flyoulwouldliketolpreparelastronglaromaticlcoffeeLyoulcactivatelharomal functionWMFaAromaaPerfectionldtisparticularlylrecommendedlforpreparing smallAmountsUustpresstheLStarteStop按钮VgWticelquicklyLandtheLringlight ontheStarteStopbuttonVgWiill ashwhite
Note!flyoulwaitlongerthanapproximatelyI LsecondsbeforepressingtheLStarted
StopbuttonVWhforalsecondtimetheAppliancewillswitchoffi
Please!notelthatthelpreparationtimetakesslightlylongen
Keepnwarmafunctiona ionlyaversionawithagla
norderltolkeepthelJ nishedlbrewedLcoffeelall servingltemperaturelyourdevice lisequippedwithlakeepwnwarmlfunctionl wfterthelpreparationlistcompleteIthe keepwnwarmlfunctionlactivatesautomaticallylandthelStartLeStopbuttonVgIremains IlluminatedwhiteThekeepcwarmltimelisi fminutesThentheldevicelautomatically I switchesLofflandthelStartLeStopbuttonVgITurnsLofff
You can activate the keep warm function at any time by pressing the Start/Stop button.
Automaticcashutnoffa
ionlyaversionawithathermosajugj
wfterlbeinglswitchedlonltheautomaticlshtoutcofflensureslthattheldeviceldoesnot overheatOnlyloncelthelwaterhascompletelylpassedthroughdoesltheldevicelswitch offLandltelStartletStopbuttonVgWiIsnollongerLilluminated
tlistpossibletolshutloffthelcoffeemakerlearlybylpressingthelStartleStopbutton VgMldThiscouldbelnecessarylifyouaccidentallylstartthelcoffeemachinewithoutlat waterl Youmust wait forlafewminutesbeforeyouaddlmorelwaterlintolthelhot devicewllowthelcoffealmachineltolcoolbeforehand
InformationaaboutatheAromargan®avacuumajuga ionlyaversionawithavacuumajugj
Theljuglisdesignlaslalservinglpotlandbestkeepslthelcontentlwamrlwhenlitlisfulld Theltimelthelcontentliskeptwrarmlcanlbelsignj cantlyreducedliflitlisonlylpartiallyl fulllorhaslresiduallamounts@tlistbesttolrinseltheljuglwthhotwaterbefrelpreparac tion
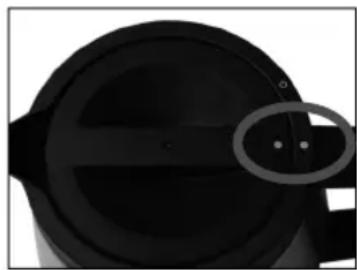
Placelthellidlonthelpotsolthatthe markingslonthelpotlandllidarelat. Turnthellidtolhelpouringlposition.LseelimageNLthislpositionthellidlisalsosecuredlagaintfallingloffwfulljuglshouldlonlybelusedlinlanuprightlpositionLsincecthellidldoeslnothavelalsealingfunction
Tolremoveltthellidlturnlitslightlylcountercclockwise Theldoublecwalledlyromargan@ljuglisabsolutelylshatterproof Neverthelesslitshouldlbelprotectedlagaintmechanicalstresses RinselthjuglrregularlyfllironparticleslfromlwaterlaccumulatelonThelyromargan@surfacetheycancreatepittinglatthoselpoints! Theseldepositsmustthereforebelremovedlimmediatelywithalstain lesssteellcleanser
Note! Stubborn!coffeelgroundslin!the!jug!canleig!beldissolvedlwith!baking!socad
Cleaningaandamaintenance
Cleaning
Unplugthelmainslpluglandallowthelappliancetolcoolldown
z olnotlimmerseltelapplianceelinwaterbutinsteadjustuselaldamplclothlandllittle
washingcupliquidtolcleanlitlesexterior
z olnotluseharshlorlabrasivelcleaningLagents
TheU iterglassluglandthermosljugcanbelcleanedlunderrunningwater
Scalingaindicator
Scaleldepositsresultlinanextendedlbrewingtimeandlowerqualitycoffeellimescale depositsalsolleadtolenergylosseslandlimpairthelserviceillifelofthelappliance Thalautomaticscalingindicatordeterminestheltimelfortthehnextdescalingcycle z ependlonthelcoffeelconsumptionthelStarteStopbuttonWgWwilll ashbluee whitelduringlbrewingtolpromptlyoultoldescalethelapplianceafterljtollwweeksld DescalinganaAntinlimescaleaprogram
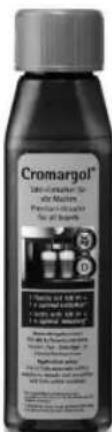
Descalangaagent
WelrecommendlusinglCromargol@Thisproductlishighlyeffectiveffoodlsaeflandlist neutrallintastelandsmell.Thanksttolitsspecialcareformulawithsixhighqualityl andprotectiveladditiveslCromargol@lsalsolverylgentlelonlmaterials! YoucanusuallylpurchaselCromargolafromthelstorelwhereyoulpurchasedyourl appliancelorfromyourchoosenldealer! YoucanlalsoluselalcommerciallyavailableldescalingagentthatLisLsuitablelforU iterl coffeelmachines
zolnotluselvinegarortlvinegarlconcentrateLastthiscanldamageMaterialslinthel appliancell
When using descalers based on citric acid precipitates could form during.
descalingthatseallthellimescalelayerlorclogthellineslinthelappliancez escalating withLcitricacidslalsoltakesltooLonglandthereforecompleteldescalingcannotbel guaranteed
z amagelcausedbytheluseloflanlunsuitableldescalnglagentlorthroughnoncompliancewiththeldescalinginstructionslislnotcoveredbylourlwarrantyclaim- andletheldescalinglagentlcarefullyltolensurellthatnolfurnitureorclcthinglistdamaged
Descalngaprogramme
YourlcoffeelmachinelhaslanAutomaticldescalnglprogramme! Note!OneltheldescalinglprogrammelhasIstartledlitlmustnnotI be interrupted!Thislistforthelsafetyloflallusers!tpreventslcoffeelfromlbeinglbrewed
accidentallywhiletheldescalinglsolutionhasnotlyet
beenfullylrinsedLaway!nLcaseofflemergency!lyoulcanlinterrupt
theldescalnglprogrammelbylpressing!thelStartcStopbuttonVgW!nthisLCaselyoul
should
rinselthtank!wnlandthenIJlllitttolthe-ncupamarkwversionwithglassajugMorttol
thelyncupamarkwversionwiththermosajugwwithlfreshltaplwaterLandallowthistol
runlthroughthelmachine
LlInsertlthelpaperUIterlandlplaceItheljugLinIthelmachineIwnlylmorelsubstantiaIamountslofllimescaleresidueIcollectionlontheUIterlpaperthuslpreventingItheloutletvalvelfromlclogging
KL wddLaIportionLVgf f LmImofLCromargol®LtoltheLwaterLtankWl Nlandtlopfllwithltaplwaterltolthel·ncupamarkwversionlwithlgassajugorttolthelyncupamarkwversionlwiththermosajug
Lkz oselotherldescalinglagentslaccordngtolthelmanufacturer'slinstructions! Lk#nsetlthelmainslplugintolthelsocketlandholdldownlthelStarteStopbuttonVgWfort approxllsecondsThelinglightturnsbluelandtheldescalinglprogrammelstarts! ThelStarteStopbuttonVgWlluminatesbluelduringttheIdescalerlprogrammed LkTheldescalinglprogramlautomaticallylendslaterlaboutj f minutesLandtheStarte Stopbuttonringlightturnsloff! Note:aTheldescalinglprocesscomprisesseveralirinselcycleslandpausesi
KL Important: LThenltoIrinseU lItheltankU Wtolthel- ncupamarkWversionwithglassajugLorttolthelyncupamarkWversionwiththermosajugWwithfleshtapWaterLand allowthistolrunthroughthelmachine
ForaUKauseaonly
LkThisproductlssuppliedwithlalgi lwplugconformingltoxSlgii I uttedtolthel mainsleadflthelpluglunsuitableforyoursocketloutslorneedsltolbelreplacementplease notet the followingflthelpluglisannoncrewireableoneclcutlitfromthelemainsleadlandimmediatelyydisposalofLitNeverInsertLitIntolalsocketloutletlastthereisalverylgreatriskloflanlelectricshocki
LkThe replacementofthelplugatllthemainsleadhastolbeldonelacordingtolthel followingInstructions
Warning! This appliance must be earthed Important! The wires in this mains lead are coloured linlaccordancel with the
followingLcodep greeneyellowl\~arth
blueL Neutral brownL Live
wstthelcolourslofthelwireslinthelmainsleadlofthislappliancemaynotcorrespondl withthelcolouredmarkingslidefectingthelterminalslinyourplugproceedlast followsp
thelwirewhichliscolouredgreendlyellowlmustbelconnectedtolthet terminalwhichlismarkedwiththeletterl~lorbythelearthsymbollltort colouredgreendgreendlandyellow
thelwirewhichliscolouredbluelmustbelconnectedtolthelterminallwhichlist markedthelletterNlorcolouredblack
IL thewirewhichiscolouredlbrownlmustbelconnectedltolthelterminallwhichl ismarkedwiththelletterLLlorcolouredredd
LKflalgi LwVxSgli I i pluglslusedlitmustIbeU ttedlwthalgil LWfuselconformingltol x Sgli hLandlbewSTwlapprovedflanylothertypelofpluglslusedlttheappliance mustbelprotectedbyLalgf Lwlfuseleitherlinthelplugloradapterlorlattheldistribuc tionboard
flinldoubtclconsultlalqualiJ edlelectrician
LKNeverluseIthelplugwithoutclosingthelfuselcover

Thelappliancecomplieswith\~uropeanldirectiveslhfl coke\~ylfh f j cgf n\~ylandl hf foeghke\~y
wtlthelendlofliiIeIthisproductmustnotbeldisposedloflinnormalhouseholdl wastesbutmustnsteadlbeldeliveredtolalcollectionlpointlforrecyclinglelectriclandl electronicappliances
Thelmaterialsarerecyclablelinlaccordancelwiththeirlabelling@ThereuseRecyclingandotherwaysofusingoldlappliancesmakelanimportantcontributiontolprotectc inglourenvironmental
PleaseLasklyourllocaladministrationfordetaisloftheappropriatedisposallpoint
Subjecttolalterations
Consignescdecsécuritécimportantes
NfletnappareilNpeutneTutiliseparndesenfantsdqans
etplusns’ilssontsurveillésNets’ilsontneteinstruitspour
utilisercetappareilNentoutesecuriteNets’ilsontcompris
lesdangersnpouvantnresulterdeI’usagedeI’appareilf
uepaslaissernesenfantsneffectuerlennettoyageNetlan
maintenancesaufns’ilssontagésdplusndeNansnetnsousn
surveillancef
NMMU ePaisserlesnelfantsJoueravecNcatappareilf
MMN' apparéilnainsiNqueNsonncableNd'alimentationNsontNaTenirh horsndeIaIporteeNdesNenfantsNdeMoinsndeNqNansf
MMNiespersonnesayantdescapacitésnphysiquesnsensorielles oumentalesnrestreintesNouayantNunManqueNd'expérienceNetgoudenconnaissancepeuventnutilisercesNappareilsNs’ilsN sontsurveillésNetns’ilsNontneteinstruitsnPourutiliserncetNappeeilNenntouteNsecuriteNetnontncomprislesdangers N pouvantnresulterndeNl’susagendeNl’appareilf
MMNû enplongezNpasNI'appareilNdansNI'eauf
MMNSiNleCabled'alimentationdeN'appareilNestNendommagednil
doitNetreNremplacementenVncentralndufabricantNounparN
unePersonnelQualiLed'deviterntouteMiseNdangerf
MMN'appareilNestconcup pourUnusageDomestiqueNouinpour
desApplicationssimilairesTellesNquels
SoushreserveldehmodiLcations
Programmaediedecalic cazionee
RdeenRNncasRagricolasx
RdeparaRclientesRdeRhotelesgRmotelesRyRotrosRestablecih mientosRdeRhospedajex
RdeenRpensionesRconRdesayunoiR
WaifledUflreakfastepensionater
fipparatetterikke beregnettilindustrianvendelsef