WT 475 - Alarm bell TECHNOLINE - Free user manual and instructions
Find the device manual for free WT 475 TECHNOLINE in PDF.
| Product Type | Alarm clock with temperature display |
| Brand | Technoline |
| Model | WT 475 |
| Main Power Supply | 230V AC mains adapter (included, model HX075-0501000-AG-001) or 3 AAA alkaline batteries (not included) |
| Display | LED with two brightness levels, temporary backlight on batteries |
| Time Functions | 12/24h display, alarm with adjustable snooze (5-60 min), alarm reminder |
| Temperature Display | Indoor, range 0°C to 50°C, °C/°F selection |
| Night Mode | Adjustable (start/end time, default 6pm-6am), dims brightness |
| Mirror Function | Integrated |
| Approximate Dimensions | 15 x 8 x 5 cm |
| Approximate Weight | 300 g (without batteries) |
| Housing Material | Plastic |
| Cleaning and Maintenance | Wipe with a soft, dry cloth. Do not use abrasive products. |
| Safety | Use only the provided adapter; observe battery polarity; do not expose to moisture or extreme temperatures |
| Spare Parts / Repairability | No spare parts designed; do not open the housing. In case of failure, unplug and remove batteries to reset. |
| Certifications | CE, RoHS (2011/65/CE), directive 2014/53/EU |
| Package Contents | Clock, mains adapter, user manual |
Frequently Asked Questions - WT 475 TECHNOLINE
User questions about WT 475 TECHNOLINE
0 question about this device. Answer the ones you know or ask your own.
Ask a new question about this device
Download the instructions for your Alarm bell in PDF format for free! Find your manual WT 475 - TECHNOLINE and take your electronic device back in hand. On this page are published all the documents necessary for the use of your device. WT 475 by TECHNOLINE.
USER MANUAL WT 475 TECHNOLINE
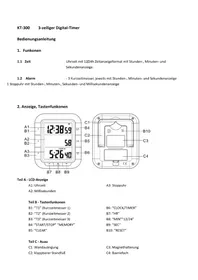
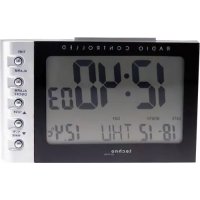
WT475 - INSTRUCTION MANUAL LED ALARM CLOCK WITH TEMPERATURE
Overview:
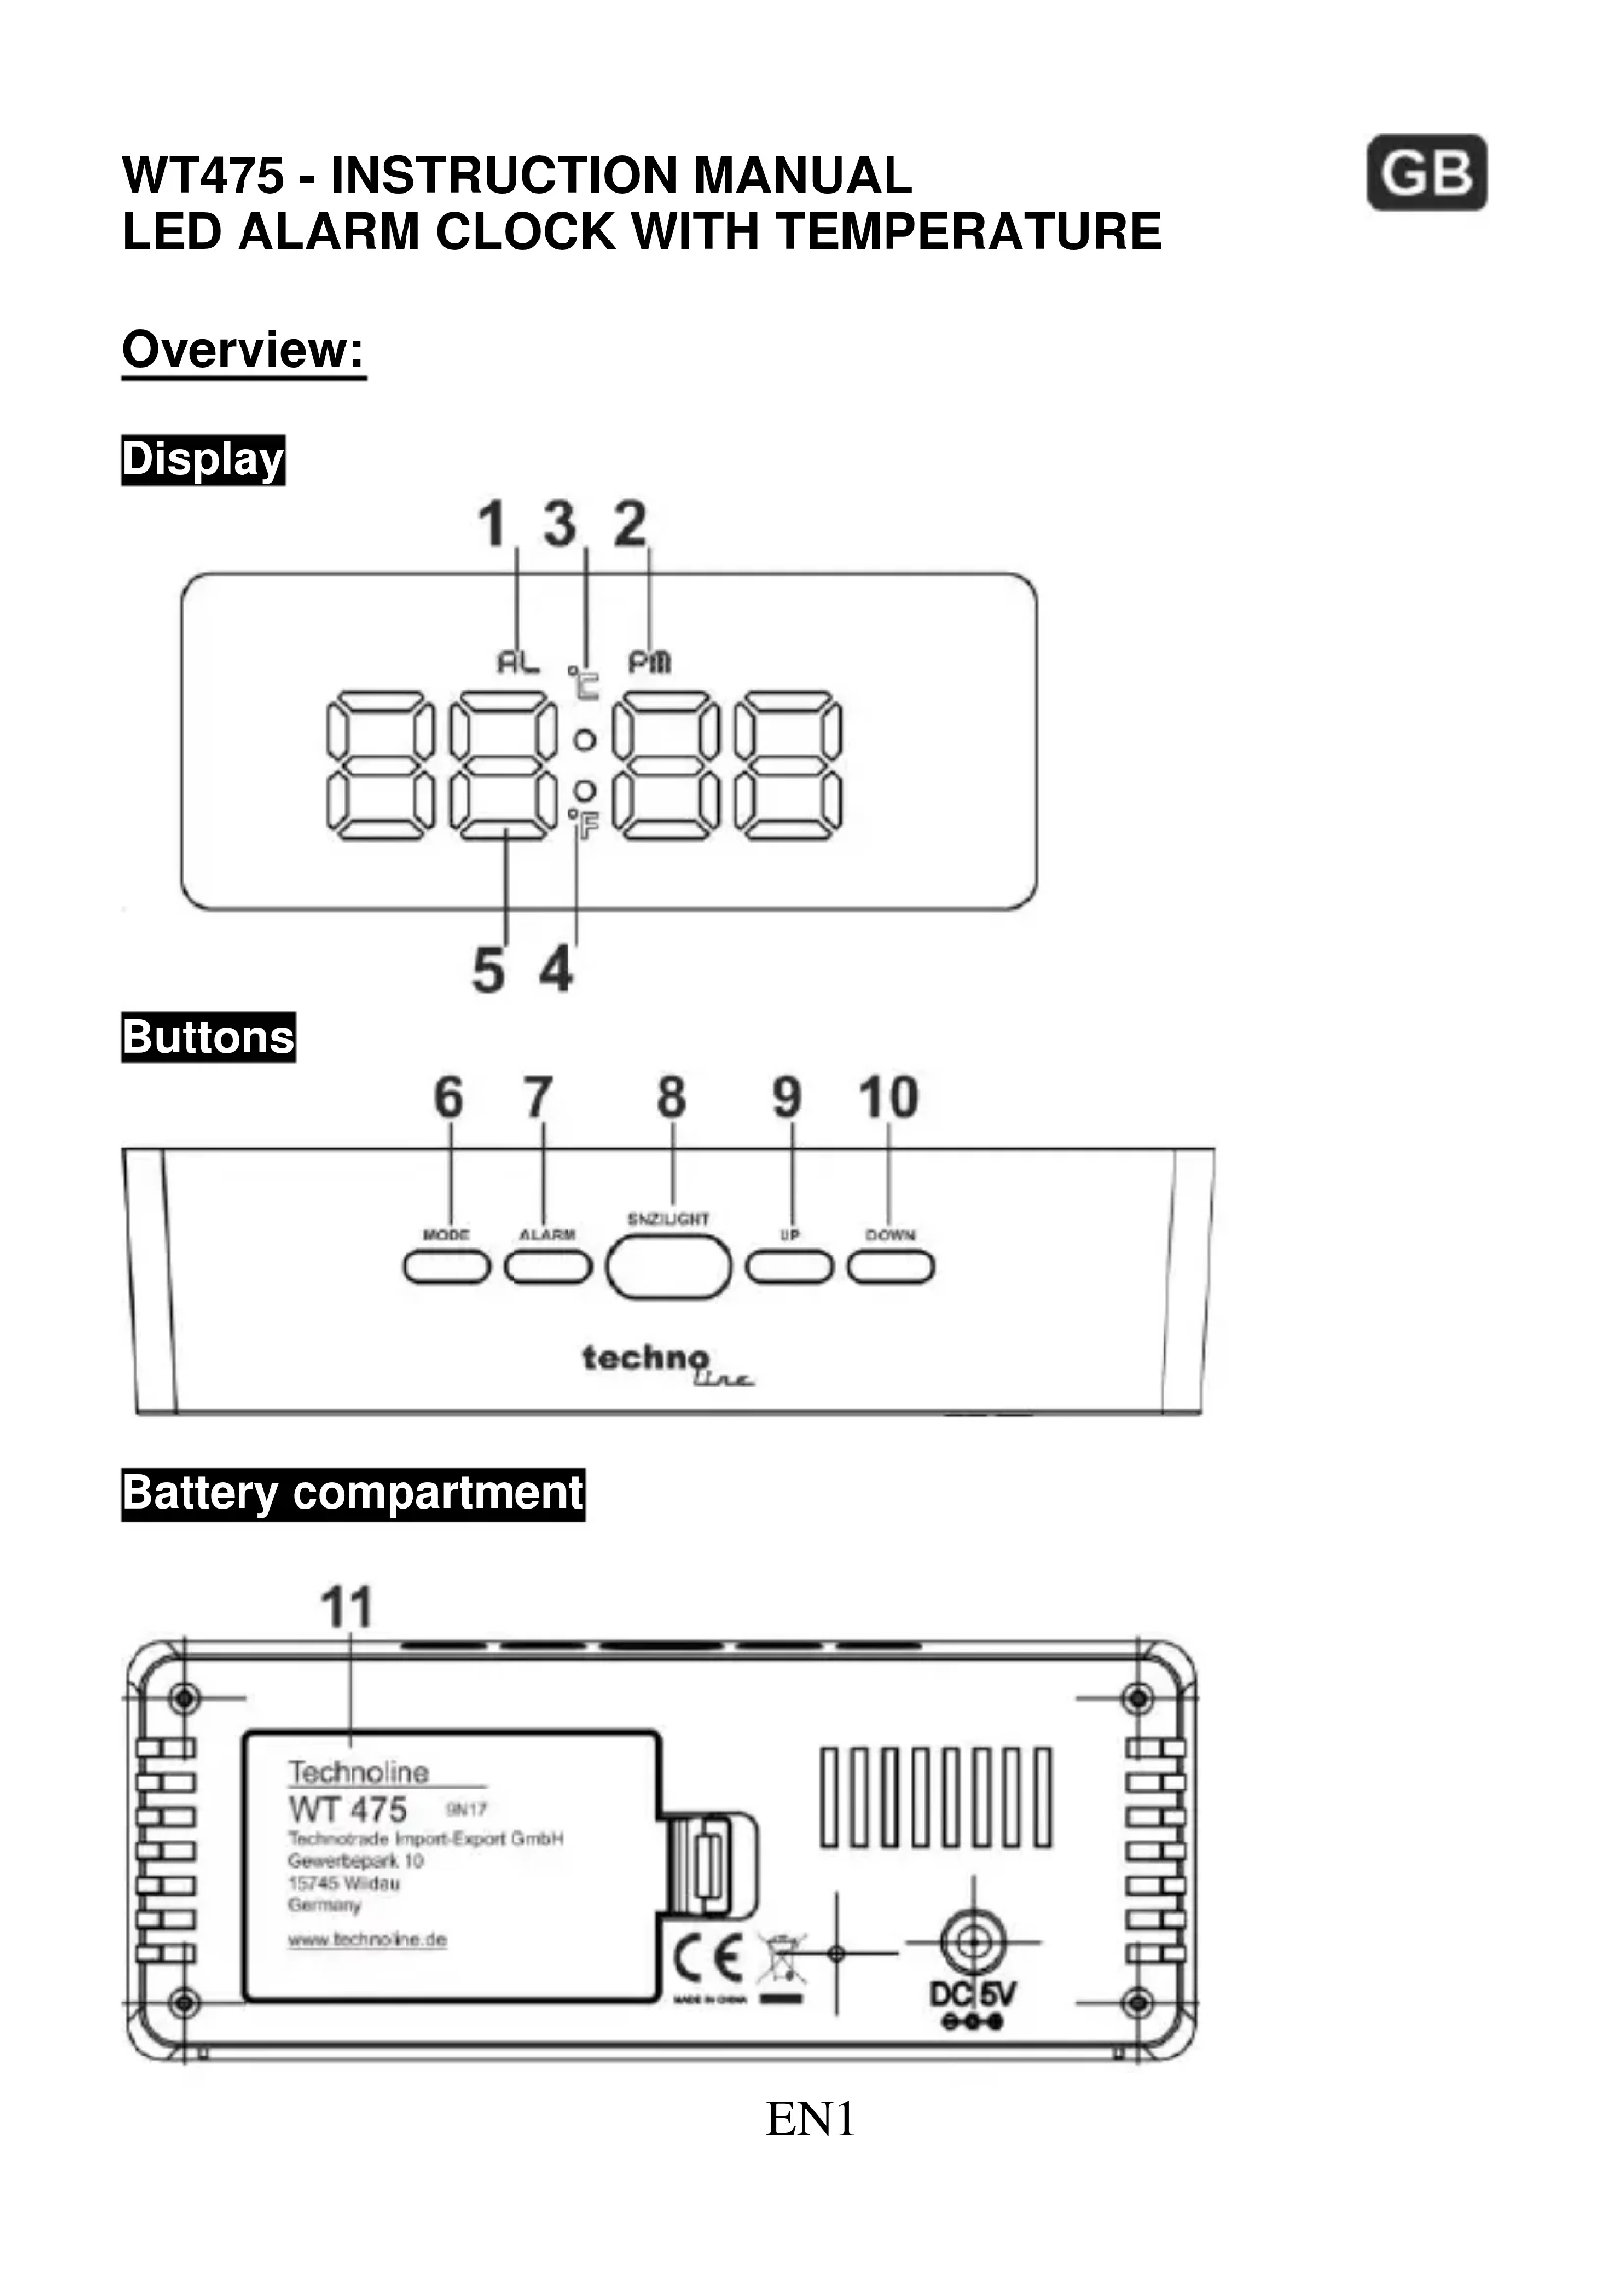
Display
text_image
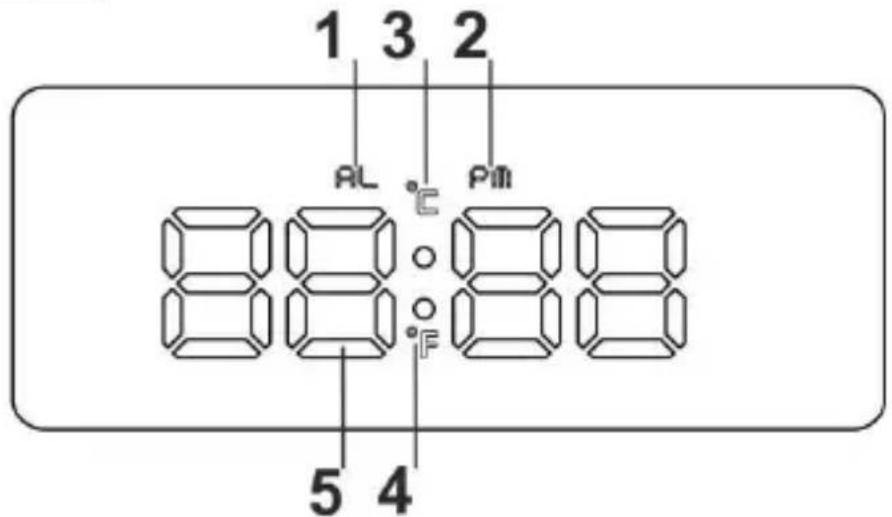
1 3 2 AL °C Pm 88:088 5 4Buttons
text_image
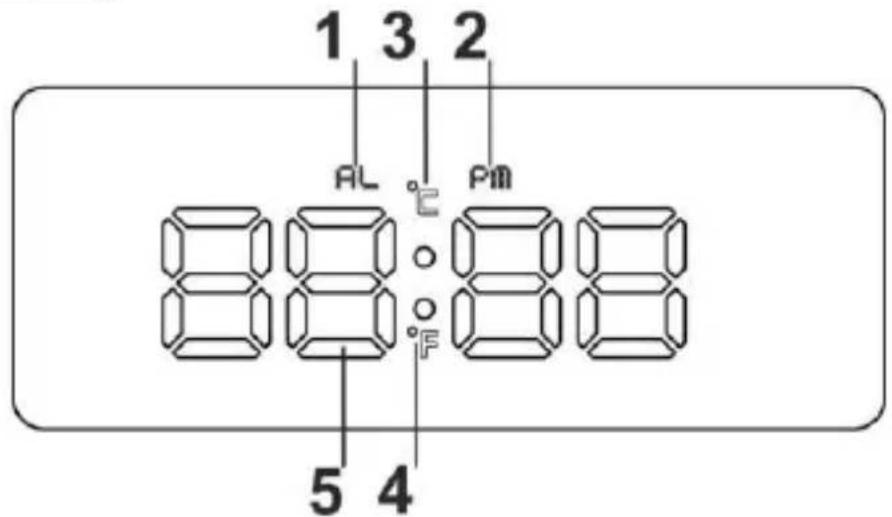
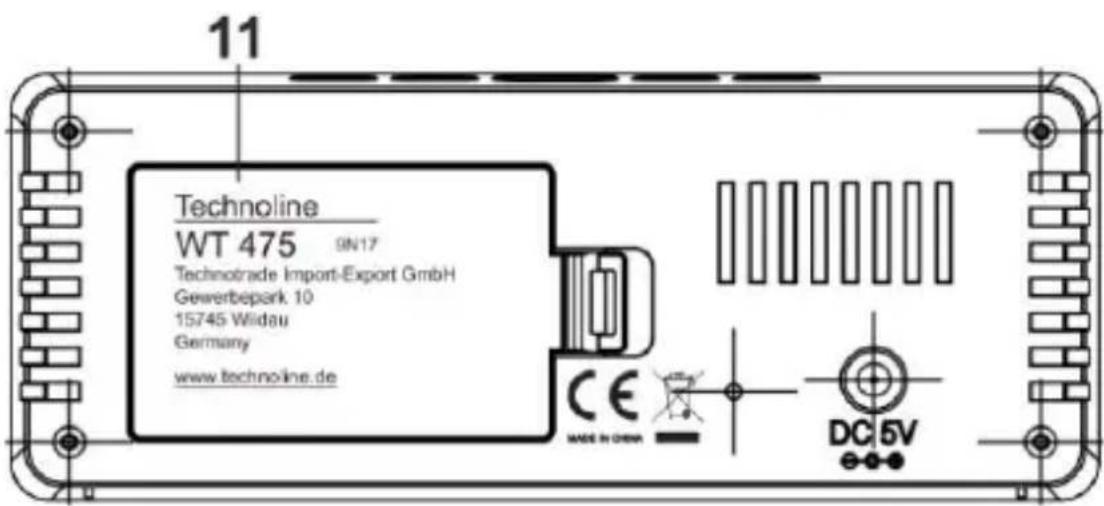
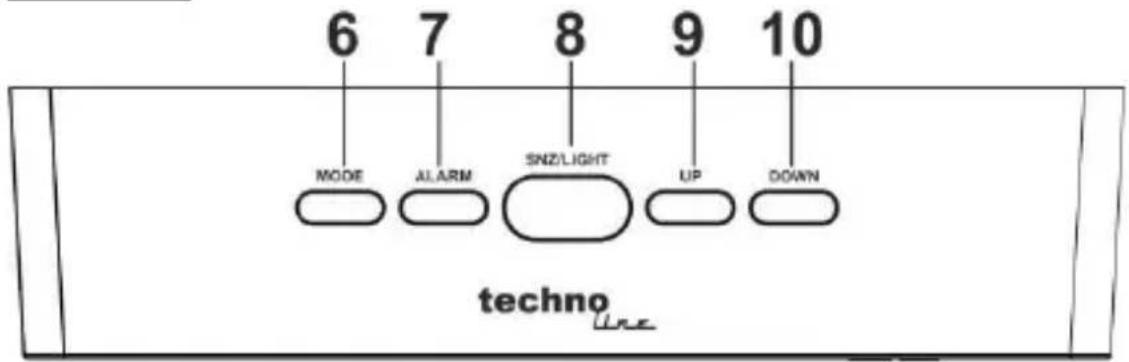
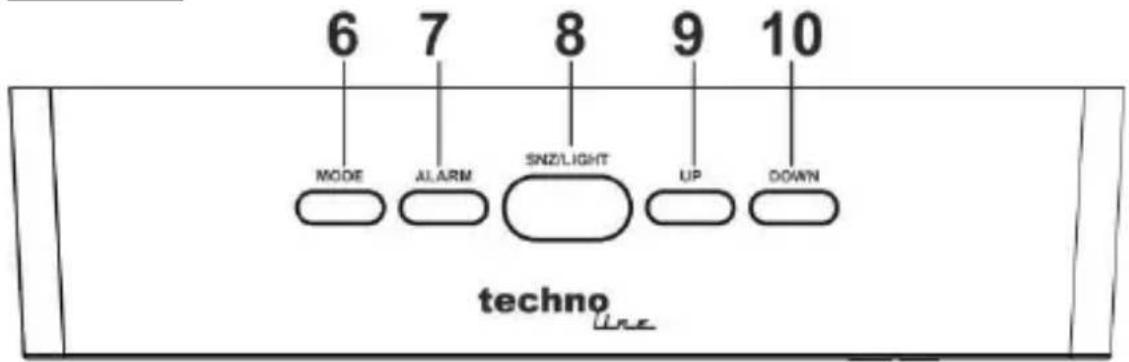
6 7 8 9 10 MODE ALARM SNZLIGHT UP DOWN technoBattery compartment
text_image
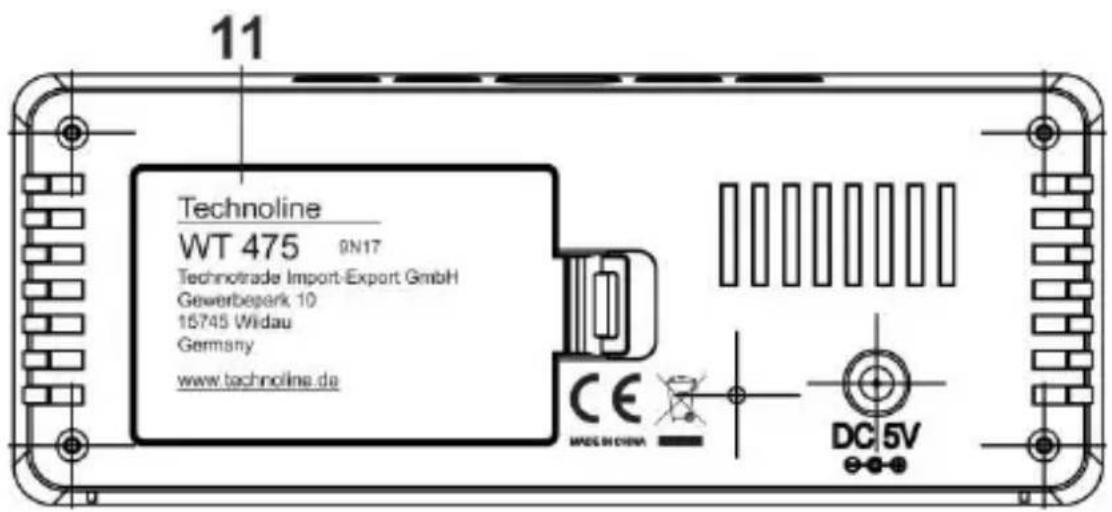
11 Technoline WT 475 9N17 Technotrade Import-Export GmbH Gewerbepark 10 15745 Wildau Germany www.technoline.de CE MADE IN CHINA DC 5VEN1
1) AL icon 2) PM icon
3)°C icon 4) °F icon
5) Digits (display of time and temperature)
6) MODE button 7) ALARM button
8) SNZ/LIGHT button 9) UP button
10) DOWN button 11) Battery compartment cover
Features
- LED time display
• 12/24 hour format selectable - Alarm & snooze
• Temperature display in °C or °F
• Temperature range: 0°C \~ 50°C
• Night mode setting (18:00-06:00) - Mirror function
- Five function button (MODE, ALARM, SNZ/LIGHT, UP, DOWN)
• Power consumption: 3 x AAA batteries (not included)
AC/DC adapter HX075-0501000-AG-001 (included)
QUICK SETUP
Step 1 Insert the AC/DC adaptor to any 230 AC household outlets. Then insert the DC jack to the back case of your unit.
Step 2 Slide open the battery compartment cover at the back of your clock, then insert 3 x AAA Alkaline batteries to the battery compartment. Make sure +/- polarity of the battery are facing in the right directions. Then replace the battery compartment cover.
The clock displays all digits and icons and makes a small signal tone to show that it is powered and ready to operate.
Note:
Do not plug in any other AC/DC adaptor with incorrect
TIME SETTING
- In time display mode, press and hold the MODE button for 2 seconds and the hour digits flash. Press the UP or DOWN button to set the hours.
- Press the MODE button once again and the minute digits flash. Press the UP or DOWN button to set the minutes.
- Press the MODE button once again and "24 Hr" flashes on the display. Press the UP or DOWN button to set 12Hr or 24Hr
- Press the MODE button to return to time display mode or it will return to time display mode in around 10 seconds if no further buttons are pressed.
Notes:
Hold the UP or DOWN button to speed up the setting. If choose 12HR format, it will have PM icon displayed in the afternoon, but there is no AM icon to show the morning time.
ALARM TIME SETTING (Default alarm setting is 6:00)
- In time display mode, press and hold the ALARM button for 2 seconds and the hour digits and the "AL" icon flash. Press the UP or DOWN button to set your desired alarm hours.
- Press the ALARM button once again, the minute digits flash. Press the UP or DOWN button to set your desired alarm minutes.
- Press the ALARM button once again, the "05" flashes on the display. Press the UP or DOWN button to set your desired snooze duration from 05 to 60 minutes.
- Press the ALARM button to return to time display mode or it will return to time display mode in around 10 seconds if no further buttons are pressed.
Note:
Hold the UP or DOWN button to speed up the setting.
TURN YOUR ALARM ON OR OFF
In time display mode, press the ALARM button once to activate the alarm and the “AL” icon will be displayed. Press the ALARM button again to deactivate the alarm and the “AL” icon will disappear.
The “AL” icon is flashing and the alarm tone is sounding for 1 minute, when alarm is activated and the set alarm time is reached. Press the MODE, ALARM, UP or DOWN button during the alarm to stop it. The “AL” icon will become static again and the alarm will become active for the same time on the next day.
SNOOZE ALARM
When time reaches your set alarm time, your clock will give a beep sound to wake you up. The “AL” icon will flash.
-
Press the SNZ/LIGHT button once to stop the alarm temporarily and the "AL" icon keeps flashing. The alarm will beep again in 5 minutes or after your set snooze duration.
-
To stop the snooze alarm, press the MODE, ALARM, UP or DOWN button and the "AL" icon becomes static again. The alarm will become active for the same time on the next day.
Notes:
The default snooze duration setting is 5 minutes. The setting of the snooze duration is part of the alarm time setting process.
DISPLAY OF INDOOR TEMPERATURE
In time display mode, press the MODE button once to change into temperature display mode. In this mode, the temperature will be shown with the corresponding temperature icon of “°C” or “°F”.
The “°C” icon is the default setting.
In temperature display mode, press the DOWN button once to change between °C and °F as temperature measuring units. The temperature icons and values will change accordingly.
In temperature display mode, press and hold the MODE button for 2 seconds to change into combined display mode and a signal tone is sounding. In this mode, the clock automatically alternates between viewing time display mode for 10 seconds and temperature display mode for 5 seconds.
Press and hold the MODE button for 2 seconds again during the 5 seconds of viewing the temperature display to change into normal time display mode. A signal tone is sounding again.
BACKLIGHT LED
When first powered, the clock will light on the display LED and a signal tone will sound. The LED of the display will stay lighted as it is powered by using the adapter.
When powered by batteries only, the display LED will only light up shortly while using the buttons on the clock. Press the SNZ/LIGHT button once to activate the backlight of LED for 5 seconds.
DIMMER FUNCTION
Press the UP button once to adjust the brightness level of the display. Two brightness levels (high and low) are available with high brightness level being the default setting.
NIGHT MODE FUNCTION
-
In time display mode, press the MODE button twice to enter night mode display.
-
The status "OFF" will be shown on the display as this is the default setting. Press the UP or DOWN button to set night mode status to "ON" (activated) or "OFF" (deactivated).
- Once set to "ON" the background LED automatically lowers the luminance during the set night mode period. The default setting of night mode period is 18:00 to 6:00.
NIGHT MODE SETTING
- Enter night mode display and set status of night mode to "ON".
- While "ON" is displayed, hold the MODE button for 2 seconds and the night mode starting hour digits flash. Press the UP or DOWN button to set the hours.
- Press the MODE button once again and the night mode starting minute digits flash. Press the UP or DOWN button to set the minutes.
- Press the MODE button once again and the night mode ending hour digits flash. Press the UP or DOWN button to set the hours.
- Press the MODE button once again and the night mode ending minute digits flash. Press the UP or DOWN button to set the minutes.
- Press the MODE button to return to night mode display or it will return to time display mode in around 10 seconds if no further buttons are pressed.
Note:
Hold the UP or DOWN button to speed up the setting.
TROUBLE SHOOTING
If your clock displays irrelevant time or does not function properly, which maybe caused by electro-static discharge or other interference, unplug the DC jack to disconnect the AC power (and remove the backup battery). The clock will be reset to default settings and you need to set it again.
Do not plug in any other AC/DC adaptor with incorrect specifications or voltage
Declaration of conformity
Hereby, Technotrade declares that this product WT 475 is in compliance with the essential requirements and other relevant provisions of Directive 2014/53/EU and ROHS 2011/65/EC. The original EU declaration of conformity may be found at: www.technoline.de/doc/4029665004754
Precautions
- This main unit is intended to be used only indoors.
- Do not subject the unit to excessive force or shock.
- Do not expose the unit to extreme temperatures, direct sunlight, dust or humidity.
- Do not immerse in water.
- Avoid contact with any corrosive materials.
- Do not dispose this unit in a fire as it may explode.
- Do not open the inner back case or tamper with any components of this unit.
Batteries safety warnings
- Use only alkaline batteries, not rechargeable batteries.
• Install batteries correctly by matching the polarities (+/-).
• Always replace a complete set of batteries. - Never mix used and new batteries.
- Remove exhausted batteries immediately.
- Remove batteries when not in use.
- Do not recharge and do not dispose of batteries in fire as the batteries may explode.
-
Ensure batteries are stored away from metal objects as contact may cause a short circuit.
-
Avoid exposing batteries to extreme temperature or humidity or direct sunlight.
- Keep all batteries out of reach from children. They are a choking hazard.
Use the product only for its intended purpose!
Consideration of duty according to the battery law

Old batteries do not belong to domestic waste because they could cause damages of health and environment. You can return used batteries free of charge to your dealer and collection points. As end-user you are committed by law to bring back needed batteries to distributors and other collecting points!
Consideration of duty according to the law of electrical devices

This symbol means that you must dispose of electrical devices separated from the General household waste when it reaches the end of its useful life. Take your unit to your local waste collection point or recycling centre. This applies to all countries of the European Union, and to other European countries with a
separate waste collection system.
Vue d'ensemble :
Affichage

text_image
1 3 2 AL °C Pm 88:88 5 4Touches

text_image
6 7 8 9 10 MODE ALARM SNZ/LIGHT UP DOWN technonatural_image
Symbolic icon of a person walking with arrows, enclosed in a circle (no text or symbols)WT475 – MANUALE D'USO
SVEGLIA A LED CON TEMPERATURA
IT
Panoramica:
Visualizzazione

text_image
1 3 2 RL °C Pm 88:88 5 4Pulsanti
text_image
6 7 8 9 10 MODE ALARM SNZ/LIGHT UP DOWN technoVano batteria
text_image
11 Technoline WT 475 9N17 Technotrade Import-Export GmbH Gewerbepark 10 15745 Widau Germany www.technoline.de CE MECHINA DC 5VIT1
WT475 - UŽIVATELSKÁ PŘÍRUČKA LED BUDÍK S TEPLOMĚREM
Přehled:
Displej
text_image
1 3 2 AL °C PM 88:88 5 4Tlačítka
text_image
6 7 8 9 10 MODE ALARM SNZ/LIGHT UP DOWN technoBateriový prostor

text_image
11 Technoline WT 475 9N17 Technotrade Import-Export GmbH Gewerbepark.10 16745 Widau Germany www.technoline.de CE MEOCHINA DC 5VCZ1
1) Ikona AL 2) Ikona PM
3) Ikona °C 4) Ikona °F
5) Číslice (zobrazení času a teploty)
6) Tlačítko REŽIM 7) Tlačítko ALARM
8) Tlačítko OPAKOVANÉ 9) Tlačítko NAHORU BUZENÍ / SVĚTLO
10) Tlačítko DOLŮ 11) Kryt bateriového prostoru
Funkce
BUDZIK LED Z ALARMEM I TERMOMETREM
PL
Przegład:
Wyświetlenie

text_image
1 3 2 AL C Pm 88:88 5 4Przyciski

text_image
6 7 8 9 10 MODE ALARM SNZ/LIGHT UP DOWN technoKomora baterii

text_image
11 Technoline WT 475 9N17 Technotrade Import-Export GmbH Gewerbepark 10 15745 Widau Germany www.technoline.de CE MECHINA DC 5VPL1