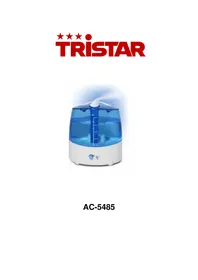
AC5420 - Humidifier TRISTAR - Free user manual and instructions
Find the device manual for free AC5420 TRISTAR in PDF.
| Product type | Dehumidifier |
| Brand | TriStar |
| Model | AC5420 |
| Power supply | 220-240 V ~ 50/60 Hz |
| Power | Not specified |
| Tank capacity | Approximately 2 L (estimate) |
| Humidity setting | 30% to 90% in 5% increments |
| Timer | Programmable from 0 to 24 hours |
| Laundry function | Yes |
| Continuous drainage | Yes (hose internal diameter 10 mm) |
| Filter | Washable air filter |
| Indicators | Power, timer, tank full, low/high humidity gauge, laundry |
| Control type | Push buttons (on/off, timer, speed, laundry, up, down) |
| Display | Screen showing humidity level and settings |
| Protection | Automatic shut-off when tank full, compressor protection delay (3 min) |
| Operating temperature | 5°C to 35°C |
| Noise level | Not specified |
| Dimensions (approx.) | 30 x 20 x 50 cm (estimate) |
| Weight | Not specified |
| Warranty | 24 months |
| Maintenance | Clean filter and tank with warm water |
| Safety | Do not immerse, use away from water and heat |
Frequently Asked Questions - AC5420 TRISTAR
User questions about AC5420 TRISTAR
0 question about this device. Answer the ones you know or ask your own.
Ask a new question about this device
Download the instructions for your Humidifier in PDF format for free! Find your manual AC5420 - TRISTAR and take your electronic device back in hand. On this page are published all the documents necessary for the use of your device. AC5420 by TRISTAR.
USER MANUAL AC5420 TRISTAR
You can find all information and spare parts at service.tristar.eu
SAFETYWARNINGS
- When using the unit, please observe the following safety precautions
- This appliance can be used by children aged from 8 years and above and persons with reduced physical, sensory or mental capabilities or lack of experience and knowledge if they have been given supervision or instruction concerning use of the appliance in a safe way and understand the hazards involved.
- Cleaning and user maintenance shall not be made by children without supervision.
Children shall not play with the appliance. - Unplug the power supply cord before cleaning or storage.
- Do not submerge the unit in water, or place the unit close to water.
- Do not put the unit close to heat-generating devices or near flammable and dangerous materials.
- Never put your fingers or objects into the intake or discharge ducts.
- Do not sit or stand on the unit.
- Discard water that has collected in the tank as required.
- Do not operate the dehumidifier in a closed area such as inside a closet, as it may cause a fire.
- Install drain piping at a downhill grade to make sure that condensed water can be drained continuously.
If the power supply cord is damaged it must be replaced by the manufacture or a qualified service agent.
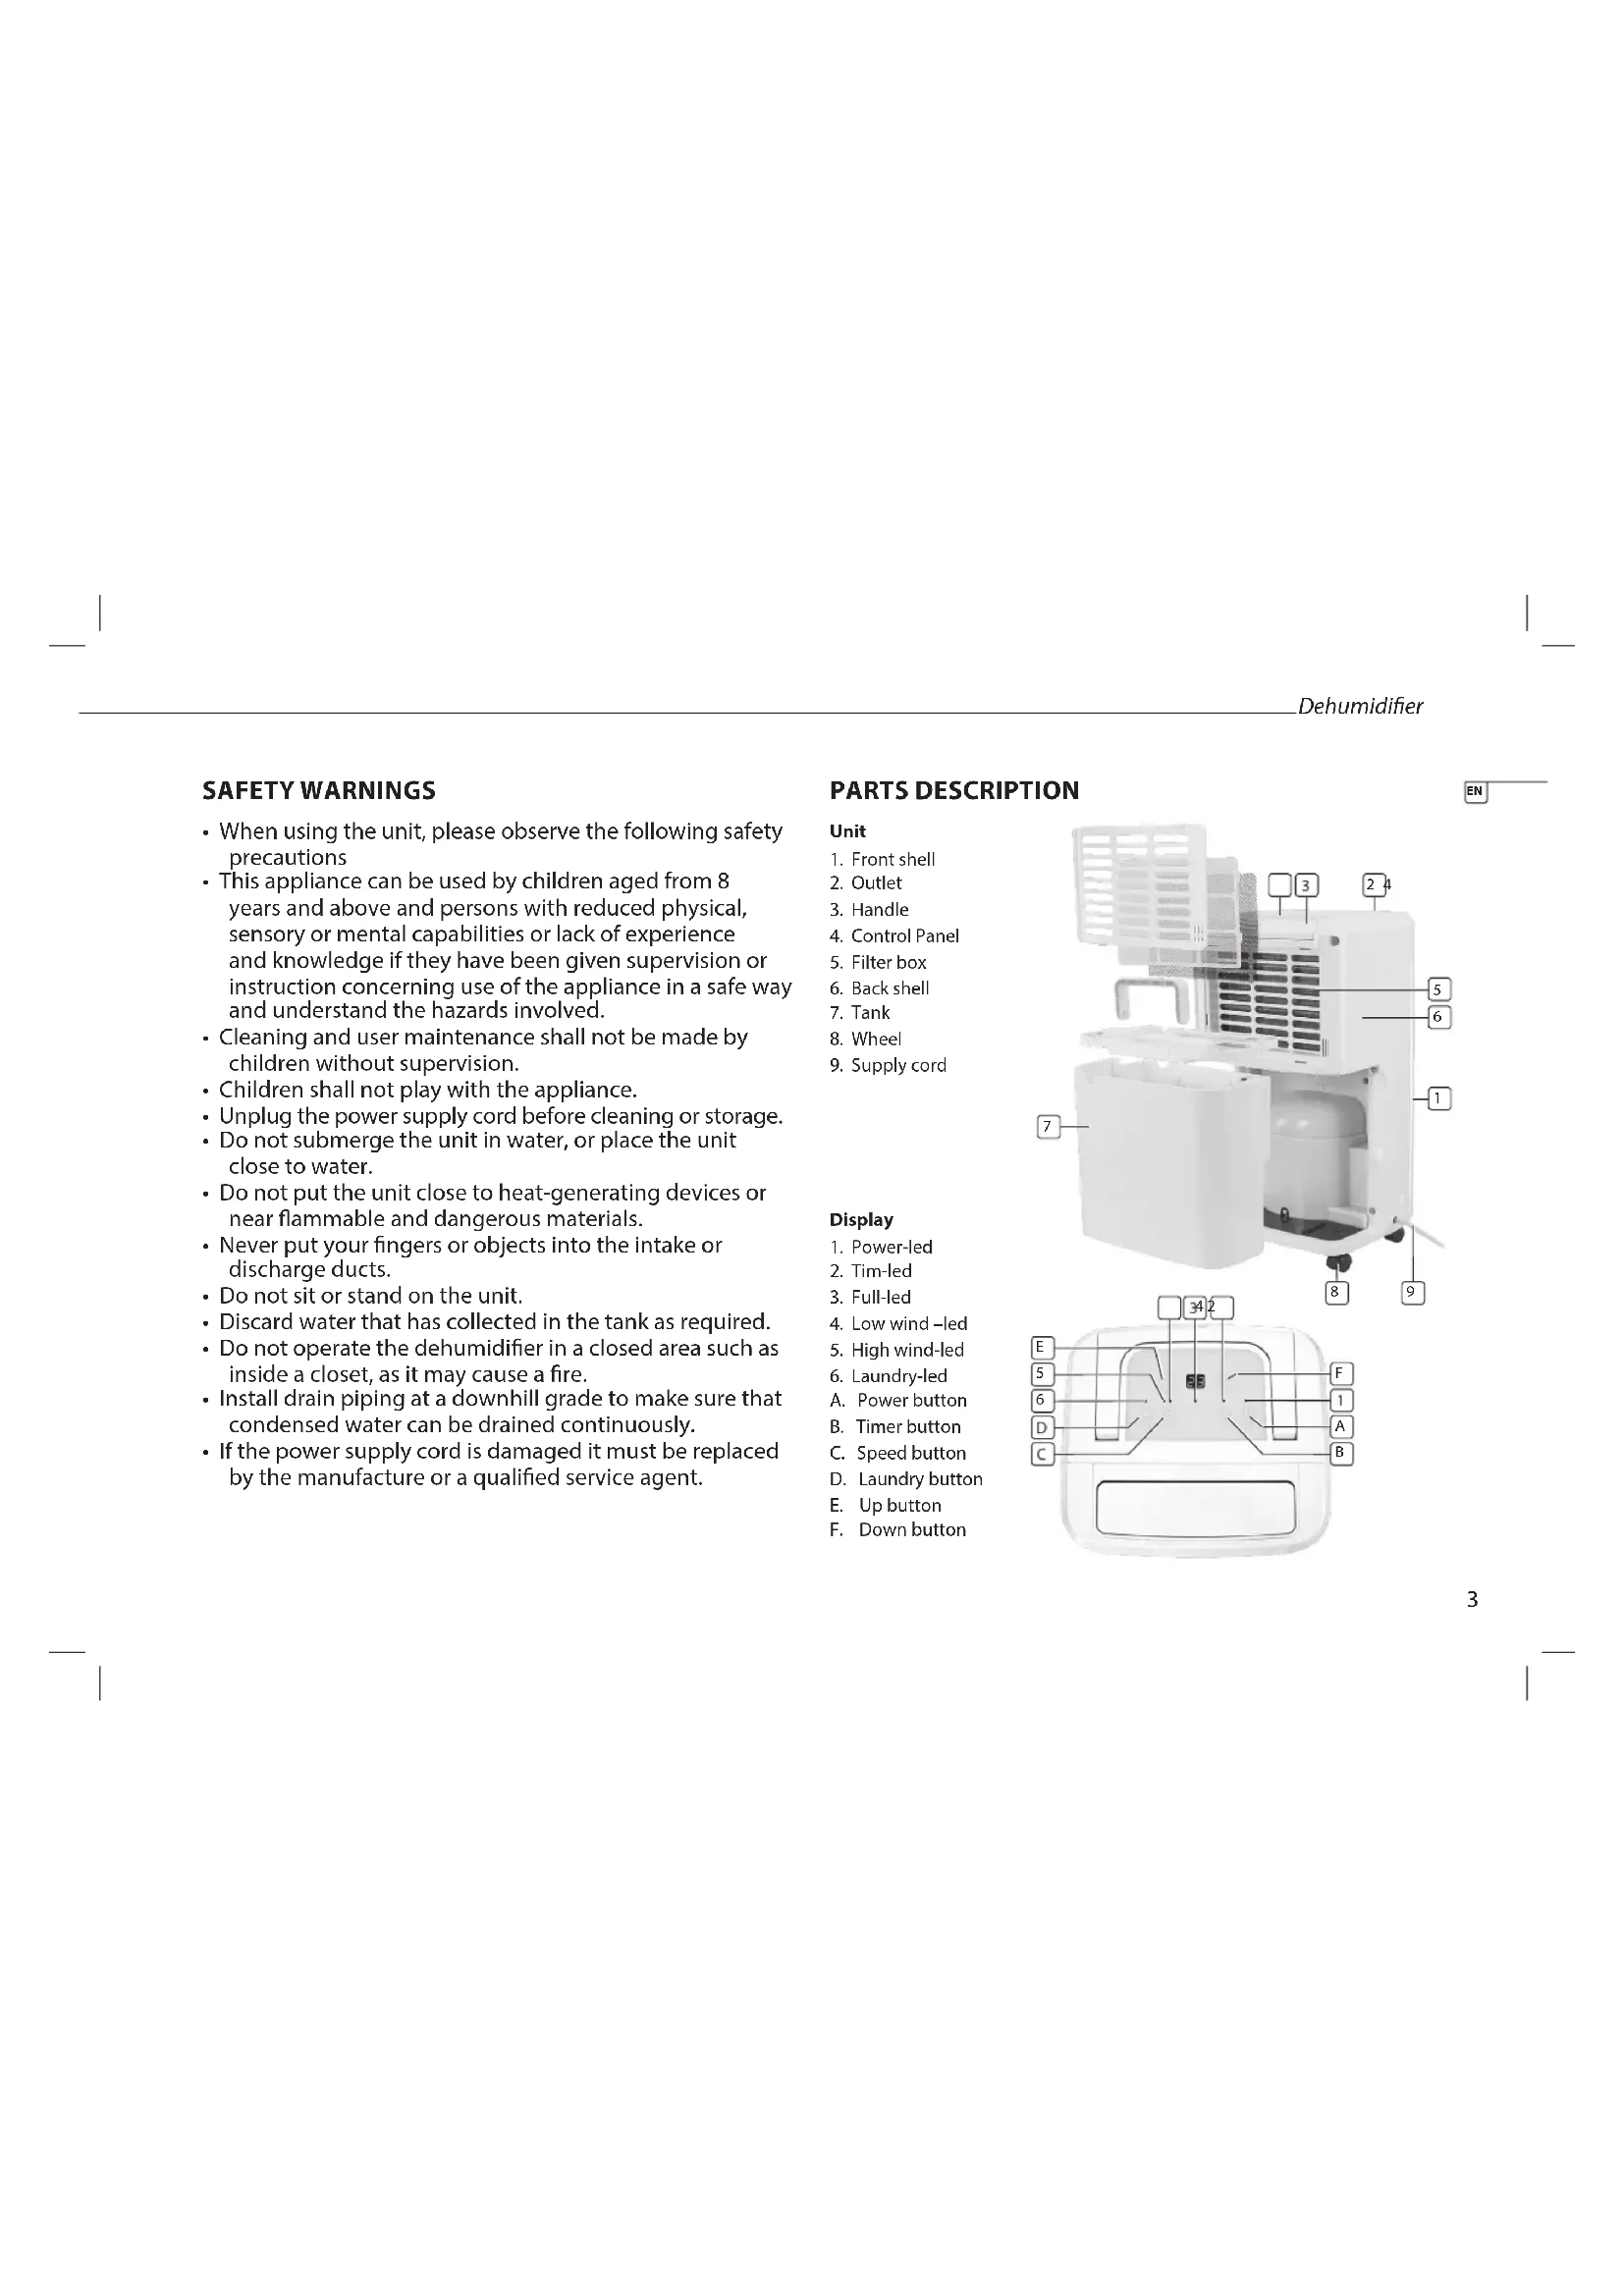
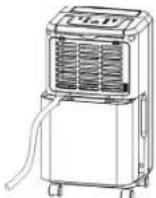
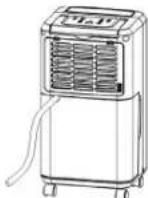
PARTS DESCRIPTION
Unit
- Front shell
- Outlet
- Handle
- Control Panel
5.Filter box - Back shell
- Tank
8.Wheel - Supply cord
Display
- Power-led
- Tim-led
- Full-led
- Low wind-led
- High wind-led
- Laundry-led
A. Power button
B. Timer button
C. Speed button
D. Laundry butter
E.Up button
F. Down button
BEFORE THE FIRST USE
- Take the appliance and accessories out the box. Remove the stickers, protective foil or plastic from the device.
- Before using your appliance for the first time, wipe off all removable parts with a damp cloth. Never use abrasive products.
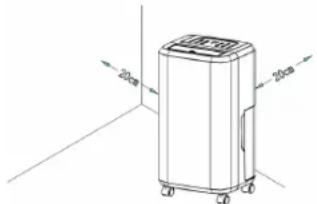
- Place the device on a flat stable surface and ensure a minimum of 20cm . free space around the device. This device is not suitable for installation in a cabinet or for outside use.
- Put the power cable into the socket. (Note: Make sure the voltage which is indicated on the device matches the local voltage before connecting the device. Voltage 220V-240V 50/60Hz)
OPERATION
Display
- When the unit is plugged in, it will indicate the room humidity level.
- When you set the humidity, it will indicate the humidity that you have selected.
- When you program the time for the unit to turn on and off, it will show the hours.
- When the environment humidity is lower than 35% , it will show "LO"
- When the environment humidity is higher than 95% , it will show "HI"
Operating Instructions
- Press the Power button once to start operation. Press it again to stop operation.
- Press the up or down button to set the desired humidity level in the room, which can be set from 30% to 90% at 5% intervals. After a period of working, when the environment humidity is lower than the selected humidity by 2% , the compressor will stop and fan stops working 3 minutes later; When the environment humidity is equal to or higher than the selected humidity by 3% , the compressor will restart once the 3-minute compressor protection time is over.
- Press the timer button to program the time when the unit turns on and turns off. If you want to cancel the timer programming, press the timer button to adjust the time at 00, and press the timer button, it will be circulate from 00-01-02....23-24. It is the programmed time to switch the machine. The programmed time will be cancelled if you switch the compressor. The programmed time remains unchanged if the machine stops to work due to water full or during defrosting
- Press the laundry button to open and close Laundry function.
Draining the collected water
When the drainage tank is full, the tank full indicator light will turn on, the operation will stop automatically and the buzzer will beep 15 times to alert the user, that the water need to be emptied from the drainage tank.
Emptying the Drainage Tank
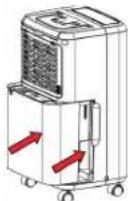
- Lightly press on the sides of the tank with both hands and pull the tank out gently.
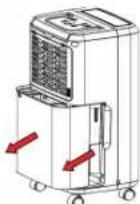
- Discard the collected water
NOTE
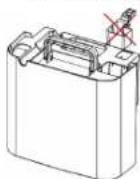
- Do not remove the float from the water tank. The water full sensor will no longer be able to detect the water level correctly without the float and water may leak from the water tank.
- If the drainage tank is dirty, wash it with cold or lukewarm water. Do not use detergent, scouring pads, chemically treated dust cloths, gasoline, benzene, thinner, or other solvents, as these can scratch and damage the tank and cause water leakage.
- When replacing the drainage tank, press the tank firmly into place with both hands. If the tank is not positioned properly, the "TANK FULL" sensor will be activated, and the dehumidifier will not operate.
Continuous Water Drainage
The unit features a continuous drainage port. Using a plastic pipe (with an inner diameter of 10mm ). Take out the water tank and put the drainpipe over the water outlet of the unit. Put the water tank back in place and guide the drainpipe through the hole of the water tank. The water in the drainage tank can be continuously drained out from the continuous port on the unit.
EN
CLEANING AND MAINTENANCE
- Wipe it with a soft damp cloth.
- Open the inlet grill firstly and remove the air filter
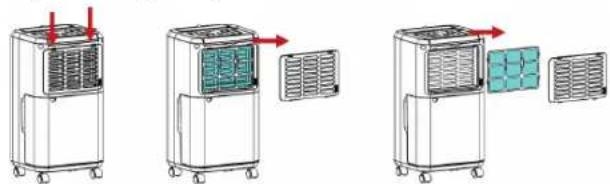
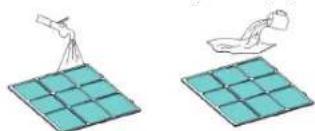
- Run a vacuum cleaner lightly over the surface of the air filter to remove dirt. If the air filter is exceptionally dirty, wash it with warm water and a mild cleanser and dry thoroughly.
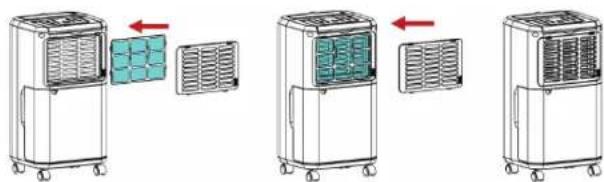
- Insert the filter into the grill smoothly, and place the inlet grill into right place.
STORING THE DEHUMIDIFIER
When the unit is not being used for a long period of time and you want to store it note the following steps:
- Empty any water left in the drainage tank.
- Fold up the power supply cord and put it in the water tank.
- Clean the air filter
- Discard in a cool and dry place.
TROUBLESHOOTING
If a condition listed below occurs, please check the following items before calling customer service.
| Problem Possi | ble Cause Solution | |
| The unit doesn't operate | Is the temperature of the room above 35°C or below 5°C? | The protection device is activated and the unit cannot be started. |
| The dehumidifying function doesn't work | Is the air filter clogged? C | Clean the air filter as instructed under "Cleaning and maintenance". |
| Is the intake duct or discharge duct obstructed? | Remove the obstruction from the discharge duct or intake duct. | |
| No air is discharged | Is the air filter clogged? C | Clean the air filter as instructed under "Cleaning and maintenance". |
| Operation is noisy | Is the unit tilted or unsteady? | Move the unit to a stable, sturdy location. |
| Is the air filter clogged? C | Clean the air filter as instructed under "Cleaning and maintenance". |
GUARANTEE
- This product is guaranteed for 24 months granted. Your warranty is valid if the product is used in accordance to the instructions and for the purpose for which it was created. In addition, the original purchase (invoice, sales slip or receipt) is to be submitted with the date of purchase, the name of the retailer and the item number of the product.
- For the detailed warranty conditions, please refer to our service website: www.service.tristar.eu

GUIDELINES FOR PROTECTION OF THE ENVIRONMENT
This appliance should not be put into the domestic garbage at the end of its durability, but must be offered at a central point for the recycling of electric and electronic domestic appliances. This symbol on the appliance, instruction manual and packaging puts your attention to this important issue. The materials used in this appliance can be recycled. By recycling of used domestic appliances you contribute an important push to the protection of our environment. Ask your local authorities for information regarding the point of recollection.
VEILIGHEIDSWAARSCHUWINGEN
Quality shouldn't be a luxury!

service.tristar.eu
Tristar Europe B.V. | Jules Verneweg 87 | 5015 BH Tilburg | The Netherlands