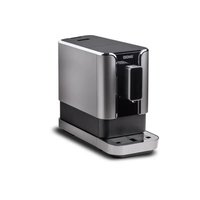
28811 - Coffee machine UNOLD - Free user manual and instructions
Find the device manual for free 28811 UNOLD in PDF.


User questions about 28811 UNOLD
0 question about this device. Answer the ones you know or ask your own.
Ask a new question about this device
Download the instructions for your Coffee machine in PDF format for free! Find your manual 28811 - UNOLD and take your electronic device back in hand. On this page are published all the documents necessary for the use of your device. 28811 by UNOLD.
USER MANUAL 28811 UNOLD
Instructions for use Model 28811/28815
Technical speci cations 20
Display messages 21
Safety information 22
Setting up 22
Quick guide: the rst cup of coffee 23
Purging the system 23
Operation 23
Settings for the preparation of coffee 24
Basic settings for the preparation of coffee 25
Menu settings 26
Dscaling. 28
Trouble shooting 29
Cleaning and care 30
Flow diagram. 92
Guarantee Conditions 96
Waste Disposal / Environmental Protection 98
Speci cation technique 32
Pump capacity: 15 bar
Housing: Modell 28811: semi-gloss white plastic or silver/stainless steel
Model 28815: semi-gloss black plastic or silver/stainless steel
Water tank: Plastic, transparent, removable, 1.8 litre holding capacity, with lid
Coffee bean Plastic, transparent, removable, with integrated grinder and lid, 150g holding container capacity
Weight: Approx. 10.5 kg
Cable length: Approx. 100 cm
Fittings:Turning knob
For 1 or 2 cups, 3 selectable cup sizes
Straightforward operation via self-explanatory LCD display
Individual preparation: Fineness, amount of ground coffee and pregrind can be set
With prebrew aroma function
- Integrated grinder with container for 150g of coffee beans
- Froth nozzle for frothing milk and hot water
- Detachable 1.8 litre water tank
- Coffee temperature can be set in 3 steps - low - medium - high
Surface for cups heatable - Removable brewer, drip grille and tray
- Stand-by power consumption about 5 watts/hour
Grind neness, amount of ground coffee and pregrind can be set - Prebrew and pregrind function
- Height-adjustable spout
- Steel grinder
- Descaling programme
ON/OFF switch
Accessories: Instructions for use, cleaning brush, silicone grease for brewer, key for brewer
Spare parts: Silicone grease, cleaning brush, water tank with lid
Subject to technical modi cations
EXTENDED GUARANTEE
Additionally to the warranty terms indicated at the end of these operating instructions a credit voucher or replacement is guaranteed in case of malfunction due to a manufacturing defect detected within the rst 6 weeks after purchase (date of receipt).
Within Germany and Austria we will bear the costs for collecting the appliance. For this purpose, please use the form at the end of these instructions and keep the appliance ready for collection (emptying water tank, coffee grounds container, coffee beans container, drip tray), if possible in the original packaging.
The extended warranty only applies to appliances sold and to be collected in Germany and Austria. In all other countries please contact your local retailer or importer.



| Meldung im Display alphabetisch | English |
| AUFWÄRMEN Warm ing up | |
| BETRIEBSBERIT All functions ready | |
| BRÜHGRUPPE REINIGEN | Please clear brewer |
| BRÜHGRUPPE EINSETZEN | Brewer unlocked |
| DAMPF BEREIT Stea am ready | |
| DAMPFREGLER AUFDREHEN | Knob turn ON |
| DAMPFREGLER ZUDREHEN | Knob turn OFF |
| ELEKTRONIK- FEHLER | Machine error |
| ELEKTRONIK- FEHLER | Machine error |
| ELEKTRONIK- FEHLER | Machine error |
| ENTKALKEN BEENDET | Descaling nished |
| ENTKALKEN NICT STARTEN | Interrupt descaling |
| ENTKALKEN STARTEN | Start of descaling |
| ENTKALKEN 500 D escaling 500 | |
| ENTKALKEN 1000 | Descaling 1000 |
| ENTKALKEN 1500 | Descaling 1500 |
| ENTKALKEN 2000 | Descaling 2000 |
| ENTKALKUNG LÄUFT | Descaling machine |
| WERKS- EINSTELLUNG | Default |
| FUNKTIONSTEST LÄUFT | Function test |
| GERÄT ENTLÜFTEN | Water pipe blocked |
| GERÄT ENTKALKEN | Please descale machine |
| Meldung im Display alphabetisch | English |
| GESAMTANZAHL TASSEN | Total number of cups |
| GROSSE TASSE Large cup | |
| HEISSWASSER BEREIT | Hot water ready |
| KAFFEEBOHNEN NACHFULLEN | Please add beans |
| KLEINE TASSE ESPRESSO | Small cup |
| MITTLERE TASSE | Medium cup |
| SATZBEHÄLTER EINSETZEN | Dregs drawer unlocked |
| SATZBEHÄLTER LEEREN | Please clear dregs |
| SPÜLVORGANG BEENDET | Rinsing nished |
| SPÜLVORGANG Läuft | Rinsing machine |
| STANDBY Standby | |
| STANDBY NACH 30 MIN | Standby after 30 min |
| STANDBY NACH 60 MIN | Standby after 60 min |
| STANDBY NACH 120 MIN | Standby after 120 min |
| STANDBY NACH 240 MIN | Standby after 240 min |
| STANDBY NACH 480 MIN | Standby after 480 min |
| TEMPERATUR NIEDRIG | Coffee temperature low |
| TEMPERATUR MITTEL | Coffee temperature medium |
| TEMPERATUR HOCH | Coffee temperature high |
| VORBRÜHEN EIN | Prebrew ON |
| VORBRÜHEN AUS | Prebrew OFF |
| VORMAHLEN EIN | Pregrind ON |
| Meldung im Display alphabetisch | English |
| VORMAHLEN AUS | Pregrind OFF |
| WärMEPLATTE AUS | Cup warmer OFF |
| WärMEPLATTE EIN | Cup warmer ON |
| WASSER ABLASSEN | Please release water |
| WASSERTANK FÜLLEN | Please add water |
| ZWEI TASSEN Two cups of coffee | |
| MANUELLER TEST | Manual testing |
| TEST PUMPE Pump test | |
| BRÜHGRUPPE HOCHFAHREN | Closewise motor test |
| BRÜHGRUPPE HERUNTERFAH. | Anti-closewise motor test |
| TEST MAHLWERK | Grind motor test |
| TEST ELEKTROMAGNET | Electromagnet test |
SAFETY INFORMATION
Please read the operating instructions thoroughly and keep 1. them for future reference.
This appliance is not intended for use by persons (including 2. children) with reduced physical, sensory or mental capabilities, or lack of experience and knowledge, unless they have been given supervision or instruction concerning use of the appliance by a person responsible for their safety.
Children should be supervised in order to ensure that they do 3. not play with the appliance.
Connect the appliance only to an AC power supply with the 4. voltage indicated on the rating plate.
Never leave the appliance unattended when it is connected to 5. the wall socket. Keep the appliance out of reach of children. The appliance may only be used to prepare coffee, never for 6. heating any other liquid.
The appliance may never be immersed in water or other liquids 7. nor cleaned in the dishwasher.
Place the appliance on a dry, even and rm surface. Never 8. place it on hot or metal surfaces.
The appliance is designed for indoor use only and may not be 9. covered during operation.
Use the appliance with original accessories only. The use of 10. accessories of other manufacturers or brands can damage the appliance or lead to hazards for the user.
The lead cable may not get in contact with the hot parts of the 11. appliance. Do not touch the hot parts of the appliance.
Do not pull on the lead cable. Make sure that the lead cable 12. does not hang over the edge of the worktop. Do not bend the lead cable or wrap it around the appliance.
Always disconnect the lead cable from the wall socket pulling 13. on the plug, never on the cable.
This appliance is intended for domestic and similar use such 14. as:
staff kitchen areas in shops, of ces and other working environments; agricultural enterprises;
by clients in hotels, motels and other accommodation facilities;
bed and breakfast accommodations and holiday homes. Never operate the appliance without water. Always use fresh, 15. cold water to prepare coffee and ll the water tank only up to the MAX mark.
16.Never switch the appliance on if it is without water.
Some components of the appliance like the steam nozzle or 17. the frother become hot during operation. Do not touch hot components.
Please consider the instructions in the chapter „Cleaning and 18. Care".
If the appliance is not going to be used for an extended time, 19. clean all detachable components before storing it.
20.Never pour water into the coffee beans container, as this 7.might damage the grinder.
Opening the lateral cover of the appliance triggers the safety 21. switch. If the cover is opened during operation, the appliance is automatically switched off.
After use and before cleaning turn the appliance off using the 22. EIN/AUS [ON/OFF] switch on the rear and disconnect it from the wall socket.
- Check the plug and lead cable regularly for wear and damage. In case the lead cable or other parts appear damaged, please send the appliance or the cable to our after-sales service for inspection and repair (for address, see warranty terms). Unauthorised repairs can constitute serious risks for the user and void the warranty.

Hot water and steam can cause scalding! Direct the frother either into a jug or towards the drip tray.
Freshly brewed coffee is very hot. Please be careful when handling cups lled with hot coffee.
The manufacturer shall not be liable in the event of improper assembly, improper or incorrect use or repairs carried out by unauthorised third parties.
SETTING UP
Each appliance is thoroughly tested before delivery. After the test the appliance is scrupulously cleaned. Nevertheless, there might be remains of coffee powder or water inside the appliance.
Unpack the appliance, remove any transport safety devices and check if all accessories have been delivered according to the list of accessories (page 7). If possible, keep the packaging in order to use it in case the appliance needs to be sent to the after-sales service.
Clean all detachable components as described in the chapter 2. Cleaning". After that assemble the appliance completely.
Remove the water tank and Il it with fresh water up to the 3. mark. Do not use milk, carbonated water or other liquids. Reinsert the water tank and t the lid.
Note:
The tank should be removed to be lled with water, in order to prevent water from getting into the coffee beans container.
Open the coffee beans container, wipe it out with a dry cloth, 4. Il it with coffee beans and t the lid.
- beans container does not contain any metal parts or other hard objects which could damage the grinder. Do not grind any other type of beans or fruit in the coffee beans container.
- Plug the lead cable into the socket on the appliance rst and then connect it to a wall socket that corresponds to the indications on the rating plate.
- Open the lateral cover and check if the brewer assembly and the coffee grounds container have been inserted correctly. Otherwise ventilation will not be possible. First insert the brewer into the appliance until it latches into place, then insert the coffee grounds container.
- Close the lateral cover. (The lateral cover is tted with a safety switch. The fully automatic coffee machine can only be switched on when the lateral cover has been closed correctly.)
QUICK GUIDE: THE FIRST CUP OF COFFEE
- Fill the water tank.
- Fill the coffee beans container.
- Connect the appliance to the mains.
- Check if the brewer assembly and the coffee grounds container are inserted correctly.
Check if the main switch on the rear of the appliance is 5 switched to AUS [OFF].
Press the menu button and keep it pressed, switch the main 6. switch on the rear of the appliance to EIN/ON, release the menu button, turn the steam control on.
Place a jug (minimum capacity 300ml ) under the steam 7. nozzle.
Press the menu button and keep it pressed until at least 50 ml 8. have been discharged.
Turn the steam control off and switch the appliance off using 9. the main switch.
10. Switch the appliance on using the main switch.
11. The display indicates „Standby“.
12. Press the Start button. The appliance starts the heating 5. process.
13. Place a cup under the coffee outlet.
During the heating phase an automatic cleaning programme 14 will be executed.
15.If the display indicates „Betriebshereit/Ready" you may obtain your rst coffee.
16. In the rst grinding process, „Bohnen nachfüllen/Re II beans“ 3. may be indicated, although the beans container is full. In this case please press the corresponding coffee button again.
PURGING THE SYSTEM
Before preparing the rst coffee or if the appliance has not 1. been used for an extended time, inner tubes have to be purged and lled again with water.
Open the lateral cover and check if the brewer assembly and 2. the coffee grounds container have been inserted correctly.
Otherwise purging will not be possible. First insert the brewer into the appliance until it latches into place, then insert the coffee grounds container.
Close the lateral cover. (The lateral cover is tted with a 3. safety switch. The fully automatic coffee machine can only be switched on when the lateral cover has been closed correctly.)
Keep the 4. MENU/MENU button pressed and switch the appliance on, using the EIN/AUS [ON/OFF] switch on the rear of the appliance. Release the MENU/MENU button.
Turn the steam nozzle towards the drip tray or into a jug with 5. a minimum capacity of 300ml
Turn the steam control on the right side of the appliance to 6. EIN [ON].
Press the 7. MENU/MENU button and keep it pressed until at least 50ml of water have been discharged. Release the MENU/MENU button, turn the steam control to AUS [OFF] and switch the appliance off, using the EIN/AUS [ON/OFF] switch.
OPERATION
- If necessary, purge the appliance.
- Make sure that the drip tray and grid are correctly inserted. Close the lateral cover. The lateral cover is tted with a safety 3. switch. The automatic coffee machine can only be switched on when the lateral cover has been closed correctly. If the cover is opened during operation, the appliance is automatically switched off.
Before switching the appliance on, please turn the steam 4^1 control on the right side of the automatic coffee machine to AUS [OFF].
- Switch the appliance on, using the EIN/AUS [ON/OFF] switch on the rear of the appliance. The display indicates:
STANDBY
- Place a cup under the outlet.
Press the Start button. You will hear an operation noise. The 7. automatic coffee machine is starting its self-test. The display indicates the following message:
FUNKTIONTEST LAUFT
This means that the status of the corresponding component of 8. the automatic coffee machine is tested and the user executes the corresponding operating step as required.
- The following messages may be displayed during testing:
BRUHGRUPPE EINSETZEN
WASSERTANK FULLEN
The brewer assembly is not inserted or not inserted properly.
The water tank is empty and must be filled.
SATZBEHÄLTER EINSETZEN
DAMPFREGLER ZUDREHEN
The coffee ground container is not inserted properly.
The steam controller is turned to EIN [ON] and has o be turned off.
- The message
FUNKTIONTEST LAUFT
is displayed for a few seconds.
- After the testing is concluded, the following message is displayed:
AUFWÄRMEN
- This means that the automatic coffee machine is in the heating phase for approx. 2 to 3 minutes. At the same time, an automatic cleaning of about 20 seconds is carried out. During this process, hot water leaks from the machine, as the inner brewing pipe, the brewer assembly and the outlet nozzle are rinsed. This mechanism serves hygienic purposes and improves the quality of the coffee.
- Usually the following message is displayed after a few seconds:
BETRIEBSBEREIT
The automatic coffee machine is now ready for operation and 14. you may brew your coffee.
- Further proceeding is described in the chapter „Settings for the preparation of coffee".
SETTINGS FOR THE PREPARATION OF COFFEE
Cup sizes

small cup/espresso cup

medium cup/standard size

big cup/coffee mug
The coffee outlet is height adjustable and can be adapted to the size of the cup. Move the lower part of the outlet up or down, as required.
One cup of coffee:
Place the corresponding cup under the coffee outlet.
As soon as the display of the automatic coffee machine indicates
BETRIEBSBEREIT
press the button for the desired cup size.


The coffee will be brewed and poured into the cup.
Two cups of coffee:
Place two coffee cups under the outlet nozzles so that each of them is under a nozzle. The proceeding is identical to the one described for the preparation of one cup. Nevertheless, it is necessary to press one of these buttons


twice within 2 seconds. The display indicates:
ZWEI TASSEN KAFFEE
The automatic coffee machine automatically prepares two cups of coffee of the corresponding size. Note:
If the feature VORMAHLEN/PRE-GRIND is selected, only one cup can be prepared at a time.
Preparation of hot water
The temperature of the hot water in the brewer assembly is more than 95^ , being of more than 85^ in the outlet. The following message must be displayed in order to prepare hot water:
BETRIEBSBEREIT
Place a jug (cup or similar) under the steam nozzle and turn the steam control to EIN [ON]. The display indicates:
The hot water is poured directly from the steam nozzle into the jug.
If you want to interrupt the process, turn the steam control to AUS [OFF]. The automatic coffee machine stops producing hot water and the display indicates:
BETRIEBSBEREIT
The frother becomes very hot when discharging hot water. Please do not touch the frother immediately after discharging hot water. Please use the rubber handle.
Steam function / Milk froth function
Make sure that the following message is displayed:
BETRIEBSBEREIT
Then press the button MENU/MENU once. The appliance starts the heating process. The display indicates:
AUFWARMEN
After approximately 120 seconds the appliance has been heated up and the following message is displayed:
DAMPF BEREIT
Place the jug with the liquid to be heated / frothed under the frother.
Then turn the steam control to EIN [ON]. The nozzle discharges hot steam.
DAMPF
To froth milk, Il one third of the jug with milk. Immerse the steam nozzle in the milk and turn the steam control to EIN [ON]. As soon as the milk is suf ciently frothed, turn the steam control to AUS [OFF].

CAUTION: Hot water and steam can cause scalding! Always direct the frother either into a jug or towards the drip tray.
If no steam is discharged, the nozzle might be clogged. Turn the steam control to AUS [OFF/0] and switch the appliance off. Clean the steam nozzle with a needle.
Finalise the preparation of steam
When the display indicates
DAMPF BEREIT
(STEAM READY) press the button MENU/MENU once. The following message is displayed:
WASSER ABLASSEN
Place a jug under the frother. Now turn the steam control to EIN [ON]. The automatic coffee machine discharges a small amount of water to automatically reduce the temperature. As soon as the following message is displayed
BETRIEBSBEREIT
(READY), turn the steam control to AUS [OF]. The automatic coffee machine returns to standby mode. If you do not turn the steam control to AUS [OFF], the appliance switches to the hot water feature.

CAUTION: During operation never open the lateral cover or interrupt the power supply and do not remove the water tank or the drip grid.
BASIC SETTINGSFOR THE PREPARATION OF COFFEE
Water quantity per cup
According to general standards, the default setting corresponds to the following quantities:

40 ml (adjustable from approx. 40-80 ml)

120 ml (adjustable from approx. 100-150 ml)

200 ml (adjustable from approx. 150-300 ml)
Nevertheless, the quantity of water per cup can be adjusted to your needs within the limits indicated above. Please proceed as follows:
Make sure that the display indicates
BETRIEBSBEREIT
(READY). Then press the button corresponding to the desired cup size and maintain this button pressed. As soon as the desired level is achieved, release the button. The automatic coffee machine stops the brewing process and saves the brewed quantity as standard for the corresponding cup size. The next time you brew coffee with the corresponding button, the saved quantity of coffee will be brewed.
ATTENTION:
Please use a measuring cup when adjusting the water quantity. If the button is still pressed when the minimum or maximum quantity for the respective cup size is reached, the appliance returns to the default settings without saving the new settings.
The settings can be adjusted for all three cup sizes correspondingly.
The capacity per cup can be saved within the limits indicated above. If the respective lower or upper limit is exceeded, the automatic coffee machine activates the corresponding minimum or maximum capacity.
Quantity of coffee powder per cup
The default setting is of 7 to 8g ground coffee per cup. If you desire to change this quantity, please open the lateral cover of the automatic coffee machine.
Push the red lever above the brewer assembly towards - to reduce the quantity and obtain a weaker coffee or towards + to increase
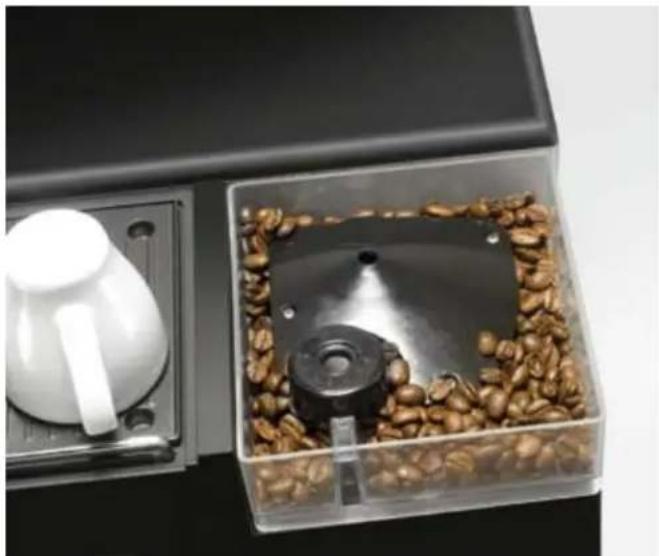
the quantity and obtain a stronger coffee. Adjustments can be made between 6 and 9g
ATTENTION:
In order to increase the service life of the appliance, we recommend not to adjust the appliance permanently to the maximum coffee powder quantity.
Degree of grinding
The default setting corresponds to a medium degree of grinding. The degree of grinding may be also adjusted as you require. For this purpose, open the coffee beans container and turn the knob to set the degree of grinding (0 = very fine to 12 = coarse).
The ner the grind, the more intense the aroma of your coffee.
CAUTION:
The setting must be adjusted while the grinder is in operation. Do not change the setting when the grinder is not operating in order to prevent the grinder from being damaged.
As there may be some ground coffee left in the grinder from previous use, the adjustment may not make a difference until the second or third cup. If necessary, you may correct the setting accordingly.
In order to increase the service life of the appliance, we recommend not to adjust the degree of grinding permanently to the nest grind.
ATTENTION:
If the pre-grind feature is selected, there will be always a certain amount of coffee powder in the coffee powder chamber. This might block the red lever when trying to adjust the quantity in one step. To avoid this, we recommend to deactivate the pre-grinding feature temporarily or adjust the quantity in several steps.
MENUS SETTINGS
The setting of the appliance may be changed when the following message is displayed:
BETRIEBSBEREIT
To activate the menu, press the MENU/MENU button until the message on the display changes.
If no button is pressed during approx. 5 seconds when being in programming mode, the programming mode is abandoned without saving the changes made.
The rst submenu indicated on the display is the water hardness adjustment:
ENTKALKEN 500
Within the submenu you may select the different options by pressing the button
Pressing the MEN/MESSAGE button once brie y, you will access the corresponding next submenu.
Pressing the MEN/Menu button for three seconds, the settings made will be saved immediately and the menu will be abandoned.
Note:
If you press the MENU/MENU button brie y at the end of the last submenu (Automatic descending), you will return to the main menu. Any changes made will not be saved.
You will nd a schematic diagram on page 92.
Water hardness
To activate the menu, press the MENU/MENU button until the message on the display changes.
Drinking water hardness changes depending on the region. Your local municipal water supplier provides information on the hardness of your water. The proper water hardness should be set, in order to allow the appliance to adjust the descaling programme to the local water hardness. The right settings prevent the appliance from being damaged and ameliorate your coffee.
As a basic rule for descending, the following applies: The higher the hardness, the earlier descending has to be carried out.
Example: Hardness 1 - Entkalken/Descaling 2000
Hardness 4 - Entkalken/Descaling 500
Opening the menu, the following message is automatically displayed:
ENTKALKEN 500
The descaling programme will be initialised after brewing 500 cups of coffee.
Press the button once.
ENTKALKEN 1000
The descending programme will be initialised after brewing 1,000 cups of coffee.
Press the button again.
ENTKALKEN 1500
The descending programme will be initialised after brewing 1,500 cups of coffee.
Press the button again.
ENTKALKEN 2000
The descending programme will be initialised after brewing 2,000 cups of coffee.
When the set total number of cups is reached, the following message will be displayed:
GERATENTKALKEN
(DESCALE APPLIANCE). Please follow the instructions described in the chapter DESCALING.
If you do not want to descale the appliance, switch it off for a short time. After reconnecting, the appliance returns to standby mode and the following message is displayed:
BETRIEBSBEREIT
To save your changes, press the MENU/MENU button until the display changes, thus abandoning the menu.
To programme further changes, press the MENU/MENU button once brie y, in order to access the next option.
Activation of the warming plate
This option connects or disconnects the warming plate for cups. The default setting is AUS [OFF].
To activate the menu, press the MENU/MENU button until the message on the display changes.
Press the MENU/MENU button once. The following message is displayed:
WARMEPLATTE AUS
The warming function is now deactivated. Press the button

once, in order to activate the warming plate. The following message is displayed:
WARMEPLATTE EIN
To save your changes, press the MENU/MENU button until the display changes, thus abandoning the menu.
To programme further changes, press the MENU/MENU button once brie y, in order to access the next option.
Pre-brewing
The pre-brewing dampens the coffee slightly before brewing, in order to improve the aroma.
To activate the menu, press the MENU/MENU button until the message on the display changes.
Press the MENU/MENU button twice. The display indicates
VORBRUHEN EIN
and the pre-brewing will be activated.
Press the button once.
The following message is displayed:
VORBRUHEN AUS
Pressing the button

the display will return to the following message:
VORBRUHEN EIN
The default setting is EIN [ON].
To save your changes, press the MENU/MENU button until the display changes, thus abandoning the menu.
To programme further changes, press the MENU/MENU button once, in order to access the next option.
Pre-grinding
Usually the coffee beans are ground immediately before brewing the coffee.
When pre-grinding is selected, immediately after brewing a cup of coffee the coffee powder for the next cup is ground, so that this step is omitted in the brewing. Thus, the preparation time for a coffee is slightly shorter. The activation of pre-grinding is recommended when using the appliance frequently.
To activate the menu, press the MENU/MENU button until the message on the display changes.
Press the MENU/MENU button three times. The display indicates:
VORMAHLEN AUS
To activate or deactivate pre-grinding, please press the button

Now the following message is displayed
VORMAHLEN EIN
and the feature is activated.
Pressing the button

the display will return to the message
VORMAHLEN AUS
and the feature is deactivated. The default setting is AUS [OFF].
Note:
If the feature VORMAHLEN/PRE-GRIND is selected, only one cup can be prepared at a time.
To save your changes, press the MEN/ MENU button until the display changes, thus abandoning the menu.
To programme further changes, press the MENU/MENU button once brie y, in order to access the next option.
Coffee temperature
You may adjust the coffee temperature to your personal requirements.
To activate the menu, press the MENU/MENU button until the message on the display changes.
Press the MENU/MENU button four times. The display indicates the current setting. Pressing the button

several times, the coffee temperature may be adjusted as desired.
TEMPERATUR NIEDRIG
TEMPERATUR MITTEL
TEMPERATUR HOCH
The default setting is MITTEL/MEDIUM
To save your changes, press the MENU/MENU button until the display changes, thus abandoning the menu.
To programme further changes, press the MENU/MENU button once brie y, in order to access the next option.
Automatic Standby
This feature allows you to determine when the appliance should switch to the energy saving standby mode.
To activate the menu, press the MEN/MESSAGE button until the message on the display changes.
Press the MENU/MENU button ve times. The display indicates:
STANDBY
Pressing the button

several times allows you to adjust the time after which the appliance automatically switches into standby mode.
When the display indicates
STANDBY
is indicated on the display, the automatic shutoff is deactivated and the appliance remains prepared for operation.
When the display indicates
STANDBY NACH 30 MIN
(STANDBY AFTER 30 MIN.), the appliance switches to standby mode 30 minutes after the last operation carried out.
When the display indicates
STANDBY ACH 60 MIN
(STANDBY AFTER 60 MIN.), the appliance switches to standby mode 60 minutes after the last operation carried out.
When the display indicates
STANDBY NACH 120 MIN
(STANDBY AFTER 120 MIN.), the appliance switches to standby mode 120 minutes after the last operation carried out. When the display indicates
STANDBY NACH 240 MIN
(STANDBY AFTER 240 MIN.), the appliance switches to standby mode 240 minutes after the last operation carried out. When the display indicates
STANDBY NACH 480 MIN
(STANDBY AFTER 480 MIN.), the appliance switches to standby mode 480 minutes after the last operation carried out.
The default setting is STANDBY.
To con rm the setting immediately, press the MENU/MENU button for three seconds, thus abandoning the menu.
To programme further changes, press the MENU/MENU button once brie y, in order to access the next option.
Cup totalisator
The cup totalisator indicates the total number of cups of coffee prepared since the starting up of the appliance.
To activate the menu, press the MENU/MENU button until the message on the display changes.
Press the MENU/MENU button six times. The following message is displayed:
GESAMTANZAHL 00000
This submenu does not allow any settings. Please bear in mind that due to the in-plant tests a certain number of cups will be indicated.
Reset
This feature deletes all personal settings and re-establishes the default settings.
To activate the menu, press the MENU/MENU button until the message on the display changes.
Press the MENU/MENU button seven times. The following message will be displayed:
WERKSEINSTELLUNG
Press the MENU/MENU button and maintain it pressed for 3 seconds. After this the appliance has re-established the default settings.
The automatic descending will not start. After reaching the number of cups set in the water hardness settings, the following message is indicated:
GERAT ENTKALKEN
Press the button once.
The following message will be displayed:
ENTKALKEN STARTEN
After abandoning the menu, the automatic descending process starts.
If you access the submenu for the settings of the water hardness by pressing the MENU/MENU button, all previous settings will not be saved!
Closing the programming mode
Save changes
If you maintain the MENU/MENU button pressed until the displayed indication shifts, all previous programme changes will be saved.
This may be carried out for each item of the menu individually. Nevertheless, you may also use the MENU/MENU button and the buttons


and to browse all submenus, carry out the desired settings and con rm and save these settings altogether at the end.
Closing the programming mode without saving
If no button is pressed during approx. 5 seconds when being in programme mode, the programme mode is abandoned without saving the changes made.
If you access the submenu for the settings of the water hardness by pressing the MENU/MENU button, all previous settings will not be saved! If this happens accidentally, you will have to repeat all changes previously made and not saved.
Automatic descaling
To activate the menu, press the MENU/MENU button until the message on the display changes.
Press the MENU/MENU button eight times. The display indicates:
DESCALING
Our automatic coffee machines have a descending memory and an automatic descending programme and also offer the possibility for manual descending.
If the ow rate decreases or coffee is no longer brewed, a manual descaling is recommended.
Use an ecological descending product. Make sure that the descending product is adequate for automatic coffee machines.
MANUAL DESCALING
If the ow rate decreases or coffee is no longer brewed, a manual.
descaling is recommended.
Fill the water tank with the descending product.
Switch the appliance on and wait until „Betriebsbereit/Ready“ is indicated.
Now press the button „Coffee mug".
With resistant calcinations it might be necessary to press the button several times until the normal ow rate is achieved.
As soon as the ow rate is normal again, press the button „Coffee mug" twice.
After this empty and clean the water tank.
Fill the water tank with fresh, cold water and insert the tank into the appliance.
To rinse thoroughly, press the button „Coffee mug" three times. Pour this coffee away.
In order to save coffee, adjust the selector switch above the brewer assembly to minimum.
If necessary, the automatic descending process can be started after the manual descending, in order to descale the appliance completely.
AUTOMATIC DESCALING
The automatic descending memory is permanently activated. In the menu you may choose the intervals of 500/1000/1500 and 2000 cups. After obtaining the set number of cups, the appliance switches to AUTOMATIC DESCALING mode. The automatic descending programme can be initialised manually at any time.
ATTENTION:
Never turn the steam control to AUS [OFF/0] when descending the appliance, if not explicitly required by means of the displayed messages. Otherwise the descending time already passed will be deleted and the programme will start a new descending process.
As the descending programme requires several steps, you should stay near the appliance in order to carry out the steps the programme needs to continue.
Use an ecological descaling product. Make sure that the descaling product is adequate for automatic coffee machines.
The service life of the appliance is considerably prolonged if you'll the tank with water treated with a commercial softening agent (Iter cartridges).
If the automatic coffee machine indicates
GERÄT ENTKALKEN
(DESCALE APPLIANCE), the appliance has to be descaled. Place a jug under the frother with a capacity high enough for the discharged water.
Fill the water tank with fresh water and add the corresponding amount of descending product, following the instructions of the manufacturer.
Turn the steam control to EIN [ON]. The following message is displayed:
ENTKALKEN STARTEN
The automatic descending programme will be initialised. The duration is of about 30 minutes.
When the display indicates
SPULVORGANG LAUFT
(RINSE IN PROGRESS), turn the steam control to AUS [OFF]. Detach the water tank and Il it with fresh, cold water. Insert the water tank and continue the descending process.
Turn the steam control to EIN [ON]. Possible residues are eliminated when rinsing. After this process nishes, the display indicates the following:
DAMPFREGLER AUS
Turn the steam control to AUS [OFF]. The following message will be displayed:
ENTKALKEN BEENDET
This messages remains on the display for 5 seconds. The appliance starts to heat up and the display indicates
AUFWÄRMEN
(HEATING UP), until the necessary operation temperature to brew coffee is achieved and the display newly indicates the following:
BETRIEBSBEREIT
The descending programme is nished and the appliance is ready for operation again.
TROUBLE SHOOTING
When the display indicates
WASSERTANK FULLEN
(FILL WATER TANK), the water tank is empty. Detach the water tank, Il it with cold water and reinsert it into the appliance to reestablish the operating state. If the oat lever is blocked, gently shake the water tank to set it free. If the water tank is full and the message is displayed all the same, please lift the water tank brie y and reinsert it.
When the display indicates
BRUHGRUPPE EINSETZEN
(INSERT BREWER ASSEMBLY), the brewer assembly is not properly inserted. Open the lateral cover and detach the coffee grounds container rst, then the brewer assembly. The brewer has two arrow marks on the front beneath the handle. These must point at one another to allow the insertion of the brewer assembly. Should this be not the case, the brewer assembly may be aligned with the brewer assembly key/wrench. Insert the brewer assembly key/wrench into the hole on the rear of the brewer assembly and turn it until the arrows on the front point at one another.
When inserting the brewer assembly, the plate with the label PRESS above the handle has to be pushed down. The brewer assembly must latch into place.
When the display indicates
SATZBEHÄLTER LEEREN
(EMPTY GROUNDSC CONTAINER), the coffee ground container is full and has to be emptied. Open the lateral cover and remove the coffee grounds container. Empty the container and rinse it thoroughly with water. Dry the container and reinsert it into the appliance. Close the lateral cover.
The following message will be displayed:
STANDBY
Pressing the right button, the appliance will be ready for operation again.
When the display indicates
SATZBEHÄLTER EINSETZEN
(INSERT GROUNDSC CONTAINER), the coffee grounds container is not properly inserted. Insert the coffee grounds container to its limit.
The following message will be displayed:
STANDBY
Pressing the right button, the appliance will be ready for operation again.
When the display indicates
(REFILL WITH COFFEE BEANS), the coffee beans container is empty. Open the coffee beans container and II it with t corresponding quantity of coffee beans. After this, press any button. The display indicates the following:
BETRIEBSBEREIT
If the display keeps on indicating „Re II with coffee beans" although the coffee beans container is full, please contact our after-sales service.
When the display indicates
DAMPFREGLER ZUDREHEN
(STEAM CONTROL ON), the steam control is activated. Turn the steam control to AUS [OFF].
When the display indicates
DAMPF BEREIT
(STEAM READY), the appliance is ready to produce steam. If this is not desired, turn it off as described in the chapter „Settings for the preparation of coffee". The automatic coffee machine switches back to ready for operation:
BETRIEBSBEREIT
When the display indicates
ELEKTRONIK-FEHLER
e(ELECTRONIC ERROR), please turn the appliance off immediately. Send the appliance to your after-sales service for inspection and repair.
When the display indicates
GERÄT ENTKALKEN
(DESCALE APPLIANCE), the appliance has to be descaled. Please follow the instructions given in chapter AUTOMATIC DESCALING.
When sending the appliance to your after-sales service for inspection, please make sure that the appliance is completely emptied (eliminate coffee grounds, dry tank, etc.) before packing. To avoid damages during transport, the appliance has to be protected well.
CLEANING AND CARE
Regular cleaning improves the quality of the brewed coffeeEmptying the drip tray
and extends the service life of the appliance.
Before cleaning, always turn the appliance off and unplug it 2. from the wall socket. Let the appliance cool off.
The appliance and the lead cable may never be immersed in 3. water or other liquids.
Clean the outside of the appliance with a thoroughly squeezed 4. out, damp cloth. Do not use any abrasive or scrubbing agents.
Regularly use a coffee degreaser or fat solvent to eliminate the 5. coffee residues.
Cleaning the water tank
Regular, daily cleaning of the water tank is decisive for the 6. quality of the coffee.
Detach the water tank and rinse it with water. Eliminate water 7. residues daily. Stale water can in uence the taste of the coffee and abet the formation of germs.
- Sediments on the screen may be eliminated with a soft brush.
- Make sure that the oat lever in the water tank remains exible.
Cleaning the coffee beans container
The coffee beans container should be cleaned as necessary or 10 when the container is empty. Open the lid of the coffee beans container.
Clean the inside of the container with a dry cloth. Damp cleaning shall be avoided as no water may enter the grinder.
Do not clean the container with a damp cloth but vacuum-12 clean it. Bean residues can be eliminated with the cleaning brush. After this, vacuum-clean the container again.
Empty the drip tray regularly as necessary, possibly several 13 times per day.
The drip tray has a red oat lever in its centre. As soon as 14. this oat lever rises through the drip grid, the tray must be emptied.
Pull the tray out carefully and horizontally and empty it.15.
16.Clean the tray and grid in warm water, if necessary.
17.Dry the drip tray and grid and reinsert them.
Emptying the coffee grounds container
Empty the coffee grounds container as soon as the following 18. message is displayed:
SATZBEHÄLTER LEEREN
- Open the lateral cover and remove the coffee grounds container.
- Empty the coffee grounds container.
Clean the coffee grounds container with warm water and dry 21. it thoroughly.
Clean the inside of the automatic coffee machine with a dry 22. cloth or a cleaning brush before you reinsert the coffee grounds container. The coffee grounds container has to be inserted up to its limit.
23.Close the lateral cover.
11 Cleaning the coffee outlet
24.Pull the coffee outlet out, pushing it gently downwards.
Clean the coffee outlet with warm water and a mild washing-up 25. liquid. Rinse the outlet with clear water and dry it thoroughly.
Reinsert the coffee outlet into the support on the appliance.26.
Cleaning the steam nozzle
Carefully detach the nozzle from the frother.27.
Carefully clean the nozzle with warm water and a mild 28. washing-up liquid. Rinse the nozzle with clear water and dry it thoroughly.
Reattach the steam nozzle on the frother.29.
Detaching the brewer assembly
The automatic coffee machine has a detachable brewer 30 assembly, which is important for the coffee quality and the operational reliability of the appliance. Clean the brewer assembly regularly, if necessary daily.
Open the lateral cover. Always detach the coffee grounds 31. container rst, then the brewer assembly, holding them on the handle and pressing the plate with the label PRESS downwards and extracting the brewer assembly.
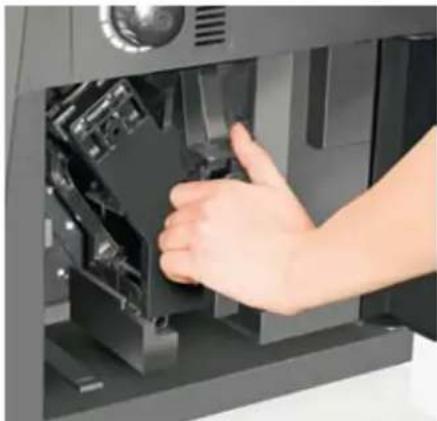
Do not use cleaning agents or disinfectants to clean the brewer 35. assembly. Dry the brewer assembly with a soft cloth.
Grease the lateral guides as well as the red gasket of the 36. brewer assembly every once in a while with the silicone grease enclosed. The red gasket should be replaced once a year or according to its wear.
Also grease the water inlet port of the brewer assembly.37.
To better distribute the grease, actuate the brewer assembly 38. several times using the brewer assembly key. Reinsert the brewer assembly into the automatic coffee machine.
Extract, empty and clean the coffee powder drawer beneath 39. the brewer assembly.
Clean the inside of the automatic coffee machine with a dry 40. cloth or a cleaning brush.
Then put the brewer assembly back to its initial position. The 41.
brewer has two arrow marks on the front beneath the handle.
These must point at one another to allow the insertion of the
brewer assembly.
First reinsert the brewer assembly until it latches into place, 42. then reinsert the coffee grounds container.
- Should the brewer assembly be trapped, thus making its extraction or reinsertion impossible, the appliance has to be inspected and repaired by our after-sales service
All components of the automatic coffee machine have to be 44. dry before reinserting them and using the appliance.
Never clean the brewer assembly with a cleaning agent or disinfectant.
Never dry the brewer assembly or other components with a hair dryer or other electric drying appliances or in the oven/microwave.
If it is not possible to extract the brewer assembly, the water 32. drain pipe might be trapped. The water drain pipe is installed in the upper left of the brewer assembly. Carefully pull on the drain pipe until the brewer assembly can be detached. After cleaning the gasket of the water drain pipe, grease it with a silicone lubricant.
33.Rinse the brewer assembly with water. Do not clean the brewer assembly in a dish-washer. To clean all components of the brewer assembly, insert the brewer assembly key into the round hole on the rear of the brewer assembly and turn it. Rinse the brewer assembly with water.
Clean the perforated screens of the brewer assembly with 34. a soft brush, if necessary. The perforated screens can be detached using the brewer assembly key.
SPECIFICATION TECHNIQUE
Puisance:1.300W,230V\~,50Hz
Activer la plaque chauffante
We guarantee our appliances for 24 months, or in case of commercial use for 12 months, from the date of purchase in case of defects that occur during normal use and are demonstrably due to a factory fault. Within the warranty period we will remedy defective materials or workmanship through repair or replacement, at our option.
Our warranty terms apply only to appliances sold in Germany and Austria. For other countries, please contact the responsible importer. In the event of a claim for remedy of defects, please send the appliance to our after sales service, properly packaged and postage paid, together with a copy of the automatically generated sales receipt, which must show the date of purchase, and a description of the defect. If the defect is covered by the warranty, the customer will be reimbursed for the shipping costs. The warranty does not cover damage from normal wear, improper handling and failure to comply with the maintenance and care instructions. The warranty is void if repairs or modifications are made to the appliance by third parties.
Any claims of the end consumer vis-à-vis the retailer are not limited by this warranty.
CONDITIONS DE GARANTIE
Our appliances are produced on a high quality level for a long lifetime. Regular maintenance and expert repairs by our after-sales service can extend the useful life of the appliance. If an appliance is defective and repair is not possible we ask you to follow the following instructions for disposal.
Do not dispose this appliance together with your standard household waste. Please bring this product to an approved collection point for recycling of electric and electronic products.
By separate collection and disposal of waste products you help to protect natural resources and ensure, that the product is disposed in an adequate way to protect health and environment.