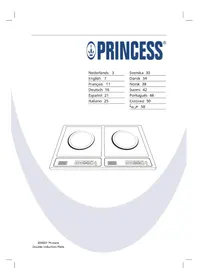
303001 - Frying Pan PRINCESS - Free user manual and instructions
Find the device manual for free 303001 PRINCESS in PDF.



| Brand | Princess |
| Model | 303001 |
| Product type | Induction hob |
| Usage | Indoor, domestic |
| Temperature range | 60 °C to 240 °C |
| Power levels | 10 levels |
| Timer | 1 to 240 minutes |
| Suitable pan diameter | 14.5 cm to 21 cm |
| Unsuitable pan diameter | Less than 10 cm |
| Hob material | Tempered glass |
| Compatible pan types | Steel, stainless steel, cast iron, enameled sheet |
| Incompatible pan types | Glass, ceramic, copper, aluminum |
| Power supply | 220-240 V ~ 50/60 Hz |
| Protections | Overheating, short circuit, over/under voltage |
| Cleaning | Soft damp cloth, do not immerse |
| Error code display | E-0 to E-5 |
| Minimum age of use | 8 years (under supervision) |
Frequently Asked Questions - 303001 PRINCESS
User questions about 303001 PRINCESS
0 question about this device. Answer the ones you know or ask your own.
Ask a new question about this device
Download the instructions for your Frying Pan in PDF format for free! Find your manual 303001 - PRINCESS and take your electronic device back in hand. On this page are published all the documents necessary for the use of your device. 303001 by PRINCESS.
USER MANUAL 303001 PRINCESS
You have purchased a Princess product. Our aim is to provide quality products with a tasteful design and at an affordable price. We hope that you will enjoy this product for many years.
The appliance can be used by children from 8 years and above and by persons with a physical, sensory, mental or motorial disability, or lack of experience and knowledge if they are supervised or instructed on how to use the appliance in a safe way and understand the hazards involved. Children shall not play with the appliance. Cleaning and maintenance shall not be made by children unless they are older than 8 years and supervised. Keep the appliance and the mains cable out of the reach of children younger than 8 years.
Description (fig. A)
Your 303001 Princess induction cooker has been designed for cooking applications using induction heating to directly heat pans. The appliance is suitable for indoor use only. The appliance is suitable for domestic use only. Suitable pans: steel pans, stainless-steel pans, cast-iron pans, enamelled-iron pans, flat-bottom pans with a diameter from 14.5 to 21cm . Non-suitable pans: ceramic pans, glass pans, copper pans, aluminium pans, rounded-bottom pans with a diameter of less than 10cm .
- On/off button
- On/off indicator
- Temperature button (°C)
- Temperature indicator (°C)
- Power button (W)
- Power indicator (W)
- Timer button (hh:mm)
- Timer indicator (hh:mm)
-
+/- buttons
-
Display
- Hotplate with cooking zone
Initial use
Before you proceed, we need you to pay attention to the following notes:
- Make sure that there is sufficient space around the appliance to allow heat to escape and provide sufficient ventilation.
Clean the appliance. Refer to the section
"Cleaning and maintenance".
Clean the accessories. Refer to the section
"Cleaning and maintenance".
Place the appliance on a stable, flat and heat-resistant surface.
Insert the mains plug into the wall socket.
The on/off indicator (2) flashes.
Place a suitable pan onto the hotplate (11).
To switch on the appliance, press the on/off button (1). The on/off indicator (2) lights continuously.
Set the maximum temperature (240°C)
The appliance starts heating.
To switch off the appliance, press the on/off button (1). The on/off indicator (2) flashes.
Remove the mains plug from the wall - socket. The on/off indicator (2) goes off.
Allow the appliance to cool down completely.
Note: If you switch on the appliance for the first time, the appliance may emit a little smoke and a characteristic smell for a short period. This is normal operation.
Use
Setting the temperature (fig. A)
The temperature can be set from 60°C to 240°C .
Press the temperature button (3). The temperature indicator (4) comes on.
Press the + / - buttons (9) to increase or decrease the temperature. The display (10) shows the set temperature.
Press the on/off button (1).
The temperature indicator (4) goes off.
Setting the power (fig. A)
The power can be set to 10 different power levels.
Press the power button (5). The power indicator (6) comes on.
Press the + / - buttons (9) to increase or decrease the power. The display (10) shows the set power.
Press the on/off button (1). The power indicator (6) goes off.
Setting the timer (fig. A)
The timer can be set from 1 minute to 240 minutes (4 hours).
Note: The timer can only be set when the temperature or the power is set.
Press the timer button (7). The timer indicator (8) flashes. The digits for the hours start to flash in the display (10).
Press the +/- buttons (9) to set the hours.
Press the timer button (7) again. The timer indicator (8) flashes. The digits for the minutes start to flash in the display (10).
Press the + / - buttons (9) to set the minutes.
The timer indicator (8) lights continuously.
Hints for use
Before you proceed, we need you to pay attention to the following notes:
- Make sure that there is sufficient space around the appliance to allow heat to escape and provide sufficient ventilation.
Place the appliance on a stable, flat and heat-resistant surface.
Insert the mains plug into the wall socket. The on/off indicator (2) flashes.
Place a suitable pan onto the hotplate (11).
Note: If you switch on the appliance without a pan on the hotplate, the appliance will beep and not operate.
To switch on the appliance, press the on/off button (1). The on/off indicator (2) lights continuously.
Take one of the following actions:
- Set the temperature. Refer to the section "Setting the temperature".
-
Set the power. Refer to the section "Setting the power".
-
Set the timer. Refer to the section "Setting the timer". The appliance starts heating.
The display (10) shows the set temperature or the set power during the process. - Press the timer button (7) to see the remaining time on the display (10).
- When the timer has counted down completely, a buzzer sounds and the appliance switches off automatically.
- To switch off the appliance, press the on/off button (1). The on/off indicator (2) flashes.
Remove the mains plug from the wall - socket. The on/off indicator (2) goes off.
- Allow the appliance to cool down completely.
Error codes (fig. A)
In case of specific failures, the display (10) will show error codes. Refer to the table below for an explanation of the error codes.
Error code Cause / Solution
E-0 No pan is placed on the hotplate. A pan with a diameter of less than 10cm is placed on the hotplate. / Place a pan with a diameter from 14.5 to 21cm onto the hotplate.
E-1 High-temperature protection. / Remove the mains plug from the wall socket and wait until the appliance has cooled down.
Short-circuit protection. / Remove the mains plug from the wall socket and wait until the appliance has cooled down. Go to a qualified electrician.
The temperature sensor fails to operate. / Remove the mains plug from the wall socket and wait until the appliance has cooled down. Go to a qualified electrician.
E-2 The bottom of the pan is too hot. / Remove the mains plug from the wall socket and wait until the appliance has cooled down. Short-circuit protection. / Remove the mains plug from the wall socket and wait until the appliance has cooled down. Go to a qualified electrician.
The temperature sensor fails to operate. / Remove the mains plug from the wall socket and wait until the appliance has cooled down. Go to a qualified electrician.
E-3 The voltage is more than 270V . Remove the mains plug from the wall socket and wait until the voltage has returned to normal.
E-4 The voltage is less than 140V . Remove the mains plug from the wall socket and wait until the voltage has returned to normal.
E-5 Overvoltage/undervoltage protection. Remove the mains plug from the wall socket and wait until the voltage has returned to normal.
Cleaning and maintenance (fig. A)
Before you proceed, we need you to pay attention to the following notes:
- Before cleaning or maintenance, switch off the appliance, remove the mains plug from the wall socket and wait until the appliance has cooled down.
- Do not immerse the appliance in water or other liquids.
Before you proceed, we would like you to focus your attention on the following notes:
- Do not use aggressive or abrasive cleaning agents to clean the appliance.
- Do not use sharp objects to clean the appliance.
- Do not use scouring pads to clean the appliance.
- Do not use steel-wool pads to clean the appliance.
Regularly check the appliance for possible damage.
Clean the outside of the appliance with a soft, damp cloth. Thoroughly dry the outside of the appliance with a clean, dry cloth.
Safety instructions
General safety
Read the manual carefully before use. Keep the manual for future reference.
Only use the appliance and the accessories for their intended purposes. Do not use the appliance and the accessories for other purposes than described in the manual.
Do not use the appliance if any part or any accessory is damaged or defective. If a part or an accessory is damaged or defective, it must be replaced by the manufacturer or an authorised repair agent.
Children should be supervised to ensure that they do not play with the appliance.
The use of this appliance by children or persons with a physical, sensory, mental or motorial disability, or lack of experience and knowledge can give cause to hazards. Persons responsible for their safety should give explicit instructions or supervise the use of the appliance.
Do not use the appliance near bathtubs, showers, basins or other vessels containing water.
Do not immerse the appliance in water or other liquids. If the appliance is immersed in water or other liquids, do not remove the appliance with your hands. Immediately remove the mains plug from the wall socket. If the appliance is immersed in water or other liquids, do not use the appliance again.
Electrical safety
Keep the appliance and the mains cable out of the reach of children younger than 8 years.
Before use, always check that the mains - voltage is the same as the voltage on the rating plate of the appliance.
Connect the appliance to an earthed wall - socket. If necessary, use an earthed extension cable of a suitable diameter (at least 3 × 1 mm2 ).
For additional protection, install a residual - current device (RCD) with a rated residual operating current that does not exceed 30mA .
- The appliance is not intended to be operated by means of an external timer or separate remote-control system.
Make sure that water cannot enter the contact plugs of the mains cable and the extension cable. - Always fully unwind the mains cable and the extension cable.
Make sure that the mains cable does not hang over the edge of a worktop and cannot be caught accidentally or tripped over.
Keep the mains cable away from heat, oil and sharp edges.
Do not use the appliance if the mains cable or the mains plug is damaged or defective. If the mains cable or the mains plug is damaged or defective, it must be replaced by the manufacturer or an authorised repair agent.
Do not pull the mains cable to disconnect the mains plug from the mains.
Disconnect the mains plug from the mains when the appliance is not in use, before assembly or disassembly and before cleaning and maintenance.
Safety instructions for induction cookers
Do not use the appliance outdoors.
Place the appliance on a stable and flat surface.
- Place the appliance on a heat-resistant and - splash-proof surface.
Do not place the appliance on a hob.
Make sure that there is sufficient space around the appliance to allow heat to escape and provide sufficient ventilation.
Make sure that the appliance does not come into contact with flammable material.
Keep the appliance away from heat - sources.
Do not cover the appliance.
Do not place a sheet of paper between the cookware and the hotplate to prevent the paper from being burnt.
The accessible surfaces of the appliance can become very hot during use. Do not touch the hot hotplate.
The hotplate becomes very hot during use. Do not touch the hotplate directly after removing the cookware.
-
The cookware becomes very hot during use. Use oven gloves to remove the cookware from the hotplate.
Metallic objects such as knives, forks, spoons and lids should not be placed on the hotplate since they can get hot. -
The hotplate is made of tempered glass. Do not use the appliance when the hotplate is damaged. If the surface is cracked, switch off the appliance to avoid the possibility of electric shock.
- Do not place empty cookware on the hotplate. Heating empty cookware will activate the overheating protection and the appliance will switch off automatically.
- Do not place objects that are affected by magnets (radios, televisions, bank cards, etc.) near the appliance.
- Do not move the appliance while it is switched on or is still hot. Remove the mains plug from the wall socket and wait until the appliance has cooled down.
U.K. Wiring instructions
The wires in the mains lead are coloured in accordance with the following code:
BLUE NEUTRAL
BROWN LIVE
As the colours of the wire in the mains lead of this appliance may not correspond with the colour markings identifying the terminals on your plug, proceed as follows:
The wire which is coloured BLUE must be connected to the terminal which is marked with the letter N or coloured black.
The wire which is coloured BROWN must be connected to the terminal which is marked with the letter L or coloured red.
This is a double-insulated appliance and does not need an earth connection.
Warning! On no account should either the live or neutral wires be connected to the earth terminal.
Disclaimer
Subject to change; specifications can be changed without further notice.
Felicitations!
J 1 J 1 J 1 J 1 J 1 J 1 J 1 J 1 J 1 J 1 J 1 J 1 J 1 J 1 J 1 J 1 J 1 J 1 J 1 J 1 J 1 J 1 J 1 J 1 J 1 J 1 J 1 J 1 J 1 J 1 J 1 J 1 J 1 J 1 J
E-2
E-3
E-4
E-5
(A)
Lilai Lall olii jy jiyj y
:
jll jll lal y p aaiall g jlll l
jgl 2 jgl
J 1 J 1 J 1 J 1 J 1 J 1 J 1 J 1 J 1
aBulil aygol ABILs aybi 1go pili
j4 = 1.11
jll 1
jgl 1
jglsl auii i 4 4 4 4 4 4 4 4 4 4 4 4
.
aai jll jjll jll 1y i y
gablliaibiole Jaiinall gall.11
1
Clll 1111111111111111111
jgl jgl jgl jgl jgl jgl jgl -
a
aaii" aai i 1
"ii
"
giuaa jll aiae 1
jinaog
ilalll jao g yjgll jai jai
(2)
(·11) 1
J. Princess Caii i 1
J 1
8
gai gai jiae gai aiey
aagaae aee
a
jglzai jglzai
iiee eae jiee ie iiaai
aaiy iiei ie 1e jie jie
8 15
a
1
(A)
303001 5
Princess
i. wioia jieai . 8 yuiu gai bai gil
iJg21. 8a 4e all jSlo21 g plzdu
Jia jiu li xin
y jlll lal gjglal
alal
21 14.5 jBj axll aabw g
gil 21 a j 21 gil 21:
(20 1
10 10 10
Jzill/1jzill 1
Jusill Jusill
(°C) 3
(°C) ① AC = BC =
(W) 5
(W)
(hh:mm) 7
(hh:mm) 8
- DESCRIPTION (FIG. A)
- INITIAL USE
- USE
- SETTING THE TEMPERATURE (FIG. A)
- SETTING THE POWER (FIG. A)
- SETTING THE TIMER (FIG. A)
- HINTS FOR USE
- ERROR CODES (FIG. A)
- ERROR CODE CAUSE / SOLUTION
- CLEANING AND MAINTENANCE (FIG. A)
- SAFETY INSTRUCTIONS
- GENERAL SAFETY
- ELECTRICAL SAFETY
- SAFETY INSTRUCTIONS FOR INDUCTION COOKERS
- U.K. WIRING INSTRUCTIONS
- DISCLAIMER
- FELICITATIONS
- (A)
- 1
Brand : PRINCESS
Model : 303001
Category : Frying Pan