ACI6K - Alarm clock radio AKAI - Free user manual and instructions
Find the device manual for free ACI6K AKAI in PDF.
| Product Type | Clock Radio with iPhone/iPod Dock |
| Brand | AKAI |
| Model | ACI6K |
| Dimensions | 198 × 112 mm (height not specified) |
| Weight | 600 g |
| Main Power | AC 100-240 V, 50/60 Hz power adapter, DC 5 V / 2 A output (included) |
| Backup Power | 2 AAA batteries (not included) |
| FM Frequency Range | 87.5 – 108 MHz |
| Speakers | 2 × 2.5 inches |
| Impedance | 4 ohms × 2 |
| RMS Output Power | 2 W × 2 |
| MAX Output Power | 2.1 W × 2 |
| Power Consumption (Operating) | 15 W |
| Power Consumption (Standby) | < 0.3 W |
| Display | LCD |
| Main Functions | FM radio, dual alarm clock, iPhone/iPod dock, 3.5 mm AUX input, snooze function, sleep timer, brightness adjustment, time sync with iPhone/iPod |
| iPod Compatibility | iPod touch (4th, 3rd, 2nd generation), iPod nano (6th, 5th, 4th, 3rd generation), iPod classic (160 GB 2009, 160 GB 2007, 80 GB), iPod 5th generation |
| iPhone Compatibility | iPhone 4, iPhone 3GS, iPhone 3G |
| Maintenance and Cleaning | Wipe with a soft cloth moistened with a mild detergent; do not use abrasive products |
| Safety | Do not expose to moisture, do not obstruct ventilation, do not place flames, use only the supplied adapter, unplug during storms |
| Included Accessories | Power adapter, user manual |
| Not Included Accessories | AAA batteries, 3.5 mm audio cable |
Frequently Asked Questions - ACI6K AKAI
User questions about ACI6K AKAI
0 question about this device. Answer the ones you know or ask your own.
Ask a new question about this device
Download the instructions for your Alarm clock radio in PDF format for free! Find your manual ACI6K - AKAI and take your electronic device back in hand. On this page are published all the documents necessary for the use of your device. ACI6K by AKAI.
USER MANUAL ACI6K AKAI
1 MANUEL D'UTILISATION
USER MANUAL
23 MANUEL DEL USUARIO
34 MANUAL DE INSTRUÇÉS
45 HANDLEIDING
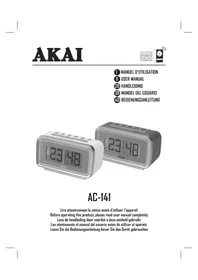
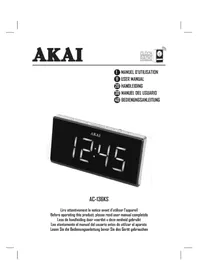
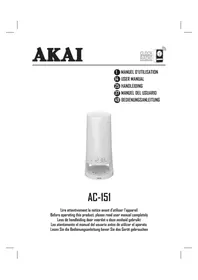
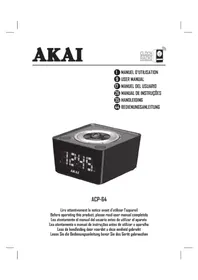
ACI-6
Lire attentivement la notice avant d'utiliser l'appareil Before operating this product, please read user manual completely Lea atentamente el manual del usuario antes de utiliser el aparato Lea atentamente omanual de instruçõesantesdeutilizar oaparelho Less de handleiding door voordat u deze eenheid gebruikt
AVENTISSEMENT
- No naked flame sources, such as lighted candles, should be placed on the apparatus.
- Do not place the product in closed bookcases or racks without proper ventilation.
- Where the mains plug is used as the disconnect device, the disconnect device shall remain readily operable.
- The ventilation should not be impeded by covering the ventilation openings with items, such as newspapers, table-cloths, curtains, etc.
- It shall not be exposed to dripping or splashing and that no objects filled with liquids, such as vases, shall be placed on the apparatus.
- Do not connect FM antenna to outside antenna.
- The unit should not be exposed to direct sunlight, very high or low temperature, moisture, vibrations or placed in a dusty environment.
- Do not use abrasive, benzene, thinner or other solvents to clean the surface of the unit. To clean, wipe it will mild non-abrasive detergent solution and clean soft cloth.
- Never attempt to insert wires, pins or other such objects into the vents or opening of the unit.
- Disconnect device warning: Main plug is used as the connection, so it should always remain ready operate.
CAUTION
Danger of explosion if battery is incorrectly replaced Replace only with the same or equivalent type
PREPARATION FOR USE
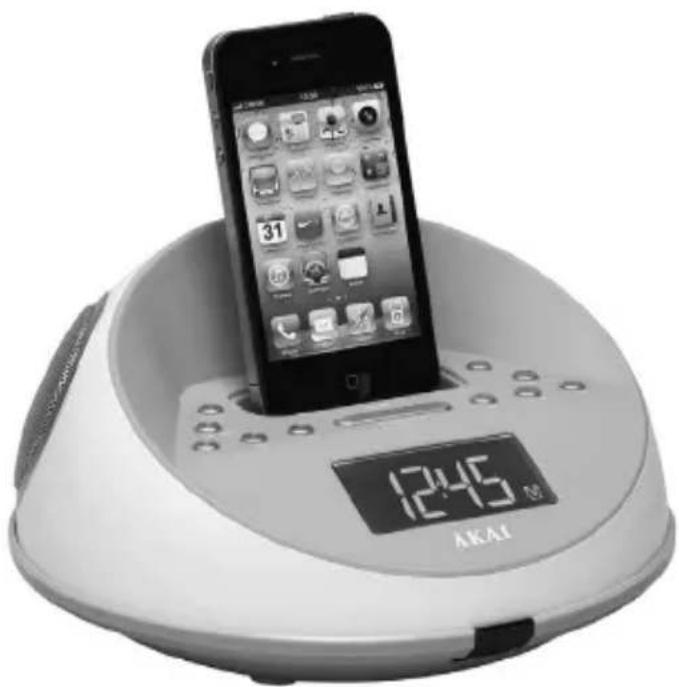
This unit designed specifically to work with your docking iPhone / iPod. Please read this instruction book carefully before operating the unit.
AC-DC adaptor connection : The clock radio unit can be powered by an external AC-DC adaptor, required the output DC 5V 2A (included).
Power connection
This unit is equipped with a battery back up system; it requires a "AAA" size battery x 2 (not included). Insert the battery in the battery compartment, making certain that the positive and negative (+and-) battery terminals are attached to the corresponding terminals on the plate in the battery compartment. Plug the AC-DC adaptor to a household outlet AC source, connect the adaptor's DC output plug to the DC IN Jack of the clock unit. If an AC power failure occurs, the clock automatically switches to the battery power supply, the clock and timer memory continue running. When the AC power resumes, the clock switches back to AC again.
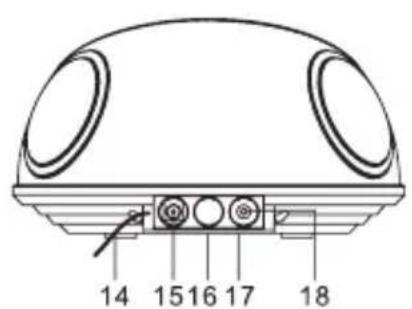
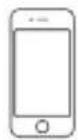
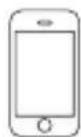
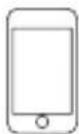
LOCATION OF CONTROLS
ENGLISH
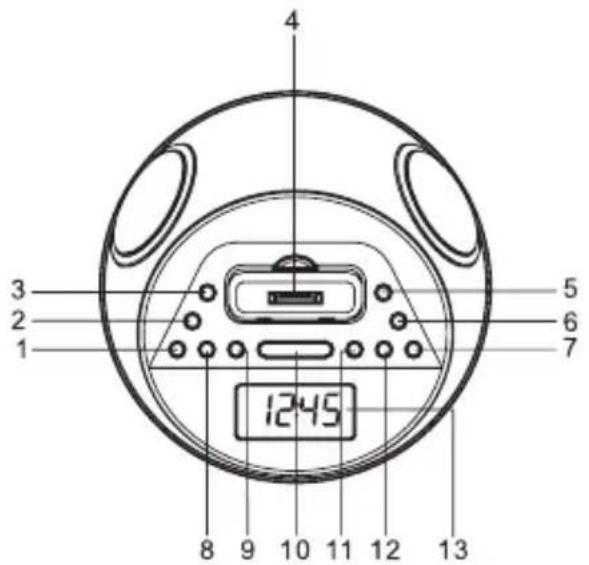
- On/off button
- Clock set/memory button
- Alarm 1 button
- iPhone / iPod compartment
- Alarm 2 button
- Function button
- SKIP FORWARD/TUNING UP button
- Volume DOWN button
- Volume UP button
- Snooze / Sleep / Dimmer button
- SKIP BACK/TUNINGDOWN button
- Memory up / play / pause button
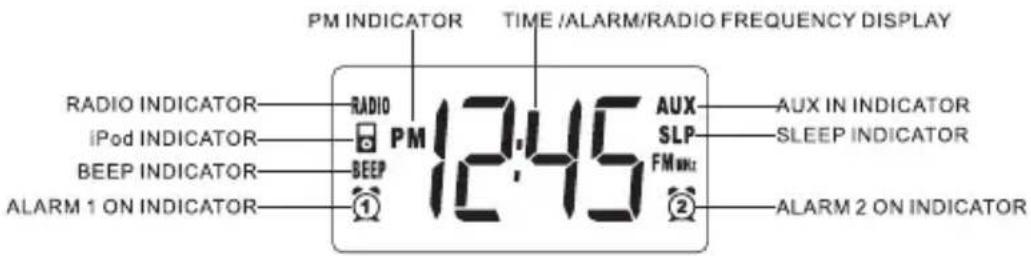
- Display
- FM antenna (rear of unit)
- DC IN Jack
- Battery compartment (bottom of unit)
- Rating label (bottom of unit)
- AUX IN Jack
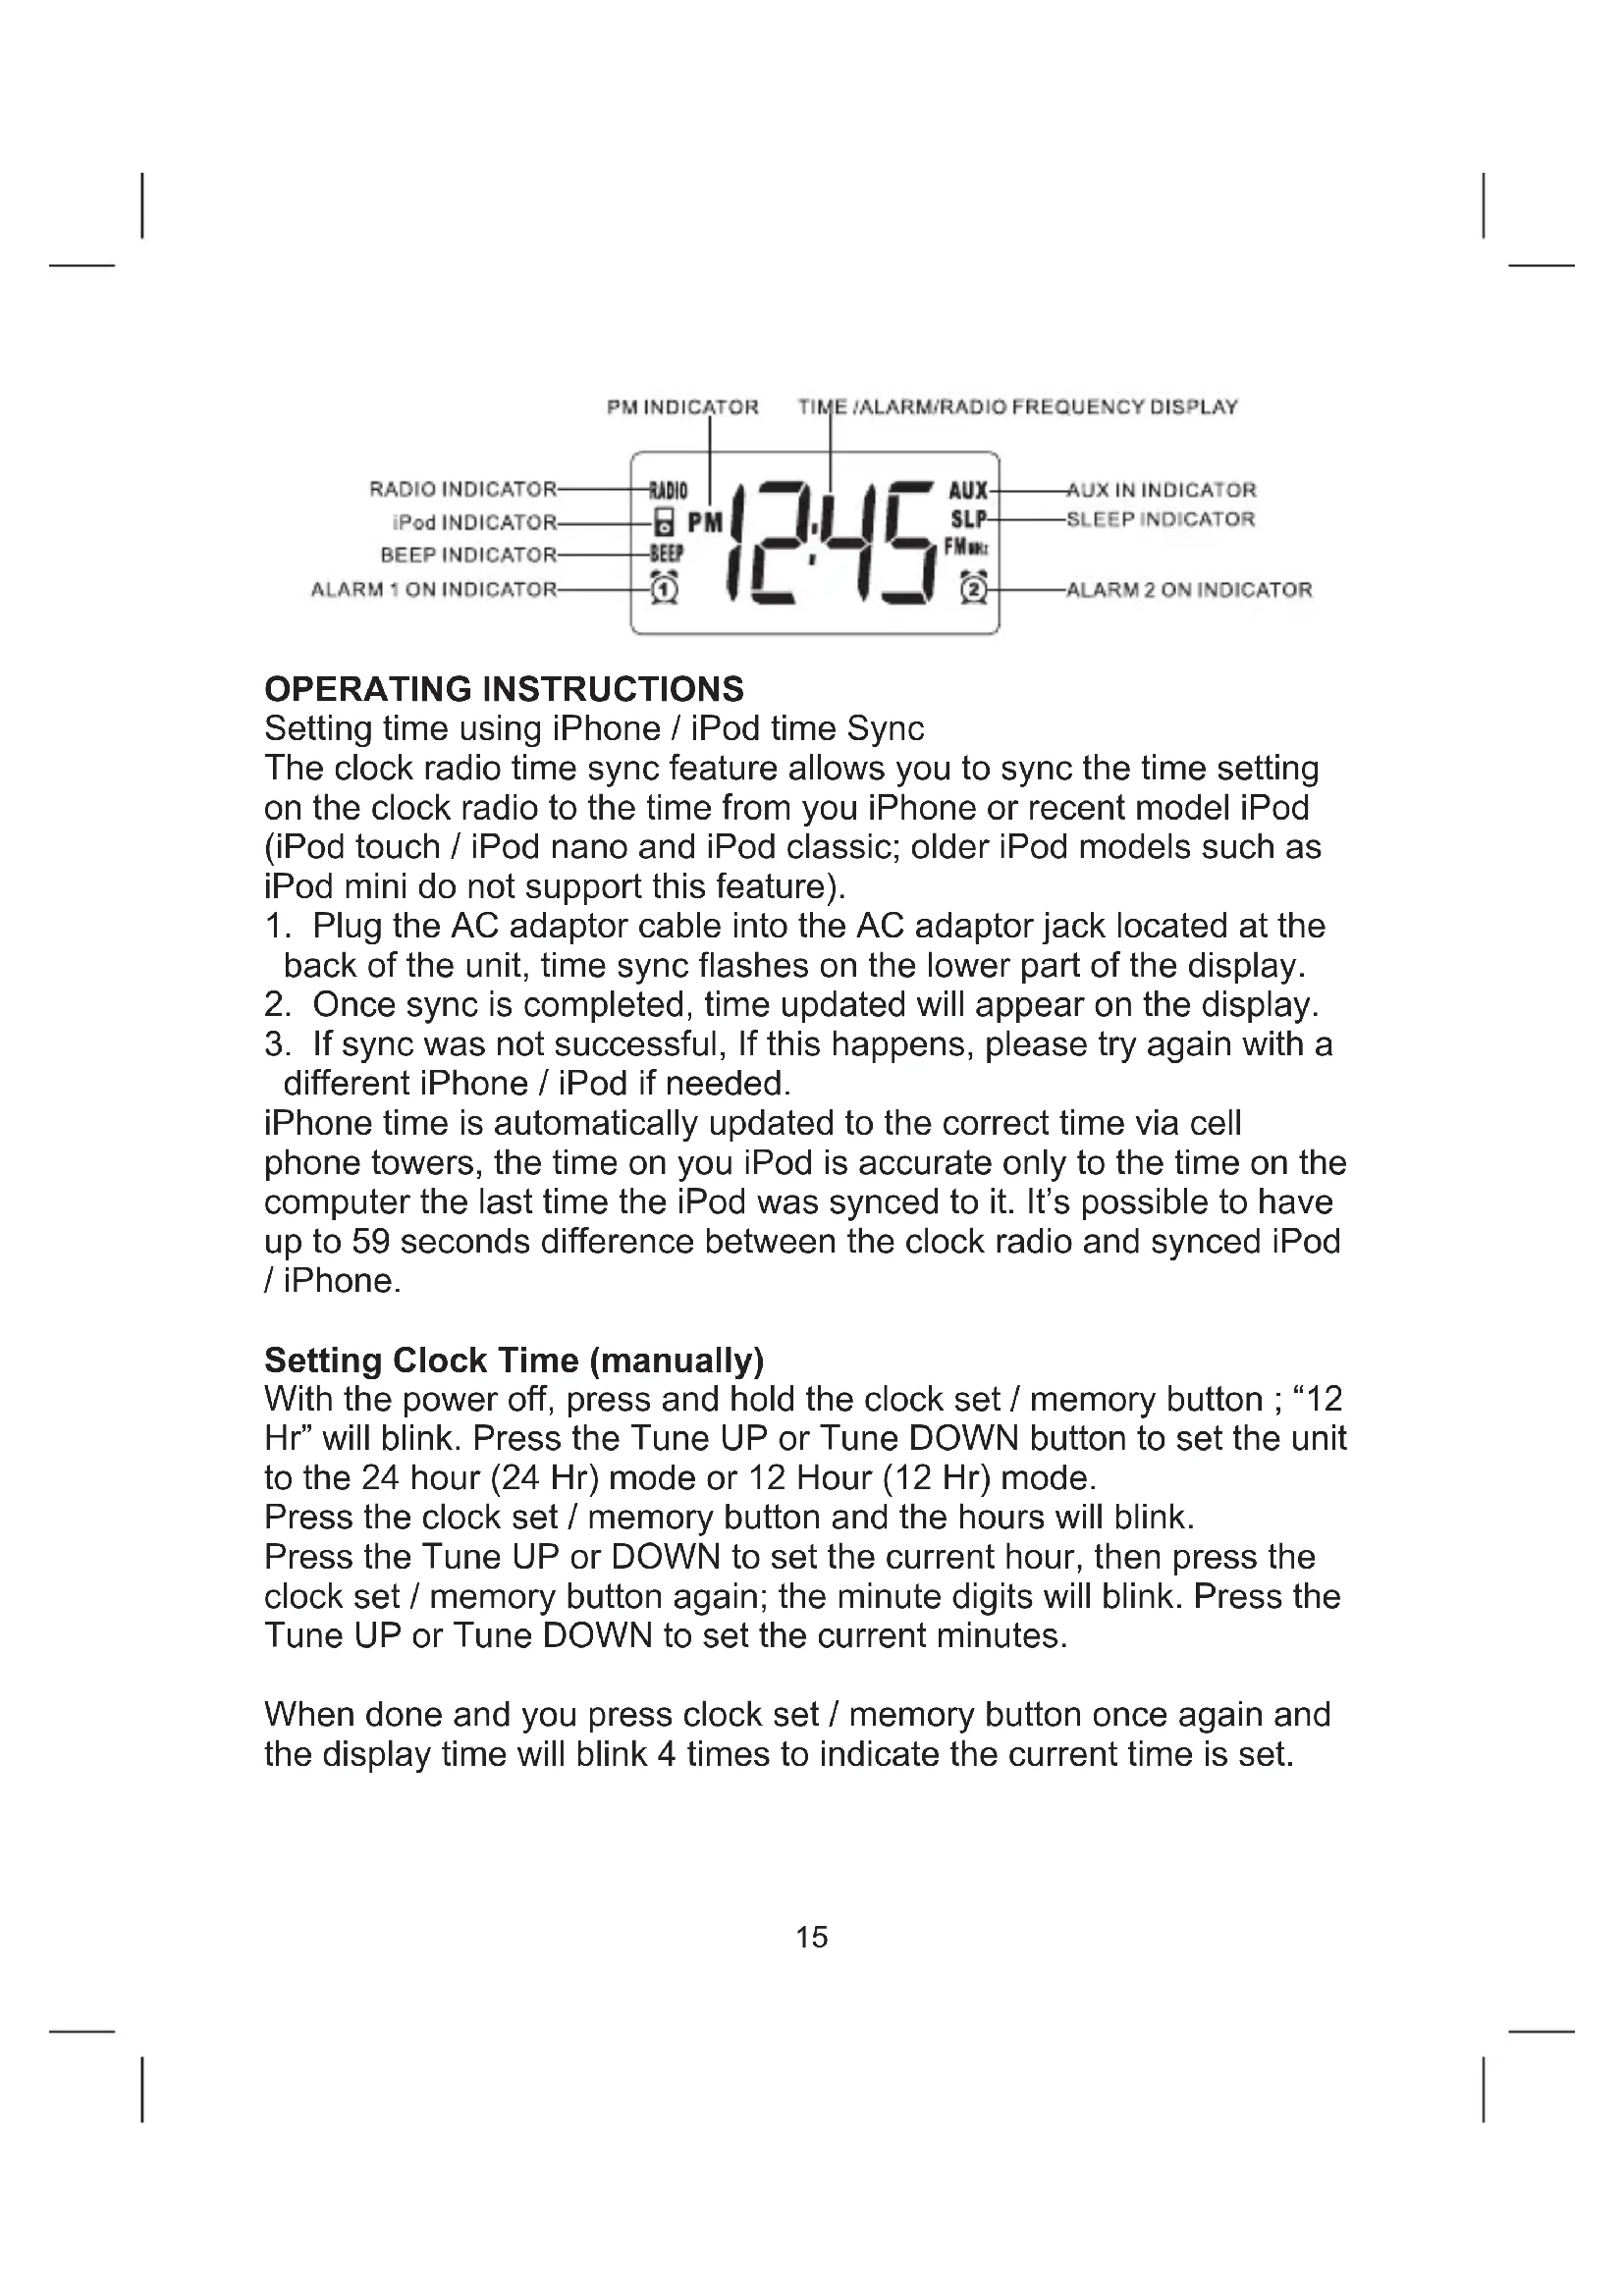
OPERATING INSTRUCTIONS
Setting time using iPhone / iPod time Sync
The clock radio time sync feature allows you to sync the time setting on the clock radio to the time from you iPhone or recent model iPod (iPod touch / iPod nano and iPod classic; older iPod models such as iPod mini do not support this feature).
- Plug the AC adaptor cable into the AC adaptor jack located at the back of the unit, time sync flashes on the lower part of the display.
- Once sync is completed, time updated will appear on the display.
- If sync was not successful, If this happens, please try again with a different iPhone / iPod if needed.
iPhone time is automatically updated to the correct time via cell phone towers, the time on you iPod is accurate only to the time on the computer the last time the iPod wasynced to it. It's possible to have up to 59 seconds difference between the clock radio andynced iPod / iPhone.
Setting Clock Time (manually)
With the power off, press and hold the clock set / memory button; "12 Hr" will blink. Press the Tune UP or Tune DOWN button to set the unit to the 24 hour (24 Hr) mode or 12 Hour (12 Hr) mode.
Press the clock set / memory button and the hours will blink.
Press the Tune UP or DOWN to set the current hour, then press the clock set / memory button again; the minute digits will blink. Press the Tune UP or Tune DOWN to set the current minutes.
When done and you press clock set / memory button once again and the display time will blink 4 times to indicate the current time is set.
Setting Alarm Time
To preview the alarm time. Press the ALARM button once.
While the display is showing the alarm time and you hold the ALARM button for 3 seconds and the hours will blink.
Press the Tune UP or Tune DOWN to set the alarm hour..
Press the ALARM button again; the minute digits will blink. Press the Tune UP or Tune DOWN to set the alarm minutes..
Press the ALARM button and you can change the sound mode (Buzzer, Radio, iPhone / ipod) for the alarm.
Press Tune UP or Tune DOWN to choose different sound mode. The alarm volume will gradually increase. Then press the ALARM button when done.
To delay the alarm, press SNOOZE. It will come on again in approx. 9 minutes. You may repeat this cycle several times during the alarm cycle. To stop the alarm. press ALARM button .
To stop the alarm from coming on the following day, hold the ALARM button to turn it off. The alarm icon 日 or 日 will disappear to indicate the alarm is disarmed.
Note: To wake to iPhone / iPod, your iPhone / iPod must be properly docked and off or no alarm will sound. Note: If you select wake to iPhone / iPod but no iPhone / iPod is present, the alarm will automatically switch to buzzer alarm.
Listening to your iPhone / iPod
When the iPhone / iPod is docked and in standby mode, press the function button to select iPod/iPhone mode. The iPhone / iPod icon will appear on the display.
Charging your iPhone / iPod
When you docked your iPhone / iPod and it recharges (until fully charged).
Note : iPod Shuffles will NOT charge.
Listening to Radio
Press the On/off button to turn the unit on.
Press the FUNCTION button to select the Radio Mode.
Use the Tune UP or Tune DOWN button to select the desired FM
station. If you press and hold the Tune UP or Tune DOWN button for one second, then release, the unit will automatically scan to the next broadcasting station.
Press the On/Off button to turn the radio off.
To Set/Recall the radio presets
Press the On/off button to turn the unit on.
Press the FUNCTION button to select the Radio Mode.
Use the Tune UP or Tune DOWN button to select the desired FM station.
Press the clock set/memory button; "P01" will blink in the display.
Press the clock set/memory button again to set the preset. Repeat steps 2 through 4 to set more presets.
The unit can preset 20 station totally for FM.
When "P01-P20" is blinking, press Tune UP or Tune DOWN to select the Preset number.
When recalling preset stations, press Mem -up to select the Preset number.
Sleep Operation
When listening to radio or iPhone / iPod, press SNOOZE button to enter sleep mode. You can just adjust the sleep timer from 90 mins to 10 mins by pressing the SNOOZE button. The unit will automatically turn off after the selected time.
Press On/Off button to cancel sleep function..
AUX IN
The AUX IN Jack can be used to playback alternate audio signal sources on the unit speakers.
This AUX IN Jack requires a 3.5mm audio cable for input signal.
Note : This unit does not provide a recording signal from AUX IN to the iPhone / iPod. It's purpose is to allow other types of audio devices to playback on the unit speaker.
Note : The 3.5mm audio cable is not included
End of Life Disposal
Warning! This logo set on the product means that the recycling of this apparatus comes within the framework of the Directive 2002/96/CE of January 27, 2003 concerning the Waste of Electrical and Electronic Equipment (WEEE). This symbol means that used electrical and electronic products should not be mixed with general household waste. There is a separate collection system for these products.
If you want to dispose of this equipment, please do not use the ordinary dust bin!
- The presence of dangerous substances in the electrical and electronic equipments can have potential consequences on the environment and human health in the cycle of reprocessing this product.
- Therefore, at the end of its lifetime, this product shall not be disposed with other non-recycled waste. Used electrical and electronic equipment must be treated separately and in accordance with legislation that requires proper treatment, recovery and recycling of used electrical and electronic equipment.
- Local authorities and resellers have set special procedures for the purpose of collecting and recycling this product (please contact your local authority for further details). You have the obligation to use the selective waste collection systems put in place by your local authority.
- If your used electrical or electronic equipment has batteries or accumulators, please dispose of these separately beforehand according to local requirements.
- By disposing of this product correctly you will help ensure that the waste undergoes the necessary treatment, recovery and recycling and thus prevent potential negative effects on the environment and human health which could otherwise arise due to inappropriate waste handling.
This unit complies with European Council Directive 2006 / 95 CE (Electromagnetic Compatibility & Low Voltage Directives)
COMPATIBLE WITH THE FOLLOWING iPod and iPhone

iPod touch 4th generation 8GB 32GB 64GB

iPod nano 4th generation (video) 8GB 16GB

iPod classic 160GB (2007)

iPod touch 3rd generation 32GB 64GB

iPod nano 3rd generation (video) 4GB 8GB
iPod classic 160GB (2009)
iPod touch 2nd generation 8GB 16GB 32GB 64GB

iPod 5th generation (video) 30GB
iPhone4 16GB32GB

iPod nano 6th generation 8GB 16GB

iPod 5th generation (video) 60GB 80GB
iPhone 3GS 16GB 32GB

iPod nano 5th generation (video camera) 8GB 16GB

iPod classic 80GB
iPhone 3G 8GB 16GB
"Made for iPod", and "Made for iPhone", mean that an electronic accessory has been designed to connect specifically to iPod or iPhone respectively, and has been certified by the developer to meet Apple performance standards. Apple is not responsible for the operation of this device or its compliance with safety and regulatory standards. Please note that the use of this accessory with iPod or iPhone may affect wireless performance.
iPhone, iPod, iPod classic, iPod nano, and iPod touch are trademarks of Apple Inc., registered in the U.S. and other countries.
TROUBLE SHOOTING GUIDE
| Symptom Possible Problem Solution | ||
| respond (no power) | AC Adaptor is not plugged into a wall outlet or the connector is not plugged into the power supply jack on the back of the unit. | Plug the AC adaptor into a wall outlet and plug the connector into the supply jack on the unit.The unit does not |
| Wall outlet is not functioning. | Plug another device into the same outlet to confirm the outlet is working. | |
| iPod/iPhone does not dock properly | iPod/iPhone is not installed properly. | Remove your iPod/iPhone from the dock and check for obstruction on the connectorsin the dock and on your iPod/iPhone. Then carefully reseat it in the dock. |
| iPod/iPhone does not respond to the speaker system | iPod/iPhone is not installed properly. | Remove your iPod/iPhone from the dock and check for obstruction on the connectors in the dock and on your iPod/iPhone. Then carefully reseat it on the dock. |
| Your iPod/iPhone is frozen Please make sure that your iPod/iPhone is working properly before docking into the unit. Please refer to your iPod/iPhone user manual for details of resetting. | ||
| not charge up | iPod/iPhone is not installed properly. | Remove your iPod/iPhone from the dock and check for obstruction on the connectors in the dock and on your iPod/iPhone. Then carefully reseat it in the dock.iPod/iPhone does |
| iPod/iPhone is frozen or its battery has developed a problem. | Please make sure that your iPod/iPhone is working properly before docking into the unit. Please refer to your iPod/iPhone user manual for details of resetting or servicing. | |
| Noise or distorted sound on FM broadcast | The listening FM station not tuned in properly. | Retune the FM broadcast station. |
| The FM Wire Antenna is not fully extended. | Fully extend the FM Wire Antenna. | |
| distorted | Volume level is set too high. Decrease the volume level.Output sound | |
| Sound source is distorted. | If the original sound source is of poor quality, distortion and noise will be more prominent with high-power speakers. Try a better audio source such as a music CD.If you are using an external sound source like older generation of iPod, try reducing the output volume on the device itself. Also try turning bass boost OFF or change to a different EQ setting. | |
| Unit gets warm after extended play at high volume | This is normal Turn the unit off for a period of time or lowert he volume. | |
TECHNICAL SPECIFICATIONS
Model no. : ACI-6
Power Supply : AC~ 100-240V 50/60Hz DC5V 2A
Power consumption : 15W
Standby power consumption : <0.3W
Radio Frequency : FM : 87.5 - 108 MHz
Speaker : 2.5" x 2
Impedance : 4 ohm x 2
Power output RMS : 2W x 2
Power output MAX : 2.1W x 2
Net weight : 600 g
Dimensions : 198 x 112 mm
ADVERTENCIA
4th generation (video)
8GB 16GB

iPod classic
160GB (2007)

iPod touch
3rd generation
32GB 64GB

iPod nano
3rd generation (video)
4GB 8GB
iPod classic
160GB (2009)
iPod touch
2nd generation
8GB 16GB 32GB 64GB

iPod
5th generation (video)
30GB
iPhone 4
16GB 32GB

iPod nano
6th generation
8GB 16GB

iPod
5th generation (video)
60GB 80GB

iPhone 3GS
16GB 32GB

iPod nano
5th generation (video camera)
8GB 16GB

iPod classic
80GB
iPhone 3G
8GB 16GB
4th generation (video)
8GB 16GB

iPod classic
160GB (2007)

iPod touch
3rd generation
32GB 64GB

iPod nano
3rd generation (video)
4GB 8GB
iPod classic
160GB (2009)
iPod touch
2nd generation
8GB 16GB 32GB 64GB

iPod
5th generation (video)
30GB
iPhone 4
16GB 32GB

iPod nano
6th generation
8GB 16GB

iPod
5th generation (video)
60GB 80GB

iPhone 3GS
16GB 32GB

iPod nano
5th generation (video camera)
8GB 16GB

iPod classic
80GB

iPhone 3G
8GB 16GB
4th generation (video)
8GB 16GB

iPod classic
160GB (2007)

iPod touch
3rd generation
32GB 64GB

iPod nano
3rd generation (video)
4GB 8GB

iPod classic
160GB (2009)
iPod touch
2nd generation
8GB 16GB 32GB 64GB

iPod
5th generation (video)
30GB
iPhone 4
16GB 32GB

iPod nano
6th generation
8GB 16GB

iPod
5th generation (video)
60GB 80GB

iPhone 3GS
16GB 32GB

iPod nano
5th generation (video camera)
8GB 16GB

iPod classic
80GB
iPhone 3G
8GB 16GB
Radiofrequency : FM: 87.5 - 108 MHz
Luidspreker : 2.5" x 2