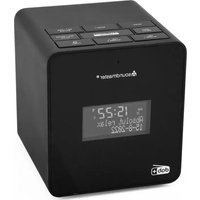
FUR 6000 - Alarm clock radio Soundmaster - Free user manual and instructions
Find the device manual for free FUR 6000 Soundmaster in PDF.
Document temporarily unavailable
The manual is currently being transferred to our new server. It will be accessible again in a few hours. Thank you for your patience.
| Product type | Alarm clock radio |
| Brand | Soundmaster |
| Model | FUR 6000 |
| Mains power | AC 230 V ~ 50 Hz, 5 W |
| Backup battery | 1 x 3 V CR2032 lithium button cell (not included) |
| Frequency bands | AM 531 – 1620 kHz, FM 87.5 – 108 MHz |
| Display | LED with adjustable backlight (auto-off, low, high) |
| Time synchronization | Automatic via DCF77 radio signal (Germany) |
| Alarm function | Dual alarm with choice of radio or buzzer, 9-minute snooze, 30-minute alarm duration |
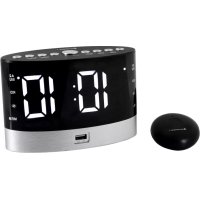
| Projection | Projects time onto ceiling or wall, adjustable focus and brightness, 180° rotation |
| Infrared sensor | Allows displaying alarm times, activating sleep mode or snooze via gesture |
| Radio | AM/FM with manual tuning and telescopic FM antenna |
| Sleep mode | Timer from 15 to 90 minutes for automatic radio shut-off |
| Daylight saving time function | Manual activation/deactivation |
| Reset | Reset button to restore factory settings |
| Audio input | Input jack (not detailed) |
| Care and cleaning | Wipe with a soft, dry cloth; do not use solvents or abrasives |
| Safety | Do not expose to water, flames, extreme temperatures; do not block ventilation openings |
| Batteries and recycling | Used batteries must be removed and disposed of according to local regulations |
Frequently Asked Questions - FUR 6000 Soundmaster
- If the radio is off, place your hand over the sensor for one second to display alarm 1 time, then another second for alarm 2 time.
- If the radio is on, wave your hand for 2 seconds to activate sleep mode.
- If the alarm is sounding, wave your hand for one second to activate the 9-minute snooze.
- Press the Snooze/Sleep (6) button to activate snooze for 9 minutes.
- Press the On/Off (8) button to completely stop the alarm for this cycle (it will sound again at the same time the next day).
- If no button is pressed, the alarm stops automatically after 30 minutes and reactivates the next day.
User questions about FUR 6000 Soundmaster
0 question about this device. Answer the ones you know or ask your own.
Ask a new question about this device
Download the instructions for your Alarm clock radio in PDF format for free! Find your manual FUR 6000 - Soundmaster and take your electronic device back in hand. On this page are published all the documents necessary for the use of your device. FUR 6000 by Soundmaster.