Focus DZ5000 - Iron ROWENTA - Free user manual and instructions
Find the device manual for free Focus DZ5000 ROWENTA in PDF.
User questions about Focus DZ5000 ROWENTA
0 question about this device. Answer the ones you know or ask your own.
Ask a new question about this device
Download the instructions for your Iron in PDF format for free! Find your manual Focus DZ5000 - ROWENTA and take your electronic device back in hand. On this page are published all the documents necessary for the use of your device. Focus DZ5000 by ROWENTA.
USER MANUAL Focus DZ5000 ROWENTA
natural_image
Exterior view of a Rowenta focus iron iron (no text or symbols visible on body)mod. DZ5020
www.rowenta.com
F
D
NL
GB
DK
FIN
N
EST
LV
LT
BG
text_image
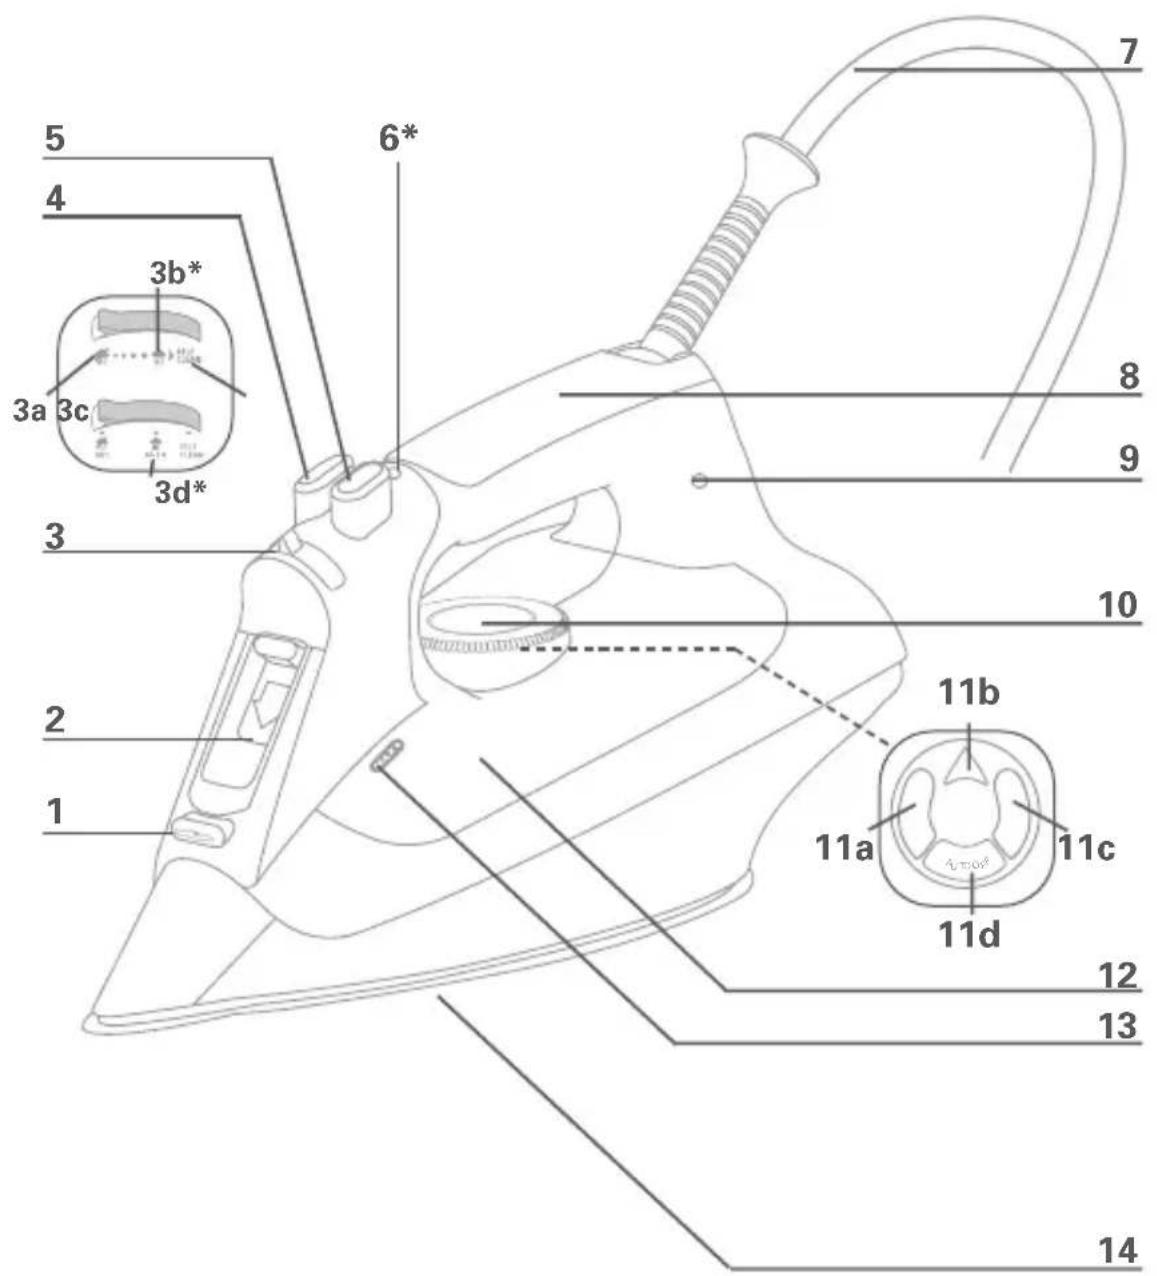
1 2 3 4 5 6* 7 8 9 10 11a 11b 11c 11d 12 13 14 3a 3c 3b* 3d*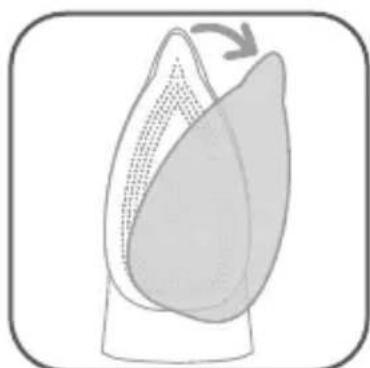
natural_image
Diagram of a corn ear with husk pattern and arrow indicating rotation (no text or symbols)fig. 1 fig. 2
natural_image
Illustration of a hand holding a plug with a square socket connected to a cable, no text or symbols present
natural_image
Hand holding a plug with a square socket connected to a cable, no text or symbols visible
natural_image
Simple circular diagram with layered segments and a small cloud icon, no text or symbols present.fig. 3
natural_image
Hand holding a cable with a smiley face icon, pointing to a wall socket (no text or symbols)fig. 4
text_image
Illustration showing a hand using a tool to brush or mark a cloud, with an arrow and a magnified inset showing a blade and gear.fig. 5 fig. 6
natural_image
Diagram of a device handle with internal components and directional arrows (no text or symbols)
natural_image
Diagram of a device with internal components and directional arrows, no text or symbols present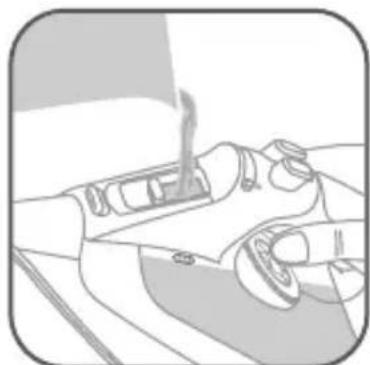
natural_image
Illustration of a hand holding a device with a pen, no visible text or symbolsfig. 7 fig. 8

natural_image
Diagram of a mechanical device with internal components and directional arrows (no text or symbols)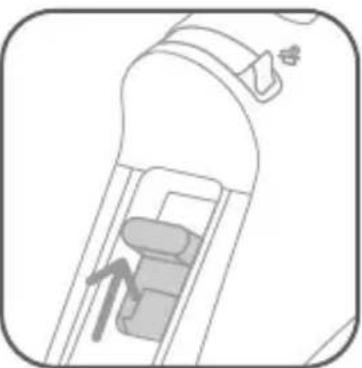
natural_image
Diagram of a car interior showing seat and dashboard placement (no text or symbols)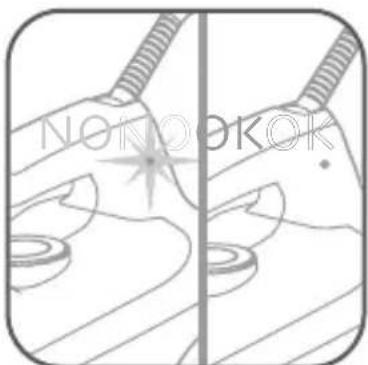
natural_image
Illustration of two hands operating a tool with a spark effect, no text or symbols present
natural_image
Diagram showing two hands operating a tool with a starburst effect, no readable text or symbols present
natural_image
Diagram showing two hands operating a tool with a starburst effect, no readable text or symbols present
natural_image
Diagram showing two hands operating a tool with a starburst effect, no readable text or symbols present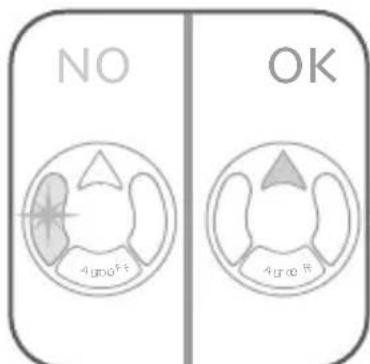
text_image
NO OK 4 μm o Fx 4 μm o Fxfig. 10
flowchart
graph TD
    A["Top Curve"] --> B["Cloud Icon 1"]
    B --> C["Cloud Icon 2"]
    C --> D["Self-Clean Icon"]
    D --> E["Up Arrow"]
fig. 11
text_image
SELF CLEAN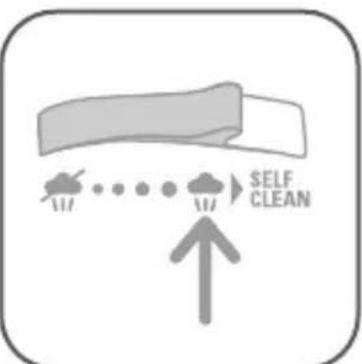
text_image
SELF CLEAN
text_image
SELF CLEAN
text_image
SELF CLEAN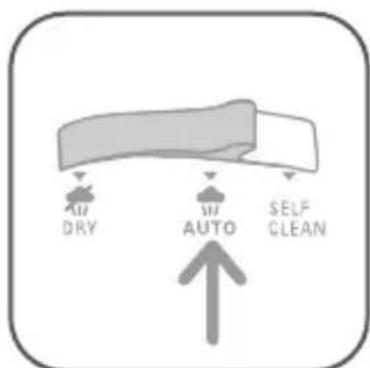
text_image
DRY AUTO SELF CLEANfig. 13 fig. 14
natural_image
Illustration of a steam iron and a cloud-shaped smokestack emitting exhaust (no text or symbols)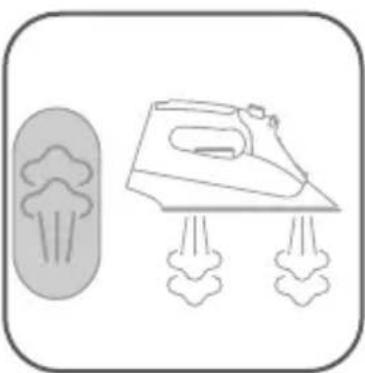
natural_image
Illustration of a steam iron emitting exhaust smoke next to a cloud-shaped smokestack (no text or symbols)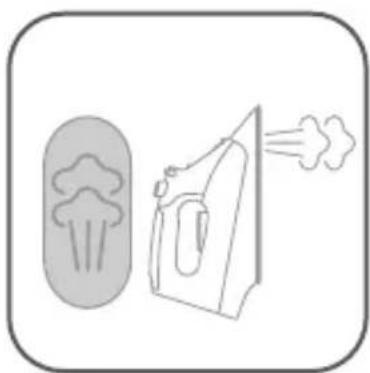
natural_image
Illustration of a steam iron emitting smoke from a cloud cover (no text or symbols)fig. 15
natural_image
Simple line drawing of a steam iron and a remote control device (no text or symbols)fig. 16
natural_image
Line drawing of a mechanical device with no visible text or symbolsfig. 17 fig. 18
natural_image
Illustration of a person using a tool to clean or wash the surface in a basin (no text or symbols visible)
natural_image
Illustration of a person using a tool to clean or wash the surface in a basin (no text or symbols visible)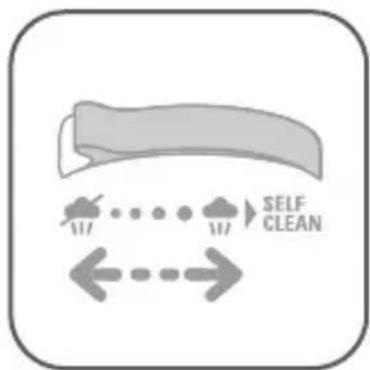
flowchart
graph TD
    A["Start"] --> B{Self-Clean}
    B --> C["Arrow Left"]
    B --> D["Arrow Right"]
    B --> E["Arrow Down"]
    B --> F["Arrow Up"]
    style A fill:#f9f,stroke:#333
    style B fill:#ccf,stroke:#333
    style C stroke-dasharray: 5 5
    style D stroke-dasharray: 5 5
    style E stroke-dasharray: 5 5
    style F stroke-dasharray: 5 5
fig. 19
natural_image
Simple line drawing of a mechanical iron or iron component (no text or symbols)fig. 20
text_image
NOfig. 21
BESCHRIJVING VAN HET APPARAAT
1 Spray nozzle
2 Filling inlet
(with slide-button opening)
3 Variable steam control
a Dry ironing 🌐
b Steam max. position 🏠 * *
c Self Clean
d Autosteam 🏠 AUTO *
4 Spray button
5 Shot of steam button
6 Auto-off indicator light*
7 Cord
8 Handle
9 Thermostat control light*
10 Temperature control dial
11 LED display*
a Yellow LED
b Green LED
c Red LED
d Auto-off LED
12 Water tank
13 Maximum water level indicator
14 Soleplate
SAFETY INSTRUCTIONS
This appliance complies with the technical rules and standards for safety currently in force (Electromagnetic Compatibility, Low Voltage, Environment).
This appliance is not designed to be used by people (including children) with a physical, sensory or mental impairment, or people without knowledge or experience, unless they are supervised or given prior instructions concerning the use of the appliance by someone responsible for their safety. Children must be supervised to ensure that they do not play with the appliance.
Caution, before plugging in your iron, check that your mains voltage corresponds to the voltage indicated on the information panel on the iron. Connecting to the wrong voltage may cause irreversible damage to the iron and will invalidate the guarantee. This iron must always be plugged into an earthed socket. If using a mains extension lead, ensure that it is correctly rated. If you use an extension lead, check that it is adapted to the power indicated on the information panel on the iron.
If the electrical cord becomes damaged, it must be immediately replaced by an Approved Service Centre to avoid any danger. The appliance should not be used if it has fallen, if it has obvious damage, if it leaks or has functional anomalies. Never dismantle your appliance: have it inspected by an Approved Service Centre, so as to avoid any danger.
Never immerse your iron in water!
* depending on model
Do not unplug your appliance by pulling on the cord. Always unplug your appliance: before filling or rinsing the reservoir, before cleaning it, after each use.
Never leave the appliance unattended when it is connected to a power source; if it has not cooled down for approximately 1 hour. Your appliance gives off steam, which may cause burns, especially when you are ironing on a corner of your ironing board. Never direct the steam towards people or animals.
Your iron should be used and placed on a stable surface. When you put your iron onto its iron rest, make sure that the surface on which you put it is stable.
This product has been designed solely for domestic use. Any inappropriate use or use contrary to the instructions releases the brand from all responsibility and renders the guarantee invalid.
Environment protection first!
Your appliance contains valuable materials which can be recovered or recycled. Leave it at a local civic waste collection point. Keep these instructions
Keep these instructions
BEFORE USE
1 • Unpacking
Take the iron out of the box and remove all the stickers.
IMPORTANT Before doing anything else, remove the soleplate protector (fig.1)!
2 • What water may be used?
Your iron has been designed to operate using untreated tap water up to 17^ dH (German water hardness). If in doubt, check with your local water authority. However, if your water is very hard, you can mix 50% untreated tap water with 50% distilled or demineralised water.
IMPORTANT Heat concentrates the elements contained in water during evaporation. The types of water listed below contain organic waste or mineral elements that can cause spitting, brown staining or premature wear of the appliance:-water from clothes dryers, scented or softened water, water from refrigerators, batteries or air conditioners, pure distilled
or demineralised water or rain water should not be used in your iron. Also do not use boiled, filtered or bottled water.
3 • Using for the first time
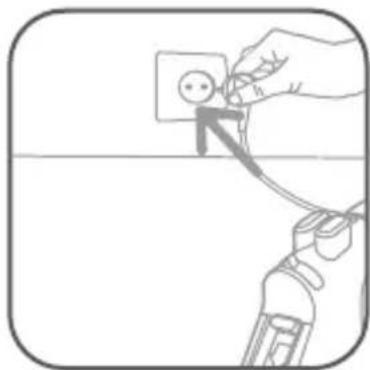
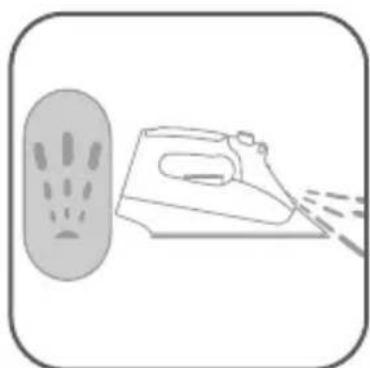
Plug in the iron (fig.2) and set the temperature control dial (fig.3) to ·s to heat the appliance.
A little smoke and a slight smell may be emitted, but this is only temporary.
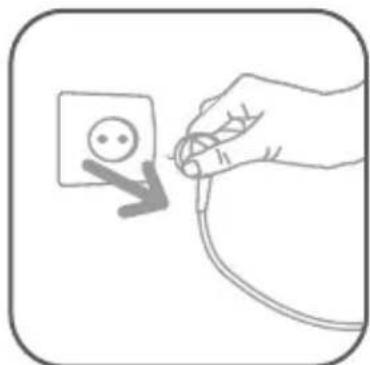
Unplug the iron (fig.4) and fill the water tank (§ 4 Filling the water tank).
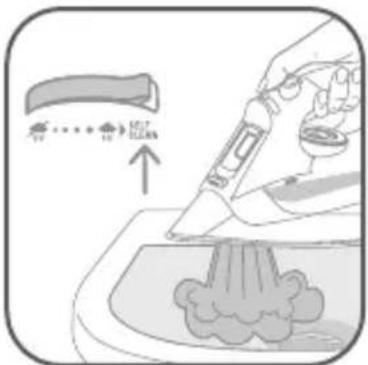
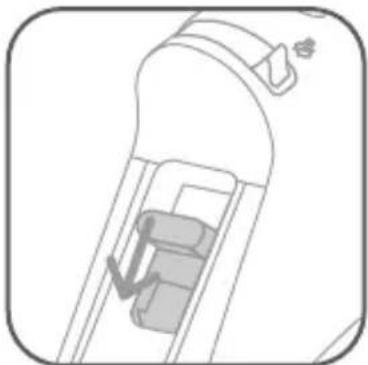
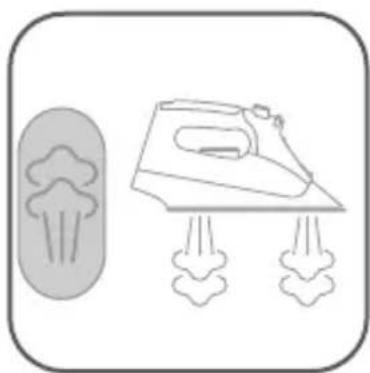
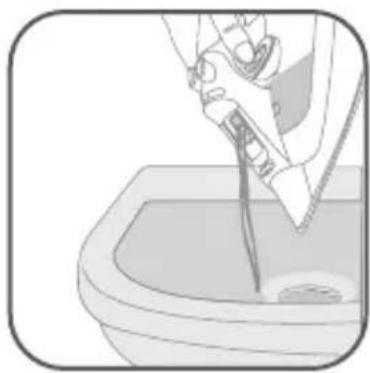
To remove any impurities in the iron's steam chamber, unplug the iron and hold it over a sink horizontally. Push the steam control into the Self Clean position : steam will now begin to build up.
After a few seconds water will emerge from the soleplate, rinsing any impurities out of the steam chamber (fig.5).
Move the steam control to steam position after approx.
1 minute. Plug in the iron and allow the iron to heat up again.
Wait until the remaining water has evaporated. Unplug from the mains and allow the iron to fully cool down.
USE
4 • Filling the water tank
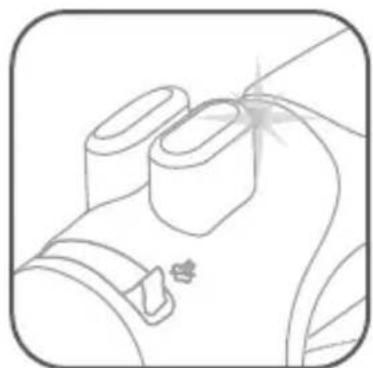
IMPORTANT Before filling the water tank, unplug the iron and set the steam control to dry position.
Tilt the iron. Open the filling inlet (fig.6). Pour in water up to the max mark (fig.7). Close the filler inlet (fig.8) and return the iron to the horizontal.
5 • Setting the temperature
Set the iron temperature to suit the type of material using the temperature control dial (fig.3).
Temperature control*: The temperature control light indicates that the soleplate is heating up. When the temperature control light goes off (fig.9), the set temperature is reached and you can begin ironing.
| Ironing label Fabric | Temperature control | |
 | Synthetic fibres, e.g. viscose, polyester... | ● |
 | Silk, wool | ●● |
 | Cotton, linen | ●●● |
Electronic temperature control*: The traffic lights tell you whether the soleplate is at the selected temperature (fig.10).
| YELLOW | The soleplate is still too cold for the selected material. |
| GREEN | The soleplate is at the right temperature for the selected material. |
| RED The soleplate is still too hot for the selected material. | |
| AUTO-OFF The automatic electronic cut-out* is active. | |
IMPORTANT The iron takes longer to cool down than to heat up. We recommend that you start with fabrics to be ironed at a low temperature. For mixed fabrics set the temperature for the most delicate fabric.
TIP Always spray starch onto the reverse side of the fabric to be ironed.
6 • Dry ironing
Set the variable steam control to (fig.11) and set the temperature to suit the type of material (care points •, ••, •••).
7 • Steam ironing
You can steam iron from temperature setting •• upwards. Steam function* The steam quantity can be set to between no steam (minimum steam quantity) and (maximum steam quantity) (fig.12). We recommend setting to maximum steam
* depending on model
quantity only when the iron is at temperature setting ...
Auto Steam function* Set the steam button to (fig.13) and the steam quantity will adjust automatically to the soleplate temperature.
8 • Shot of steam
(from temperature setting •• upwards)
IMPORTANT Leave an interval of 4 seconds between each shot and wait until the flow of steam is finished before standing the iron on its heel.
Press the shot of steam button to generate a powerful jet of steam and remove stubborn creases (fig.14).
9 • Vertical shot of steam
(from temperature setting •• upwards)
TIP Hold the iron 10 to 20 centimetres away from the garment to avoid burning delicate fabrics.
Hold the iron to the vertical and press the shot of steam button (fig.15) to remove creases from suits, jackets, skirts, hanging curtains etc.
IMPORTANT Never direct the steam at persons or animals!
10 • Spray
Press the spray button to dampen stubborn creases (fig.16).
11 • Anti-Drip system\*
It prevents water escaping from the soleplate when the temperature is too low.
12 • Automatic electronic 3-position cut-out\*
If, although switched on, the appliance is not moved, it will automatically switch off and the auto off light will blink after the following intervals (fig. 17):
- After 30 sec., if the iron is left standing on the soleplate or lying on its side.
- After 8 mins., if the iron is left standing on its heel.
To switch the iron back on, move the iron gently.
AFTER USE
13 • Emptying
Unplug the iron (fig.4), pour away remaining water (fig.18) and set steam control to .
Open and close the steam control several times (fig.19) to prevent the valve hole into the steam chamber from scaling or blocking up.
14 • Storing
Allow the appliance to cool down before storing the iron standing on its heel (fig.20).
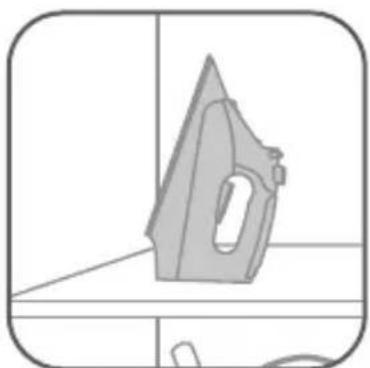
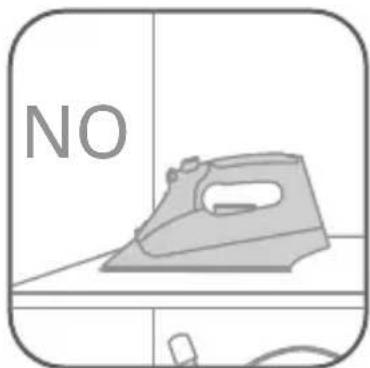
IMPORTANT Do not wind the cord around the hot soleplate. Never store your iron placed down on the soleplate (fig.21).
MAINTENANCE AND CLEANING
IMPORTANT Unplug and allow the iron to fully cool down before maintenance and cleaning.
15 • Anti-scale system
Your iron contains an anti-scale cartridge to reduce scale deposits. This considerably prolongs the operational life of your iron. The anti-scale cartridge is an integral part of the water tank and does not need to be replaced.
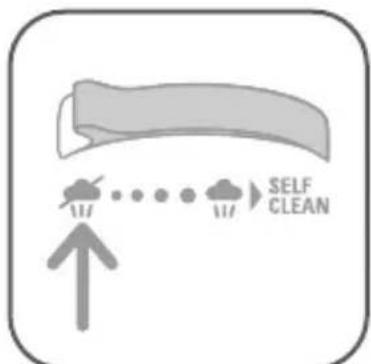
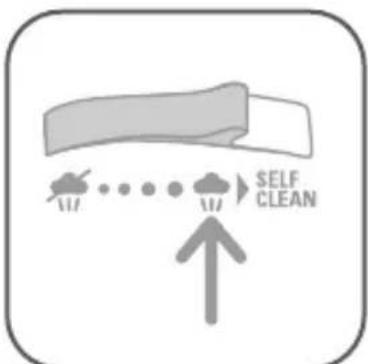
16 • Self Clean function
(prolongs the life of the iron) The Self Clean function flushes dirt and scale particles out of the steam chamber.
IMPORTANT Do not use descaling agents, as these damage the lining of the steam chamber and so may impair the steam function.
Fill the water tank with tap untreated water up to the max mark and heat the iron to the ·s temperature. Unplug the iron and hold it over a sink horizontally. Hold the steam control into the Self Clean position (fig.5): steam will now begin to build up. After a few seconds water will emerge from the soleplate, rinsing dirt and scale particles out of the steam chamber.
Move the steam control to position after approx. 1 minute.
Plug in the iron and allow the iron to heat up again. Wait until the remaining water has evaporated. Unplug from the mains and allow the iron to fully cool down.
When cool, the soleplate can be wiped with a damp cloth.
TIP Use the Self Clean function approx. every 2 weeks. If the water is very hard, clean the iron weekly.
17 • Cleaning the iron
When the appliance has cooled down, wipe it down with a damp cloth or sponge, as required.
Remove the dirt from the soleplate with a damp cloth or sponge.
IMPORTANT Do not use sharp or abrasive cleaning agents or objects to clean soleplate and other parts of the iron. If the appliance has been standing unused for long periods, use the Self Clean function (see § 16).
PROBLEMS?
| Problems | Cause Solution | |
| The iron is plugged in, but the soleplate of the iron remains cold. | No mains supply. Check that the mains plug is properly inserted or try plugging the iron into a different socket. | |
| Temperature control set too low. | Set the temperature control to a higher temperature. | |
| The automatic electronic cut-out* is active. | Move your iron. | |
| Thermostat control light* or the yellow led* goes on and off. | This is normal. When the thermostat control light* or the yellow led* goes on and off the iron is heating up. As soon as the thermostat control light* goes off or the green led* lights up the set temperature has been reached. | |
* depending on model
| None or too little steam is being emitted. | Steam control set on dry position | Turn the steam control to the required setting area. |
| Not enough water in the water tank. | Fill the water tank. | |
| Anti-Drip* is active (§ 11). | Wait for the soleplate to reach the correct temperature. | |
| Brown streaks come through the holes inthe soleplate and stain the linen. | Residues in the steam chamber or on the soleplate. | Use the Self Clean function then clean your iron. |
| Use of chemical descaling agents. | Do not add any descaling agents to the water in the water tank. Use the Self Clean function and clean your iron. | |
| Fabric fibres have accumulated in the holes of the soleplate and are burning. | Clean the soleplate with a non-metallic sponge. Vacuum the holes of the soleplate from time to time. | |
| Your linen is not rinsed sufficiently or you have ironed a new garment before washing it. | Ensure linen is rinsed thoroughly to remove any soap deposits or chemicals on new garments which may be sucked by the iron. | |
| Use of starch. Always spray | ray starch onto the reverse side of the fabric to be ironed and clean your iron soleplate. | |
| Pure distilled / demine-ralised or softened water is being used. | Only use untreated tap water or mix half tap water with half distilled/demineralised water. Use the Self Clean function and clean your iron. | |
| Iron is leaking. | Overuse of shot of steam button. | Allow more time between each shot. |
| Soleplate temperature too low. | Set the temperature control to a higher temperature. |
If you are unable to trace the cause of the fault, contact an official Rowenta Customer Service Centre. The addresses are shown in the enclosed service centre address list. Helplines listed at the front of this leaflet.
Further hints and tips are obtainable from our homepage: www.rowenta.com.
Subject to modifications!
APPARATBESKRIVELSE
1 Spray
2 Påfyldningsåbning med
klap
3 Dampregulator
a Tørstrygning
b Max. damp position
c Selvrens
d Autodamp
4 Sprayknap
5 Dampskudsknap
6 Auto-off indikator*
7 Elektrisk ledning
8 Håndtag
9 Kontrol af temperaturen*
10 Temperatur regulator
11 Kontrollampe*
a Gul kontrollampe
b Grøn kontrollampe
c Rød kontrollampe
d Kontrollampe for automatisk stop
12 Vandbeholder
13 Indikator for max. vandpåfyldning
14 Strygesål
SIKKERHEDSREGLER
15 • Antikalk system
IESPĒJAMĀS PROBLĒMAS