iStation Base - Docking station Logic3 - Free user manual and instructions
Find the device manual for free iStation Base Logic3 in PDF.
User questions about iStation Base Logic3
0 question about this device. Answer the ones you know or ask your own.
Ask a new question about this device
Download the instructions for your Docking station in PDF format for free! Find your manual iStation Base - Logic3 and take your electronic device back in hand. On this page are published all the documents necessary for the use of your device. iStation Base by Logic3.
USER MANUAL iStation Base Logic3
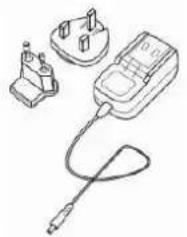
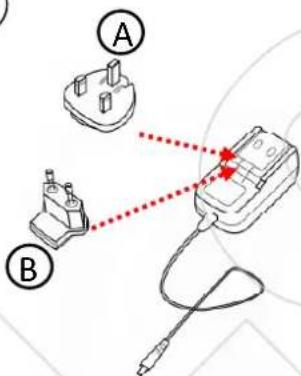
AC Adapter with Interchangeable Plugs (Euro 2pin and BS 3pin)

Line-In Cable

Battery CR2025
Remote Control
Product Overview
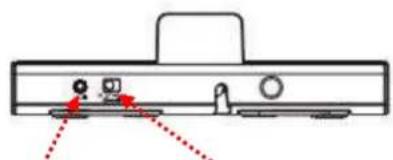
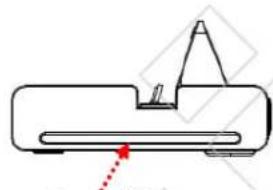
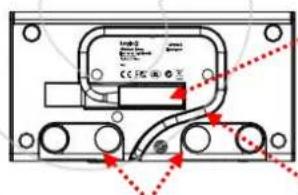
REAR SIDE BOTTOM
Line in
AC Adapter input Socket
Power LED
Supporting Stands
Removable Dock Connector
Set up of i-Station Base
Section A
(1)
②
(3)
(4)

Section C
Section D


Section E
Section F
1

2
3
4
5
6
3b
4b
For iPad
1

2
3
4
(5)
(6)
7

8
3b
(5b)
For iPad

Section K


Section L 1


Section M
1
2
3

4
5
Section N
1
2
3
Section P Section Q
i-Station Base (MPS024) - EN User Manual
Thank you for purchasing the Logic3 i-Station Base. As with all Logic3 products it has been built to the highest manufacturing standards and tested throughout its development, to ensure you get the best possible product. Please read through and familiarize yourself with this manual before you use the i-Station Base.
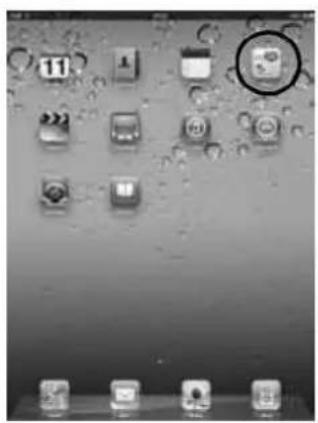
NOTE: For all iPhone/iPod touch models, please go to iTunes and download the i-Station Base App before proceeding to set up.
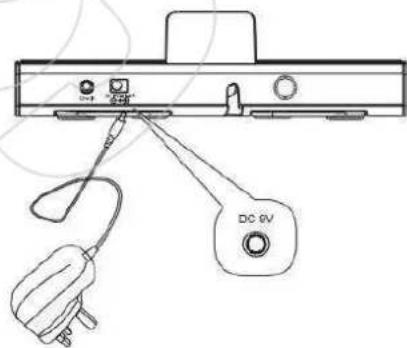
Section A Set up of i-Station Base
- Select and fit the correct plug adapter to suit your power supply (A - UK 3pin or B - Euro 2 Pin).
- Connect the mains AC Adapter to the i-Station Base (DC 9V 2.1A) input socket, plug the power supply into your mains socket and switch the mains socket ON.
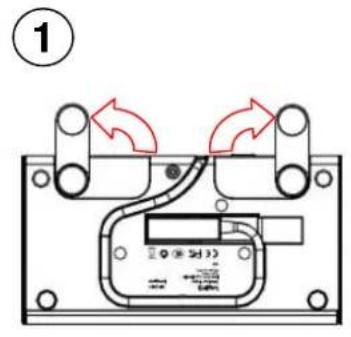
- Fold out the supporting stands.
-
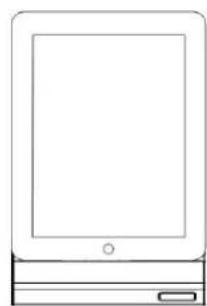
Dock the iPad/iPhone/iPod onto the dock connector and execute the i-Station Base App on your iPad, iPhone or iPod touch. The Power LED's on either side of the i-Station Base will illuminate.
-
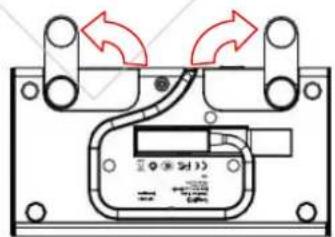
Fold out the supporting stands.
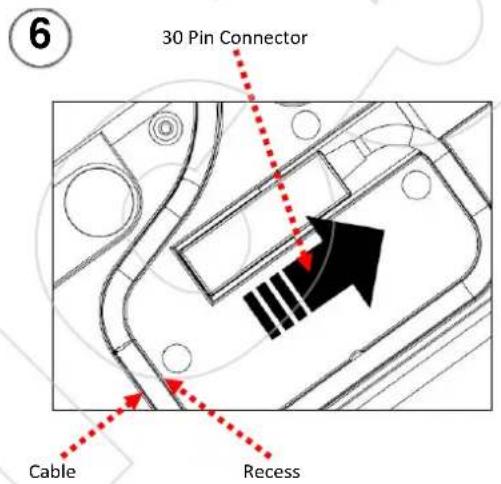
- At the bottom of the i-Station Base remove the cable from the cable recess
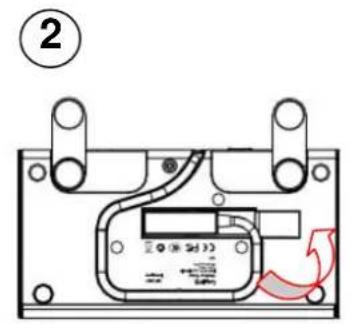
- Turn the i-Station Base over slide the 30 pin dock connector to the left, the 30 pin connector will then be released.
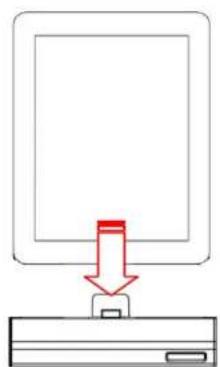
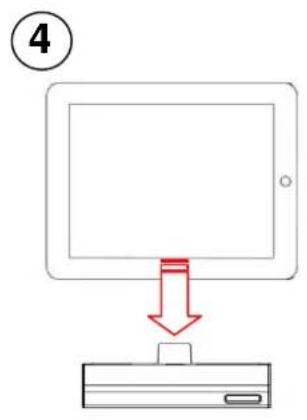
- Place the iPad/iPhone/iPod on the i-Station Base in Landscape position.
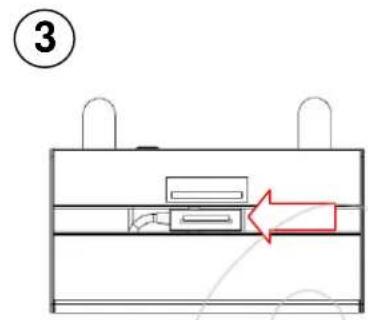
- Connect the 30 pin dock connector to the iPad/iPhone/iPod.
- Diagram showing where cable and 30 pin connector are positioned and released.
NOTE: When changing back to Portrait display mode ensure the dock connector is pushed firmly back into Position and the cable is then pushed back into its recess.
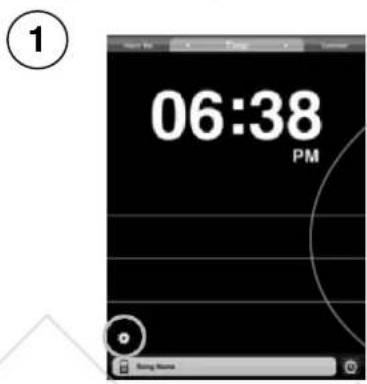
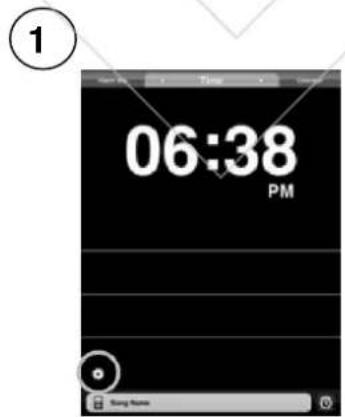
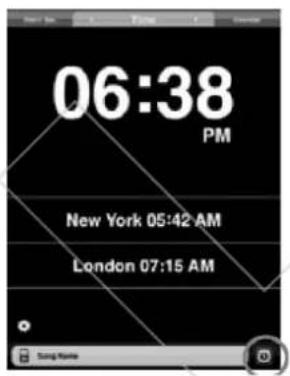
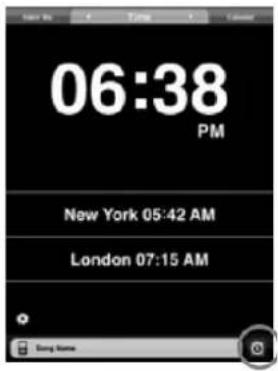
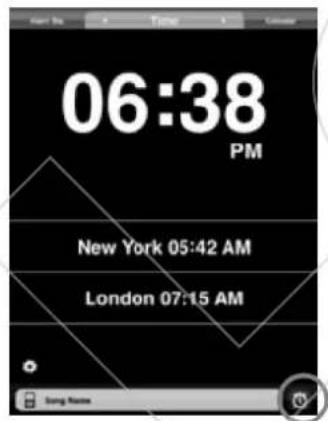
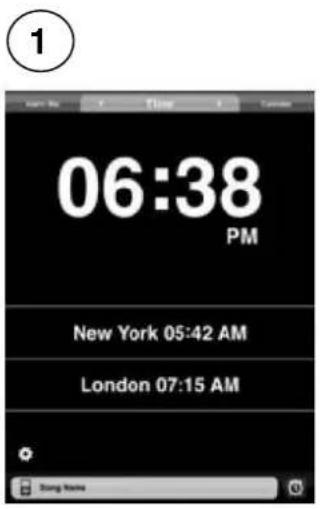
Section C - Setting of Time features / World Clock Locations
Once you have installed the i-Station Base APP your Time/Date will be automatically updated to your i-Station Base APP.
- In Standby mode, select the setting icon on the bottom left corner of the screen.
- All Time settings can now be adjusted.
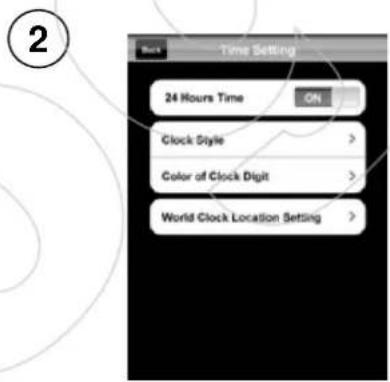
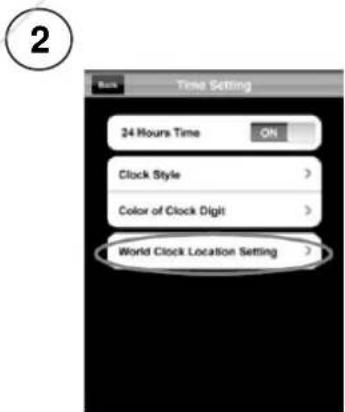
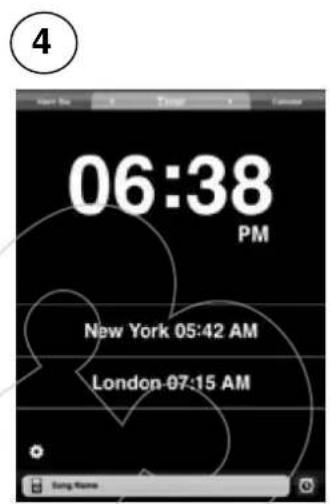
Section D - Setting of World Clock Locations
It is possible to add selected Time Zones to your application.
- In Standby mode, select the setting icon on the bottom left corner of the screen.
- Select 'World Clock Location'
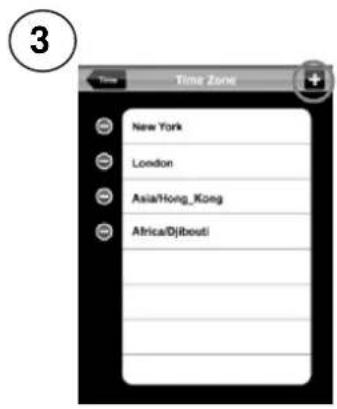
- All your current World Clock Locations will be shown, Select the ^+ on the top right of the screen.
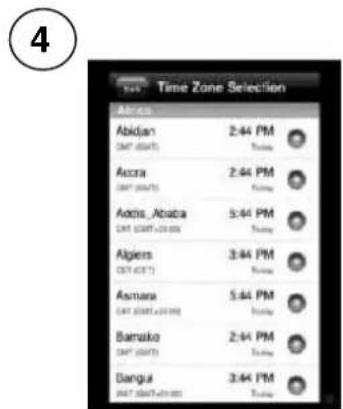
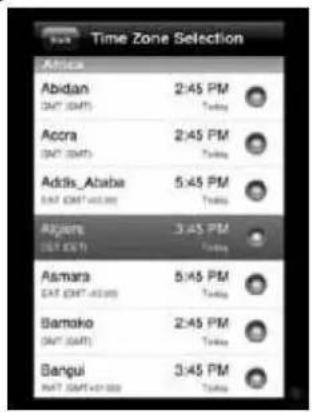
- A list of World Clock Locations will be shown.
- Select the Time Zones you wish to add.
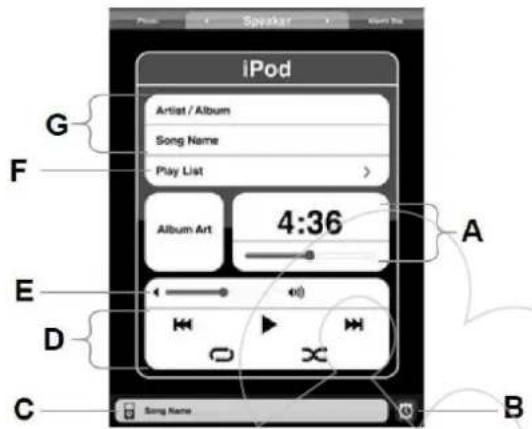
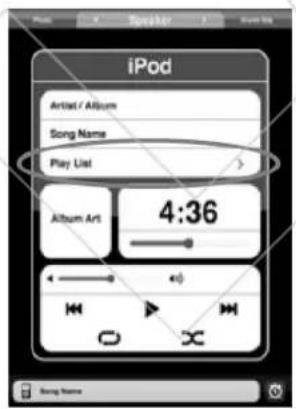
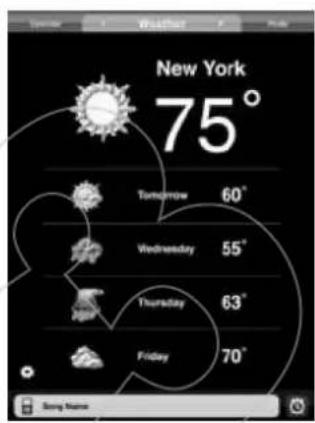
Section E - Overview of Music tab
A. Track Time.
B. Alarm Setting (Short-cut)
C. iPod Playback (Short-cut)
D. Main controls (Bck/Rwd- Play/Pause-Fwd/Skip-Repeat/Repeat All - Random)
E. Volume Bar.
F. Play List.
G. Artist/Track Details.
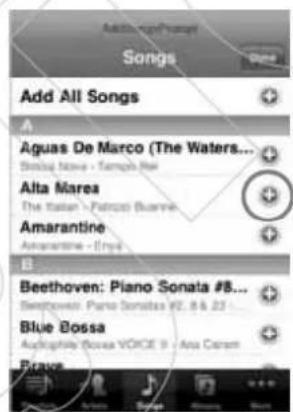
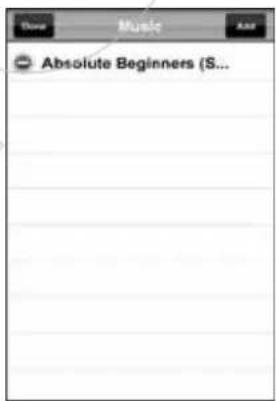
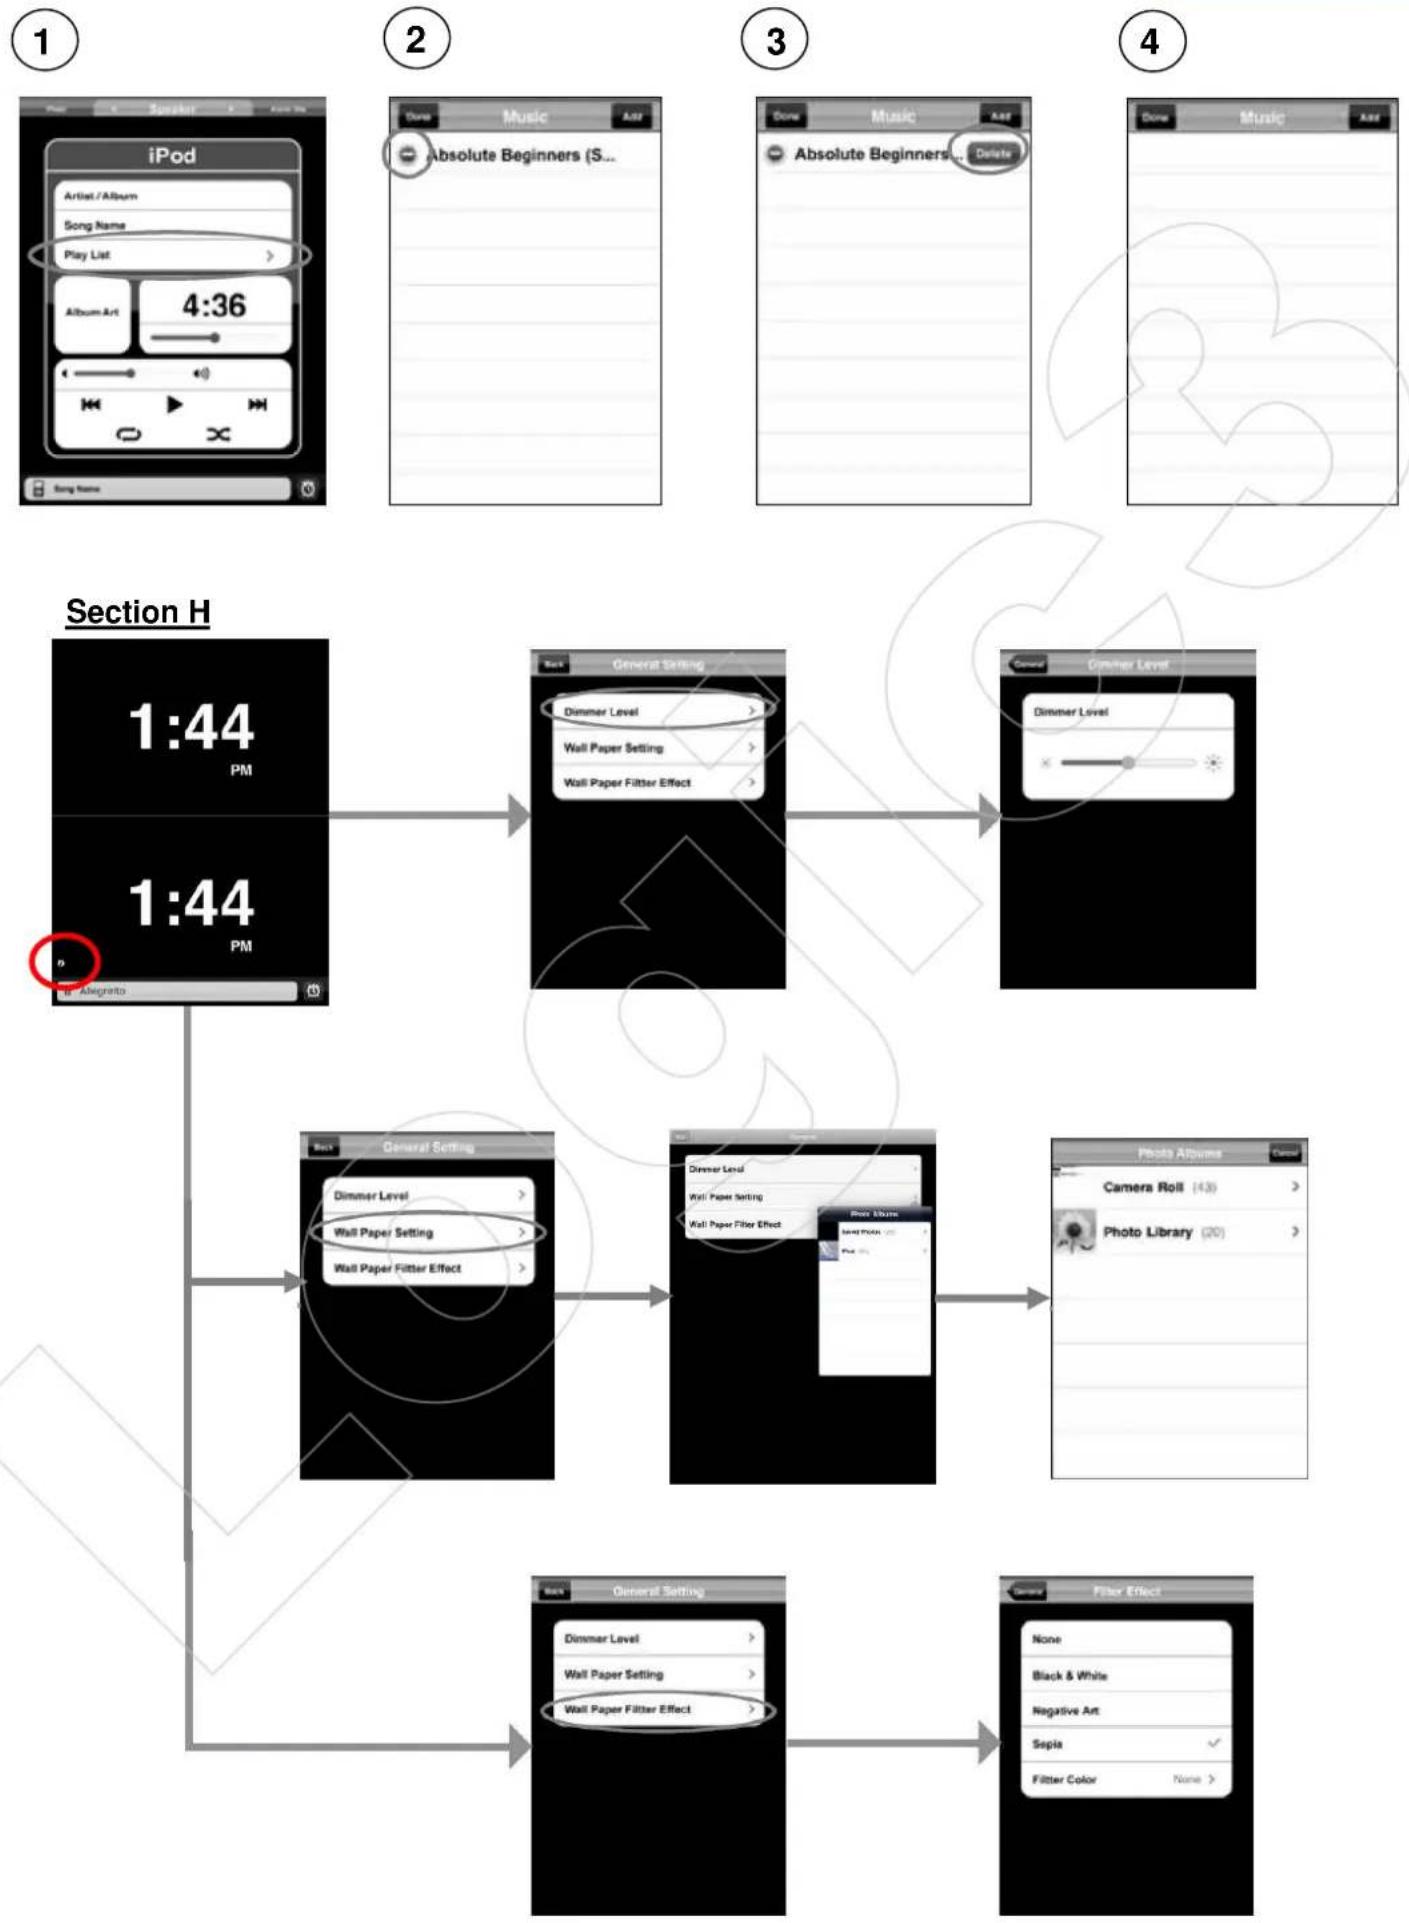
Section F - Creating a Play list via the Base App
For iPhone
- In Standby mode, swipe the screen to the 'Left' until you have reached the 'Speaker Tab'.
- Select ' Playlist'
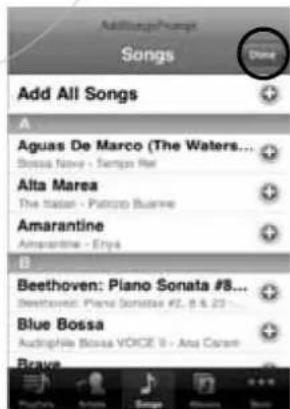
- Select the songs you wish to add to the playlist
- Once you have selected your songs the title will not be highlighted. Select 'Done'
- To view your playlist select ' Playlist'
- Your chosen songs will be shown in your Playlist.
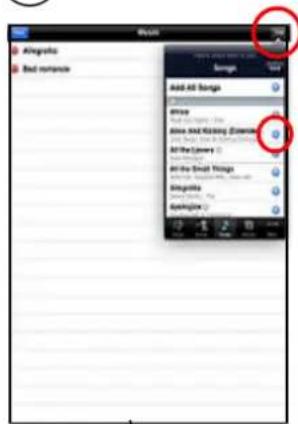
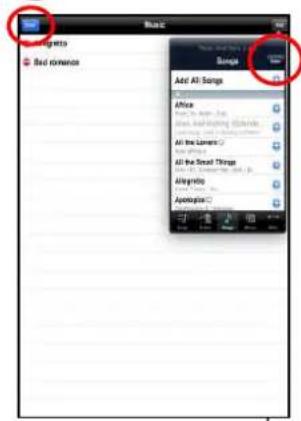
For iPad
Follow steps 1-6 but replace 3b + 4b with the below
3b. Select the add icon, select your song in the dropdown menu.
4b. Once you have selected the title it will not be highlighted then press done.
Section G - How to delete songs from a Playlist
- Select ' Playlist'
- Select the song you wish to delete.
- 'Delete' will appear next to the selected song, press 'Delete'.
- Once you have pressed 'Delete' the song will no longer be in your ' Playlist'
Section H - Personal Settings
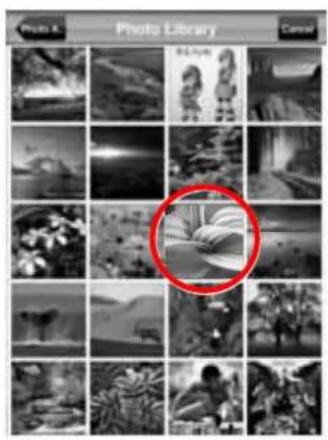
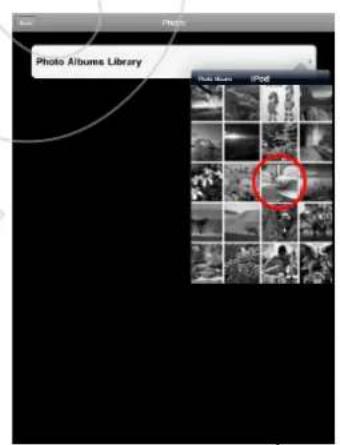
Section I - Viewing and using a Photo in the i-Station Base APP
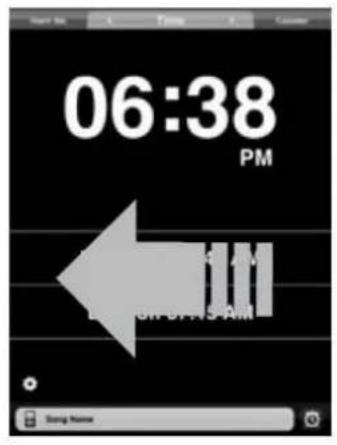
For iPhone
- In Home mode, swipe the screen to the 'Left' until you have reached the 'Photo'Tab.
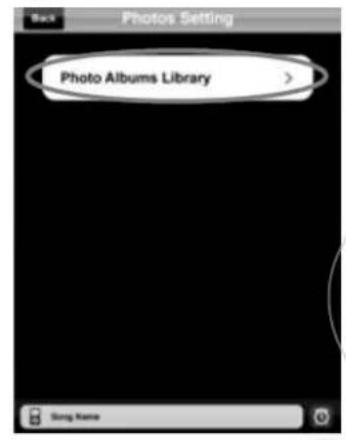
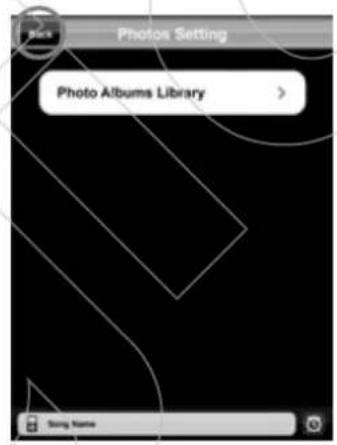
- Select the setting icon on the bottom left corner of the screen.
- Select 'Photo Albums Library'
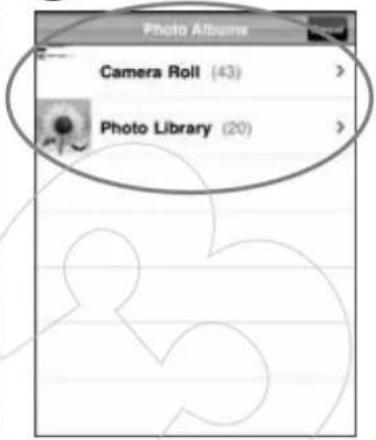
- All your Photo Albums will be shown, Select the Album.
- Select a picture from that Album.
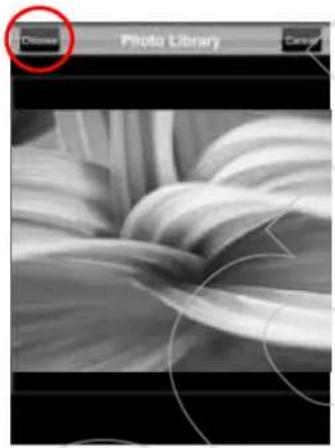
- Select picture and then 'Choose'
- Select 'Back'
- Photo will now be displayed.
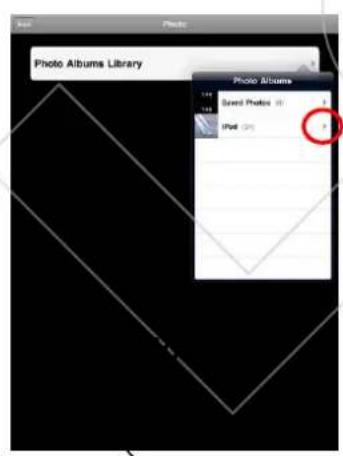
For iPad
Follow steps 1-6 but replace 3b + 5b with the below
3b. Select Photo Album Library, in dropdown menu you will select from Albums
5b. Select a picture from album
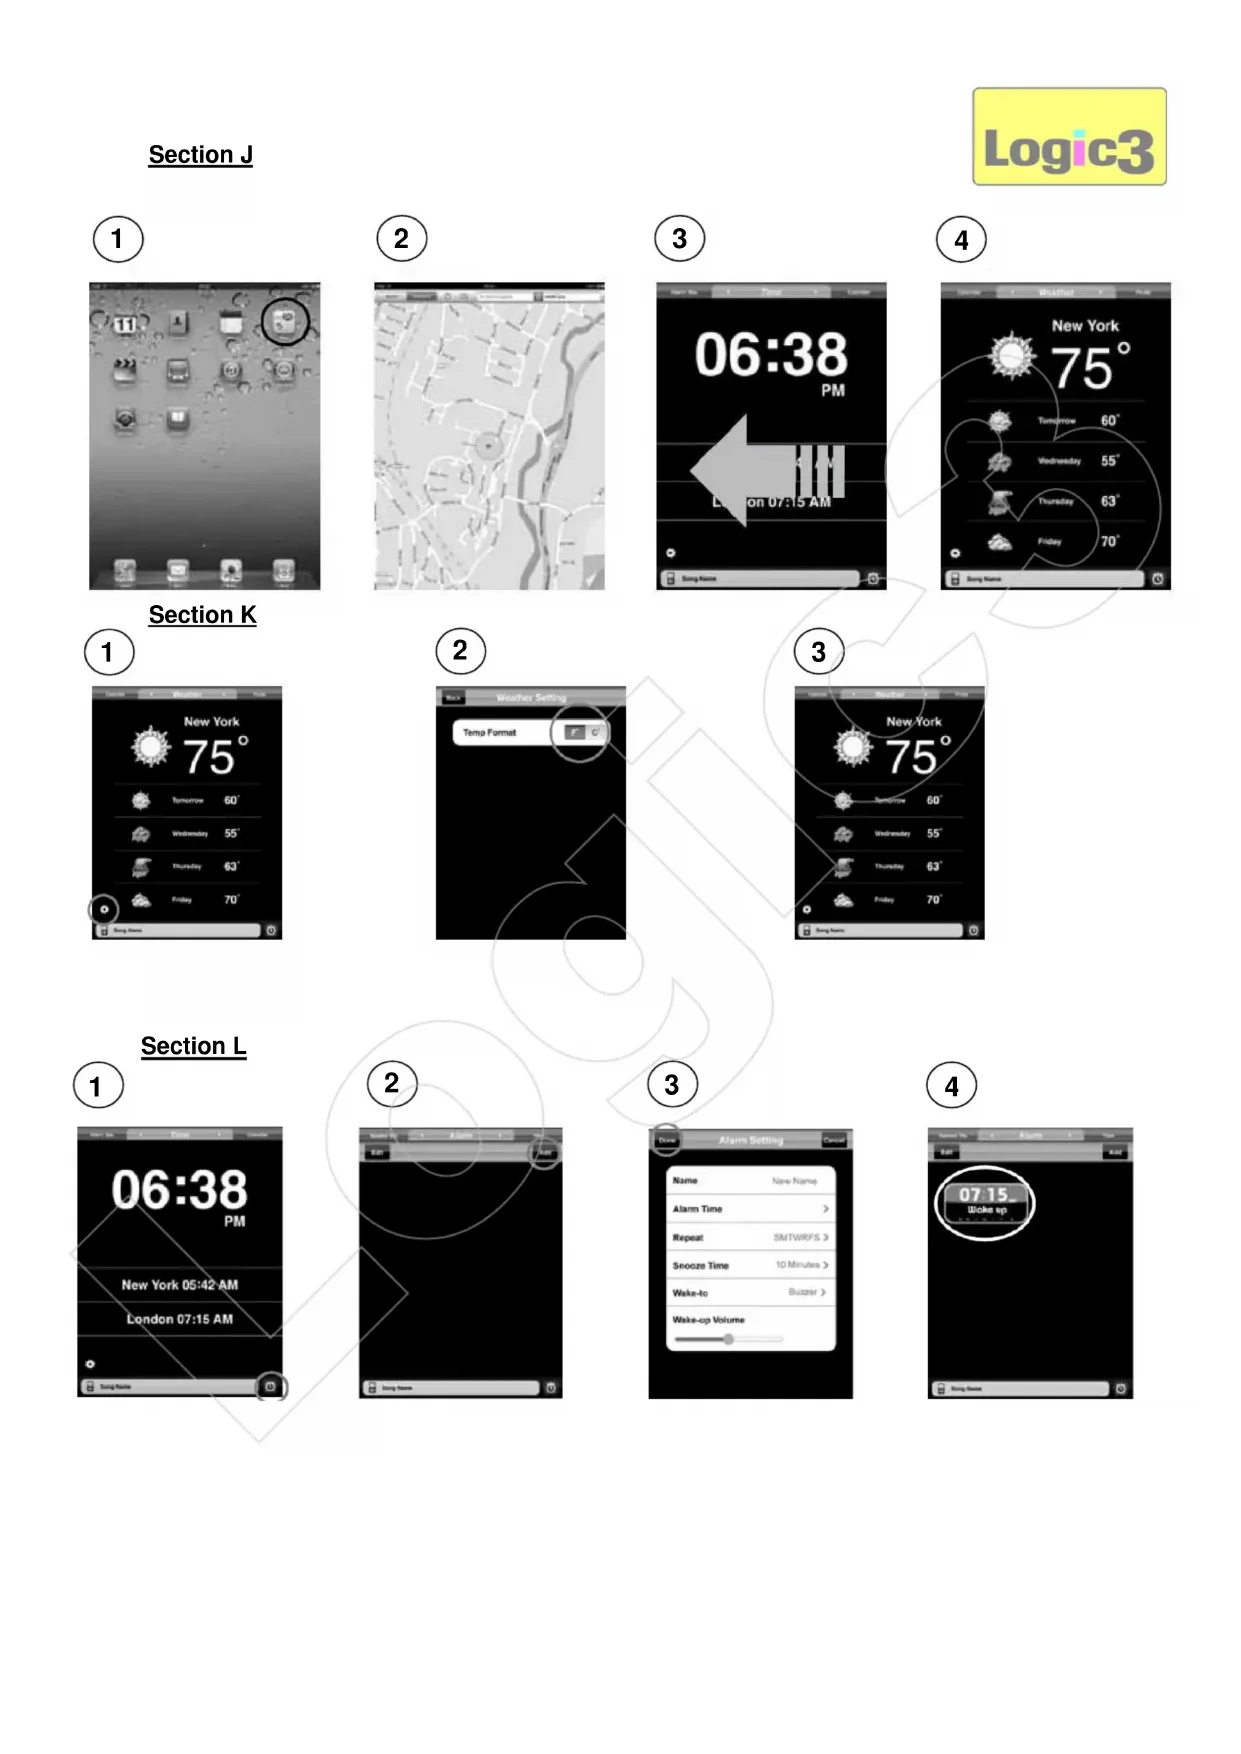
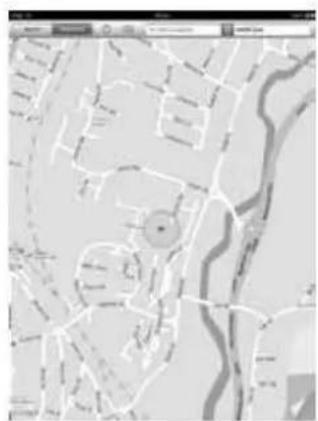
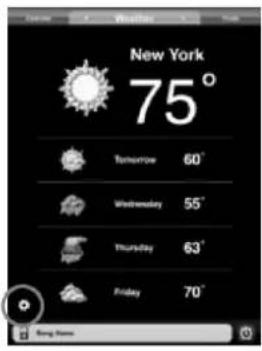
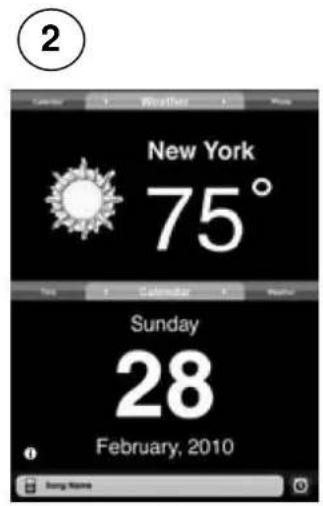
Section J - Setting the Weather Location
The Base APP allows you display the weather in your chosen area:
- Select 'Maps' on your iPad/iPod/Phone.
- Select your current location.
- Open the i-Station Base APP and scroll left to the 'Weather' Tab.
- Weather details of your set current location will be shown.
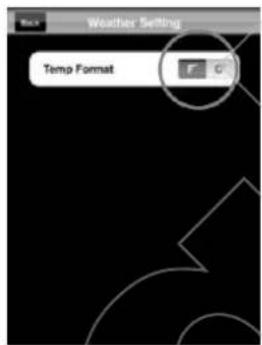
Section K - Changing the units of the temperature
- Select the setting icon on the bottom left corner of the screen.
- Select your preferred temperature units and select back.
- Your chosen weather units will be changed.
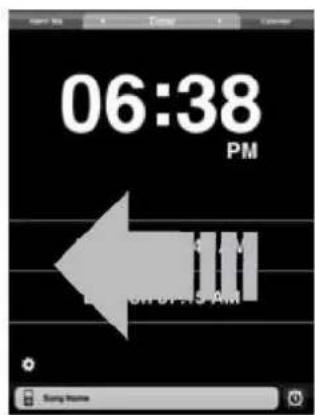
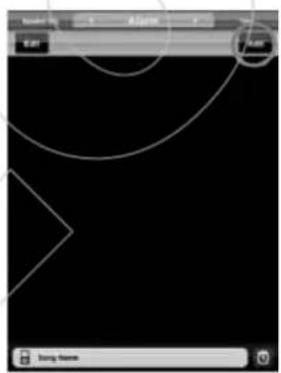
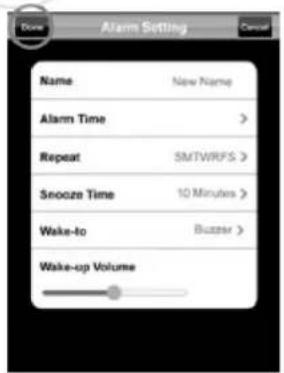
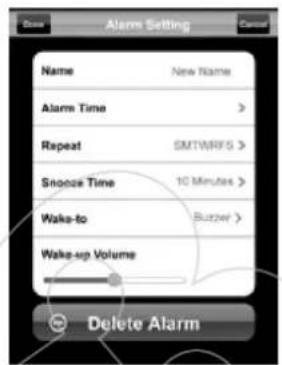
Section L - Setting of Alarm
The i-Station Base APP enables you to set multiple Alarm settings.
- In Home mode, Select the 'Alarm' icon or swipe the screen to the 'left' until you have reached the 'Alarm Tab.
- Select 'Add'
- Adjust your alarm setting and select 'Done'.
- Your Alarm will now be stored.
- If you wish to add another alarm repeat steps 2-3.
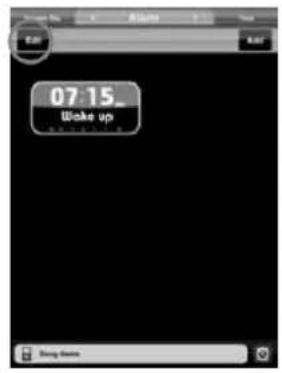
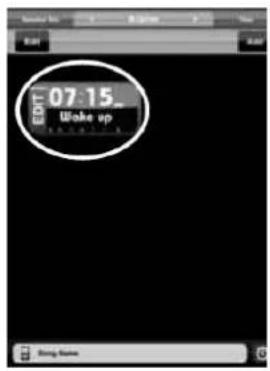
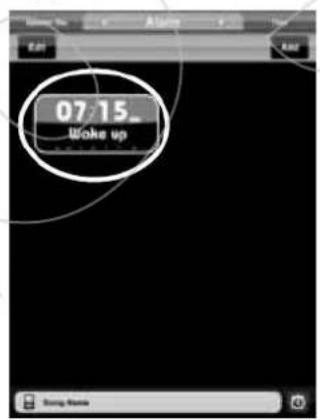
Section M - To Delete/Edit a Alarm
- In Home mode Select the 'Alarm' icon or swipe the screen to the 'left' until you have reached the 'Alarm' Tab.
- Select Edit.
- Select the Alarm you wish to edit.
-
You are now able to Delete/Edit your alarm settings.
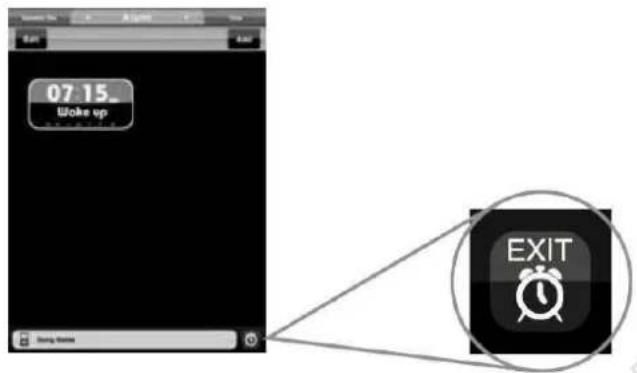
-
If you have entered the 'Alarm Tab' by selecting the 'Alarm icon' on the bottom of the right the screen, you are able to exit the 'Alarm Tab' at any time via the 'Exit' button located on the bottom right of the screen, all current settings will not be saved when exited
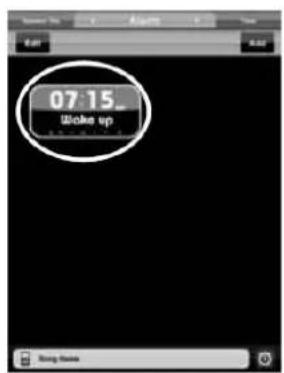
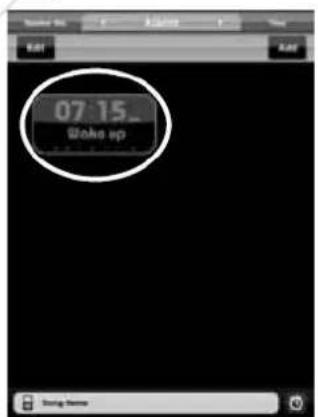
Section N - To activate/deactivate the alarm
- In Home mode Select the 'Alarm' icon or swipe the screen to the 'left' until you have reached the 'Alarm' Tab.
- Select the Alarm you wish to deactivate.
- Once the Alarm has been deactivated the Alarm will not be highlighted.
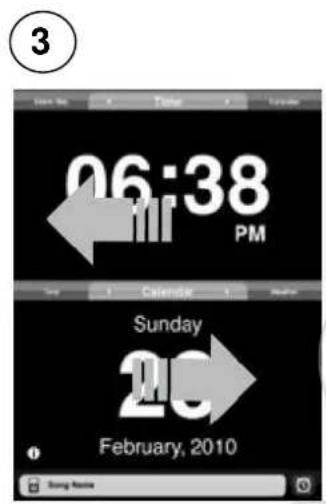
Section O - Setting your i-Station Base APP to view 2 Tabs on one screen
The i-Station Base APP allows you to have a split screen view, so you can view 2 Tabs in one screen.
- In 'Home Tab' double tap the bottom part of the screen.
- The screen will then be split.
- You are now able to have 2 Tabs on one screen, Change the tabs by swiping left or right on the top/bottom of the screen.
- To view back one TAB, double tap the bottom part of the screen
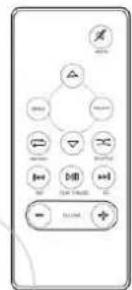
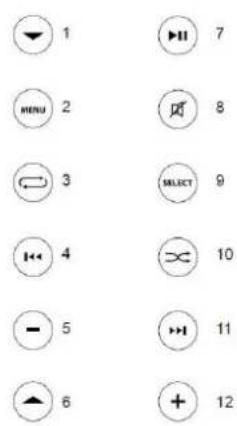
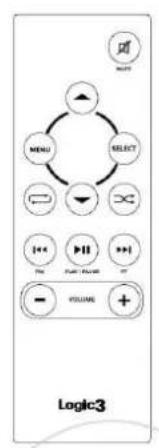
Section P - Remote Control Functions
Insert the battery into the back of the Remote Control.
WARNING: Please ensure that the battery is inserted correctly. If the battery is inserted incorrectly (reversed polarity), this may cause personal injury as well as damage to your remote control.
1 - Scroll Down
7 - Play/Pause
2-Menu8-Mute
3 - Repeat 9 - Select
4-RW/Previous 10-Shuffle
5 - Volume Down
11-FF/Next
6-ScrollUp
12 - Volume Up
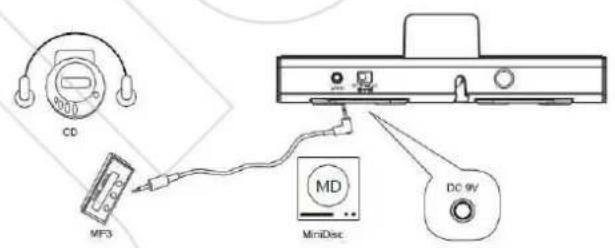
Section Q - Aux In mode
The i-Station Base also offers the ability to allow other portable audio devices such as iPod shuffle, MP3, Minidisc and Portable CD Players to be connected for use as a speaker system.
- Plug in the line in cable into the rear of the i-Station Base Aux In Socket.
- Connect the other end of the line in cable to your devices headphone socket.
- Set your devices volume level to maximum.
- The i-Station Base will default to AUX mode.
NOTE: Remember to remove the line in cable when using the i-Station Base dock connector for iPad/iPhone/iPod as the line in cable will override any sound coming from the docking station.
| Problem What Should I do? | |
| No Sound | Check play status on the iPad/iPhone/iPod |
| Please try updating the software for your iPad/iPhone/iPod using the latest iTunes. | |
| If you are using the iPad/iPhone/iPod ensure the line in cable is not plugged into the rear of the i-Station Base | |
| Check the MUTE function is not ON by pressing the MUTE on the remote control | |
| Remote Control is not working | Replace battery |
| Check the battery is inserted correctly (Polarity) | |
| Ensure remote control operating range is within 6metres from the i-Station Base |
Spare Part List
| Part No. | Item code Item Name Price | ||
| 1 | YAD024B | AC ADAPTOR (WITH INTERCHANGEABLE UK 3PIN PLUG) | For prices visit our website at www_logic3.com |
| 2 | YAD024E | AC ADAPTOR (WITH INTERCHANGEABLE EURO 2PIN PLUG) | |
| 3 | YAD024U | AC ADAPTOR (WITH INTERCHANGEABLE USA PLUG) | |
| 4 YR M024K Remote Control | |||
| 5 YCB000K Line in Cable (Black) | |||
Please use Item Codes above, when searching for Spare Parts on our Website www_logic3.com
Should you have any setup problems with the i-Station Base (MPS024) please contact our Technical Support Hotline on +44 (01923) 471 000 - National/International call rates apply or Email support@logic3.com - Spare parts are available for some models at our website www_logic3.com
Follow steps 1-6 but replace 3b + 4b with the below
3b. Select the add icon, select your song in the dropdown menu.
4b. Once you have selected the title it will not be highlighted then press done.
Follow steps 1-8 but replace 3b + 5b with the below
3b. Select Photo Album Library, in dropdown menu you will select from Albums
5b. Select a picture from album
Section Q - Mode Aux In
Follow steps 1-6 but relace 3b + 4b with below
3b. Select the add icon, select your song in the dropdown menu.
4b. Once you have selected the title it will not be highlighted then press done.
3b. Select Photo Album Library, in dropdown menu you will select from Albums
5b. Select a picture from album
3b. Select the add icon, select your song in the dropdown menu.
4b. Once you have selected the title it will not be highlighted then press done.
3b. Select 'Photo Album Library, in dropdown menu you will select from Albums
5b. Select a picture from album
3b. Select 'Photo Album Library, in dropdown menu you will select from Albums
5b. Select a picture from album
3b. Select the add icon, select your song in the dropdown menu.
4b. Once you have selected the title it will not be highlighted then press done.
3b. Select 'Photo Album Library, in dropdown menu you will select from Albums
5b. Select a picture from album
A. Track Time
B. Alarminstellingen (Short-cut)
C. iPod Playback Screen (Short-cut)
D. Main Controls (Bck/Rwd - Play/Pause - Fwd/Skip - Repeat/Repeat All - Random
E. Volume Bar
F. Play List
G. Artiest/Track Details
For iPhone
- Beweeg in de stand-bymodus het scherm maar 'links' totdat u bij de 'Speaker' tab komt.
- Selecione " Playlist" ( lista de reproducao).
- SeLECTIONE AS MUISCAS QUE DESEA adcionar a lista de reproducao.
- Assim que seleccionar as suas musica, o titre deixa de estar seleccionado - SeLECTION "Done" (terminado).
- Om uw playlist te bekijken kiest u ' Playlist'
- As_musicas escolhidas serao armazenadas na sua lista de reproducao.
For iPad
Follow the step 1-6 but replace 3b + 4b with below
3b. Select the add icon, select your song in the dropdown menu.
4b. Once you have selected the title it will not be highlighted then press done.
Follow all operating and usage instructions
Please remove all batteries from the i-Station and the remote control when not in use or when stored for long periods of time.
Do not submerge or use the i-Station in or near water
Do not disassemble any part of the i-Station
Do not place heavy objects on top of the i-Station
Do not allow small children to play with the i-Station unsupervised
Keep i-Station away from extreme temperatures and store away from dust and humidity
Unplug this product from the power source before cleaning
Do not use liquid or aerosol cleaner, use only a damp cloth for cleaning
Do not block or obstruct the ventilation vents as this may cause overheating or damage.
Logic3
Rhodes Way, Watford
WD24 4YW UK
Tel: +44 (0) 1923 471 000
Email: support@logic3.com
www_logic3.com
For Spares/ Prices visit our website at www_logic3.com

Logic3 International Ltd. of Watford, UK is the owner of the Logic3 and i-Station registered trademarks as well as registered and unregistered design rights and copyright subsisting in various products within its range. "Made for iPod" means that an electronic accessory has been designed to connect specifically to iPod and has been certified by the developer to meet Apple performance standards. Apple is not responsible for the operation of this device or its compliance with safety and regulatory standards. iPod is a trademark of Apple Inc., registered in the U.S. and other countries. All other trademarks, copyrights and trade names are registered properties of their respective owners. Logic3 are continually updating their products in the interest of improving the quality and design. As a result, some features and the appearance of the product may vary from those shown on this packaging. Copyright in this manual is owned by Logic3 International Ltd. Rhodes Way,