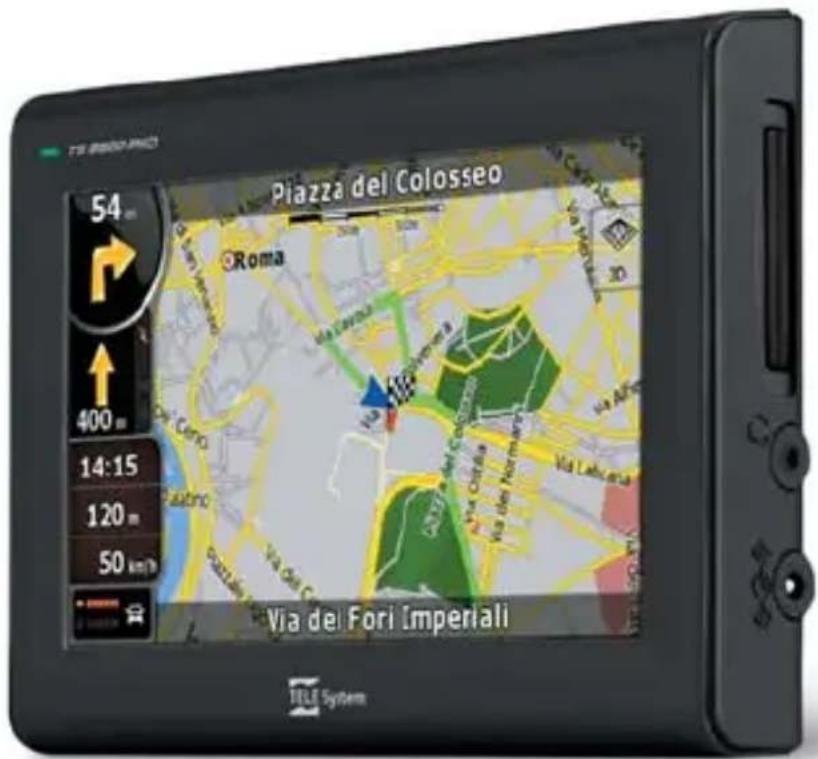
USER MANUAL TS8500PND TELE System
TS 8500 PND - GPS portable navigator
Quick Start Guide
Gentile cliente,
natural_image
Close-up of hands holding a black mechanical component (no visible text or symbols)
natural_image
Close-up of a hand holding a black plastic clip attached to a car's front grille (no visible text or symbols)
natural_image
Close-up of hands installing or adjusting a black plastic component on a car air vent (no visible text or symbols)
natural_image
Close-up of a hand holding a black plastic clip attached to a car's hood (no visible text or symbols)
natural_image
Close-up of hands adjusting a car seatbelt component (no visible text or symbols)
natural_image
Close-up of a hand adjusting a small component on a vehicle (no visible text or symbols)
natural_image
Interior view of a car with visible dashboard and grille (no text or symbols)
natural_image
Close-up of hands assembling a black electronic component (no visible text or symbols)
natural_image
Close-up of a mechanical assembly with no visible text or symbols
natural_image
Close-up of a hand holding a small electronic component, no visible text or symbols
natural_image
Close-up of a hand cleaning the back of a car grille (no visible text or symbols)

thank you for choosing this TELE System product. If you would like to be informed of the latest updates, news and special offers available for your portable navigator TS8500 PND, register now at:
www.telesystem.it
WARNING!
TELE System Srl communicates, that eventual software or hardware modifies to improve the product, it should highlight some slight differences between this own User manual and the own product. Besides, we recommend to refer to the complete User manual contained into the CD or to the Help-On-line (present on each screenshot).
WARNING!
CONTENT MANAGER: among the contents of the CD you will find the Content Manager, this application will allow the full management of Your PND through Your PC. We suggest you to install the application on Your PC and to connect the navigator by USB slot. For further information read carefully the manual of the Content Manager stored into the CD
WARNING!
The navigation software is protected by licensing method "SD lock", for which the license is tied up to the SD card on which this is loaded. We suggest to back up the folder License. Please note that, in according to the "SD lock" policy, the license can work only and exclusively in the supplied SD card.
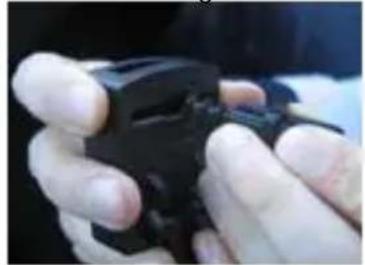
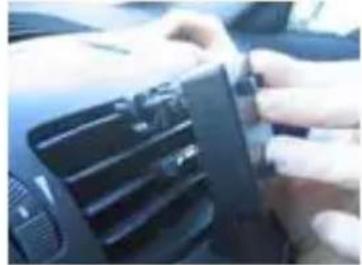
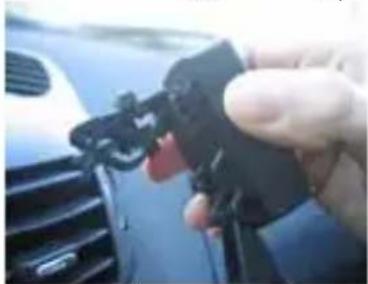
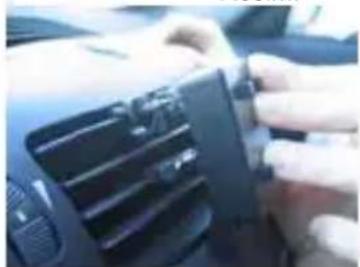
Use of the PND in Auto Installation of the air mount vent support (NEW)
The new support allows you a safe and comfortable drive, with full view on your windshield. Besides it can avoid damages on your car, because isn't so visible by thieves. In succession, we will show you the easy procedure for mounting it (from the fig. A to the fig. G) and the unmounting procedure (from fig. H to fig. M):
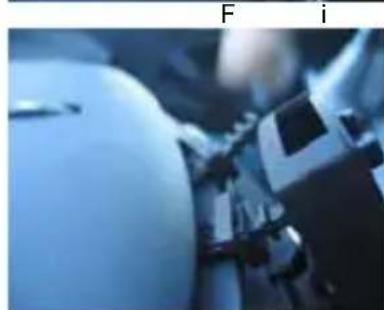
F i g .
natural_image
Close-up of hands holding a black mechanical device (no visible text or symbols)
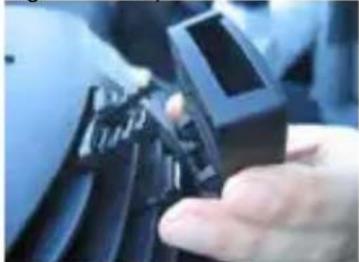
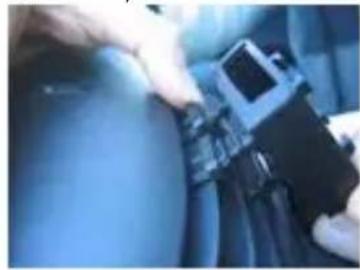
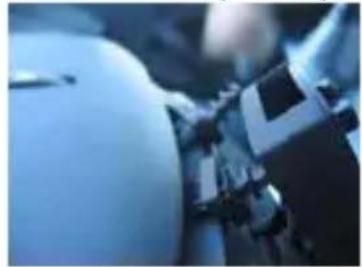
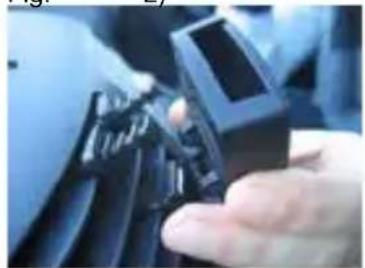
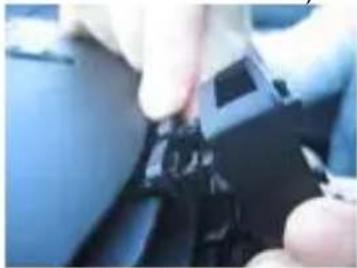
Remove the mobile rear hooks, shifting inwards. Then position them at will. We always advice to use the last step
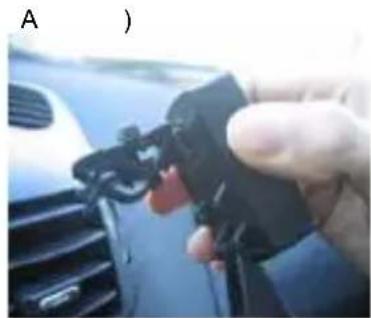
A )

natural_image
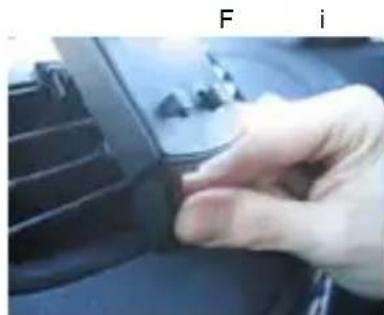
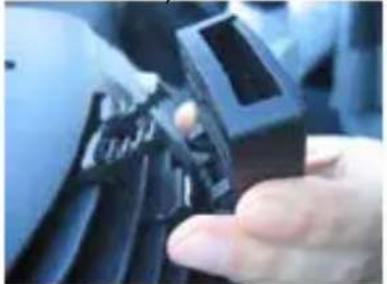
Close-up of a hand holding a black plastic clip attached to a car grille (no visible text or symbols)
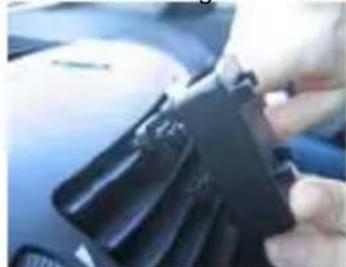
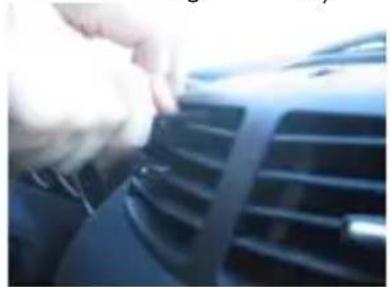
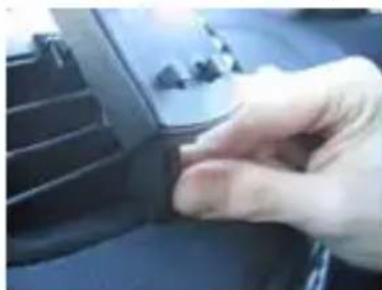
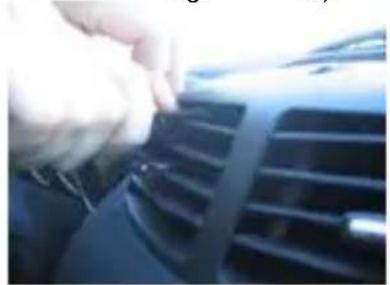
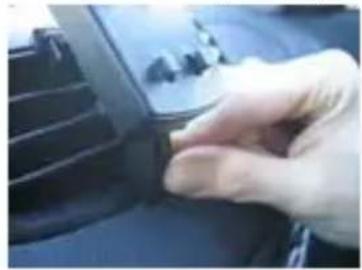
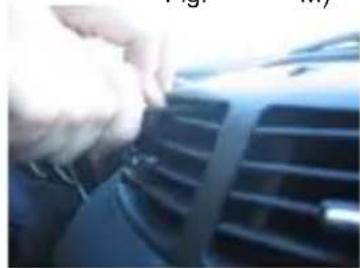
Proceed at the insertion as the picture shows, choosing the air vent on the left or on the right of the driver.
F i
natural_image
Close-up of hands holding a car air vent (no visible text or symbols)
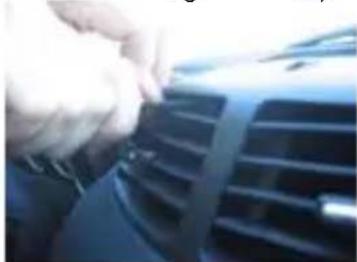
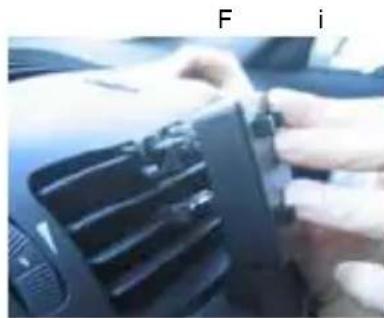
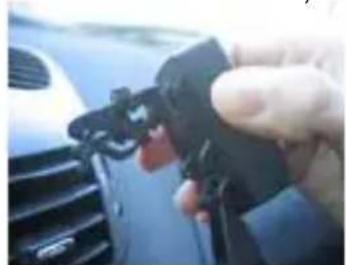
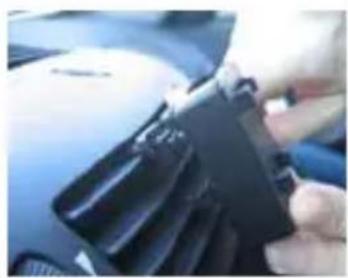
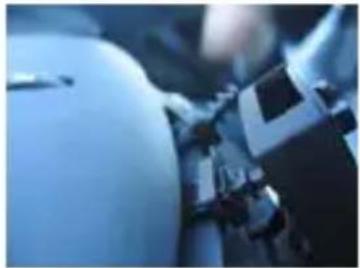
Push carefully on the superior tab of the chosen air vent
F i g
natural_image
Close-up of a hand holding a black plastic clip against a blue background (no visible text or symbols)
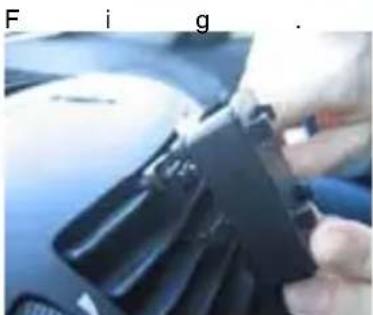
Continue to push until the click of both hooks is heard
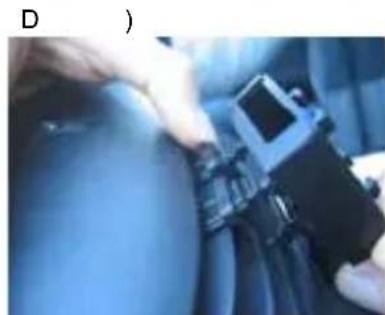
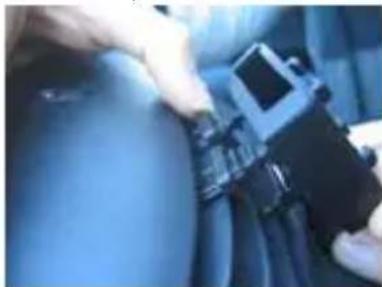
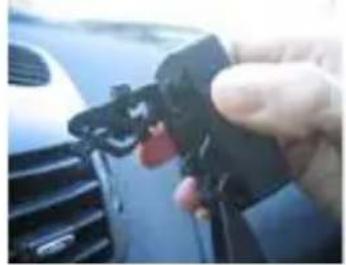
D )
natural_image
Close-up of hands holding a car seatbelt and a small electronic device (no visible text or symbols)
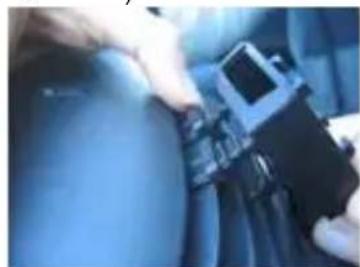
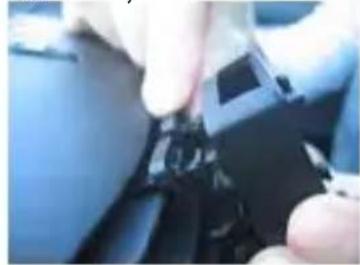
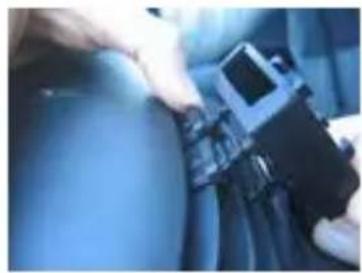
Shift properly the mobile superior clamps for a better balance
F i

natural_image
Close-up of a hand adjusting a small black component on a car dashboard (no visible text or symbols)
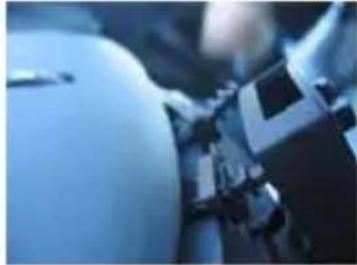
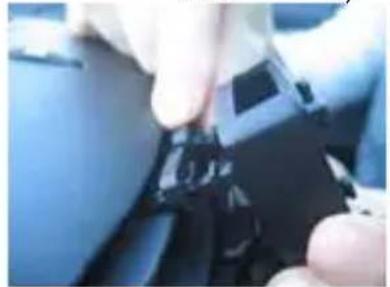
Position properly the mobile inferior lever for a better balance and ergonomics
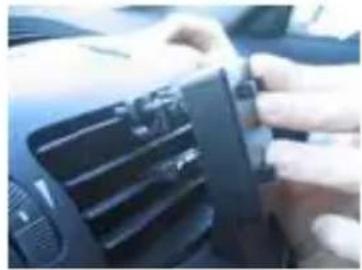
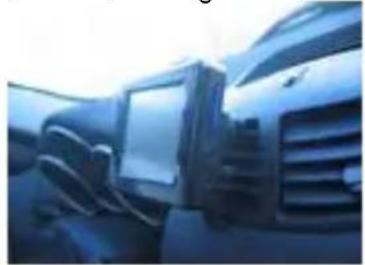
F i g
natural_image
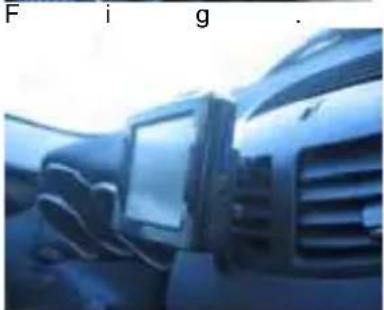
Interior view of a car with visible dashboard and grille (no text or symbols)
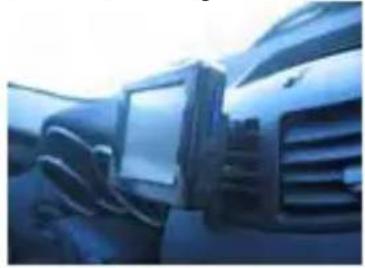
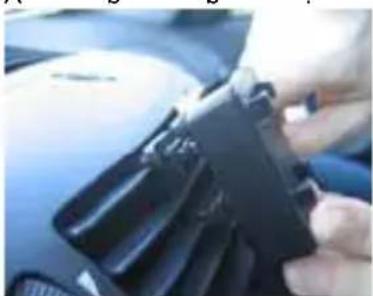
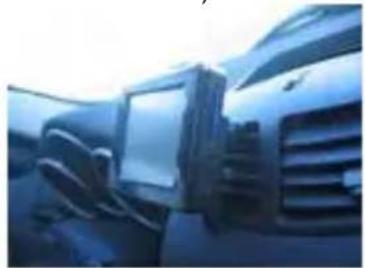
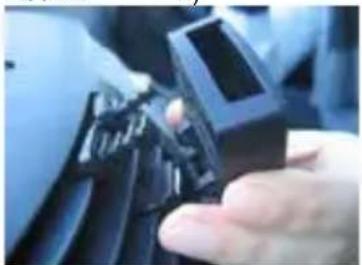
Clasp your navigator TS8500 PND with the suitable holds of the cover
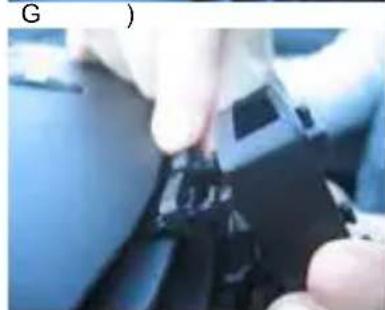
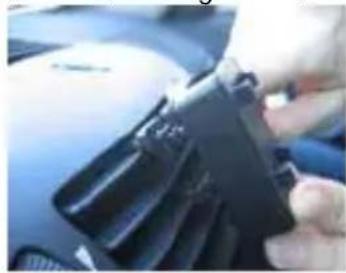
G )

natural_image
Close-up of hands holding a black plastic clip or connector (no visible text or symbols)
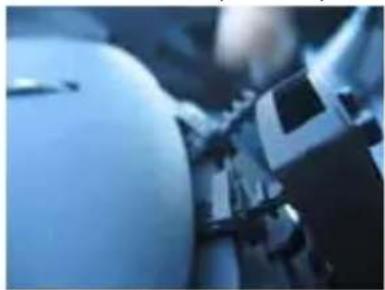
After have removed your TS8500 PND, push a hook inwards of the base
F i
natural_image
Close-up of a mechanical device with blue lighting and no visible text or symbols
Remove the hook from the base of the support and repeat the operation as fig. H) for the other hook
Fig. L)
natural_image
Close-up of a hand holding a black plastic component, no visible text or symbols
Remove totally the base of the support
Fig. M)
natural_image
Close-up of a hand adjusting a car grille (no visible text or symbols)
Remove both the hooks from the air vent of your vehicle
WARNING!
The device had been deeply tested and again used in a normal drive. Anyway we advice to close or limit the cold/hot air from the chosen air vent. We advice to perform the unmounting only when it is necessary.
Device description
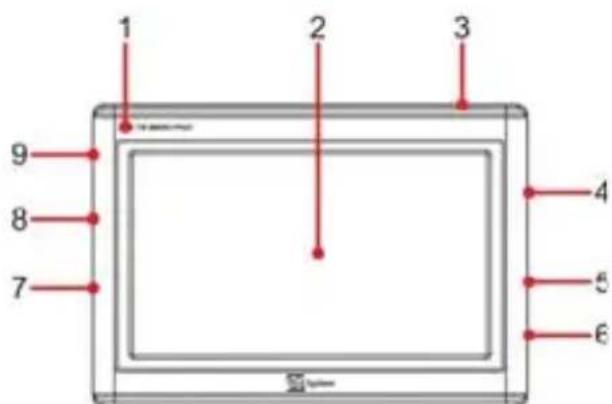
- LED
- LCD Panel (Touch Screen)
- Stand by key
- SD card slot
- Earphone output
- Power input DC 5V
- Switch ON/OFF
- Vol + / -
- External GPS module connector
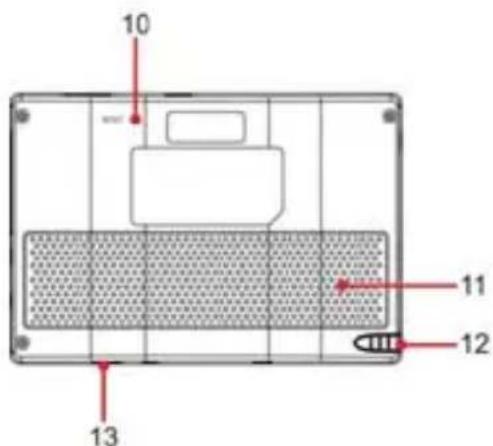
- RESET
- Speaker
- Touch screen pen
- USB Slot
Miscellaneous
The manufacturer can not be held responsible for any damages to property and/or people resulting from improper use of the TS8500 PND or from lack of attention paid to warnings and notes inserted in the technical documentation.
The use of the navigator implies that the content of this manual has been accepted and observed.
The manufacturer can not be held responsible for any violations of traffic regulations related to the use of the product.
The map making data contained in the navigator could lead to discrepancies with actual itineraries, due to constant changes to the make up of streets. Some areas are characterised, for various reasons, by a larger map representation than others.
Battery Charging
Please use only the supplied cables to connect the PND by AC car Adapter. Before installing the device check the power car cable to make sure it is suitable for use, paying particular attention to the area where it enters the power socket and to where it enters the device. If the cable is damaged do not connect the device and replace the cable.
At the first turning the device couldn't be completely charged, it's necessary, however, to recharge the battery before the use of the PND.
Charge the battery to connect the navigator with the AC car Adapter or with the USB cable plugged into the running PC.
Installation
• Install the device when the vehicle is stopped and in safe conditions.
- Install the device so that it does not obstruct the drivers' vision and so that it can not cause any danger in the case of an accident.
- Check that the device does not interfere with airbags or other vehicle safety devices.
• Make sure that the device is firmly attached to the car support before starting the journey.
- TELESystem doesn't answer to any damages in any vehicle coming from installation or uninstallation of the car support.
While Driving
- The driver of the vehicle is responsible for the correct use of the TS8500 PND.
- The user must ignore the instructions given by the TS8500 PND if they are not compliant with traffic regulations.
- Do not listen solely to the vocal directions. These could be incorrect or badly timed. Always consider the directions given as advice and respect the road signs.
- Satellite navigators provide a simple aid to driving and navigation. Correct driving and choice of the best route are always the responsibility of the vehicle driver.
- While driving it is possible to receive vocal information such as: "Keep to the right" or "Turn right after 300 metres"; these indications come from map data which at times may not be pertinent with the actual street on which you are travelling. Pay particular attention to roundabouts or large intersections: vocal indications may not always be simple.
- Do not distract yourself while driving to consult the navigator if this could put yourself or others in danger.
- Pull over to a stop as soon as possible to consult the navigator.
- Only carry out manual operations on the navigator when the vehicle is stopped.
- With optimal signal reception the precision of the GPS position has a guaranteed range of around 15 metres.
Speed camera warning
The speed camera warning function allows the user to identify and view the speed cameras situated on the route.
The main menu will appear.
• On the screen select Settings.
- Choose Warnings.
- Press Speed camera Warning to activate the function and to set it.
A warning will be issued if there are speed cameras on the route. Each warning is represented by a “beep” sound and a message shown on the screen showing the type of speed camera and distance.
WARNING!
The database is compiled using data coming from the network and user indications. TELE System can therefore not be held responsible for the accuracy and completeness of this data, the activation/deactivation of this service is the sole responsibility of the client.
Operating modes
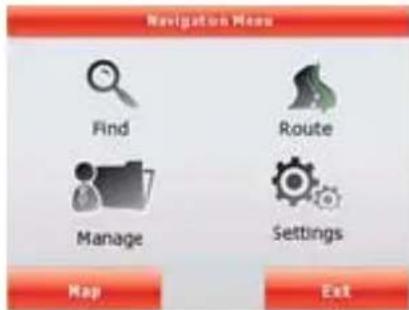
When Navigator is started the first time, you need to select whether to start the program in Simple mode or in Advanced mode.
The two operating modes of Navigator mainly differ in the menu structure and the number of available features. The controls and screen layouts are the same.
- Simple mode: you have easy access to the most important navigation functions and the basic settings only. The rest of the settings are set to values that are optimal for typical use.
- Advanced mode: you have access to the full functionality of Navigator.
This Guide covers actions in Simple mode. See the User Manual for detailed instructions on both modes.
Later you can switch between the two operating modes:
- To switch from Simple mode to Advanced mode: on the startup screen (Navigation Menu), tap Settings Advanced Mode.
- To switch from Advanced mode to Simple mode: on the startup screen (Navigation Menu), tap Simple Mode
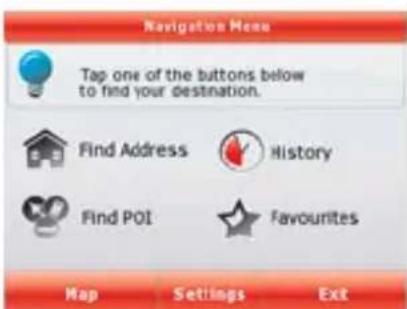
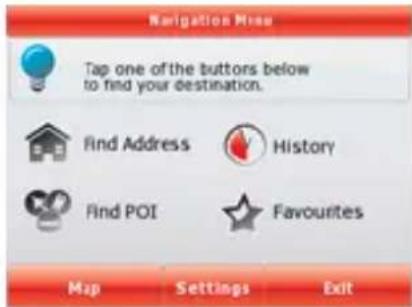
After selecting Simple mode, the Navigation menu appears. From here you can reach all parts of Navigation Software.
The Navigation menu contains the following options:
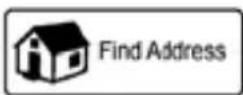
- Tap to specify an address as your destination.

- Tap for the list of recent destinations.
- Tap to select one of the stored Points of Interest.

• Tap for the list of your favourite destinations.

- Tap to navigate or to browse the map.

- Tap to customise the way Navigator works.
Navigating to an address
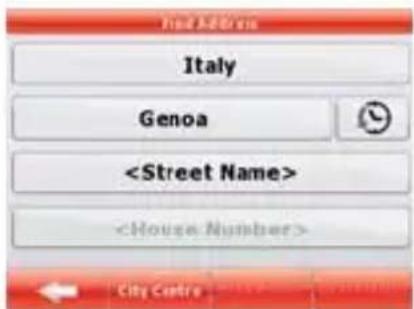
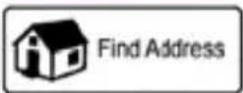
In the Navigation menu, tap
By default, Navigation Software proposes the country/state and settlement where you are. If needed, tap the button with the name of the country/state, and select a different one from the list.
If needed, change the settlement:
-
To select the settlement from the list of recently used ones, tap the button.
• To enter a new settlement:
-
Tap the button with the name of the settlement, or if you have changed the country/state,

- Start entering the settlement name on the keyboard.
- Get to the list of search results:
• After entering a couple of characters, the names that match the string appear in a list.
- Tap Done to open the list of results before it appears automatically.
- Pick the settlement from the list.
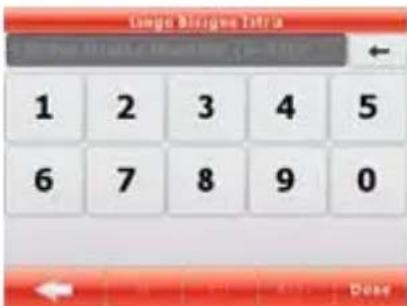
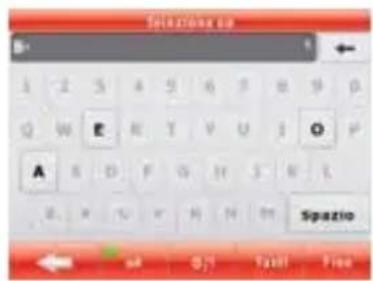
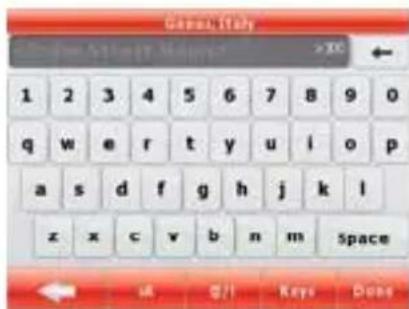
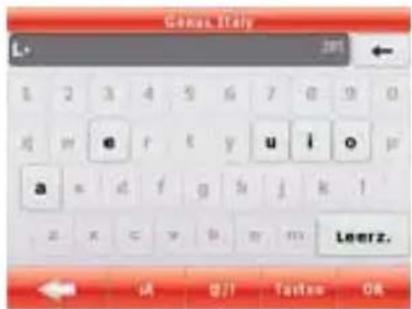
Enter the street name:

- Tap □ Green Name □
-
Start entering the street name on the keyboard.
-
Get to the list of results:
• After entering a couple of characters, the names that match the string appear in a list.
- Tap Done to open the list of results before it appears automatically.
- Pick the street from the list.
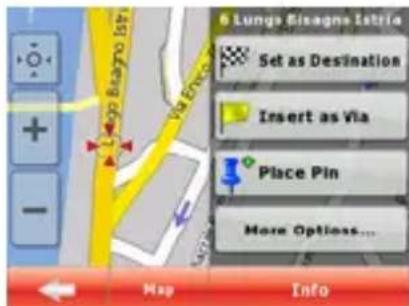
Enter the house number:
- Tap

-
Enter the house number on the keyboard.
-
Tap

to finish entering the address.
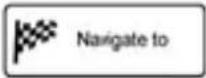
The map appears with the selected point in the middle. Tap from the Cursor menu. The route is then automatically calculated, and you can start navigating.
Navigating to a POI

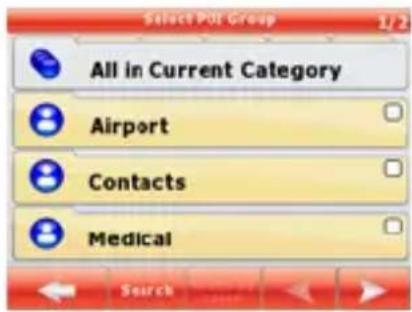

On the Map screen, tap to return to the Navigation menu.
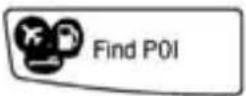
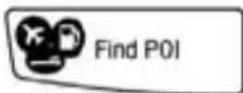
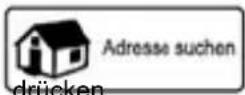
In the Navigation menu, tap
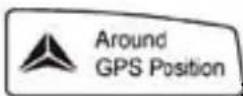
Select the area around which the POI should be searched:
• The POI will be searched around a given address.

• The POI will be searched around the Cursor.
• The POI will be searched around the current GPS position.
• The POI will be searched around the destination of the active route.
- : The POI will be searched not around a given point but by the size of the detour it means from the active route. This can be useful if you search for a later stopover that causes only a minimal detour. For example upcoming petrol stations or restaurants. After this, the list of POI categories appear.

You can narrow the search with the following:
- Select the POI group (e.g. Accommodation), and after that, if needed, select the POI subgroup (e.g. Hotel or Motel).
- To find the POI by its name, tap Search, and use the keyboard to enter a part of the name.
- To list all POIs in a given POI group, press of its name.
Search, and then Done without entering any letters
[optional] When finally the list of results appear, you can change the list order with the button.
Tap the desired POI in the list.
The map appears with the selected point in the middle. Tap from the Cursor menu. The route is then automatically calculated, and you can start navigating.
Map screen
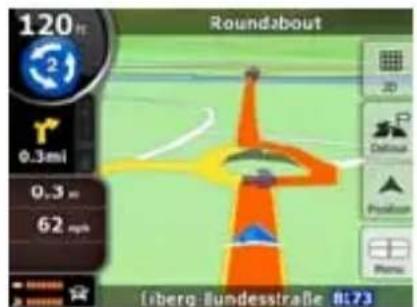
The most important and most often used screen of Navigator is the Map screen. The map looks similar to a conventional road-map. The blue arrow represents your current position, and the green line shows the recommended route.
There are several screen buttons and data fields on the screen to help you navigate. Their functions are explained in detail in the User Manual.
During navigation, the screen shows route information and trip data (left screenshot), but when you tap the map, additional buttons and controls appear for a few seconds (right screenshot). Most parts of the screen behave as buttons.
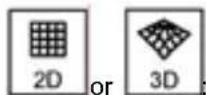
Switches between 2D (classic top-down view) and 3D (perspective view for navigation) map modes.

: Opens the Navigation menu.
If you have moved the map, a button appears. Tap this button to move the map back to the current GPS position.
WARNING!
- Keep the device out of the reach of children.
- Plastic bags can be dangerous. To avoid suffocation keep the bags out of reach of children.
- If the device is used in very high temperatures an internal protection mechanism may activate causing the navigator to automatically turn itself off. This mechanism is necessary for the users' safety and to safeguard the batteries contained in the device.
- Do not dispose of the product in unauthorised places as this could cause damage to the environment and to human health. Proper disposal assists in the recycling of the components/materials contained in the product. Disposal of the product in unauthorised places is punishable according to current Italian legislation.
- The manufacturer has set up a WEEE recovery system for the product using separate collection and treatment systems with production plants that meet all current regulations
- Once the product can no longer be used it must be taken to a recycling centre which is authorised to handle electrical waste, as this can not be mixed with general waste. It is also possible to return the used product to its distributor or to return the no longer useable product when buying a new product of the same type.
Cher client,
natural_image
Close-up of hands holding a black object with visible texture and handings (no text or symbols)
natural_image
Close-up of a hand holding a black plastic clip attached to a car grille (no visible text or symbols)
natural_image
Close-up of hands installing or adjusting a car air vent on the hood (no visible text or symbols)
natural_image
Close-up of a hand holding a black plastic clip attached to a car's air vent (no visible text or symbols)
natural_image
Close-up of hands adjusting a car seatbelt (no visible text or symbols)
natural_image
Close-up of a hand holding a small object on a car intake manifold (no visible text or symbols)
natural_image
Interior view of a car with visible dashboard and grille (no text or symbols)
natural_image
Close-up of gloved hands holding a small black electronic component (no visible text or symbols)
natural_image
Close-up of a robotic arm interacting with a white mechanical component (no visible text or symbols)
Fig.
L)

natural_image
Close-up of a hand holding a small electronic component, possibly a camera or connector (no visible text or symbols)
Fig.
M)
natural_image
Close-up of a car's hood with a hand adjusting the grille (no visible text or symbols)
ATTENTION!
natural_image
Close-up of hands holding a black object, possibly a camera or device (no visible text or symbols)
A
b
b
natural_image
Close-up of a hand holding a black plastic clip attached to a car hood (no visible text or symbols)
Abb.
B)
natural_image
Close-up of a hand holding a black plastic clip attached to a car's front grille (no visible text or symbols)
D
)
natural_image
Close-up of hands installing or adjusting a car seatbelt device (no visible text or symbols)
Abb.

natural_image
Close-up of hands installing or adjusting a car air vent on the hood (no visible text or symbols)
A
natural_image
Close-up of a hand adjusting a small component on a car intake manifold (no visible text or symbols)
b
C)
b
Abb.
G)

natural_image
Interior view of a car showing a mounted computer monitor and rear air vent (no visible text or symbols)
Abb.
H)
natural_image
Close-up of hands holding a small black object, possibly a device or component (no visible text or symbols)
Abb.

natural_image
Close-up of a robotic arm with a large cylindrical component, possibly a robotic or mechanical device (no visible text or symbols)
Abb.
L)
natural_image
Close-up of a hand holding a black plastic clip or connector, with no visible text or symbols.
Abb.

natural_image
Close-up of a hand adjusting a car grille (no visible text or symbols)
M)
ACHTUNG!
natural_image
Close-up of hands holding a black object with visible texture and a small mark (no text or symbols)
natural_image
Close-up of a hand holding a black plastic clip attached to a car grille (no visible text or symbols)
natural_image
Close-up of hands installing or adjusting a car air vent on the hood (no visible text or symbols)
natural_image
Close-up of a hand holding a black plastic clip against a car dashboard (no visible text or symbols)
natural_image
Close-up of hands installing or adjusting a blue surface with a black device (no visible text or symbols)
natural_image
Close-up of a hand adjusting a small component on a dark surface (no visible text or symbols)
natural_image
Interior view of a car with visible dashboard and grille (no text or symbols)
G )

natural_image
Close-up of hands holding a small black mechanical component (no visible text or symbols)
F i
natural_image
Close-up of a robotic arm with a large cylindrical component, possibly a robotic arm or device, in blue tones (no visible text or symbols)
natural_image
Close-up of a hand holding a small electronic device component (no visible text or symbols)
Fig. M)
natural_image
Close-up of a hand adjusting a black car grille (no visible text or symbols)
natural_image
Close-up of hands holding a black object, possibly a device or tool, with no visible text or symbols.
A )
natural_image
Close-up of a hand holding a black plastic clip attached to a car grille (no visible text or symbols)
F i
natural_image
Close-up of hands installing or adjusting a car air vent on the hood (no visible text or symbols)
g
F i g
natural_image
Close-up of a hand holding a black plastic clip attached to a car (no visible text or symbols)
D )
natural_image
Close-up of hands adjusting a car seatbelt (no visible text or symbols)
F i
natural_image
Close-up of a hand holding a small black object with a blurred city skyline in the background (no visible text or symbols)
g
F i g
natural_image
Interior view of a car showing dashboard and rear grille (no visible text or symbols)
G )
natural_image
Close-up of hands holding a small black object with a dark handle, possibly part of a device or tool (no visible text or symbols)
F i
natural_image
Close-up of a mechanical component with blue and white surfaces, no visible text or symbols
g
Fig. L)
natural_image
Close-up of a hand holding a black mechanical component, possibly a tool or device (no visible text or symbols)
Fig. M)
natural_image
Close-up of a hand adjusting a car grille (no visible text or symbols)
ATENTIE!
natural_image
Close-up of hands holding a black object with a small inset image (no visible text or symbols)
Resim.
D)
Resim.
natural_image
Close-up of a hand holding a black plastic clip attached to a car grille (no visible text or symbols)
Resim.
B)
E)
Resim.
natural_image
Close-up of hands adjusting a car air vent (no visible text or symbols)
Resim.
C)
F)
natural_image
Close-up of a hand holding a black plastic clip against a blue background (no visible text or symbols)
Resim.
G)
natural_image
Close-up of hands operating a car seatbelt device (no visible text or symbols)
Resim.
H)

natural_image
Close-up of a hand holding a small object on a car dashboard (no visible text or symbols)
Resim.
1)
natural_image
Close-up of a car's front grille and dashboard, showing no visible text or symbols
Resim.
L)
natural_image
Close-up of hands holding a small black mechanical component (no visible text or symbols)
Resim.
M)
natural_image
Close-up of a mechanical device with blue lighting and no visible text or symbols
natural_image
Close-up of a hand holding a black mechanical component, no visible text or symbols
UYARI!

Cadde adını girin:
CE conformity declaration
TELE System Electronic states that these products meet the basic European requirements of 2004/108/EC (EMC - Electromagnetic Compatibility) and 2006/95/EC (LVD - Low Voltage Directive), following the technical standards:
TELE System Electronic
Via S. Benedetto, 14 Q/M
36050 Bressanvido (VI)
Internet: www.telesystem.it
Tel. assistenza guasti / Customer assistance tel.:
199 214 444 (solo da Italia / Italy only)

System