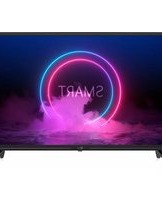
TS32 SMX10 - Television TELE System - Free user manual and instructions
Find the device manual for free TS32 SMX10 TELE System in PDF.


| Product Type | LED TV |
| Screen Size | 32 inches (81 cm) |
| Resolution | 1366 x 768 (HD Ready) |
| Aspect Ratio | 16:9 |
| Smart TV | No |
| Tuner | DVB-T/T2/C |
| Dimensions (W x H x D) with stand | approx. 73.5 x 47.6 x 18 cm |
| Dimensions (W x H x D) without stand | approx. 73.5 x 43.2 x 8.5 cm |
| Weight with stand | approx. 4.2 kg |
| Weight without stand | approx. 4.0 kg |
| Power Consumption (typical) | 45 W |
| Standby Power Consumption | < 0.5 W |
| VESA Mount Pattern | 100 x 100 mm |
| Input Connectors | HDMI x2, USB x1, VGA, Composite, RF, CI+ |
| Output Connectors | Headphone jack, Optical audio out |
| Remote Control | Yes, included (batteries not included) |
| Power Supply | AC 100-240V, 50/60Hz |
| Cleaning Instructions | Use a soft, dry cloth. Do not use liquid or aerosol cleaners. |
| Safety Warning | Do not block ventilation openings. Use a stable stand or wall mount. |
| Spare Parts / Repairability | Contact authorized service center. Use only genuine parts. |
Frequently Asked Questions - TS32 SMX10 TELE System
User questions about TS32 SMX10 TELE System
0 question about this device. Answer the ones you know or ask your own.
Ask a new question about this device
Download the instructions for your Television in PDF format for free! Find your manual TS32 SMX10 - TELE System and take your electronic device back in hand. On this page are published all the documents necessary for the use of your device. TS32 SMX10 by TELE System.
USER MANUAL TS32 SMX10 TELE System
The following inputs and outputs are available behind the TV:
- USB (x2): USB2.0 ports for connecting USB mass storage devices for multimedia playback (Media player function).
- Headphone: headphone output (3,5mm jack).
- Cl/Cl+: housing for Cl/Cl + common interface modules.
- COAXIAL: coaxial digital audio output.
- HDMI1, HDMI2, HDMI3: HDMI digital audio-video inputs (v.1.4) for connecting an external AV source (e.g. a receiver or DVD player) equipped with an HDMI interface.
- RF IN (T2/C): antenna input (IEC type) for receiving digital terrestrial (DVB-T / T2) or cable (DVB-C) signal.
- RF IN (S2): SATELLITE RF Antenna input (type F).
- SCART/RCA: analogue audio-video input for connecting an AV device with a RCA (CVBS + Stereo Audio) interface.
- PC Audio IN and PC VGA: audio inputs (3.5mm jack) and video (VGA) for connecting a Personal Computer.
- LAN: Ethernet (RJ45) port for connection to the Internet, necessary for the Smart TV function.
- Supply: integrated power cable for connecting the television to the 230VAC, 50Hz mains supply.
Batteries
You must insert the batteries (not supplied) when the product is purchased; it is instead necessary to replace them once the remote control no longer works properly.
First open the appropriate cover on the back of the remote control. Then to replace the batteries, introduce the 2 AAA batteries into the compartment respecting the correct polarity as indicated; instead, to remove batteries, remove the dead batteries from the compartment and dispose of the batteries separately from household waste and take them to any point of sale or collection.
WARNINGS
To prevent corrosive liquid leakage from damaging the remote control, it is advisable to remove the batteries if you believe you will not use the device for a long time.
Avoid using different types of batteries such as new and used batteries at the same time.
First installation
Before switching on the television, it is advisable to connect the aerial cable (terrestrial and/or satellite) and the ethernet cable (if available). In this way, thanks to the installation wizard, you can start using your Smart TV by performing a few simple steps briefly described below:
Steps 1, 2, 3 and 4: the procedure requires the choice of the menu language, country of use and, PIN setting and time zone. Press the arrow key ▶ to continue.
Step 4: TV connection to the Internet network necessary to use the connected Smart / TV functions. If the Ethernet cable has already been connected to the TV's RJ45 port, the connection to the home modem/router will take place automatically. If it is not possible, configure the Wireless connection using the arrow keys and ENTER on the remote control: select the item Use Wi-Fi network, choose your own Wi-Fi network from the list of detected networks, type the correct network password very carefully (press ENTER to bring up the virtual keyboard), then select the Connect item. Finally press the arrow key ▶ to go to the next step.
Step 5: To download the application, simply frame the QR code visible on the screen with the appropriate QR/video camera of your mobile device, then proceed with the installation.
ATTENTION!
Make sure that your mobile device and Smart TV are connected to the same home data network.
The application does not totally replace the traditional remote control, it is mainly designed to control the Smart features of the TV (applications, media player, etc. ...)
Some IP applications require the use of a keyboard and/or a cursor/mouse; in this case, the traditional remote control supplied with the TV is not sufficient to control them.
Step 6: choose the user's favorite mode / source. In particular
Main functions
Digital TV mode
if you have selected the TV mode, you need to scan a digital TV channel. To access the Channel menu, set the Antenna Type between Digital Terrestrial(DVB-T / T2), Cable(DVB-C) or Digital Satellite (DVB-S / S2), make sure that the corresponding antenna cable is correctly connected, define the search parameters and proceed with the scan. If you opt for automatic scanning of digital TV, the TV will propose that you upload a list of Italian satellite default channels with a typical arrangement of the TivùSat platform channels.
NOTE
The viewing of the encrypted TivùSat channels requires the use of a dedicated conditional access module (CAM) and card (Smart-card), to be purchased separately.
Due to frequent satellite channel updates, the default satellite channel list may contain obsolete channels and may not coincide exactly with the TivùSat channel list.
Once the selected frequencies have been scanned, the TV will create the channel list with the defined arrangement (e.g. the LCN one, corresponding to the numbering requested by the terrestrial channel issuers).
If you want to proceed with the scanning of different input/antenna channels, proceed as described above choosing the corresponding type of antenna desired (different from the previous one). The different available channel lists will then be available only if the TV is in the correct TV section (terrestrial/cable/satellite). In particular, to switch from viewing a terrestrial channel to a satellite channel, press the MENU button, enter the Channel menu
and set Digital SAT (satellite) as Antenna Type. Obviously to return to the terrestrial channel list, set Digital terrestrial as Antenna Type. The TV will create a channel list with the defined ordering (e.g. the LCN one, corresponding to the numbering requested by the terrestrial channel broadcasters) once TV has scanned the frequencies. If you want to scan channels from a different input/antenna, then proceed as just described above by selecting the corresponding Antenna type (a different one from the previous). The various available channels list will then be accessible only if the TV is in the correct TV section (terrestrial/cable/satellite). In particular, to switch from viewing a terrestrial channel to a satellite channel, press the MENU button, enter the Channel menu, and set the Antenna Type to Digital SAT(satellite). If you want to return to the terrestrial channel list, set the Antenna Type back to Digital terrestrial.
Smart (Home) mode
The Home menu, also directly accessible from the HOME key on the remote control, mainly allows access to the so-called Smart section (connected component/IP) to manage and use the IP applications and the browser for navigation, as well as access to the various sources of input/mode.
APPS selection
Moving to the APPS section of the Home menu, you can see the list of all IP applications installed under the Application List (accessible directly from the APP button on the remote control), where you can also access the application store to download and install new ones. The Multimedia submenu on the other hand allows access to the Multimedia player function (Media player), to reproduce multimedia audio/video contents saved on an external USB memory device or to manage files saved in the internal TV storage (e.g. installation of APK expert users, a procedure recommended only for expert users).
Settings section
The submenu to configure the connection to the Internet (via LAN cable or via Wi-Fi) is particularly important. This submenu is essential to use the connected Smart/TV functions and can be reached from the path: Home Menu> Settings> Other Settings > Network It is useful if you want to change the network settings defined during initial installation. In the Other Settings menu, you will also find: Time settings submenu to adjust the time and related parameters, the Common Settings submenu for general changes such as language, keyboard type, permissions/account management and finally the Info submenu to consult technical system information such as the MAC addresses of the Ethernet/LAN and Wi-Fi interfaces.
Advanced functions
Antenna system configuration
The factory settings provide that the satellite system can receive signals simultaneously from 2 satellites via DiSEqC switch, HotBird 13° East in first position and Astra 19.2° East in second position. If the system does not correspond to the settings indicated, it is necessary to modify the default settings to make them consistent with the satellite dish used.
NOTES AND WARNINGS
The TV is compatible with single universal, multi-satellite DiSEqC 1.0 and multi-user SCR/Uni-cable systems. Motorized antennas (DiSEqC 1.2 and USALS) are not supported. Incorrect antenna configuration may result in some or all channels not being loaded. If you do not know the characteristics of your antenna system and/or you are not able to configure the receiver yourself, it is advisable to contact a trusted professional installer. The Signal and Quality Level indicators refer to the transponder of the selected satellite indicated on the screen. Make sure that it is valid/updated and actually active. It is not recommended to avoid connecting the TV to the satellite signal through the pass-through antenna connector (LNB Out / Loop Through) of an external satellite receiver as both devices cannot operate simultaneously. When the TV is switched on, the receiver must be in standby (with the tuner not powered) and vice versa.
Factory reset (reset)
It is possible to reset the entire television, returning all the settings to the initial condition. To do so, select Settings> Reset in the Home menu (connected Smart/TV mode) and confirm. Another way to do this is: Home> Settings> Other Settings > Common Settings> System Restore.
WARNING
Restoring the factory settings deletes all the customizations made by the user, including stored channels, downloaded applications and changed settings. Furthermore, by confirming the reset, the TV will perform a complete system rebook and then display the first installation wizard on the screen.
Technical specifications
| Panel | Format | 31,5" - 16:9 wide (80cm) |
| Resolution | 1366x768 (HD) | |
| Contrast | 3000:1 | |
| Brightness | 180 (cd/m2) | |
| Viewing angle | 176°/176° (Horizontal/Vertical) | |
| Inputs | HDMI | x3 - HDMI |
| A/V in | x1 - CVBS + Audio LR (RCA/SCART adaptor cable included) | |
| USB | x2 - USBv2.0, compatible FAT32e NTFS, Media player function | |
| VGA | x1 - DSUB15 + Audio PC | |
| LAN | x1 - RJ45, Ethernet 10/100 | |
| TV Signals | RF input (DTT) | x1- 75 Ω, type IEC, VHF/UHF 7MHz/8MHz |
| RF input (SAT) | x1 - 75 Ω, F type | |
| Common Interface | x1 - CI / CI+ | |
| Video | MPEG-2, MPEG-4, H.265.Main@L4.1-1920*1080@50fps | |
| Audio | MPEG-1 layer 1/2, MPEG-2 layer 2/Dolby AC3 H.265 | |
| Speaker | 2 x 8 Watt | |
| General | Power Supply | 100-240V, 50/60Hz |
| Energy Consumption | <0,5W in Standby 56W max | |
| Supported Formats via USB | AVI/MP4/MKV | |
| Wi-Fi | IEEE b/g/n, 2,4GHz | |
| TV dimensions (WxHxD) | with supports | 732 x 480 x 191 mm |
| without supports | 732 x 434 x 75mm | |
| Standard wall bracket | VESA200/100 | |
| Included Accessories | x1 standard remote control, x1 RCA/SCART adaptor, x1 instruction manual | |
Simplified EU conformity declaration
Tele System Digital declares, under its own responsibility, that this product meets the essential requirements of European directives. The complete text of EU conformity declaration is available at following link: https://www.telesystem.it/CE
Scan QRcode with your mobile device to download the extended version of user manual, or visit the website: https://bit.ly/39D2Aoc

TELE System Digital Srl


Brand : TELE System
Model : TS32 SMX10
Category : Television