
Bapi 7.0 Plus Inox - Blender TAURUS - Free user manual and instructions
Find the device manual for free Bapi 7.0 Plus Inox TAURUS in PDF.
| Product type | Multifunctional immersion blender with accessories |
| Brand | Taurus |
| Model | Bapi 7.0 Plus Inox |
| Body material | Stainless steel and plastic |
| Power supply | 220-240 V ~ 50/60 Hz |
| Power | 700 W |
| Speed adjustment | Variable electronic |
| Included accessories | Whisk, reduction gear unit, emulsifier beater, jug |
| Main functions | Blend, whisk, chop, emulsify |
| Jug capacity | 1 liter (estimated) |
| Thermal protection | Yes, automatic shutdown in case of overheating |
| Cleaning | Accessories dishwasher safe (gentle cycle); motor body cleaned with damp cloth |
| Use | Domestic use only |
| After-sales service | Contact authorized technical service for any repairs |
Frequently Asked Questions - Bapi 7.0 Plus Inox TAURUS
User questions about Bapi 7.0 Plus Inox TAURUS
0 question about this device. Answer the ones you know or ask your own.
Ask a new question about this device
Download the instructions for your Blender in PDF format for free! Find your manual Bapi 7.0 Plus Inox - TAURUS and take your electronic device back in hand. On this page are published all the documents necessary for the use of your device. Bapi 7.0 Plus Inox by TAURUS.
USER MANUAL Bapi 7.0 Plus Inox TAURUS
Fig.1
natural_image
Line drawing of a mug with handle and small object inside, no text or symbols presentFig.2
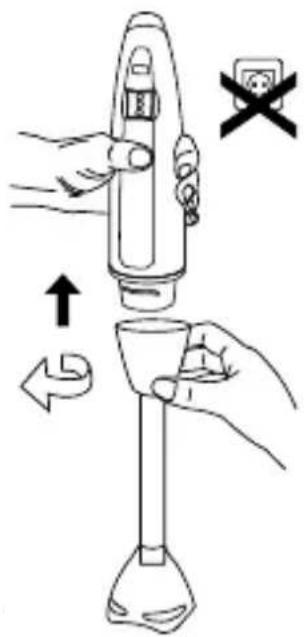
Fig.2A
Fig.3

natural_image
Line drawing of a hand pouring liquid into a glass mug (no text or symbols)
natural_image
Line drawing of a hand pouring tea leaves into a glass mug with a straw inside (no text or symbols)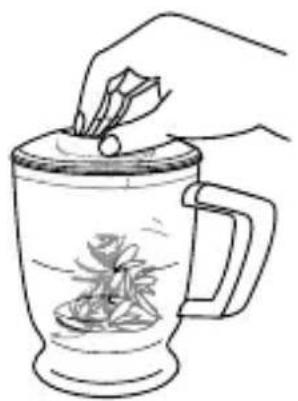
natural_image
Line drawing of a hand pouring tea into a glass mug filled with tea leaves (no text or symbols)Fig.3A
natural_image
Line drawing of a hand using a handheld device to interact with a glass container containing a small plant (no text or symbols)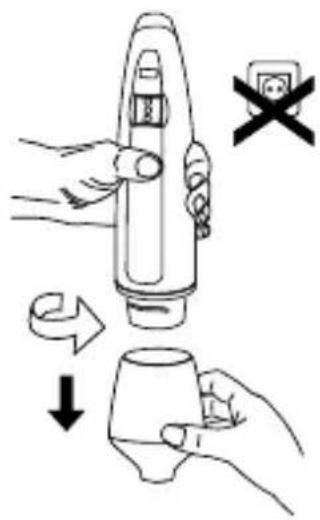
Fig.3B Fig.3C Fig.3D
Fig.4
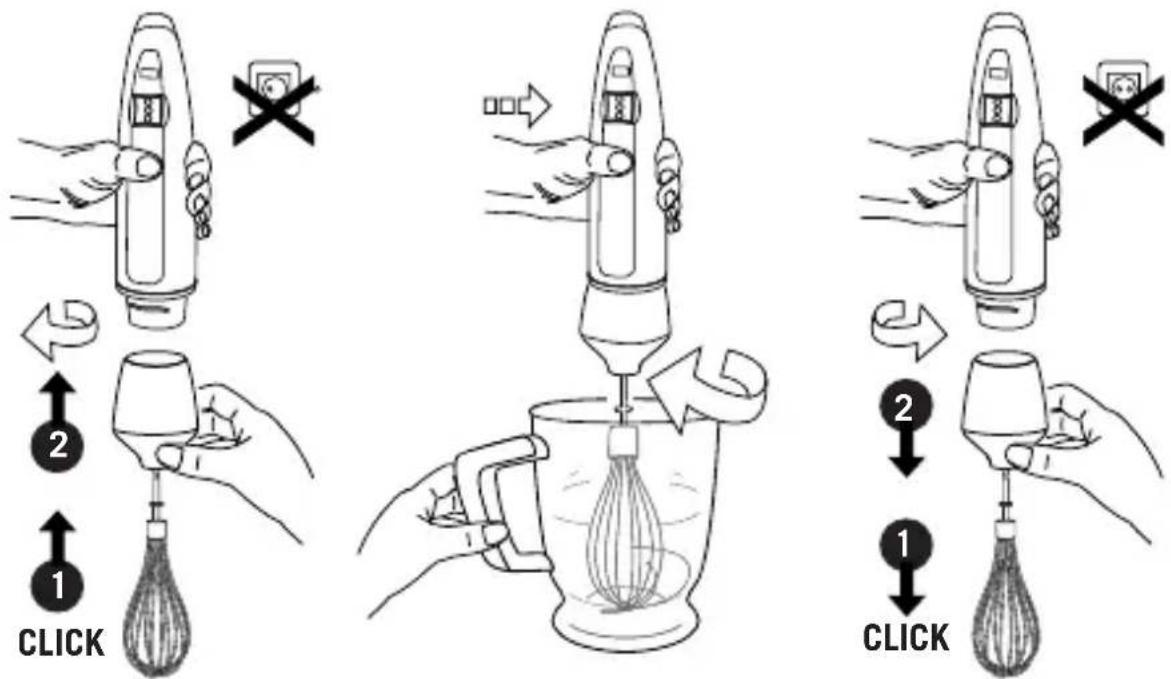
Fig.4AFig.4CFig.4B
Fig.5
natural_image
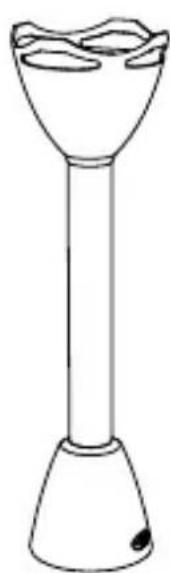
Simple line drawing of a cylindrical object with a flared base and a pointed tip, resembling a lamp or stand (no text or symbols)Bapi 7.0 Inox
Bapi 7.0 Plus Inox

professional o industrial.
Many thanks for choosing to purchase a TAURUS brand product.
Thanks to its technology, design and operation and the fact that it exceeds the strictest quality standards, a fully satisfactory use and long product life can be assured.
Description
A Speed control
B Start button
C Driving motor
D Liquidiser attachment
E Adapter fitting (*)
F Whisk (*)
G Goblet
(*) Only available in the model Bapi 7.0 Plus Inox.
If the model of your appliance does not have the accessories described above, they can also be bought separately from the Technical Assistance Service.

Safety advice and warnings
- Read these instructions carefully before switching on the appliance and keep them for future reference. Failure to follow and observe these instructions may result in an accident.
- Clean all the parts of the product
that will be in contact with food, as indicated in the cleaning section, before use.
Use or working environment:
- Keep the working area clean and well lit. Cluttered and dark areas invite accidents.
Electric safety:
- Do not use the appliance if the cable or plug is damaged.
- Ensure that the voltage indicated on the nameplate matches the mains voltage before plugging in the appliance.
- Connect the appliance to a base with an earth socket withstanding a minimum of 10 amperes.
- The appliance's plug must fit into the mains socket properly. Do not alter the plug. Do not use plug adaptors.
- Do not use or store the appliance outdoors.
- If any of the appliance casings breaks, immediately disconnect the appliance from the mains to prevent the possibility of an electric shock.
- Do not use the appliance if it has fallen on the floor, if there are visible signs of damage or if it has a leak.
- Do not use the appliance with damp hands or feet, or when barefooted.
- Never use the electric wire to lift up, carry or unplug the appliance.
- Do not wrap the cable around the appliance.
- Do not touch the plug with wet hands.
Personal safety:
- Take the necessary measures to avoid starting the appliance involuntarily.
- Do not touch any of the appliance's moving parts while it is operating.
- The temperature of the accessible surfaces may be high when the appliance is in use.
Use and care:
- Fully unroll the appliance's power cable before each use.
- Do not use the appliance if its accessories are not properly fitted.
- Do not use the appliance if it is empty.
- Do not use the appliance while the goblet is empty.
- Do not use the appliance if the on/off switch does not work.
- Do not force the appliance's work capacity.
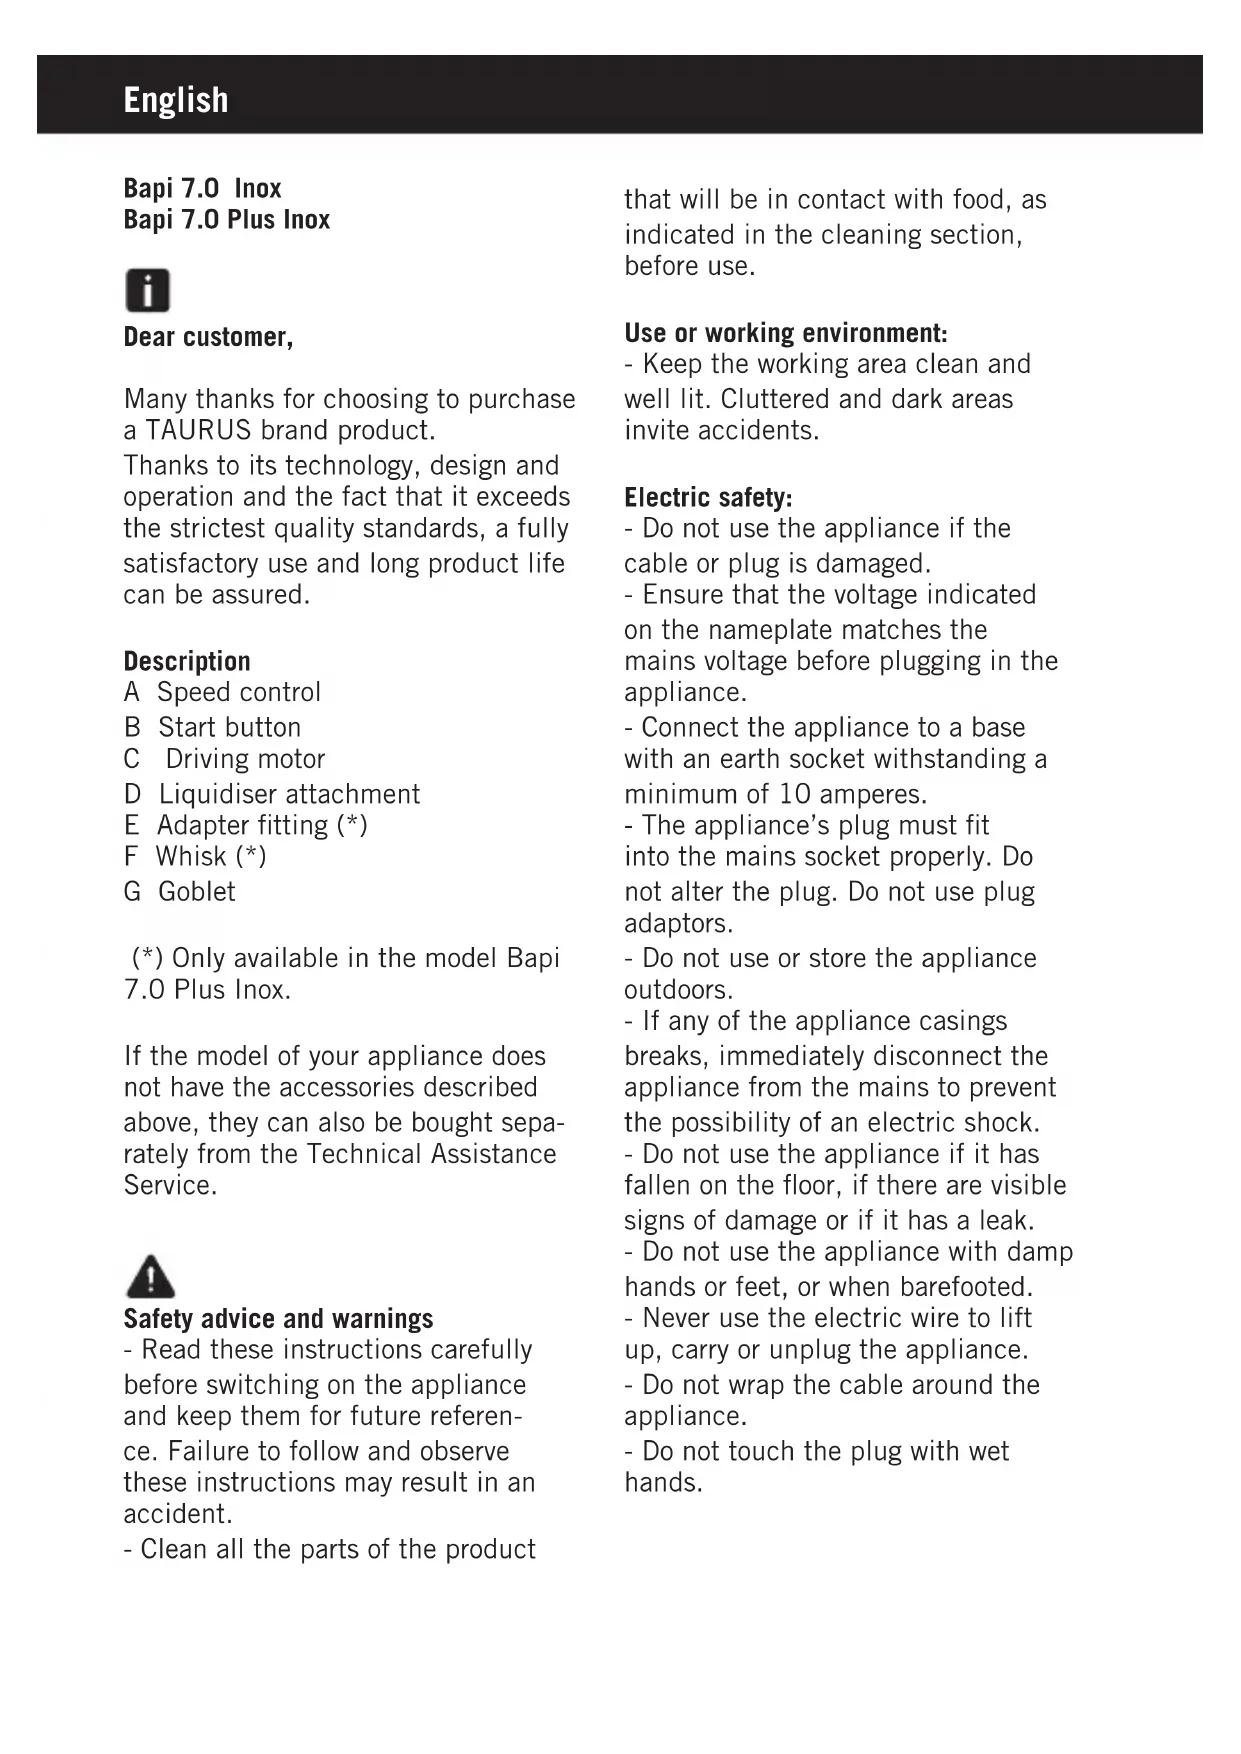
- Respect the MAX level indicator (Fig. 1)
-Do not add a volume of hot liquid greater than half of the total capacity of the goblet, and whenever there are hot liquids inside the goblet ensure that only the slowest speed is used. - Disconnect the appliance from the mains when not in use and before undertaking any cleaning task.
- Unplug the appliance from the mains before replacing any accessory.
- This appliance is for household use only, not professional or industrial use.
- Ensure that this product is not used by the disabled, children or people unused to its handling.
- This appliance is not a toy. Children
should be supervised to ensure that they do not play with the appliance.
- This appliance should be stored out of reach of children and/or the disabled.
- Keep the appliance in good condition. Check that the moving parts are not misaligned or locked and make sure there are no broken parts or anomalies that may prevent the appliance from operating correctly.
- Keep cutting tools well sharpened and clean.
- Do not use the appliance for longer than 1 minute at a time, or to complete cycles lasting more than 5 minutes. In the latter case always ensure rest periods of at least 1 minute between cycles.
- The table adjoined contains example recipes with ingredient quantities and operating times.
- Do not use the appliance on any part of the body of a person or animal.
- In view of the sharpness of the cutting blades, take extra care when adding or removing accessories; proceed cautiously and avoid direct contact with the blades.
Service:
- Make sure that the appliance is serviced only by specialist personnel, and that only original spare parts or accessories are used to replace existing parts/accessories.
- Any misuse or failure to follow the instructions for use renders the guarantee and the manufacturer's liability null and void.

Instructions for use
Before use:
- Make sure that all the product's packaging has been removed.
- Before using the product for the first time, clean the parts that will come into contact with food in the manner described in the cleaning section.
Use:
- Unroll the cable completely before plugging it in.
- Connect the appliance to the mains.
- Work with the food you want to process.
- Select the desired speed.
- Turn the appliance on using the on/off switch.
Electronic speed control:
- The speed of the appliance can be regulated by using the speed regulator control (A). This function is very useful, as it makes it possible to adapt the power of the appliance to the type of work that needs to be done.
Once you have finished using the appliance:
- Turn the appliance off, using the on/off switch.
- Unplug the appliance to the mains.
- Clean the appliance
Accessories:
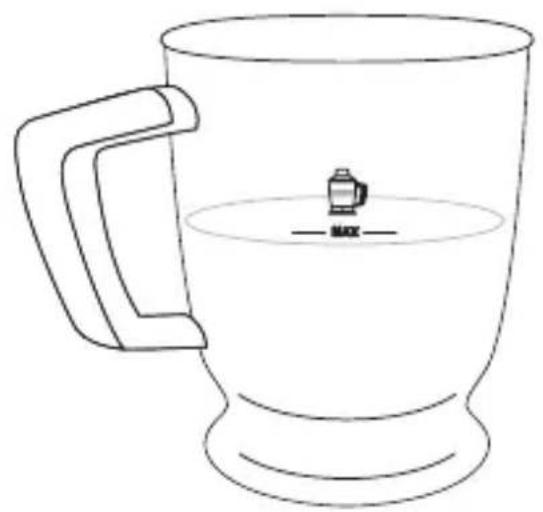
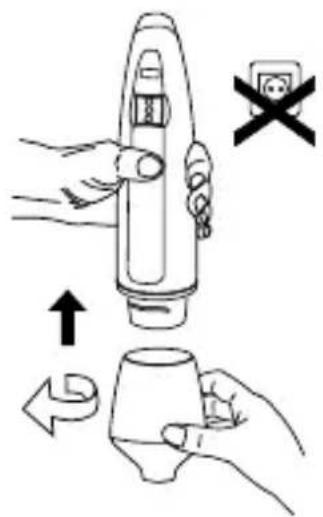
Stick blender accessory (Fig. 2)
- This accessory is used to make sauces, soups, mayonnaise, milkshakes, baby food, crushed ice, etc.
- Attach the stick blender to the motor body by turning it in the direction indicated by the arrow (Fig. 2A).
- Pour the foodstuffs into the sieve and operate it by pressing the start button.
- Detach the stick blender by turning it in the opposite direction to the arrow and remove it for later cleaning.
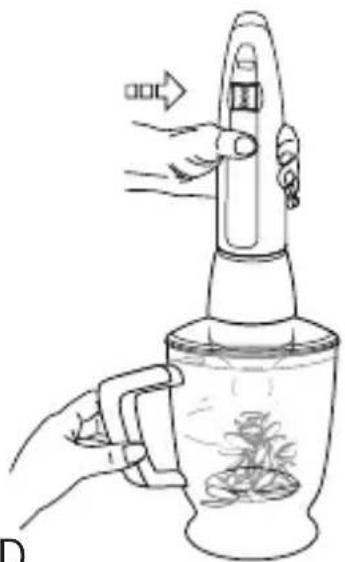
Chopping accessory (Fig. 3):
- This accessory is used to chop vegetables or meat...
- Put the food to be prepared in the chopping container with the blades inside and attach the cover firmly (Fig. 3A).
- Fit the adapter fitting to the motor unit by turning it in the direction of the arrow (Fig. 3B).
- Attach the unit to the cover and switch the appliance on (be careful: do not switch the appliance on if the whole unit is not properly fitted and connected together (Fig. 3C).
- Stop the appliance when the food reaches the desired texture.
- Detach the unit from the lid, and release the adapter fitting (Fig. 3D)
Whisk accessory (Fig. 4):
- This accessory is used to whip cream, beat egg whites...
- Insert the whisk into the reducer assembly (Fig. 4A). Attach this assembly to the motor body by turning it in the direction indicated by the arrow (Fig. 1B).
- Put the food into a large receptacle and switch the appliance on. For best
results, turn the whisk clockwise.
- Remove the whisk accessory and release the adapter fitting (Fig. 4C)
- Note 1: Do not work at high speeds with this accessory attached, as this would cause defects in the whisk (spinning its wires).
- Note 2: To free the whisk (F) from the adapter fitting (G), pull the ring on the whisk.
Safety thermal protector:
- The appliance has a safety device, which protects the appliance from overheating.
- If the appliance turns itself off and does not switch itself on again, disconnect it from the mains supply, and wait for approximately 15 minutes before reconnecting. If the machine does not start again seek authorised technical assistance.

Cleaning
Disconnect the appliance from the mains and let it cool before undertaking any cleaning task.
- Clean the equipment with a damp cloth with a few drops of washing-up liquid and then dry.
- Do not use solvents, or products with an acid or base pH such as bleach, or abrasive products, for cleaning the appliance.
- Do not submerge the appliance in water or any other liquid, or place it under a running tap.
-
During the cleaning process, take special care with the blades, as they are very sharp.
-
It is advisable to clean the appliance regularly and remove any food remains.
- If the appliance is not in good condition of cleanliness, its surface may degrade and inexorably affect the duration of the appliance's useful life and could become unsafe to use.
The appliance is suitable for cleaning in hot soapy water or in a dishwasher (using a soft cleaning program):
- Goblet
- Whisk
- Liquidiser attachment
- The draining/drying position for washable parts in dishwashers or after washing by hand in a sink must allow for water to drain easily (Fig. 5).

Anomalies and repair
- Take the appliance to an authorised technical support service if problems arise. Do not try to dismantle or repair without assistance, as this may be dangerous.
- If the connection to the mains has been damaged, it must be replaced and you should proceed as you would in the case of damage.
For EU product versions and/or in case that it is requested in your country:
Ecology and recyclability of the product
- The materials of which the packaging of this appliance consists are included in a collection, classification and recycling system. Should you wish to dispose of them, use the
appropriate public recycling bins for each type of material.
The product does not contain concentrations of substances that could be considered harmful to the environment

This symbol means that in case you wish to dispose of the product once its working life has ended, take it to an authorised waste agent for the selective collection of
waste electrical and electronic equipment (WEEE)
This appliance complies with Directive 2006/95/EC on Low Voltage and Directive 2004/108/EC on Electromagnetic Compatibility.
| Preparation of foodstuffs | |||||
| Recipe | Accessory recommended | Speed Quantity | Preparation Time | ||
| Mayonnaise |  | 2 | 250 ml | Put 1 egg in the jug with a pinch of salt and some drops of vinegar or lemon. Add oil until the indicated level. Turn the appliance on without moving until the oil binds. | 35 s |
| Fruit smoo-thies |  | 8 | ---- | Add fruit and activate the blender until the mixture has a smooth consistency. | ---- |
| Béchamel sauce | [5SH4] | 4 | 600 ml | Melt 30 gr. of butter in a pan on a slow heat. Add 100 gr. of flour and 30 gr. of fried onions (already cut up with the slicer). Slowly add 500 ml of milk. | 15 s |
| Crushed ice | [SW4C] | 10 | 4/6 cubes | Put the ice cubes in the jug and crush by exerting pressure on each ice cube | 15 s |
| Whipped cream | 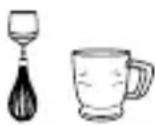 | 2-4 | 250 ml | Pour the cold liquid cream (0-5°C) into a jug and turn on the blender in a clockwise direction. It is recommended to set the blender to speed 2^a and when it begins to thicken up increase to speed 4^a . Be careful not to go over the time as the cream will turn into butter | 2 min |
| Stiff egg whites | 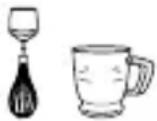 | 2 | 5 whites | Pour the egg whites into a jug and activate the blender. Mix in a vertical motion until the egg whites become stiff. | 1,5 min |
| Mashed potato | [2ST0] | 10 | 400 g | The potatoes can be sliced by activating the blender directly in the saucepan directly. | 30 s |
| Baby food: fruit and biscuit mush | [WW4W] | 10 | 300 g | Cut up and place 100 gr. of apple, 100 gr. of banana, 50 gr. of biscuits and the juice of one orange in the jug. | 25 s |
| Bread crumbs 10 | [4S0Z] | 50 g | Cut up the stale bread before putting it in the jug. Blend until the desired texture is obtained. | 1,5 min | |
| Recipe | Accessory recommended | Speed Quantity Preparation Time | |||
| Grated cheese |  | 10 | 200 g | Dice the cheese into 1 cm chunks and blend until the desired texture is obtained. | 30 – 50 s |
| Sliced carrot 10 |  | 300 g | Peel the carrots and dice into 1 cm chunks. Chop until the desired texture is obtained.. | 30 s | |
| Ground nuts 10 |  | 300 g | Remove the shells and grind until the desired texture is obtained | 30 s | |
| Cut into quarters and chop until the desired texture is obtained. | 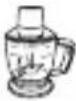 | 10 | 5 eggs | Cut into quarters and chop until the desired texture is obtained. | 10 s |
| Chopped meat (raw or cooked) |  | 10 | 300 g | Dice the meat into 1 cm chunks. Chop until the desired texture is obtained. | 30 s |
| Chopped meat |  | 10 | 40 g | Dice the meet into 1 cm chunks and chop until the desi-red texture is obtained | 3 s |
| Chopped Spanish Serrano ham |  | 10 | 60 g | Dice the ham into 1 cm chunks. Chop until the desired texture is obtained. | 3 s |
Bapi 7.0 inox radikal Bapi 600 plus inox radikal

Cher Client,


- Bapi 7.0 Inox
- Bapi 7.0 Plus Inox
- Description
- Safety advice and warnings
- Use or working environment:
- Electric safety:
- Personal safety:
- Use and care:
- Service:
- Instructions for use
- Before use:
- Use:
- Electronic speed control:
- Once you have finished using the appliance:
- Accessories:
- Stick blender accessory (Fig. 2)
- Chopping accessory (Fig. 3):
- Whisk accessory (Fig. 4):
- Safety thermal protector:
- Cleaning
- Anomalies and repair
- Ecology and recyclability of the product
- Bapi 7.0 inox radikal Bapi 600 plus inox radikal
- Cher Client,
Brand : TAURUS
Model : Bapi 7.0 Plus Inox
Category : Blender