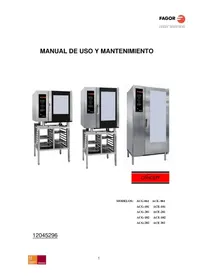
6H414AX - Electric oven FAGOR - Free user manual and instructions
Find the device manual for free 6H414AX FAGOR in PDF.
| Product Type | Built-in Electric Oven |
| Brand | Fagor |
| Model | 6H414AX |
| Power Supply | 220-240 V ~ 50 Hz |
| Cooking Functions | Traditional cooking, Traditional fan cooking, Turbo plus, Large grill, Large fan grill, Small grill, Bottom intense, Bottom fan, Defrosting, Celeris (quick preheat) |
| Cleaning Type | Self-cleaning catalytic walls, Aquasiding function (steam cleaning) |
| Included Accessories | Multifunction grid, Deep tray, Flat tray, Partial or full extraction grid (depending on model) |
| Maximum Temperature | 250 °C |
| Controls | Conventional or digital clock, Timer, Child lock |
| Safety | Child lock, automatic safety shut-off, cool door |
| Installation | Built-in, electrical connection via fixed socket with grounding |
| Number of Shelf Positions | 5 positions |
| Cavity Material | Self-cleaning enamel (rough walls) or smooth depending on version |
| Lighting | Interior lamp |
| Energy Class | Not specified |
| Dimensions (W x H x D) | Approx. 59.5 x 59.5 x 55 cm |
| Weight | Approx. 30 kg |
Frequently Asked Questions - 6H414AX FAGOR
User questions about 6H414AX FAGOR
0 question about this device. Answer the ones you know or ask your own.
Ask a new question about this device
Download the instructions for your Electric oven in PDF format for free! Find your manual 6H414AX - FAGOR and take your electronic device back in hand. On this page are published all the documents necessary for the use of your device. 6H414AX by FAGOR.
USER MANUAL 6H414AX FAGOR
Important! Read the entire manual before using the oven. The documentation and accessories are inside the oven.
The texts in the manual correspond to the numbered diagrams.
Safety

Important
Keep this manual with the appliance. If you sell or give the appliance to another person, make sure you also pass on the user manual. Read these instructions carefully when using and installing the appliance. They are designed to protect your own and others' safety.
- The electrical installation that feeds the oven must have circuit breakers installed in accordance with current local installation regulations.
- The oven must be installed by an authorised installer in accordance with the manufacturer's instructions and diagrams.
- The electrical installation must be dimensioned for the maximum power indicated on the reference plate and the electrical socket must have a regulatory earth connection.
- If the power cord is damaged, it must be replaced by the after-sales technical service or by similarly qualified staff, to avoid hazard.
- Ensure the appliance is unplugged from the mains before replacing the oven lamp, to avoid electric shock.
- Do not use abrasive cleaning products or metal scouring pads to clean the oven door, as they could scratch the surface and cause the glass to shatter.
- During operation, some accessible parts may become hot.
Children under the age of 8 must not go near the appliance unless under permanent supervision.
- Do not touch the heating elements inside the oven.
- This appliance can be used by children aged from 8 years and above and persons with reduced physical, sensory or mental capabilities or lack of experience and knowledge if they have been given supervision or instruction concerning use of the appliance in a safe way and understand the hazards involved. Children shall not play with the appliance. Cleaning and user maintenance shall not be made by children without supervision.
- This appliance is designed for normal household use only. Do not use it for commercial or industrial purposes. Use exclusively for cooking food products.
- Do not try to modify the characteristics of the appliance. It could be dangerous.
- During cleaning by pyrolysis, surfaces become hotter than during normal use. Keep out of reach of children.
- Before cleaning with pyrolysis, remove all cooking items and signifi cant overflows.
- Do not put heavy weights on the oven door and make sure that children do not climb or sit on it.
- Always make sure that the oven is switched off before cleaning.
- After using the oven, make sure that all the controls are in the off position.
- Do not use the oven as a larder or to store accessories after use.
- Do not use steam or high pressure devices to clean the device (electrical device safety reasons)
- The oven door should always be kept closed when working, for all programmes, including the grill.

Identification

To find out which model your oven is ("a", "b", "c", "d", "e", "f") compare its control panel with the control panels shown in the illustrations.
1
Installation

1.1 Unpacking. Remove all the protective packaging elements.
1.2 Mains connection. Always take into account the data on the reference plate (1.2.1) and the measurements of the cabinet the oven will be housed in (1.2.2, 1.2.3).
Freestanding ovens: the appliance must be connected to the mains with a fixed single-phase connection with the neutral (blue) connection guaranteed (1.2.4). Fit the oven into the space, ensuring there is no excess cable in the upper part (1.2.5, 1.2.6). Screw it to the ftting using the two screws supplied (1.2.7). The fitted furniture or its surface must be heat-resistant. The time must be set in order to finish the installation (a, c, d, f). After a period of inactivity, the machine will turn to standby and its brightness will diminish or the screen will switch off, depending on the model.
Multi-purpose ovens for vitro-ceramic
hobs: to avoid hazard, the oven may only be installed with the vitro-ceramic hobs recommended by the manufacturer. Fit the cooking hob into the worktop and remove the switch box (1.2.8). Insert the hob in the worktop space according to the installation requirements (see the hob manual) (1.2.9). Insert the oven into the cabinet space, leaving enough room for handling (1.2.10). Screw the switch box onto the oven (1.2.11, 1.2.12). Connect the hob to the oven (1.2.13). Fully insert the oven and fix it in place with the two screws supplied (1.2.14, 1.2.15). Firmly push in the control accessories, according to the cooking ring type (1.2.16), and the controls (1.2.17).

Using the oven

Before using your new oven for the first time, heat it up while empty (with no food in it and with the control turned to , at for 30 minutes at 250^ ). It may produce some smoke or a bad smell (this is normal and is caused by the oven heating up grease residue etc.). When it has cooled down, pre-clean it by wiping the inside with a damp cloth.
2.1 Accessories. Depending on the model there is a Deep Tray (2.1.1), Flat Tray (2.1.2) and Multifunctional Grill (2.1.3) that work separately. If it also possible to combine either tray with the Multifunctional Grill (2.1.4) to make a set. All the accessories or sets can be used directly or mounted on the Partial Extraction Grill (2.1.5) or the Total Extraction Grill (2.1.6, 2.1.7), (2.1.8). If you have the partial extraction tray, it can be used separately or together with trays (3 types) (2.1.9). The Simple Grill is used separately (2.1.10). If you have telescopic rails, remove the tray before installing them in the oven (2.1.11). The telescopic rails extend automatically due to the weight of the tray when the oven is opened (2.1.12). Food must always be placed on a tray on the telescopic rails (2.1.13). Bear in mind the position of the grills when installing them. There are anti-tipping stops at the sides (2.1.14).
2.2 Accessory positions. The accessories can be fitted in 5 different positions,
2.3 Setting the time. Ordinary clock: Pull on the lower dial and turn it to the right (2.3.1). Set the time (2.3.2). Digital clock: press the button. (2.3.3). Set the time using the and buttons (2.3.4). After a few seconds will stop flashing (2.3.5).
Note: the time will need to be set again after an electricity cut or when the hour changes.
2.4 Cooking the food. Place the food in the oven. Consult the cooking table to choose the accessory or accessories to be used and their position. Close the oven door.
2.5 Selecting the cooking function.
Select the cooking function according to the model

Traditional fanned heat. For any kind of dish. Several dishes may be cooked at once without their flavours or smells mixing.

Turbo plus. The heat is produced by the central element.

Fanned high grill. This browns the food, distributing the heat evenly. Ideal for large-sized roasts.

High grill. For browning pasta, soufflés and bechamel sauce.
Low grill. For hamburgers, toast and food with a small surface area.
High base heat. The heat from the oven base is evenly distributed. Ideal for paellas or pizzas.
Fanned base heat. The fan distributes the base heat evenly. Suitable for paellas.
Traditional heat. For bread, cakes, cakes with filling and lean meat.
Defrost. Rapidly thaws any kind of food.
Celeris. For pre-heating the oven.
2.6 Selecting the temperature ^ C . Select the temperature by turning the selector dial. The pilot light will switch off when the selected temperature is reached.
TIME FUNCTIONS
2.7 Selecting the cooking time. Timer: select the minutes by turning the selector dial. (2.7.1). If you prefer the oven to function without a time limit, turn it to hand position
Ordinary clock: Turn the upper dial to the right and select the minutes (2.7.2). If you prefer the oven to function without a time limit, turn it to hand position and line up the red arrow with the time shown by the hands of the clock.
Digital clock: press the button. will start to flash (2.7.3). Adjust the duration using the + and - buttons (2.7.4). will stop flash after a few seconds.
2.8 Selecting the start time.
Ordinary clock: When you have selected the programme and the temperature, turn the upper dial to A. Then pull on the upper dial and turn it until the red arrow shows the start time (2.8.1). Select the duration by turning the upper dial to the right.
2.9 Selecting the end time.
Digital clock: after selecting the programme, temperature and cooking time, press the button. will start to flash (2.9.1). Set the desired end of cooking time by pressing the + and - buttons (2.9.2). will stop flashing after a few seconds.
2.10 Beeper function.
Ordinary clock: Select the position 0 on the programme dial (2.10.1). Turn the upper dial to the right and select the minutes (2.10.2). This only works if the oven is switched off.
Digital clock: press the button several times. will start to flash (2.10.3). Adjust the duration using the + and - buttons (2.10.4). will stop flashing after a few seconds. This works with the oven switched off and switched on.
2.11 Child lock. To prevent children from playing with the oven.
Ordinary clock: Turn the upper dial to select A.(2.11.1)
Digital clock: press the + and - buttons
at the same time and hold them down for 3 seconds. will appear on the display (2.11.2). To remove the child lock, repeat the process.
Warnings: when the cooking time has elapsed, turn the function and temperature dials to 0 and the time dial to hand position. Open the oven door, taking care as hot steam may come out.
3
Maintenance and cleaning

3.1 Cleaning the accessories. The accessories are dishwasher-safe. To wash them up by hand, use normal detergent. Leave them to soak for easier cleaning.
Cleaning the inside of the oven.
3.2 Smooth-walled models. ake out the side runners. Depending on the models, the side runners are fixed in two ways, either without a support (3.2.1, 3.2.2) or with a support (3.2.4, 3.2.5). Clean the oven while it is warm, wiping the walls with a cloth soaked in hot soapy water (3.2.3, 3.2.6). When you have cleaned the oven walls, replace the runners.
3.3 Self-cleaning rough-walled models. On these models, the rear plate and side panels are covered with a self-cleaning enamel that removes the grease while the oven is functioning. The side panels are reversible, doubling the lifetime of the coating.
To remove the self-cleaning panels, firstly remove the side rails.
If the panels are not performing the selfcleaning process sufficiently, they will need regenerating. To do this, remove all the accessories and utensils from the inside of the oven. Thoroughly clean the oven surfaces that are not self-cleaning. Select the function.
Set the temperature to 250^ and set the time between 30 and 60 minutes, depending on how dirty the oven is.
When the cleaning programme ends and the oven has cooled down, wipe the selfcleaning elements with a damp sponge. They will then be totally functional again. Note: Do not use specific oven cleaning products to clean the catalytic walls.
Do not scrape the surface with metal scouring pads or sharp or pointed instruments.
3.4 Cleaning the oven ceiling. If your oven has a fold-down grill, pull upwards and press to fold it down (3.4.1) and clean the top wall with a damp cloth (3.4.2).
3.5 Cleaning the outside of the oven. Use
neutral cleaning products and dry the oven well with a soft cloth.
3.6 The Aquasiding Function system makes it easier to clean the oven with steam. It takes 35 minutes and is done as follows:
-
Start with a lukewarm oven.
-
Remove all accessories and side guides from the model.
-
Spray 200ml of water onto the inside walls of the oven. Using too much water could cause overflow.
Depending on the model, a) Aquaslading wait until the oven indicates the end of the cleaning cycle.
b) Traditional t 150^ for 10 minutes. After this time has elapsed, reduce the temperature to minimum (35^ - 75^ according to the model) and maintain for 20 minutes. Failure to follow these instructions may cause condensation on the front.
-
Switch the oven off.
-
Carefully open the oven door, avoiding contact with the steam.
-
At the end of the cycle, remove the water from inside and wipe away any remaining dirt with a dishcloth. This cycle is used to assist cleaning but loses its effectiveness if the recommended times are not followed.
-
Depending on the model, it can assist the Warning function.
Warnings: 1. Make sure the oven is switched off.
2. Never use steam cleaning machines.
4
Troubleshooting

You can solve the following problems yourself:
4.1 The oven does not switch on. Check it is plugged in and that the time selector dial is not turned to 0.
4.2 Smoke comes out during cooking. Tum the temperature down and/or clean the oven (point 3.3).
4.3 The oven makes a noise after cooking. This is normal, as the fan keeps running until the temperature inside and outside the oven is reduced.
Digital display models have a diagnosis system which detects any problems and warns the user. You can see this on the display:
4.4 Oven not working. fl ashing. Turn the function selector dial to 0 and set the time (point 2.3).
4.5 Oven not working. flashing. The oven has been working for several hours and for safety reasons it has switched off
automatically. Turn the function selector dial to 0 and set the time (point 2.3).
4.6 Oven not working. is fl ashing. Turn the function selector dial to 0 and remove the child lock (point 2.11).
4.7 Oven not working. l is flashing. Press any button.
Do not try to repair the oven yourself. Call the technical assistance service.
5
The Environment

This oven has been designed with environmental protection in mind.
Respect the environment. Only preheat the oven when necessary (see table). Use dark coloured cake tins whenever possible. For long cooking times, switch off the oven 5 or 10 minutes before the end of cooking time.
Management of waste electrical and electronic equipment.
The symbol indicates that the appliance must not be disposed of in traditional bins for domestic waste.
Take your oven to the a special collection centre. Recycling domestic appliances will prevent negative consequences for health and the environment and will allow savings on energy and resources.
For further information, contact the local authorities or the shop where you bought the oven.
Cooking Table
| meat and poultryvege | Food | Programme and temperature | Time | Position | Preheat | Accessories | |
| beef 1,5 Kg | 190°C | 210°C 50 - 60 min no | 1 | ||||
| pork 1,5 Kg | 150°C | 180°C | 85 - 95 min | 2 | no | ||
| lamb 1,2 Kg | 200°C | 220°C | 40 - 50 min | 2 | no | ||
| turkey 4 Kg | 170°C | 190°C | 115 - 125 min | 1 | no | ||
| chicken 1,25 Kg | 210°C | 230°C | 50 - 60 min | 1 | no | ||
| roasted red peppers 1,25 Kg | baked hake/baked cod 1,5 Kg | 190°C | 210°C | 30 - 40 min | 2 | no | |
| stuffed tomat-oes 4 servings | stuffed tomatoes 4 servings | 200°C | 220°C | 15 - 19 min | 2 | no | |
| baked hake/baked cod 1,5 Kg | baked hake/baked cod 1,5 Kg | 210°C | 230°C | 7 - 9 min | 2 | yes | |
| roasted lobster 1 Kg | lobster 1 Kg | 220°C | 240°C | 4 - 5 min | 4 | yes | |
| pizza | pizza | 200°C | 220°C | 18 - 22 min | 1 | yes | |
| defrosting, all types of food | defrosting, all types of food | 75°C | 2 | no | |||
| Fermenting dough for bread/cakes | fermenting dough for bread/cakes | 40°C | 40°C | 25 - 30 min | 0 | no | |
| 8.4.1 Butter cookies | 175°C | 22 min | 3 | yes | Deep Tray | ||
| 8.4.2 Fairy cakes | 185°C 23 min | 2 | yes | Deep Tray | |||
| *160°C 45 min | 3 | no | Deep Tray/standard | ||||
| 8.5.1 Fat-free sponge cake | 180°C 25 min | 1 | no | Mould on grill | |||
| *180°C | 40 min | 3 | no | 2 moulds on 1 grills and deep | |||
| 8.5.2 Apple tart | 185°C | 40-45 min | 2 | no | Grill | ||
| *180°C | 50-55 min | 3 | no | 2 moulds on 1 grills and deep | |||
| 9.1 Surface browning | *250°C | 2-3 min | 4 | Pre-heat for 5 min | Cook 2-3 min. on grill | ||
- Depending on the model.
Bedienungsanleitung
2.11ФyHKU6IbOKpOBKn:HTObI DeTn He MOrnn MaHInTyNpOBaTb C DxyOBKoN.
06bHbIe Yacb:BpaaTaB BepXIOO pyKy Do TcNop, noka He 6ydt yctaHOBeHO . (2.11.1)
LcHpObBie yacbl: HaxmMaTe B TeHeHne 3 cekyHd OHOBpeMeHHo KlaBnU+ ,-N OTobpa3NTc3HaOK (2.11.2).ДЯ pa36NoKIpOBKn NOBtOpHTe ONepaunIO.
IpeynpexeHne: Io OKOHaHm BpemHn pnproTOBHeHnyCTAHOBITE nepeKIOUaTeHn cyHKuN n TEMepaTpybI B noJoxHe 0,a nepeKIOUaTeHb BpemHn Bno3uNo pyHoro ynpabHeHn .OTKpbBaIte oCtOPOXHO DBepydyxOBKn, TAK KAK OTTuDa MoKeT BbIPBaTc RopAHy nap.

YxOu n ynctKa

3.1 YnCTKa DOnONHmTeJbHbIx npCnocO6neHm.
Bce npncnoc6bHeHn npnoDhbl nI MytBn B nocydomoeyho MaHne. Pn uCTKe BpyHyIO nCNOb3yTe 0bUHbE MOUe CpeCTBa. TTo6bI O6JIeHTb NcTky npncnoc6bHeHn, INMOxHO npdBaPteJIbHO 3amOHTb.
HcTka BHTpeHHHe NOBepxHOCTn KamepbI dYXOBKn.
3.2 MoJIcI cIraKIMn CTeHkAMn. HeO6xOIMMO CHATb 60KOBbIe HAnpaBIAIOUne. B 3aBcIMMoCTn OT MoJIeN dXoBOrO WkaFpa 60KOBbIe HAnpaBIAIOUne MOryT KpeINTBcA ODNHM IN3 DByx CnOCo6OB: 6e3 OnOpbl (3.2.1, 3.2.2) mN cOnopoi (3.2.4, 3.2.5). DxyoBky cNeJyET MbITb CnEgKa HArPeToi, npOMbIBaR TANKy rOpHey BOdON MOIOUM CpeCDtBOM INN MblON (3.2.3, 3.2.6). IocNE 3aBePseHn PpOeDpybl OuNCTKn CTehOK HApBaBIAIOUne CNeDeYET YCTaHOBnTb Ha MeTO.
3.3 MoJIcpeJIbeΦHbIMnCTeHkAMn (camoouuaouneca).BdyxOBkax TaKHX MOJIeN 3aDHRAI60KOBbie naHEJIIOKpbITbI camoouauouece3MaJIbIO,6laOdaPryMyXIp ydaJIHTcCO CTeHOK BO BPEMpaBOI pnp6opa. BoKOBbie naHEJI MoxHO IpeBopauHBaTb Ha DpyrHyo CTOpOHy, YTO IpOJaNEBaET cPOK ClyXbI ObluOBOHOrO CNoR B Dba pa3a.
Korda nane nepectaHT obecneHbTaDbocTaOHyIO
OuCTy 3a CHT CBOUX CBOICTB, HEOXOIMO
npou3BcTn ux perehepaunio. Iy 3TOrO u3 uka pa Hyxho N3BvneB BCE npHaJNeXHOCTN EMKoCTn.
Iocne 3TOrO TuaTeJIbHO OoHCTnTB NOBepxHOCTN
IyXOBKn, He ABJNIOUINCECA CAMOONIIAOUINMNC. 3aTEM
3aДaItepeKIM
YctaHOBtTe TEMnepaTpy Ha ypOBHe 250 ^ N BpEMr
BДипаэоhe 30-60 MInHyT B3aBnCmOCTN O TcTeHn 3aRpy3HeHHoCTn np6opa.
TTOKAPorpmaOHTK3aBepnT
paBOy n DxyOBKa OCTbIHET, CaMOOHuaOuIuecH
3IeMeHTbI Heo6xO.ImO IpotepeTb BlaXHOI r6koI.
Ito3aBepeHn 3ToI npOeJepybIOHn pIoNHOCTbIO
BOCCTaHaBJIbAHT CBOIO IIPIROJHOCTb K3KJIpyTa
3.4 Ynctka notonka.Ecn nyxOBKa NmeeT CbeMbH
rpnIb,To HJxHIO npnOAnHTb erO,HaKaTb Ha Hero n
BbIHyTb Bn3 (3.4.1), nOuCTHTe BepXHOIO CTENKy BlaJxHoi TpAknKoI (3.4.2).
3.5 Ynctka HapyKbIX NOBepxHOCTeI dYXOBKn.
IcnoIb3yIte HeITpAlbHbIe MOIOUme CpeIcTBA,
XopoIO BoBITpIte DyXOBky KycKOM MAnKoT KaHn.
3.6 PexkM Aquasiding. 3TO peXIM, oBnErYuAoUsm
YnCTKy DuyxOBOrO WkaFa 3a CcET NcNoIb30BaHnA
BODAHorO napa.ДиTeJIbHocTb pa60tbi npi6oBa B 3ToM
pekimecoctabnreT35MnHyT,noHNCNoJb3yeTC
CNEyUOIMo6pa3OM:
- Ynctky duyxOBoro shkaopa Heo6xoJIMO HaunHaTb,
Korda OH TeNbl.
- N3BJeCb BCE npHuaNdxKHOCTn 6OKOBBe
HappaBJIHOUINE (B 3aBNCIMOCTN OT MOeJIIN).
Pa36pb3raTb npBBePn3aTopoM 200 Ml BObl Ha
BHYTpEHHne CTeHKn uKaΦa. △Pn N36bIToCHOM
B 3aBcHMOCTN OT MOdJI,
a) Aquaslading. IdoJxIte, noka dyoXOBoi
KkaΦ He Coo6uNT O 3aBepWeHn Lkna
OHTKIN.
b) 乌布尼Hn npT TemnepaType 150°C Ha 10
MnHyT. IIO nCTeUHeHn yKa3aHHOro BpeMeHn
yCTaHOBNTb TEmpePaTy pHa MmHmMaJIbHO
3NaueHn(OT35do 75^ B3aBNCMOCTN
OTMOENI)NdaTb np60py npap60TaTb 20
MnHyT. Pnp Heco6IIOJeHmN 3TINx yKa3aHn Ha
IpeDHeN CTeHKe MoKTe O6pa3OBbIBaTbCn
KOHdEHCAT.
-
BbIKIOuHTb dyXOBoB ukaΦ.
-
Octopoxho OTkpBtB DBepu uKaopa, cneIa 3a TEM, yTo6bI He o6KeuCn napOM.
-ПоЗаBERPseHIN ZIKJa YNCTKN y6paTb n3 WkaFa BOy N BbItepeTb OCTaTKn 3aRpa3HeHn TpRKnKoJ.
3TOT BCNOMORAteJbHbI cIKnI dIy ONUCTKIN
YtpaunbaeT 0fpeKtNBHOCTb,ecnN YCTKa
BbINOJIHReTc6eCobIOJDeHHyYka3aHHbIX
3HaueHnBpeMeHn.
*B3aBnCIMoCTNOTMOJeIN B KaueCTBe
BCNOMOraTeJIbHOJ MOKET NIOJIb30BaTbCpHKLUN
npedynpexKeHEnn.
PepdynpexdHn:1.YoCTOBeBbTcB TOM,TO DyXOBKa
HaxoDHTCByHepa6OtaIOUeM COCTOHHN.2.HNKOrda He
NIOJIb3yIte npoBbe OuHCTInTeIM.
PpO6JIeMbI
HeKOTOpBIE npOJIeMbI BbIMoKTepeWHTb CaMl.
4.1 DuyxOBKa He pa6oTaE. YIOCTOBepeBTEcB B TOM,TO
DyXOBKa NOkJIIOHeHa K CETn N/INN YTO NepeKJIIOUaTeJIb
BPEMEHN He HAXOINTCB INIOJOXEHMN 0.
4.2 Bo Bpem npiroTOBnHn NOBnAETcIbIM.
YmehbIHTe TEMnepaTyPy w/nnIN NOuNCTNe DyXOBky
(πγκτ 3.3).
4.3 DyXOBKa npOn3BODnT wM, KOrDa npnroTOBHeHne
Yxke 3aBepweHo. 3TO HOPMaJIbHOE RAJIeHHe, BEHTIJIrTOp
npoJnJaet paOtaTb, TOb6bI NOHIm3ntb Tempeatypy
BHTPNI CHApyKIN DxyOBKN.
MoJeIN CzPpOBbIM DcNpIeem Cha6KeHb CnCTEmO
DnarHocTNK, nO3BOJRAUeIe ObHApyXNBaTJIIOBle HeNoJaIKN
I CnHnHaJIIN3NIOBaTb O HNX. 3TO OTo6paXaTeTc Ha IINCIIeE.
4.4 DyxOBka He pa6oTaet. Mraet 3haQok [O]. YcTaHOBnTe
IpeekJIOUaTeJIb cyHKmB nOJooKeHne OyCTaHOBInTe
Tekyuee Bpem (nykT 2.3).
4.5 DyXOBka He pa6oTaet. Mraet 3HaouK []. DxyOBka
pa6oTanaB TeueHHe HecKoJIbKHX YaCOB N aBTOMaTHUeCKN
OTKIOUHINaBДЯOBScneYeHn6Be3OpaNCHOCTM.
UctahOBHTepeKIOuateIb cyHKmB NOLOXeHne 0 n
yctahOBHTeTeKyuueBpEma(nyHKT2.3)
4.6 DuyxOBka He pa6oTaE.Miraet 3Haayok | - .YCTaHOBtE
pepekIyauTeJIb cyHKuB nIOxKeHne O n CHIMITE
6JoknpoBky (nyHKT 2.11).
4.7 Duyxobka He pa6oTaet. Miraet 3haOK
JIIO6yIO KlaBnIy.

He npo3BODnte CdyxOBKoHnKaHX MaHnYIaui,
CBXITcB COTDeIOM TEXO6CnyXnBaHNA.

Okpyxauo
cpeda

KoHCTpykunnydxyOBKnOCHOBaHaHa npnHua
3aunTbOkpykaouei cpebl.
Co6IouaIte npHunIbI 3auTbI OkpyKaIOuei
cpebl. PpOn3BODnTe npEbnapntelbHoe HarpBaHne dYXOBKN, TOnbKO eCm 3TO Heo6xoDmO (CM. TaJnUy).
PnDInTeBHOpaBoTe DxOBKn BbIKIOaHTe e3a5-10 MNHT Do yCTaHOBNEHORo BPemH.
Ipo6Jema OTPa6OtaHHbIX 3neKtpnuecknx H
3JIeKToHHbIX annapaTOB.

0603haeHne
yKa3bIbaeHTaTO,TO daHHbI
Pn60 HEnb3a Bbl6paCbIbTaB 06bIhIe KOHTHeHepb
Ta6nca npiroTOBJeHna