BabyDuck WA210 - Washing machine Soba - Free user manual and instructions
Find the device manual for free BabyDuck WA210 Soba in PDF.


| Product type | Washing machine |
| Brand | Soba |
| Model | BabyDuck WA210 |
| Washing capacity | 3.6 kg |
| Dimensions (H x W x D) | 76 x 51.5 x 42 cm |
| Net weight | 50 kg |
| Rated voltage | 230 V ~ 50 Hz |
| Current | 7 A |
| Total power | 1500 W |
| Motor power | 300 W |
| Heating power | 1200 W |
| Spin speed | 600 rpm |
| Temperature range | Cold water to 60 °C |
| Required water pressure | 0.5 to 10 bar |
| Wash programs | 6 programs (P1 to P6): intensive colors, normal, easy care, delicate/wool, brief, express |
| Special functions | Anti-spin, Anti-crease |
| Safety | Door lock, automatic stop in case of problem, do not use with damaged cord |
| Maintenance | Clean with damp cloth; leave door slightly open after use; do not use detergent or solvent |
| Repairability | Do not repair yourself; contact authorized after-sales service |
| Spare parts | Available from after-sales service on request |
| Warranty | 2 years from delivery, subject to conditions stated in the manual |
| Usage | Domestic only |
| Electrical connection | Mandatory earth socket, without extension lead |
| Installation | On flat, hard floor, remove transport screws before use |
| User manual | 28 pages, available in several languages |
Frequently Asked Questions - BabyDuck WA210 Soba
User questions about BabyDuck WA210 Soba
0 question about this device. Answer the ones you know or ask your own.
Ask a new question about this device
Download the instructions for your Washing machine in PDF format for free! Find your manual BabyDuck WA210 - Soba and take your electronic device back in hand. On this page are published all the documents necessary for the use of your device. BabyDuck WA210 by Soba.
USER MANUAL BabyDuck WA210 Soba
natural_image
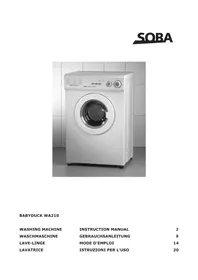
White SOBA BabyDuck WA218 washing machine with front panel and control buttons, displayed against tiled wall (no visible text or symbols on device body)BABYDUCK WA210
WASHING MACHINE INSTRUCTION MANUAL 2
text_image
Control panel Detergent drawer Handle Loading door Mains cord Water inlet Drain hoseIMPORTANT SAFETY MEASURES
All electrical appliances should be handled with care. Certain fundamental safety precautions are essential to avoid the risk of fire, electric shock or injury. In particular, always observe the following
Read the instructions through before using this appliance for the first time.
- Do not use the appliance if the mains cable is damaged. If it is damaged, it must be replaced by a qualified electrician to avoid all risk of electrical shock.
- Always shut off the water supply and disconnect the power supply after using.
- Always make sure the appliance is disconnected before cleaning.
- Use a damp cloth or a proprietary window cloth to clean this appliance. Never use detergent or solvent for cleaning.
- Use the appliance without a cable extension.
- To avoid all risk of electrical shock do not use this appliance with wet hands or with bare feet on a damp surface.
- Do not use the appliance out of doors or in a damp place.
- Do not move the appliance when it is full to avoid water slopping over
-
The mains cable must be plugged into a correctly earthed socket. Never tug at the cable to remove the plug. Hold the plug firmly to pull it out of the socket
10 Never lift the appliance by the mains lead.
11 Never try to repair, regulate or replace parts of this appliance yourself. Contact the after sales service at once if anything is not working properly.
12 This appliance is designed for domestic use, it should on no account be used professionally
13 Do not exceed 3.6 kg of washing per wash.
14 The door cannot be opened for 2 to 3 minutes after the end of each wash. Before opening it is advisable to look through the door to check that the water has run off completely. If this is not the case, consult the section V "troubleshooting".
15 Never wash articles that are not machine washable. Follow the washing instructions on the label of each item of laundry. -
Empty any pockets that could contain coins, screws or other objects that could damage the washing or the machine.
- Put small items like socks in a washing bag or a pillow case to ensure they cannot get trapped between the tub and the drum.
- Use a low foaming, high quality detergent. Never exceed the quantity recommended by the detergent manufacturer. Using too much detergent is not good for your laundry and is hostile to the environment.
- Leave the door open when the washing machine is not in use to reduce wear on the seal and prevent mould formation.
- Do not put anything heavy on the machine that could damage the top.
Never let children play with the appliance.
I. INSTALLATION
1. Removing the accessories
Open the door by pulling on the handle and remove the accessories in the drum prior to installation.
2. Transport grip-safe pieces
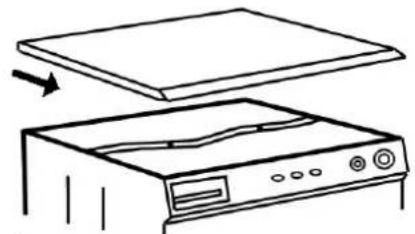
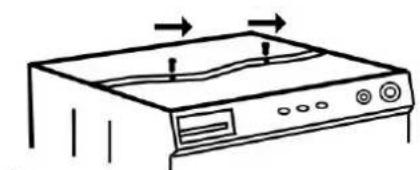
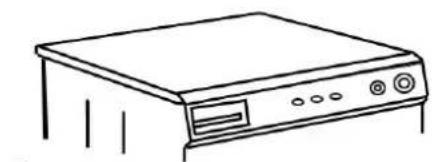
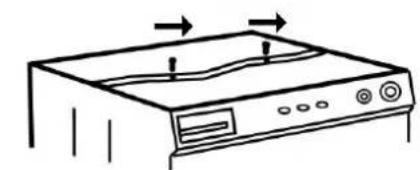
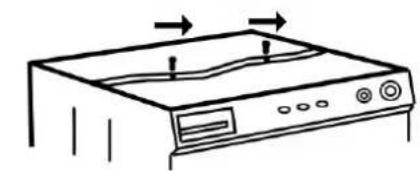
All the pieces inserted to hold the drum steady during transport must be removed before using for the first time.
Proceed as follows:
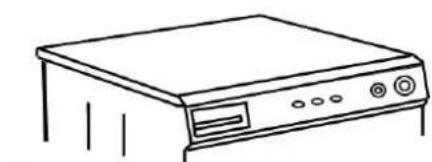
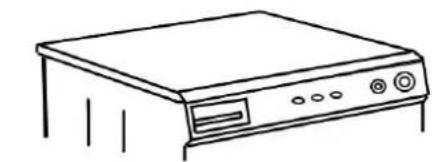
Unscrew and remove the three screws (A) fixed on the top cover, pull it forward and outwards. Unscrew and remove the two nuts (B), remove the polystyrene then replace the cover (C).
N.B. It is advisable to keep the packaging and transport holding pieces in case the machine has to be transported again.
natural_image
Line drawing of a kitchen appliance with a lid and front panel, showing a close-up of the lid (no text or symbols)A
natural_image
Line drawing of a front-mounted computer with ventilation slots and indicator lights (no text or symbols)B
natural_image
Line drawing of a desktop computer with front panel and control buttons (no text or symbols)C
3. Positioning
Install the machine on a firm, flat surface. Make sure that nothing – carpets, cloths etc., can prevent the air from circulating around the machine. Make sure that the machine is not touching a wall or any piece of furniture as this would cause vibrations.
Level the machine by screwing the adjustable feet up or down; never place a piece of wood or any other object underneath to set off any difference in height between one side and the other. Once the machine is level, tighten the counter nuts on the feet.
4. Connecting to the water supply
The appliance may only be connected to the cold tap. Screw one end of the cold water intake hose to the threaded connection point at the back of the appliance and connect the other to the cold water tap. The machine is designed to work with a water pressure of 0.5 to 10 bar. Check that the connections are watertight.
5. Emptying the water
The machine uses a pump to empty the water. The end of the flexible hose must be hung at a maximum height of 1 metre and minimum 0.5 metres so the water can run off properly. Make sure there are no kinks or snags in the runoff hose.
6. Electric connection
The machine is designed for use with 230V 50Hz. Connect the machine to an earthed socket that complies with approved safety standards. The makers refuse all responsibility in the event of damage caused by failure to respect the security provisions.
II. CONTROL PANEL
text_image
P1 Coloureds intensive Burtwäsche intensiv Linge à couleurs intensif Bilicheria interno P4 Delicate fabrics / Wool Feinwäsche / Wolfe Linge diccat / Laine Bilicheria delicata / Lana Anti-crease Kvittenschutzur Anti-provisionnent Antistroposcimento P2 Coloureds Burtwäsche Linge à couleurs Bilicheria colorata P5 Short program Kurzprogramm Programme brief Programma breve No spm Ohne Schloudera Sena essovrage Senta centrifugare P3 Easy care fabrics Philogeschussliche Linge facile i entretenza Bilicheria di facile trattamento P6 Express program Express Programm Programme express Programma espresso Start / stop Start / stop Marche / ariet Acceso / spento E SOBA BabyDuck WA210 H G F D C B AA Choice of programme
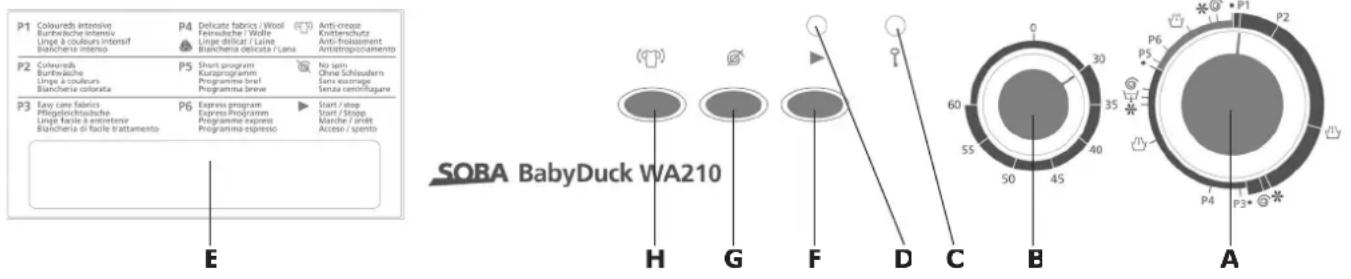
The washing machine offers a choice of several programmes; choose the programme to suit the type of laundry garments you want to wash by referring to the control panel with the list of programmes.
N.B.: before selecting a programme, make sure that the ON/OFF button is at OFF. Press the programme selector button so that it is in the raised position. Now it can be turned clockwise to select; never use force to turn it anticlockwise.
B Regulating the temperature
Once the button has moved out of the recess by pressing it with a finger, the temperature can be regulated on a range of 30^ C to 60^ C. Select the "0" symbol for a cold water wash
C Door locked pilot light
The pilot light stays on to show the door is locked.
D ON pilot light
The pilot light comes on when the washing machine is started and stays on until the end of the programme. It does not go out until the ON/OFF button is pressed again
E Detergent drawer
The detergent drawer is divided into two sections, 1 and 2 respectively for the washing powder and the fabric softener
F ON/OFF button
Press this button to start or stop the machine.
G No spin dry button
Press this button to eliminate the spin dry cycle for fine fabrics.
H Anti-crease button
Press this button to stop the machine before the emptying and spin dry cycles. This is used when washing fine fabrics or for a wool wash.
In order to finish the wash programme press the anti-crease button once more
III. USING THE MACHINE
1. Loading the machine
Open the door and place the laundry in the drum, then close the door firmly; the machine will not start if the door is not closed properly.
2. Selecting washing programme
Choose the programme according to the type of fabric you are going to wash by referring to the programme list.
Attention: Never turn the button anticlockwise!
Turn the button so that the arrow points to the programme required; never point the arrow between two programmes.
3. Selecting washing temperature
Turn the temperature dial to the required position. If you want a cold wash leave the button in the «0» position.
Do not exceed 40^ C in the wool programme.
4. Selecting the function
If necessary, activate the special function button according to the control pane.
N.B.: ANY FUNCTION BUTTONS THAT ARE NOT ACTIVATED MUST BE IN THE NEUTRAL POSITION.
5. Dosing and adding washing products
Put the detergent and other products in the correct compartments. Compartment 1 is used for washing powder, compartment 2 for fabric softeners, whiteners, stain removers etc. When using programmes 1, 2 and 3, the fabric softener is run in during the first rinsing cycle to produce an anti-allergenic effect. If you want a classic fabric softener rinsing cycle, pour the fabric softener into compartment 2 and start the programme again in position 4.
Make sure you use a good quality detergent to avoid excessive foam.
6. Filling and starting the machine
Turn the water tap on full and check that there is no leaking
Press the ON/OFF button to start the machine; it will run automatically until the end of the cycle.
The machine will stop when the programme dial reaches the “●” position.
7. Unloading the machine
Press the ON/OFF button to set to the STOP position. Wait for two minutes then push the button to open the door; remove the garments.
IV. PROGRAMME RANGE
| PROGRAMMES | DETAILS OF THE PROGRAMMES | LENGTH IN MINS | |
| Coloureds intensive wash | P1 | Very dirty linen | 130(Temp. 60°C) |
| Coloureds normal wash | P2 | Dirty linen | 115(Temp. 40°C) |
| Rinse | 35 | ||
| Rinse with liquid fabric softener | 12 | ||
| Spin dry | 5 | ||
| Stop / End of program | |||
| Easy care fabrics | P3 | Easy care fabrics | 90(Temp. 60°C) |
| Delicate fabrics / Wool | P4 | Delicate fabrics or wool wash; max.temperature 40°C | 70(Temp. 40°C) |
| Rinse | 22 | ||
| Rinse with liquid fabric softener | 12 | ||
| Empty | |||
| Spin dry | 3 | ||
| Stop / End of program | |||
| Short program | P5 | Lightly soiled coloureds or easy carefabrics | 38(Temp. 30°C) |
| Express program | P6 | Very lightly soiled linen or delicatefabrics | 27(Temp. 20°C) |
| Rinse | 15 | ||
| Rinse with liquid fabric softener | 3 | ||
| Spin dry | 3 | ||
| Stop / End of program | |||
V. TECHNICAL DETAILS
| Capacity | 3.6 kg |
| Power | 230 Volts 50 Hz |
| Current | 7 A |
| Total power | 1500 W |
| Motor power | 300 W |
| Heating power | 1200 W |
| Spin drying | 600 t/min |
| Adjustable thermostat | cold to 60°C |
| Water pressure | from 0.5 to 10 bars |
| Dimensions | H 76 x W 51,5 x D 42 cm |
| Net weight | 50 kg |
VI. TROUBLESHOOTING
1. The machine won't start.
- Check the door is closed properly
- Check that the machine is plugged in and that the electricity is on.
- Check that the programme dial is in the correct position and that the ON/OFF button is presse
2. The machine won't fill.
- Check that the tap is turned on.
- Check that there are no kinks in the water intake hose.
- Check that the filter is not blocked.
- Check the door is closed properly.
- Check that the programme dial is in the correct position.
- Check that the water pressure is strong enough (minimum 0.5 bar).
3. The machine fills and empties immediately.
- Check that the runoff hose is not positioned too low.
- Check that the runoff hose is mounted properly.
4. The machine does not empty and/or the drum does not turn.
- Check that there are no kinks or snags in the water intake hose.
- Check that the runoff hose is installed properly and there re no blockages.
- Check whether the button for anti-crease is set (the water remains in the drum after the last rinse for this kind of programme).
5. There is water on the floor.
- Check that there are no kinks or snags in the water intake hose.
- Check that the runoff hose is not punctured.
- Too much detergent means too much foam: this will run over
6. The laundry is not washed properly.
- The quantity of detergent was not sufficient or was not up to standard.
- The temperature setting was not correct for this wash.
- Stubborn stains should be pretreated before each washing.
7. The machine is vibrating a lot or is making a lot of noise.
- Check that the transit screws have been removed.
- Check that the adjustable feet of the machine are all firmly on the ground and that the counter nut on each one has been tightened properly
- Check that the washing is well distributed in the drum.
- There is not enough washing in the machine.
B. The door will not open.
• The programme is not finished.
- There is a delay of 2 to 3 minutes after the end of the cycle, before the door will open.
9. The machine stops before the programme is finished.
- Check that the neither the electricity nor the water have been cut off.
10. The machine is not working during the washing programme.
- Check whether it is during the anti-crease soaking phase.
11. Foam is running over from the detergent drawer.
- Check the quality of the product used.
- Check the quantity of the product used.
Subject to change without prior notice.
natural_image
Line drawing of a kitchen appliance with a lid and front panel, showing internal components (no text or symbols)A
natural_image
Line drawing of a computer monitor with two arrows indicating upward motion (no text or symbols)B
natural_image
Line drawing of a desktop kitchen appliance with control panel and buttons (no text or symbols)C
3. Aufstellung
natural_image
Line drawing of a kitchen appliance with a lid and front panel, showing a handle and control buttons (no text or symbols)A
natural_image
Line drawing of a computer monitor with control buttons and ventilation slots (no text or symbols)B
natural_image
Line drawing of a desktop computer with monitor, tower, and keyboard (no text or symbols)C
3. Positionnement
natural_image
Line drawing of a kitchen appliance with a lid and base, showing a component with control buttons and an arrow indicating motion (no text or symbols)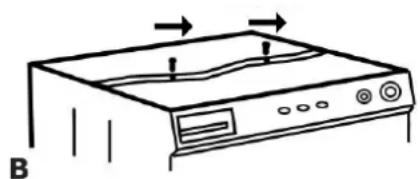
natural_image
Line drawing of a computer monitor with control buttons and indicator lights (no text or symbols)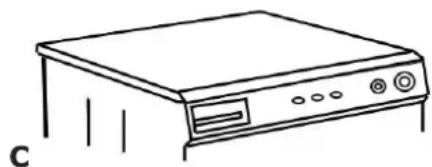
natural_image
Line drawing of a desktop computer with monitor, keyboard, and indicator lights (no text or symbols)3. Posizionamento
CONDITIONS OF GUARANTEE
The guarantee is valid for 2 years from date of supply to the end user. In order to claim under the guarantee the faulty appliance must be taken to the official after-sales service agent together with proof of purchase (copy of the invoice or receipt). The guarantee covers the costs for work and material.
The guarantee shall be invalid or prematurely discontinued if damages are due to any of the following causes: utilisation of the appliance in the commercial sector, exterior influences, non-professional installation, non-observance of the instructions for use or operating instructions, force majeure, inappropriate use, intervention by non-authorised persons as well as normal wear and tear. Also excluded are damage due to dropping or falling, water or operating with incorrect electrical power.
CONDITIONS DE GARANTIE
Contact us for Customer Service addresses in other countries.
Information from SOBA International Trading AG