AVerLife Extreme Vision - Media player AVERMEDIA - Free user manual and instructions
Find the device manual for free AVerLife Extreme Vision AVERMEDIA in PDF.
User questions about AVerLife Extreme Vision AVERMEDIA
0 question about this device. Answer the ones you know or ask your own.
Ask a new question about this device
Download the instructions for your Media player in PDF format for free! Find your manual AVerLife Extreme Vision - AVERMEDIA and take your electronic device back in hand. On this page are published all the documents necessary for the use of your device. AVerLife Extreme Vision by AVERMEDIA.
USER MANUAL AVerLife Extreme Vision AVERMEDIA
This product is herewith confirmed to comply with the requirements set out in the Council Directives on the Approximation of the laws of the Member States relating to Electromagnetic Compatibility Directive 2004/108/EC.
Safety- Low Voltage Directive 2006/95/EC
ErP Directive 2009/125/EC
FCC NOTICE (Class B)

This device complies with Part 15 of the FCC Rules. Operation is subject to the following two conditions: (1) this device may not cause harmful interference, and (2) this device must accept any interference received, including interference that may cause undesired operation.
Federal Communications Commission Statement
NOTE- This equipment has been tested and found to comply with the limits for a Class B digital device, pursuant to Part 15 of the FCC Rules. These limits are designed to provide reasonable protection against harmful interference in a residential installation. This equipment generates uses and can radiate radio frequency energy and, if not installed and used in accordance with the instructions, may cause harmful interference to radio communications. However, there is no guarantee that interference will not occur in a particular installation. If this equipment does cause harmful interference to radio or television reception, which can be determined by tuning the equipment off and on, the user is encouraged to try to correct the interference by one or more of the following measures:
- Reorient or relocate the receiving antenna.
- Increase the separation between the equipment and receiver.
- Connect the equipment into an outlet on a circuit different from that to which the receiver is connected.
- Consult the dealer or an experienced radio/television technician for help.
CAUTION ON MODIFICATIONS
To comply with the limits for the Class B digital device, pursuant to Part 15 of the FCC Rules, this device must be installed in computer equipment certified to comply with the Class B limits. All cables used to connect the computer and peripherals must be shielded and grounded. Operation with non-certified computers or non-shielded cables may result in interference to radio or television reception.
Changes and modifications not expressly approved by the manufacturer could void the user's authority to operate this equipment.
ICES-003
This B digital apparatus complies with Canadian ICES-003.
All the screen shots in this documentation are only example images. The images may vary depending on the product and software version. Information presented in this documentation has been carefully checked for reliability; however, no responsibility is assumed for inaccuracies. The information contained in this documentation is subject to change without notice.
COPYRIGHT
©2010 by AVerMedia Technologies, Inc. All rights reserved.
No part of this document may be reproduced or transmitted in any form, or by any means without the prior written permission of AVerMedia Technologies Inc. AVerMedia Technologies Inc. reserves the right to modify its models, including their characteristics, specifications, accessories and any other information stated herein without notice. The official printout of any information shall prevail should there be any discrepancy between the information contained herein and the information contained in that printout.
"AVerMedia" is a trademark (or registered trademark) of AVerMedia Technologies, Inc. Other trademarks used herein for description purpose only belong to each of their companies.
BATTERY SAFETY INFORMATION
- Store the batteries in a cool dry place.
- Do not dispose of used batteries in domestic waste. Dispose of batteries at special collection points or return to point of sale if applies.
- Remove the batteries during long periods of non-use. Always remove exhausted batteries from the remote control. Battery leakage and corrosion can damage this remote control, dispose of batteries safely.
- Do not mix old and new batteries.
- Do not mix different types of batteries: alkaline, standard (carbon-zinc) or rechargeable (nickel-cadmium).
- Do not dispose of batteries in a fire. The batteries may explode or leak.
- Never short circuit the battery terminals.
WASTE ELECTRICAL AND ELECTRONIC EQUIPMENT (WEEE)
The mark of Crossed-out wheeled bin indicates that this product must not be disposed of with your other household waste. Instead, you need to dispose of the waste equipment by handing it over to a designated collection point for the recycling of waste electrical and electronic equipment. For more information about where to drop off your waste equipment for recycling, please contact your household waste disposal service or the shop where you purchased the product.
IMPORTANT SAFETY INSTRUCTIONS
This device is designed and manufactured to assure personal safety. Improper use can result in electric shock or fire hazard. The safeguards incorporated into this unit will protect you if you observe the following procedures for installation, use, and servicing.
- Read these instructions.
- Keep these instructions.
Heed all warnings. - Follow all instructions.
- Do not use this apparatus near water.
- Clean only with dry cloth.
- Do not block any ventilation openings. Install in accordance with the manufacturer's instructions.
- Do not install near any heat sources such as radiators, heat registers, stoves, or other apparatus (including amplifiers) that produce heat.
- Do not defeat the safety purpose of the polarized or grounding-type plug. A polarized plug has two blades with one wider than the other. A grounding type plug has two blades and a third grounding prong. The wide blade or the third prong is provided for your safety. If the provided plug does not fit into your outlet, consult an electrician for replacement of the obsolete outlet.
- Protect the power cord from being walked on or pinched particularly at plugs, convenience receptacles, and the point where they exit from the apparatus.
- Only use attachments/accessories specified by the manufacturer.
- Unplug this apparatus during lightning storms or when unused for long periods of time.
- Refer all servicing to qualified service personnel. Servicing is required when the apparatus has been damaged in any way, such as power-supply cord or plug is damaged, liquid has been spilled or objects have fallen into the apparatus, the apparatus has been exposed to rain or moisture, does not operate normally, or has been dropped.
- Carefully read and follow the Quick Install Guide and User Manual.
- Do not operate this device outside the temperature range of 5^ - 35^
- Do not drop or shake the device.
- Do not move the device when it is powered on.
- Power supply cords should be routed so that they are not likely to be walked on or pinched by items placed upon them or against them.
- Do not overload wall outlets.
Dolby Digital:
Manufactured under license from Dolby Laboratories.
Dolby and the double-D symbol are trademarks of Dolby Laboratories.
International Headquarter
Address No. 135, Jian-Yi Road Chung-Ho City, Taipei County Taiwan
Website www.avermedia.com/averty
Telephone 886-2-2226-3630
Table of Contents
PACKAGE CONTENTS 2
HARDWARE OVERVIEW 3
PERIPHERAL CONNECTIONS 4
USING REMOTE CONTROL 5
SETUP AND UPGRADE 7
5.1 SETUP FOR TV MODE 7
5.2 WIRED NETWORK SETUP 7
5.3 WIRELESS NETWORK SETUP (OPTIONAL) 8
5.4FIRMWAREUPGRADE 9
MEDIA SOURCES 10
6.1 UPNP & AVERMEDIA DMS. 10
6.2 NETWORK NEIGHBORHOOD (SAMBA CLIENT) 10
6.3 LOCAL STORAGE DEVICE 11
ENJOY MULTIMEDIA 12
7.1 PLAYING MUSIC, PHOTO AND VIDEO FILES 12
7.2 WEB BROWSER & RSS 13
7.3 PLAY INTERNET RADIO-LIVE 365^TM 14
7.4 SHOUTCASTTM 15
7.5 FICKR 15
FAQ 16
Q: WHY CAN'T I SEE ANYTHING ON TV SCREEN? 16
Q: WHY CAN'T I CONNECT THE PLAYER TO MY HOME NETWORK? 16
Q: Is USB HDD EXTERNAL ENCLOSURE NOT SUPPORTED? 16
ENG-1
About This Guide
This Quick Guide gives you the fastest way for hand-on procedure to enjoy multimedia with AVerLife ExtremeVision Media Player. For more details how to use this device, please refer to the User's Manual available on AVerMedia website: www.avermedia.com
1 Package Contents
The product package contains the following items:
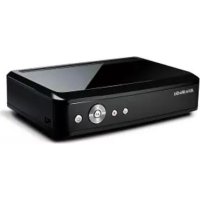
AVerLife ExtremeVision Media Player
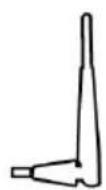
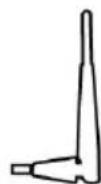
High Gain USB Wireless Adapter (Optional)
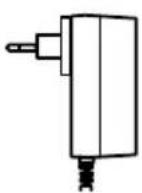

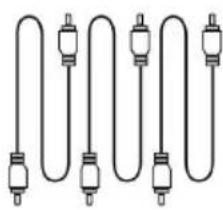
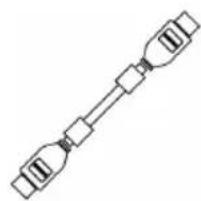
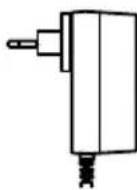
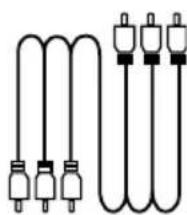
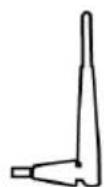
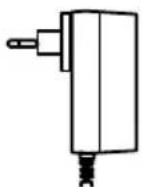
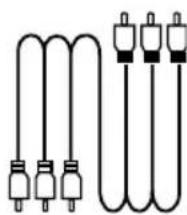
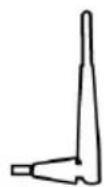
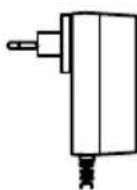
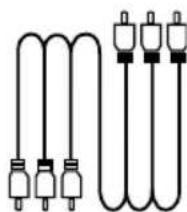
Power Adaptor Composite Cable Component Cable
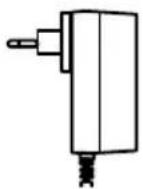
WARNING: Be sure to use the power adapter shipped with AVerLife ExtremeVision Media Player. Other power adapters such as the one with 12V output generally for laptop PC will damage or even burn the device.
HDMI Cable Quick Guide
Remote Control (Batteries included)
ENG-2
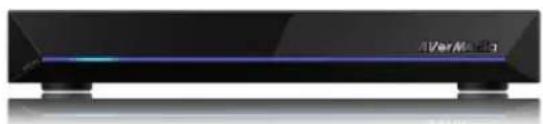
2 Hardware Overview
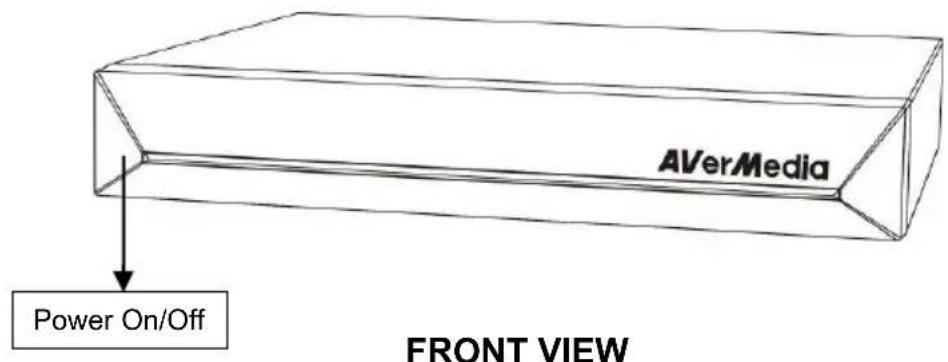
Power Off
If you want to power off the system, please press the "POWER" key on the remote control.
- Front Panel LED indicator:
No color- Power Off
Blue color - Booting-up / Operating
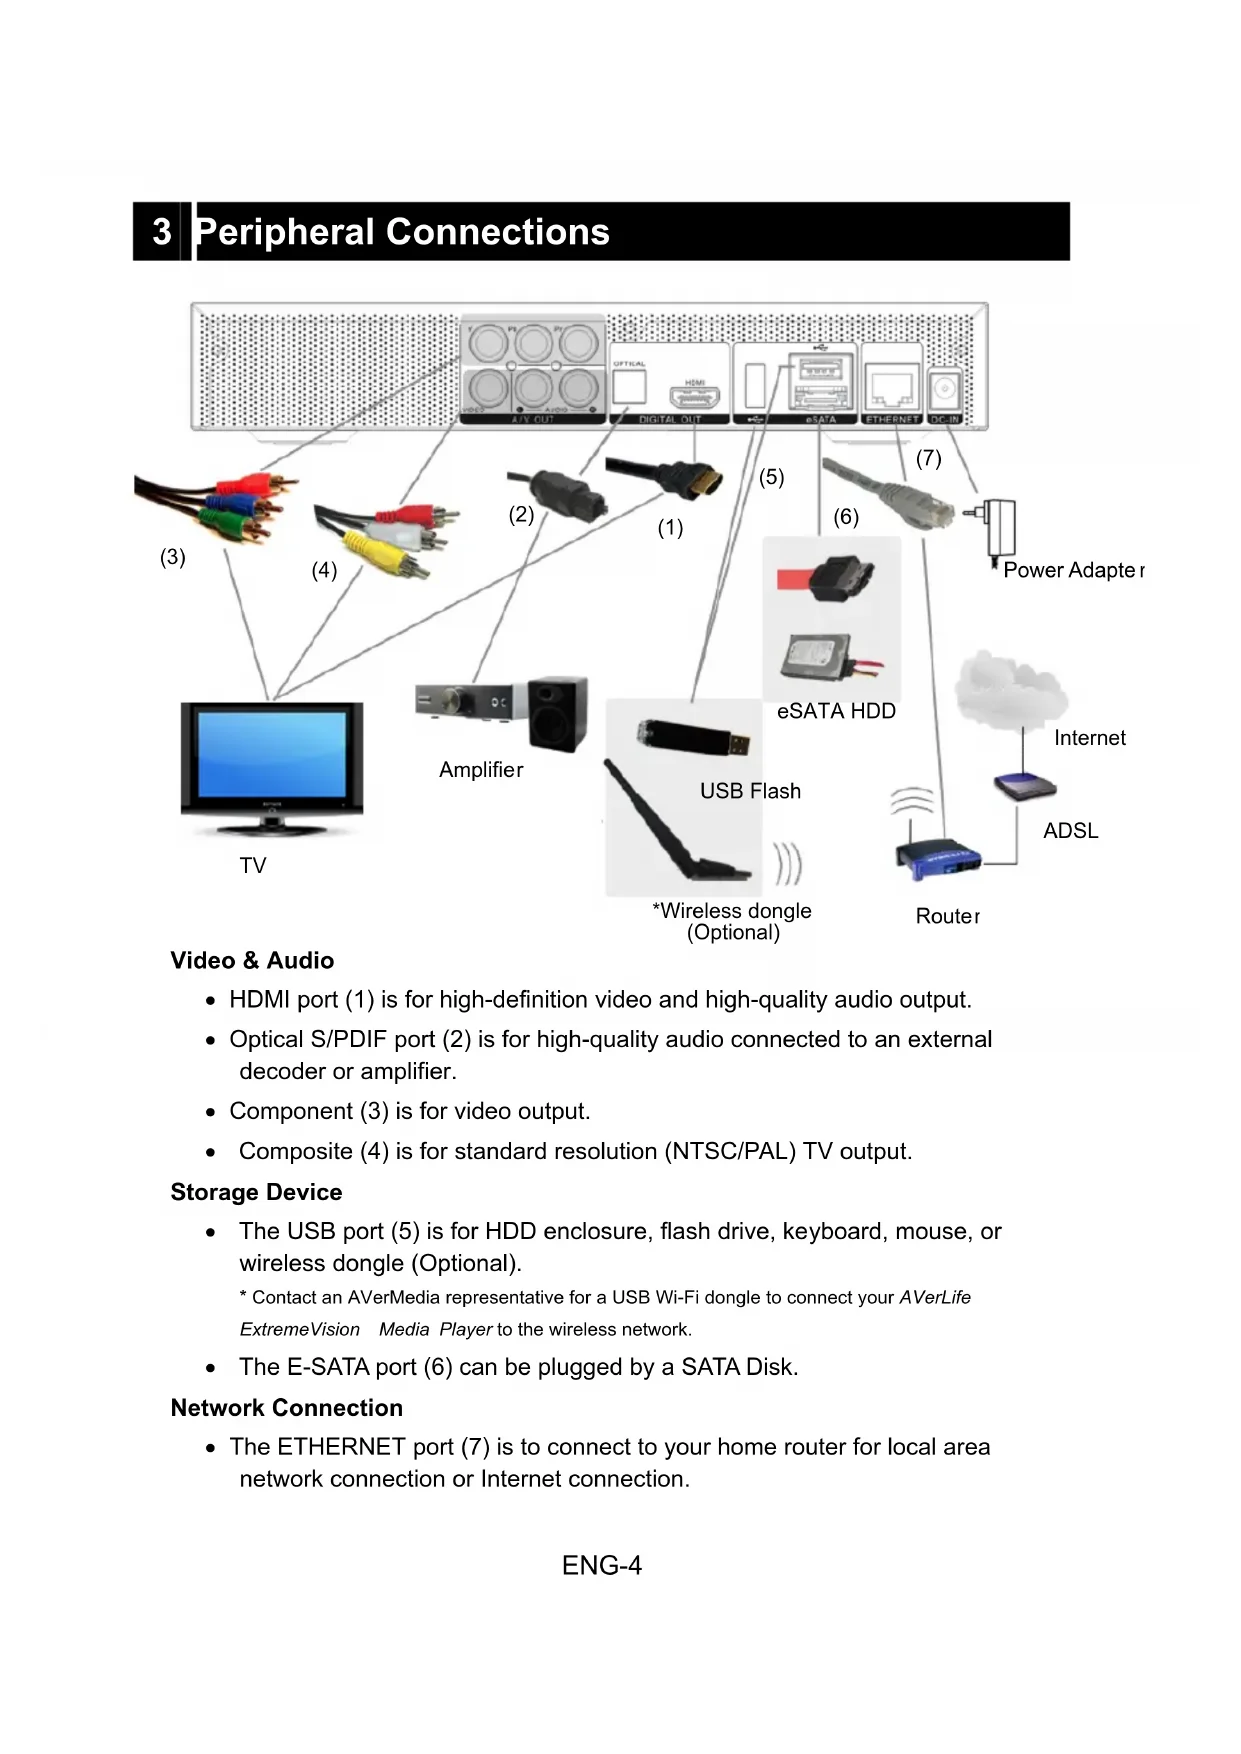
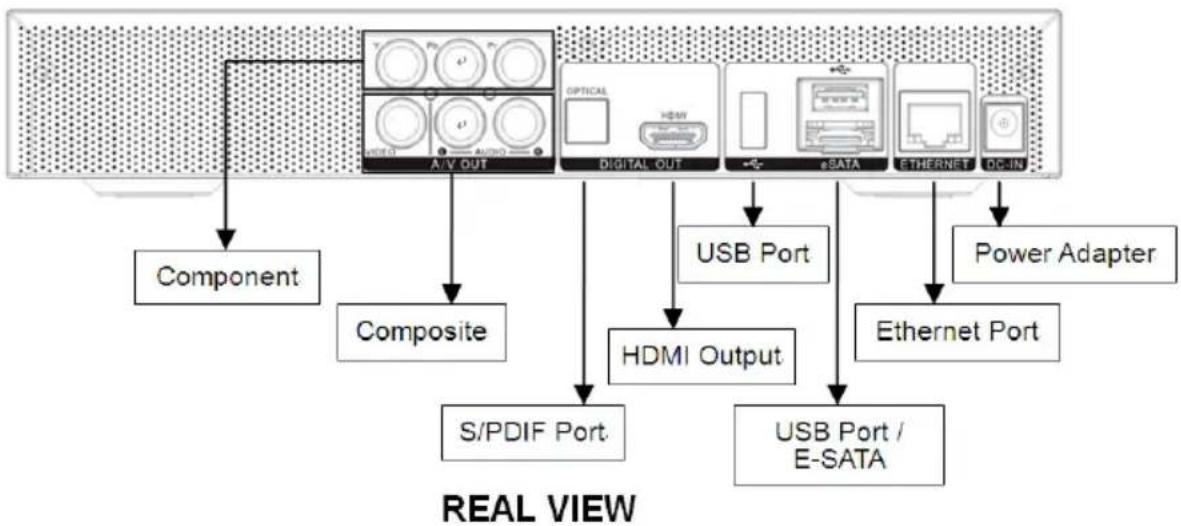
3 Peripheral Connections
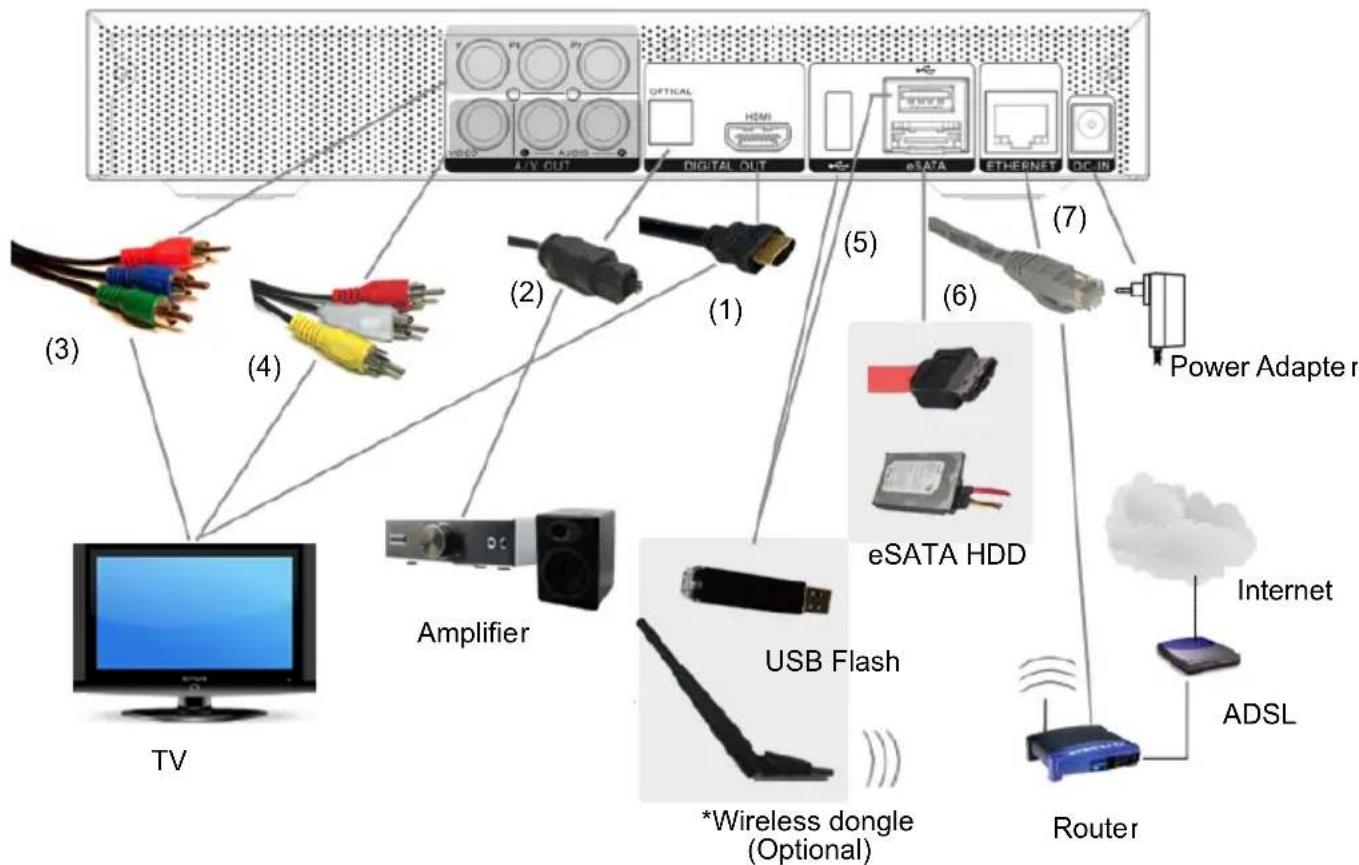
Video & Audio
- HDMI port (1) is for high-definition video and high-quality audio output.
- Optical S/PDIF port (2) is for high-quality audio connected to an external decoder or amplifier.
- Component (3) is for video output.
Composite (4) is for standard resolution (NTSC/PAL) TV output.
Storage Device
-
The USB port (5) is for HDD enclosure, flash drive, keyboard, mouse, or wireless dongle (Optional).
-
Contact an AVerMedia representative for a USB Wi-Fi dongle to connect your AVerLife ExtremeVision Media Player to the wireless network.
The E-SATA port (6) can be plugged by a SATA Disk.
Network Connection
- The ETHERNET port (7) is to connect to your home router for local area network connection or Internet connection.
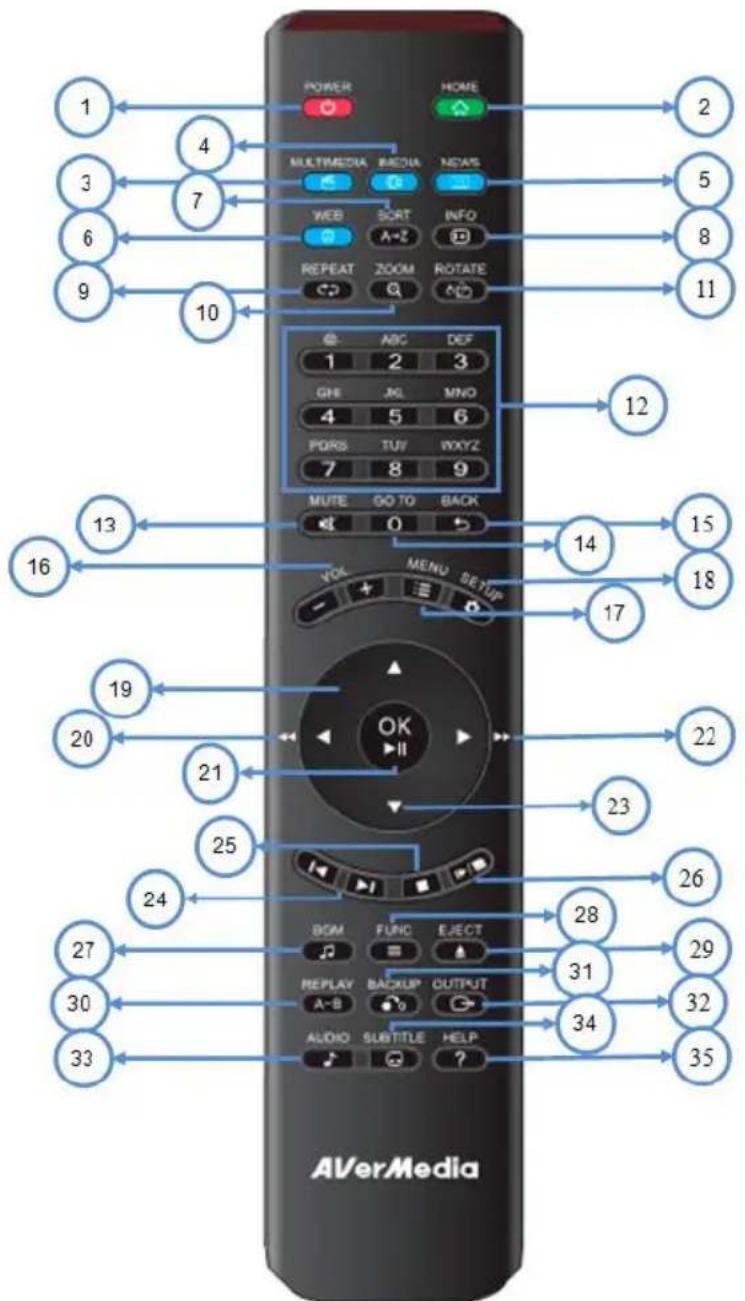
4 Using Remote Control
Use the remote control to navigate the menu, and to select and watch videos, listen to music, or view photos on your television. For more details about how to use the remote control, please refer to the User's Manual.
ENG-5
| No. | KEYPAD FUNCTION DESCRIPTION | |
| 1 | POWER Turn On/Standby | |
| 2 | HOME Return to Main | Menu. |
| 3 | MULTIMEDIA | Enter Multimedia page. |
ENG-6
| 4 | IMEDIA Enter to iMedia page. | |
| 5 | NEWS Enter to News | page. |
| 6 | WEB Enter to Web page. | |
| 7 | SORT | Sorting all the files in one folder and re-arrange them in alphabetical order. |
| 8 | INFO | Display media info. When pressing twice, it will show more details about the video. |
| 9 | REPEAT | Video & Music: repeat the current file or all files in this folder or cancel repeat function. |
| 10 | ZOOM Zoom video or photo | Video & Music: repeat the current file or all files in this folder or cancel repeat function. |
| 11 | ROTATE Rotate the photo. | Video & Music: repeat the current file or all files in this folder or cancel repeat function. |
| 12 | NUMBERS Input numbers when required. | Enter setup page. |
| 13 | MUTE Mute audio output | Move cursor for item selection. |
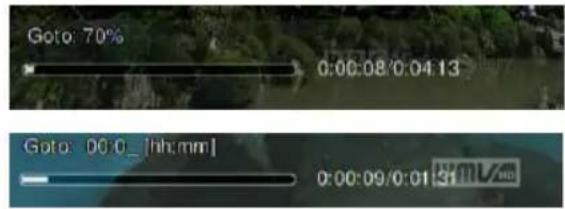
| 14 | GOTO | Progress of current video (hr/min) or music (00%-99%) file. |
| 15 | BACK | 1. Return to previous page. Save/cancel setting in setup pages.2. Escape from Web Browser. |
| 16 | Volume ADJ. | (+ ) Increase the volume / (- ) Decrease the volume |
| 17 | MENU | 1. Go to the Menu of DVD films.2. Choose file path when navigating. |
| 18 | SET UP | Enter SETUP page. |
| 19,23 | DIRECTIONS | Move cursor for item selection. |
| 20,22 | FAST FORWARD/RE WIND | 1. Play video with speed 1.3x,2x,4x,8x...2. Rewind video with speed 2x,4x,8x... |
| 21 | OK/PLAY PAUSE | 1. Play or pause media files.2. Enter the highlighted item. |
| 24 | PREV/NEXT | 1. Skip to the Previous/Next page when browsing media files.2. Skip to the Previous/Next file when playing media files. |
| 25 | STOP | Stop the media playing. |
| 26 | SLOW/SLIDE | Slow forward / backward the media with speed 1/2x, 1/4x, 1/8x... |
| 27 | BGM | Add/Remove/Play music files or iMedia station as or background music. |
| 28 | Func | Go Mode/Sort/BGM function area |
| 29 | Eject USB eject | |
| 30 | A-B | Set/Cancel A-B repeat mode. |
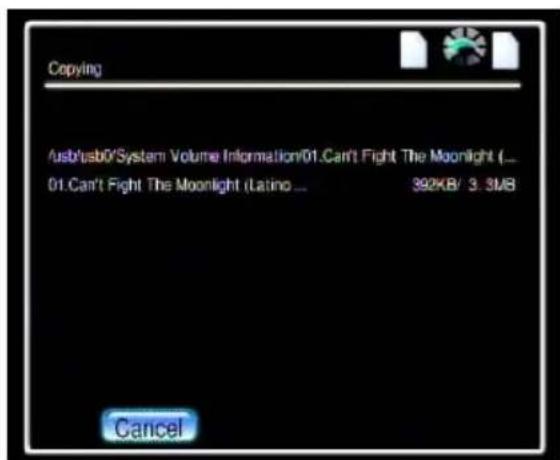
| 31 | Backup | Copy files or folders between USB storage and SATA HDD, or delete. |
| 32 | OUTPUT | Switch the video output type with Composite-HDMI sequence. |
| 33 | AUDIO Select different languages/audio tracks | Select different subtitles |
| 34 | SUBTITLE | Show help message |
| 35 | HELP | Show help message |
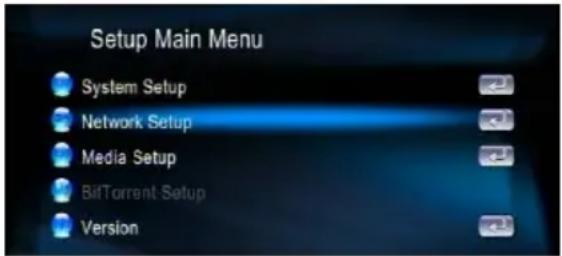
5 Setup and Upgrade
5.1 Setup for TV Mode
Please set the video source selector of your TV to match the connection from your AVerLife ExtremeVision Media Player. For example, if you use HDMI, set the TV to use the correspondent HDMI input port.
START-UP PAGE
Check the TV display by going to "Setup" "System Setup" "TV Mode Setup" "Video Output". The default display of AVerLife ExtremeVision Media Player is Composite (CVBS).
NOTE: You can press "SETUP" button on the remote control to enter Setup Main Menu. And use to select an item and press "OK" button to confirm the selection.
If you use HDMI, use the remote control and press "OUTPUT" button. You can run through the TV modes to get the correct display mode.
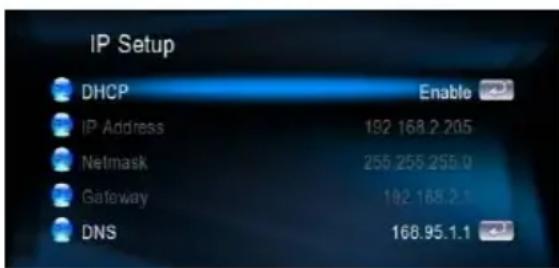
5.2 Wired Network Setup
-
Press "SETUP" button on the remote control or select "SETUP" mode from the Main Menu.
-
Select "Network Setup" "IP Setup", and Enable DHCP or set your static IP address according to your local configuration.
5.3 Wireless Network Setup (Optional)
AVerLife ExtremeVision Media Player supports wireless Ethernet with a USB Wi-Fi dongle supplied by AVerMedia. To enable wireless function, please make sure you plug the Wi-Fi dongle into the USB port before Powering on AVerLife ExtremeVision Media Player. And please be noted that a USB Wi-Fi dongle not authorized by AVerMedia is NOT supported.
For video of very high-definition, streaming with a wired connection between AVerLife ExtremeVision Media Player and home router is recommended. Playing music and photo with wireless connection is fine
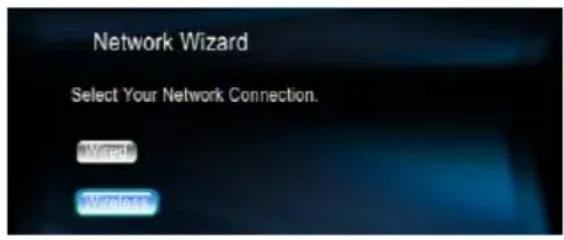
- Press"SETUP"button on the remote control or select "SETUP" from the Main Menu.
- Press "Network Setup" button Select "Network Wizard" from Network set up menu to start setup wizard and choose "Wireless".
- AVerLife ExtremeVision Media Player scan
Scan ESSID displays all available networks, choose the right one for you.
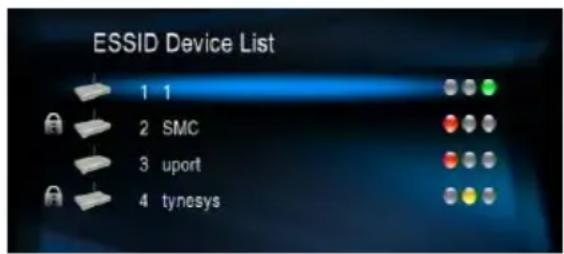
-
If the network you choose is locked by password, a "Lock" icon will be shown. And the signal strength is indicated by the RED (poor quality), YELLOW (fair quality) or GREEN (good quality) light.
-
Select "Key Value". Enter your password. The key length of each Key Format is described in the table below. For WPA and WPA2 format, AVerLife ExtremeVision Media Player will detect and switch automatically.
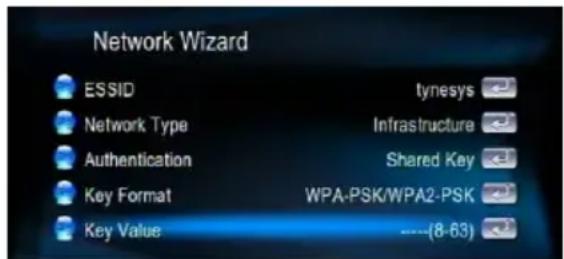
| Key Format Key Length | |
| WEP64(ASCII)5 digits | |
| WEP64(HEX)10 digits | |
| WEP128(ASCII)13 digits | |
| WEP128(HEX)26 digits | |
| WPA-PSK/WPA2-PSK | 8 digits or more |
5.4 Firmware Upgrade
There're two ways to upgrade the firmware. Go to "Setup" in the main menu and select 'Version'. The first way to upgrade the firmware is by "Internet Upgrade", which in convenient without the necessity of a PC. Make sure AVerLife ExtremeVision Media Player is connected to the Internet beforehand. Follow the steps below:
- Go to "Setup Main Menu", Select "Version", and choose 'Firmware upgrade'.
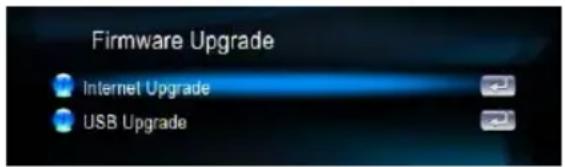
-
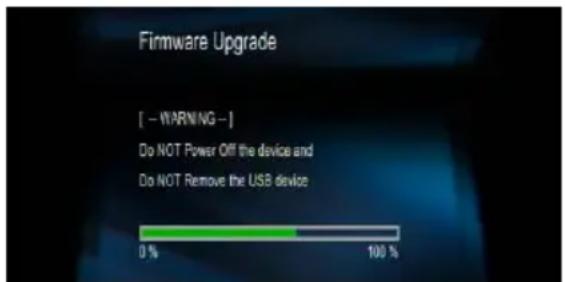
Choose "Internet Upgrade", the system will automatically search available firmware code from the Internet.
-
Select 'Yes' if you like to proceed. Please be noted that the power must not be off during the process, otherwise the firmware can be crash and AVerLife ExtremeVision Media Player will not able to boot again.
- When the process is successfully finished, AVerLife ExtremeVision Media Player will reboot automatically.
- An alternative way is to choose "USB Upgrade". The latest firmware binary file is compressed and located on http://www.avermedia.com. Download the firmware file, store it in your USB flash disk and uncompressed it. The "upgrade.bin" file must be stored in the root directory for AVerLife ExtremeVision Media Player to detect it.
- Insert the USB disk to the USB port of AVerLife ExtremeVision Media Player. Go to "Set Up" "Version" "Firmware upgrade" "USB Upgrade".
- Select "Yes" to proceed or "No" to cancel. Please be cautious that the power MUST
NOT be turned off during the process.
- When the process is successfully finished, AVerLife ExtremeVision Media Player will reboot automatically.
6 Media Sources
6.1 UPnP & AVerMedia DMS
The AVerLife ExtremeVision Media Player will automatically detect all available UPnP AV compliant content severs on boot-up and list them on UPnP column of the main menu. No additional setup is necessary on the AVerLife ExtremeVision Media Player itself.
Note:If you need to connect AVerLife
ExtremeVision Media Player to your computer, please download from www.avermedia.com if UPnp is required.
6.2 Network Neighborhood (Samba Client)
As long as the network is linked and no firewall is blocking the shares from remote sites, there is no additional set-up to enable this feature.
Following steps show how to access media through the Samba Client Protocol.
-
Select "My Network Places" in the main menu and all available sources will be detected and shown automatically.
-
Press "Down" button to choose the one target machine and navigate to the destination files you like to play.

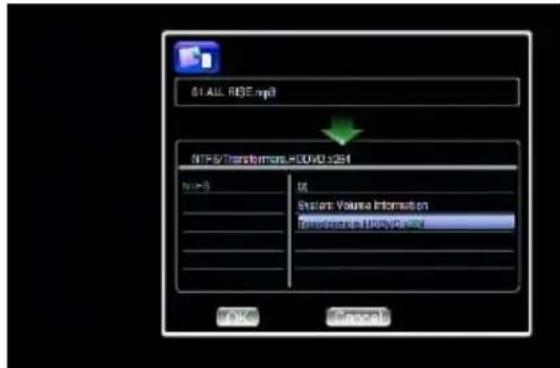
6.3 Local Storage Device
AVerLife ExtremeVision Media Player supports USB flash disk, USB HDD and eSATA HDD. In the main menu, just choose "MultiMedia" and navigate to play the files you like.
Note: The number of USB ports can be extended by a USB hub, please be careful of the extra power consumption for the extra devices. AVerLife ExtremeVision Media Player itself supplies limited power (1.1A) for the USB port.
- Go to "MultiMedia" at the Main Page.
-
Select the name of your storage device from the list and press "COPY" button.
-
Select the origin and destination. Press "OK" button if you want to proceed or "No" to go back.
7 Enjoy MultiMedia
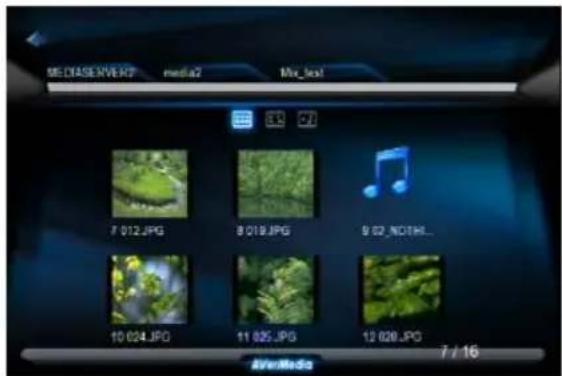
7.1 Playing Music, Photo and Video files
For the supported file format and container in detail, please refer to the user manual. Some frequent usage of functions is highlighted as follows:
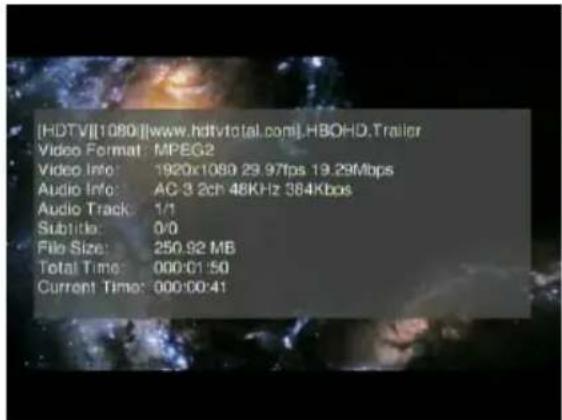
- Viewing Video Information: Press "INFO" button to get video information; press again to see more info.
- Searching elapsed time and percentage of a music or video playing: Press "0(GOTO)" button on the remote control unit to enter time seek mode, and press the numeric buttons directly for a certain percentage of the file being played.
-
Photo Slide Show: Press 'OK' for the selected photo in thumbnail for full-screen display and press again to start the slide show.
-
Location Directory Navigation: Press "MENU" button to go to the 'directory' baron the top of the screen. By pressing the numerical buttons on the remote control unit during navigation will sort the file names by the first letter of the key pressed. This will help you find the targeted file among many.
- If you would like to use some functions (like iMEDIA or audio settings etc) while you're navigating directories and files, always press hot keys such as 'HOME', 'SETUP'...on the remote control unit instead of just pressing 'BACK' button numerous time. Then it will be easy to go back to where you were in a long directory path by pressing 'MULTIMEDIA' hot keys.
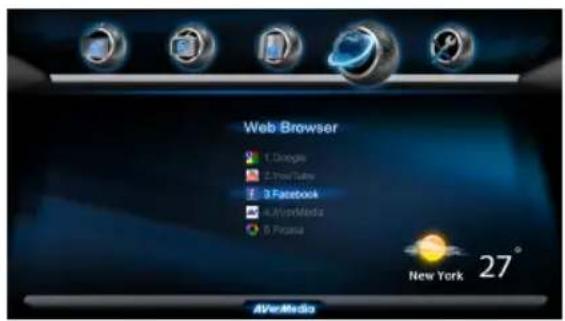
Wherever you stay in the user interface, press "Home" button on the remote control to return to the main menu as shown below. Select the icon which shows 'Web Browser' and press "OK" button.
The homepage of the web browser will be displayed, then you can surf the web using the remote control or keyboard and mouse.
An USB keyboard and mouse can be
plugged to facilitate the web surfing. Make sure you plug it before you enter the Web Browser.
If you like to use the remote control unit for web browsing, press "INFO" button to have the URL bar like below:

A virtual keyboard is also available there by pressing to ease 'key in'. Press the
HELP button for help; you'll get instructions of all function hot keys like below.

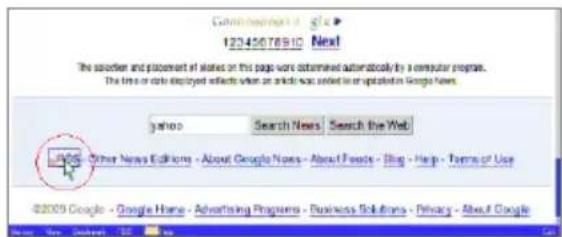
When there's an RSS(Really Simple Syndication) icon like on a webpage, that
means the page can be viewed with RSS format used to publish frequently updated works—such as blog entries, news headlines, audio, and video. An RSS document (which is called a "feed", "web feed" or "channel") includes full or summarized text, plus metadata such as publishing dates and authorship. Web feeds benefit publishers by letting them syndicate content automatically.
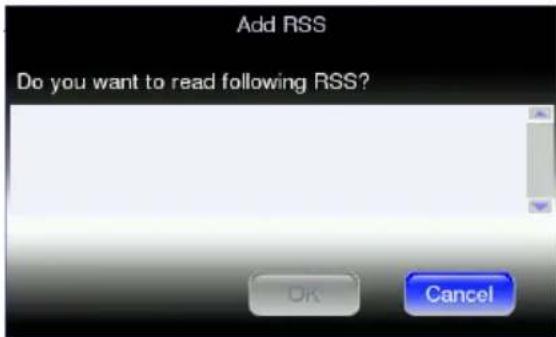
To add the feed into the RSS list of AVerLife ExtremeVision Media Player, please click on the icon on the page.
Press "ok" to confirm or "Cancel" to skip.
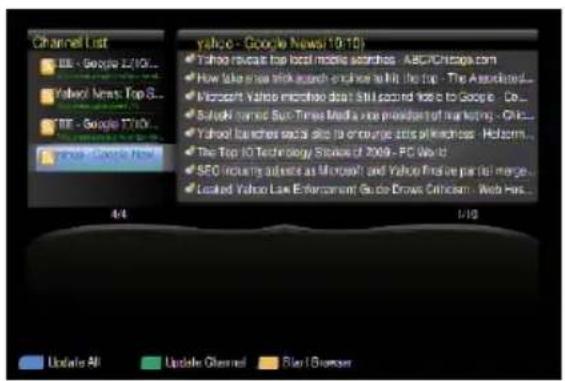
Go into the RSS page from the main page, and select the one you like to view. There're already some built-in feeds.
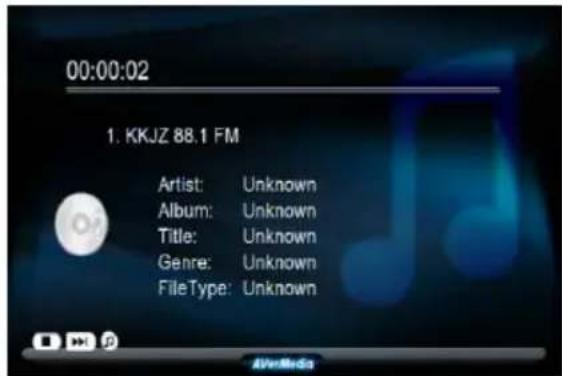
7.3 Play Internet Radio-Live 365^TM
Live365™ is an Internet radio service that provides unlimited on-demand access to thousands of radio stations. The audio is streamed directly over the Internet. Follow below steps to access the radio stations:
- Make sure your network setting is correct and be able to access internet.
- Select "iMedia" from main menu or press "iMedia" button on the remote control.
- Select "Live 365" and press "OK" button on remote control.
- Select a catalog you prefer from the list, or select "All Broadcasts" to browse all radio stations.
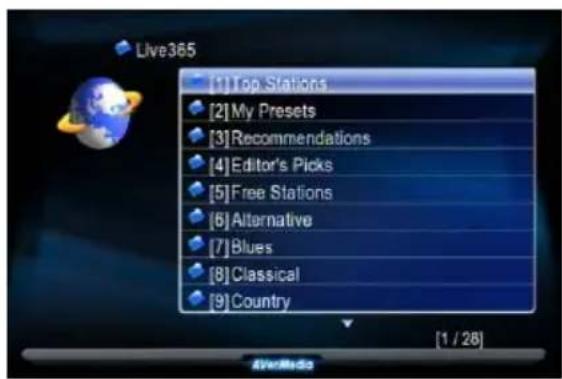
- Select a radio station from list, and press "OK", "Play" button to play it.
Note1: stands for a radio station.
Note2: Press "BGM" hotkey on the remote control to add the station into background music list.

7.4 SHOUTcastTM
You can use the AVerLife ExtremeVision Media Player to listen to ShoutCast station without the need for a PC.
Follow these steps:
- Select "iMedia" from main menu or choose "ShoutCast".
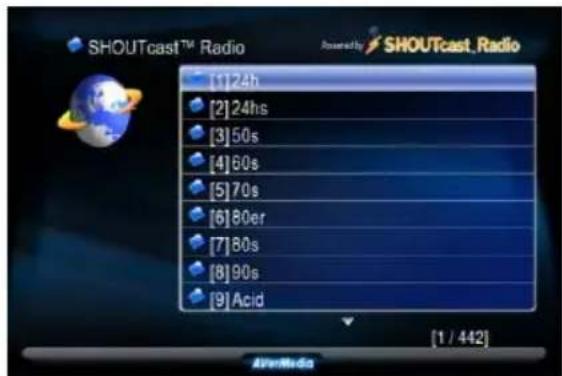
- Navigate to choose one to play.
Because the content is directly streaming from the Internet, please be patient while the content is being loaded.
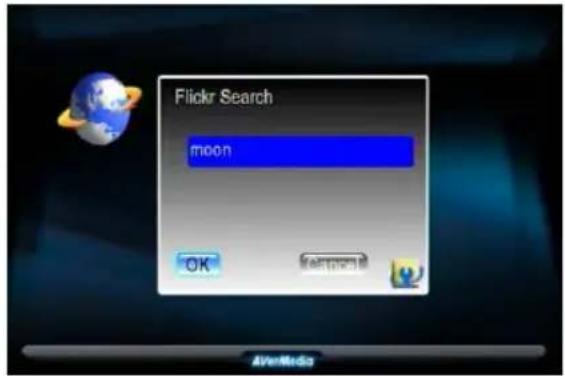
7.5 Flickr
Without computer, you can see the photos from Flickr through AVerLife ExtremeVision Media Player
Please follow the steps :
- Enter "IMedia" button, choose "Flickr", the Interestingness and Recent parts will be shown on screen as below:
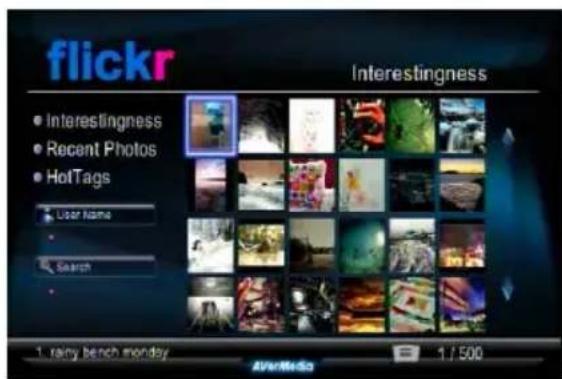
-
Surfing the photos and press "OK" button, you can see the full size photo. Press "OK" again, the playback will be repeated
-
Press "Search" button will allow you to search your favorite photos from Flickr
FAQ
Q: Why can't I see anything on TV screen?
Answer: Please select the correct signal input on your TV set. If you connect the player to TV via HDMI, please select the right HDMI port no. on your TV set; if you connect the player to TV via A/V port, please select the right A/V port no. on your TV set.
Q: Why can't I connect the player to my home network?
Answer: If you use wireless connection, please make sure the right encryption way is selected and right password is entered. Choose the 'iMedia' icon on the main menu and presses "Enter "button; you'll see if an IP address is assigned.
Q: Is USB HDD External Enclosure not supported?
Answer: Please use external power supply for USB HDD External Enclosure.
INHALTSVERZEICHNIS
High Gain USB Wireless Adapter (Optional)
6.2 Network Neighborhood (Samba Client)
High Gain USB Wireless Adapter (optional)
6.2 Vicinato di Rete (Network Neighborhood) (Samba Client)
High Gain USB Wireless Adapter (optional)

contentido automatically.
High Gain USB Wireless Adapter (optional)