CLLCHITCHAT - Webcam CONCEPTRONIC - Free user manual and instructions
Find the device manual for free CLLCHITCHAT CONCEPTRONIC in PDF.
| Product Type | Webcam with integrated headset |
| Brand | Conceptronic |
| Model | CLLCHITCHAT (Lounge'n'LOOK ChitChat) |
| Connectivity | USB 2.0 |
| Video Resolution | Up to 640x480 pixels (estimated) |
| Frame Rate | 30 frames per second (estimated) |
| Built-in Microphone | Yes, via the supplied headset |
| Main Functions | Video chat, photo/video capture, face tracking, image effects, photo frames |
| Supported Operating Systems | Windows 2000, XP, Vista |
| Minimum System Requirements | 256 MB RAM, 100 MB disk space, USB port, CD-ROM drive, sound card |
| Package Contents | Webcam, headset, CD-ROM, multilingual manual, warranty card |
| Power Supply | Via USB port |
| Dimensions (estimated) | 8 x 5 x 5 cm |
| Weight (estimated) | 100 g |
| Care and Cleaning | Clean with a soft, dry cloth |
| Safety | No specific instructions |
| Spare Parts and Repairability | Not specified |
| General Information | Compatible with MSN Messenger, Skype, and other chat applications |
Frequently Asked Questions - CLLCHITCHAT CONCEPTRONIC
User questions about CLLCHITCHAT CONCEPTRONIC
0 question about this device. Answer the ones you know or ask your own.
Ask a new question about this device
Download the instructions for your Webcam in PDF format for free! Find your manual CLLCHITCHAT - CONCEPTRONIC and take your electronic device back in hand. On this page are published all the documents necessary for the use of your device. CLLCHITCHAT by CONCEPTRONIC.
USER MANUAL CLLCHITCHAT CONCEPTRONIC
Congratulations on the purchase of your
Conceptronic Lounge'n'LOOK ChitChat.
This user manual gives you a step-by-step explanation of how to install the Conceptronic Lounge'n'LOOK ChitChat.
When problems occur, we advise you to go to our support-site (go to www.conceptronic.net and click 'Support'. Here you will find the Frequently Asked Questions Database.
When you have other questions about your product and you cannot find it at our website, contact us by e-mail: support@conceptronic.net
For more information about Conceptronic products, please visit the Conceptronic Web Site: www.conceptronic.net
The Software installation as described below may be slightly different from the installation on your computer. This depends on the Windows version you are using.
1. Introduction
With the Conceptronic Lounge'n'LOOK ChitChat, you are able to see each other while you are chatting! The Lounge'n'LOOK ChitChat is compatible with all messenger programs and chat applications. You can use the Lounge'n'LOOK ChitChat on your desk or attached to the screen of your notebook or TFT screen.
ENGLISH
2. Package Contents
The following items must be present in your package:
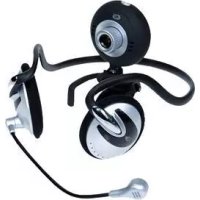
- Conceptronic Lounge'n'LOOK webcam (Clicqcam)
- Conceptronic Lounge'n'LOOK headset
Product CD-ROM - This multilanguage user manual
Warranty card & CE declaration booklet
3. System Requirements
- Operating Systems: Windows 2000, Windows XP or Windows Vista
256 MB System Memory (or higher)
100 MB Free Hard disk Space
One (free) USB port - CD-ROM Drive
Soundcard
4. Driver Installation
Note: First install the software, before you connect the CLLCHITCHAT to the computer!
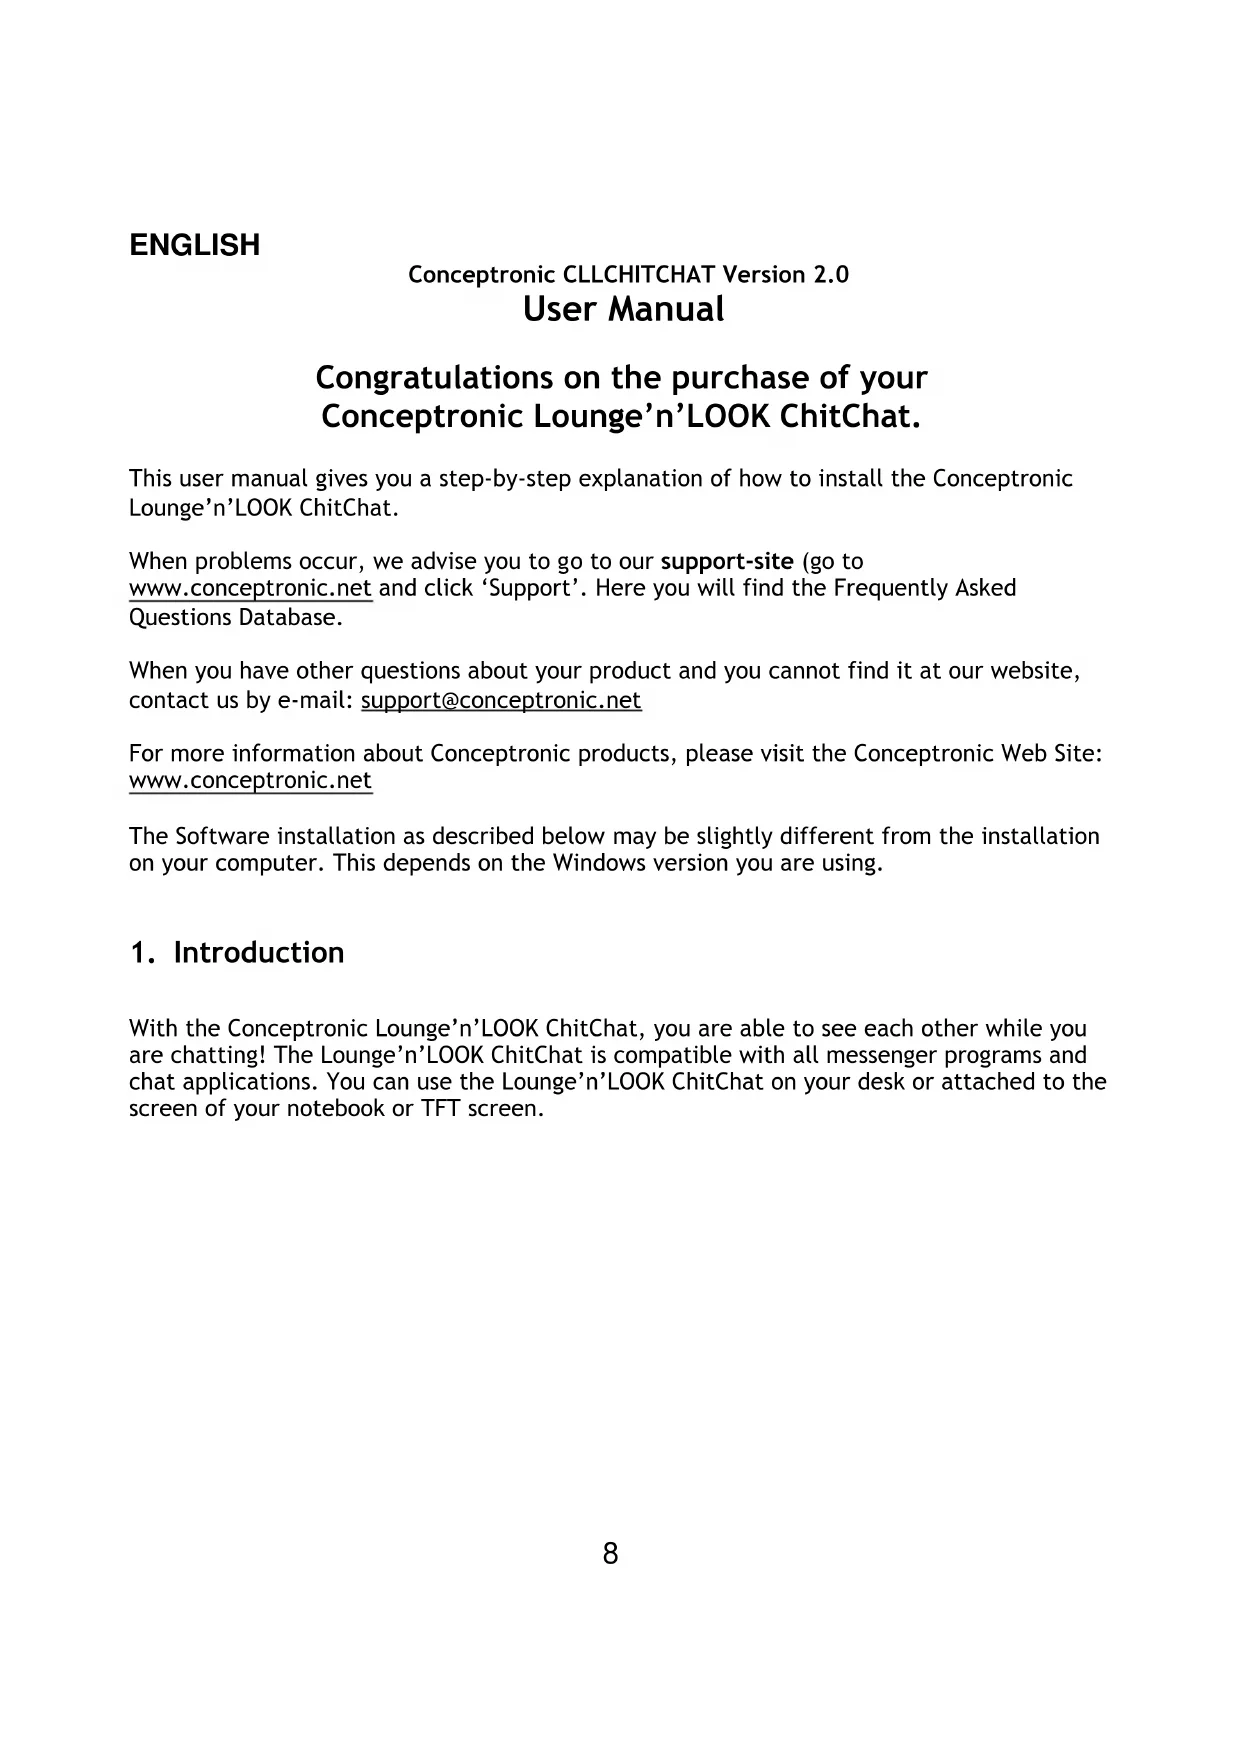
A. Insert the Product CD-ROM in your CD-ROM drive. The Autorun Menu should appear automatically.
If the Menu does not appear, use Windows Explorer to navigate to the CD-ROM and execute "Autorun.exe".
B. Select the option "Install Drivers & Software" from the Autorun Menu. The Setup Wizard will appear.
ENGLISH
C. The Driver Setup Wizard will appear. Click "Next" to continue.
D. The driver will be installed.
E. Click 'Finish' to complete.
ENGLISH
5. Hardware Installation
After the driver installation is completed, you can connect the Lounge'n'LOOK ChitChat to any available USB port on your PC or on any USB hub attached to your PC.
5.1 Windows 2000/XP
Windows will show a popup notification with the message "Found new hardware". Please wait until Windows finishes the driver installation.
Note: We advise to reboot the computer after the webcam installation.
5.2 Windows Vista
Windows will show a popup notification with the message "Installing device driver software". Please wait until Windows Vista finishes the driver installation.
Note: We advise to reboot the computer after the webcam installation.
The webcam is now ready to use!
ENGLISH
6. Using the Lounge'n'LOOK ChitChat
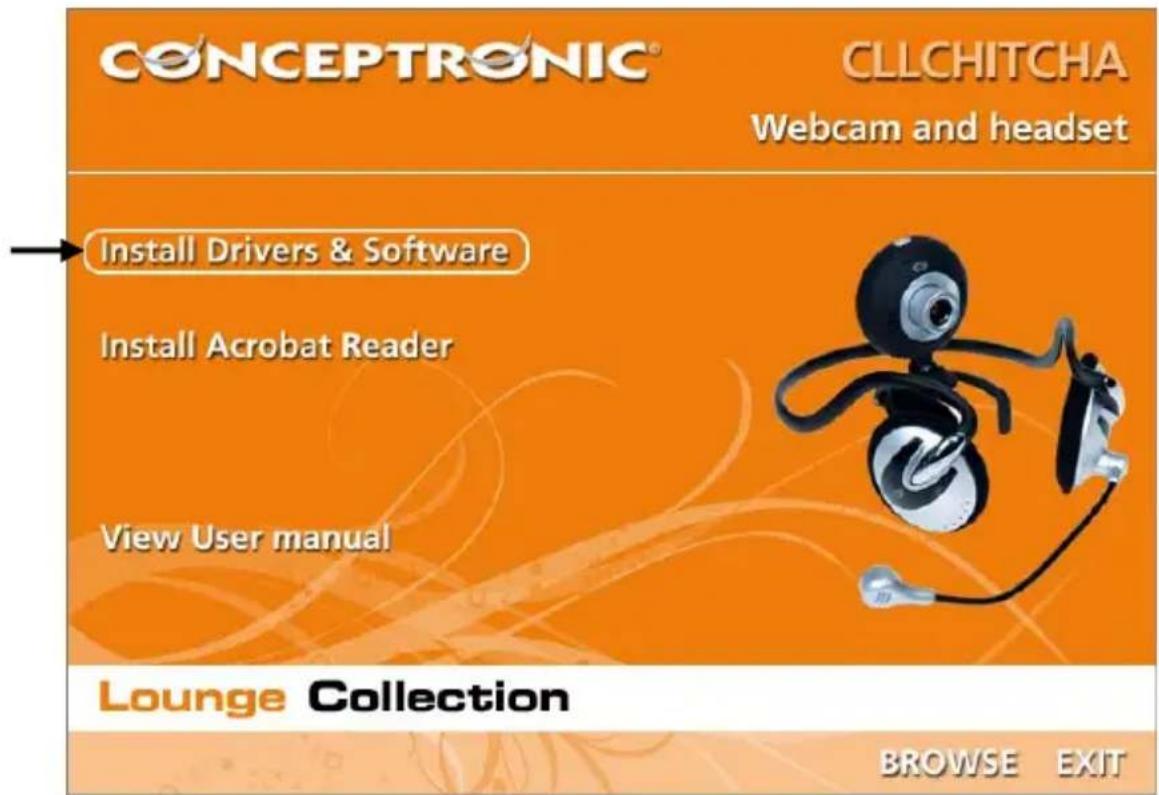
To check the functionality of the webcam, you can use the program AMCAP. The program AMCAP is installed together with the drivers. This program is a simple program to configure the webcam and make video captures.
To execute the program AMCAP, click 'Start', 'Programs', 'PC Camera' and 'AMCAP'. You will see the live stream of the webcam available in the program.
When no image of the webcam is visible, use the option 'Devices' (1) to select the 'PC Camera'.
Through the menu 'Options' (2), you are able to change the default settings for the Lounge'n'LOOK ChitChat. Using the menu 'Capture' (3) will allow you to save video captures on your computer hard disk.
The Lounge'n'LOOK ChitChat can also be used within Microsoft MSN Messenger. You need to configure MSN Messenger before you can use the webcam. To configure, use the 'Tools', 'Audio and Video setup' in the main MSN Messenger window.
ENGLISH
7. Extra webcam options
The Lounge'n'LOOK ChitChat is equipped with "Image Effect", "Photo Frame" and "Face Tracking" options.
Note: The "Image Effect", "Photo Frame" and "Face Tracking" options are only available for Windows Vista. If you use Windows 2000 or Windows XP, these options will not be available.
These options can be set through the properties of the webcam, which can be accessed in different ways:
AMCAP: Start AMCAP and click "Options", "Video Capture Filter".
The properties of the webcam will be shown.
MSN: Start a conversation with a contact and enable the webcam. Right-click on the webcam image and select "Web Camera Settings...". Click "Advanced" in the shown window. The properties of the webcam will be shown.
Skype: Start a conversation with a contact and enable the webcam. Right-click on the webcam image and select "Video Settings". The properties of the webcam will be shown.
7.1 Properties - Stream Property
On the "Stream Property" tab, you can change several image settings for the webcam like contrast, brightness and sharpness.
7.2 Properties - Face Tracking
On the "Face Tracking" page, you can enable or disable digital face tracking.
Select the option "Face Tracking" and click "OK" to enable the Face Tracking function. To disable the Face Tracking function, deselect the option "Face Tracking" and click "OK".
ENGLISH
7.3 Properties - Effect Frame
On the "Effect Frame" tab, you can add a photo-frame or image effect to your webcam image.
To manipulate your webcam image with an effect, select an effect from the "Effect" menu. Click "OK" to enable the selected effect.
To disable a selected effect, select the option "Disable" from the "Effect" menu and click "OK".
To manipulate your webcam image with a photo-frame, select a photo-frame from the "Frame" menu. Click "OK" to enable the selected effect.
To disable a selected photo-frame, select the option "Disable" from the "Frame" menu and click "OK".
ESPANOL
Conceptronic CLLCHITCHAT Version 2.0