EVA LITTLE - Humidifier STADLER FORM - Free user manual and instructions
Find the device manual for free EVA LITTLE STADLER FORM in PDF.
Download the instructions for your Humidifier in PDF format for free! Find your manual EVA LITTLE - STADLER FORM and take your electronic device back in hand. On this page are published all the documents necessary for the use of your device. EVA LITTLE by STADLER FORM.
USER MANUAL EVA LITTLE STADLER FORM
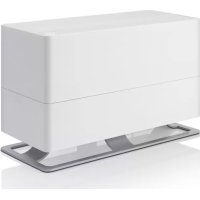
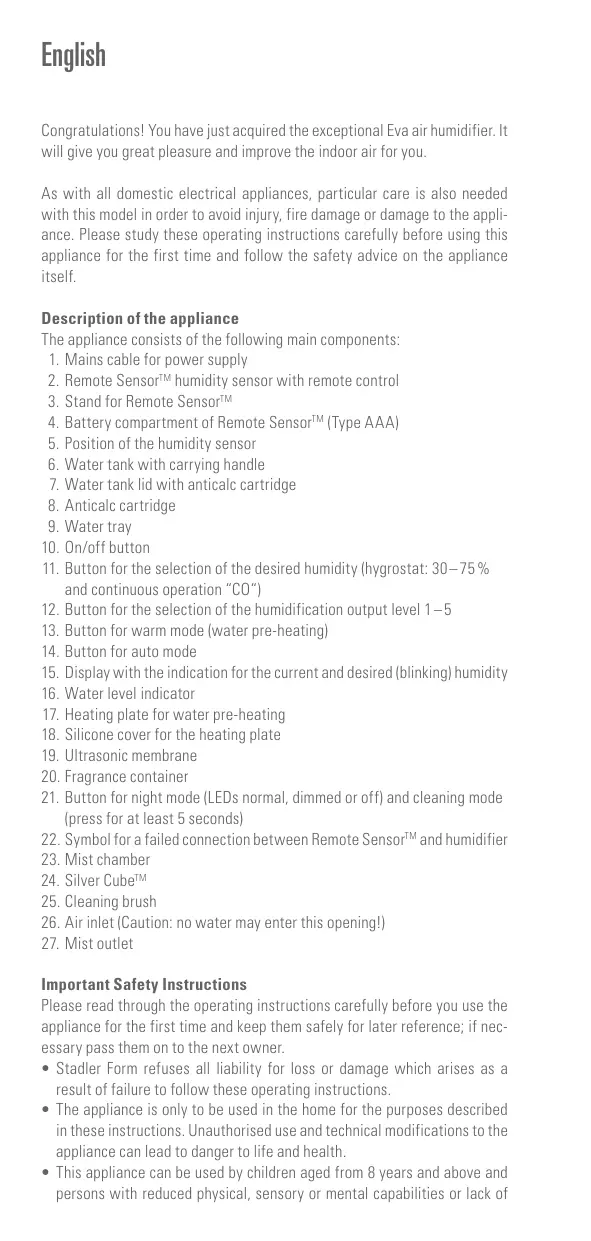
English Congratulations! You have just acquired the exceptional Eva air humidifier. It wil give you great pleasure and improve the indoor air for ou As with all domestic electrical appliances, particular care is also needed with this model in order to avoid injury, fire damage or damage to the appli- ance. Please study these operating instructions carefully before using this appliance for the first time and follow the safety advice on the appliance itself. Description ofthe appliance The appliance consists of the following main components: Mains cable for power supply Remote Sensor” humidity sensor with remote control Stand for Remote Sensor" Battery compartment of Remote Sensor" (Type AAA) Position of the humidity sensor Water tank with carrying handle Water tank lid with anticalc cartridge Anticalc cartridge Water tray Onoff button Button for the selection of the desired humidity (hygrostat: 3075 % and continuous operation “CO")
12. Button for the selection of the humidification output level 1-5
13. Button for warm mode (water pre-heating)
14. Button for auto mode
15. Display with the indication for the current and desired (blinking) humidity
16. Water level indicator
17. Heating plate for water pre-heating
18. Silicone cover for the heating plate
21. Button for night mode (LEDs normal, dimmed or off} and cleaning mode
{press for at least 5 seconds)
22. Symbol for a failed connection between Remote Sensor * and humidifier
BSvooupnewn Important Safety Instructions Please read through the operating instructions carefully before you use the appliance for the first time and keep them safely for later reference; if nec- essary pass them on to the next owner. + Stadler Form refuses all liability for loss or damage which arises as à result of failure to follow these operating instructions. + The appliance is only to be used in the home for the purposes described in these instructions. Unauthorised use and technical modifications to the appliance can lead to danger to life and health + This appliance can be used by children aged from 8 years and above and persons with reduced physical, sensory or mental capabiliies or lack of
experience and knowledge if they have been given supervision or instruc- tion concerning use of the appliance in a safe way and understand the hazards involved. Children shall not play with the appliance. Cleaning and user maintenance shall not be made by children without supervision. Only connect the cable to altemnating current. Observe the voltage infor- mation given on the appliance Do not use damaged extension cords. Do not run the power cord over sharp edges and make sure that it does not get trapped Do not pull the plug from the socket with wet hands or by holding on to the power cord. Do not use the appliance in immediate vicinity of a bath tub, a shower or a swimming pool (observe a minimum distance of 3m). Place the appliance such that a person in the bath tub cannot touch the appliance. Do not place the appliance near a heat source. Do not subject the power cord to direct heat (such as a heated hotplate, open flames, hot iron sole plates or heaters for examplel. Protect power cords from oil. See to it that the appliance is properly positioned to ensure a high stabil- ity during its operation and make sure that no one can trip over the power cord. The appliance is not splash-proof. For indoor use only. Do not store the appliance outdoors. Store the appliance in a dry place inaccessible to children (pack the ap- pliance). If the power cord is damaged, it must be replaced by the manufacturer or a repair shop authorized by the manufacturer or by similarly qualified persons in order to avoid a hazard « Prior to any maintenance, cleaning and after each use, switch off the ap- pliance and unplug the mains cable from the socket. Prior to cleaning the interior of the appliance, make sure the appliance has been off for at least 15 minutes! « When the pre-heating is turned on, the water inside the appliance is heated: the water in the water tray (9) and the heating plate (17) become hot. Avoid touching the water and the heating plate! Place the appliance out of reach of children, as the water inside the ap- pliance is heated up to 50°C and the heating plate reaches hot tempera- tures up to 75°C. Before setup: Anticalc cartridge and water hardness The anticalc cartridge reduces the limescale in the water and the undesir- able emission of limescale particles into the surroundings. Effective for one to three months, depending on water hardness (see table) Important: Soak the anticalc cartridge in a water bath for 24 hours before the first use (not in the water tank!}. The resin has to absorb water to reach high performance. The period of time that the cartridge is effective for depends on the hard- ness of the water. This can be tested using the testing strips provided [test- ing strip stuck to the Quick Setup Guide)
1. Dip the testing strips into the water for a second.
2. After around one minute the results can be seen on the test strip.
Some of the green fields change colour into pink. The water hardness is shown by how many boxes turn pink. Example: If three are pink, then the water hardness is >14°dH Number of | Water Degree of Cartridge will last for pinkboxes | hardness hardness {with 4 liter/day)
es Days Liter 01 Soft From4°dH | 90 days approx. 360L 2 Moderately | From7°dH | 45 days approx. 180L hard 3 Hard From 14°dH | 30 days approx. 120L 4 Veryhard | From21°dH | 15 days approx. 60L With a water hardness above 21 °dH, we can no longer recommend the use of an ultrasonic humidifier. We recommend that you use an evaporative humidifier to increase the humidity in your house {e.g. an Oskar humidifier made by Stadler Form: www.stadlerform.com/Oskar) Note: Do not operate Eva with decalcified water out of a decalcification system that uses the principle of an ion exchanger (salt is added to the wa- ter). The salt contained in the water may lead to white dust accumulation around the appliance. However, Eva may be operated from a drinking water filter system (e.g. Brita). Should you be unsure about the quality or composi- tion of the water in your area, contact the caretaker ar your drinking water provider. Setting up / operation
1. Put Eva in the desired location on a flat surface. The mist reaches a
height of up to 1.4m thanks to the high-performance humidification (out- put level 5, warm mode on). This makes it possible to place Eva directly on the floor. Connect the power cord (1) to a suitable socket. Take the Remote Sensor" (2), the stand (3) and the two batteries out of the packaging. Open the battery compartment (4) on the underside of the Remote Sensor" (2) by turning the lid anticlockwise. Insert the two batteries into the battery compartment (4), as shown on page 4, and close the lid again. Now place the Remote Sensor" (2) on the stand (3). On the one hand, the Remote Sensor” (2) is a humidity sensor and guarantees precise humidification by its external position. On the other hand, the Remote Sensor" (2) also serves as a remote control. Position the humidity sensor Remote Sensor!” [2] in the centre of the room on a table or a sideboard with an optimal distance from Eva between 35m. The Remote Sensor!” should be positioned centrally in the room so that the room air can flow past the sensor (5) as freely as possible. If this is not possible, we recommend positioning the Remote Sensor” with a minimum distance of 30 cm from the wall and a minimum distance of 2m from windows and ventilation openings. Remove the water tank (6) by holding it by the handle and pulling it up. Screw off the water tank lid (7] and fill the water tank with clean,
cold tap water up to the maximum mark. Make sure that the anticalc cartridge (8) has been soaked in water for 24 hours prior (see “Before setup"). Finally, screw the lid (7) back on the water tank (6). Then place the water tank (6) in the unit. The water tray {9) will now slowly fil from the water tank. Important: please do not move the appliance when it is filled with water. The water could run into the electronics Press the on/off button (10) to switch Eva on. The current relative humid- ity in % is shown on the display (15). If the water level indicator light (16) isred, there is too little water in the unit. The humidification output level is pre-set to level 2 and the desired humidity at 45 % Activate the Remote Sensor" (2) by pressing the “Hygrostat” button (a). The humidity sensor automatically sends information about the measured relative humidity several times per minute to the unit, which shows it on the display (15). The measurement can also be activated by pressing any button on the Remote Sensor” 2} (aside from the an/off button (10)). The desired humidity can be changed by pressing the “Hygrostat” but- ton (11) several times (35—75% and continuous operation “CO'). The symbol on the display (15) blinks during input. After a few seconds with- out input, the selected value is saved. The symbol changes ta the current measured humidity. The humidification performance can be changed by pressing the “Out- put” button (12) several times (levels 15). The level is indicated on the display (15) by horizontal bars {e.g. 1 bar = level 1} By pressing the “Warm” button (13), the warm mode, and with it the water pre-heating, is turned on. Now the LED on the “War” button on the unit is on. The heating plate (17) warms the water before it is turned to mist by the ultrasonic membrane (19). The warm mode creates a pleasantiy warm mist plus increases the humidification performance. By pressing the “Auto” button 14], the auto mode, and with it the Adap- tive Humidity" Technology, is activated. Now the LED on the “Auto” button on the unit is on. In auto mode, the unit adapts the humidification output level automatically in order to reach and maintain the desired humidity of 45% quietly and in an energy-efficient way. The lower the current humidity is, the higher the humidification output level will auto- matically be set (under 33% = level 4, from 34 %—37 % = level 3, from 38% 41% = level 2, from 42%—45 % = level 1]. You can change the desired humidity in auto mode by pressing the “Hygrostat” button (11) several times while auto mode is active (the LED on the “Auto” button on the unit is an). The humidification output level (12) cannot be altered manually in auto mode. As soon as the “Output” button (12) is pressed to change the humidification output level, the auto mode is deactivated You can use Eva to disperse fragrances in the room. Be extremely spar- ing with fragrances because an excessive dosage can result in the mal- functioning of, and damage to, the appliance. In order to use fragrances, briefly press and release the fragrance container (20) and pull it out of the appliance. Let the fragrance drip directly onto the cotton pad in the fragrance container (20). Add a maximum of 1-2 drops of fragrance into the fragrance container! Push the container back again and press and release it to lock it. Tip: in order to change the fragrance, remove the cotton pad and clean the container with soap. Now you may insert
à new cotton pad (commercially available] and add drops of the desired fragrance
12. If the water level indicator (16) changes to red, the water must be re-
filed. Remove the water tank (6) and fill it with clean, cold tap water up to the maximum mark. After replacing the water tank, the appliance automatically resumes operation after a few seconds. The water tank can also be refilled during operation.
13. 1f you find the lamps too bright [in a bedroom, for example], you may
reduce the light intensity by pressing the night mode key (21) + Normal mode (default mode} + Dimmed mode (push once) + Lights-out mode (push twice] «By pushing the dimmer button once more, you can go back into nor- mal mode. If there is no water in the appliance, the red water level symbol (16 lights up in all modes. The red light cannot be dimmed
14. If two dots are shown (22) on the display (15), Eva cannot establish a
radio connection to the Remote Sensor" (2). Eva still functions thanks to a humidity sensor within the appliance. Press any button on the Re- mote Sensor" (2) to activate it. Make sure that the Remote Sensor” {2} is within a 10m radius of Eva. Walls, doors and floors between Eva and the Remote Sensor" (2) can disrupt the radio connection. The Re- mote Sensor! (2) should be optimally positioned at a distance between 35m from Eva and on an elevated surface in the middle of the room {see «Setup/aperation» No. 3). The two dots on the display (22) could also indicate that the batteries in the Remote Sensor" (2) need replac- ing (see «Setup/operation» No. 2) Note: Should you see droplets (or other signs of dampness) on or around the unit, this condensed water is from the humidifier. This means that the air can no longer absorb the moisture from the humidifier. Please activate the auto mode with a desired humidity of 45 %. Water droplets should then stop forming. Cleaning Prior to any maintenance, cleaning and after each use, switch off the appli- ance and unplug the mains cable (1} from the socket. Attention: Never submerge the appliance in water (danger of short-circuit). If pre-heating is turned on (the warm mode LED is on (13]}, the water inside the appliance is heated: the water in the water tray (9) and the heating plate (17) become hot. Avoid touching the water and the heating plate! + For external cleaning, rub with a damp cloth and then dry thorough. + Run the cleaning mode at least once per month. The appliance must be off for at least 15 minutes prior to internal cleaning! Then remove the water tank (6), the mist chamber (23), the silicone cover (18), the Silver Cube (24) and the fragrance container (20). Fill a cup with 200ml of tap water mixed with descaling agent (mix according to the manufacturer's instructions). Pour the liquid carefully into the water tray (9) by holding the cup directly over the water tray [see page 5). Do not pour the liquid into the water tray from high above the tray! Be sure that no liquid enters the air inlet opening (26). This will damage the appliance and will void any claim to the warranty,
+ To start the cleaning mode, the mains cable must be connected to a sock- et. Press and hold the night mode button (21) on the underside of the right corner for 5 seconds to activate the cleaning mode. Now the water level symbol (16) on the appliance will blink red. The cleaning mode runs for around 5 minutes and automatically turns off afterwards (the water level symbol stops blinkingl. Check in the water tray (9) if the limescale on the ultrasonic membrane (18) and the heating plate (17) has dissolved. Attention: the water and the heating plate are hot, risk of scaldingl! If limescale residue remains, the ultrasonic membrane (19) and the heat- ing plate (17) can be cleaned with the help of the cleaning brush (25) {front- and backside), Do not try to scrape them with a hard object For stubborn limescale, we recommend descaling the appliance by run- ning the cleaning mode [21] several times in a row. Leave the descaling agent in the water tray for a maximum of 20 minutes and pour it out after- wards as described below. Important: Pour the descaling agent out over the left front corner of the appliance (see the arrow on the appliance). No water may enter the air inlet opening (26). This will damage the appliance and will void any claim to the warranty. « To rinse, now fill the cup with 200 ml of tap water and carefully pour the liquid into the water tray (9) by holding the cup directly over the water tray (see page 5). Do not pour the liquid into the water tray from high above the tray! Pour the water out over the left front corner of the appliance. Repeat the process until there is no more descaling agent in the water tray (9). Place the Silver Cube (24), silicone cover (18), mist chamber (23), water tank (6) and fragrance container (20) back into the appliance. If the water tank is not sitting right, check if the upper part of the mist chamber (23) is properly mounted Clean the water tank (6) tharoughly every two weeks with a soft brush or sponge and warm water. Use diluted descaling agent (mix according to the manufacturer's instructions) for lime deposits. Rinse the water tank afterwards with clean, cold tap water thoroughy. Replacement ofthe anticalc cartridge + Please find the recommended replacement interval in the table (see “Be- fore setup) « Tip: the efficiency of the cartridge (8) can be inspected with a simple test. Hold a small mirror in the mist (27) for a few seconds. If white de- posits (calcium carbonate) appear on the mirror, then the cartridge needs changing + The anticalc cartridge is located on the inner side of the tank lid (7). First, screw the tank lid (7) off the water tank (6) and then screw the cartridge off the tank lid. Dispose of the cartridge in the domestic waste (8). Prior to screwing the new anticalc cartridge into the inside of the tank lid, soak it in water (not in the water tank!) for 24 hours. « Keep the tank lid (7) when replacing the cartridge! Silver Cube” The Silver Cube" (24) prevents the growth of germs and bacteria in the humidifier due to the continuous release of silver ions. The use of silver cubes leads to a hygienic room climate. The lifetime of the silver is around
one year. We therefore recommend that you replace the silver cube at the beginning of every humidifying season. The silver cube starts working as soon as it cames into contact with water, and also works when the unit is switched off, Repairs + Repairs to electrical appliances must only be carried out by a qualified electrical technician. If improper repairs are carried out, the warranty lapses and all liability is refused + Never operate the appliance if the adaptor or plug is damaged, after ithas malfunctioned, if it has been dropped or has been damaged in any other way (eracks/breaks in the casing) + Do not push any object into the appliance. + Ifthe appliance is beyond repair, make it unusable immediately by cutting through the cable and hand it in at the collection point provided for the purpose Disposal The European directive 2012 / 19 / CE on Waste Electrical and Electronic Equipment (WEEE), requires that old household electrical appliances must not be disposed in the normal unsorted municipal waste stream. Old appli- ances must be collected separately in order to optimize the recovery and recycling of the materials they contain and reduce the impact on human health and the environment. The crossed out "wheeled bin” symbol on the product reminds vou of our obligation, that when you dispose of the appliance it must be separately collected. Consumers should T contact their lacal authority or retailer for information concerning the correct disposal of their old appliance = Specifications Rated voltage 220-240 V/50Hz Rated power 10-95W Humidity output up to 550g/h Dimensions 196 x 418 x 196mm {width x height x depth) Weight 3.0kg Water tank capacity 6.3litres Sound level 26-34dB{A) Complies with EU regulations CE / WEEE / RoHS All rights for any technical modifications are reserved