Oskar Big - Humidifier STADLER FORM - Free user manual and instructions
Find the device manual for free Oskar Big STADLER FORM in PDF.
Download the instructions for your Humidifier in PDF format for free! Find your manual Oskar Big - STADLER FORM and take your electronic device back in hand. On this page are published all the documents necessary for the use of your device. Oskar Big by STADLER FORM.
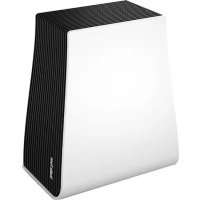
USER MANUAL Oskar Big STADLER FORM
1. Upper part of air humidifier with motor
2. Lower part of air humidifier (water container)
3. Mains cable for electricity supply
11. Opening for refilling while in operation
How your product works Your humidifier works on the natural principle of evaporation. A fan passes the dry indoor air through the humidifier filters, which are soaked with wa- ter. The air thereby only absorbs as much moisture as it needs at the current temperature. Important safety instructions Please read through the operating instructions carefully before you use the appliance for the first time and keep them safely for later reference; if nec- essary pass them on to the next owner.
- Stadler Form refuses all liability for loss or damage which arises as a result of failure to follow these operating instructions.
- The appliance is only to be used in the home for the purposes described in these instructions. Unauthorised use and technical modifications to the appliance can lead to danger to life and health.
- This appliance can be used by children aged from 8 years and above and persons with reduced physical, sensory or mental capabilities or lack of experience and knowledge if they have been given supervision or instruc- tion concerning use of the appliance in a safe way and understand the hazards involved. Children shall not play with the appliance. Cleaning and user maintenance shall not be made by children without supervision.
- Only connect the cable to alternating current. Observe the voltage infor- mation given on the appliance.
- Do not use damaged extension cords. English• Do not run the power cord over sharp edges and make sure that it does not get trapped. Do not pull the plug from the socket with wet hands or by holding on to the power cord.
- Do not use the appliance in immediate vicinity of a bath tub, a shower or a swimming pool (observe a minimum distance of 3 m). Place the appliance such that a person in the bath tub cannot touch the appliance.
- Do not place the appliance near a heat source. Do not subject the power cord to direct heat (such as a heated hotplate, open flames, hot iron sole plates or heaters for example). Protect power cords from oil.
- See to it that the appliance is properly positioned to ensure a high stabil- ity during its operation and make sure that no one can trip over the power cord.
- The appliance is not splash-proof.
- For indoor use only.
- Do not store the appliance outdoors.
- Store the appliance in a dry place inaccessible to children (pack the ap- pliance).
- If the power cord is damaged, it must be replaced by the manufacturer or a repair shop authorized by the manufacturer or by similarly qualified persons in order to avoid a hazard.
- Prior to any maintenance, cleaning and after each use, switch off the ap- pliance and unplug the mains cable from the socket. Setting up / operation
1. Place Oskar big on a flat surface in the desired area. Use the filling open-
ing (11) to fill the lower part (2) with water up to the maximum mark (14), either at a water tap or with a watering can. When you have filled the lower part at the tap, carefully fit the upper part (1) to the lower part (2). Plug the mains cable (3) into a electric socket.
2. Start the appliance by pressing the on/off switch (5). The blue LED should
then light up. If a red pilot lamp (10 and 14) lights up however, this indi- cates either lack of water in the appliance or failure to seat the upper part correctly on the lower part. If there is no water in the appliance, the motor will stop automatically.
3. By pressing the speed level selector button (6) you can change the humid-
ity output (1 to 4 LEDs = normal evaporation to high evaporation).
4. You can use the hygrostat to set the desired air humidity. To do this, press
on the hygrostat button (7). You can choose between the following lev- els: 40 % relative air humidity (1 blue LED), 45 % (2 blue LED), 50 % (3 blue LED), 55 % (4 blue LED), constant operation (5 blue LED). If the lamps are flashing, this indicates that the desired air humidity has already been reached. Please note that the hygrostat needs about 3 second to measure the current humidity in the room. The hygrostat switches on automatically once the relative air humidity in the room sinks below the preset value. We recommend that you set your room humidity to 45 % (comfort range).
5. If you find the lamps too bright (in a bedroom for example), you may reduce
the light intensity by pressing the night mode key (8). You can choose between three different modes:
- Lights-out mode (push twice)By pushing the dimmer button once more, you can go back into normal mode. If there is no water in the appliance, the red LEDs (10 and 14) light up in all modes (normal and night mode). The red light can not be dimmed.
6. Oskar big has a reminder function for filter change. At first use timer will
be set automatically. After a whole operating duration of two months the filters need to be changed. In this case, the blue LED above the reset button (9) is blinking. After changing the filters, press and hold the reset button (9) until the blue filter LED is continuously illuminated again.
7. You can use the Oskar big humidifier to distribute fragrances in the room.
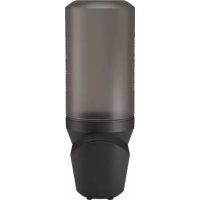
Please be as economical as possible in the use of fragrances, because ex- cessive quantities may lead to malfunctions and damage to the appliance. To use fragrances, remove the fragrance container (12) from the filling opening (11). Place no more than 2–3 drops of fragrance in the container and replace it in the space provided in the filling opening. If you wish to change the fragrance, you can wash out the fragrance container and fleece under running water.
8. If you wish to top up with water during operation, you can open the filling
opening (11) by pressing on it (Push to open). You can then refill the ap- pliance using a water can or water bottle without having to switch it off. PLEASE NOTE: If you are operating the appliance with fragrances, remove the fragrance container before refilling to prevent water getting into it. Should this nevertheless occur, it will be necessary to remove the water container (2) and rinse it. Fragrances should not be permitted to enter the water tank, since they might destroy the plastic. Important information Humidification with an evaporator takes time. This means that it usually takes more than 2–3 hours to reach the desired humidity. If you operate the humidifier in a very dry environment we recommend to operate it on humidity level 5 and speed level 4 to reach a maximum amount of humidity in a short time. Cleaning Prior to any maintenance, cleaning and after each use, switch off the appli- ance and unplug the mains cable (3) from the socket. Attention: Never submerge the appliance in water (danger of short-circuit). For hygienic reasons and to ensure proper operation, we recommend the following cleaning intervals.
- Daily: Fill the appliance with fresh, cold tap water. If the appliance is not used for several days, empty the water from the lower part (2) beforehand and if necessary, clean it with a bit of dish detergent and a clean cloth. Fill fresh water into the lower part (2) before putting the appliance back into operation.
- Every 2 weeks: First remove the filters (13) and the Water Cube™ (15). Clean the inside of the lower part (2) thoroughly every 2 weeks with a bit of dish detergent, warm water and a soft, clean cloth, sponge or brush. Then rinse the lower part (2) thoroughly with cold water and put the filters and the Water Cube back in.• Approx. every 4 weeks (depending on the hardness of the water): First remove the filters (13) and the Water Cube™ (15). In the case of limescale deposits on the inside of the lower part (2), we recommend using the Stadler Form Cleaner & Descaler (www.stadlerform.com/accessories). Alternatively, you can use a household decalcifier or vinegar. Then rinse the lower part (2) thoroughly with cold water and put the filters and the Water Cube back in. For hygienic reasons, the filters (13) must be replaced every 2–3 months.
- Regularly as required: For external cleaning, rub with a damp cloth and then dry thoroughly.
- At the end of the season: Before storing the appliance at the end of the season, clean it inside and out thoroughly and let it dry completely. Descale the lower part (2) as described above. Clean the fan blades in the upper part with a damp cloth and then wipe them dry (see page 4). Insert new humidifier filters (13) and a new Water Cube (15) in order for your appliance to be ready for the start of the next season. Replacement of the humidifier filters
- For hygienic and optimum operation of the air humidifier, the filters must be replaced every 2 – 3 months. If the filters remain in use for longer than this, on the one hand the humidity output may decline severely and on the other, the antimicrobial action of the filters can no longer be guaran- teed. The humidifier filters can be obtained from the dealer where you purchased your Oskar big.
Water Cube™ – optimal hygiene for your air humidifier The Water Cube™ (15) by Stadler Form provides optimal hygiene in your air humidifier. It keeps your humidifier running smoothly, extending its lifespan. The Water Cube even works when your appliance is switched off, so the humidifier stays fresh all season long. We recommend replacing the Water Cube at the start of the humidifier season. Repairs
- Repairs to electrical appliances must only be carried out by a qualified electrical technician. If improper repairs are carried out, the warranty lapses and all liability is refused.
- Never operate the appliance if the adaptor or plug is damaged, after it has malfunctioned, if it has been dropped or has been damaged in any other way (cracks/breaks in the casing).
- Do not push any object into the appliance.
- If the appliance is beyond repair, make it unusable immediately by cutting through the cable and hand it in at the collection point provided for the purpose.
- In the event of a repair, the following points must be observed before the appliance is shipped or taken to the dealer: completely empty the water in the appliance (water tray and any water tank), remove any filters and/ or anti-limescale cartridges and allow the appliance to dry completely. Appliances containing residual water may be damaged during transport, invalidating the warranty.Disposal The European directive 2012 / 19 / CE on Waste Electrical and Electronic Equipment (WEEE), requires that old household electrical appliances must not be disposed in the normal unsorted municipal waste stream. Old appli- ances must be collected separately in order to optimize the recovery and recycling of the materials they contain and reduce the impact on human health and the environment. The crossed out “wheeled bin” symbol on the product reminds you of your obligation, that when you dispose of the appliance it must be separately collected. Consumers should contact their local authority or retailer for information concerning the correct disposal of their old appliance. Specifications Rated voltage 220 – 240 V / 50 Hz Output 8 – 30 W Room size (up to) 100 m