Club Racer - Spinning Bike CARE FITNESS - Free user manual and instructions
Find the device manual for free Club Racer CARE FITNESS in PDF.
User questions about Club Racer CARE FITNESS
0 question about this device. Answer the ones you know or ask your own.
Ask a new question about this device
Download the instructions for your Spinning Bike in PDF format for free! Find your manual Club Racer - CARE FITNESS and take your electronic device back in hand. On this page are published all the documents necessary for the use of your device. Club Racer by CARE FITNESS.
USER MANUAL Club Racer CARE FITNESS
https://cloud.carefitness.com/index.php/s/E2WD22KMNBQzE
RL
https://www.carefitness.com/sav
RPM:0\~199 RPM
SPEED: 0 99 KM/H
PULSE: 30 240 BPM (need chest belt)
(Bluetooth and ANT+)
WATT: 0~999
Time : Count down setting range 1~99 minutes
Count up setting range 00:01~99:59
Protocol: CARE CONNECT
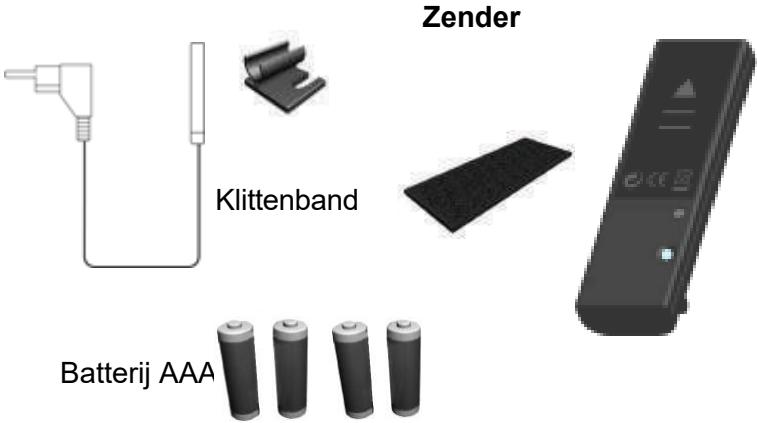
ITEM Check List
Sensor Cable & Holder
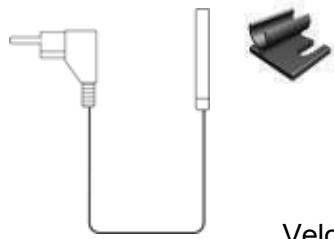
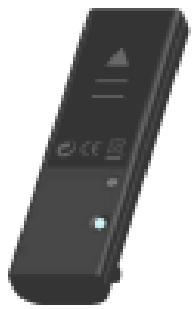
Transmitter
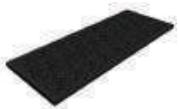
Velcro
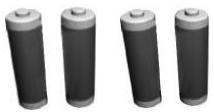
AAA Batteries

Cable Stripe
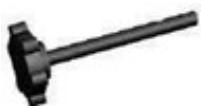
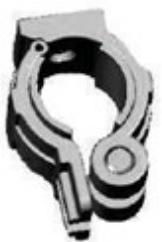
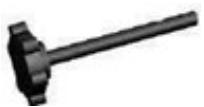
Clamp Bracket Set
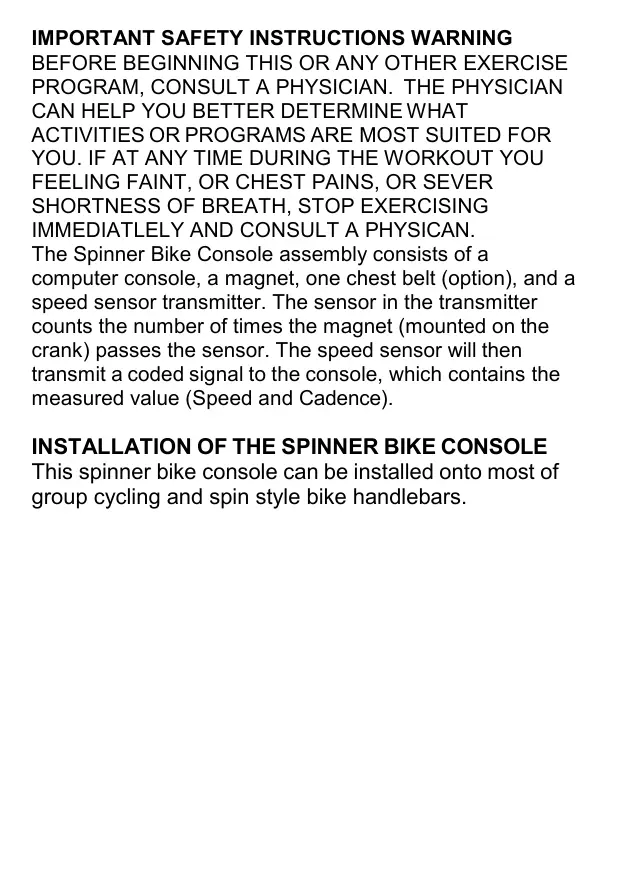
IMPORTANT SAFETY INSTRUCTIONS WARNING
BEFORE BEGINNING THIS OR ANY OTHER EXERCISE PROGRAM, CONSULT A PHYSICIAN. THE PHYSICIAN CAN HELP YOU BETTER DETERMINE WHAT ACTIVITIES OR PROGRAMS ARE MOST SUITED FOR YOU. IF AT ANY TIME DURING THE WORKOUT YOU FEELING FAINT, OR CHEST PAINS, OR SEVER SHORTNESS OF BREATH, STOP EXERCISING IMMEDIATELY AND CONSULT A PHYSICAN.
The Spinner Bike Console assembly consists of a computer console, a magnet, one chest belt (option), and a speed sensor transmitter. The sensor in the transmitter counts the number of times the magnet (mounted on the crank) passes the sensor. The speed sensor will then transmit a coded signal to the console, which contains the measured value (Speed and Cadence).
INSTALLATION OF THE SPINNER BIKE CONSOLE
This spinner bike console can be installed onto most of group cycling and spin style bike handlebars.
Console Installation:
- Ensure the Console Clamp is securely mounted on the back of the console. Insert the mounting screw through the Console Clamp into the Console.
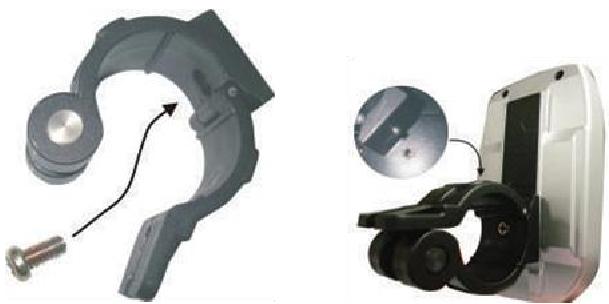
- Spread the bottom of the console clamp apart, than clamp it back together over the top center of the handlebar.
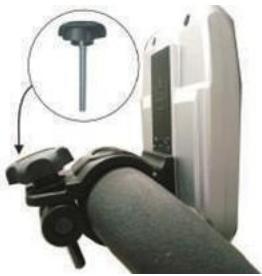
- Turn the screw bar downward, slightly tighten the screw and adjust the console for optimal Visibility. Once the console is adjusted, continue to tighten the screw until it is securely attached to the handle bar.
Speed Sensor Transmitter Battery Installation
- Remove battery cover from the transmitter.
- Install 2 AAA batteries in battery compartment and reinstall the battery cover.
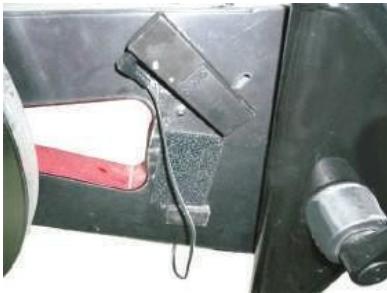
Transmitter
Depending on the make and model of the bike, speed sensor transmitter can be installed nearby the drive belt cover. The transmission range is around 2 meters from the speed sensor transmitter to the computer console.
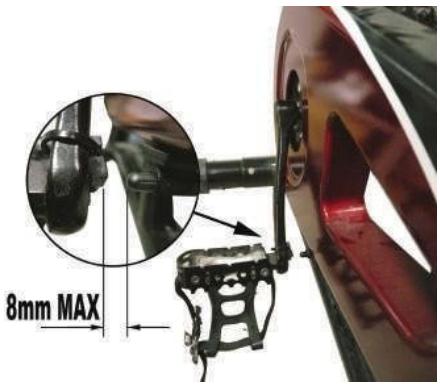
Magnet
Firmly attach the magnet on the crank arm at the measured location. The allowable maximum distance between the magnet and sensor is 8 mm.
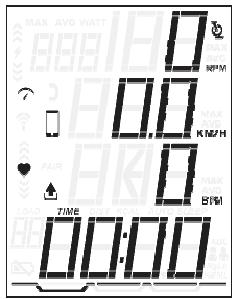
SPEED PAIR STAGE
(After setting up the sensor)
Note: All models will be paired right after production
For commercial and maintenance purpose - follow the below steps.
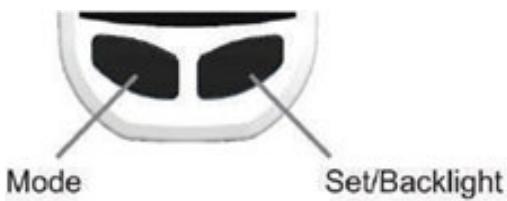
- Press the 'MODE' key to go into DIST mode.
- HOLD 'PAGE' key to go into TIME, the word TIME will flash.
- Once in TIME HOLD 'MODE' and 'PAGE' keys together, there will be 3 dot lines appear.
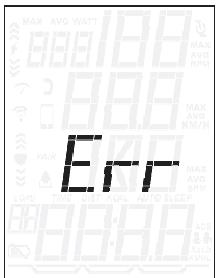
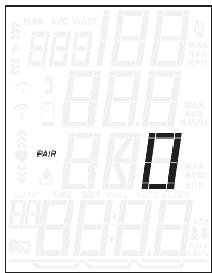
- Start pedaling to wake up the sensor. Once pairing is successful the 3 dot lines will disappear and will show a number.
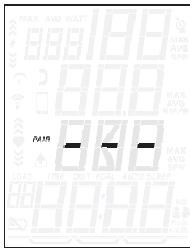
If the number '0' is displayed on LCD, it means that pair stage is successfully completed. If the monitor displays 'Err', it means the pair stage has failed. The user can repeat step 3 and run the pairing stage again. Console will exit pairing stage automatically after 10 seconds with previously paired speed transmitter.
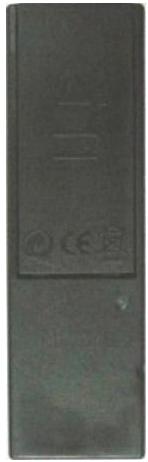
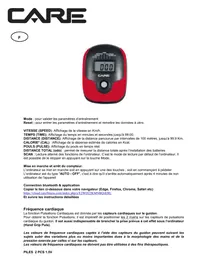
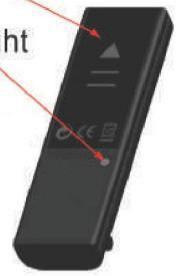
Speed transmitter illustration
Notice: LED indication light will flash a few times when it wakes up and ready to be paired.
AAA Battery x 2
LED Indication Light
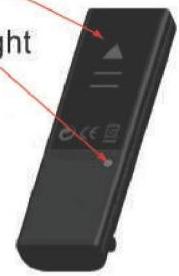
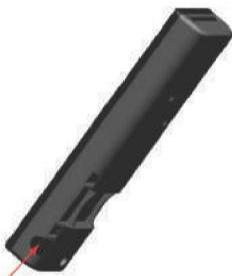
Sensor plug-in port
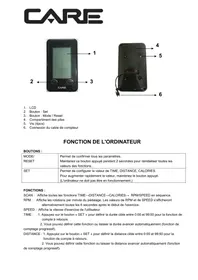
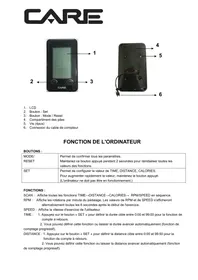
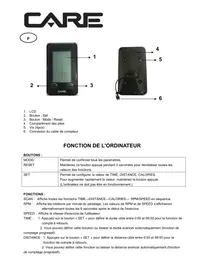
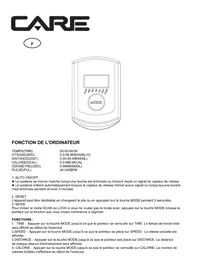
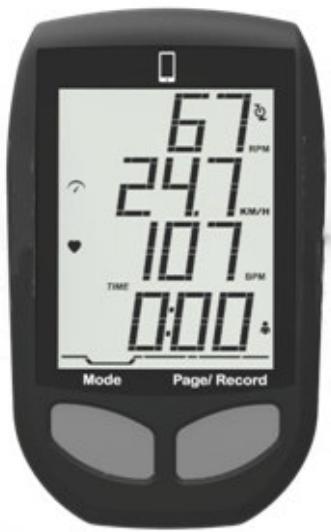
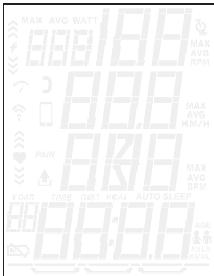
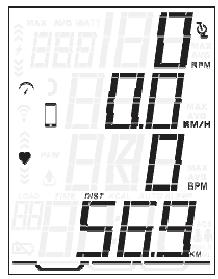
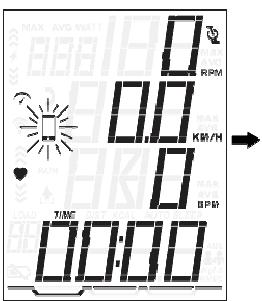
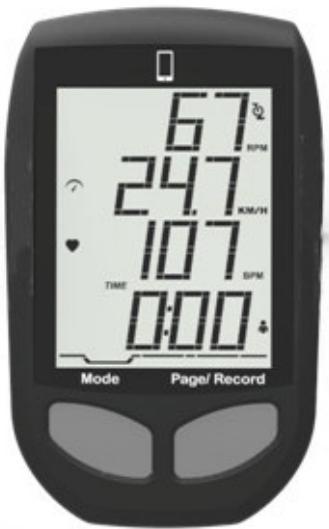
DISPLAY WINDOW
LOW BATTERY
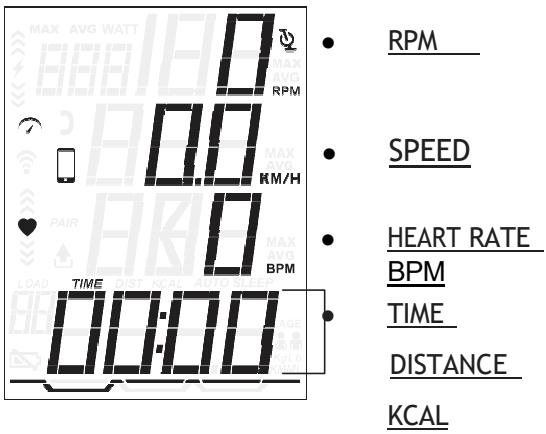
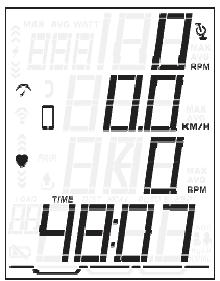
TIME
Time is the length of time (min. / sec.)
The time will count up or count down when user is pedaling. When pedaling stops, timer will stop to count up or count down after 3 seconds.
CADENCE & SPEED
Cadence is measurement of how fast the cranks are rotating in RPM's. The approximate speed of the bike can also be displayed (MPH/KPH) in this section.
In addition to MPH/KPH, CADENCE will also display a bar graph allow riders to keep track of approximate cadence.
Average Cadence or Speed will be automatically shown after rider stop pedaling for 3 seconds.
DISTANCE
Distance is measurement of the approximate distance achieved on the bike. This distance is calculated based on user riding a bike with tires having same diameter as flywheel.
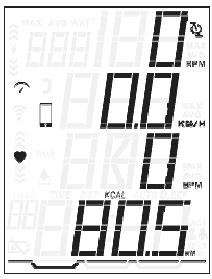
CALORIES (KCAL)
Kcal is the approximation of calories burned during work out. Calories are calculated by measuring rider's instantaneous heart rate, age, and weight.
HEART RATE (apply to HR featured models only)
This is the approximation of heart rate detect from chest belt during work out. Average Heart Rate will automatically show after 3 seconds if console cannot detect current Heart Rate.
POWER (WATT)
Watt is the approximation of applied force during work out. This is measured by RPM.
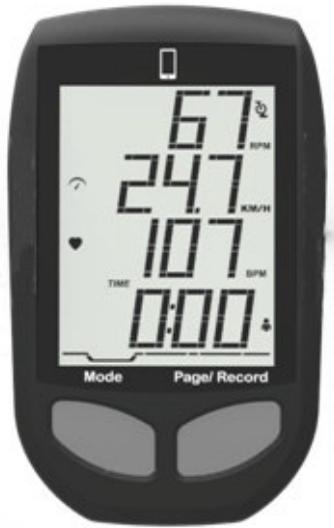
QUICK Start
In power saving mode, press page key to bring the console to 'QUICK Start' state.
Power Saving Mode
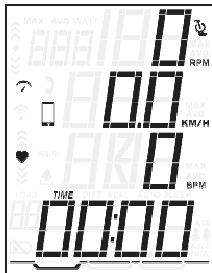
Quick Start Mode
MODE SELECT
Press 'MODE' key to select TIME, DIST, KCAL display.
RESETTING ALL MEASURED VALUE
To clear all measured values, press and hold Page key under TIME Mode for 3 seconds. All measured value AVG SPEED, AVG PULSE, TIME, DIST, KCAL will reset.
TIMER SETTING
TIMER displays user's workout duration. If the user does not set the COUNT DOWN TIME, TIMER will count up from 00:00 to 99:59.
If user presets the COUNT DOWN TIME, the TIME will count down to zero with flashing display, then counting up the Timer. The user can go into TIMER setting by holding 'PAGE' key for 3 seconds.
Under DIST or KCAL, hold Page key for 3 seconds to go into settings, Press "MODE" key to go to heart rate icon then press page to go to heart rate target zones window.
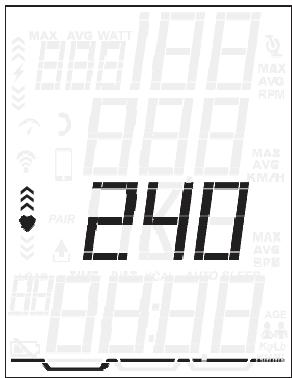
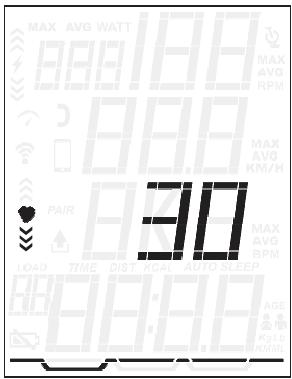
Press Mode key to increase maximum heart rate limit. After setting maximum heart rate, press Page key to adjust minimum heart rate.
PERSONAL DATA SETTING
Accurate personal data will make your estimated calories burned more accurate. Under KCAL or DISTANCE MODE, Hold Page key for 3 seconds to go into setting, continuously' key to get to heart rate windows.
- Press Page key to select gender, either: Male / Female
- Press Page key to go to weight unit Settings. Press Mode key to select weight, Kg. / Lb. Note: change of metric units to imperial units will affect all displaying units: MPH/KPH, Lb/KG and ML/KM.
- Press Page key, will go to weight settings press Mode key to increase weight by 0.5Kg or 0.5Lb.
Console pairing with Kinomap®
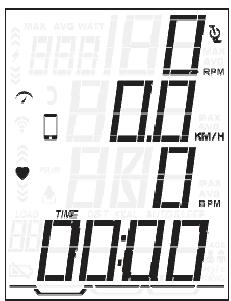
- Please download Kinomap® from Google Play/APP STORE
- After open the APP, press the phone icon on bike console.
- After APP search for bike console, the bike console will display the pairing interface.
Copy the link here under to your browser (Edge, Firefox, Chrome, Safari etc)
https://cloud.carefitness.com/index.php/s/E2WD22KMNBQzERL
And Followw the detailed instruction
TROUBLESHOOTING
No Display on Console
- Press any key to bring the console to 'Quick Start' mode.
- Ensure the battery icon is not shown on the Console and transmitter have batteries installed properly. Red LED light will flash on the transmitter when battery is low.
RPM or HR does not change
- Press 'MODE key' repeatedly to toggle between SPEED (SPD), DISTANCE (DIST), TIME (TIME) and CLOCK (CLK) values.
- Holding 'PAGE key' to clear past measured value or go into setting and exit.
Cadence number jumps high or low
- Separate bikes may be paired to same console and are cross-talking, simply run transmitter pair stage again on the bike.
- Relocate the bike to a different part of the room, away from any RF interference areas.
Heart Rate signal gets interrupted or drops out
- Ensure that there is a minimum distance of 36 inches between bikes.
- Make sure your chest strap is secure and electrodes are making contact with your chest at all times.
No Heart Rate signal displayed
- Ensure your chest strap is worn correctly, and there is moist under electrodes of the chest strap.
CAUTION
EXTERNAL INTERFERENCE MAY BE CAUSED BY
OTHER ELECTRONIC DEVICES, SUCH AS:
NEARBY TELEVISIONS, STEREO EQUIPMENT,
SPEAKERS, ELECTRICAL WIRE CABLING, ETC. IF
YOU EXPERIENCE DISTURBANCES IN CONSOLE
DISPLAY TRY MOVING YOUR BIKE (S) AWAY
FROM POTENTIAL RF INTERFERENCE AREAS.
RELOCATE THE BIKE AWAY FROM ANY EQUIPMENT
THAT COULD POTENTIALLY INTERRUPT THE RADIO
FREQUENCY SIGNAL, SUCH AS A DVD PLAYER OR
TELEVISION, ETC.
To order spare parts
To guarantee an efficient service, make sure you have the following items before you contact our After Sales Service:
The name or reference of the product.
The manufacturing number shown on the main chassis and on the packing box.
The number of the missing or faulty part shown on the exploded view of the product described in this manual.
After Sales Service
Email: service-uk@carefitness.com
RPM:0\~199 RPM
GESCHWINDIGKEIT : 0 ~ 99 KM/H
https://cloud.carefitness.com/index.php/s/E2WD22KMNB QzERL
E mail: service-de@carefitness.com
RPM:0\~199 RPM
VELOCIDAD:0\~99KM/H
https://cloud.carefitness.com/index.php/s/E2WD22KMNB QzERL
LED Indication Light

Sensor plug-in port
https://cloud.carefitness.com/index.php/s/E2WD22KMNB QzERL
E mail: service-it@carefitness.com

TPM:0\~199 TPM
SNELHEID:0\~99KM/U
PULSE: 30 240 BPM (borstriem vereist)
(Bluetooth en ANT+)
WATT: 0~999
Tijd: Aftelbereik 1~99 minutes
Accountbereik
00:01~99:59
Protocol: CARE CONNECT
Lijst van elementen
Sensorvoet en kabel
Kabelstrip

Montagebeugel
In optie


ATTENTIE BELANGRIJKE VEILIGHEIDSINSTRUCTIES
RAADPLEEG UW ARTS VOORDAT U MET DIT OF EEN ANDER TRAININGSPROGRAMMA BEGINT. UW ARTS KAN U HELPEN BESLISSEN WELKE ACTIVITEITEN OF PROGRAMMA'S HET BESTE VOOR U ZIJN. ALS U OP ENIG MOMENT TijdENS HET SPORTEN DUIZELIGHEID, PIJN OP DE BORST OF ERNSTIGE KORTADEMIGHEID ERVAART, STOP DAN ONMIDDELLIJK MET TRAINEN EN RAADPLEEG EEN ARTS.
enz.)https://cloud.carefitness.com/index.php/s/E2WD22KMNB QzERL
E-mail: service-nl@carefitness.com