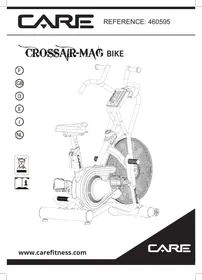
ROADSTER - ergomètre - Exercise bike CARE FITNESS - Free user manual and instructions
Find the device manual for free ROADSTER - ergomètre CARE FITNESS in PDF.

| Product Type | Exercise bike ergometer |
| Brand | CARE FITNESS |
| Model | ROADSTER |
| Usage | Home and gym use (compliant with EN-957 class SA) |
| Maximum user weight | 140 kg |
| Power supply | Rechargeable battery (first charge via mains transformer 8h, then recharging by exercise generator) |
| Display | LED console with matrix display |
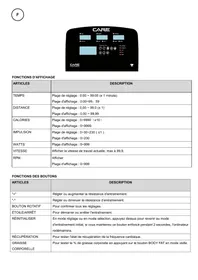
| Available displays | RPM, Speed, Time, Calories, Distance, Watts, Level, Program graph |
| Programs | Manual, Programs P1-P12, User (graphic editing), HRC (target heart rate), Watts |
| HRC modes | Target, 90%, 75%, 55% of maximum heart rate |
| Resistance | Levels 1 to 16 (electronic) |
| Pulse sensor | Hand grip sensors |
| Recovery function | 60-second recovery test with indication F1 (best) to F6 |
| Pause and stop functions | Yes |
| Warranty | Frame 3 years, wear parts 1 year (domestic use) |
| Maintenance | Monthly lubrication of bearings, cleaning after use (corrosive sweat) |
| Safety | Stable and flat surface, do not use in humid environment, children not allowed unattended, consult a doctor before any program |
| Spare parts | Order via after-sales service with product reference and manufacturing number |
| After-sales service | C.A.R.E, 18/22 rue Bernard, Z.I. Les Vignes, 93012 Bobigny Cedex, tel. 0820 821 167 (Mon-Fri 10am-12pm, 2pm-5pm) |
Frequently Asked Questions - ROADSTER - ergomètre CARE FITNESS
User questions about ROADSTER - ergomètre CARE FITNESS
0 question about this device. Answer the ones you know or ask your own.
Ask a new question about this device
Download the instructions for your Exercise bike in PDF format for free! Find your manual ROADSTER - ergomètre - CARE FITNESS and take your electronic device back in hand. On this page are published all the documents necessary for the use of your device. ROADSTER - ergomètre by CARE FITNESS.
USER MANUAL ROADSTER - ergomètre CARE FITNESS
The generator bike is delivered with an adaptor.
This adaptor must be plugged for at least 8 hours before the first use of the bike and in case the bike is not used for a long time, to load the battery.
Afterwards, the battery will be loaded by the generator during the training.
- Read this user manual and keep it in a safe place. Use this product exclusively in the manner indicated.
- This equipment must be assembled and used by adults.
- The equipment complies with the EN-957 standard, classification SA for use in the home, in a sports center.
- For totally safe use, a stable, level surface is required. Protect your floor covering with a mat. Do not use the equipment in damp areas (swimming pool, sauna, etc.).
- Do not allow children to play with this equipment. CARE declines all responsibility for any injuries they may incur. Do not allow children close to this equipment when you are training.
- CARE declines all responsibility if technical modifications are made to any of its products by the user.
Maximum weight of user: 140 ~kg . - Before you start training, it is essential that you consult your doctor to determine the intensity level of the program you use.
- Excessive or badly programmed training can damage your health.
- Keep your back straight when exercising.
- It is strongly recommended that your wear suitable clothing and footwear.
- For adjustable parts, bear the maximum positions in mind.
Maintenance
- Regularly check that elements fastened with nuts and bolts are correctly tightened.
- To maintain the level of safety, the equipment must be regularly checked. It is vital that any faulty parts are replaced and that it is not used until completely repaired. Remember regularly to grease moving parts.
- As sweat is very corrosive, do not allow it to come into contact with the enameled or chromed parts of the equipment, particularly the computer. Immediately wipe the equipment after training. The enameled parts can be cleaned using a damp sponge. All aggressive or corrosive products should be avoided.
Guarantee: the chassis is guaranteed for 3 years. Moving parts are guaranteed for 1 year. The guarantee applies to normal use by a private individual in his home. Validate your product warranty on line www.carefitness.com
Recycling: The « crossed out dustbin » sign means that this product and its batteries cannot be thrown out whit domestic waste. They should be treated apart. When you have finished with them, drop them at an authorised collection point so they can be recycled. This gesture will go towards protecting the environment and your health.
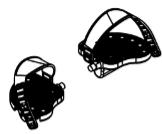
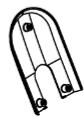
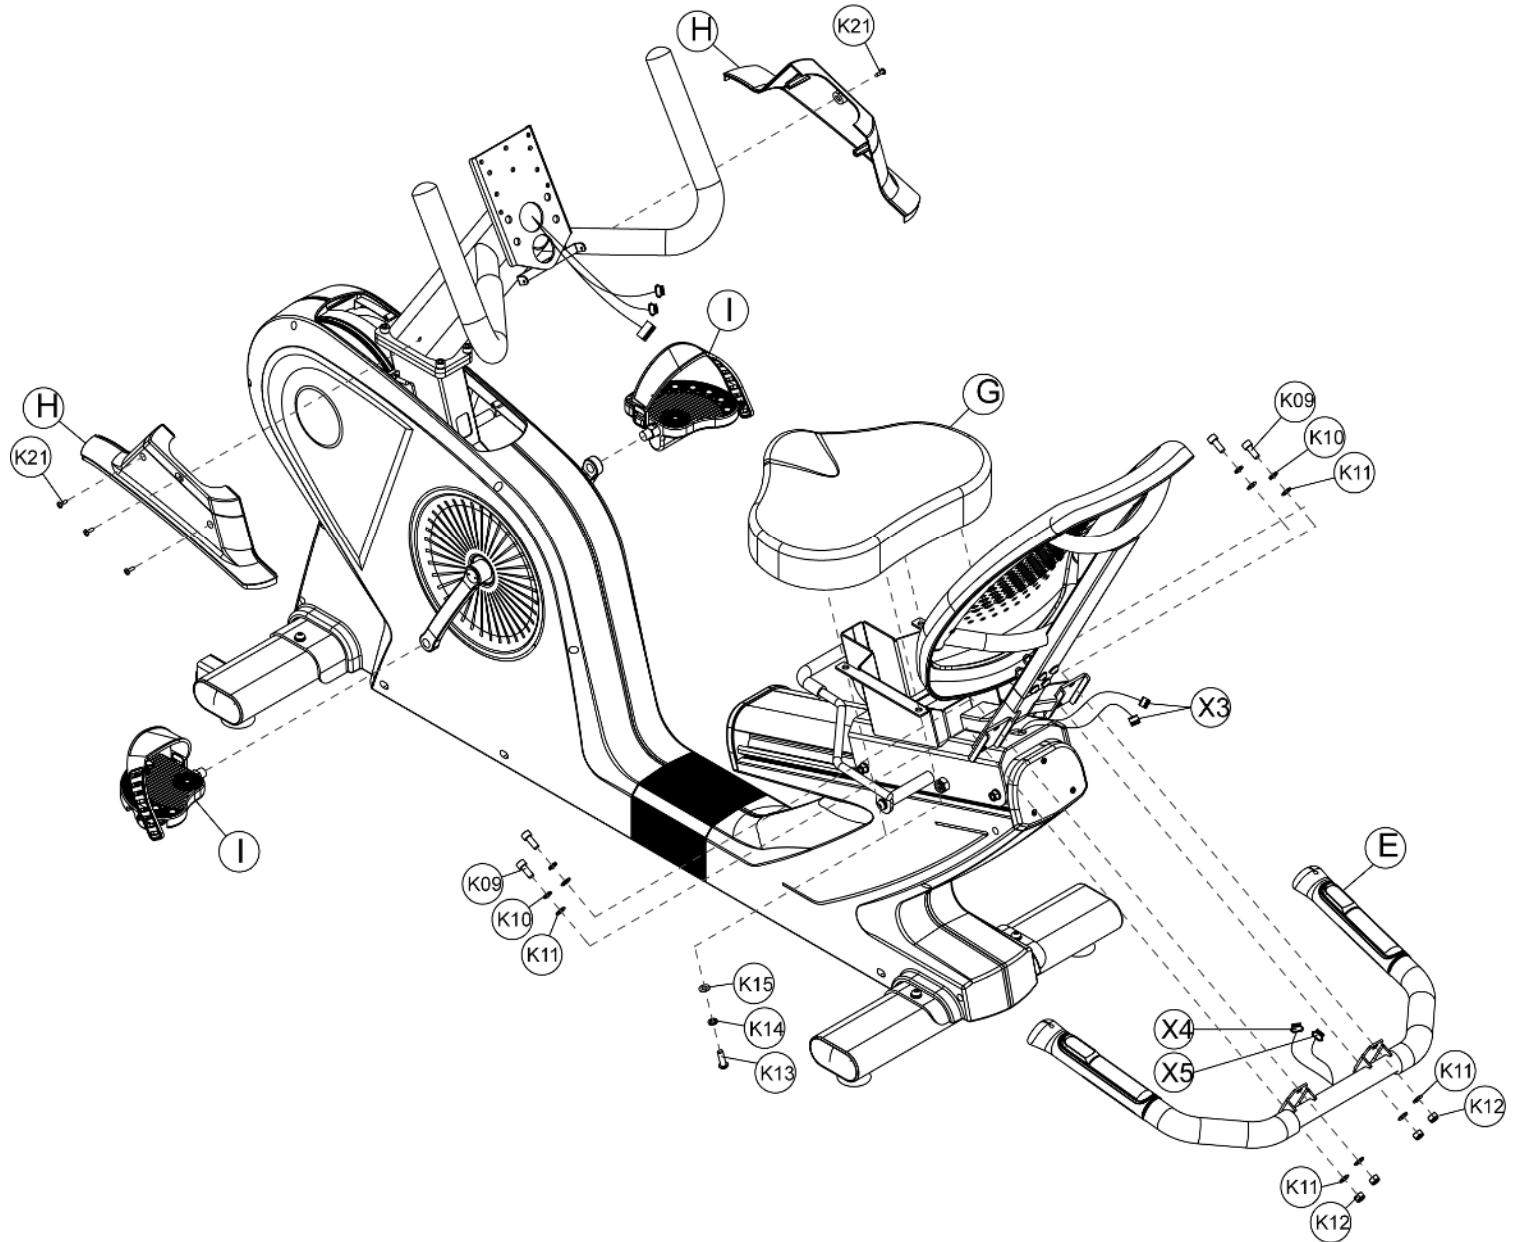
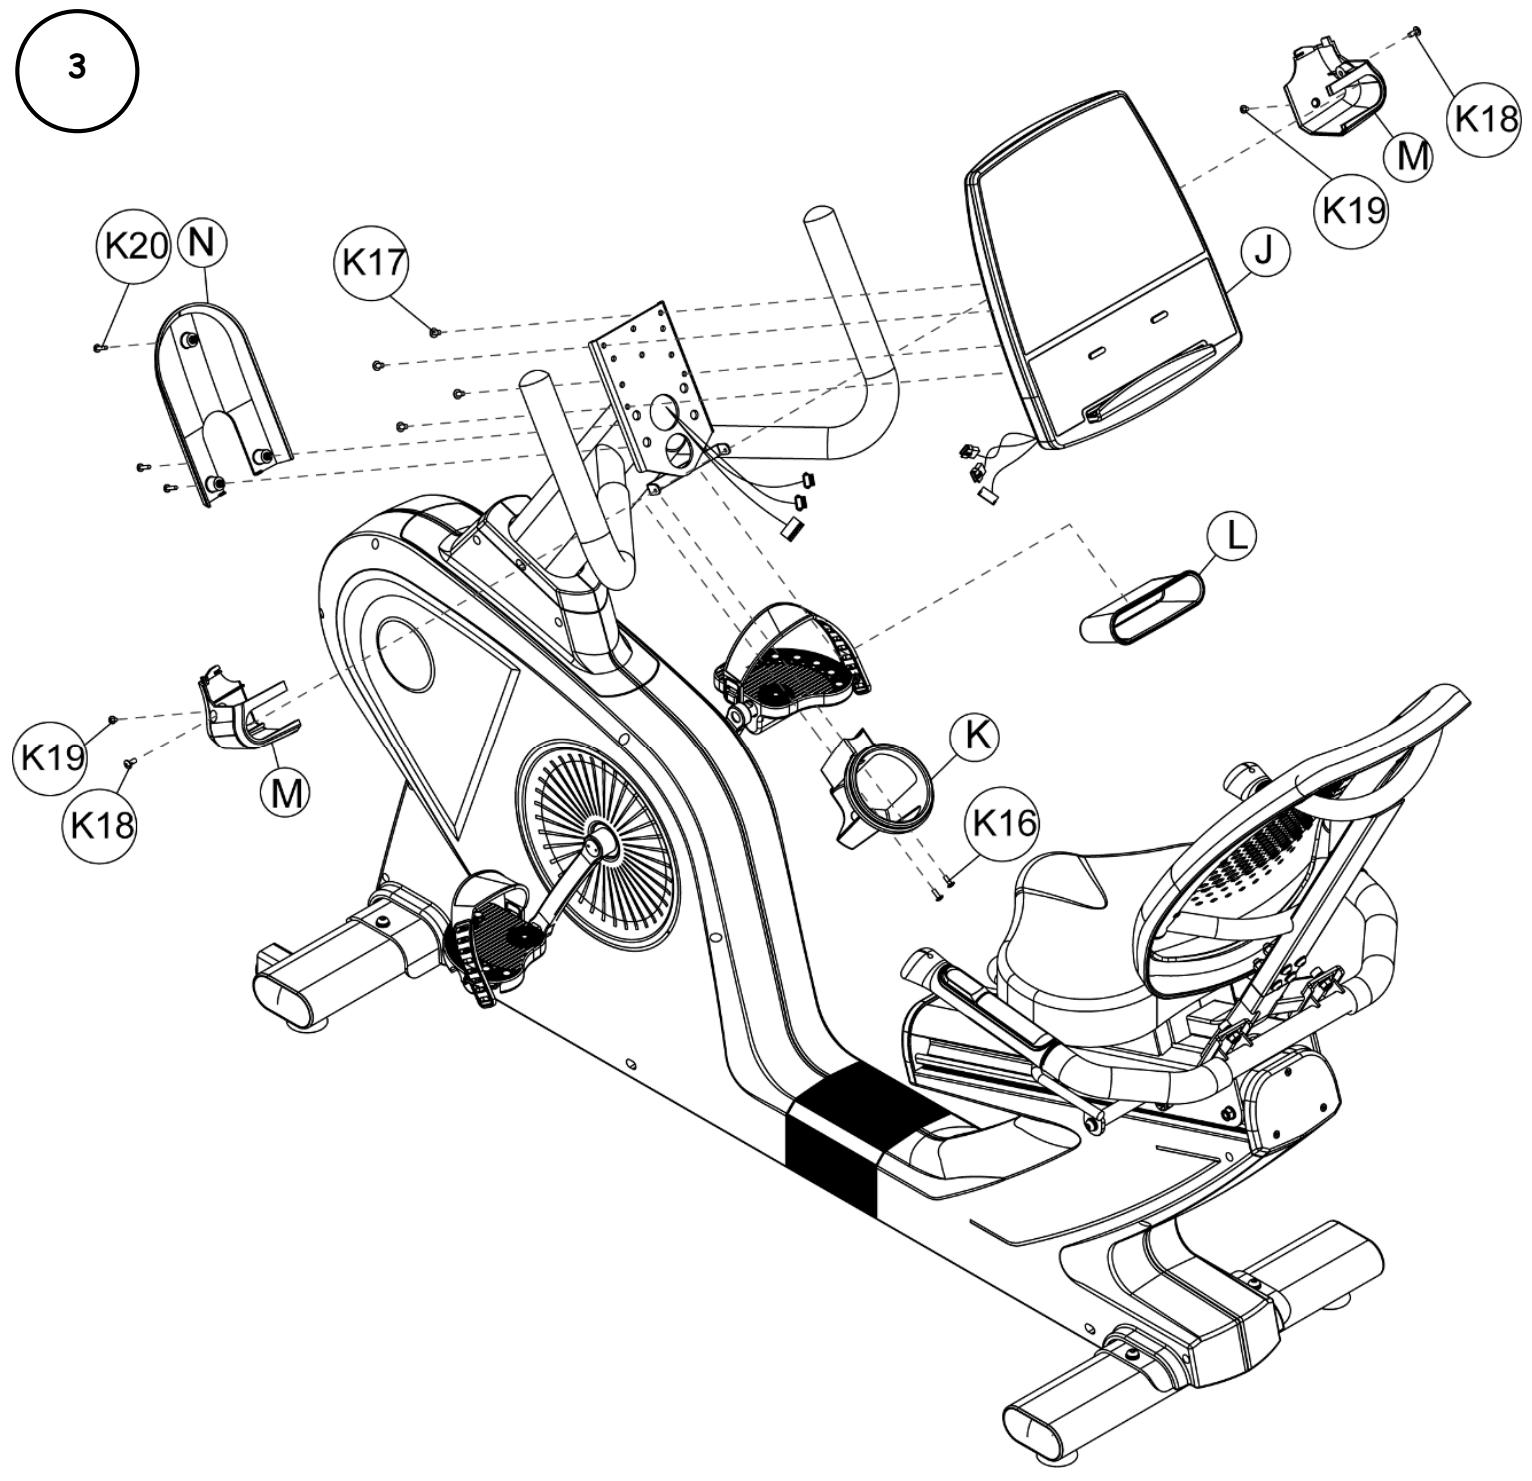
C. Front stabilizer set
D. Rear stabilizer set
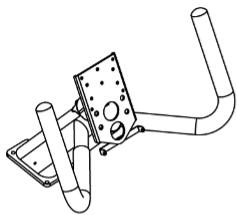
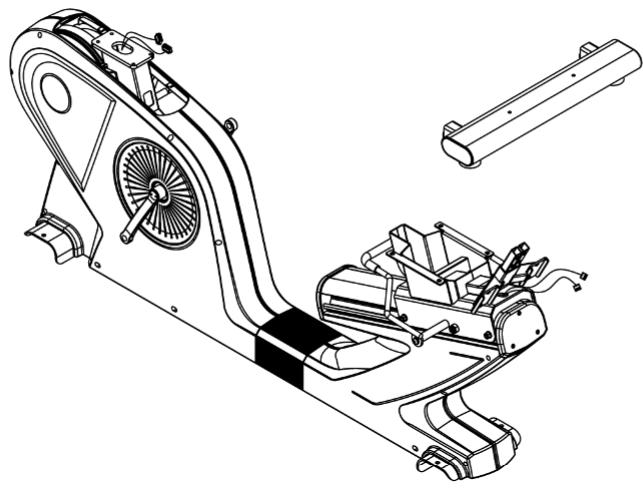
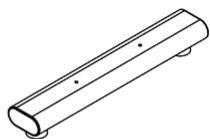
E. Handrail tube set
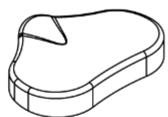
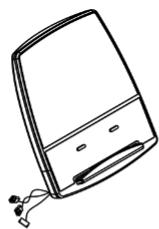
F. Back pad seat
G. Seat pad
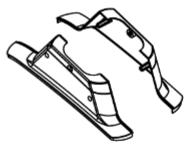
H. Console mast decoration cover (left) (right)

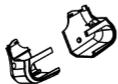
I. Left & right pedal set
J. Console set (LED)
K. Water bottle holder

L. Accessory holder
M. Console front decoration cover (left) (right)
N. Console lower decoration cover

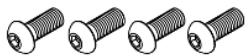
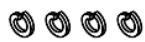
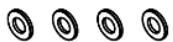
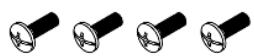
K01.
K02.
K03.
K04.
K05.
K06.
K07.

K08.
K09.
K10.
K11.
K12.
K13.
K14.
K15.
K16.

K17.
K18.
K19.
K20.
K21.
K22.
K23.
K24.

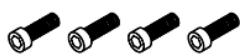
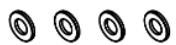
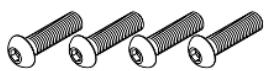
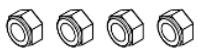
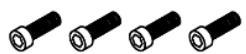
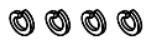
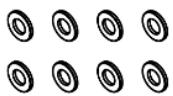
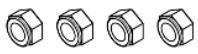
| ITME | Qty | ITEM | Qty | |
| K01 | 4 | K13 | 4 | |
| K02 | 4 | K14 | 4 | |
| K03 | 4 | K15 | 4 | |
| K04 | 4 | K16 | 2 | |
| K05 | 4 | K17 | 4 | |
| K06 | 4 | K18 | 2 | |
| K07 | 8 | K19 | 2 | |
| K08 | 4 | K20 | 3 | |
| K09 | 4 | K21 | 4 | |
| K10 | 4 | K22 | 1 | |
| K11 | 8 | K23 | 1 | |
| K12 | 4 | K24 | 1 |
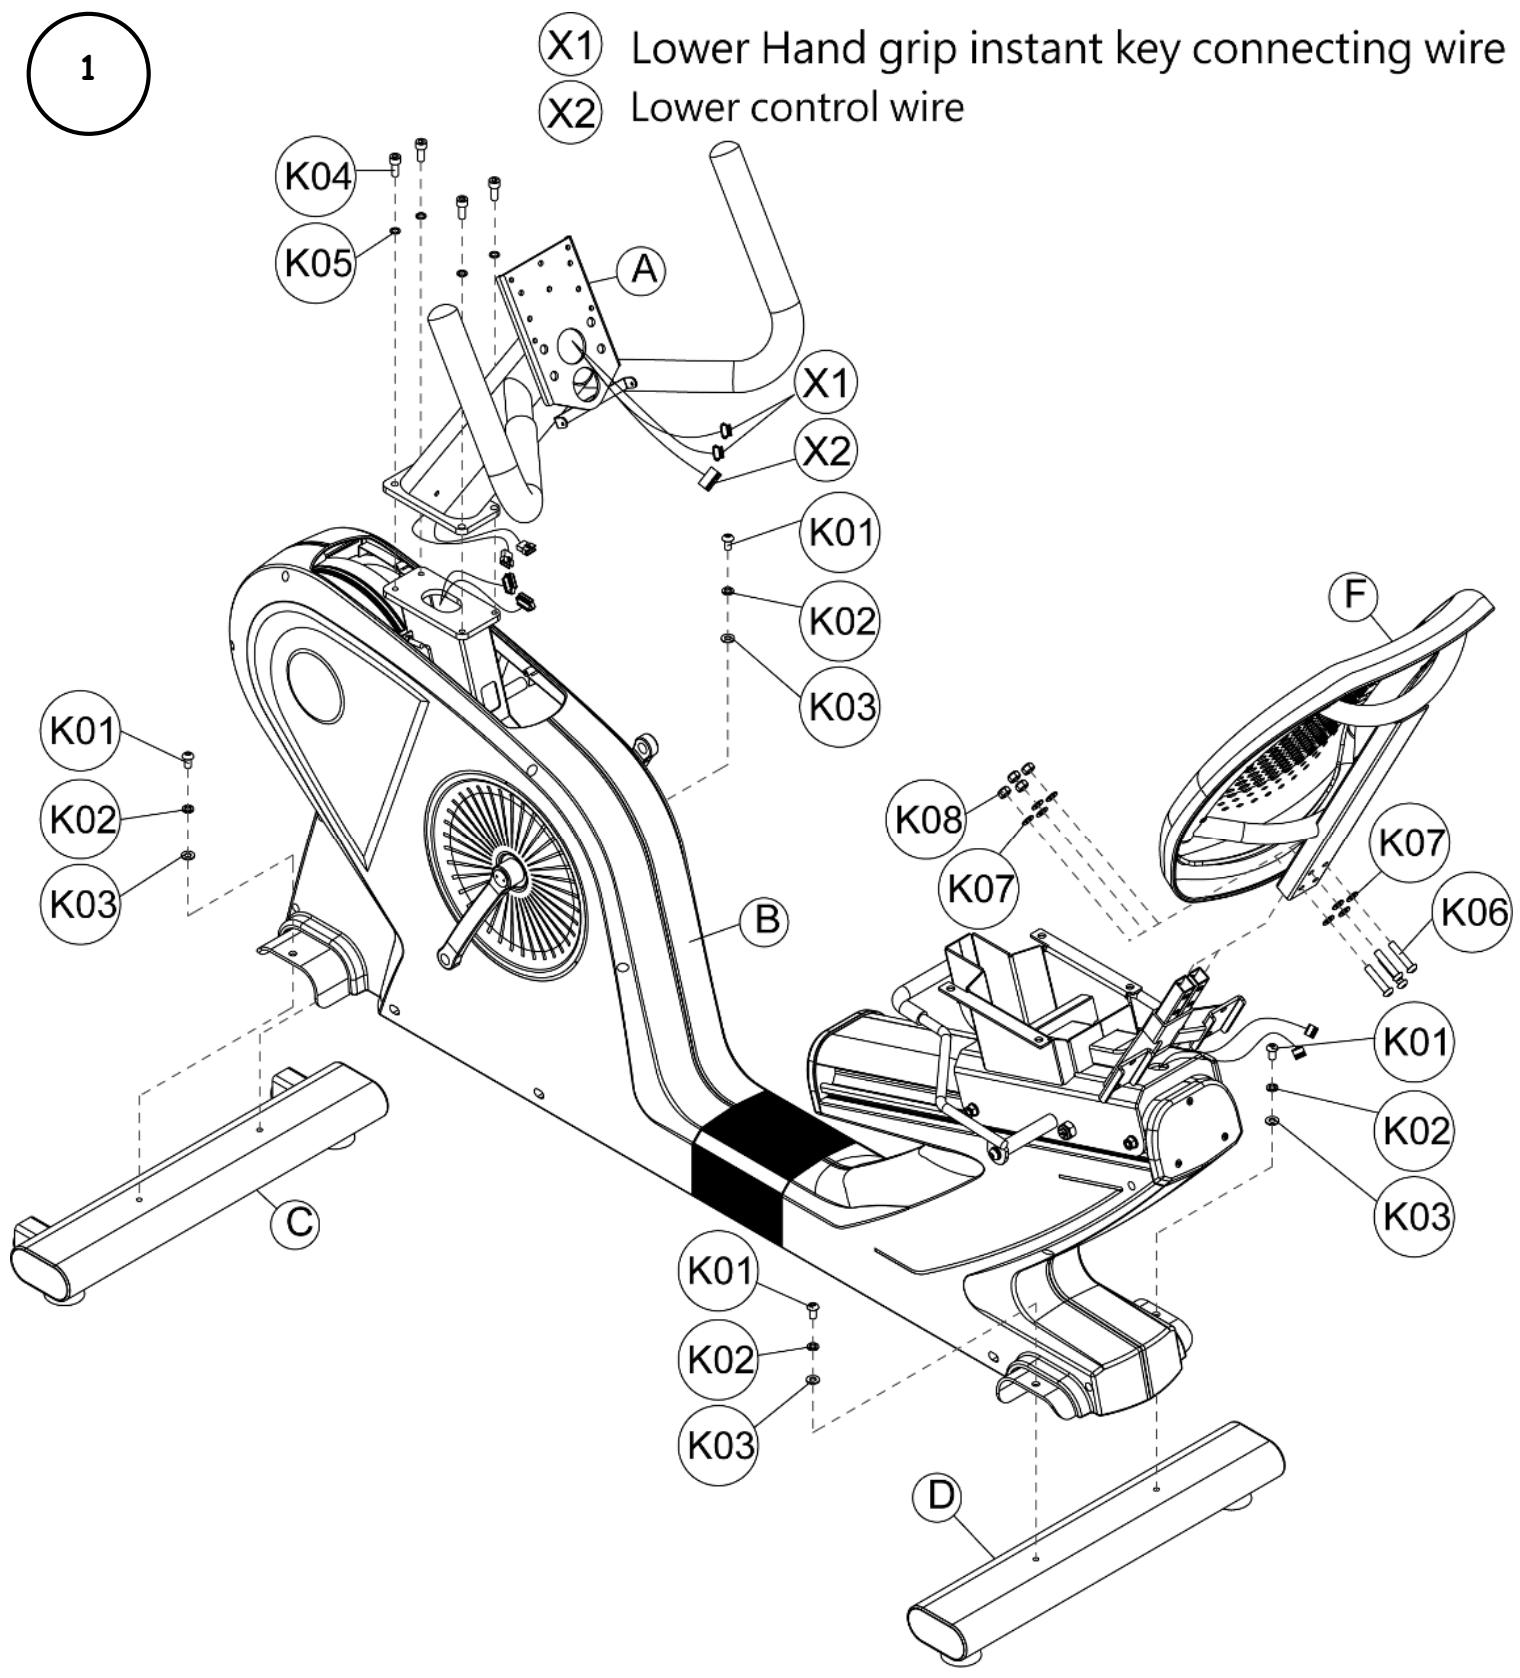
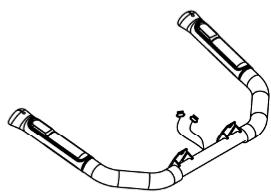
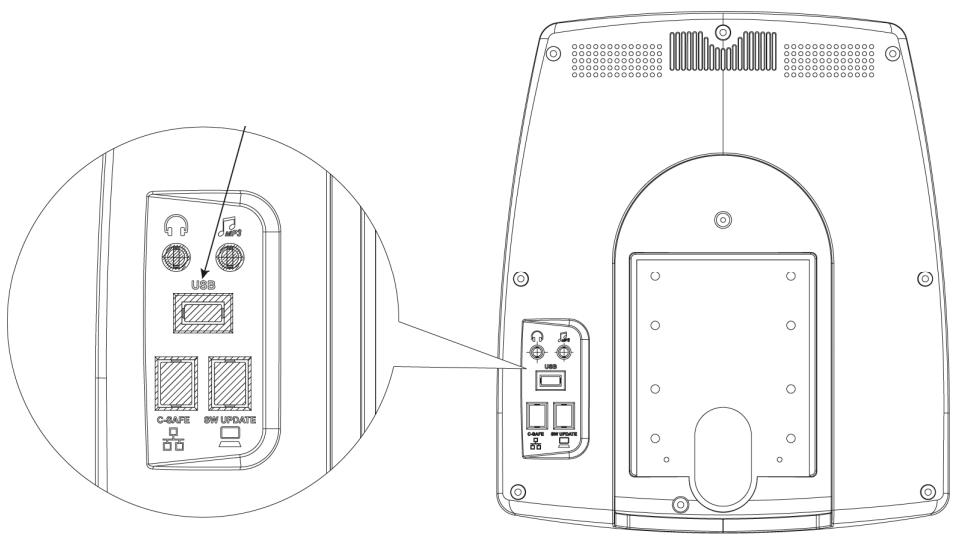
X3 Hand grip instant key connecting wire ( middle / upper )
X4 Hand grip instant key connecting wire (Lower/Left)
X5 Hand grip instant key connecting wire (Lower/Right)
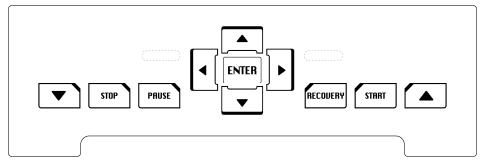
III. Instructions relatives aux touches

E mail: sav@carefitness.com
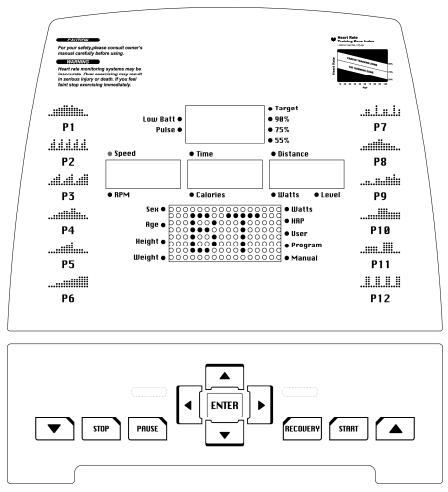
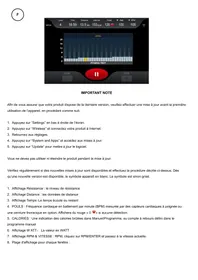
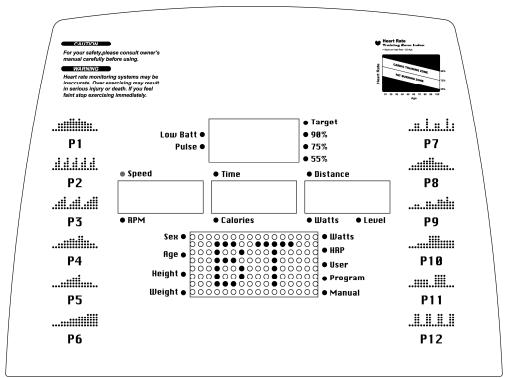
I. Display introduction
This is a LED display console, and the functions shown include RPM, SPEED, TIME, CALORIES, DISTANCE, WATTS, LEVEL, and dot matrix display of PROGRAM graph.
II. Display and start-up of boot window
Standby mode:
After the console is light up, dot matrix display Metric (or British) unit “KM (or ML)” to “U1” graphic, and there are U1 to U4 to choose from.
Sleep Mode :
When the console in the standby mode, if RPM is lower than 30 or keys no operation for 15 seconds, the program will enter the prompt mode for 16 seconds (after 16 beeps the scale enters sleep mode). During the timing period of 16 seconds, if RPM is higher than 30 or keys are pressed, the timing program of 16 seconds will be canceled, and the console will go back to standby mode.
In the setting page (User setting, weight setting and settings in all programs), if RPM is lower than 30 for 10 seconds, the program will be end and jump back to standby mode. If RPM is still lower than 30 or no key operation is detected after 5 seconds, the program will enter prompt for 16 seconds (after 16 beeps the scale enters sleep mode). During the timing period of 16 seconds, if RPM is higher than 30 or keys are pressed, the timing program of 16 seconds will be canceled, and the console will go back to standby mode.
When operating all the programs, if RPM has not been reached to 30, dot matrix display will show the rolling string of "RPM↑" for 5 seconds. After that, if the RPM still not reached to 30, dot matrix display will show the rolling string of "PAUSE" for 5 seconds.
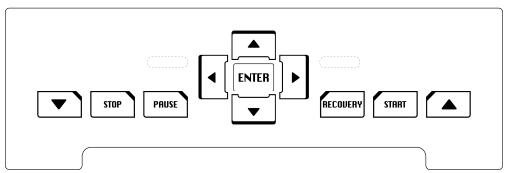
III. Key instruction
- START :
Press the key (START), and the program will start the function of QUICK START directly.
2.RECOVERY RECOUERY
During the exercise, hold the hand pulse sensor until the PULSE window shows the heart rate value, and then press RECOVERY. After press RECOVERY, the displays will stop and the TIME window will show count down for 60 seconds. After the time count down to 0, will display will show the result of your heart rate recovery status with F1~F6. F1 means the best level of the heart rate recovery status.
3.PAUSE
After the start the exercise, press PAUSE key, and the program will immediately operate the action of "pause".
During the setting process within PROGRAM, press PAUSE key could go back to the program select page for reworking.
4.STOP STOP
Press STOP key to stop. And can use ENTER key to switch the display "SPEED - TIME - DISTANCE / RPM - CALIROES - WATTS" screen.
5.ENTER ENTER
During the setting of programs, press ENTER key to confirm and go to the next page.
6.DIRECTION
The direction keys are used for the increase and decrease of various values (WEIGHT, HEIGHT, AGE, SEX, PULSE, TIME...), selection of functional modes (WATT, HRP, USER, PROGRAM, MANUAL), and increase or decrease of resistance.
IV. Program function
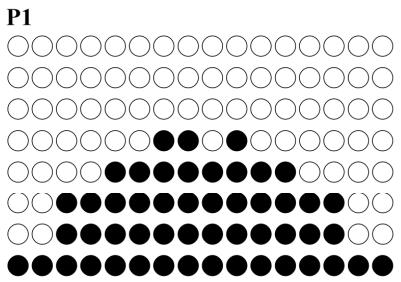
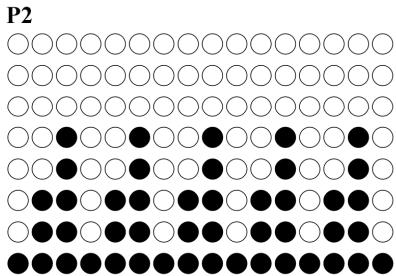
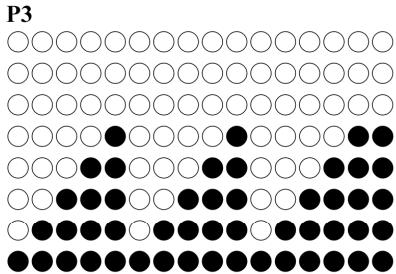
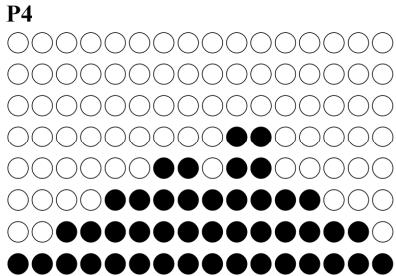
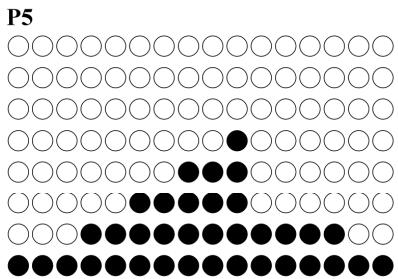
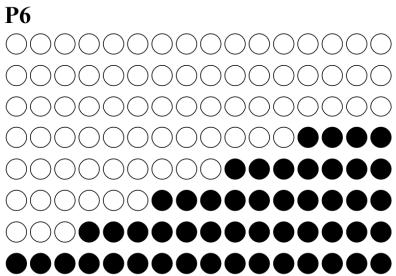
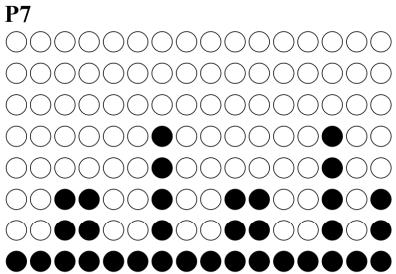
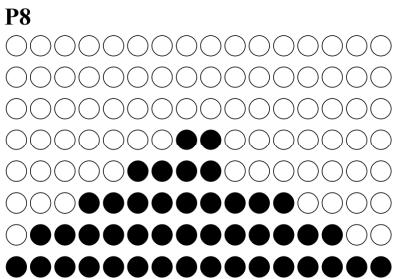
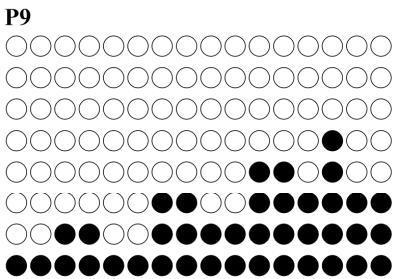
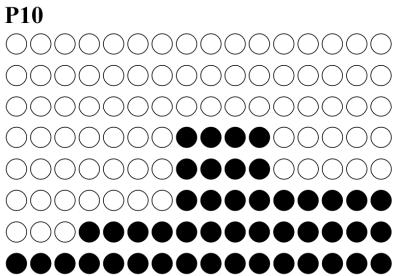
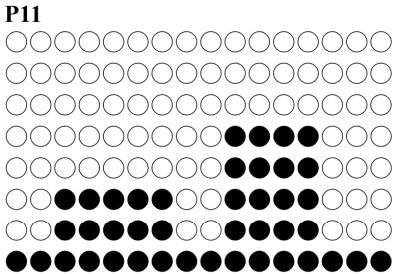
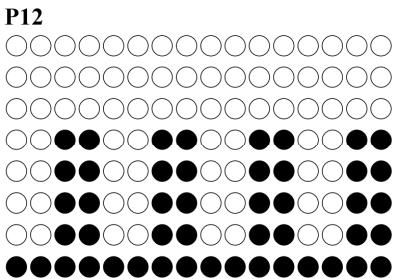
Program mode: P1~P12 PROGRAM
Press the direction keys to select P1~P12 PROGRAM.
Press Enter to get into the target value setting page.
After press ENTER, the TIME indicator light up and the LED indicator light shines on the display of "TIME". The initial value of "TIME" is "0:00". Press direction keys to set "TIME".
After the setting of “TIME”, press ENTER, the DISTANCE indicator light up and the LED indicator light shines on the display of “DISTANCE”. The initial value of “DISTANCE” is “0.0”. Press direction keys to set “DISTANCE”.
After the setting of "DISTANCE", press ENTER, the CALORIES indicator light up and the LED indicator light shines on the display of "CALORIES". The initial value of "CALORIES" is "0". Press direction keys to set "CALORIES".
The TIME - DISTANCE - CALORIES can be cycle setting. After the target settings of TIME, DISTANCE and CALORIES are determined, press the key "START", and this mode starts to operate.
During the exercise, press "ENTER" to switch, fix and display "SPEED - TIME - DISTANCE / RPM - CALORIES - WATTS" screen.
During the exercise, press "PAUSE", and the program will pause. The TIME / DISTANCE / CALORIES display will show motion data by turns.
After pause, if you want to continue the previous exercise, press "START" and the program will continue accumulate with the TIME/DISTANCE/CALORIES data before press pause.
Press "STOP" could stop the program, and press "STOP" again will clean the exercise date and go back to the main program selecting page for MANUAL/ PROGRAM/ USER/ HRC/ WATTS.
Dot matrix displayed messages during exercise:
During exercise, if RPM has not been reached to 30, screen will appear twice the rolling string of "RPM↑" for 5 seconds. After the message, if the RPM still not reach to 30, program will be paused and screen will appear twice the rolling string of "PAUSE" for 5 seconds.
MANUAL mode
Press the direction keys to select MANUAL.
Press Enter to get into the target value setting page.
After press ENTER, the TIME indicator light up and the LED indicator light shines on the display of "TIME". The initial value of "TIME" is "0:00". Press direction keys to set "TIME".
After the setting of “TIME”, press ENTER, the DISTANCE indicator light up and the LED indicator light shines on the display of “DISTANCE”. The initial value of “DISTANCE” is “0.0”. Press direction keys to set “DISTANCE”.
After the setting of "DISTANCE", press ENTER key, the CALORIES indicator light up and the LED indicator light shines on the display of "CALORIES". The initial value of "CALORIES" is "0". Press direction keys to set "CALORIES".
The TIME - DISTANCE - CALORIES can be cycle setting. After the target settings of TIME, DISTANCE and CALORIES are determined, press the key "START", and this mode starts to operate.
During the exercise, press "ENTER" to switch, fix and display "SPEED - TIME - DISTANCE / RPM - CALORIES - WATTS" screen.
During the exercise, press "PAUSE", and the program will pause. The TIME / DISTANCE / CALORIES display will show motion data by turns.
After pause, if you want to continue the previous exercise, press "START" and the program will continue accumulate with the TIME/DISTANCE/CALORIES data before press pause.
Press "STOP" could stop the program, and press "STOP" again will clean the exercise date and go back to the main program selecting page for MANUAL/ PROGRAM/ USER/ HRC/ WATTS.
Dot matrix displayed messages during exercise:
During exercise, if RPM has not been reached to 30, screen will appear twice the rolling string of "RPM↑" for 5 seconds. After the message, if the RPM still not reach to 30, program will be paused and screen will appear twice the rolling string of "PAUSE" for 5 seconds.
USERmode
Press the direction keys to select USER.
Press Enter to get into the target value setting page.
After press ENTER, the TIME indicator light up and the LED indicator light shines on the display of "TIME".
The initial value of "TIME" is "0:00". Press direction keys to set "TIME".
After the setting of “TIME”, press ENTER, the DISTANCE indicator light up and the LED indicator light shines on the display of “DISTANCE”. The initial value of “DISTANCE” is “0.0”. Press direction keys to set “DISTANCE”.
After the setting of "DISTANCE", press ENTER, the CALORIES indicator light up and the LED indicator light shines on the display of "CALORIES". The initial value of "CALORIES" is "0". Press direction keys to set "CALORIES".
The TIME - DISTANCE - CALORIES can be cycle setting. After the target settings of TIME, DISTANCE and CALORIES are determined, press the key "START", and this mode starts to operate.
- If the user want to do the operating program of graphical editing:
Enter into "USER" program, the TIME indicator light up and the LED indicator light shines on the display of "TIME". The initial value of "TIME" is "0:00".
For editing of graphs, press "ENTER" for 3 seconds, then the first row on the Dot Matrix flicked. At the TIME display chart will show code S-1 to show the editing.
Press DIRECTION keys to set "LEVEL". After completed setting is confirmed, press "ENTER" to setting program of LEVEL on the next row.
When entering the LEVEL setting but failed on setting, the user can press ENTER and convert to the next operation setting program. There are "S-1 ~ S-16" locations in total to set; after the setting of those locations, the machine converts to the setting program of "TIME" for operation.
During the exercise, press "ENTER" to switch, fix and display "SPEED - TIME - DISTANCE / RPM - CALORIES - WATTS" screen.
During the exercise, press "PAUSE", and the program will pause. The TIME / DISTANCE / CALORIES display will show motion data by turns.
After pause, if you want to continue the previous exercise, press "START" and the program will continue accumulate with the TIME/DISTANCE/CALORIES data before press pause.
Press "STOP" could stop the program, and press "STOP" again will clean the exercise date and go back to the main program selecting page for MANUAL/ PROGRAM/ USER/ HRC/ WATTS.
Dot matrix displayed messages during exercise:
During exercise, if RPM has not been reached to 30, screen will appear twice the rolling string of "RPM↑" for 5 seconds. After the message, if the RPM still not reach to 30, program will be paused and screen will appear twice the rolling string of "PAUSE" for 5 seconds.
HRP mode
Press the direction keys to select "HRP".
Press Enter to get into the target value setting page.
After press ENTER, the "HEIGHT" indicator light up and the Dot Matrix display will show "HEIGHT". The initial value of "HEIGHT" is "170". Press direction keys to set "HEIGHT".
After the setting of HEIGHT, press ENTER, the "AGE" indicator light up and the Dot Matrix display will show "AGE". The initial value of "AGE" is "30". Press direction keys to set "AGE".
After the setting of AGE, press ENTER, the "SEX" indicator light up and the Dot Matrix display will show GENDER. The initial value of "SEX" is "M" as male ("F" as female). Press direction keys to set "SEX".
After the setting of SEX, press ENTER, the “TARGET, 90%, 75%, 55%” indicator light up and at “PULSE” display will show the initial value. Press the direction keys to select the target. TARGET could allow user to set the target heart rate value with the direction keys. The initial value of 90% , 75% and 55% depend on the HEIGHT, AGE and SEX setting.
After complete the setting of "PULSE", press "ENTER", the TIME indicator light up and the LED indicator light shines on the display of "TIME". The initial value of "TIME" is "0:00". Press direction keys to set "TIME". After the setting of "TIME", press ENTER, the DISTANCE indicator light up and the LED indicator light shines on the display of "DISTANCE". The initial value of "DISTANCE" is "0.0". Press direction keys to set "DISTANCE".
After the setting of “DISTANCE”, press ENTER key, the CALORIES indicator light up and the LED indicator light shines on the display of “CALORIES”. The initial value of “CALORIES” is “0”. Press direction keys to set “CALORIES”.
The TIME - DISTANCE - CALORIES can be cycle setting. After the target settings of TIME, DISTANCE and CALORIES are determined, press the key "START", and this mode starts to operate.
During the exercise, press "ENTER" to switch, fix and display "SPEED - TIME - DISTANCE / RPM - CALORIES - WATTS" screen.
During the exercise, press "PAUSE", and the program will pause. The TIME / DISTANCE / CALORIES display will show motion data by turns.
After pause, if you want to continue the previous exercise, press "START" and the program will continue accumulate with the TIME/DISTANCE/CALORIES data before press pause.
Press "STOP" could stop the program, and press "STOP" again will clean the exercise date and go back to the main program selecting page for MANUAL/ PROGRAM/ USER/ HRC/ WATTS.
A. Operation of "WARM UP" function:
Resistance is preset at level 1, and "Heart Rate Control" function will automatically work after 1 minute.
Users can still use the direction keys to increase or reduce resistance.
B. Operating program of "Heart Rate Control" function
In the program, comparison between "actual heart rate" and "preset heart rate (55% / 75% / 90% /
TARGET)" will be conducted once each 10 seconds.
When the program fails to detect "actual heart rate", then the program will be paused and resistance won't be increased. The PULSE display will show "P".
Users can also use the direction keys to increase or reduce resistance.
When "actual heart rate" is lower than "preset heart rate" with 4, the program will automatically increase the resistance. Each time will increase for 1 level; the maximum will be increased to level 16.
When "actual heart rate" is higher than "preset heart rate" with 4, the program will automatically reduce the resistance. Each time will decrease for 1 level; the minimum will be decreased to level 1.
When actual heart rate reaches preset heart rate for consecutive 3 minutes, or preset time is over, the program will automatically stop "Heart Rate Control" function, and enter into "COOL DOWN".
C. "COOL DOWN" for 1 min after "Heart Rate Control"
When start "1-minute COOL DOWN" function, the program makes a long sound of "beep", and the Dot Matrix display will show "COOL". The TIME display will start 1 minute count down.
In COOL DOWN function, resistance will be level 1, and all data are continuation of the data in previous "Heart Rate Control" function, and they continue to be used and accumulated.
In this COOL DOWN function, only the key "STOP/RESET" is open for use.
WATTS mode
Press the direction keys to select WATTS.
Press Enter to get into the target value setting page.
After press ENTER, the WATTS indicator light up and the LED indicator light shines on the display of "WATTS". The initial value of "WATTS" is "120". Press direction keys to set "WATTS".
After the setting of WATTS, press ENTER, the TIME indicator light up and the LED indicator light shines on the display of "TIME". The initial value of "TIME" is "0:00". Press direction keys to set "TIME".
After the setting of "TIME", press ENTER, the DISTANCE indicator light up and the LED indicator light shines on the display of "DISTANCE". The initial value of "DISTANCE" is "0.0". Press direction keys to set "DISTANCE".
After the setting of "DISTANCE", press ENTER, the CALORIES indicator light up and the LED indicator light shines on the display of "CALORIES". The initial value of "CALORIES" is "0". Press direction keys to set "CALORIES".
The TIME - DISTANCE - CALORIES can be cycle setting. After the target settings of TIME, DISTANCE and CALORIES are determined, press the key "START", and this mode starts to operate.
During the exercise, press "ENTER" to switch, fix and display "SPEED - TIME - DISTANCE / RPM - CALORIES - WATTS" screen.
During the exercise, press "PAUSE", and the program will pause. The TIME / DISTANCE / CALORIES display will show motion data by turns.
After pause, if you want to continue the previous exercise, press "START" and the program will continue accumulate with the TIME/DISTANCE/CALORIES data before press pause.
Press "STOP" could stop the program, and press "STOP" again will clean the exercise date and go back to the main program selecting page for MANUAL/ PROGRAM/ USER/ HRC/ WATTS.
Dot matrix displayed messages during exercise:
During exercise, if RPM has not been reached to 30, screen will appear twice the rolling string of "RPM↑" for 5 seconds. After the message, if the RPM still not reach to 30, program will be paused and screen will appear twice the rolling string of "PAUSE" for 5 seconds.
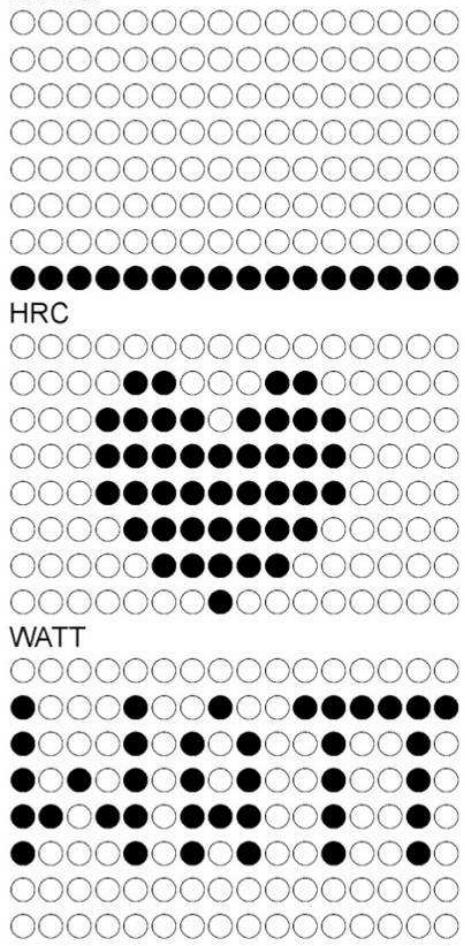
PROGRAM graphs
Manual
To order spare parts
To guarantee an efficient service, make sure you have the following items before you contact our After Sales Service:
The name or reference of the product.
After Sales Service
Email: service-uk@carefitness.com
E mail : service-de@carefitness.com
I. Introduccion de la pantalla
E-mail: service-it@carefitness.com

I. Inleiding scherm
E-mail: service-nl@carefitness.com