
9000F MARK II - Scanner CANON - Free user manual and instructions
Find the device manual for free 9000F MARK II CANON in PDF.
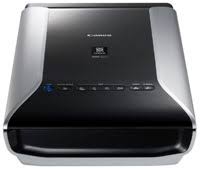



| Product Type | Flatbed scanner with film and slide adapter |
| Brand | Canon |
| Model | CanoScan 9000F Mark II |
| Dimensions (W x D x H) | 270 x 480 x 130 mm |
| Weight | 5.3 kg |
| Power | 100-240 V AC, 50/60 Hz |
| Optical Resolution | 9600 x 9600 dpi |
| Color Depth | 48 bits (input/output) |
| Interface | USB 2.0 High Speed |
| Document Types | Documents, photos, magazines, books, 35 mm film, 120 film |
| Included Software | MP Navigator EX, ScanGear, Quick Menu |
| Operating Systems | Windows, macOS |
| Main Functions | Single and multiple scanning, automatic color correction, photo restoration, film scanning |
| Care and Cleaning | Wipe the exterior with a soft, dry cloth. Do not use solvents. Clean the glass with a damp cloth if necessary. |
| Safety | Unplug before cleaning. Do not expose to moisture. Use only the supplied power cord. |
| Spare Parts and Repairability | Manufactured by Canon. Contact Canon after-sales service for spare parts. |
| General Information | Comes with installation CD-ROM, USB cable, power cord, film guides for 35 mm and 120 formats, quick start guide. |
| Power Consumption | Approximately 8 W (operating), 1.5 W (standby) |
Frequently Asked Questions - 9000F MARK II CANON
User questions about 9000F MARK II CANON
0 question about this device. Answer the ones you know or ask your own.
Ask a new question about this device
Download the instructions for your Scanner in PDF format for free! Find your manual 9000F MARK II - CANON and take your electronic device back in hand. On this page are published all the documents necessary for the use of your device. 9000F MARK II by CANON.
USER MANUAL 9000F MARK II CANON
CanoScan 9000F Mark II
Quick Start Guide
Kurzanleitung
KpaTkoe pykoBOdCTBo no Haay pa60tbl
Stručná príručka
Please read this guide before operating this scanner. After you finish reading this guide, store it in a safe place for future reference.
Table of Contents
Safety Precautions 3 Package Contents 4
Preparing the Scanner 5 Installing the Software 6
- Screens are based on Windows 7 operating system Home Premium and Mac OS X 10.7.x. Actual screens may differ depending on the OS version.
- Windows is a trademark or registered trademark of Microsoft Corporation in the U.S. and/or other countries.
- Mac and Mac OS are trademarks of Apple Inc., registered in the U.S. and other countries.
- All other company names and products mentioned herein may be trademarks or registered trademarks of their respective companies.
Warning
When you use this product, you should pay attention to the following legal issues:
- Scanning of certain documents, such as bank notes (bank bills), government bonds and public certificates, may be prohibited by law and may result in criminal and/or civil liability.
- You may be required under law to obtain authorization from a person possessing copyrights or other legal rights to the item being scanned. If you are uncertain of the legality of scanning any particular item, you should consult your legal adviser in advance.
The socket-outlet shall be installed near the equipment and shall be easily accessible.
Notes for Energy Saving Setting
For purpose of energy saving, this product will be automatically turned off after designated period without operation (The Auto Power Off function).
For instructions on how to change the setting, refer to the "On-Screen Manual".
Turning the Power Off
To turn the scanner off, be sure to press the ON button. Check the POWER lamp goes off, and then unplug the power cord.
If you unplug the power cord while the POWER lamp is lighting or blinking, the scanning unit does not move correctly.
Safety Precautions
Make sure to read following precautions before using the scanner and accessories.
Read the "On-Screen Manual" for precautions against product damages.
WARNING
Indicates a warning concerning operations that may lead to death or injury to persons if not performed correctly. In order to use the scanner safely, always pay attention to these warnings.
WARNING
This product emits low level magnetic flux. If you use a cardiac pacemaker and feel abnormalities, please move away from this product and consult your doctor.
WARNING
Fire or electrical shock may result when the following acts are carried out. - Do not place the scanner near flammable liquids such as alcohol or thinners. - Do not use cables other than the one supplied. - Do not plug the power cord into outlets with voltages other than the specified voltages. Always plug the power cord in all the way. - Do not plug in/unplug the power cord with wet hands. - Do not pull or excessively bend the power cord. - Do not place heavy objects on the power cord. - Do not twist or tie the power cord. - Do not connect excessive numbers of plugs into one electrical outlet. - Do not use multiple extension cords. - If lightning strikes in your neighborhood, unplug the power cord from the outlet and refrain from using it. - When cleaning the scanner, always unplug the power cord. Do not use flammable liquids such as alcohol, benzene or thinners. Wipe with a soft dry cloth. - Do not take apart or modify the scanner and supplies.
Unplug the power cord once a month to see if the cord/plug shows anything unusual such as heat, rust, bent, scratch and split and so on. Unplug the power cord and call for service if above is observed since they may lead to a fire or an electric shock afterwards.
If you hear unusual noises, see smoke, feel excessive heat, smell anything unusual, drop metallic part or spill liquid into the scanner, immediately unplug the power cord and call for service. Continued use of the scanner may result in fire or electrical shock.
Package Contents
Scanner and Accessories
Scanner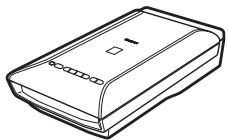
USB Cable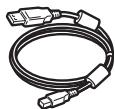
Power Cord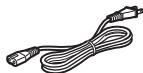
Setup CD-ROM
Film Guides (for 35mm film strip/slide)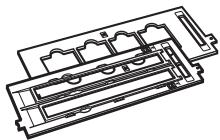
Film Guide (for 120 format film)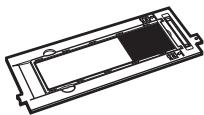
Documentation
- Quick Start Guide (this document) Additional Documents
Preparing the Scanner
1 Peel the shipping tapes off the scanner. 2 Open the document cover and slide the scanner lock switch toward the unlock mark ().
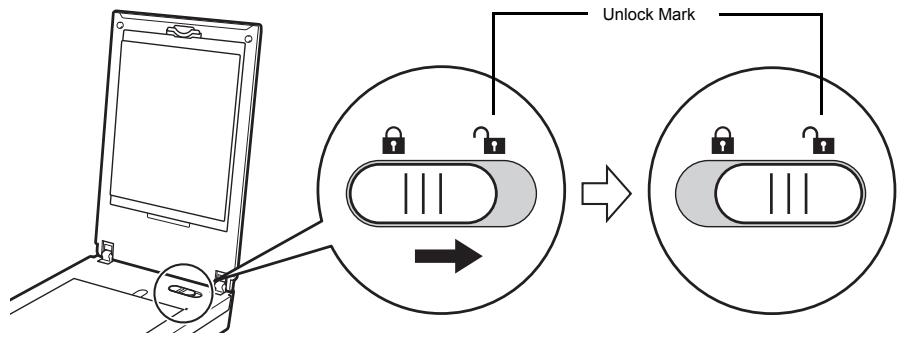
The document cover is locked temporarily at an angle of about 50 degrees. 3 Close the document cover.

- Handle the scanner with both hands. Be careful not to drop the scanner.
- When you carry or transport the scanner, press the ON button to turn the power off, and then make sure to slide the scanner lock switch toward the lock mark ( ) to fasten the scanning unit.
4 Connect the supplied power cord to the scanner. 5 Plug the power cord into the electrical outlet.
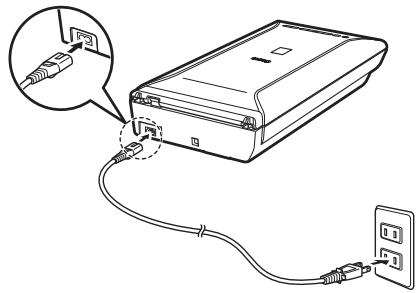

- Only use the power cord provided with the scanner. Use of other cables may lead to a malfunction.
- Always attach the power cord to the scanner before plugging into the electrical outlet. Reversing this order may lead to malfunctions.
Installing the Software

- Quit all applications before installation.
- Log on using an administrator account.
- Windows Internet connection may be required during the installation. Connection fees apply.
- Mac Internet connection is required during software installation. Connection fees apply.
1 Insert the CD-ROM into the computer.

If the USB cable is already connected, unplug it. If a message appears on the computer, click Cancel.

2 Follow the on-screen instructions to proceed.
Windows
To select a language, click Language.
If the CD-ROM does not autorun:
Windows
Double-click (My) Computer > CD-ROM icon > MSETUP4.EXE.
Mac
Double-click the CD-ROM icon on the desktop.
Windows
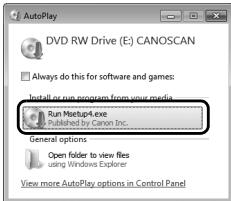
Mac
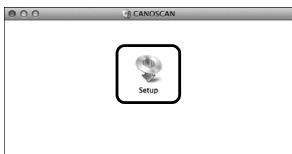



CanoScan 9000F Mark II
Starting the software installation. Follow the on-screen instructions.
Language
Exit
Next
To complete the installation, follow the on-screen instructions on the computer.
Windows
During installation, you will be prompted to connect the USB cable and turn the power on.
Mac
After installation is completed, connect the USB cable and turn the power on.
Use the On-Screen Manual on the Computer
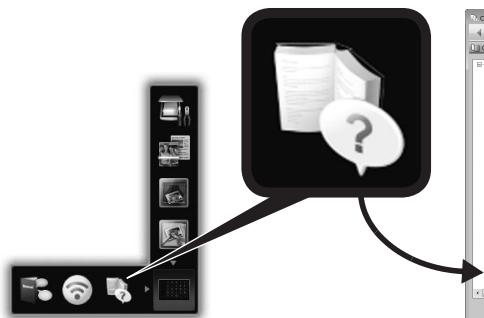
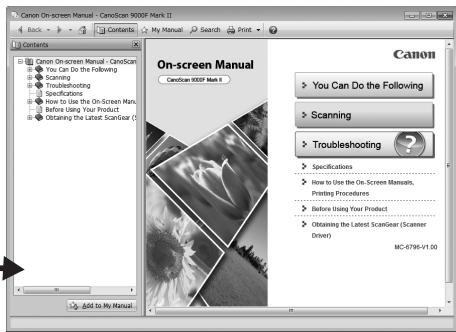
For more information about the functions and operation of the software and also the troubleshooting tips, refer to the "On-Screen Manual". You can start the "On-Screen Manual" from the Quick Menu.
Starting the On-Screen Manual
1 Start the Quick Menu.
Windows
Double-click the Quick Menu shortcut icon on the desktop.
Mac
Click the Quick Menu icon in the Dock.

2 Click the on-screen manual icon on the Quick Menu.
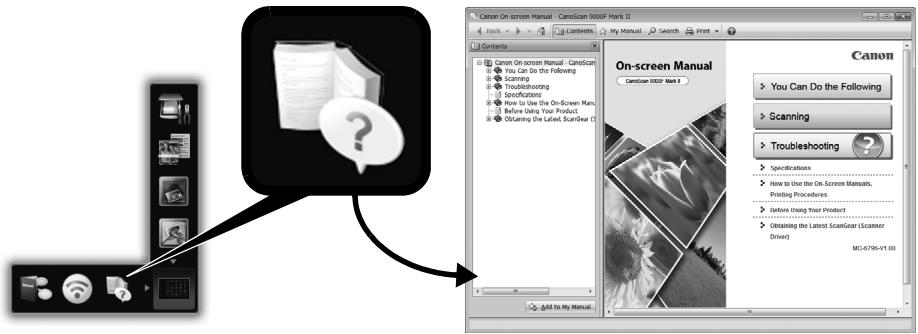
- It requires the installations of the Quick Menu and the "On-Screen Manual".
Types of Document Supported
A sheet of photo document and CD/DVD - Several sheets of photo documents and CD/DVD - Magazine and book Films
There are various ways to place documents in accordance with the document type and number of documents. For details, refer to the "On-Screen Manual".
Quick Guide
Starting the software installation. Follow the on-screen instructions.
Language
Exit
Next
Starting the software installation. Follow the on-screen instructions.
Language
Exit
Next
Scanner accessories
Scanner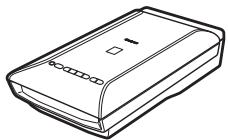
USB cable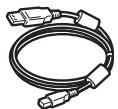
Power cable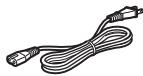
Installation CD-ROM (Setup CD-ROM)
Film guides (for 35mm slides/film strips)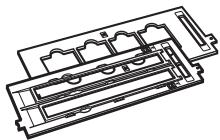
Film guide (for 120 format films)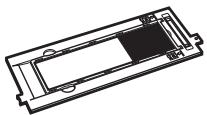
Documentation
Starting the software installation. Follow the on-screen instructions.
Language
Exit
Next
Starting the software installation. Follow the on-screen instructions.
Language
Exit
Next
Starting the software installation. Follow the on-screen instructions.
Language
Exit
Next
Installation of software

Starting the software installation. Follow the on-screen instructions.
Language
Exit
Next
Starting the software installation. Follow the on-screen instructions.
Language
Exit
Next
During installation, a message will appear asking you to connect the USB drive and activate the device.
Windows
During installation, you will be prompted to connect the USB drive and activate the device.
Mac
Film holder (for film in 120 format)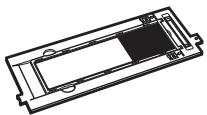
Documents
Brief introduction (this document) Other documents
Preparing the scanner
1 Remove the shipping tape from the scanner. 2 Open the document cover, and slide the scanner lock switch toward the unlock mark (T).
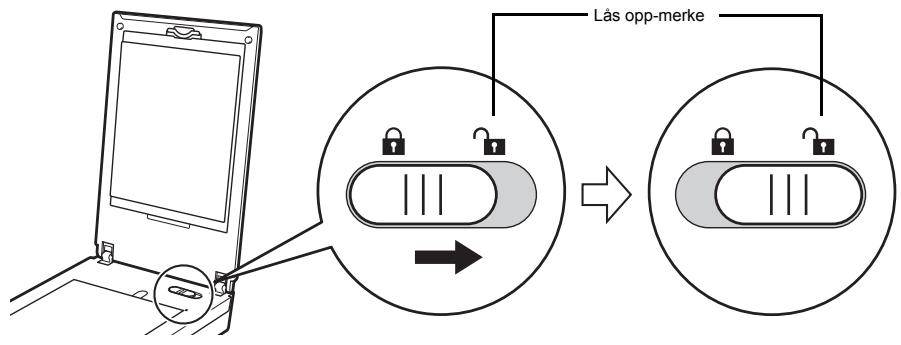
- The document cover is temporarily locked at an angle of approximately 50 degrees.
3 Close the document cover.

Starting the software installation. Follow the on-screen instructions.
Language
Exit
Next
Starting the software installation. Follow the on-screen instructions.
Language
Exit
Next
Film guide (for 120-format film)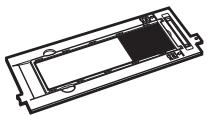
Documentation
- Quick guide (this document)
- Additional documents
Preparing the scanner
Starting the software installation. Follow the on-screen instructions.
Language
Exit

CanoScan 9000F Mark II Starting the software installation. Follow the on-screen instructions.
Language
Exit
Next
Complete the installation according to the instructions on the computer screen.
Windows
Starting the software installation. Follow the on-screen instructions.
Language
Exit
Next
Starting the software installation. Follow the on-screen instructions.
Language
Exit
Next
Before using the scanner, please read this manual carefully. Keep the manual in an accessible place for future reference.
Contents
Safety precautions 3 Contents 4
Scanner preparation 5 Software installation 6
- The illustrations shown are based on the Windows 7 operating system Home Premium and Mac OS X 10.7.x. Actual screens may differ depending on the OS.
- Windows is a trademark or registered trademark of Microsoft Corporation in the U.S. and/or other countries. Mac and Mac OS are trademarks of Apple Inc., registered in the U.S. and other countries.
- Other product and company names mentioned herein may be trademarks or registered trademarks of their respective owners.
Warning!
When using this product, special attention must be paid to the following legal aspects.
Scanning certain documents, such as banknotes (bank credit bills), government bonds, and certificates, may be prohibited and subject to criminal and/or civil liability. Scanning documents may require permission from the copyright holder or other legal rights holders.
If you are unsure about the legality of scanning a particular document, be sure to consult a legal advisor.
The electrical outlet should be located near the equipment in an easily accessible place.
Notes regarding energy saving parameters.
To save energy, this product automatically turns off after a specified period of inactivity (auto-off function). For instructions on changing this parameter, see the "Electronic Manual".
Turning off the power
To turn off the scanner, press the ON button. Make sure the POWER indicator is off, then disconnect the power cord.
If you disconnect the power cord while the POWER indicator is on or blinking, the scanner unit may not move properly.
!Safety precautions
Before using the scanner and its accessories, carefully read the safety precautions described below.
To learn about precautions that help avoid damage to the device, see the "Electronic Manual".
!WARNING!
This message alerts to actions that, if not performed correctly, may lead to death or injury. For safe use of the scanner, be sure to pay attention to these warnings.
!WARNING!
Keep the product away from magnetic fields and low temperatures. If you use a pacemaker and you experience unusual sensations, move away from the product and consult a doctor.
!Warning!
Failure to follow the above rules may result in fire or electric shock.
- Do not place the scanner near flammable liquids such as alcohol or solvents.
- Do not use other power plugs.
- Do not connect the power cord to outlets whose voltage does not match that specified for the scanner. Always connect the power cord securely.
- Do not connect the power cord to the mains or disconnect it with wet hands.
- Do not pull the power cord excessively or bend it. Do not place heavy objects on the power cord. Do not twist the power cord or tie it in a knot.
- Do not connect many devices to one electrical outlet.
- Do not use multiple extension cords.
- If lightning occurs nearby, disconnect the power cord from the outlet and refrain from using it.
- When cleaning the scanner, always disconnect the power cord. Do not use flammable liquids such as alcohol, benzene, or solvents. Wipe the scanner gently with a soft cloth.
- Do not disassemble the scanner or its components, and do not modify their structure.
Once a month, disconnect the power cord to check the cord and plug for any abnormalities—for example, overheating, rust, bends, scratches, or exposed wires. If any of these are observed, to avoid fire or electric shock, disconnect the power cord and contact a service center.
If you hear unusual sounds, see smoke, feel excessive heat or an abnormal smell, or if a metal object or liquid gets into the scanner, immediately disconnect the power cord and contact a service center. Continued use of the scanner may result in fire or electric shock.
Scanner accessories
Scanner accessories
Scanner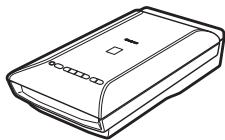
USB cable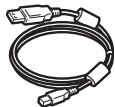
Power cord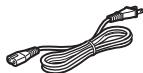
Setup CD-ROM
Film guides (for 35 mm film)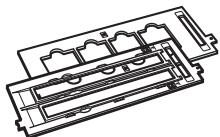
Film guides (for 120 format film)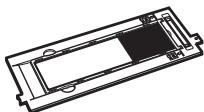
Documentation
Quick start guide (this guide) - Supplementary documentation
Preparing the scanner
1 Remove the protective material from the scanner. 2 Open the scanner lid and slide the lock release switch in the direction of the lock release mark ( ).
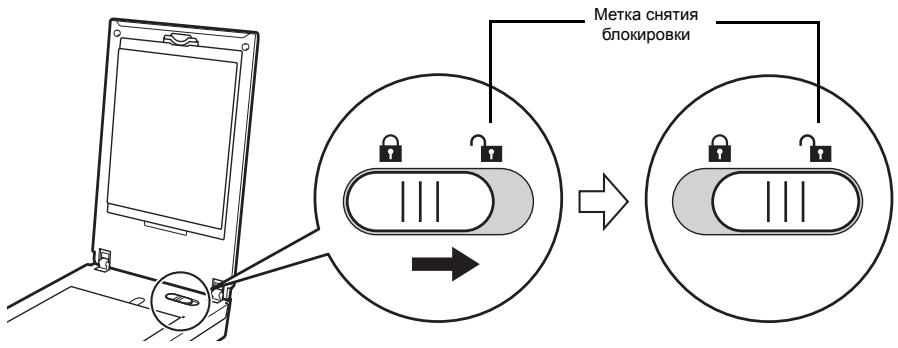
The scanner lid will temporarily stay open at an angle of about 50 degrees.
3 Close the scanner lid.

CanoScan 9000F Mark II Starting the software installation. Follow the on-screen instructions.
Language
Exit
Next
Starting the software installation. Follow the on-screen instructions.
Language
Exit
Next
Starting the software installation. Follow the on-screen instructions.
Language
Exit
Next
Quick Menu

Quick Menu
Windows
Kllh 100 Quick Menu Juaaia jaojao
Mac
Dock Quick Menu
Quick Menu
1
"Quick Menu
aegdall 1iiinell
CD/DVDd
CD/DVDg jg gjg jg jg jg
Cill, C
ρ > ( 3/4,3/4)
"giyjlll jlll lgl 1111111111111111111111111111111
J
Cill 1 Jd Clllill 000
Windows
Mac
Windows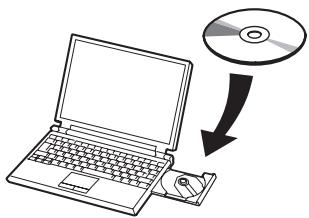
Starting the software installation. Follow the on-screen instructions.
Language
Exit

Windows
3
Language
Windows
MSETUP4.EXE<
Mac
1
- gua 4
(POWER) button (ON) 150
(POWER) button
30-2, Shimomaruco 3-chome, Ohta-ku, Tokyo 146-8501, Japan
CANON EUROPA N.V.
Bovenkerwerweg 59-61 1185 XB Amstelveen The Netherlands
- CANOSCAN 9000F MARK II
- TABLE OF CONTENTS
- WARNING
- NOTES FOR ENERGY SAVING SETTING
- TURNING THE POWER OFF
- SAFETY PRECAUTIONS
- PACKAGE CONTENTS
- SCANNER AND ACCESSORIES
- DOCUMENTATION
- PREPARING THE SCANNER
- INSTALLING THE SOFTWARE
- INSERT THE CD-ROM INTO THE COMPUTER
- FOLLOW THE ON-SCREEN INSTRUCTIONS TO PROCEED
- WINDOWS
- IF THE CD-ROM DOES NOT AUTORUN
- MAC
- USE THE ON-SCREEN MANUAL ON THE COMPUTER
- STARTING THE ON-SCREEN MANUAL
- START THE QUICK MENU
- CLICK THE ON-SCREEN MANUAL ICON ON THE QUICK MENU
- TYPES OF DOCUMENT SUPPORTED
- QUICK GUIDE
- SCANNER ACCESSORIES
- INSTALLATION OF SOFTWARE
- DOCUMENTS
- CONTENTS
- NOTES REGARDING ENERGY SAVING PARAMETERS
- TURNING OFF THE POWER
- !WARNING!
- J
Brand : CANON
Model : 9000F MARK II
Category : Scanner