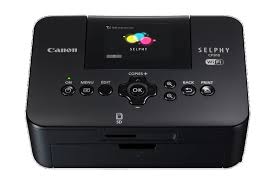
SELPHY CP900 - Photo printer CANON - Free user manual and instructions
Find the device manual for free SELPHY CP900 CANON in PDF.



| Product type | Compact thermal sublimation photo printer |
| Brand | Canon |
| Model | SELPHY CP900 |
| Dimensions (W x H x D) | 178.0 x 127.0 x 60.5 mm (without protruding parts) |
| Weight (printer only) | Approximately 810 g |
| Power supply | Compact AC adapter CA-CP200 B (24 V DC, 1.8 A) or rechargeable lithium-ion battery NB-CP2L (sold separately, 22.2 V, 1200 mAh) |
| Power consumption | 60 W max. (4 W in standby) |
| Print resolution | 300 x 300 dpi |
| Number of colors | 256 shades per color (Y/M/C/overcoat) |
| Supported paper sizes | Postcard (100x148 mm), card size (54x86 mm), labels (full page/8 per sheet/square) |
| Print speed | Approximately 47 s (postcard), approximately 27 s (card size) |
| Display | Tiltable 6.75 cm (2.7 inch) TFT color LCD |
| Wireless connectivity | Wi-Fi IEEE 802.11b/g (infrastructure and ad hoc modes), WPS compatible |
| Wired connectivity | High-speed USB (Mini-B for computer, Type A for PictBridge device) |
| Compatible memory cards | SD/SDHC/SDXC, MMC/MMCplus, miniSD/miniSDHC/microSD/microSDHC/microSDXC (with adapter), RS-MMC, MMCmobile, MMCmicro |
| Main functions | Wireless printing, cropping, ID photo printing (multi-format, standard, custom), red-eye correction, skin smoothing, image optimization, brightness adjustment, color effects (sepia, B&W, etc.), date printing, layout (1, 2, 4, 8, index, random), DPOF printing |
| Maintenance and cleaning | Wipe the body with a soft cloth. Clean the ventilation grille after removing the ink cassette. Do not use solvents (alcohol, benzine, thinner). |
| Safety precautions | Do not expose to water, do not disassemble, use only recommended Canon accessories, unplug during thunderstorms, do not touch the interior in case of a drop. |
| Spare parts and accessories | Color ink cassette, paper kit (KP-36IP, KP-72IN, KP-108IN, KC-36IP, KC-18IF/KC-18IL/KC-18IS), paper cassette PCP-CP400 (included) and PCC-CP400 (optional), AC adapter, battery NB-CP2L, charger adapter CG-CP200, dust cover DPC-CP100 |
| Repairability | Do not attempt to repair yourself. Contact a Canon authorized service center. Warranty valid only in the country of purchase. |
| Operating temperature | 5 to 40 °C |
| Operating humidity | 20 to 80% |
Frequently Asked Questions - SELPHY CP900 CANON
User questions about SELPHY CP900 CANON
0 question about this device. Answer the ones you know or ask your own.
Ask a new question about this device
Download the instructions for your Photo printer in PDF format for free! Find your manual SELPHY CP900 - CANON and take your electronic device back in hand. On this page are published all the documents necessary for the use of your device. SELPHY CP900 by CANON.
USER MANUAL SELPHY CP900 CANON
- Make sure you read this guide including the "Safety Precautions" section before using the printer.
- Read this guide carefully for the correct use of the printer.
- Keep this guide handy for future reference.
Check if the following items are included in your printer package, using the □ check boxes. If anything is missing, contact the retailer where you purchased the printer.
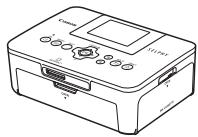
□ SELPHY Printer Unit
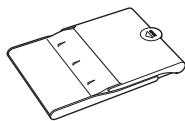
□ Paper Cassette (Postcard Size) PCP-CP400
□ Warranty System Booklet

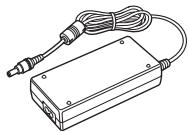
□ Compact Power Adapter CA-CP200 B
□ SELPHY CP900 Solution Disk

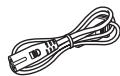
□ Power Cord
□ Printer User Guide (This Guide)

Ink and Paper (Sold Separately)
Before using the printer, be sure to purchase a Color Ink Cassette/Paper Set separately.
| Color Ink Cassette/Paper Set | Necessary Paper Cassette | ||
| Product Name | Paper Size | Number of Possible Prints | |
| Color Ink Cassette/Paper Set KP-36IP (Postcard) | Postcard Size | 36 | Paper Cassette PCP-CP400 (Included with SELPHY) |
| Color Ink Cassette/Paper Set KP-72IN (Photo Paper) | 72 | ||
| Color Ink Cassette/Paper Set KP-108IN (Photo Paper) | 108 | ||
| Color Ink Cassette/Paper Set KC-36IP | Card Size | 36 | Paper Cassette PCC-CP400* |
| Color Ink Cassette/Label Set KC-18IF (Full Page Sticker) | 18 | ||
| Color Ink Cassette/Label Set KC-18IL (8 Stickers Per Page) | 18 | ||
| Color Ink Cassette/Square Label Set KC-18IS (square stickers) | 18 | ||
* Purchase separately with Color Ink Cassette/Paper Set. Some accessories may not be available in some regions.
Read This First
The images printed with this product should be intended for personal use. Do not print images that infringe upon copyright laws without the prior permission of the copyright holder.
This product's warranty is only effective in the country of sale. If there is a problem with the printer while abroad, please return it to the country of sale before proceeding with a warranty claim to a Canon Customer Support Help Desk.
The LCD monitor is produced with extremely high-precision manufacturing techniques. More than 99.99% of the pixels operate to specification. However, some pixels may occasionally misfire or appear as red or black dots. This is not a malfunction. Also, this will not affect the printed image.
The LCD monitor may be covered with a thin plastic film for protection against scratches during shipment. If so, remove the film before using the printer.
Conventions Used in this Guide
This printer will be referred to as "SELPHY" or "printer".
- Icons are used in the text to represent SELPHY's buttons. For details, refer to "Controls" (p. 6).
Language that displays on the screen appears inside [ ] (square brackets).
!: Indicates important notes.
: Indicates tips and additional information.
(p. xx): Indicates where you can find more information. xx: Indicates the page number.
This guide assumes all functions are at their default settings.
The various types of memory cards that can be used in this printer are collectively referred to as “memory cards”.
Table of Contents
Package Contents 2
Ink and Paper (Sold Separately) ____ 2
Read This First 3
Conventions Used in this Guide 3
Safety Precautions 4
Setting Up SELPHY 5
Component Guide 6
Information Displayed on the Screen 7
Getting Started 7
Setting the Display Language ____ 11
Memory Cards You Can Use 12
Images That Can Be Printed 12
Selecting and Printing Images 13
Printing All Images 16
Storing the Printed Photos 17
Cleaning Up After Printing 17
Cropping and Printing Images 18
Printing ID Photos 19
Printing a Variety of Images 20
Printing via Wireless LAN 25
Before Using Wireless LAN 26
Selecting Communication Mode 28
Printing in Ad Hoc Mode 29
Printing in Infrastructure Mode 31
Printing Images from Your Computer 35
Other Functions of Wireless LAN 41
Connecting with Other Devices
Using a Cable 43
Printing From Your Computer 44
Printing From Your Digital Camera ____ 46
Appendix 47
Printing When a Power Outlet is not
Available 48
Troubleshooting 49
Specifications 52
Handling SELPHY 54
Safety Precautions
Before using the product, please ensure that you read the safety precautions described below. Always ensure that the product is used correctly.
The safety precautions noted on the following pages are intended to prevent injuries to yourself and other persons, or damage to the equipment.
- Be sure to also check the guides included with any separately sold accessories you use.

Warning
Denotes the possibility of serious injury or death.
- Store this equipment out of the reach of children and infants.
Mistakenly putting the power cord around a child's neck could result in asphyxiation.
- Use only recommended power sources.
- Do not attempt to disassemble, alter or apply heat to the product.
- Avoid dropping or subjecting the product to severe impacts.
- To avoid the risk of injury, do not touch the interior of the printer if it has been dropped or otherwise damaged.
- Stop using the product immediately if it emits smoke, a strange smell, or otherwise behaves abnormally.
Do not use organic solvents such as alcohol, benzine, or thinner to clean the equipment.
Do not let the product come into contact with water (e.g. sea water) or other liquids. - Do not allow liquids or foreign objects to enter the printer.
This could result in electrical shock or fire.
If liquid comes into contact with the product, unplug it from the outlet and consult your retailer or a Canon Customer Support Help Desk.
Do not touch this printer or the power plug during thunderstorms.
This could result in electrical shock or fire. Immediately stop using the equipment and distance yourself from it.
- Unplug the power cord periodically and wipe away any dust and dirt that has collected on the plug, the exterior of the power outlet, and the surrounding area with a dry cloth.
- Do not handle the power cord with wet hands.
- Do not use the equipment in a manner that exceeds the rated capacity of the electrical outlet or wiring accessories. Do not use if the power cord or plug are damaged, or not fully plugged into the outlet.
Do not allow dirt or metal objects (such as pins or keys) to contact the terminals or plug.
Do not cut, damage, alter or place heavy items on the power cord.
This could result in electrical shock or fire.
Do not play the supplied CD-ROM(s) in any CD player that does not support data CD-ROMs.
Playing the CD-ROM(s) in an audio CD player (music player) could damage the speakers. It is also possible to suffer hearing loss from listening with headphones to the loud sounds of a CD-ROM played on a music CD player.

Caution
Denotes the possibility of injury.
Do not stick any part of your hand into the printer interior.
- Be sure to place SELPHY safely so as to avoid tripping over the power cord.
This could lead to injury or damage the printer.
- Avoid using, placing or storing the printer in the following places.
- Places subject to strong sunlight. ●Places subject to temperatures above 40 °C (104 °F).
● Humid or dusty areas. ● Places subject to strong vibrations.
This may heat up and damage the printer or adapter and could result in electrical shock, burn, injury, or a fire. High temperature may cause deformation of the adapter or printer casing.
- Unplug the product from the power outlet when you are not using it.
- Do not place anything, such as cloth, on top of the printer while in use.
Leaving the unit plugged in for a long period of time may cause it to overheat and become distorted, resulting in fire.
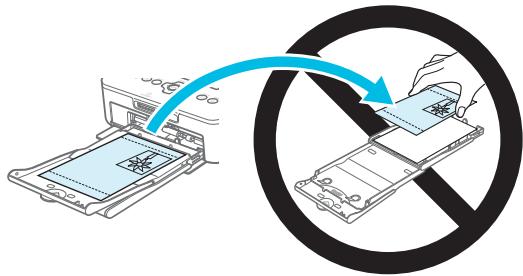
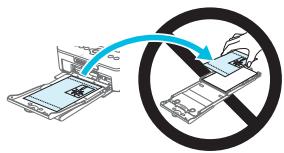
- Never reuse paper for printing, even if an image is only printed on part of the paper, and there is leftover blank space as shown.
Reusing paper to print can cause the ink sheet to become stuck to the paper or cause paper jams and damage the printer.
- Do not disconnect the power plug while printing.
If you have accidentally turned off the power, turn it on again and wait for the paper to be ejected. Consult your retailer or a Canon Customer Support Help Desk in the event of a paper jam. Do not remove jammed paper by force. The printer could be damaged. - Do not use the printer near a device that creates a magnetic field such as a motor, or in a dusty place.
This may damage the printer or cause the printer to malfunction.

Setting Up SELPHY
- Place SELPHY on a stable and even surface, such as a table. Never place it on an unstable or tilted surface.
- Keep SELPHY at least 1 m (3 ft.) from devices emitting electromagnetic waves or strong magnetic fields.
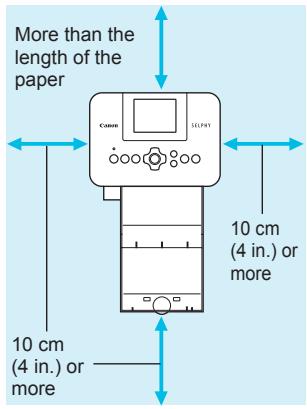
- Make sure there is at least 10 cm (4 in.) of free space around SELPHY.
- Since paper will pass in and out of SELPHY during printing, make sure the space behind the printer is greater than the length of the paper.

- Do not use SELPHY near a device that creates a magnetic field such as a motor, or in a dusty place. This may damage the printer or cause the printer to malfunction.
- Do not place near a television or radio. This may cause the printer to malfunction.
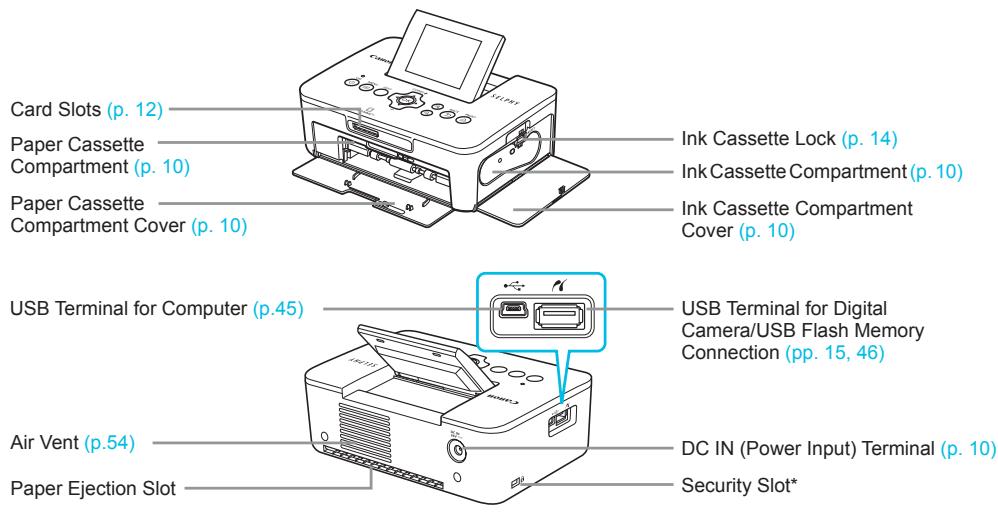
* Security cables, such as a Kensington lock, can be attached to this slot.

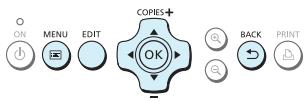
Controls
![graph TD 1["①"] --> A["ON"] 2["②"] --> B["MENU"] 3["③"] --> C["EDIT"] 4["④"] --> D["⑤"] 5["⑥"] --> E["⑦"] 6["⑧"] --> F["⑨"] 7["⑨"] --> G["⑩"] H["⑪"] --> I["BACK"] J["⑫"] --> K["PRINT"]](/content/2020/04/31013/images/24172704b2555800b3b19b27e1b6da4202762332456bf01dda3c3f46fb160f35.jpg)
| Icons Used in This Guide | Name | Function | |
| 1 | - | Screen (LCD Monitor) | Displays images, setting screens, or error messages (p. 51) |
| 2 | ON Button | Turns SELPHY on or off (p. 11). | |
| 3 | MENU Button | Displays the menu screen (p. 11). | |
| 4 | - | EDIT Button | Displays the edit menu and rotates the cropping frame. |
| 5 | OK | OK Button | Sets the selected item. |
| 6 | ▲ | Up/+ COPIES Button | Specifies number of copies, selects items to set. |
| 7 | ▼ | Down/- COPIES Button | |
| 8 | Left Button | Switches images, changes settings. | |
| 9 | Right Button | ||
| 10 | Enlarge Button | Switches the display, enlarges the cropping frame. | |
| 11 | Reduce Button | Switches the display, reduces the cropping frame. | |
| 12 | BACK Button | Restores the previous screen (p. 20), cancels printing (p. 14). | |
| 13 | PRINT Button | Starts printing (p. 14). | |
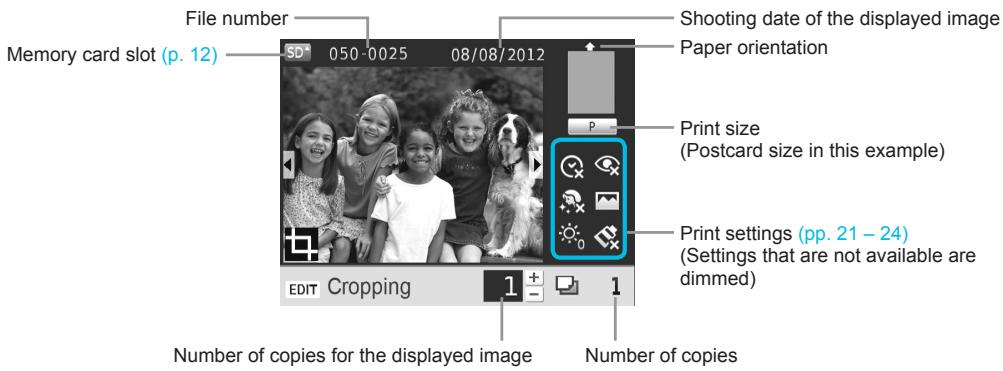
Switching the screen display
You can display the image full-screen by pressing the Ⓧ button. A frame to indicate the print range is also displayed.
You can display 4 images on the screen by pressing the 🔒 button.

Getting Started
Preparations for printing images. A Postcard size Color Ink Cassette/Paper Set (sold separately) (p. 2) will be used as an example; however, preparation is the same for other sizes.
Take care not to get any dust on the paper since it may cause lines on the printed photos or damage the printer (p. 5).

Preparing the Ink Cassette
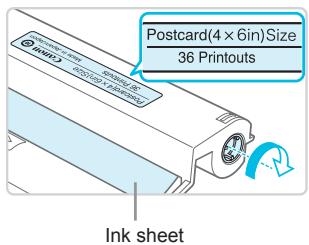
Check the ink cassette and ink sheet.
Hold the ink cassette without touching the ink sheet and check if the size of the paper you are going to print matches the paper size shown on the ink cassette (Postcard (4x6in) Size), Card Size, etc.).
- Check that the ink sheet is taut with no slack. If the ink sheet is slack, turn the sprocket as shown in the illustration to tighten it, otherwise the ink sheet may be torn when it is inserted into SELPHY.

Take care not to touch the ink sheet, not to handle the ink cassette with wet hands, and not to get any dust or dirt in the ink sheet. Dirt and water drops may cause lines on photos, poor print quality, a tear in the ink sheet, or cause the printer to malfunction (p. 5).
- When tightening, turn the sprocket gently without force. Forcing it may cause a tear in the ink sheet or the ink sheet will run out before completing a photo print, resulting in leftover paper.
- Do not reuse a spent ink cassette since this may damage the printer or cause malfunction.
Preparing the Paper Cassette


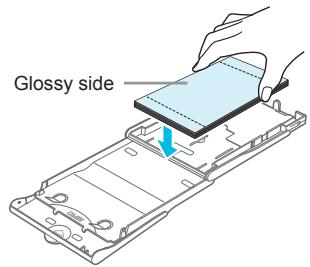
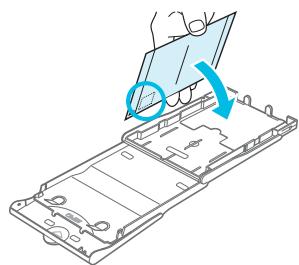

Check the paper size.
- Check that the prepared ink cassette and the size shown on the paper cassette (POSTCARD (4x6in), CARD SIZE, etc.) match.
Open the lid.
There are two layers of lids. Open the outer lid ① first, then open the inner lid ②.
Set the paper.
- Set the paper into the paper cassette that you prepared.
- You can place up to 18 sheets in the paper cassette. Inserting 19 or more sheets may damage the printer or cause malfunction.
Hold the paper as shown in the illustration and load with the glossy side up. (Do not touch the print side (glossy side) of the paper with your fingers. This may prevent you from making clean prints.) - If a protective sheet is included with the paper, remove it and set only the paper into the cassette.
- When making Postcard size prints that have an area for pasting a stamp, insert the cards so that the stamp area is faced as shown in the illustration.
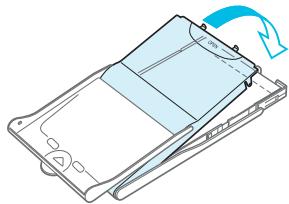
Close the lid.
- Close the inner lid until it clicks into place. Leave the outer lid open during printing.

Use only dedicated paper included in the genuine Canon brand Color Ink Cassette/Paper Sets for use in SELPHY CP series printers. Regular printing paper, regular postcards, or dedicated paper for SELPHY ES series printers cannot be used.
- Never do the following. This may damage the printer or cause the printer to malfunction.
- reverse the paper (the glossy side is the print side)
- bend or separate the paper at the perforations before printing
- use label sheets that have begun to peel or label sheets with portions peeled
- write on a sheet before printing
- reuse paper for printing on the blank part (p. 5).
- Do not touch the springs on the paper cassette.
If the springs are bent or deformed, paper will not feed correctly into SELPHY.
One spring is attached at the center of the top surface on card sized paper cassettes.
Take care not to touch or rub the print (the glossy) side of the paper, not to handle the paper with wet hands, and not to get any dust or dirt on the paper. Dirt and water drops may cause lines on photos, poor print quality, or damage the printer (p. 5).
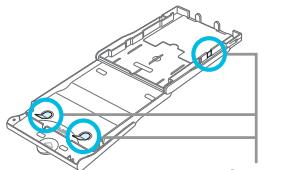
Spring
Attaching the Dust Protection Cover
By attaching the dust protection cover DPC-CP100, you can prevent dust or dirt from accumulating on the paper. The dust protection cover may not be included in some regions. Purchase separately if required.
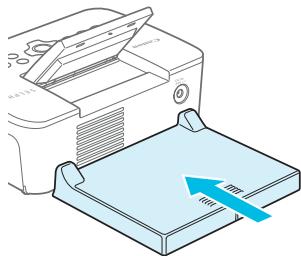
- Insert the dust protection cover as shown in the illustration.

In a place with a lot of dust or dirt, or outdoors, the dust protection cover may not be able to prevent dust or dirt from accumulating on the paper, so take care to select a clean environment when using SELPHY.

- Store the dust protection cover in a bag to prevent dust when not using.
Inserting the Ink and Paper Cassettes
1
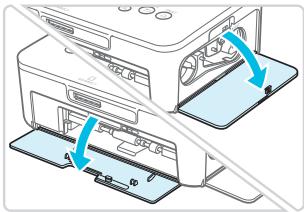
Open the covers.
- Open the covers for the ink cassette and paper cassette compartments.
2
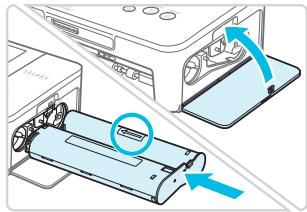
Insert the ink cassette.
- Insert the ink cassette into the printer in the direction indicated by the arrow on the cassette until it clicks and locks into place. - Close the ink cassette compartment cover.
3
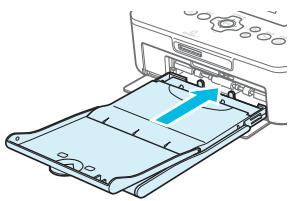
Insert the paper cassette.
- Make sure that the outer lid is open (p. 8) and insert the paper cassette all the way into the compartment.
Connecting the Power
1
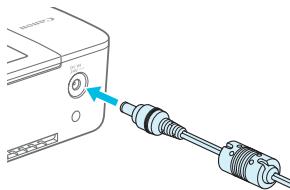
Plug the adapter cord into SELPHY.
- Fully insert the adapter plug into SELPHY.
2
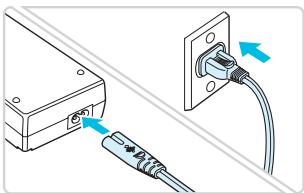
Connect the power cord.
- Connect the power cord to the compact power adapter, then plug the other end into a power outlet.
Setting the Display Language
You can change the language displayed in the LCD monitor menus and messages. The default setting is English.
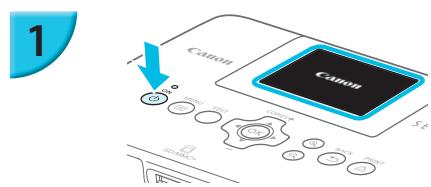
Turn on SELPHY.
- Press and hold the ⏻ button until the screen shown on the left is displayed.
- To turn the power off, press and hold the ⏻ button and release when the screen display changes.
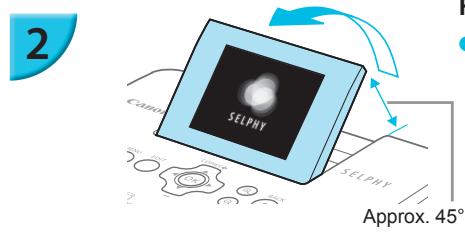
Raise the screen (LCD monitor).
- Do not raise the LCD monitor more than 45° as this may result in damage or malfunction.
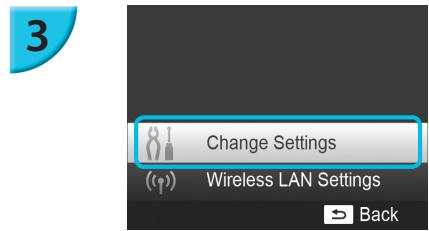
Display the settings screen.
- Press the ☐ button.
- Press the ▲▼ buttons to select [Change Settings], and then press the OK button.
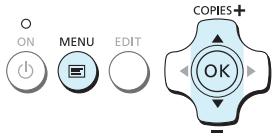
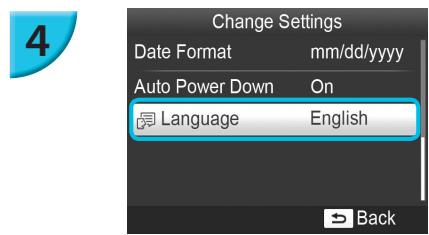
Display the language settings screen.
- Press the ▲▼ buttons to select [Language], and then press the OK button.

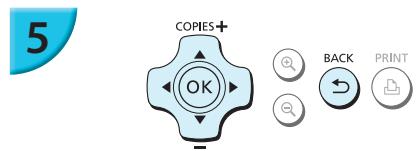
Select a language.
- Press the ▲▼◀▶ buttons to select a language, and then press the OK button.
- You can go back to Step 2 if you press the ↩ button twice.
| Memory Cards That Can be Used Without an Adapter | Memory Cards That Require an Adapter (commercially available) |
SD Memory CardSDHC Memory CardSDXC Memory Card  MultiMediaCardMMCplus CardHC MMCplus Card MultiMediaCardMMCplus CardHC MMCplus Card | miniSD Memory CardminiSDHC Memory CardmicroSD Memory CardmicroSDHC Memory CardmicroSDXC Memory CardRS-MMC Card *MMCmobile CardMMCmicro Card |
* "RS-MMC" is an abbreviation of "Reduced-Size Multi Media Card".

- For memory cards that require an adapter, be sure to first insert the memory card into the adapter before inserting into the appropriate card slot.
If you insert the memory card into a card slot without using an adapter, you may not be able to remove the memory card from the printer.
- Use a memory card formatted in the device used for taking the images. A memory card formatted on a computer may not be recognized.

Refer to the user guide included with your memory card and adapter for handling instructions.

About USB Flash Memory
You can print images on a commercially available USB flash memory by connecting it to SELPHY (p. 15).

Images That Can Be Printed
JPEG images conforming to the Exif standard can be printed with SELPHY.

Irregularly sized images, or images that have been edited on a computer may not display or print properly.
Selecting and Printing Images
You can select an image and specify the number of copies for printing. In this section, an SD memory card will be used as an example, but you can print from other memory cards using the same steps.
1
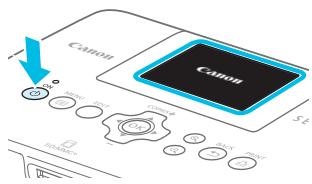
Turn on SELPHY.
- Press and hold the ⏻ button until the screen shown on the left is displayed.
- To turn the power off, press and hold the ⏻ button and release when the screen display changes.
2

Approx. 45°
Raise the screen (LCD monitor).
- Do not raise the LCD monitor more than 45° as this may result in damage or malfunction.
3
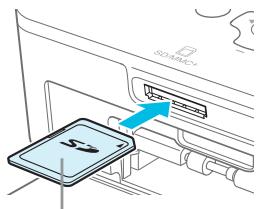
Label side
Insert the memory card into the slot.
- Insert the card faced as shown in the illustration until it clicks.
- To remove the card, push it in until it clicks and release your finger slowly.
The screen in Step 4 below (image display screen) (p. 7) will be displayed.
4
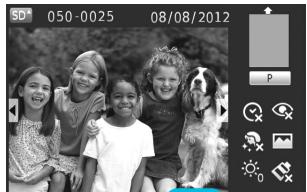
EDIT Cropping


Number of copies for the displayed image
Number of copies

Select an image.
- Press the ◀▶ buttons to select an image to print.
- Every 5th image will be displayed if you press and hold the ◀▶ buttons.
Select the number of copies.
- Press the ▲▼ buttons to select the number of copies.
- If you press and hold the ▲▼ buttons, the number increases or decreases by 5 copies.
- To print another image at the same time, repeat Steps 4 and 5.

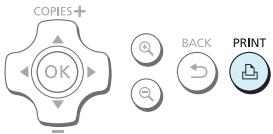


Print.
- Press the 📁 button to start printing.
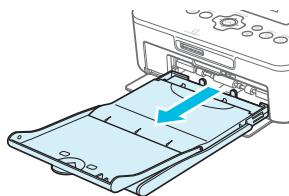
During printing, the paper will pass in and out from the back of SELPHY several times. Do not touch the paper until printing has finished and the printed sheets collect on the print output tray (on the outer lid of the paper cassette). - Do not let 19 or more printed sheets collect on the print output tray.
During printing, always press the ↩ button to cancel printing.
Insert the paper.
- If the paper out message is displayed on the screen, pull the paper cassette out from SELPHY without turning off the power.
- Refill the paper cassette with new paper (p. 8) and reinsert the cassette into SELPHY (p. 10).
Change the ink cassette.
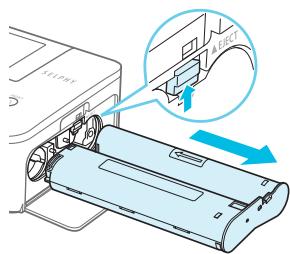
- If the ink out message is displayed on the screen, open the ink cover without turning off the power.
- The ink cassette will come out if you move the lock in the direction shown in the illustration. Insert a new ink cassette (pp. 7, 10).

- Never pull out the paper cassette, open the ink cassette compartment cover, or remove the memory card while you can hear the printer's operation sounds immediately after turning on the printer, or during printing. This may damage the printer.
- Press the → button to cancel printing. You cannot cancel printing by pressing the ON button and the printer could be damaged if you unplug it to disconnect power.

It may take some time before images are displayed on the screen in Step 4 if the memory card contains a large number of images.
- If the [DPOF images remain] screen is displayed, refer to “Printing Images Using Digital Camera Specified Settings (DPOF Print)” (p .46).
- You can specify up to 99 images in Step 4 and up to 99 copies per image in Step 5. However, the total number of copies cannot exceed 999.
The printer does not stop printing until it finishes the page being printed even if you press the ➕ button to cancel printing.

Avoiding Incomplete Photos
Note the following to avoid wasted remaining paper due to the ink sheet running out before completing a photo print.
- Do not turn the sprocket too much when tightening the ink sheet (p. 7).
- Always press the ⇔ button when you want to cancel printing and never turn off the power before pressing the ⇔ button (Step 6).
- If the paper out message is displayed on the screen, refill the paper without turning off the power and without removing the ink cassette (Step 7), or press the → button to cancel printing (Step 6).
Depending on print conditions, you may not be able to avoid incomplete photo prints due to the ink sheet running out in some cases even if you follow the above instructions.
Printing From USB Flash Memory
Just like images on memory cards, images on commercially available USB flash memory can also be printed.
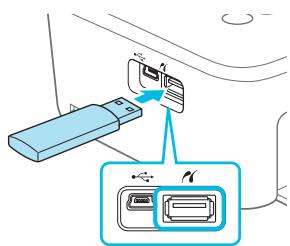
Insert a USB flash memory.
- Insert a USB flash memory as shown.
- All further steps are the same as those used for printing images from memory cards (pp. 13 – 14).

- Depending on the brand of USB flash memory used, it may be difficult to insert or remove, and it may not operate properly.
Refer to the user guide included with your USB flash memory for operating instructions.
Printing 1 Copy of the Selected Image
You can print 1 copy of the selected image with simple operation.
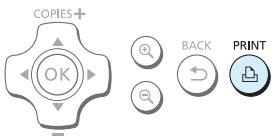
Select and print an image.
- Select the image as described in Steps 1 to 4 on p. 13.
- Press the 📁 button to print 1 copy of the selected image.

- If you have specified the image and the number of copies in Steps 4 to 5 on p. 13, SELPHY will print as specified even if you carry out the above operations. Therefore, make sure that the number of copies is "0" in Step 4 on p. 13 before trying this operation.
Printing on Square Stickers
- You can print square images on stickers using Color Ink Cassette/Square Label Set KC-18IS (p. 2).
Set [Borders] to [☐ Bordered] (p. 21).

- If the image is not square, the image may not fit into the sticker or may leave margins.
You can print all images on a memory card at once.
1
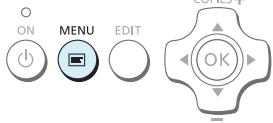
Display the menu.
- Press the ☐ button.
2
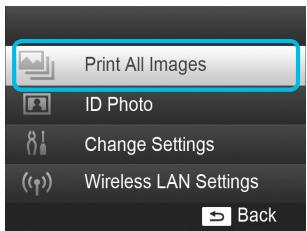
Display the settings screen.
- Press the ▲▼ buttons to select [Print All Images], then press the OK button.

3
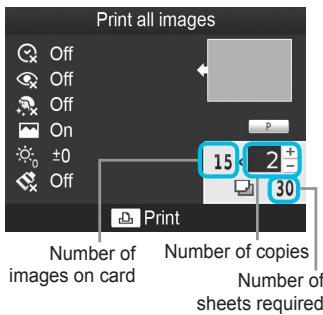
Select the number of copies.
- Press the ▲▼ buttons to set the number of copies.

4
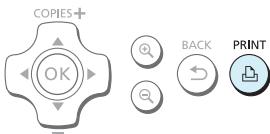
Print the images.
- Press the 📁 button to start printing.
To cancel printing, press the ↩ button.

- If there are 1000 or more images on the card, only 999 copies will be printed in order of the most recent by shooting date.
- You can specify up to 99 copies in Step 3. However, the total number of copies cannot exceed 999. (For example, you can specify up to 9 copies when you have 100 images in the card.)
Storing the Printed Photos
- When both edges of a print have perforations, you can remove the edges by bending them.
- Use an oil-based pen to write on prints.
- To prevent discoloration, do not store prints in places subject to temperatures of over 40 °C (104 °F), humid or dusty places, or in direct sunlight.
- Avoid the following actions as they may result in color change, color fading or color bleeding: Sticking any type of adhesive tape on a print surface, allowing print surfaces to come into contact with vinyl or plastic, applying alcohol or other volatile solvents to a print surface, or leaving the print surface tightly pressed against other surfaces or objects for prolonged periods.
- If you wish to mount prints in an album, select an album with photo covers made of nylon, polypropylene or cellophane.
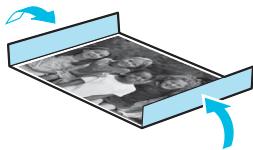

- Color may change over time or depending on storage conditions. Canon assumes no liability for color changes.

Cleaning Up After Printing
① Turn off SELPHY (p. 11), then remove the memory card or USB flash memory.
② Lower the screen (LCD monitor) flat for storage.
③ Unplug the power cord from the power outlet and disconnect the adapter plug from SELPHY.
- If the compact power adapter is hot, wait until it has cooled down before you store it.
④ Remove the paper cassette and close the paper cassette compartment cover. Keep the remaining paper inside the cassette and store the cassette in a dark, cool, and dry place free from dust.
- Keep the ink cassette inside SELPHY.
- Store SELPHY horizontally, in a dark place free from dust. Dust and dirt may cause white lines on photos or damage the printer.

- When you have more than one ink cassette, keep one inside SELPHY, and keep the other inside the original packaging or a bag to protect it from dust, and store it in a dark place.
- When storing new paper and ink cassettes, leave them in unopened packages, and keep them in a dark place.
You can crop and print part of an image.
1
Display the cropping screen.
- Select an image as described in Step 4 on p. 13, press the EDIT button, and then press the OK button.
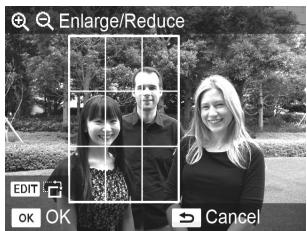
A cropping frame to indicate the range will be displayed.
2
Determine the range.
The cropping frame switches between portrait and landscape each time you press the EDIT button.
- You can move the cropping frame by pressing the ▲▼◀▶ buttons.
- You can enlarge the cropping frame by pressing the ⭕ button and shrink it by pressing the ⭖ button.
3

Make the setting.
- When you press the OK button, the cropping range is set and the screen returns to the image display screen with ▶ displayed at the bottom left.
- To crop another image and print at the same time, repeat Steps 1 to 3.
4
Print the images.
- Print as described in Step 6 on p. 14.
The cropping range is cleared when printing is finished.

- If you want to change the cropping range after setting it, press the EDIT button in the image display screen, press the ▲▼ buttons to select [Adjust Cropping], and press the OK button to repeat Steps 2 to 3.
- If you want to cancel the cropping range after setting it, press the EDIT button in the image display screen, press the ▲▼ buttons to select [Reset Cropping], press the OK button to display the reset cropping screen, and then press the OK button again.
The cropping ranges are all cleared if you turn SELPHY off or remove the memory card before printing them.
You can set up to 99 images with cropping ranges. - You cannot crop images when you are printing with [Print All Images] or [DPOF Print], or you have selected 📄Index] or 📄Shuffle] in [Page Layout] (p. 22).
- You cannot change the vertical and horizontal ratio of the cropping frame on the screen.
- You can change the number of copies by pressing the ▲▼ buttons in the image display screen in Step 3. The cropping range setting is not cleared by setting the number of copies to 0.
Printing ID Photos


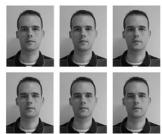
You can print your image as an ID photo. You can select the size from [Multi-size], [Standard]*, and [Custom].
Also, you can select up to 2 types of images to be printed on 1 sheet.
* The Standard size conforms to the ICAO international standards.
1
Set to print ID photos.
- Press the 📄 button.
- Press the ▲▼ buttons to select [ID Photo], and then press the OK button.
2
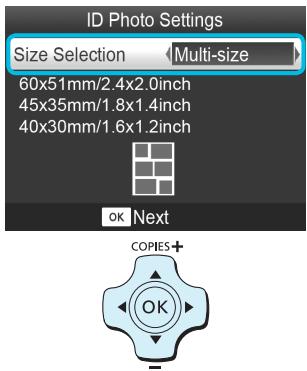
Specify the ID photo size.
- Press the ◀▶ buttons to select the size, and then press the OK button.
- If you have selected [Custom], press the ▲▼ buttons to select [Long Side], press the ◀▶ buttons to specify the length, then specify the length for [Short Side], and then press OK again. The values which can be specified in [Short Side] change automatically according to the value you have specified in [Long Side].
- If you have selected [Multi-size], the size of the image to be printed is displayed.
3
Select and print the images.
- Select the image by pressing the ◀▶ buttons, and press the ▲ button. √ is displayed at the bottom right of the screen (up to 2 images).
- Press the EDIT button to set the cropping range (p. 18).
- Print as described in Step 6 on p. 14.
▶ Settings are cleared when printing is finished.

The ID photo may not be accepted officially, depending on the institution the ID photo is required for. Please contact the appropriate institution for regulation details.
- You cannot use card size paper.
[Borders] settings will be ignored. Also, the date is not printed.
- If you have selected 2 types of images in Step 3, these 2 types are printed in equal numbers for the number of columns in the layout. If you have selected 2 types of images and the number of columns is an odd number, nothing will be printed in the center column.
Crop the image for the passport.
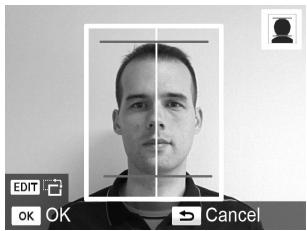
- If you display the cropping range (p. 18) while the [Standard] size is selected for [ID Photo], 2 lines are displayed.
- Adjust so that one line is at the top of the head and the other line is under the chin to print a passport photo conforming to the passport standards.

Please contact the appropriate institution for regulation details other than regarding position and size of the face.
Printing a Variety of Images
You can use various printing features, such as imprinting the shooting date or adjusting the color of an image. You do not need to make settings for each image because once the settings are made, they are applied for all images.
Making Settings
1
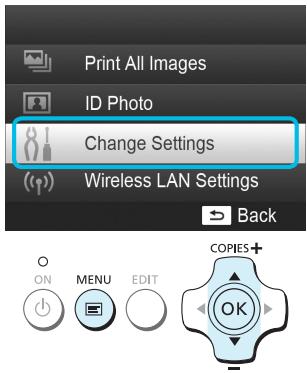
Display the settings screen.
- Press the ☐ button.
- Press the ▲▼ buttons to select [Change Settings], and then press the OK button.
2
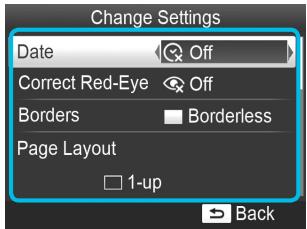
Select the item and change the settings.
- Press the ▲▼ buttons to select an item.
- Press the ◀▶ buttons to change the settings, then press the ↩ button to complete the setting.
- Pressing the ↔ button again will restore the image display screen.
Refer to pp. 21 – 24 for information about each setting.
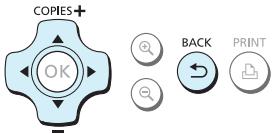
3
Print.
- Select an image for printing (p. 13) and the number of copies (p. 13), and then press the 📁 button to print.
Printing With the Date (Date)



- You can print the shooting date recorded by the digital camera.
Off (Default setting) / On
08/08/2012

- Specify [ ✉ Off] for images that already have the date imprinted by the camera to prevent two dates being printed in the image.

Turning off SELPHY will return the setting to [ ✉ Off].
The date which the digital camera recorded into the image is printed. This date cannot be changed by SELPHY.
You can change the style of the printed date in [Date Format] (p. 24).
The date will not be printed if [ 📄 Index] or [ 📄 Shuffle] is selected in [Page Layout] (p. 22).
Correcting Red Eyes and Printing (Correct Red-Eye)
- Correct images with red-eye.
Off (Default setting) / On

- Portions other than the eyes may be mistakenly corrected. Set [Correct Red-Eye] to [ On ] only when printing images with red-eye.

If SELPHY is turned off or the memory card is removed, the setting will return to [ 📄 Off].
- Red-eye may not be automatically detected or optimally corrected when faces appear extremely small, large, dark or bright in relation to the overall image, with faces turned to the side or diagonally, or faces with a portion hidden.
- You cannot correct red-eye when you have selected [☐ 2-up], [☐ 4-up], [☐ 8-up], or [☐ Index] in [Page Layout] (p. 22).
Red-eye correction is not applied when you have selected [se Sepia] or [aw B/W] in [My Colors] (p. 23).
The level of correction may change depending on the cropping range setting, page layout, and paper size.
Printing With or Without a Border (Borders)

- You can set images to print with or without a border.
- Borderless (Default setting) / - Bordered
- Specify [Bordered] when using Color Ink Cassette/Square Label Set KC-18IS (square stickers) (p. 2).

Turning off SELPHY will return the setting to [☐ Borderless].
Images are printed without borders if you select [ 📄 Index] or [ 📄 Shuffle] in [Page Layout] (p. 22).
- If you select [ 8-up] in [Page Layout] (p. 22) when printing on card sized paper (p. 2), images will be printed without borders even if [ Bordered] is selected.
Selecting a Layout and Printing (Page Layout)
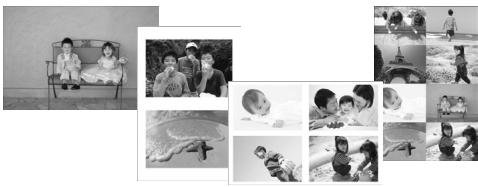
- You can set the number of images that you want to print on one sheet. The number of images that you specified (p. 13) will be printed in the selected layout.
- Specify [ 8-up] when using Color Ink Cassette/Label Set KC-18IL (8-label sheet) (p. 2).
| □ 1-up(Default setting) | Prints one image using a full sheet | □□ 8-up | Prints eight images on one sheet |
| □ 2-up | Prints two images on one sheet | □□□ Index | Prints as an index |
| □□ 4-up | Prints four images on one sheet | □□ Shuffle | Images are automatically arranged in a variety of sizes and printed on a single sheet |

If SELPHY is turned off, the setting will return to [☐ 1-up].
- You can retain a layout even after SELPHY is turned off. To have SELPHY retain layouts, first make sure SELPHY is turned off, press and hold the ☐, ▲, and 🔊 buttons, and then press and hold the ⏻ button until "SELPHY" is displayed on the screen. If you want SELPHY to no longer retain layouts, turn off SELPHY and then turn it on in the same way as you did before for retaining layouts.
- You cannot specify the position of the images.
- Depending on the selected layout, the settings made in [Date] (p. 21), [Image Optimize] (p. 23), [Correct Red-Eye] (p. 21), [Borders] (p. 21), [Smooth Skin] (p. 23), or [Brightness] (p. 23) may not be applied.
- If you select [Print All Images] (p. 16) while selecting [____] Index], you can print all images on a memory card as an index print.
Arranging Images of Different Sizes (Shuffle)


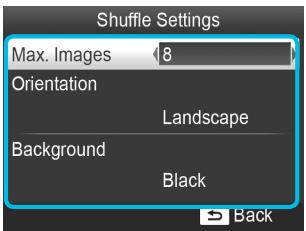
- Shuffle automatically arranges images in a variety of sizes for printing.
A group of up to 8 images, or a group of up to 20 images can be printed on a single sheet.
You can print on Postcard size paper (p. 2).
In "Making Settings" (p. 20), press the ▲▼ buttons to select [Page Layout] in the screen in Step 2. Press the ◀▶ buttons to select [ [ ] Shuffle], then press the OK button.
- When the screen shown on the left appears, press the ▲▼ buttons to select an option.
- Press the ◀▶ buttons to change the settings, then press the ⇔ button to complete the setting.
- Press the ↩ button twice to restore the image display screen.

- You cannot specify the position of the images.
It may take some time before printing starts.
Making Skin Look Smooth in Prints (Smooth Skin)
- Makes skin look smooth and beautiful in prints.
Off (Default setting) / On

Correction may be applied to areas other than skin, producing unexpected results.

This setting is reset to [ Off] when printing finishes, SELPHY is turned off, or the memory card is removed.
- When [ [ ] Index] is selected in [Page Layout] (p. 22), [Smooth Skin] will not be applied.
Getting the Best Results With Auto Correction (Image Optimize)



- SELPHY will automatically correct the image to achieve optimum image quality.
Off / On (Default setting)

Some images may not be adjusted correctly.

Turning off SELPHY will return the setting to [On].
- When [ ] Index] is selected in [Page Layout] (p. 22), [Image Optimize] will not be applied.
The level of correction will change depending on the page layout and paper size.
Adjusting the Brightness (Brightness)



- You can adjust the brightness of an image within a range of ± 3 .
- The larger the + value, the brighter the image gets. The larger the - value, the darker the image gets.

- Turning off SELPHY will return the setting to [± 0] .
- When [ ] Index] is selected in [Page Layout] (p. 22), [Brightness] will not be applied.
Changing the Color Tone (My Colors)
- You can adjust the colors in your images, or make your images sepia-toned or black and white.
| Off(Default setting) | - | PositiveFilm | Intense, natural colors like those obtained with positive film |
| Vivid | Emphasizes the contrast and color saturation for a vivid impression | Sepia | Changes the image to sepia tone |
| Neutral | Tones down the contrast and color saturation for neutral hues | B/W | Black and white |

Turning off SELPHY will return the setting to [ Off].
Depending on the settings made in My Colors, [Correct Red-Eye] (p. 21) settings may not be applied.
Changing the Date Style (Date Format)

08/08/2012

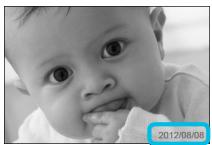
2012/08/08
- You can change the order of the printed date (p. 21).
mm/dd/yyyy (Default Setting), dd/mm/yyyy, yyyy/mm/dd

The setting will be retained even if SELPHY is turned off or the memory card is removed from the slot.
Saving Energy (Auto Power Down)
- SELPHY turns itself off automatically if it is not operated for approximately 5 minutes.
On (Default setting) / Off

- If you print multiple images that include images SELPHY cannot print (p. 12), a message "Could not print some images! Cancel printing?" is displayed and printing stops. If [Auto Power Down] is [On] and SELPHY is not operated for approximately 5 minutes, SELPHY cancels printing and turns itself off. If you turn SELPHY back on after the above sequence, a blank sheet may be output. Never reuse ejected paper (p. 5).
Note that the battery is still consumed after printing stops until the Auto Power Down function takes effect if you are using the battery (p. 48).

- SELPHY is not turned off automatically when it is connected to other devices (including wireless communications) or an error message is displayed on the screen.
Printing via Wireless LAN
This chapter describes how to print images stored in wireless LAN compatible smartphones and computers via wireless LANs.
This printer is Wi-Fi ®1 certified. You can print images stored in Wi-Fi ready smartphones 2 , tablets *2 , and computers via wireless LANs.
*1 Wi-Fi is a brand name for certified wireless LAN devices that provide bidirectional connectivity.
*2 You need to install the designated application on your smartphone or tablet. See our website for details of the application (supported models, functions, etc.). Hereinafter "smartphones" is used as the generic name for smartphones and tablets.
This product is embedded with a wireless device. The model numbers are CD1100 and CD1107 (including WLAN module model WM317).
Countries and Regions Permitting WLAN Use
- Use of WLAN is restricted in some countries and regions, and illegal use may be punishable under national or local regulations. To avoid violating WLAN regulations, visit the Canon website to check where use is allowed.
Note that Canon cannot be held liable for any problems arising from WLAN use in other countries and regions.
You can be penalized for the following actions.
- Disassembling or modifying this product
- Removing the certification label on this product
Parts within this product that are classified as strategic materials (or services) according to the Foreign Exchange and Foreign Trade Act require the export license (or permission for service transactions) from the Japanese government to be exported outside Japan.
This product cannot be exported to or taken to US embargoed countries since this product includes encryption software developed in the US and is subject to US export administration regulations.
- Be sure to note down the settings of your wireless LAN.
The wireless LAN setting registered in this product may be corrupted or lost due to a malfunction, interfering radio waves, static electricity, an accident, or failure. Note down and keep the wireless LAN settings just in case. Canon is not liable for any direct or indirect damage or lost profit due to a corruption or loss of such contents that is not caused by Canon.
Note down the wireless LAN settings as necessary and then initialize the settings before transferring or disposing this product, or sending this product to repair.
Canon is not liable for any damage caused by a loss or theft.
Canon is not liable for any damage or loss due to illegal access to or misuse of connection destinations registered in this product as a result of a loss or theft.
- Follow the instructions described in this guide.
Use the wireless LAN functions of this product within the scope of this guide. Canon is not liable for any damage or loss resulting from the use that is not described in this guide. - Do not use the wireless LAN functions of this product near medical equipment or electronic devices.
The wireless LAN functions may affect the operations of the medical equipment or electronic devices.

Radio Frequency Interference
This product may receive radio interference from other devices which transmit radio waves.
Avoid radio interference by distancing from these devices or using the interfering device at a different time.
Complies with
IDA Standards
DB00671
This product is installed with the WLAN Module which is certified to standards set by IDA Singapore.
Security
Wireless LANs communicate using radio waves; therefore, the users must pay more attention to security than they would for wired LANs.
Pay attention to the following when using wireless LANs.
- Use the network that you are authorized to use.
This product searches for wireless networks nearby and displays them on the screen.
Therefore, the list may include networks unknown to you and you have no authorization to use them. It may be deemed illegal access if you attempt to connect to these networks or if you connect and use these networks. Use the authorized networks only and do not connect to any other networks.
The following may occur if appropriate security measures are not applied.
Eavesdropping
Malicious third parties may eavesdrop on wireless LAN radio transmissions and access data information.
- Illegal access to the network
Malicious third parties may illegally intrude into your network and cause damage such as eavesdropping, falsification, or destruction.
Also, the third party may use your network for "spoofing" in which they impersonate someone else and transmit illegal information, or use it as a relay point or "stepping stone" to illegally access other subjects. In order to reduce the possibility of such issues, apply measures and use functions to implement wireless LAN security.
We recommend you to understand wireless LAN security and implement it with consideration to balanced convenience and risk when using the wireless LAN function of this product.
While Printing
Do not shut down the communication until printing is complete. If you shut down the communication prematurely, the printing result may be incomplete or incorrect.
Hereby, Canon Inc., declares that this WM317 is in compliance with the essential requirements and other relevant provisions of Directive 1999/5/EC.
Please contact the following address for the original Declaration of Conformity:
CANON EUROPA N.V.
Bovenkerkerweg 59-61, 1185 XB Amstelveen, The Netherlands
CANON INC.
30-2, Shimomaruko 3-chome, Ohta-ku, Tokyo 146-8501, Japan

The setting procedure of SELPHY varies depending on the communication mode. Select the communication mode according to the device you are using. You can change the communication mode later (p.41).

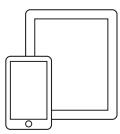
Ad Hoc Mode (p. 29)
You can connect SELPHY to a wireless LAN and print images without an access point.
Some smartphones may not be able to connect in ad hoc mode. In such a case, use infrastructure mode (below).
Smartphone*1

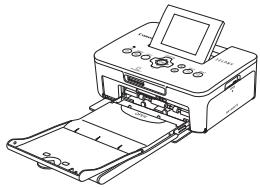
SELPHY

Infrastructure Mode (p. 31)
You can connect smartphones, cameras, or computers to a wireless LAN using your access point to print images.
Smartphone*1

Camera *2

Access point *4

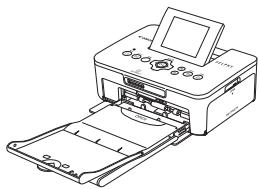
SELPHY
Computer *3

1 You need to install the designated application (free) on your smartphone. See our website for detailed information on supported smartphones and the designated application (free).
2 Cameras must be PictBridge (DPS over IP) compliant for connecting to wireless LANs.

PictBridge
USB LAN WLAN
✓ ■ ✓
This product can print using PictBridge over wireless LANs.
PictBridge is a standard to facilitate directly connecting digital cameras and printers. This product is compliant with the DPS over IP standard that allows the use of PictBridge in network environments.
*3 You need to install the supplied software on the computer (p. 37).
*4 Some cameras can be used as an access point.
Printing in Ad Hoc Mode
You can send images from a smartphone to SELPHY for printing.
You need to install the designated application (free) on your smartphone.
Some smartphones may not be able to connect in ad hoc mode. In such a case, use infrastructure mode (p.31).
Items to Prepare
- See our website for the information on supported smartphones.
1
Install the designated application on the smartphone.
- Check on our website whether your smartphone is supported, and install the designated application.
2
Prepare SELPHY.
- Remove any inserted card or USB memory.
- Insert an ink cassette and a paper cassette that contains paper you want to use into SELPHY (pp.7 – 10).
3
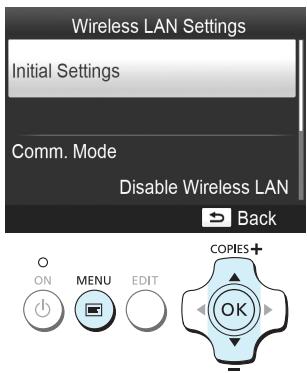
Display the settings screen.
- Press the ☐ button.
- Press the ▲▼ buttons to select [Wireless LAN Settings], and press the OK button.
- Press the ▲▼ buttons to select [Initial Settings], and then press the OK button.
4
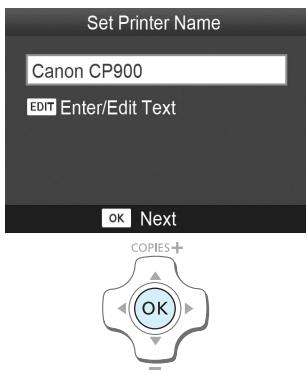
Check the printer name.
- Check the displayed printer name and press the OK button.
- This name will be displayed on the devices as the printer name when they are connected via a wireless LAN.
- You can change the printer name by pressing the EDIT button (p. 42).
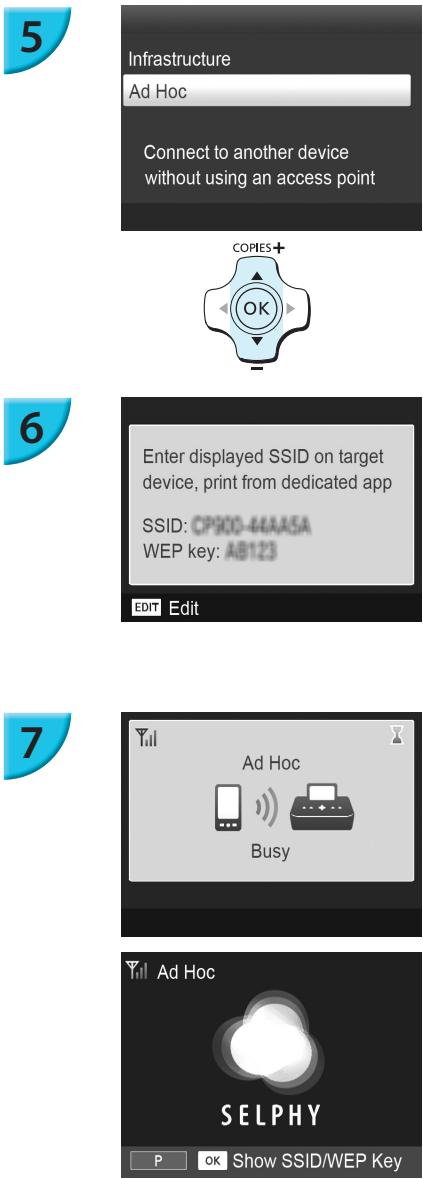
Select the wireless LAN mode.
- Press the ▲▼ buttons to select [Ad Hoc], and then press the OK button.
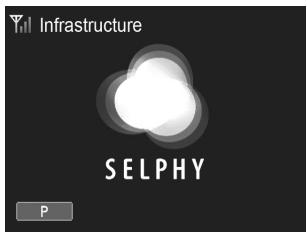
Connect the smartphone to the network displayed on the printer screen.
- Check that the screen on the left is displayed on the printer.
- Select the SSID (network name) displayed on the printer from the Wi-Fi setting menu on the smartphone.
- Enter the WEP key (password) displayed on the printer into the password field.
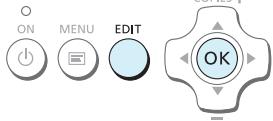
- Press the EDIT button to display the [Encryption Key Entry] screen and press the EDIT button again to change the WEP key (p. 42).
Print from the smartphone.
- Print the image from the smartphone.
The screen on the left is displayed when printing starts. Do not shut down the communication and do not quit the printing application while this screen is displayed. The printing result may be incomplete or incorrect.
The screen on the left is displayed when printing is complete.
- Repeat Step 7 if you want to print another image.

- On the screen, wireless signal strength is indicated by the following icons.
[II] high, [II] medium, [I] low, [] weak or no service
Printing for the Second Time
Once you have configured settings, the second screen in Step 7 (Ready screen) is displayed when you turn the power on. All you have to do is to connect the smartphone to the printer whenever you want to print.
- You can display the screen in Step 6 to see the SSID and WEP key by pressing the OK button while the Ready screen is displayed.
Even when the Ready screen is displayed, you can insert the memory card (p. 13) to display the screen in Step 4 and print images in the card.
- You can stop displaying the Ready screen when you turn the power on by selecting [Disable Wireless LAN] in [Comm. Mode] (p. 41).
Printing on Square Stickers
- You can print square images on stickers using Color Ink Cassette/Square Label Set KC-18IS (p. 2).
- Specify borderless printing in the smartphone's application (the [Borders] setting on SELPHY will be ignored).

Printing in Infrastructure Mode
You can connect wireless LAN ready devices such as smartphones, cameras, and computers to a wireless LAN to print images.
Checking Wireless LAN Settings
In order to use a wireless LAN in infrastructure mode, you need to connect a wireless parent station (wireless router, etc.) acting as the access point and a device that transmits images (smartphone, camera, computer, etc.). Any wireless parent stations such as wireless routers are called "access points" in this guide.
Some cameras can be used as an access point. Refer to the user guide supplied with your camera.
- Select wireless LAN standards compliant devices listed on p. 52 for your access point. Refer to the user guide supplied with your access point for information on how to check.
- Check if your wireless LAN is WPS (Wi-Fi Protected Setup) compatible. If you are not sure whether or not it is WPS compatible, also check the following items.
- Network name (SSID/ESSID)
- Network authentication/data encryption (encryption method/encryption mode)*
- Encryption key (network key)
* Supported security settings are [No security], [WEP (open system authentication) (64-bit)], [WEP (open system authentication) (128-bit)], [WPA-PSK (TKIP)], [WPA-PSK (AES)], [WPA2-PSK (TKIP)], and [WPA2-PSK (AES)].

- If your network is managed by the system administrator, request details of network settings from the administrator.
Connecting the Printer to the Wireless LAN
You can connect the printer to the wireless LAN and print from your smartphone, camera, or computer via the access point.
This section describes how to connect a printer to a wireless LAN using a camera as the access point; however, the same procedure applies when you are printing from a smartphone or computer.
Items to Prepare
A device that can be used as an access point*
A device that transmits images (smartphone, camera, or computer connected to the access point)*
* A camera is used as the access point as well as the transmitter in this example.
1
Prepare the access point.
- Configure a camera as the access point. Refer to the user guide supplied with your camera.
- If you are using an access point other than a camera, check that the device is turned on and able to communicate.
Select the wireless LAN mode.
- Display the screen on the left by carrying out Steps 2 to 4 described on p. 29.
- Press the ▲▼ buttons to select [Infrastructure], and then press the OK button.
Connection Method
WPS Connection
Search for an access point
Manual Settings
Search for nearby access points and select one to use

Access Point Select
| Access Point A | |
| Access Point B | |
| Access Point C | |
| Access Point D | |
| Access Point E |

Encryption Key Entry
12345678
EDIT Enter/Edit Text
WPA/WPA2
ok Next
Select the connection method.
- Press the ▲▼ buttons to select [Search for an access point], and then press the OK button.
A list of access points found nearby is displayed.
Select the access point.
- Press the ▲▼ buttons to select the access point, and then press the OK button.
Enter the encryption key.
- Press the EDIT button to display the screen to enter characters and enter the encryption key (p. 42).
- Press the OK button.

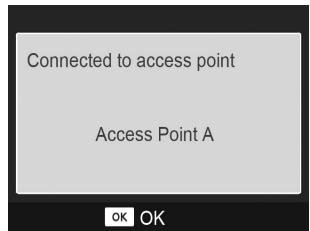

Check the access point.
The screen on the left is displayed when you are connected to the access point. Check the displayed access point name and press the OK button.
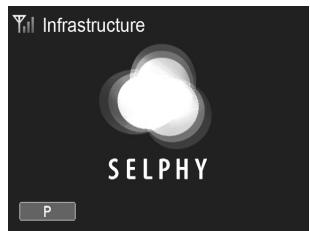
The screen on the left is displayed.

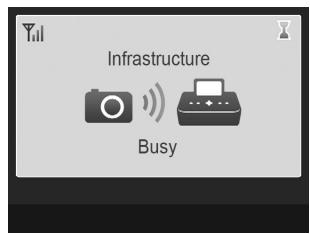
Print.
- Print the image from the camera.
- If you are printing from a smartphone, install the designated application, connect the smartphone to the access point, and print.
- If you are printing from a computer, install the supplied software (p. 37) and print.
The screen on the left is displayed when printing starts. Do not shut down the communication and do not cancel printing while this screen is displayed. The printing result may be incomplete or incorrect.

- Select an access point on which security is not set in Step 4 and press the OK button to display the screen for Step 6.
Up to 20 access points can be displayed. If you cannot find the access point you want to connect to, press the button and select [Manual Settings] in Step 3 described on p. 32 to specify the access point manually. Follow the instruction on the screen to enter the SSID, security settings, and encryption key (p. 42). - On the screen, wireless signal strength is indicated by the following icons.
[Υ] high, [Υ] medium, [Υ] low, [Υ] weak or no service

Printing for the Second Time
Once you have configured settings, the second screen in Step 6 (Ready screen) is displayed when you turn the power on. If you could not connect to the specified wireless LAN for some reason such as the access point being turned off, the Ready screen with "Reconnect" displayed at the bottom appears. Check the access point setting and press the OK button to try again.
Even when the Ready screen is displayed, you can insert the memory card (p. 13) to display the screen in Step 4 and print images in the card.
- You can stop displaying the Ready screen when you turn the power on by selecting [Disable Wireless LAN] in [Comm. Mode] (p. 41).

- If you failed to connect to an access point to which you had once connected, check the channel setting on the access point (p. 51).
Printing on Square Stickers
- You can print square images on stickers using Color Ink Cassette/Square Label Set KC-18IS (p. 2).
- Specify borderless printing in the smartphone's application or on the camera when printing on square stickers (the [Borders] setting on SELPHY will be ignored except when the border setting on the camera is at its default).
Using a WPS Compatible Access Point
You can connect the printer to the wireless LAN easily when your access point is WPS compatible.
1
Connection Method
WPS Connection
Search for an access point
Manual Settings
Connect easily to WPS
compatible access points
Select the connection method.
- Display the [Connection Method] screen in Steps 1 to 2 described on pp. 31 – 32, press the ▲▼ buttons, select [WPS Connection], and then press the OK button.
2
WPS Connection
PBC Method
PIN Method
Press the button on the access point to connect

Select a setting method.
- Press the ▲▼ buttons to select [PBC Method] and press the OK button.
3
Push and hold the access point button, then proceed
ok Next

Connect to the access point.
- Check that the screen on the left is displayed on the printer and then press and hold the button for WPS connection on the access point for a few seconds.
- Press the OK button on the printer.
[Connecting...] is displayed on the printer screen, and then [Connected to access point] is displayed when connected. Press the OK button.
Print the images.
- When connected, the screen for Step 6 described on p. 33 is displayed. Print as described in Steps 6 to 7.

- If you have selected [PIN Method] in Step 2, specify the PIN code displayed on the printer to the access point, press the OK button on the printer, and proceed to Step 3.

Printing Images from Your Computer
If you connect your computer to SELPHY and use the supplied software, you can view all images at once and take advantage of various printing functions that cannot be done with just SELPHY alone.
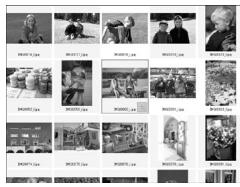
Select favorite images from an index and print
- You can select images you wish to print from an index, and print them all at once. You can also add text to your images and print.

Print with decorations
- You can add frames or stamps to your images and print. You can also add text to your images and print.
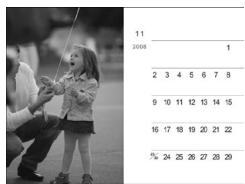
Print calendars
- You can add calendars to your prints. You can also add text to your images and print.
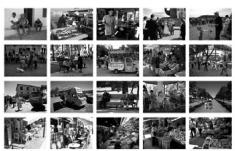
Arrangement printing
- You can arrange multiple images on the same sheet.
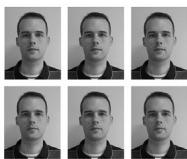
ID photo printing
- You can print in the size required for ID photos.

The ID photo may not be accepted officially, depending on the institution the ID photo is required for. Please contact the appropriate institution for regulation details.
Computer environment
| Windows | Macintosh | |
| OS | Windows 7 Service Pack 1*1*2 | Mac OS X v10.6.8 - v10.7*1 |
| Configuration | The above OS is preinstalled | |
| CPU | Pentium 1.3 GHz or higher | Mac OS X v10.7: Intel Core 2 Duo or higherMac OS X v10.6: Intel processor |
| RAM | Windows 7 (64-bit): 2 GB or moreWindows 7 (32-bit): 1 GB or more | 1 GB or more |
| Interface | USB, wireless LANAn IEEE 802.11b/g compliant access point is required*3 | |
| Free Hard Disk Space | 120 MB or more*4 | 140 MB or more |
| Display | 1,024 x 768 pixels or more | |
*1 If you are connecting with a USB cable (p. 45), you can also use Windows Vista Service Pack 2 (RAM 1 GB or more), Windows XP Service Pack 3 (RAM 512 MB or more), and Mac OS X v10.6 or later.
*2 Windows 7 Starter and Home Basic are not supported*3. Download Windows Media Feature Pack from the Microsoft Support page and install if you are using Windows 7 N (EU version) or Windows 7 KN (Korean version). For details, refer to the following web page. http://go.microsoft.com/fwlink/?LinkId=159730
*3 Except when connecting using a USB cable (p. 45).
*4 For Windows, Microsoft .NET Framework 2.0 (max. 280 MB) or higher must be installed. Installation may take some time depending on your computer's capabilities.
Wireless LAN environment
Refer to p. 26 and 31 to check wireless LAN settings.
Install the software
Windows 7 and Mac OS X 10.7 are used for these explanations.
Items to Prepare
Computer
● Supplied CD-ROM (SELPHY CP900 Solution Disk) (p. 2)
Windows
1
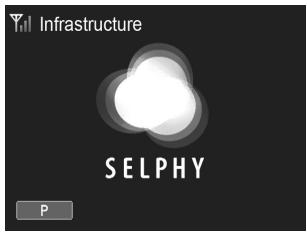
Connect SELPHY to the wireless LAN.
- Connect SELPHY to the wireless LAN as described in "Connecting the Printer to the Wireless LAN" (p. 31).
- Check that the screen on the left is displayed on SELPHY.
2
Install the software.
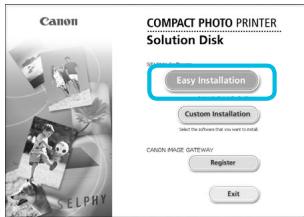
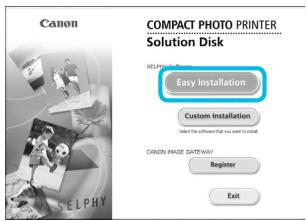
- Place the CD-ROM in the computer's CD-ROM drive and click [Easy Installation] when the screen on the left appears.
- Follow the on-screen instructions to proceed.
- If the User Account Control window appears, follow the on-screen instructions to proceed.
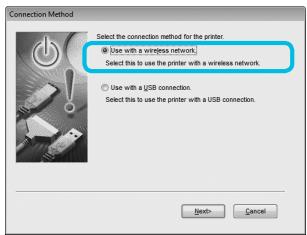
- When the screen to select the connection method (on the left) is displayed, select [Use with a wireless network], and then click [Next].
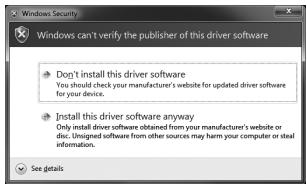
- If a message [Windows can't verify the publisher of this driver software] is displayed, click [Install this driver software anyway].
- When the installation finishes, click [Restart] to restart the computer.
Macintosh



Install the software.
- Insert the CD-ROM in the computer's CD-ROM drive. Click [Finder] in the Dock (the bar at the bottom of the desktop) and double click [ ] in the CD-ROM.
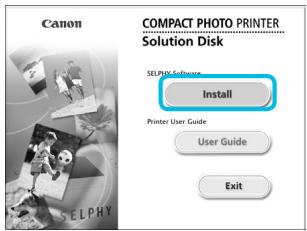
If [💡] is displayed on the desktop, you can also double-click [💡] to display files in the CD-ROM. - When the screen on the left appears, click [Install] and follow the on-screen instructions to proceed.
- When the installation finishes, click [Yes] to restart the computer.
Connect SELPHY to the wireless LAN.
- Connect SELPHY to the wireless LAN as described in "Connecting the Printer to the Wireless LAN" (p. 31).
- Check that the screen on the left is displayed on SELPHY.
Register the printer.
- Select [⚙️] from the menu, and click [System Preferences] ▶ [Print & Fax] to open the [Print & Fax] screen. Click [+] to select the printer name (pp. 29, 41) from the pop-up window, then click [Add].

For details on handling the computer, refer to the user guide included with your computer.
Printing Images with the Software
You can print images saved on the computer using the installed software (SELPHY Photo Print).
The [Simple print] feature will be explained in this section. Using this feature, you can view all your images at once and select which ones you want to print.
1
Make sure that a memory card is not inserted in SELPHY, and a USB cable is not connected to SELPHY.
2
Start the software.
Windows
- Click the [Start] menu ▶ [All Programs] ▶ [Canon Utilities] ▶ [SELPHY Photo Print] ▶ [SELPHY Photo Print].
Macintosh
- Click the [SELPHY Photo Print] icon in the Dock (the bar at the bottom of the desktop).
3
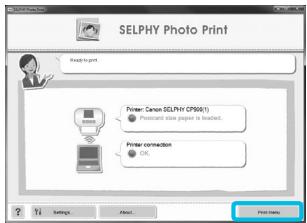
Display the print menu.
- Click [Print menu].
- If printing preparations are not complete (paper cassette and ink cassette inserted), you cannot click [Print menu]. Follow the on-screen instructions to perform the necessary operations.
4
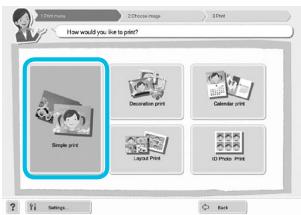
Select a print method.
Click [Simple print].
- You can make prints with frames, stamps, and speech balloons by clicking [Decoration print].
- You can make prints with calendars added by clicking [Calendar print].
- You can print multiple images on the same sheet by clicking [Layout Print].
- You can print in the size required for ID photos by clicking [ID Photo Print].
Select an image.
You can select the criteria for images to display.
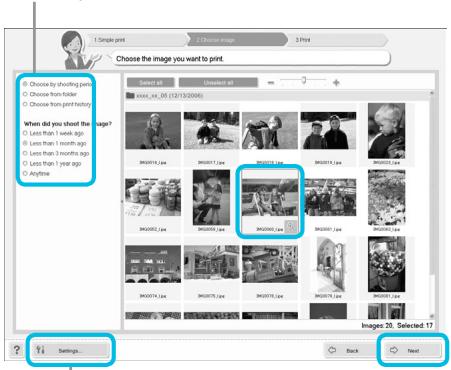
You can display images saved in another folder by clicking this button and selecting a folder from the screen that appears.
- Click an image to select for printing.
The background color changes and the image is set for printing. - Use the same procedure to click all images you want to print.
- If you click an image again, the background color switches back to the original color and the settings are canceled.
Once images are selected, click [Next].
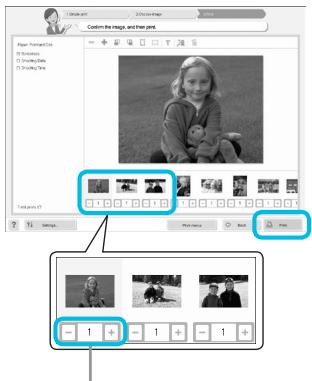
Click the - or + button to set the number of copies.
Select the number of prints.
- Select the number of copies for each image.
For Windows, click [Print] to start printing. - For Macintosh, click [Print menu], then click [Print] in the screen that appears.
- Do not shut down the communication until printing is complete. If you shut down the communication prematurely, the printing result may be incomplete or incorrect.
End the program.
Windows
- When all printing is finished, click ✗ at the top right corner of the screen.
Macintosh
- When all printing is finished, click Ⓧ at the top left corner of the screen.

The layout image shown in the right side of the screen that is displayed when you click [ID Photo Print] in Step 4 on p. 39 differs from the actual layout. You can check the actual layout by clicking [Preview] in the [4.Print] screen.
- If you select an index layout in the screen that is displayed when you click [Layout Print] in Step 4 on p. 39, then you cannot adjust the image, such as changing the size or orientation of the image in the [4.Print] screen.
Connecting to Other Access Points (Infrastructure Mode)
After connecting to an access point in infrastructure mode (p. 31), you can connect to another access point as follows.
- Press the ☐ button, and then press the ▲▼ buttons to select [Wireless LAN Settings], and press the OK button.
- Press the ▲▼ buttons to select [Access Point Connect], and then press the OK button.
- Specify as described on p. 31.

[Access Point Connect] is available only when the selected communication mode (below) is [Infrastructure].
Checking Setting Information
You can check connection settings such as the communication mode and channel, and printer information such as the printer name and IP address.
- Press the 📄 button, and then press the ▲▼ buttons to select [Wireless LAN Settings], and press the OK button.
- Press the ▲▼ buttons to select [Confirm Settings], and then press the OK button.
- Press the ▲▼ buttons to check setting information.
- Press the ↩ to go back.
Changing Communication Mode
You can change the communication mode (p. 28) to connect to another device, or stop using wireless LAN.
- Press the ☐ button, and then press the ▲▼ buttons to select [Wireless LAN Settings], and press the OK button.
- Press the ▲▼ buttons to select [Comm. Mode], and then press the OK button.
- Press the ▲▼ buttons to select a communication mode, and then press the OK button.
- Press the ▲▼ buttons to select [Disable Wireless LAN], and then press the OK button to stop using wireless LAN.
Changing the Printer Name
You can change the printer name (p. 29).
- Press the ☐ button, and then press the ▲▼ buttons to select [Wireless LAN Settings], and press the OK button.
- Press the ▲▼ buttons to select [Other Settings], and then press the OK button.
- Press the ▲▼ buttons to select [Set Printer Name], and then press the OK button.
- Press the EDIT button to display the screen to enter characters and enter the printer name (p. 42).
Setting the IP Address Manually
You can specify the printer's IP address and subnet mask manually.
1
Display the settings screen.
- Press the ☐ button, and then press the ▲▼ buttons to select [Wireless LAN Settings], and press the OK button.
- Press the ▲▼ buttons to select [Other Settings], and then press the OK button.
- Press the ▲▼ buttons to select [IP Address Settings], and then press the OK button.
- Press the ▲▼ buttons to select [Manual], and then press the OK button.
2
Set the IP address.
- Press the ◀▶ buttons to select the position, press the ▲▼ buttons to set the value, and then press the OK button.

Set the subnet mask
- Press the ◀▶ buttons to select the position, press the ▲▼ buttons to set the value, and then press the OK button.

Check the settings
- Check the displayed setting details and press the OK button.

Resetting Wireless LAN Settings
You can reset the specified printer name and access point information.
- Press the ☐ button, and then press the ▲▼ buttons to select [Wireless LAN Settings], and press the OK button.
- Press the ▲▼ buttons to select [Reset Settings], and then press the OK button.
- Check the displayed details and press the OK button.

Character Entry Method
You can use the character entry screen by pressing the EDIT button when setting the printer name or encryption key.
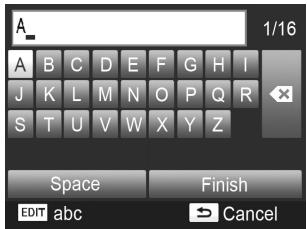
Enter a character.
- Press the ▲▼◀▶ buttons to select a character, and then press the OK button. You can enter a space by selecting [Space] and pressing the OK button.
Delete a character.
- Press the ▲▼◀▶ buttons to select [ ✕ ], and then press the OK button.
Switch the character type.
- You can change the character type each time you press the EDIT button in order of alphabetical characters (upper case), alphabetical characters (lower case), numbers, and symbols.
Return to the previous screen.
- Press the ▲▼◀▶ buttons to select [Finish] and press the OK button to set the entered characters and return to the previous screen.
- Press the ⇔ button to return to the previous screen without setting the entered characters.
Connecting with Other Devices Using a Cable
This chapter describes how to connect the printer to a computer or camera using a USB cable.
Windows 7 and Mac OS X 10.7 are used for these explanations.
Items to Prepare
Computer (p. 36)
● Supplied CD-ROM (SELPHY CP900 Solution Disk) (p. 2)
A commercially available USB cable shorter than 2.5 m (8.2 ft.) (SELPHY terminal requires a Mini-B connector)
Windows

Install the software.
- Place the CD-ROM in the computer's CD-ROM drive and click [Easy Installation] when the screen on the left appears.
- Follow the on-screen instructions to proceed.
- If the User Account Control window appears, follow the on-screen instructions to proceed.
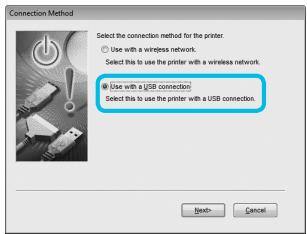
- If using Windows 7, a screen (on the left) to select the connection method is displayed. Click [Use with a USB connection], and then click [Next] (This screen is not displayed in Windows Vista and Windows XP).
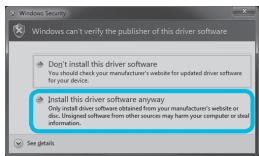
- If a message [Windows can't verify the publisher of this driver software] is displayed on Windows 7 or Windows Vista, click [Install this driver software anyway].
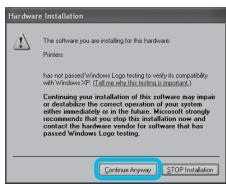
- If a message [The software you are installing for this hardware:] is displayed on Windows XP, click [Continue anyway].
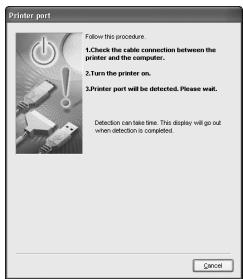
Proceed with the installation to display the screen on the left.

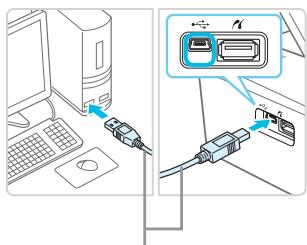
Commercially available USB cable
Prepare SELPHY and connect to a computer.
- Turn off SELPHY and remove the memory card or USB flash memory.
- Insert an ink cassette and a paper cassette that contain paper you want to use into SELPHY (pp. 7 – 10).
- Use the USB cable to connect SELPHY to the computer.
- Refer to the user guides included with the cable and computer for handling instructions.

Turn on SELPHY.
- Press the ⏻ button to turn on SELPHY.
Finish installation.
- When the installation finishes, click [Restart] to restart the computer and complete the installation.

Print.
- Print as described in Steps 2 to 7 on p. 39.
Macintosh
Install the software as described in Step 1 on p. 38.
Connect SELPHY to the computer as described in above Steps 2 to 3 and turn SELPHY on.
- Select [ ] from the menu, and click [System Preferences] ▶ [Print & Fax] to open the [Print & Fax] screen. Click [+] to select [CP900] from the pop-up window, then click [Add].
- Print as described in Steps 2 to 7 on p. 39.

- SELPHY may not operate correctly if it is connected to a computer via a USB hub.
- SELPHY may not function properly if other USB devices (with the exception of a USB mouse or USB keyboard) are used at the same time. Disconnect any other USB devices from your computer and then reconnect SELPHY.
- Do not put your computer into standby mode (or sleep mode) while SELPHY is connected to the computer's USB port. If you accidentally do so, awaken the computer from standby mode without disconnecting the USB cable. Restart the computer if the computer does not recover properly.
For details on handling the computer, refer to the user guide included with your computer.

- You can start the software automatically when SELPHY and the computer are connected by a USB cable by setting [Start SELPHY Photo Print automatically] to [On] in the screen displayed by clicking [Settings] in Step 3 described on p. 39.
Printing From Your Digital Camera
You can select and print images from a digital camera that supports the PictBridge standard.
A Canon brand compact digital camera will be used as an example to explain the print method. If operations are different for the digital camera you use, refer to the user guide included with your digital camera.

Prepare SELPHY.
- Check that SELPHY has no memory card inserted, is not connected to any devices via a wireless LAN, and is not connected to a USB cable.

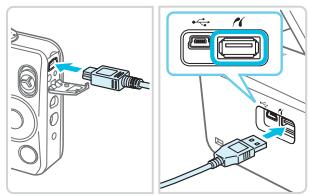
Connect SELPHY to the digital camera using the interface cable (USB cable) included with the digital camera.

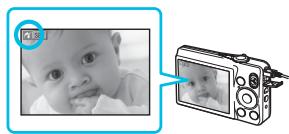
First turn on SELPHY, then turn on the digital camera and play back the images on the digital camera.
Depending on the digital camera you use, 7 may appear on the digital camera's screen.

Perform the necessary operations on your digital camera to select an image for printing.
- Use the digital camera to start printing.
- After printing has completed, turn off SELPHY and the digital camera, then unplug the cable.

- You cannot stop printing with the ↩ button. Use the digital camera to stop printing.
This product can print using PictBridge via USB connection.
PictBridge is a standard to facilitate directly connecting digital cameras and printers. This product is compliant with the DPS over IP standard that allows the use of PictBridge over network connections.

Printing Images Using Digital Camera Specified Settings (DPOF Print)
When you insert a memory card that contains DPOF information set with the digital camera into the memory card slot, [DPOF images remain Print images?] is displayed. You can display the information set with the digital camera by pressing the OK button, and you can print the specified images all at once by pressing the button.

Refer to the user guide supplied with your digital camera for information on how to set the information.
The date and file number are the DPOF settings made with the digital camera (these settings cannot be changed with SELPHY).
- If the [Print Type] is set to [Standard] on a Canon brand digital camera, the settings made in "Printing a Variety of Images" (pp. 20 – 24) will be applied.
- You can also display the settings made on the digital camera by pressing the ☐ button, selecting [DPOF Print], and pressing the OK button.
[DPOF Print] only displays when a memory card is inserted that contains DPOF information set with the digital camera.
Appendix
This chapter describes how to print using the separately sold battery when a power outlet is not available, troubleshooting, printer specifications, and how to maintain SELPHY.
You can use the battery pack NB-CP2L (sold separately) and charger adapter CG-CP200 (sold separately) to print images where there is no power outlet. You can print approximately 36 sheets* of postcard size paper with a fully charged battery.
* The number of printable pages is determined by our testing conditions. It may differ depending on the printing conditions.

Installing the Battery

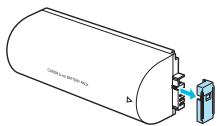
Remove the battery terminal cover.


Attach the battery to the charger adapter.
- First insert in the direction indicated by ①, and then in the direction indicated by ② until it clicks and locks into place.

Charging the Battery
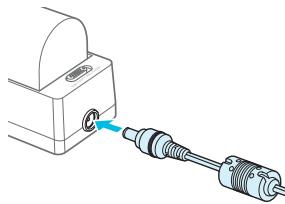
Connect the power cord to the charger adapter with the attached battery.
The battery charge starts and the orange lamp will be lit.
The battery charge will complete after approximately 4 hours and the green lamp will be lit.
The charge will continue even if you turn SELPHY on while the charger adapter is connected to it. However, the charge stops while printing.

Using SELPHY with a Battery
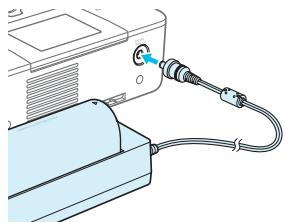
Connect the charger adapter to SELPHY.

For cautions concerning the battery, refer to the user guide included with the battery.
- Keep SELPHY on a stable surface such as a desk while it is connected to the charger adapter and take care not to unplug the charger adapter cable.
Troubleshooting
If you think there is a problem with SELPHY, first, check the following. If the items below do not solve your problem, contact a Canon Customer Support Help Desk as listed on the included customer support list.
Power
● Power will not turn on
- Make sure the power plug is correctly connected (p. 10).
- Press and hold the ⏻ button until the screen is displayed (p. 11).
- If you are using the battery pack NB-CP2L (sold separately) and charger adapter CG-CP200 (sold separately), check if the battery is charged, attached correctly, and the cable is connected properly.
Printing Problems
- Cannot print
• Make sure SELPHY is turned on (p. 11).
- Make sure that the ink and paper cassettes are correctly inserted (p. 10).
- Make sure there is no slack in the ink sheet (p. 7).
• Make sure that you are using dedicated paper (p. 9).
- When the ink is spent, replace the ink cassette with a new one. When the paper is spent, refill the paper cassette with new paper (p. 14).
- Make sure you are using the correct combination of paper, paper cassette and ink cassette (p. 7).
- If SELPHY is connected simultaneously to a digital camera, computer and has a memory card inserted, you may not be able to print properly. Connect SELPHY to only one device at a time.
- Depending on the room temperature, SELPHY may overheat and temporarily stop operating. This is not a malfunction. Wait until the temperature drops and printing resumes.
Cannot display/print images from memory card or USB flash memory
- Make sure the memory card is inserted all the way into the correct slot with the label facing upward (pp. 12, 13).
- Make sure the USB flash memory is inserted all the way in the correct slot faced correctly (p. 15).
- Make sure you are using a supported image type (p. 12).
- Make sure that any memory card requiring an adapter is inserted into the adapter before being inserted into the slot (p. 12).
Cannot print from a digital camera
- Make sure your digital camera supports PictBridge (p. 46).
- Make sure SELPHY and the digital camera are connected correctly (p. 46).
- Make sure the rechargeable battery/disposable batteries in your digital camera are not depleted. If there is insufficient charge, replace the battery with a fully charged one, or new batteries.
Cannot print from a computer
- Make sure you installed the software according to the correct procedure (p. 44).
- Check if SELPHY is correctly connected in infrastructure mode (p. 31) when printing via a wireless LAN. Unplug the USB cable if a USB cable is connected.
- Check if SELPHY and your computer are directly connected by a USB cable (p. 45) when printing via a USB cable. If connected to a wireless LAN, disable wireless LAN (p. 41) and restart the software.
- Problems Exclusive to Windows: Make sure the printer is not set to offline. If it is, right-click the printer icon and cancel the offline setting.
- Problems Exclusive to Macintosh: Make sure SELPHY is registered on the Printer List (p. 45).
- Cannot print the date
Cannot print from memory cards or USB flash memory
- Make sure the date imprint option is set (p. 21). If you are using DPOF printing, the date imprint settings are configured on the digital camera used for the DPOF settings.
Cannot print from digital cameras
- Make sure the date setting in your digital camera is set to [On]. However, if the setting is [Default], the date imprint settings on SELPHY will be used.
- Cannot make clean prints
• Make sure the ink sheet and paper are not dusty.
• Make sure there is no dust inside of SELPHY (p. 54).
- Make sure no condensation has formed inside of SELPHY (p. 54).
- Make sure SELPHY is not placed near a device emitting electromagnetic waves or a strong magnetic field (p. 5).
- Colors on the computer display and the print are different
- Color generation methods are different with computer screens and printers. Moreover, variance may be attributable to the environment in which the screen is viewed (color and strength of the light), or to the screen's color adjustment settings.
● After using the computer to cancel a print in progress, an image that had already been printed was printed again when printing resumed
- When you restart printing on a Macintosh computer after canceling, an already printed image may print again when printing resumes.

Paper
● Paper will not fit into cassette
- Make sure the paper size matches the size of the paper cassette (p. 2).
● Paper is not feeding properly/frequent paper jams
- Make sure the paper and paper cassette are correctly inserted (pp. 8, 10).
- Make sure there are less than 19 sheets in the cassette.
- Make sure 19 or more sheets have not collected on the outer lid of the paper cassette.
• Make sure that you are using dedicated paper (p. 9).
● Cannot print the specified number of prints/paper left over
• Paper may be left over if the ink runs out first (p. 14).
Paper is jammed
- If the paper is sticking out from the front or back (paper ejection slot) (p. 6) of SELPHY, gently pull the paper to remove it. However, if a gentle tug is not sufficient to remove the paper, do not attempt to forcibly pull it out. Turn the printer off and on repeatedly until the paper is ejected. If you have accidentally turned off the power while printing, turn it on again and wait for the paper to be ejected. Consult your retailer or a Canon Customer Support Help Desk in the event of a paper jam. Do not remove jammed paper by force. The printer could be damaged.
Wireless LAN
● The printer's SSID (network name) is not displayed on the smartphone
- Select ad hoc mode (p. 29).
- Check if your smartphone supports ad hoc mode. If it does not support ad hoc mode, connect with infrastructure mode (p. 31).
- Do not use wireless LAN near a device that uses 2.4 GHz frequency band such as a microwave oven or Bluetooth since it will cause radio wave interference.
- Place the printer and smartphone close and do not place any object between them.
- Cannot connect after changing the WEP key
- After changing the WEP key in ad hoc mode (p. 29), enable the new WEP key by turning off the printer, and then turning it on again. Then, enter the new WEP key on the smartphone.
● The access point is not displayed on the list
- Cannot connect in infrastructure mode
- If you have many access points and the one you want to connect to is not displayed on the list, use WPS Connection (p. 34) or Manual Settings (p. 33) to connect to it.
- Do not use wireless LAN near a device that uses 2.4 GHz frequency band such as a microwave oven or Bluetooth since it will cause radio wave interference.
- Place the printer and access point close and do not place any object between them.
- Check if the encryption key is correct and try connecting again.
- Check that the channel is set to one between 1 and 11 on the access point. It is recommended to manually fix the channel between 1 and 11 rather than leaving it to automatically select the number. Refer to the user guide supplied with your access point for information on how to check and change the settings.
- If you are using a MAC address filter or IP filter on your access point, register the printer information you checked in [Confirm Settings] (p. 41) to the access point. In such a case, disable the privacy separator function. Refer to the user guide supplied with your access point for information on how to modify and check the settings.
- Set the IP address manually (p. 41) if you are using WEP security on your network and not using DHCP.
● Cannot connect to SELPHY
- Turn SELPHY's power off, and then turn it on again. If a connection still cannot be established, check the settings of the access point or device that you are trying to connect wirelessly.
● Printing takes time, or wireless connection is disconnected
- Do not use wireless LAN near a device that uses 2.4 GHz frequency band such as a microwave oven or Bluetooth since it will cause radio wave interference.
Note that images may take a long time to send even when [] is displayed.
- Place the printer and smartphone close and do not place any object between them in ad hoc mode.
- Place the printer and access point close and do not place any object between them in infrastructure mode.
Error Messages
If a problem occurs with SELPHY, a message appears on the screen. If a possible solution displays with the error message, follow the on-screen instructions. If you have an error message only, check items in "Troubleshooting" (p. 49).
If these items do not solve your problem, contact a Canon Customer Support Help Desk.

- If a problem occurs while SELPHY is connected to a digital camera, an error message may appear for you to check on the screen of the digital camera.
SELPHY CP900
| Printing Method | Dye-sublimation thermal transfer (with overcoating) | |
| Resolution/Color Representation | 300 x 300 dpi | |
| Gradation | 256 shades per color | |
| Ink | Dedicated color ink cassette (Y/M/C/overcoating) | |
| Paper | Postcard Size, Card Size (including full page label sheets, 8-label sheets) | |
| Print Size | Borderless | Bordered |
| Postcard Size | 100.0 x 148.0 mm (3.94 x 5.83 in.) | 91.3 x 121.7 mm (3.59 x 4.79 in.) |
| Card Size | 54.0 x 86.0 mm (2.13 x 3.39 in.) | 49.9 x 66.6 mm (1.96 x 2.62 in.) |
| (Each label on an 8-label sheet) | 22.0 x 17.3 mm (0.87 x 0.68 in.) | - |
| Printing Speed*1 | Printing from memory cards/USB flash memory/Connected to cameras (PictBridge) | |
| Postcard Size | Approx. 47 sec. | |
| Card Size | Approx. 27 sec. | |
| Feeding System | Automatic paper feed from paper cassette | |
| Ejection System | Automatic paper ejection on top of paper cassette | |
| Screen | Tilt-up, 6.75 cm (2.7 in.), TFT LCD Color Monitor | |
| Interface | ||
| Hi-Speed USB | Connecting to a PictBridge compliant device: USB compliant Type A connector Connecting to a computer: USB compliant Mini-B connector | |
| Memory Cards | SD Memory Card, SDHC Memory Card, SDXC Memory Card, MMC Card, MMCplus Card, miniSD Memory Card*2, miniSDHC Memory Card*2, microSD Memory Card*2, microSDHC Memory Card*2, microSDXC Memory Card*2, RS-MMC Card*2, MMCmobile Card*2, MMCmicro Card | |
| Wireless LAN | Specification: IEEE802.11b/gSupported Wireless Channels: 1 - 11Connection Mode: Infrastructure mode*3, Ad hoc modeTransmission Method: DSSS modulation (IEEE 802.11b), OFDM modulation (IEEE 802.11g)Security: Ad hoc mode: WEP (open system authentication) (64-bit)Infrastructure mode: No security, WEP (open system authentication) (64-bit), WEP (open system authentication) (128-bit), WPA-PSK (TKIP), WPA-PSK (AES), WPA2-PSK (TKIP), and WPA2-PSK (AES) | |
| USB Flash Memory | FAT/exFAT only supported | |
| Operating Temperatures | 5 – 40 °C (41 – 104 °F) | |
| Operating Humidity | 20 – 80% | |
| Power | Compact Power Adapter CA-CP200 BBattery Pack NB-CP2L (Sold Separately)Charger Adapter CG-CP200 (Sold Separately) | |
| Power Consumption | 60 W or less (4 W or less on standby) | |
| Dimensions | 178.0 x 127.0 x 60.5 mm (7.01 x 5.00 x 2.38 in.) (excluding protrusions) | |
| Weight (printer only) | Approx. 810 g (approx. 28.6 oz.) | |
*1 Measured from the start of the yellow printing pass to final output.
*2 Special adapter (commercially available) is required.
*3 Supports Wi-Fi Protected Setup.
Compact Power Adapter CA-CP200 B
Rated Input 100 – 240 V AC (50/60 Hz) 1.5 A (100 V) – 0.75 A (240 V)
Rated Output 24 V DC, 1.8 A
Operating Temperatures 0 – 45 °C (32 – 113 °F)
Dimensions 122.0 x 60.0 x 30.5 mm (4.80 x 2.36 x 1.20 in.) (excluding power cord)
Weight Approx. 310 g (10.9 oz.)
Dust Protection Cover DPC-CP100 (Sold Separately)
This may not be included in some regions. Purchase separately if required.
Dimensions 137.5 x 117.0 x 27.2 mm (5.41 x 4.61 x 1.07 in.)
Weight Approx. 88 g (3.1 oz.)
Charger Adapter CG-CP200 (Sold Separately)
Rated Input 24 V DC
Rated Output 24 V DC
Operating Temperatures 5 – 40 °C (41 – 104 °F)
Dimensions 156.2 x 49.0 x 35.5 mm (6.15 x 1.93 x 1.40 in.)
Weight Approx. 134 g (4.73 oz.)
Battery Pack NB-CP2L (Sold Separately)
Type Rechargeable lithium-ion battery
Nominal Voltage 22.2 V DC
Nominal Capacity 1200 mAh
Battery Life (Charge Cycles) Approx. 300 times
Operating Temperatures 5 – 40 °C (41 – 104 °F)
Dimensions 110.0 x 40.7 x 37.5 mm (4.33 x 1.60 x 1.48 in.)
Weight Approx. 230 g (8.11 oz.)
All data is based on tests by Canon.
- Printer specifications or appearance are subject to change without notice.
CAUTION
RISK OF EXPLOSION IF BATTERY IS REPLACED BY AN INCORRECT TYPE.
DISPOSE OF USED BATTERIES ACCORDING TO LOCAL REGULATION.
Use of genuine Canon accessories is recommended.
This product is designed to achieve excellent performance when used with genuine Canon accessories.
Canon shall not be liable for any damage to this product and/or accidents such as fire, etc., caused by the malfunction of non-genuine Canon accessories (e.g., a leakage and/or explosion of a battery pack).
Please note that this warranty does not apply to repairs arising out of the malfunction of non-genuine
Canon accessories, although you may request such repairs on a chargeable basis.
Handling SELPHY
- Do not apply strong force or vibration. This may cause paper jams or the printer to malfunction.
- Do not expose SELPHY to insect sprays and volatile liquids. Do not allow SELPHY to be in contact with rubber or plastic products over a long time. This may deteriorate the external casing.
- Depending on the room temperature, SELPHY may overheat and temporarily stop operating. This is not a malfunction. Wait for a while until SELPHY cools down and restarts operating. Printing may take longer when continuously printing, the room temperature is high, or SELPHY's rear air vent (p. 6) is blocked because SELPHY will temporarily stop printing due to overheating.
- When moving SELPHY from a cold place to a warm place, insert SELPHY in an airtight plastic bag in advance and remove after SELPHY has reached room temperature to avoid condensation. If condensation forms, leave SELPHY in room temperature until the condensation evaporates naturally.
Clean SELPHY with a soft dry cloth. - If dust accumulates on the air vent (p. 6), remove the ink cassette (p. 14) and clean away the dust. The printing results may not be clean if dust gets in from the air vent.

- Never clean SELPHY with solvents such as benzine or thinner, or mild detergent. This may deteriorate or deform the external casing, or the coating may peel off.
Trademarks and Licenses
- DCF is a collective trademark of Japan Electronics and Information Technology Industries Association and a registered trademark in Japan.
The SDXC logo is a trademark of SD-3C, LLC.
Wi-Fi , Wi-Fi Alliance , WPA TM , WPA2 TM , and Wi-Fi Protected Setup TM are trademarks or registered trademarks of Wi-Fi Alliance.
This product is implemented with exFAT technology licensed by Microsoft.
About this Guide
- Reprinting, transmitting, or storing in a retrieval system any part of this guide without the permission of Canon is prohibited.
Canon reserves the right to change the contents of this guide at any time without prior notice.
● Illustrations and screenshots in this guide may differ slightly from the actual equipment.
The above items notwithstanding, Canon accepts no liability for damages resulting from the use of this product and software.
WPA Supplicant
Copyright (c) 2003-2012, Jouni Malinen j@w1.fi and contributors All Rights Reserved.
This program is licensed under the BSD license (the one with advertisement clause removed).
If you are submitting changes to the project, please see CONTRIBUTIONS file for more instructions.
License
This software may be distributed, used, and modified under the terms of BSD license:
Redistribution and use in source and binary forms, with or without modification, are permitted provided that the following conditions are met:
- Redistributions of source code must retain the above copyright notice, this list of conditions and the following disclaimer.
- Redistributions in binary form must reproduce the above copyright notice, this list of conditions and the following disclaimer in the documentation and/or other materials provided with the distribution.
- Neither the name(s) of the above-listed copyright holder(s) nor the names of its contributors may be used to endorse or promote products derived from this software without specific prior written permission.
THIS SOFTWARE IS PROVIDED BY THE COPYRIGHT HOLDERS AND CONTRIBUTORS “AS IS” AND ANY EXPRESS OR IMPLIED WARRANTIES, INCLUDING, BUT NOT LIMITED TO, THE IMPLIED WARRANTIES OF MERCHANTABILITY AND FITNESS FOR A PARTICULAR PURPOSE ARE DISCLAIMED. IN NO EVENT SHALL THE COPYRIGHT OWNER OR CONTRIBUTORS BE LIABLE FOR ANY DIRECT, INDIRECT, INCIDENTAL, SPECIAL, EXEMPLARY, OR ONSEQUENTIAL DAMAGES (INCLUDING, BUT NOT LIMITED TO, PROCUREMENT OF SUBSTITUTE GOODS OR SERVICES; LOSS OF USE, DATA, OR PROFITS; OR BUSINESS INTERRUPTION) HOWEVER CAUSED AND ON ANY THEORY OF LIABILITY, WHETHER IN CONTRACT, STRICT LIABILITY, OR TORT (INCLUDING NEGLIGENCE OR OTHERWISE) ARISING IN ANY WAY OUT OF THE USE OF THIS SOFTWARE, EVEN IF ADVISED OF THE POSSIBILITY OF SUCH DAMAGE.
* Notice displayed in English as required.
European Union (and EEA) only.
These symbols indicate that this product is not to be disposed of with your household waste, according to the WEEE Directive (2002/96/EC), the Battery Directive (2006/66/EC) and/or your national laws implementing those Directives. If a chemical symbol is printed beneath the symbol shown above, in accordance
with the Battery Directive, this indicates that a heavy metal (Hg = Mercury, Cd = Cadmium,
Pb = Lead) is present in this battery or accumulator at a concentration above an applicable threshold specified in the Battery Directive.
This product should be handed over to a designated collection point, e.g., on an authorized one-for-one basis when you buy a new similar product or to an authorized collection site for recycling waste electrical and electronic equipment (EEE) and batteries and accumulators. Improper handling of this type of waste could have a possible impact on the environment and human health due to potentially hazardous substances that are generally associated with EEE.
Your cooperation in the correct disposal of this product will contribute to the effective usage of natural resources.
For more information about the recycling of this product, please contact your local city office, waste authority, approved scheme or your household waste disposal service or visit www.canon-europe.com/environment.
(EEA: Norway, Iceland and Liechtenstein)
SELPHY CP900
KOMPAKT FOTOPRINTER
□ Hæftet Canon garantierklæring

□ Kompakt strømadapter
CA-CP200 B
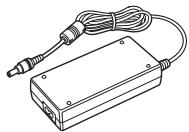
□ Cd-rom'en SELPHY CP900 Solution Disk

□ Netledning
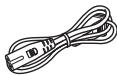
2
3
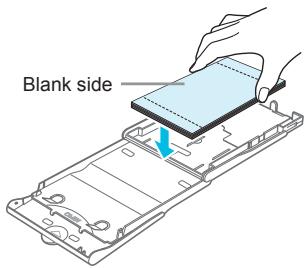
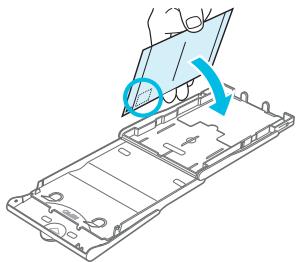
4
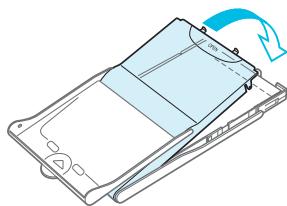
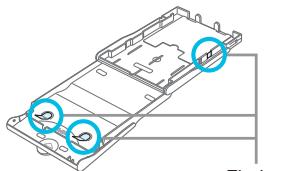
Fjeder
Åbn dækslerne.
Isæt blækpatronen.
Sæt adapterledningen i SELPHY.
Sæt adapterstikket helt ind i SELPHY.
2
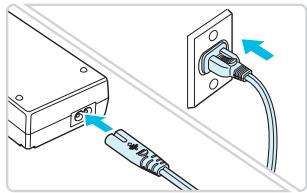

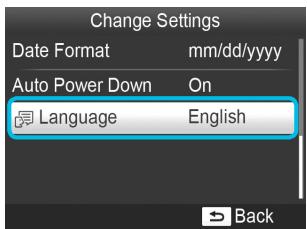
Vælg et billede.

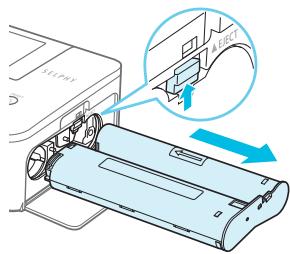
Udskriv.
Isæt en USB-nøgle.
Åbn menuen.
Tryk på knappen 📄.
2
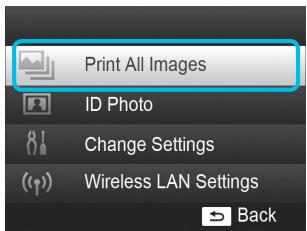

Fastlæg området.

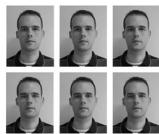
Angiv id-fotoets størrelse.



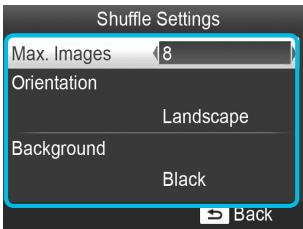




08/08/2012


2012/08/08
30-2, Shimomaruko 3-chome, Ohta-ku, Tokyo 146-8501, Japan

SELPHY
SELPHY
Computer *3


PictBridge
USB LAN WLAN
✓ = ✓
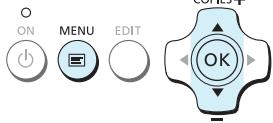


Connect via an access point
Search for an access point
Manual Settings
Search for nearby access points and select one to use
| Access Point A | |
| Access Point B | |
| Access Point C | |
| Access Point D | |
| Access Point E |
Encryption Key Entry
12345678
EDIT Enter/Edit Text
WPA/WPA2
ok Next
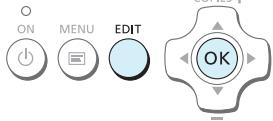

Search for an access point
Manual Settings
Connect easily to WPS compatible access points

Press the button on the access point to connect
Push and hold the access point button, then proceed
ok Next
Dekorer, og udskriv
Udskriv id-foto
Slut SELPHY til det trådløse LAN.
Installer software.

Installer software.
Vis udskriftsmenuen.
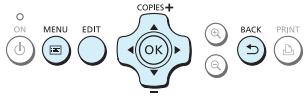
Angiv et tegn.
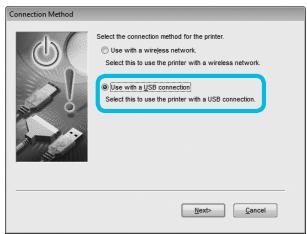
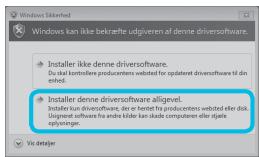
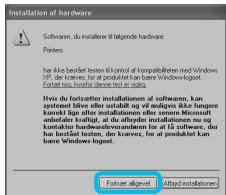
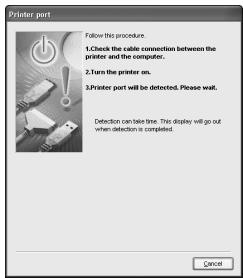
Installer software.
Tænd SELPHY.
Copyright (c) 2003-2012, Jouni Malinen j@w1.fi and contributors All Rights Reserved.
This program is licensed under the BSD license (the one with advertisement clause removed).
If you are submitting changes to the project, please see CONTRIBUTIONS file for more instructions.
License
This software may be distributed, used, and modified under the terms of BSD license:
Redistribution and use in source and binary forms, with or without modification, are permitted provided that the following conditions are met:
- Redistributions of source code must retain the above copyright notice, this list of conditions and the following disclaimer.
- Redistributions in binary form must reproduce the above copyright notice, this list of conditions and the following disclaimer in the documentation and/or other materials provided with the distribution.
- Neither the name(s) of the above-listed copyright holder(s) nor the names of its contributors may be used to endorse or promote products derived from this software without specific prior written permission.
THIS SOFTWARE IS PROVIDED BY THE COPYRIGHT HOLDERS AND CONTRIBUTORS "AS IS" AND ANY EXPRESS OR IMPLIED WARRANTIES, INCLUDING, BUT NOT LIMITED TO, THE IMPLIED WARRANTIES OF MERCHANTABILITY AND FITNESS FOR A PARTICULAR PURPOSE ARE DISCLAIMED. IN NO EVENT SHALL THE COPYRIGHT OWNER OR CONTRIBUTORS BE LIABLE FOR ANY DIRECT, INDIRECT, INCIDENTAL, SPECIAL, EXEMPLARY, OR ONSEQUENTIAL DAMAGES (INCLUDING, BUT NOT LIMITED TO, PROCUREMENT OF SUBSTITUTE GOODS OR SERVICES; LOSS OF USE, DATA, OR PROFITS; OR BUSINESS INTERRUPTION) HOWEVER CAUSED AND ON ANY THEORY OF LIABILITY, WHETHER IN CONTRACT, STRICT LIABILITY, OR TORT (INCLUDING NEGLIGENCE OR OTHERWISE) ARISING IN ANY WAY OUT OF THE USE OF THIS SOFTWARE, EVEN IF ADVISED OF THE POSSIBILITY OF SUCH DAMAGE.
□ Papierkassette (Postkartenformat) PCP-CP400
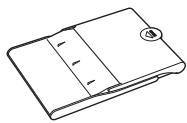
□ Canon-Garantiebroschüre
□ CD-ROM SELPHY CP900 Solution Disk

□ Netzkabel
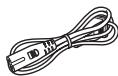
2
3
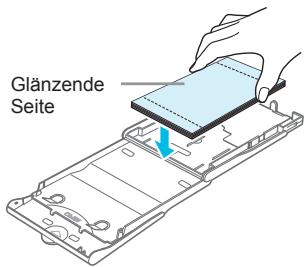
4
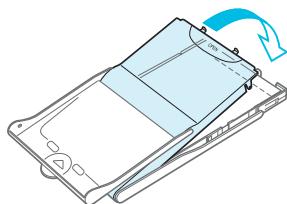
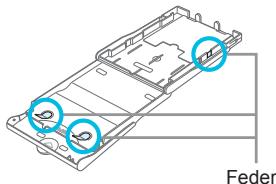
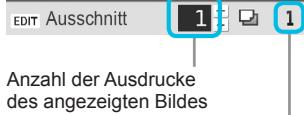


2
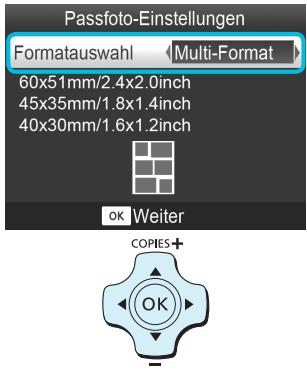




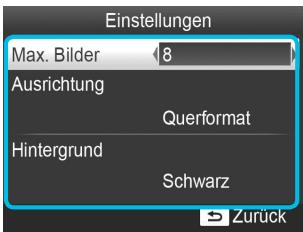




08/08/2012


2012/08/08
30-2, Shimomaruko 3-chome, Ohta-ku, Tokyo 146-8501, Japan

SELPHY
SELPHY
Computer *3

| Access Point A | |
| Access Point B | |
| Access Point C | |
| Access Point D | |
| Access Point E |

Eing. Kodier.schlüssel
12345678
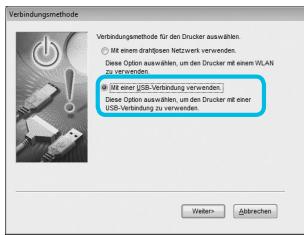
Copyright (c) 2003-2012, Jouni Malinen j@w1.fi and contributors All Rights Reserved.
This program is licensed under the BSD license (the one with advertisement clause removed).
If you are submitting changes to the project, please see CONTRIBUTIONS file for more instructions.
License
This software may be distributed, used, and modified under the terms of BSD license:
Redistribution and use in source and binary forms, with or without modification, are permitted provided that the following conditions are met:
- Redistributions of source code must retain the above copyright notice, this list of conditions and the following disclaimer.
- Redistributions in binary form must reproduce the above copyright notice, this list of conditions and the following disclaimer in the documentation and/or other materials provided with the distribution.
- Neither the name(s) of the above-listed copyright holder(s) nor the names of its contributors may be used to endorse or promote products derived from this software without specific prior written permission.
THIS SOFTWARE IS PROVIDED BY THE COPYRIGHT HOLDERS AND CONTRIBUTORS “AS IS” AND ANY EXPRESS OR IMPLIED WARRANTIES, INCLUDING, BUT NOT LIMITED TO, THE IMPLIED WARRANTIES OF MERCHANTABILITY AND FITNESS FOR A PARTICULAR PURPOSE ARE DISCLAIMED. IN NO EVENT SHALL THE COPYRIGHT OWNER OR CONTRIBUTORS BE LIABLE FOR ANY DIRECT, INDIRECT, INCIDENTAL, SPECIAL, EXEMPLARY, OR ONSEQUENTIAL DAMAGES (INCLUDING, BUT NOT LIMITED TO, PROCUREMENT OF SUBSTITUTE GOODS OR SERVICES; LOSS OF USE, DATA, OR PROFITS; OR BUSINESS INTERRUPTION) HOWEVER CAUSED AND ON ANY THEORY OF LIABILITY, WHETHER IN CONTRACT, STRICT LIABILITY, OR TORT (INCLUDING NEGLIGENCE OR OTHERWISE) ARISING IN ANY WAY OUT OF THE USE OF THIS SOFTWARE, EVEN IF ADVISED OF THE POSSIBILITY OF SUCH DAMAGE.
30-2, Shimomaruko 3-chome, Ohta-ku, Tokyo 146-8501, Japan
CANON EUROPA N.V.
Bovenkerkerweg 59-61, 1185 XB Amstelveen, The Netherlands
SELPHY CP900
IMPRESORA FOTOGRÁFICA COMPACTA
□ SELPHY CP900 Solution Disk
2
3
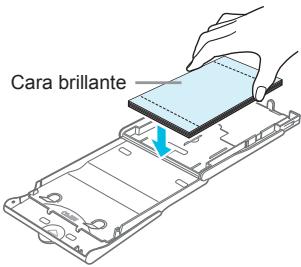
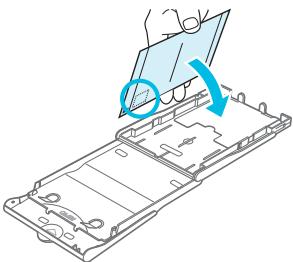
4
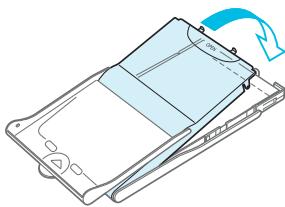
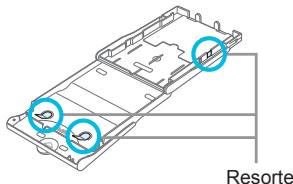
Abra las tapas.
Conecte el cable del adaptador a la SELPHY.
Encienda la SELPHY.

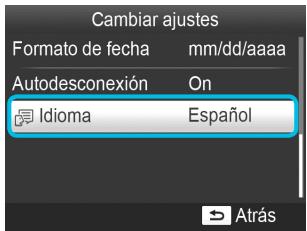
8
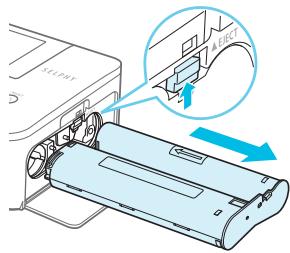
Imprima.
Inserte una memoria flash USB.
Acceda al menú.
- Pulse el botón 📄.
2
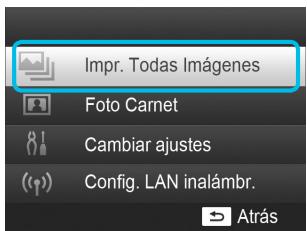

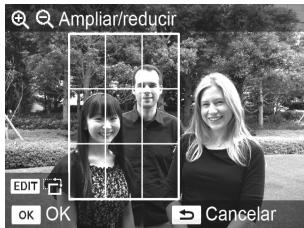
2
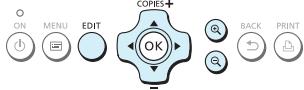

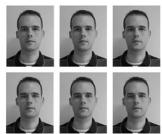
2
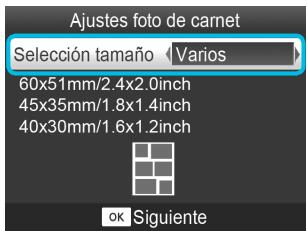



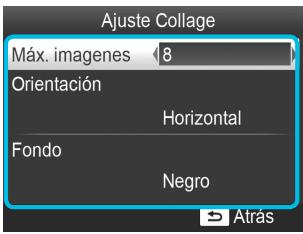




08/08/2012

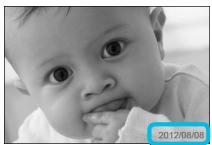
2012/08/08
30-2, Shimomaruko 3-chome, Ohta-ku, Tokyo 146-8501, Japan

SELPHY
SELPHY
Ordenador *3

4

SSID: CP900-44AASA Clave WEP: AB123
EDIT Editar
| Access Point A | |
| Access Point B | |
| Access Point C | |
| Access Point D | |
| Access Point E |

5
Entrada clave cifrado
12345678
EDIT Introducir/editar texto
WPA/WPA2
ok Siguiente
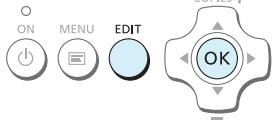

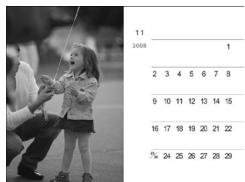
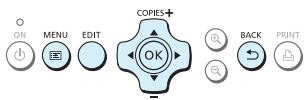
Copyright (c) 2003-2012, Jouni Malinen j@w1.fi and contributors All Rights Reserved.
This program is licensed under the BSD license (the one with advertisement clause removed).
If you are submitting changes to the project, please see CONTRIBUTIONS file for more instructions.
License
This software may be distributed, used, and modified under the terms of BSD license:
Redistribution and use in source and binary forms, with or without modification, are permitted provided that the following conditions are met:
- Redistributions of source code must retain the above copyright notice, this list of conditions and the following disclaimer.
- Redistributions in binary form must reproduce the above copyright notice, this list of conditions and the following disclaimer in the documentation and/or other materials provided with the distribution.
- Neither the name(s) of the above-listed copyright holder(s) nor the names of its contributors may be used to endorse or promote products derived from this software without specific prior written permission.
THIS SOFTWARE IS PROVIDED BY THE COPYRIGHT HOLDERS AND CONTRIBUTORS “AS IS” AND ANY EXPRESS OR IMPLIED WARRANTIES, INCLUDING, BUT NOT LIMITED TO, THE IMPLIED WARRANTIES OF MERCHANTABILITY AND FITNESS FOR A PARTICULAR PURPOSE ARE DISCLAIMED. IN NO EVENT SHALL THE COPYRIGHT OWNER OR CONTRIBUTORS BE LIABLE FOR ANY DIRECT, INDIRECT, INCIDENTAL, SPECIAL, EXEMPLARY, OR ONSEQUENTIAL DAMAGES (INCLUDING, BUT NOT LIMITED TO, PROCUREMENT OF SUBSTITUTE GOODS OR SERVICES; LOSS OF USE, DATA, OR PROFITS; OR BUSINESS INTERRUPTION) HOWEVER CAUSED AND ON ANY THEORY OF LIABILITY, WHETHER IN CONTRACT, STRICT LIABILITY, OR TORT (INCLUDING NEGLIGENCE OR OTHERWISE) ARISING IN ANY WAY OUT OF THE USE OF THIS SOFTWARE, EVEN IF ADVISED OF THE POSSIBILITY OF SUCH DAMAGE.
30-2, Shimomaruko 3-chome, Ohta-ku, Tokyo 146-8501, Japan
CANON EUROPA N.V.
Bovenkerkerweg 59-61, 1185 XB Amstelveen, The Netherlands
SELPHY CP900
IMPRIMANTE PHOTO COMPACTE
□ SELPHY CP900 Solution Disk

2
3
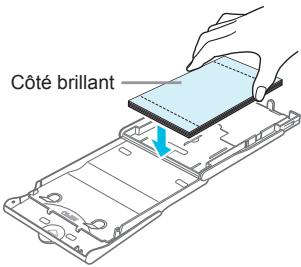
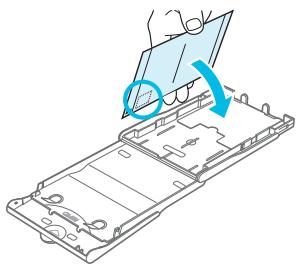
4
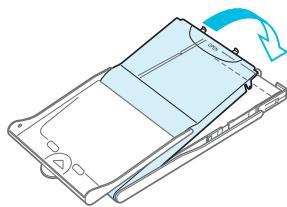
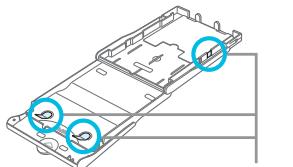
Ressort
Attacher le capot de protection anti-poussière
8
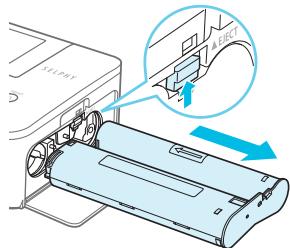
Imprimez.
Affichez le menu.


2
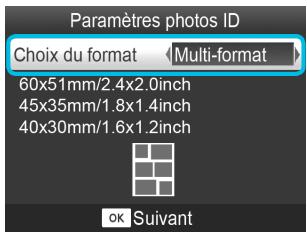




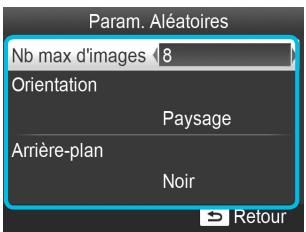




08/08/2012

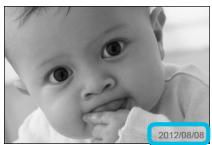
2012/08/08
30-2, Shimomaruko 3-chome, Ohta-ku, Tokyo 146-8501, Japan

Imprimante SELPHY
Mode infrastructure (p. 31)
Imprimante SELPHY
Ordinateur*3


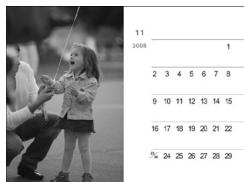
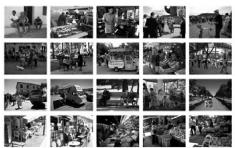
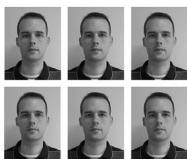
2
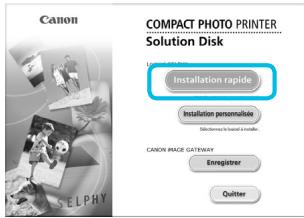
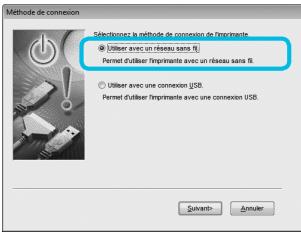

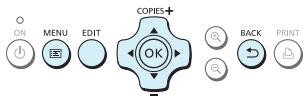
License WPA Supplicant
WPA Supplicant
Copyright (c) 2003-2012, Jouni Malinen j@w1.fi and contributors All Rights Reserved.
This program is licensed under the BSD license (the one with advertisement clause removed).
If you are submitting changes to the project, please see CONTRIBUTIONS file for more instructions.
License
This software may be distributed, used, and modified under the terms of BSD license:
Redistribution and use in source and binary forms, with or without modification, are permitted provided that the following conditions are met:
- Redistributions of source code must retain the above copyright notice, this list of conditions and the following disclaimer.
- Redistributions in binary form must reproduce the above copyright notice, this list of conditions and the following disclaimer in the documentation and/or other materials provided with the distribution.
- Neither the name(s) of the above-listed copyright holder(s) nor the names of its contributors may be used to endorse or promote products derived from this software without specific prior written permission.
THIS SOFTWARE IS PROVIDED BY THE COPYRIGHT HOLDERS AND CONTRIBUTORS “AS IS” AND ANY EXPRESS OR IMPLIED WARRANTIES, INCLUDING, BUT NOT LIMITED TO, THE IMPLIED WARRANTIES OF MERCHANTABILITY AND FITNESS FOR A PARTICULAR PURPOSE ARE DISCLAIMED. IN NO EVENT SHALL THE COPYRIGHT OWNER OR CONTRIBUTORS BE LIABLE FOR ANY DIRECT, INDIRECT, INCIDENTAL, SPECIAL, EXEMPLARY, OR ONSEQUENTIAL DAMAGES (INCLUDING, BUT NOT LIMITED TO, PROCUREMENT OF SUBSTITUTE GOODS OR SERVICES; LOSS OF USE, DATA, OR PROFITS; OR BUSINESS INTERRUPTION) HOWEVER CAUSED AND ON ANY THEORY OF LIABILITY, WHETHER IN CONTRACT, STRICT LIABILITY, OR TORT (INCLUDING NEGLIGENCE OR OTHERWISE) ARISING IN ANY WAY OUT OF THE USE OF THIS SOFTWARE, EVEN IF ADVISED OF THE POSSIBILITY OF SUCH DAMAGE.
□ Cassetto Carta (Formato Cartolina) PCP-CP400
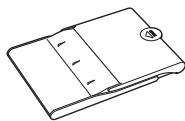
□ CD SELPHY CP900 Solution Disk

2
3
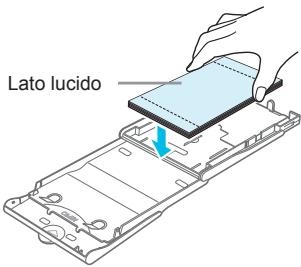
4
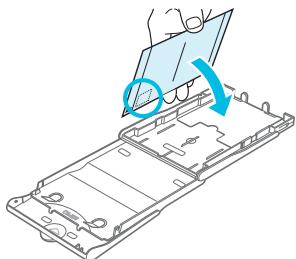
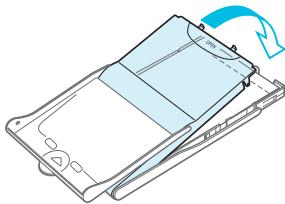
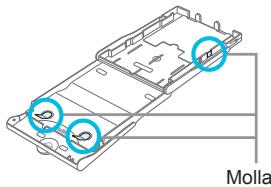
Aprire i coperchi.
Accendere la stampante SELPHY.

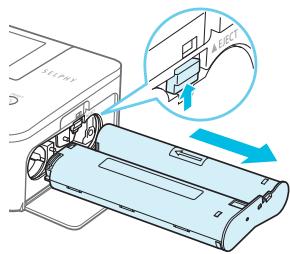
Stampare.
Inserire una memoria flash USB.

Determinare la gamma.

2
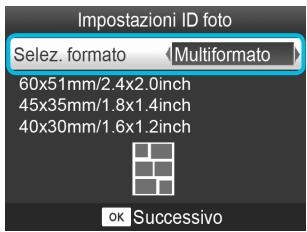





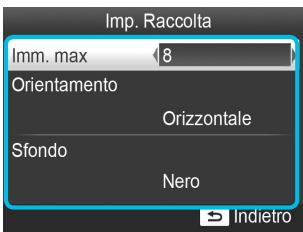




08/08/2012

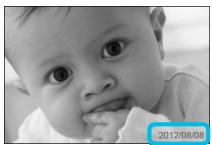
2012/08/08
30-2, Shimomaruko 3-chome, Ohta-ku, Tokyo 146-8501, Japan

SELPHY
SELPHY
Computer *3


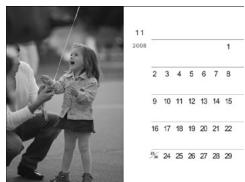

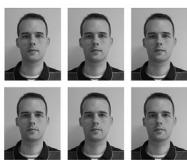
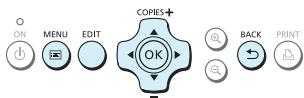
Accendere la stampante SELPHY.
Licenza WPA Supplicant
WPA Supplicant
Copyright (c) 2003-2012, Jouni Malinen j@w1.fi and contributors All Rights Reserved.
This program is licensed under the BSD license (the one with advertisement clause removed).
If you are submitting changes to the project, please see CONTRIBUTIONS file for more instructions.
License
This software may be distributed, used, and modified under the terms of BSD license:
Redistribution and use in source and binary forms, with or without modification, are permitted provided that the following conditions are met:
- Redistributions of source code must retain the above copyright notice, this list of conditions and the following disclaimer.
- Redistributions in binary form must reproduce the above copyright notice, this list of conditions and the following disclaimer in the documentation and/or other materials provided with the distribution.
- Neither the name(s) of the above-listed copyright holder(s) nor the names of its contributors may be used to endorse or promote products derived from this software without specific prior written permission.
THIS SOFTWARE IS PROVIDED BY THE COPYRIGHT HOLDERS AND CONTRIBUTORS “AS IS” AND ANY EXPRESS OR IMPLIED WARRANTIES, INCLUDING, BUT NOT LIMITED TO, THE IMPLIED WARRANTIES OF MERCHANTABILITY AND FITNESS FOR A PARTICULAR PURPOSE ARE DISCLAIMED. IN NO EVENT SHALL THE COPYRIGHT OWNER OR CONTRIBUTORS BE LIABLE FOR ANY DIRECT, INDIRECT, INCIDENTAL, SPECIAL, EXEMPLARY, OR ONSEQUENTIAL DAMAGES (INCLUDING, BUT NOT LIMITED TO, PROCUREMENT OF SUBSTITUTE GOODS OR SERVICES; LOSS OF USE, DATA, OR PROFITS; OR BUSINESS INTERRUPTION) HOWEVER CAUSED AND ON ANY THEORY OF LIABILITY, WHETHER IN CONTRACT, STRICT LIABILITY, OR TORT (INCLUDING NEGLIGENCE OR OTHERWISE) ARISING IN ANY WAY OUT OF THE USE OF THIS SOFTWARE, EVEN IF ADVISED OF THE POSSIBILITY OF SUCH DAMAGE.
□ Papiercassette (Briefkaartformaat) PCP-CP400
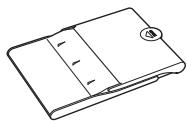
□ Cd SELPHY CP900 Solution Disk

□ Netsnoer
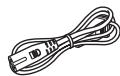
2
3
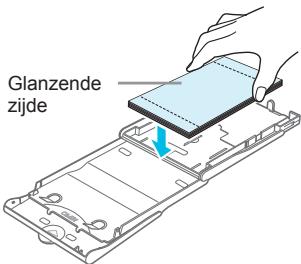
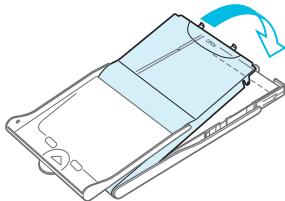
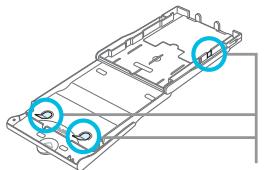
Veer

De stofkap bevestigen
Open de kleppen.
Plaats de inktcassette.

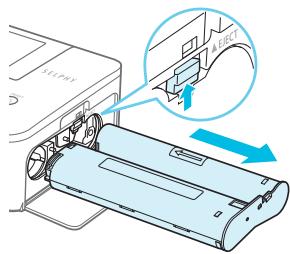
Druk af.
Geef het menu weer.
Druk op de knop 📄.
2
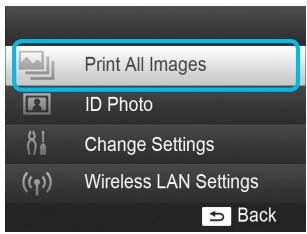

Bepaal het bereik.





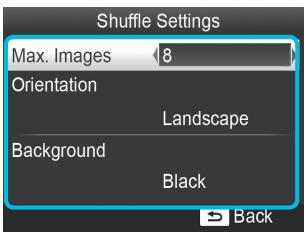




08/08/2012

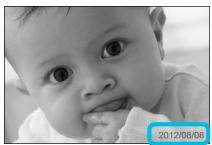
2012/08/08
30-2, Shimomaruko 3-chome, Ohta-ku, Tokyo 146-8501, Japan

SELPHY
SELPHY
Computer *3

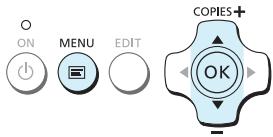


Druk af vanaf de smartphone.
Connect via an access point
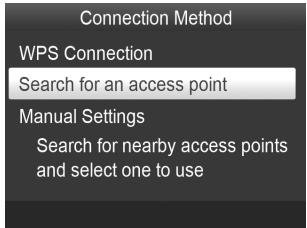

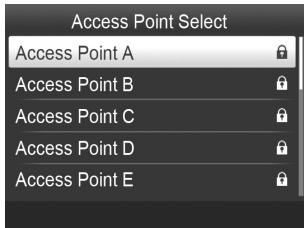

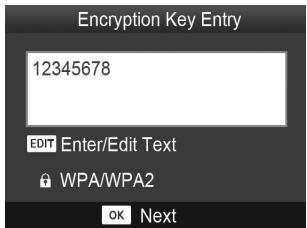
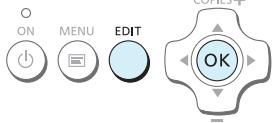

Search for an access point
Manual Settings
Connect easily to WPS compatible access points
Selecteer de verbindingsmethode.
Press the button on the access point to connect

Push and hold the access point button, then proceed
ok Next

Pasfoto's afdrukken
Installeer de software.
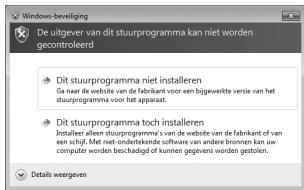

Installeer de software.
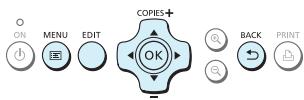
Voer een teken in.
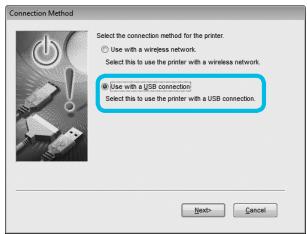
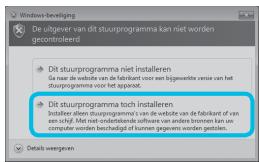
Installeer de software.
Gewone USB-kabel
Schakel de SELPHY in.
Licentie WPA Supplicant
WPA Supplicant
Copyright (c) 2003-2012, Jouni Malinen j@w1.fi and contributors All Rights Reserved.
This program is licensed under the BSD license (the one with advertisement clause removed).
If you are submitting changes to the project, please see CONTRIBUTIONS file for more instructions.
License
This software may be distributed, used, and modified under the terms of BSD license:
Redistribution and use in source and binary forms, with or without modification, are permitted provided that the following conditions are met:
- Redistributions of source code must retain the above copyright notice, this list of conditions and the following disclaimer.
- Redistributions in binary form must reproduce the above copyright notice, this list of conditions and the following disclaimer in the documentation and/or other materials provided with the distribution.
- Neither the name(s) of the above-listed copyright holder(s) nor the names of its contributors may be used to endorse or promote products derived from this software without specific prior written permission.
THIS SOFTWARE IS PROVIDED BY THE COPYRIGHT HOLDERS AND CONTRIBUTORS “AS IS” AND ANY EXPRESS OR IMPLIED WARRANTIES, INCLUDING, BUT NOT LIMITED TO, THE IMPLIED WARRANTIES OF MERCHANTABILITY AND FITNESS FOR A PARTICULAR PURPOSE ARE DISCLAIMED. IN NO EVENT SHALL THE COPYRIGHT OWNER OR CONTRIBUTORS BE LIABLE FOR ANY DIRECT, INDIRECT, INCIDENTAL, SPECIAL, EXEMPLARY, OR ONSEQUENTIAL DAMAGES (INCLUDING, BUT NOT LIMITED TO, PROCUREMENT OF SUBSTITUTE GOODS OR SERVICES; LOSS OF USE, DATA, OR PROFITS; OR BUSINESS INTERRUPTION) HOWEVER CAUSED AND ON ANY THEORY OF LIABILITY, WHETHER IN CONTRACT, STRICT LIABILITY, OR TORT (INCLUDING NEGLIGENCE OR OTHERWISE) ARISING IN ANY WAY OUT OF THE USE OF THIS SOFTWARE, EVEN IF ADVISED OF THE POSSIBILITY OF SUCH DAMAGE.
30-2, Shimomaruko 3-chome, Ohta-ku, Tokyo 146-8501, Japan
CANON EUROPA N.V.
Bovenkerkerweg 59-61, 1185 XB Amstelveen, The Netherlands
SELPHY CP900
KUVATULOSTIMET
□ Paperikasetti (Postikorttikoko) PCP-CP400
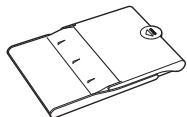
□ SELPHY CP900 Solution Disk -levy

□ Virtajohto
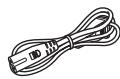
Tarkista paperikoko.
4
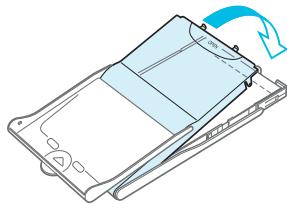
Sulje kansi.
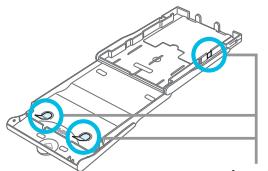
Jousi
Avaa kannet.
Liitä virtajohto.
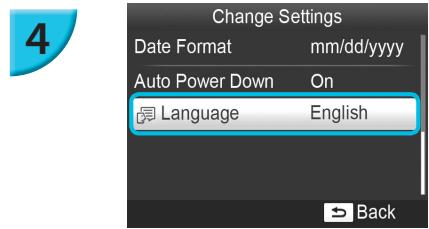
Aseta USB-muisti.

Näytä rajausnäyttö.
Määritä alue.

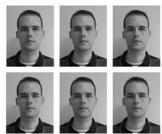




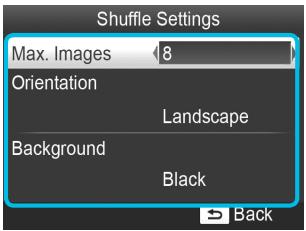




08/08/2012


2012/08/08
30-2, Shimomaruko 3-chome, Ohta-ku, Tokyo 146-8501, Japan

SELPHY-tulostin
SELPHY-tulostin
Tietokone*3

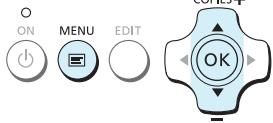


Tarkista tukiasema.
Search for an access point
Manual Settings
Connect easily to WPS compatible access points
Press the button on the access point to connect
Push and hold the access point button, then proceed
ok Next

Asenna ohjelmisto.

Asenna ohjelmisto.
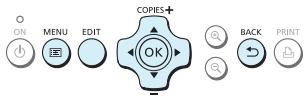
Syötä merkki.
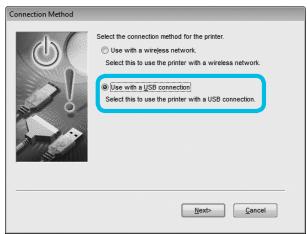
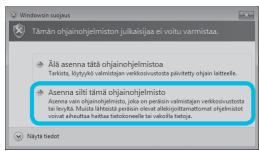
Asenna ohjelmisto.
Kytke SELPHY-tulostimeen virta.
Copyright (c) 2003-2012, Jouni Malinen j@w1.fi and contributors All Rights Reserved.
This program is licensed under the BSD license (the one with advertisement clause removed).
If you are submitting changes to the project, please see CONTRIBUTIONS file for more instructions.
License
This software may be distributed, used, and modified under the terms of BSD license:
Redistribution and use in source and binary forms, with or without modification, are permitted provided that the following conditions are met:
- Redistributions of source code must retain the above copyright notice, this list of conditions and the following disclaimer.
- Redistributions in binary form must reproduce the above copyright notice, this list of conditions and the following disclaimer in the documentation and/or other materials provided with the distribution.
- Neither the name(s) of the above-listed copyright holder(s) nor the names of its contributors may be used to endorse or promote products derived from this software without specific prior written permission.
THIS SOFTWARE IS PROVIDED BY THE COPYRIGHT HOLDERS AND CONTRIBUTORS "AS IS" AND ANY EXPRESS OR IMPLIED WARRANTIES, INCLUDING, BUT NOT LIMITED TO, THE IMPLIED WARRANTIES OF MERCHANTABILITY AND FITNESS FOR A PARTICULAR PURPOSE ARE DISCLAIMED. IN NO EVENT SHALL THE COPYRIGHT OWNER OR CONTRIBUTORS BE LIABLE FOR ANY DIRECT, INDIRECT, INCIDENTAL, SPECIAL, EXEMPLARY, OR ONSEQUENTIAL DAMAGES (INCLUDING, BUT NOT LIMITED TO, PROCUREMENT OF SUBSTITUTE GOODS OR SERVICES; LOSS OF USE, DATA, OR PROFITS; OR BUSINESS INTERRUPTION) HOWEVER CAUSED AND ON ANY THEORY OF LIABILITY, WHETHER IN CONTRACT, STRICT LIABILITY, OR TORT (INCLUDING NEGLIGENCE OR OTHERWISE) ARISING IN ANY WAY OUT OF THE USE OF THIS SOFTWARE, EVEN IF ADVISED OF THE POSSIBILITY OF SUCH DAMAGE.
□ Papperskassett (Vykortsformat) PCP-CP400
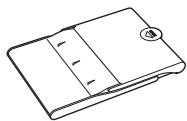
□ Häfte om Canons garantisystem

□ Nätaggregat
CA-CP200 B

□ CD:n SELPHY CP900 Solution Disk

□ Nätkabel
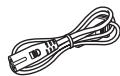
2
3
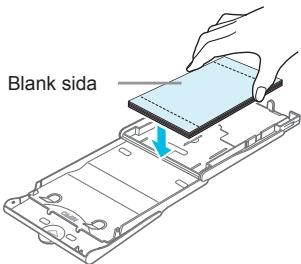
4
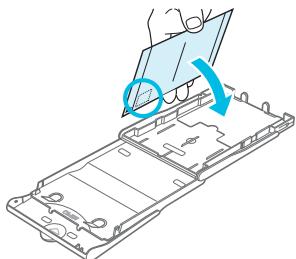
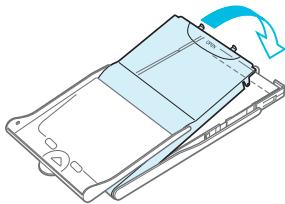
Kontrollera pappersformatet.

Fjäder
Montera dammskyddet
Öppna luckorna.
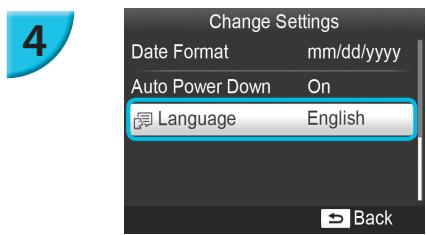
Starta SELPHY.
Lägg i papperet.
Byt färgkassett.
Visa menyn.
Tryck på 📄.
2
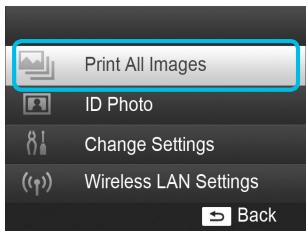

En beskärningsram visas.

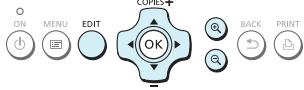

Ange fotostorleken.




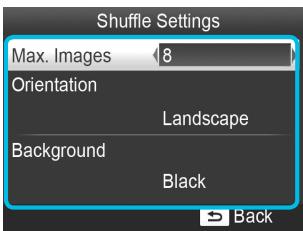




08/08/2012

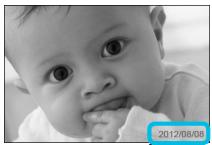
2012/08/08
30-2, Shimomaruko 3-chome, Ohta-ku, Tokyo 146-8501, Japan

SELPHY

SELPHY
Dator *3

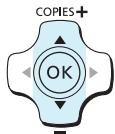
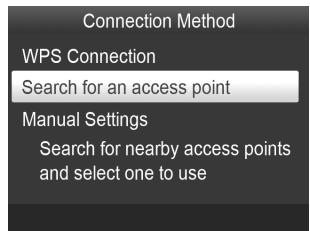

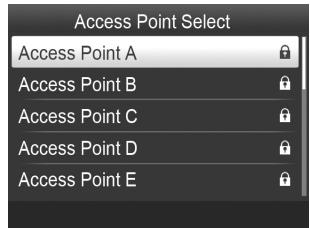

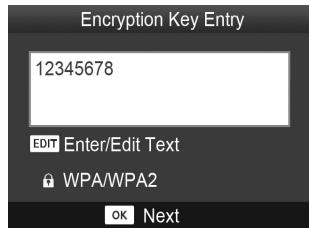
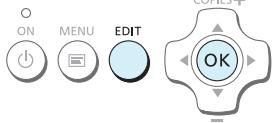

Search for an access point
Manual Settings
Connect easily to WPS compatible access points
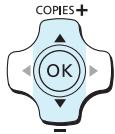
Press the button on the access point to connect
Push and hold the access point button, then proceed
OK
Next

Anslut till kopplingspunkten.
Skriva ut med dekorationer
Collageutskrifter
ID-fotoutskrifter
Installera programmet.

Installera programmet.
Visa utskriftsmenyn.
Välj utskriftsläge.
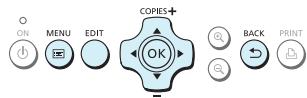
Ange ett tecken.
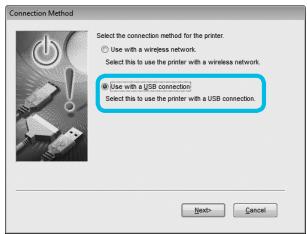
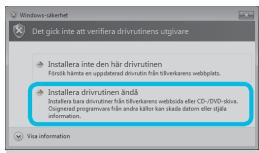
Installera programmet.
Starta SELPHY.
Copyright (c) 2003-2012, Jouni Malinen j@w1.fi and contributors All Rights Reserved.
This program is licensed under the BSD license (the one with advertisement clause removed).
If you are submitting changes to the project, please see CONTRIBUTIONS file for more instructions.
License
This software may be distributed, used, and modified under the terms of BSD license:
Redistribution and use in source and binary forms, with or without modification, are permitted provided that the following conditions are met:
- Redistributions of source code must retain the above copyright notice, this list of conditions and the following disclaimer.
- Redistributions in binary form must reproduce the above copyright notice, this list of conditions and the following disclaimer in the documentation and/or other materials provided with the distribution.
- Neither the name(s) of the above-listed copyright holder(s) nor the names of its contributors may be used to endorse or promote products derived from this software without specific prior written permission.
THIS SOFTWARE IS PROVIDED BY THE COPYRIGHT HOLDERS AND CONTRIBUTORS “AS IS” AND ANY EXPRESS OR IMPLIED WARRANTIES, INCLUDING, BUT NOT LIMITED TO, THE IMPLIED WARRANTIES OF MERCHANTABILITY AND FITNESS FOR A PARTICULAR PURPOSE ARE DISCLAIMED. IN NO EVENT SHALL THE COPYRIGHT OWNER OR CONTRIBUTORS BE LIABLE FOR ANY DIRECT, INDIRECT, INCIDENTAL, SPECIAL, EXEMPLARY, OR ONSEQUENTIAL DAMAGES (INCLUDING, BUT NOT LIMITED TO, PROCUREMENT OF SUBSTITUTE GOODS OR SERVICES; LOSS OF USE, DATA, OR PROFITS; OR BUSINESS INTERRUPTION) HOWEVER CAUSED AND ON ANY THEORY OF LIABILITY, WHETHER IN CONTRACT, STRICT LIABILITY, OR TORT (INCLUDING NEGLIGENCE OR OTHERWISE) ARISING IN ANY WAY OUT OF THE USE OF THIS SOFTWARE, EVEN IF ADVISED OF THE POSSIBILITY OF SUCH DAMAGE.

- INK AND PAPER (SOLD SEPARATELY)
- READ THIS FIRST
- CONVENTIONS USED IN THIS GUIDE
- TABLE OF CONTENTS
- CONNECTING WITH OTHER DEVICES
- SAFETY PRECAUTIONS
- WARNING
- CAUTION
- SETTING UP SELPHY
- CONTROLS
- SWITCHING THE SCREEN DISPLAY
- GETTING STARTED
- PREPARING THE INK CASSETTE
- CHECK THE INK CASSETTE AND INK SHEET
- PREPARING THE PAPER CASSETTE
- CHECK THE PAPER SIZE
- OPEN THE LID
- SET THE PAPER
- CLOSE THE LID
- ATTACHING THE DUST PROTECTION COVER
- INSERTING THE INK AND PAPER CASSETTES
- 1
- OPEN THE COVERS
- 2
- INSERT THE INK CASSETTE
- 3
- INSERT THE PAPER CASSETTE
- CONNECTING THE POWER
- PLUG THE ADAPTER CORD INTO SELPHY
- CONNECT THE POWER CORD
- SETTING THE DISPLAY LANGUAGE
- TURN ON SELPHY
- RAISE THE SCREEN (LCD MONITOR)
- DISPLAY THE SETTINGS SCREEN
- DISPLAY THE LANGUAGE SETTINGS SCREEN
- SELECT A LANGUAGE
- ABOUT USB FLASH MEMORY
- IMAGES THAT CAN BE PRINTED
- SELECTING AND PRINTING IMAGES
- INSERT THE MEMORY CARD INTO THE SLOT
- 4
- SELECT AN IMAGE
- SELECT THE NUMBER OF COPIES
- INSERT THE PAPER
- CHANGE THE INK CASSETTE
- AVOIDING INCOMPLETE PHOTOS
- PRINTING FROM USB FLASH MEMORY
- INSERT A USB FLASH MEMORY
- PRINTING 1 COPY OF THE SELECTED IMAGE
- SELECT AND PRINT AN IMAGE
- PRINTING ON SQUARE STICKERS
- DISPLAY THE MENU
- PRINT THE IMAGES
- STORING THE PRINTED PHOTOS
- CLEANING UP AFTER PRINTING
- DISPLAY THE CROPPING SCREEN
- DETERMINE THE RANGE
- MAKE THE SETTING
- PRINTING ID PHOTOS
- SET TO PRINT ID PHOTOS
- SPECIFY THE ID PHOTO SIZE
- SELECT AND PRINT THE IMAGES
- CROP THE IMAGE FOR THE PASSPORT
- PRINTING A VARIETY OF IMAGES
- MAKING SETTINGS
- SELECT THE ITEM AND CHANGE THE SETTINGS
- PRINTING WITH THE DATE (DATE)
- CORRECTING RED EYES AND PRINTING (CORRECT RED-EYE)
- PRINTING WITH OR WITHOUT A BORDER (BORDERS)
- SELECTING A LAYOUT AND PRINTING (PAGE LAYOUT)
- ARRANGING IMAGES OF DIFFERENT SIZES (SHUFFLE)
- MAKING SKIN LOOK SMOOTH IN PRINTS (SMOOTH SKIN)
- GETTING THE BEST RESULTS WITH AUTO CORRECTION (IMAGE OPTIMIZE)
- ADJUSTING THE BRIGHTNESS (BRIGHTNESS)
- CHANGING THE COLOR TONE (MY COLORS)
- CHANGING THE DATE STYLE (DATE FORMAT)
- SAVING ENERGY (AUTO POWER DOWN)
- PRINTING VIA WIRELESS LAN
- RADIO FREQUENCY INTERFERENCE
- SECURITY
- WHILE PRINTING
- AD HOC MODE (P. 29)
- INFRASTRUCTURE MODE (P. 31)
- PRINTING IN AD HOC MODE
- ITEMS TO PREPARE
- INSTALL THE DESIGNATED APPLICATION ON THE SMARTPHONE
- PREPARE SELPHY
- CHECK THE PRINTER NAME
- SELECT THE WIRELESS LAN MODE
- CONNECT THE SMARTPHONE TO THE NETWORK DISPLAYED ON THE PRINTER SCREEN
- PRINT FROM THE SMARTPHONE
- PRINTING FOR THE SECOND TIME
- PRINTING IN INFRASTRUCTURE MODE
- CHECKING WIRELESS LAN SETTINGS
- CONNECTING THE PRINTER TO THE WIRELESS LAN
- PREPARE THE ACCESS POINT
- CONNECTION METHOD
- WPS CONNECTION
- ACCESS POINT SELECT
- ENCRYPTION KEY ENTRY
- SELECT THE CONNECTION METHOD
- SELECT THE ACCESS POINT
- ENTER THE ENCRYPTION KEY
- CHECK THE ACCESS POINT
- USING A WPS COMPATIBLE ACCESS POINT
- SELECT A SETTING METHOD
- CONNECT TO THE ACCESS POINT
- PRINTING IMAGES FROM YOUR COMPUTER
- SELECT FAVORITE IMAGES FROM AN INDEX AND PRINT
- PRINT WITH DECORATIONS
- PRINT CALENDARS
- ARRANGEMENT PRINTING
- ID PHOTO PRINTING
- WIRELESS LAN ENVIRONMENT
- INSTALL THE SOFTWARE
- WINDOWS
- CONNECT SELPHY TO THE WIRELESS LAN
- MACINTOSH
- REGISTER THE PRINTER
- PRINTING IMAGES WITH THE SOFTWARE
- START THE SOFTWARE
- DISPLAY THE PRINT MENU
- SELECT A PRINT METHOD
- SELECT THE NUMBER OF PRINTS
- END THE PROGRAM
- CONNECTING TO OTHER ACCESS POINTS (INFRASTRUCTURE MODE)
- CHECKING SETTING INFORMATION
- CHANGING COMMUNICATION MODE
- CHANGING THE PRINTER NAME
- SETTING THE IP ADDRESS MANUALLY
- SET THE IP ADDRESS
- SET THE SUBNET MASK
- CHECK THE SETTINGS
- RESETTING WIRELESS LAN SETTINGS
- CHARACTER ENTRY METHOD
- ENTER A CHARACTER
- DELETE A CHARACTER
- SWITCH THE CHARACTER TYPE
- RETURN TO THE PREVIOUS SCREEN
- CONNECTING WITH OTHER DEVICES USING A CABLE
- PREPARE SELPHY AND CONNECT TO A COMPUTER
- FINISH INSTALLATION
- PRINTING FROM YOUR DIGITAL CAMERA
- PRINTING IMAGES USING DIGITAL CAMERA SPECIFIED SETTINGS (DPOF PRINT)
- APPENDIX
- INSTALLING THE BATTERY
- CHARGING THE BATTERY
- USING SELPHY WITH A BATTERY
- TROUBLESHOOTING
- POWER
- ● POWER WILL NOT TURN ON
- PRINTING PROBLEMS
- CANNOT PRINT
- CANNOT DISPLAY/PRINT IMAGES FROM MEMORY CARD OR USB FLASH MEMORY
- CANNOT PRINT FROM A DIGITAL CAMERA
- CANNOT PRINT FROM A COMPUTER
- CANNOT PRINT THE DATE
- CANNOT PRINT FROM MEMORY CARDS OR USB FLASH MEMORY
- CANNOT PRINT FROM DIGITAL CAMERAS
- CANNOT MAKE CLEAN PRINTS
- COLORS ON THE COMPUTER DISPLAY AND THE PRINT ARE DIFFERENT
- ● AFTER USING THE COMPUTER TO CANCEL A PRINT IN PROGRESS, AN IMAGE THAT HAD ALREADY BEEN PRINTED WAS PRINTED AGAIN WHEN PRINTING RESUMED
- PAPER
- ● PAPER WILL NOT FIT INTO CASSETTE
- ● PAPER IS NOT FEEDING PROPERLY/FREQUENT PAPER JAMS
- ● CANNOT PRINT THE SPECIFIED NUMBER OF PRINTS/PAPER LEFT OVER
- PAPER IS JAMMED
- WIRELESS LAN
- ● THE PRINTER'S SSID (NETWORK NAME) IS NOT DISPLAYED ON THE SMARTPHONE
- CANNOT CONNECT AFTER CHANGING THE WEP KEY
- ● THE ACCESS POINT IS NOT DISPLAYED ON THE LIST
- CANNOT CONNECT IN INFRASTRUCTURE MODE
- ● CANNOT CONNECT TO SELPHY
- ● PRINTING TAKES TIME, OR WIRELESS CONNECTION IS DISCONNECTED
- ERROR MESSAGES
- COMPACT POWER ADAPTER CA-CP200 B
- DUST PROTECTION COVER DPC-CP100 (SOLD SEPARATELY)
- CHARGER ADAPTER CG-CP200 (SOLD SEPARATELY)
- BATTERY PACK NB-CP2L (SOLD SEPARATELY)
- USE OF GENUINE CANON ACCESSORIES IS RECOMMENDED
- HANDLING SELPHY
- TRADEMARKS AND LICENSES
- ABOUT THIS GUIDE
- WPA SUPPLICANT
- LICENSE
- EUROPEAN UNION (AND EEA) ONLY
- SELPHY CP900
- ÅBN DÆKSLERNE
- ISÆT BLÆKPATRONEN
- SÆT ADAPTERLEDNINGEN I SELPHY
- VÆLG ET BILLEDE
- UDSKRIV
- ISÆT EN USB-NØGLE
- ÅBN MENUEN
- FASTLÆG OMRÅDET
- ANGIV ID-FOTOETS STØRRELSE
- DEKORER, OG UDSKRIV
- UDSKRIV ID-FOTO
- SLUT SELPHY TIL DET TRÅDLØSE LAN
- INSTALLER SOFTWARE
- VIS UDSKRIFTSMENUEN
- ANGIV ET TEGN
- TÆND SELPHY
- CANON EUROPA N.V
- ABRA LAS TAPAS
- CONECTE EL CABLE DEL ADAPTADOR A LA SELPHY
- ENCIENDA LA SELPHY
- IMPRIMA
- INSERTE UNA MEMORIA FLASH USB
- ACCEDA AL MENÚ
- 5
- ATTACHER LE CAPOT DE PROTECTION ANTI-POUSSIÈRE
- IMPRIMEZ
- AFFICHEZ LE MENU
- MODE INFRASTRUCTURE (P. 31)
- LICENSE WPA SUPPLICANT
- APRIRE I COPERCHI
- ACCENDERE LA STAMPANTE SELPHY
- STAMPARE
- INSERIRE UNA MEMORIA FLASH USB
- DETERMINARE LA GAMMA
- LICENZA WPA SUPPLICANT
- DE STOFKAP BEVESTIGEN
- OPEN DE KLEPPEN
- PLAATS DE INKTCASSETTE
- DRUK AF
- GEEF HET MENU WEER
- BEPAAL HET BEREIK
- DRUK AF VANAF DE SMARTPHONE
- SELECTEER DE VERBINDINGSMETHODE
- PASFOTO'S AFDRUKKEN
- INSTALLEER DE SOFTWARE
- VOER EEN TEKEN IN
- SCHAKEL DE SELPHY IN
- LICENTIE WPA SUPPLICANT
- TARKISTA PAPERIKOKO
- SULJE KANSI
- AVAA KANNET
- LIITÄ VIRTAJOHTO
- ASETA USB-MUISTI
- NÄYTÄ RAJAUSNÄYTTÖ
- MÄÄRITÄ ALUE
- TARKISTA TUKIASEMA
- ASENNA OHJELMISTO
- SYÖTÄ MERKKI
- KYTKE SELPHY-TULOSTIMEEN VIRTA
- KONTROLLERA PAPPERSFORMATET
- MONTERA DAMMSKYDDET
- ÖPPNA LUCKORNA
- STARTA SELPHY
- LÄGG I PAPPERET
- BYT FÄRGKASSETT
- VISA MENYN
- ANGE FOTOSTORLEKEN
- ANSLUT TILL KOPPLINGSPUNKTEN
- SKRIVA UT MED DEKORATIONER
- COLLAGEUTSKRIFTER
- ID-FOTOUTSKRIFTER
- INSTALLERA PROGRAMMET
- VISA UTSKRIFTSMENYN
- VÄLJ UTSKRIFTSLÄGE
- ANGE ETT TECKEN
Brand : CANON
Model : SELPHY CP900
Category : Photo printer