USER MANUAL SELPHY CP760 CANON
natural_image
White Canon self-service printer with a child's photo being printed out (no visible text or symbols on the device body)
ENGLISH
DANSK
DEUTSCH
ESPAÑOL
FRANÇAIS
ITALIANO
NEDERLANDS
SUOMI
SVENSKA

PictBridge

DIRECT PRINT


DPOF


SELPHY CP760
COMPACT PHOTO PRINTER
Printing Guide
ENGLISH

natural_image
Black-and-white photo of two children sitting on a decorative bench, one in formal attire and the other in a dress with flowers (no text or symbols visible)
Easy Printing
Beautiful Prints
and Fun!
SELPHY Has Come to Your Home.
A stylish and powerful printer for preserving precious family moments. SELPHY enriches your daily life with beautiful photo prints.
BEAUTIFUL
Long lasting
fine prints

FUN
Creating your
original album
>>> Table of Contents
* Unpack....p. 4
* Getting Started....p. 5
* Printing from Memory Cards....p. 7
* What You Can Do with Your SELPHY Printer....p. 9
* Printing from Digital Cameras, Mobile Phones or Computers......p. 15

natural_image
Black-and-white collage featuring a child playing with flowers, a plate of noodles, and the Eiffel Tower (no text or symbols visible)
EASY
Quick printing

natural_image
Black-and-white photo collage of children's portraits and illustrations, no visible text or symbols

natural_image
White Canon self-printed printer with a child's photo being scanned, showing its screen and control buttons (no readable text or symbols on the device itself)
* Accessories (Sold Separately)....p. 20
* Cleaning, Storing or Carrying the Printer....p. 21
* Troubleshooting....p. 23
* Please Read (Safety Precautions and Handling Precautions)....p. 27
* Specifications....p. 30

Package Contents
The package contains the following accessories. If there is anything missing, please contact the store where you purchased this product.

natural_image
Line drawing of a handheld electronic device labeled 'Cinua' with control panel and display (no readable text or symbols beyond branding)
Printer Unit

natural_image
Line drawing of a rectangular electronic device with a coiled cable (no text or symbols)
Compact Power Adapter

Power Cord

Starter Paper Pack
(Postcard Size, 5 sheets)

natural_image
Line drawing of a closed notebook or binder with a circular top and a small square icon on the cover (no text or symbols)
Paper Cassette (Postcard Size)

Paper Cassette (Card Size) ^*

Starter Ink Cassette
(Postcard Size for 5 prints)

Cleaner

CD-ROM:
Compact Photo Printer
Solution Disk
- Printing Guide (This guide)
• European Warranty System (EWS) Booklet
* Card size paper cassette may not be supplied depending on region.

Components Guide
Controls (p. 9)
Memory Card Slots
Paper Cassette Slot
Paper Cassette Slot Cover

natural_image
Illustration of a handheld electronic device with control panel and display (no text or symbols visible)
Ink Cassette Lever
Ink Cassette Compartment
Ink Cassette Compartment
Cover
Air Vents
Paper Ejection Slot

USB Terminal for Computer Connection
USB Terminal for
Camera Connection
DC IN (Power Input)
Terminal
Getting Started
Insert the ink and paper cassettes into the printer.

Preparing the Ink Cassette
Confirm that the ink sheet is taut with no slack.


Preparing the Paper Cassette
1 Open the outer lid.

2 Open the inner lid.
For Wide Size paper cassette (sold separately), slide the inner lid first, then open it.

natural_image
Diagram of a mechanical component with an arrow indicating rotation or assembly (no text or symbols present)
3 Set the paper.

For Postcard Size paper with a stamp field, orient the stamp field on the reverse side towards the inner lid.
4 Close the inner lid.

For Wide Size paper cassette, close the inner lid and slide it until it clicks.

- Always use the paper specific to SELPHY CP series printers included in the genuine Canon brand Color Ink/Paper Sets. Commercially sold printing paper, regular postcards, or paper specified for use in SELPHY ES series printers cannot be used.
- Do not set 19 or more sheets in the paper cassette (13 or more for Wide Size sheets).
- Mistakenly reversing the paper in the cassette may damage the printer.
- Do not bend the paper at the perforations or separate it before printing.
- Do not use label sheets that have begun to peel or label sheets with portions peeled back.
- Do not write on a sheet before printing with the printer. It may lead to a malfunction.
- Do not print on printed paper.
- Never reuse a spent ink cassette.
1 Open the two covers of the printer.

2 Insert the ink cassette and the paper cassette.


To remove the ink cassette, slide up the ink cassette lever.
3 Close the ink cassette cover.

Placing and Connecting the Printer
Set up and connect your SELPHY printer in the following manner for safe use.
① Insert the power cord to the compact power adapter.
② Plug the other end into a power outlet.
③ Connect the compact power adapter to the printer.

Make sure there is free space at the front and back of the printer of at least the length of the paper. (During printing, the paper will pass in and out.)

- Do not place the printer on an unstable or tilted surface.
- Keep the printer at least 1 meter (3 ft.) from devices emitting electromagnetic waves or strong magnetic fields.
Printing from Memory Cards
Print images from a memory card that is inserted into the printer.

- Make sure that no camera or computer is connected to the printer.
- This SELPHY printer supports image data conforming to the Design rule for Camera File system (Exif compliant) and DPOF (Ver.1.00) standard.
- Use a memory card formatted in the device used for taking the images. A memory card formatted in the computer might not be recognized.
- Images that have been edited on a computer might not be displayed or printed properly.
- An image that has been taken by a mobile phone might not be displayed or printed properly depending on the size of the image when it was taken.
• Movies cannot be played back on this printer.

Compatible Memory Cards
| Slot | Memory Cards |
 | CompactFlash CardMicrodrive | 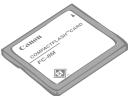 |
| CFmicrodrive | xD-Picture Card^*1 |  |
 [H2TX] [H2TX] SD/miniSD/MMC+RS-MMC SD/miniSD/MMC+RS-MMC | SD Memory CardminiSD CardSDHC Memory CardminiSDHC CardMultiMediaCardMMCplus CardHC MMCplus CardMMCmobile CardRS-MMC Card^*2 |  |
| microSD CardmicroSDHC CardMMCmicro Card |   |
 | Memory StickMemory Stick PROMemory Stick DuoMemory Stick PRO Duo |  |
| MSMS Duo | Memory Stick micro | [TSDS] |
: You need to use the specific adapter for the memory card. Please purchase the specific adapter.
*1 Purchase the CompactFlash Card Adapter for xD-Picture Card.
*2 Reduced-Size MultiMediaCard

- For memory cards requiring an adapter, be sure to first insert the memory card into the adapter before inserting the adapter into the appropriate card slot. If you insert the memory card into a card slot without first inserting it into an adapter, you may not be able to remove the memory card from the printer.
- Please refer to the user guide included with your memory card and adapter for handling instructions.
Printing the Selected Image (Basic Printing)
You can select images, specify the number of copies for each, and then print them all out. If you want to embed the date, follow the instructions on page 12 before printing.

- Do not pull out the paper cassette or open the ink cassette cover just after turning on the printer or while printing. This will lead to malfunctions.
- During printing, the paper will pass in and out several times. Do not touch or pull on the paper until printing has finished and the printed sheet collects on the print output tray (on top of the paper cassette).
- Do not let 10 or more sheets of printed paper collect on the print output tray.
- Do not pull out the memory card during printing.
1 Press and hold ⏻ until the start-up image appears on the LCD monitor to turn on the power.

To change the display language, refer to page 14.

2 Insert a single memory card into the appropriate card slot.

When inserting a small memory card like miniSD Card in the “SD/miniSD/MMC+/RS-MMC” slot, insert the card in the lower portion of the slot.

3 Press ◀ or ▶ to select the image you wish to print.

Press and hold down ◀ or ▶ : Jumps images by 5.
4 Press ▲ or ▼ to set the number of copies.

- Press and hold down ▲ or ▼ : Increases or decreases the number of copies by 5.
- You can specify up to 99 copies (or total of 999 prints).

5 Press
Printing starts.

- To print other images together, repeat the steps 3 and 4.
- Pressing ☐ when the total number of prints is 0 copies will print one copy of the image displayed on the LCD monitor.
- To remove a memory card, grasp the portion of the card protruding from the card slot and pull it out.
- Use a marker pen to write on the printed sheets.
Enjoy a multitude of basic and advanced functions with SELPHY.

Controls

1 LCD monitor Displays images, setting screens, and error messages.
2 ☐ Turns on or off the power.
3 ○ (MENU) Displays the menu screen.
- DPOF Print (p. 13)
- Print All Images (p. 13)
- Print Settings (p. 10)
- Printer Setup (p. 14)
4 ▲, ▼ Specifies the number of prints or changes menu items.
5 OK Selects settings.
6 ○ (BACK) Returns to the previous operation or cancels printing.
7 Starts printing.
8 ◀, ▶ Switches between images or changes setting values.

The LCD monitor may be covered with a thin plastic film for protection against scratches during shipment. If so, remove the film before using the printer.
- LCD Monitor
Display when [Info Display] (p. 14) is set to [On].

1 File Number
2 Installed ink cassette type
(In this example, [P] stands for Postcard Size)
3 Card slot being used
4 Print Settings (p. 10)
Date
Correct Red-Eye
My Colors
Page Layout
Image Optimize
Borders
(Settings that are not available are grayed out)
5 Number of sheets required
6 Number of copies of the selected image
You can make print-related settings such as bordered/borderless or print layout.
The default setting is marked as √.
Date
Prints images with the date when they were taken.


natural_image
Close-up black-and-white photo of a smiling baby with hands near face (no text or symbols visible)
05/05/2008
Correct Red-Eye
Corrects red-eye in the image.


natural_image
Two smiling young men seated on a sofa, one wearing a light-colored shirt (no visible text or symbols)

natural_image
Black-and-white photo of two smiling young men sitting on a sofa (no text or symbols visible)
My Colors
Changes the color of the image.


natural_image
Black-and-white photo of the Eiffel Tower with arches and a tree in the foreground (no visible text or symbols)

natural_image
Black-and-white exterior view of the Eiffel Tower with arches and trees (no visible text or symbols)
Page Layout
Sets the number of images to print on a single sheet of paper. The number of copies selected for an image (p. 8) will be printed in the set layout.


natural_image
Collage of black-and-white family photos including children, animals, and a chair (no text or symbols visible)

Image Optimize
Corrects the images for optimum quality.


natural_image
Two black-and-white photos of a smiling child holding a net, no text or symbols visible
Borders
Prints bordered or borderless.

Bordered,
Borderless (√)

natural_image
Black-and-white photo of two children sitting on a bench, one in a suit and the other in a dress with a flower (no text or symbols visible)

natural_image
Black-and-white photo of two children sitting on a metal bench, no visible text or symbols
*1 Contrast and color depth are enhanced.
*2 Contrast and color depth are suppressed.
*3 Produces intense, yet natural-looking colors, such as those obtained with positive film.
The menu screen appears.

[DPOF Print] displays only when you insert a memory card with DPOF settings made with the camera.

2 Press ▲ or ▼ to select [Print Settings].
3 Press OK.
The Print Settings menu appears.
4 Press ▲ or ▼ to select an item you wish to set.
5 Press ◀ or ▶ to change the setting value.

To change multiple settings, repeat the steps 4 and 5.

6 Press ○ (BACK).
Returns to the menu screen.
Press ○ (BACK) again to return to image display.

- When printing with a camera connected, the print settings made with the camera will be used.
- Depending on the selected layout, some settings may not be available. You can check the available settings when [Info Display] is set to [On] on the LCD monitor (p. 9).
- Depending on the image, red-eye may not be automatically detected or optimally corrected. In the following examples red-eye may not be corrected.
- Faces that appear extremely small, large, dark or bright in relation to the overall image.
- Faces turned to the side or at a diagonal, or faces with a portion hidden.
- Images could have portions other than the eyes mistakenly corrected. Set [Correct Red-Eye] to [On] only when printing images with red-eye.
Correct Red-Eye
Page Layout
- The position of the image in the layout cannot be selected.
- When you select [Index] and the print mode is set to [Print All Images] (p. 13), all images in the memory card can be printed out as a thumbnail index.
● Printing with the Date
Print images with the date when the images were taken. Follow the steps below before selecting images.

natural_image
Black-and-white photo of a young girl gently touching a brown and white dog outdoors (no text or symbols visible)
1 Press ○ (MENU).
2 Select [Print Settings] with ▲ or ▼, then press OK.
3 Press ▲ or ▼ to select [Date].
4 Press ◀ or ▶ to set [Date] to [On].
5 Press ○ (BACK).
Returns to the menu screen.
Press ○ (BACK) again to return to image display.


An image in the memory card appears.

natural_image
Black-and-white photo of a young girl holding a dog, no visible text or symbols in the image content

- You can change the display order of the date in [Date Format] (p. 14).
- Printing with the date may not be possible depending on the selected layout (p. 10). Make sure that [Info Display] is set to [On] in the LCD monitor and check if [Date] is available (p. 9).
● Printing Images Using Camera Specified Settings (DPOF Print)
Select images or specify print settings with the camera before printing. For details on the DPOF settings, refer to the user guide provided with your camera.
1 Insert a memory card, containing DPOF settings made with the camera into the card slot.
The confirmation screen for the DPOF settings appears.
2 Press OK and check the settings.
![Print type set with the camera : Index : Standard [Date] and [File No.] set with the camera Number of sheets required Start DPOF printing 0ff 0ff 1-up Borderless 1 5 6 P4×6/10×15 Print](/content/2019/10/30807/images/118369306bbc404aa3bf45e9b59517da4156d97ea4a5b1057e01e1936c5ada96.jpg)
3 Press
Printing starts.

- The date and file number reflect the DPOF settings. These settings cannot be changed with the printer.
- The screen of step 2 also appears if you press ○ (MENU) to select [DPOF Print] and press OK. Be sure to insert a memory card containing DPOF settings, otherwise [DPOF Print] will not appear on the LCD monitor.
● Print All Images
Print all the images on the memory card.
1 Press ○ (MENU) and select [Print All Images] with ▲ or ▼.

2 Press OK and check the settings.

- Press ▲ or ▼ to specify the number of copies of the selected image.
- You can specify up to 99 copies (or total of 999 prints).

3 Press 📋.
Printing starts.
You can make printer settings such as the display language.
The default setting is marked as √.
| Item | Description | Settings |
| Date Format | Sets the date format used when printing out with the date. | yy/mm/dd, mm/dd/yy, dd/mm/yy (✓) |
| Language | Sets the display language of the LCD monitor. | See ☑ below. |
| Info Display | Displays the properties of the print settings or file number of the image. | On (✓), Off* |
* The image display will be large but it will take some time until it displays.
1 Press ○ (MENU).
2 Select [Printer Setup] with ▲ or ▼, then press OK.
3 Press ▲ or ▼ to select an item you wish to set.
4 Press ◀ or ▶ to change the setting value.

To change multiple settings, repeat steps 3 and 4.


5 Press ○ (BACK).
Returns to the menu screen.
Press ○ (BACK) again to return to image display.

Changing the [Language] setting
1 Select [Language] in step 3, then press OK.
2 Press ▲, ▼, ◀ or ▶ to select the language you wish to set.
3 Press OK.
Returns to the [Printer Setup] screen.

![CANON SELPHY CP760 - Changing the [Language] setting - 2](/content/2019/10/30807/images/32611af8ee21ace393cf33464328ec65951c11d9150256d8ecb4dd2e7fb3fa56.jpg)
Printing from a Camera
Print from a camera supporting 📋 (PictBridge*) (p. 11) or ✅ (Canon Direct Print) by connecting it to the printer. This guide explains the procedure for printing with a Canon digital camera connected as an example.
* PictBridge is an industry standard that allows any digital camera or video camera, regardless of the manufacturer or model, to print images directly without using a computer.

- Make sure that no memory cards are inserted into the printer and that no computer is connected to the printer before connecting a camera.
- Ensure the camera's communication settings are configured correctly.
- Set the print setup with the camera.
- For camera handling details, refer to the user guide provided with your camera.
1 Connect a camera with the printer using the USB cable supplied with the camera.

2 Turn on the power of the printer first, then the camera. Play back the images with the camera.
The 📞 or the 🔊 icon appears on the LCD monitor of the camera.

natural_image
Diagram showing a child's photo connected to a digital camera and printer (no text or symbols present)
Printing starts.

- If the camera does not feature the 📁 button, make the settings with the camera until printing. For details, refer to the user guide provided with your camera.
- Printing cannot be canceled with (BACK) on the printer while printing with a camera connected. Operate the camera to cancel printing.
- When printing from a ☑ (Canon Direct Print) connected camera on Wide Size paper (100 x 200 mm (4 x 8 in.)), the image will print only up to 100 x 150 mm (4 x 6 in.), aligned to the left.
Print images wirelessly from a mobile phone supporting Bluetooth.

- Make sure that no memory cards are inserted in the printer, and no camera or computer is connected to the printer during wireless printing.
- You cannot establish a wireless connection between the printer and a computer.
- Only image data files up to approx. 2 MB can be transmitted (maximum data size varies depending on the mobile phone).
- Data transmission time increases when data size is large. Accordingly, it may take some time before printing starts.
- Movies, E-mails, phone directories, or image data, for example, downloaded from a URL attached to an E-mail may not be printable.
- The printer may not be able to print images saved onto the memory card of certain mobile phones.
- Printing cannot be canceled by pressing (BACK) during wireless printing.
- The position and orientation (horizontal or vertical) of images for printing is set automatically by the printer.
- The edges of the image may be cropped with certain paper sizes.
- For information on how to use the mobile phone's wireless functions, refer to the user guide of your mobile phone.
● Printing via Bluetooth
1 Install Bluetooth Unit BU-30, sold separately.
2 Turn the printer's power on.
3 Transmit an image from your mobile phone to the printer.
Bluetooth unit blinks blue during data transmission.
Printing starts after data transmission is completed.

natural_image
Close-up of a Canon printer's side panel showing the brand name and control buttons (no readable text beyond branding)

natural_image
Illustration of a mobile phone emitting signal waves from a printer (no text or symbols)
Up to approx. 10 m (33 ft.)

For instructions for connecting or communication with Bluetooth, refer to the user guide provided with your Bluetooth unit. If prompted by the mobile phone for a device to connect to, select [Canon SELPHY CP760-xx:xx:xx] (where x refers to a numerical digit).
Print from a computer connected to the printer.

- Make sure that no memory card is inserted in the printer, and that no camera is connected to the printer before connecting a computer.
- The printer may not function properly if other USB devices (with the exception of a USB mouse or USB keyboard) are used at the same time as the printer. Disconnect all other USB devices from your computer and then reconnect the printer.
- Do not put your computer into the standby mode (or sleep mode) while the printer is connected to a USB port. If you accidentally do so, do not disconnect the USB cable from your computer while it is in standby mode.
- For details on how to use the computer, refer to the user guide of your computer.
● System Requirements
| Windows | Macintosh |
| OS | Windows Vista, Windows XP Service Pack 2, Windows 2000 Service Pack 4 | Mac OS X (v10.3 - v10.4) |
| Configuration | The above OS should be pre-installed on computers with built-in USB ports. |
| CPU | Windows Vista: Pentium 1.3 GHz or higher Windows XP/Windows 2000: Pentium 500 MHz or higher | PowerPC G3/G4/G5 or Intel processor |
| RAM | Windows Vista: 512 MB or more Windows XP/Windows 2000: 256 MB or more | 256 MB or more |
| Interface | USB |
| Free Hard Disk Space | 520 MB or more (when all applications are installed) | 320 MB or more (when all applications are installed) |
| Display | 1,024 x 768 pixels or more High Color (16 bit) or better | 1,024 x 768 pixels or more 32,000 colors or better |
● Introduction to the Supplied Programs
The software necessary for printing with the printer connected to a computer is included on the supplied Compact Photo Printer Solution Disk.
◆ Ulead Photo Express LE (Windows Vista, Windows XP)
Use this software's functions to add frames or text to your images, and to easily print them in various ways.


natural_image
Two grayscale photos: one showing a sleeping child with musical notes and a small animal, the other showing two children in a bedroom with balloons (no text or symbols visible)
◆ ZoomBrowser EX (Windows)/ImageBrowser (Macintosh)
Use this multi-function software not only for printing, but also for managing, viewing, editing, and exporting images.

● Installing the Printer Driver

- Do not connect the computer to the printer before placing the CD-ROM in the computer.
- You must login to the computer as an administrator before beginning installation.

The instructions in this section are intended for Windows XP and Mac OS X (v10.4). If you are using another version, actual screen contents and procedures may differ slightly from those indicated here.
Windows
1 Place the supplied CD-ROM in the computer.
2

Macintosh
1 Place the supplied CD-ROM in the computer and double-click the 🔊 icon in the CD-ROM window.
2

Click to select your printer name.
3 Click [Yes], if you consent to the software license agreement.
4 Connect the computer to the printer, and turn the printer's power on.

5 Click [Finish].
3 Click [Agree], if you consent to the software license agreement.
4 Click ☐ to select [Easy Install], then click [Install].
5 Restart your computer.
6 Connect the computer to the printer (see the figure left), and turn the printer's power on.
Register your printer on the Printer List in the [Printer Setup Utility].
Windows
1 Place the supplied CD-ROM in the computer.

3 Click [Install].
Macintosh
1 Place the supplied CD-ROM in the computer and double-click the 🔊 icon in the CD-ROM window.

3 Select [Easy Installation] and click [Next].
Follow the onscreen instructions to proceed.
4 Click [Restart] or [Finish], then remove the CD-ROM after screen returns to the desktop.
4 Click [OK], then remove the CD-ROM.

- Refer to the [Help] menu of the software for operations.
- For Ulead Photo Express LE customer support, consult the following website. http://ulead.com/events/canon/selphy
Accessories (Sold Separately)

Color Ink/Paper Sets and Paper Cassettes
The color ink cassette and the paper cassette differ depending on the paper size. Check the table below ^*1 .
| Paper size | Color Ink/Paper Set | Sheets | Paper Cassette |
| Postcard Size | Color Ink/Paper Set KP-36IP | 36 | Paper Cassette PCP-CP300(Included with the SELPHY) |
| Color Ink/Paper Set KP-72IP | 72 |
| Color Ink/Paper Set KP-72IN | 72 |
| Color Ink/Paper Set KP-108IP | 108 |
| Color Ink/Paper Set KP-108IN | 108 |
| L Size | Color Ink/Paper Set KL-36IP | 36 | Paper Cassette PCL-CP300 |
| Card Size | Color Ink/Paper Set KC-36IP | 36 | Paper Cassette PCC-CP300(Included with the SELPHY) |
| Color Ink/Label Set KC-18IF (Full-page labels) | 18 |
| Color Ink/Label Set KC-18IL (8-label sheets)*2 | 18 |
| Wide Size | Color Ink/Paper Set KW-24IP | 24 | Paper Cassette PCW-CP100 |
*1 Some accessories may not be available depending on region.
*2 Set the page layout to [8-up] (p. 10).

Other Accessories
- Bluetooth Unit BU-30: You can print wirelessly from a mobile phone supporting Bluetooth.
Cleaning, Storing or Carrying the Printer

Cleaning the Printer
● Cleaning the Inside of the Printer
Remove dust inside of the printer with the supplied cleaner.
1 Remove the ink cassette (p. 6).
2 Insert the cleaner all the way in the ink cassette compartment and slide it in and out 2 or 3 times.

Arrow side facing up
Do not touch white parts of the cleaner as its performance may be affected.
● Cleaning the Printer Casing
Wipe the casing with a soft dry cloth.
Never use volatile solvents such as benzine, paint thinner, or diluted neutral solvent. They may cause deformation or peeling of the printer's casing.
● Cleaning the Back of the Printer
Clean the dust from the air vents on the back.
If dust enters from the air vents and gets on the ink sheet, the printer may not print cleanly. If dust becomes lodged on the ink sheet, use a commercially available blower brush to remove it so that you do not touch the ink sheet.
● Storing the Printer

If dirt or foreign objects enter the printer, print quality may deteriorate.
● Storing Prints
- Avoid storing prints in the following places.
- Places with high temperatures (40°C/104°F or higher).
- Places with high humidity or dusty areas.
- Places subject to direct sunlight.
- Please avoid the following actions as they may result in color change, color fading or color bleeding.
- Sticking any type of adhesive tape on a print surface.
- Allowing print surfaces to come into contact with vinyl or plastic.
- Applying alcohol or other volatile solvents to a print surface.
- Leaving print surfaces tightly pressed against other surfaces or objects for prolonged periods.
- If you wish to mount prints in an album, select an album with photo covers made of nylon, polypropylene or cellophane.

Color may change over time depending on the conditions of storage. Canon assumes no liability for color changes.

Carrying the Printer
- Remove the paper and ink cassettes and close the covers.
- Carry the printer wrapped in a soft cloth to avoid scratching it.
Troubleshooting
Consult this section when the printer does not function as expected or an error occurred.

You Think There is a Problem
If the solutions below do not remedy your problem, contact the retail outlet or a Canon customer support center.
● Printer and Power Source
Power will not turn on
- Has the plug come out of the power outlet? (p. 6)
- Is the connector of the compact power adapter securely connected to the printer's DC IN terminal? (p. 6)
- Did you try pressing ⏻ for a long time? (p. 8)
● Printing Problems
Cannot Print
• Is the printer power turned on? (p. 8)
- Is the ink cassette empty? Replace the ink cassette.
- Are you using the correct combination of paper, paper cassette and ink cassette? (p. 6)
- Is the printer connected to more than one device at once?
Do not connect simultaneously to a camera, memory card or computer.
- Is there paper in the paper cassette? Is the paper cassette inserted all the way in?
- Is the ink cassette inserted all the way in?
• Is the ink sheet slack? (p. 5)
- Are you using the specified paper?
- Were the perforated portions of the paper folded over or separated before printing?
- Has the printer overheated?
The printer will temporarily stop when it exceeds a certain temperature. This is not a malfunction. Wait until the temperature drops and the printer resumes. If the printer is connected to a computer when this happens, a message will appear on the computer display. Do not cancel the print. Wait until printing resumes.
Printing from Memory Cards
- Is the memory card inserted all the way into the slot with the label facing upward? (p. 8)
- Do the image files conform to the Design rule for Camera File system?
- Have you inserted the memory card directly into the card slot without first inserting the card into the adapter? (p. 7)
Some memory cards require a specific adapter.
Cannot Print (continued from previous page)
Printing from Cameras
- Is the printer connected to the camera correctly? (p.15)
- Does the firmware of the Canon-brand camera support the printer?
- Does the camera battery have sufficient charge?
Replace the battery with a fully charged (or new) battery, or use the compact power adapter for the camera.
Printing from Computers
- Did you install the printer driver according to the correct procedures? (p. 18)
- Is the printer connected directly to a port on the computer with the USB cable?
The printer may not operate correctly if it is connected to a USB hub.
Problems Exclusive to Windows
• Is the printer set to offline?
Right-click the printer icon and cancel the offline setting.
Problems Exclusive to Macintosh
- Is the printer registered on the Printer List? (p. 18)
Image Does Not Appear When Memory Card Is Inserted
- Is the memory card inserted all the way into the slot with the label facing upward? (p. 8)
- Do the image files conform to the Design rule for Camera File system?
- Have you inserted the memory card directly into the card slot without first inserting the card into the adapter? (p. 7)
Some memory cards require a specific adapter.
Cannot Print the Date
Printing from Memory Cards
- Is the date imprint option set? (p. 12)
If you are using DPOF printing, the date imprint settings are configured on the device used for the DPOF settings.
Printing from mobile phones
- When using Bluetooth, the date will not be printed.
Printing from Cameras
- Is the date imprint option set to [Off] on the camera?
Set the date imprint option to [On] on the camera. However, if the setting is [Default], the date imprint settings of the printer will be used.
Cannot Print Cleanly
• Is the ink sheet or paper dirty?
• Is dirt lodged within the printer? (p. 21)
- Has condensation formed within the printer?
Leave it to dry at room temperature for a while.
- Is the printer placed near a device with a strong electromagnetic or magnetic field? Electromagnetic waves from video game devices or strong magnetism from speakers may distort images. Set it at least 1 meter (3 ft.) apart.
Colors on the Computer Display and the Print Are Different
- Color generation methods are different for computer displays and printers. Moreover, the variance may be attributable to the environment in which the display is viewed (color and strength of the light), or to the display's color adjustment settings.
After using the computer to cancel a print in progress, an image that had already been printed was printed again when resumed printing.
- Are you using a Macintosh computer?
When you restart printing on a Macintosh computer after canceling, an already printed image may print again when printing resumes.
● Paper Problems
Paper Will Not Fit into Cassette
- Does the paper size match the size of the paper cassette? (p. 6)
Paper is Not Being Advanced Properly
- Check the paper and paper cassette are correctly inserted. (p. 6)
Frequent Paper Jams
- Has too much paper been placed in the paper cassette?
Do not place 19 or more sheets in the cassette (13 or more for Wide Size sheets).
- Have 10 or more sheets collected on the print output tray?
• Is the paper folded or bent?
- Have you printed on a sheet that has already been used?
Cannot Print the Specified Number of Prints. Paper Left Over
- Are you wasting ink sheet capacity with following operations?
- Repeatedly turning the printer on and off without printing.
- Cancel printing while printing is in progress.
- Pulling on the ink sheet.
- Taking out the ink cassette when the paper runs out while printing multiple copies.
Do not remove the ink cassette when removing and refilling the paper cassette.
If a problem occurs with the printer, a message accompanied with a possible solution appears in the LCD monitor. In this section, other possible solutions are described. If a problem occurs while the printer is connected to the camera, the camera's LCD monitor may display an error message.
No paper, or cassette incorrectly inserted!
- Check that the paper cassette is firmly inserted all the way into the printer.
- If the paper is not feeding correctly into the printer, remove the paper cassette and any paper left in the printer.
Paper jam!
- Contact a Canon Customer Support center if the paper will not come out even when the power is turned off and back on.
There is a problem with the ink cassette!
- Contact a Canon Customer Support center for assistance if the ink cassette is stuck in the printer.
Cannot read data from memory card!
- The following images cannot be printed.
- Images other than JPEG
- Corrupted images
- Press (BACK) to return to the original screen.
Communication error!
- When printing from a mobile phone (wirelessly), the maximum image file size that can be transmitted is approx. 2 MB (maximum file size varies depending on the mobile phone).
- Press (BACK) to return to the original screen.
No images on card!
- Check to see if the memory card is properly inserted all the way into the slot.
- Do the image files confirm to the Design rule for Camera File system?
Error!
- Turn the printer's power off and turn it on again. If the error message continues to display, contact a Canon Customer Support center for assistance.
Safety Precautions
Use this equipment correctly according to the following precautions to avoid the risk of injury, fire, electrical shock, malfunction or other hazards.
Equipment refers to the printer unit and accessories.

WARNINGS
- Store the equipment in a place where it cannot be reached by children.
- Do not disassemble or modify the equipment.
- If the equipment is dropped or the casing becomes damaged, do not continue operation.
- Stop operating the equipment immediately if it emits smoke or noxious fumes. Immediately contact the retail outlet or a Canon Customer Support center.
- Do not allow water or other liquids to enter the interior of the equipment. If the equipment is subjected to water droplets or damp salty air, gently wipe it with a soft, absorbent cloth.
- Do not insert or drop metallic objects or flammable substances into the equipment interior. If it occurs, immediately turn off the printer power and remove the power cord from the power outlet.
- Do not touch metal parts of the device or the power plug during thunderstorms. Immediately stop using the equipment and distance yourself from it.
- Do not use flammable solvents such as alcohol, benzine, or paint thinner to clean the equipment.
- Do not rest heavy objects on the power cord or plug, pull on it with excessive force or damage it.
- Do not use a power source (compact power adapter) that is not specified for the equipment.
- Remove the power cord on a regular periodic basis and wipe away the dust or dirt that collects on the plug, the exterior of the power outlet and the surrounding area.
- Do not handle the power cord if your hands are wet.
-
Do not play the supplied CD-ROM(s) in any CD player that does not support data CD-ROMs. Playing the CD-ROM(s) in an audio CD player (music player) could damage the speakers. It is also possible to suffer from hearing loss from listening with headphones to the loud sounds of a CD-ROM played on a music CD player.
-
Do not stick any part of your hand into the printer interior.
-
Do not use or store the equipment in the following types of places.
-
Humid or dusty areas
- Places subject to heavy vibrations
- Places near flames or subject to direct sunlight
-
Places that may heat up such as an automobile trunk or dashboard
-
Do not attach metallic pins or allow dirt to collect on the power plug or recharging connectors.
- Do not excessively pull or bend the power cord.
- Do not use the compact power adapter for any other equipment except this printer, use it beyond its rated capacity or voltage, or leave the plug partially inserted into a power outlet.
- Unplug the equipment when you are not using it.
Leaving the equipment plugged in during prolonged periods of non-use poses risk of electric shock or fire.
- Do not touch the paper or remove the paper cassette while printing is in progress.
Handling Precautions
For the handling of memory cards, cameras, mobile phones, or computers, refer to the supplied user guide of each product.
Warning Against Copyright Infringement
Please respect all copyrights. Use of images produced by this printer for purposes other than personal entertainment may be prohibited by law.
Warranty Limitations
For information on your printer's warranty, please refer to the Canon European Warranty System (EWS) Booklet supplied with your printer.
For Canon Customer Support contacts, please see the European Warranty System (EWS) Booklet.
Printer
- Do not apply excessive force to the printer.
Force or impact on the printer may result in paper jams or equipment damage.
- Do not turn the power on and off repeatedly when you do not intend to print.
The printer initialization process consumes ink and the equivalent of several pages could be wasted.
- Be careful not to spray the equipment with insecticides or volatile substances. In addition, do not store the equipment in contact with rubber or vinyl products for long periods of time.
These materials may cause deformation of the printer's casing.
- If the printer overheats, it will temporarily stop operating. This does not mean that the printer has malfunctioned. The printer will resume normal printing as soon as it cools down. Temporary stoppages are most likely to occur in the following cases:
- When printing continuously.
- If a room is unusually warm.
- If the air vents on the back of the printer are blocked or if ventilation is inadequate.
- Do not touch the springs of the paper cassette.
If the springs are bent or deformed, paper will not feed correctly into the printer.

- Do not place any foreign objects in the print output tray (on the top of the paper cassette).
- Do not touch the print side (shiny side) of the paper with your fingers.
Always hold the paper along the edges (outside the perforated border). Be sure that hands are dry before touching the paper. Sharp objects will scratch the paper surface. Keep the paper surface free from fingerprints, dust, water droplets, etc.
- Do not handle the ink cassette with wet or sweaty hands.
To prevent malfunctions and damage caused by electromagnetic fields
- Never position the equipment close to motors or other devices that generate strong electromagnetic fields. Moreover, do not use near televisions or AM radio.
To prevent condensation
- Avoid condensation on the equipment when moving it from a cold to a hot place, by putting it in an airtight, sealable plastic bag and allow for adjustment to temperature changes gradually before removing from the bag. In the event that condensation does form within the equipment, keep it at room temperature until the water droplets evaporate naturally before use.
Specifications
All data is measured according to standard Canon testing procedures. We reserve the right to change specifications without notice.
SELPHY CP760
| Printing Method | Dye-sublimation thermal transfer (with overcoating) |
| Print Resolution | 300 x 300 dpi |
| Gradation | 256 shades per color |
| Ink | Dedicated ink cassette (Y/M/C/overcoating) |
| Paper | Postcard Size, L Size, Card Size (including full page label sheets, 8-label sheets), Wide Size |
| Print Size | Borderless | Bordered |
| Postcard Size | 100.0 x 148.0 mm (3.94 x 5.83 in.) | 91.3 x 121.7 mm (3.59 x 4.79 in.) |
| L Size | 89.0 x 119.0 mm (3.50 x 4.69 in.) | 78.8 x 105.1 mm (3.10 x 4.14 in.) |
| Card Size | 54.0 x 86.0 mm (2.13 x 3.39 in.) | 49.9 x 66.4 mm (1.96 x 2.61 in.) |
| (per label) | 22.0 x 17.3 mm (0.87 x 0.68 in.) | |
| Wide Size | 100.0 x 200.0 mm (3.94 x 7.87 in.) | 91.3 x 121.7 mm (3.59 x 4.79 in.) |
| Printing Speed*1 | Printing from Memory Cards | Connected to Cameras with PictBridge |
| Postcard Size | Approx. 52 sec. | Approx. 52 sec. |
| L Size | Approx. 43 sec. | Approx. 43 sec. |
| Card Size | Approx. 25 sec. | Approx. 25 sec. |
| Wide Size | Approx. 1 min. 5 sec. | Approx. 1 min. 5 sec |
| Feeding System | Automatic paper feed from paper cassette |
| Ejection System | Automatic paper ejection on top of paper cassette |
| LCD Monitor | 2.5-inch type, TFT color |
| Interface | |
| USB | Connecting to a PictBridge compliant device/a Canon Direct Print compliant camera: USB compliant Type A connectorConnecting to a computer: USB compliant Type B connector |
| Wireless | Bluetooth*2 |
| Memory Cards | CF (CompactFlash) Card, Microdrive, xD-Picture Card*3, SD Memory Card, miniSD Card, SDHC Memory Card, miniSDHC Card, MultiMediaCard, MMCplus Card, HC MMCplus Card, MMCmobile Card, RS-MMC Card, microSD Card*3, microSDHC Card*3, MMCmicro Card*3, Memory Stick, Memory Stick PRO, Memory Stick Duo, Memory Stick PRO Duo, Memory Stick micro*3 |
| Operating Temperatures | 5 - 40°C (41 - 104°F) |
| Operating Humidity | 20 - 80% |
| Power Source | Compact Power Adapter CA-CP200 |
| Power Consumption | 60 W or less (4 W or less on standby) |
| Dimensions | 180.0 x 126.7 x 73.1 mm (7.09 x 4.99 x 2.88 in.) |
| Weight (printer only) | Approx. 900 g (approx. 31.7 oz.) |
*1 Measured from start of the yellow printing pass to final output.
*2 Bluetooth Unit BU-30 (sold separately) is required.
*3 Specialized adapter is required.
Compact Power Adapter CA-CP200
| Rated Input | 100 – 240 V AC (50/60 Hz)1.5 A (100 V) – 0.75 A (240 V) |
| Rated Output | 24 V DC, 2.2 A |
| Operating Temperatures | 0 – 45°C (32 – 113°F) |
| Dimensions | 122.0 x 60.0 x 30.5 mm (4.80 x 2.36 x 1.20 in.) (excluding power cord) |
| Weight | Approx. 310 g (10.9 oz.) |

natural_image
Simple line drawing of a trash bin with two crossed lines indicating no waste or prohibition (no text or symbols)

European Union (and EEA) only.
This symbol indicates that this product is not to be disposed of with your household waste, according to the WEEE Directive (2002/96/EC) and your national law. This product should be handed over to a designated collection point, e.g., on an authorized one-for-one basis when you buy a new similar product or to an authorized collection site for recycling waste electrical and electronic equipment (EEE). Improper handling of this type of waste could have a possible negative impact on the environment and human health due to potentially hazardous substances that are generally associated with EEE. At the same time, your cooperation in the correct disposal of this product will contribute to the effective usage of natural resources. For more information about where you can drop off your waste equipment for recycling, please contact your local city office, waste authority, approved WEEE scheme or your household waste disposal service.
For more information regarding return and recycling of WEEE products, please visit www.canon-europe.com/environment.
(EEA: Norway, Iceland and Liechtenstein)
SELPHY


- Microsoft, Windows Vista and the Windows Vista logo are trademarks or registered trademarks of Microsoft Corporation in the United States and/or other countries.
• Macintosh and the Mac logo are trademarks of Apple Inc., registered in the U.S. and other countries.
- The SDHC logo and miniSDHC logo are trademarks.
- Corel, the Corel logo, Ulead and Ulead Photo Express are trademarks or registered trademarks of Corel Corporations and/or its subsidiaries.
- Portions of the code used in this firmware are based in part on the work of the Independent JPEG Group.
- No part of this guide may be reproduced, transmitted, transcribed, stored in a retrieval system, or translated into any language in any form, by any means, without the prior written permission of Canon.
- While every effort has been made to ensure that the information contained in this guide is accurate and complete, no liability can be accepted for any errors or omissions. Canon reserves the right to change the specifications of the hardware and software described herein at any time without prior notice.
- Canon makes no warranties for damages resulting from corrupted or lost data due to a mistaken operation or malfunction of the camera, the printer, the software, the memory cards, personal computers, peripheral devices, or use of non-Canon memory cards.
you can
Canon
Open up a world of online
digital photos with
CANON iMAGE GATEWAY
Share your photos with friends and family
Create and share online photo albums. Build your own albums around themes such as birthdays, holidays and celebrations. Be creative by applying fun backgrounds and layouts to your albums, then email them to family and friends so they can share the fun.

Customise your camera
Great start-up images and sounds. Simply click on My Camera ^2 to download those little extras that will personalise your camera. Choose a Picture Style ^2 just as you would a film, allowing you to produce the best result for your subject.

Get hints, tips and ideas
Get the most out of your product and learn how to take great photos with hints and tips. Discover ways to enjoy your product even more!
How to register with CANON iMAGE GATEWAY
To use CANON iMAGE GATEWAY, you can register via your Canon Solution Disk.
1. Insert the Canon Solution Disk bundled with your product.
2. Select your region, country and language and then click on the "Register" button and you will be directed to the CANON iMAGE GATEWAY website.
3. Follow the online instructions and complete the registration form. You will then be sent your login details and password via email to your registered email address.
For further information, please visit CANON iMAGE GATEWAY at www.cig.canon-europe.com.
^2 My Camera and Picture Style functions are not supported on all camera models.


natural_image
Black-and-white photo of five people joyfully jumping on a cliff with sky and distant landscape (no text or symbols visible)
CANON iMAO E
GATEWAY
Register your new Canon digital product today and start enjoying 100MB of online space allowing you to share your photos with friends
and family. Order photo prints directly from your
online photo album. Get hints, tips and
ideas, plus customise your camera with
great start-up images and sounds.
With Canon iMAGE GATEWAY ^1 you can!
CANON iIMAGE GATEWAY is currently only available in the
following European countries: United Kingdom, Deutschland,
France, Italia, Suomi, Danmark, Nederland, Sverige, Schweiz, Norge,
Eire, Belgie, Österreich, España, Luxembourg, Élloáða, Portugal
SELPHY CP760
COMPACT PHOTO PRINTER
Print Guide
DANSK

natural_image
Black-and-white photo of two children sitting on a decorative bench, one in wedding attire and the other in a dress with flowers (no text or symbols visible)
natural_image
Black-and-white collage featuring a child eating with a dandelion, a plate of pasta, and the Eiffel Tower in the background (no text or symbols)
NEM
hurtig udskrift

natural_image
Black-and-white photo collage of children's portraits and illustrations on a table, no visible text or symbols

natural_image
White Canon self-printer with a child's photo being scanned, no visible text or symbols on the device itself.
natural_image
Line drawing of a Canon EF597 device with control panel and display (no text or symbols)
Printerenhed

natural_image
Line drawing of a rectangular electronic device with coiled cable (no text or symbols)
Kompakt
strømadapter

Netledning

Startpapirpakke
(postkortstørrelse, 5 ark)

natural_image
Line drawing of a closed notebook or binder with a circular top and square base (no text or symbols)
natural_image
Illustration of a Canon EF-491 printer with control panel and paper sheets (no text or symbols on device body)
Blækpatronlås
Rum til blækpatron
natural_image
Diagram of a mechanical component with an arrow indicating rotation or assembly (no text or symbols present)
3 Anbring papiret.

natural_image
Black-and-white photo of a baby's face with no visible text or symbols in the main image area
natural_image
Close-up black-and-white photo of a smiling baby with hands near face (no text or symbols visible)
05/05/2008
natural_image
Two smiling young men seated on a sofa, one wearing a cap and the other in casual wear (no visible text or symbols)

natural_image
Black-and-white photo of two smiling young men sitting on a sofa (no text or symbols visible)
My Colors
Ændrer billedets farve.

Off/Fra (√),

Vivid/ Vivid effekt*1,

Neutral ^*2 ,

Positive Film/Positiv film ^*3 ,

Sepia/Sepia-effekt,

B/W / Sort/Hvid

natural_image
Black-and-white photo of the Eiffel Tower with illuminated arches and surrounding trees (no visible text or symbols)
Page Layout/ Sidelayout
natural_image
Collage of black-and-white photos showing family scenes including children, adults, and a child in a bedroom (no visible text or symbols)

Image Optimize/ Auto-optimer
natural_image
Two black-and-white photos of smiling children holding climbing ropes, no text or symbols visible
Borders/Kanter
Bordered/Print kant
Borderless/
Uden kant (√)

natural_image
Two black-and-white photos of children sitting on chairs, no text or symbols visible
natural_image
Black-and-white photo of a young girl interacting with a dog (no text or symbols visible)
1 Tryk på ○ (MENU).
2 Vælg [Print Settings/Print indstillinger] med ▲ or ▼, tryk derefter på OK.
3 Tryk på ▲ eller ▼ for at angive [Date/Dato].
4 Tryk på ◀ eller ▶ for at angive [Date/Dato] til [On/Til].
5 Tryk på ○ (BACK).
natural_image
Photo of a young girl holding a dog, no visible text or symbols in the image content

natural_image
Close-up of a Canon printer's front panel showing the brand name and control buttons (no readable text beyond branding)

natural_image
Illustration of a mobile phone emitting signal waves from a printer (no text or symbols)
Op til ca. 10 m


natural_image
Two black-and-white photos: one showing a cartoon child with musical notes, the other showing two children sleeping in bed (no text or symbols visible)
◆ ZoomBrowser EX (Windows)/ImageBrowser (Macintosh)
● Installation af printerdriveren

3 Klik på [Install/Installer].
Macintosh
natural_image
Simple line drawing of a trash bin with two crossed lines indicating no waste or prohibition (no text or symbols)

Kun EU (og E∅S).
SELPHY CP760
COMPACT PHOTO PRINTER
Drucker-Handbuch
DEUTSCH

natural_image
Black-and-white photo of two children sitting on a decorative bench, one in formal attire and the other in a dress with flowers (no text or symbols visible)
natural_image
Black-and-white photo collage showing a baby crawling on a surface, a close-up of flowers in a garden setting (no text or symbols visible)
SPASS tell
natural_image
Black-and-white photo of a heart-shaped photo on a checkered tablecloth, with a pen and plate of food in the background (no visible text or symbols)

natural_image
Black-and-white photo collage showing a group of children posing together, with a potted plant and indoor furniture in the foreground (no visible text or symbols)
>>> Inhalt
natural_image
Black-and-white collage featuring a child playing with flowers, a plate of pasta, and the Eiffel Tower in the background (no text or symbols)
natural_image
Black-and-white photo collage of children's portraits and illustrations on a table (no readable text or symbols)

natural_image
Black and white photo of a Canon self-printed printer with a child's photo being inserted (no visible text or symbols on the device itself)
natural_image
Line drawing of a beige electronic device labeled 'Cuiola' with control panel and display (no readable text or symbols beyond branding)
Druckereinheit

natural_image
Line drawing of a rectangular electronic device with a coiled cable (no text or symbols)
Kompakt-Netzadapter

Netzkabel
natural_image
Line drawing of a closed notebook or binder with a circular top and a small square base (no text or symbols)
natural_image
Diagram of a mechanical component with an arrow indicating rotation or assembly (no text or symbols present)
natural_image
Close-up black-and-white photo of a smiling baby with no visible text or symbols
05/05/2008
Rote Augen korr
natural_image
Two smiling young men seated on a sofa, one wearing a light-colored shirt (no visible text or symbols)

natural_image
Black-and-white photo of two smiling young men sitting on a sofa (no text or symbols visible)
My Colors
natural_image
Black-and-white photo of the Eiffel Tower with arches and surrounding trees (no visible text or symbols)

natural_image
Black-and-white exterior view of the Eiffel Tower with arches and a tall spire (no visible text or symbols)
Seitenlayout
natural_image
Collage of black-and-white photos showing various scenes including children, adults, and family activities (no visible text or symbols)

natural_image
Two black-and-white photos of a smiling child holding a net, no text or symbols visible
Ränder
natural_image
Black-and-white photo of two children sitting on a bench, one in a suit and the other in a dress with a flower (no text or symbols visible)

natural_image
Black-and-white photo of two children sitting on a metal bench, no visible text or symbols
natural_image
Black-and-white photo of a young girl gently touching a brown and white dog outdoors (no text or symbols visible)
natural_image
Black-and-white photo of a young girl holding a dog, no visible text or symbols in the image content

natural_image
Close-up of a Canon printer's side panel showing the brand logo and control buttons (no text or symbols on the device itself)

natural_image
Illustration of a mobile phone emitting signal waves from a printer (no text or symbols)

natural_image
Two black-and-white photos: one showing a sleeping child with musical notes, the other showing two children in a bedroom with balloons (no text or symbols visible)
◆ ZoomBrowser EX (Windows)/ImageBrowser (Macintosh)
natural_image
Symbol of a trash bin crossed out by two diagonal lines (no text or numbers present)

m = 311
Kemore individuell processon
kamera individuell anpassen
natural_image
Black-and-white photo of two children sitting on a decorative bench, one in formal attire and the other in a dress with flowers (no text or symbols visible)
natural_image
Black-and-white photo collage featuring children's portraits and a starfish, arranged on a decorative background (no text or symbols visible)

natural_image
Exterior view of a Canon self-printed printer with a child's photo being scanned (no visible text or symbols on the device itself)
natural_image
Line drawing of a Canon EF597 device with control panel and display (no text or symbols on body)
Unidad impresora

natural_image
Line drawing of a rectangular electronic device with coiled cable (no text or symbols)
natural_image
Line drawing of a closed notebook or binder with a circular top and square base (no text or symbols)
- Folleto European Warranty System (EWS)
natural_image
Illustration of a Canon 51.00Y printer with control panel and paper sheets (no text or symbols on device body)
Palanca
Terminal USB para
natural_image
Diagram of a mechanical component with an arrow indicating rotation or assembly (no text or symbols present)
3 Ponga el papel.

natural_image
Black-and-white photo of a smiling baby face with no visible text or symbols in the main image area.
natural_image
Close-up black-and-white photo of a smiling baby with no visible text or symbols
05/05/2008
Corr. Ojos Rojos
natural_image
Two smiling young men seated on a sofa, one wearing a light-colored shirt (no visible text or symbols)

natural_image
Black-and-white photo of two smiling young men sitting on a sofa (no text or symbols visible)
Mis colores
natural_image
Black and white photo of the Eiffel Tower with arches and surrounding trees (no visible text or symbols)

natural_image
Black-and-white exterior view of the Eiffel Tower with arches and trees (no visible text or symbols)
Diseño Página
natural_image
Collage of black-and-white family photos including children, animals, and a piano (no text or symbols visible)

natural_image
Two black-and-white photos of a smiling child holding a net, no text or symbols visible
Bordes
natural_image
Two black-and-white photos of children sitting on benches, no text or symbols visible
natural_image
Black-and-white photo of a young girl gently touching a brown and white dog outdoors (no text or symbols visible)
natural_image
Black-and-white photo of a young girl holding a dog, no visible text or symbols in the image content

2
natural_image
Diagram showing a child's photo connected to a digital camera and printer (no text or symbols present)
3
natural_image
Close-up of a Canon printer's cable being inserted into the case (no visible text or symbols)

Hasta aprox. 10 m (33 pies)


natural_image
Two black-and-white photos: one showing a sleeping child with musical notes, the other showing two children in a bed with floating stones (no text or symbols)
◆ ZoomBrowser EX (Windows)/ImageBrowser (Macintosh)

natural_image
Simple line drawing of a trash bin with two crossed lines indicating no waste or prohibition (no text or symbols)

natural_image
Black-and-white photo of a family playing on a sandy beach, no text or symbols visible
you can
Canon

natural_image
Black-and-white photo of two children sitting on a decorative bench, one in formal attire and the other in a dress with flowers (no text or symbols visible)
natural_image
Black-and-white collage featuring a child playing with a flower, a plate of noodles, and the Eiffel Tower in the background (no text or symbols)
FACILE Impression rapide

natural_image
Black-and-white photo collage featuring children's portraits and a starfish, arranged on a decorative background (no text or symbols visible)

natural_image
Exterior view of a Canon self-printed printer with a child's photo being inserted (no visible text or symbols on the device itself)
natural_image
Line drawing of a Canon EF597 device with control panel and display (no text or symbols)
Unité d'impression

natural_image
Line drawing of a rectangular electronic device with a coiled cable (no text or symbols)
natural_image
Line drawing of a closed notebook or binder with a circular top and square base (no text or symbols)
natural_image
Illustration of a Canon EF-108Y printer with control panel and paper binding (no text or symbols on device body)
natural_image
Diagram of a mechanical component with an arrow indicating rotation or assembly (no text or symbols present)
3 Placez le papier.
natural_image
Black-and-white photo of a baby's face with no visible text or symbols in the main image area
L'impression commence.

natural_image
Close-up black-and-white photo of a smiling baby with no visible text or symbols
05/05/2008
Cor. yeux rouge
natural_image
Two smiling young men seated on a sofa, one wearing a light-colored shirt (no visible text or symbols)

natural_image
Black-and-white photo of two smiling young men sitting on a sofa (no text or symbols visible)
Mes couleurs
natural_image
Black-and-white photo of the Eiffel Tower with arches and a tree in the foreground (no visible text or symbols)

natural_image
Black-and-white exterior view of the Eiffel Tower with arches and trees (no visible text or symbols)
natural_image
Collage of black-and-white photos showing children in various settings including family, outdoor scenes, and indoor activities (no visible text or symbols)

natural_image
Two black-and-white photos of a smiling child holding a net, no text or symbols visible
Bordures
natural_image
Black-and-white photo of two children sitting on a bench, one in a suit and the other in a dress with a flower (no text or symbols visible)

natural_image
Black-and-white photo of two children sitting on a metal bench, no visible text or symbols
natural_image
Black-and-white photo of a young girl gently touching a brown and white dog outdoors (no text or symbols visible)
natural_image
Black-and-white photo of a young girl holding a dog, no visible text or symbols in the image content

L'impression commence.

L'impression commence.
2
3
L'impression commence.

natural_image
Close-up of a Canon printer's side panel showing the brand name and control buttons (no readable text beyond branding)

natural_image
Illustration of a mobile phone emitting signal waves from a printer (no text or symbols)

natural_image
Two grayscale photos: one showing a sleeping child with musical notes and a small animal, the other showing two children in a bedroom with balloons (no text or symbols visible)
◆ ZoomBrowser EX (Windows)/ImageBrowser (Macintosh)
Macintosh
natural_image
Symbol of a trash bin crossed out by two diagonal lines (no text or numbers present)

natural_image
Black-and-white photo of two children sitting on a decorative bench, one in wedding attire and the other in a dress with flowers (no text or symbols visible)
natural_image
Black-and-white photo collage showing a baby crawling on a surface and a close-up of flowers in a garden (no text or symbols visible)
natural_image
Black-and-white photo of a heart-shaped photo on a checkered tablecloth with a pen and plate of food in the background (no visible text or symbols)

natural_image
Black-and-white photo collage showing a group of people posing together, with indoor furniture and plants in the foreground (no visible text or symbols)
>>> Sommario
natural_image
Black-and-white collage featuring a child eating with a flower, a plate of pasta, and the Eiffel Tower in the background (no text or symbols)
FACILE
Stampa rapie

natural_image
Black-and-white photo collage featuring children's portraits and a baby, arranged on a patterned surface (no text or symbols visible)

natural_image
White Canon self-printer with a child's photo being scanned, no visible text or symbols on the device itself.
natural_image
Line drawing of a Canon EF597 device with control panel and display (no text or symbols on body)
Unità stampante

natural_image
Line drawing of a rectangular electronic device with coiled cable (no text or symbols)
natural_image
Line drawing of a closed notebook or binder with a circular top and square base (no text or symbols)
natural_image
Illustration of a Canon printer with control panel and display (no text or symbols visible)
natural_image
Diagram of a mechanical component with an arrow indicating rotation or assembly (no text or symbols present)
3 Caricare la carta.
natural_image
Close-up black-and-white photo of a smiling baby with hands near face (no text or symbols visible)
05/05/2008
natural_image
Two smiling young men sitting on a couch, one in foreground and one in background (no visible text or symbols)

natural_image
Black-and-white photo of two smiling young men sitting on a sofa (no text or symbols visible)
natural_image
Black-and-white exterior view of the Eiffel Tower with arches and trees (no visible text or symbols)

natural_image
Black and white photograph of the Eiffel Tower with visible arches and towers, surrounded by trees (no text or symbols)
natural_image
Collage of black-and-white family photos including children, adults, and a child sitting on a bench (no text or symbols visible)

Ottimiz. Imm.
natural_image
Two black-and-white photos of a smiling child holding a net, no text or symbols visible
natural_image
Black-and-white photo of two children sitting on a bench, one wearing a suit and the other in a dress with flowers (no text or symbols visible)

natural_image
Black-and-white photo of two children sitting on a bench, one in light-colored dress and the other in white dress (no text or symbols visible)
natural_image
Black-and-white photo of a young girl gently touching a brown and white dog (no text or symbols visible)
natural_image
Black-and-white photo of a young girl holding a dog, looking at the camera (no text or symbols visible)

natural_image
Close-up of a Canon printer's front panel showing the paper and printer (no text or symbols visible)
natural_image
Illustration of a mobile phone emitting signal waves from a printer (no text or symbols)

natural_image
Two black-and-white photos: one showing a baby with musical notes and a cat, the other showing two children sitting on a bed with floating balloons (no text or symbols)
◆ ZoomBrowser EX (Windows)/ImageBrowser (Macintosh)
natural_image
Symbol of a trash bin crossed out by two diagonal lines (no text or numbers present)

natural_image
Black-and-white photo of a family of adults and children playing on a sandy beach under a partly cloudy sky (no text or symbols visible)
natural_image
Black-and-white photo of two children sitting on a decorative bench, one in formal attire and the other in a dress with flowers (no text or symbols visible)
natural_image
Black-and-white photo collage showing a smiling baby lying on a wooden surface, with a close-up of flowers and foliage in the background (no text or symbols)
LEUK
natural_image
Black-and-white photo of a heart-shaped photo on a checkered tablecloth, with a pen and plate of food in the background (no visible text or symbols)

natural_image
Black-and-white photo collage showing a group of children posing together, with a potted plant and indoor furniture in the foreground (no visible text or symbols)
>>> Inhoudsopgave
natural_image
Black-and-white collage featuring a child, a plate of noodles, the Eiffel Tower, and a circular logo with text (no readable document text in the main image area)
EENVOUDIG
Snel printen

natural_image
Black-and-white photo collage featuring children's portraits and a starfish, arranged on a decorative background (no text or symbols visible)

natural_image
Black and white photo of a Canon self-printed printer with a child's photo being inserted (no visible text or symbols on the device itself)
natural_image
Line drawing of a Canon EF597 device with control panel and display (no text or symbols)
Printer

natural_image
Line drawing of a rectangular electronic device with coiled cable (no text or symbols)
Compacte
voedingsadapter

Netsnoer

Papier
(briefkaartformaat, 5 vellen)

natural_image
Line drawing of a closed notebook or binder with a circular top and square base (no text or symbols)
Papiercassette (briefkaartformaat)

Papiercassette (creditcardformaat) ^*
natural_image
Illustration of a Canon 51.00Y printer with control panel and paper sheets (no text or symbols on device body)
Hendel van klep
inktcassettecompartiment
Inktcassettecompartiment
Klep van
inktcassettecompartiment
Ventilatieopeningen
natural_image
Diagram of a mechanical component with an arrow indicating rotation or assembly (no text or symbols present)
natural_image
Close-up black-and-white photo of a baby's face, no visible text or symbols
05/05/2008
Correct Red-Eye/Corr. rode ogen
natural_image
Black-and-white photo of two smiling young men seated on a sofa, with no visible text or symbols.

natural_image
Black-and-white photo of two smiling young men sitting on a couch (no text or symbols visible)
My Colors
natural_image
Black-and-white photo of the Eiffel Tower with flared arches and trees in the foreground (no visible text or symbols)
Page Layout/Paginaindeling
natural_image
Collage of black-and-white photos showing children in various settings, including outdoor scenes and indoor activities (no visible text or symbols)

Image Optimize/ Autom. optimal.
natural_image
Two black-and-white photos of smiling children holding ropes, no text or symbols visible
Borders/Randen
Borderless/Randloos (√)

natural_image
Two black-and-white photos of children sitting on chairs, no text or symbols visible
natural_image
Black-and-white photo of a young girl gently touching a brown and white dog outdoors (no text or symbols visible)
natural_image
Black-and-white photo of a young girl holding a dog, no visible text or symbols in the image content

natural_image
Close-up of a Canon printer's side panel showing the brand name and control buttons (no readable text beyond branding)

natural_image
Illustration of a mobile phone emitting signal waves from a printer (no text or symbols)
Max. afstand 10 m.


natural_image
Two black-and-white photos: one showing a sleeping child with musical notes, the other showing two children in a bedroom with balloons (no text or symbols visible)
◆ ZoomBrowser EX (Windows)/ImageBrowser (Macintosh)
3 Klik op [Install/Installeren].
Macintosh
Paper jam!/Papier storing!
natural_image
Symbol of a trash bin crossed out by two diagonal lines (no text or numbers present)

Alleen Europese Unie (en EER).
Pas uw camera aan
natural_image
Black-and-white photo of two children sitting on a decorative bench, smiling and posing (no text or symbols visible)
natural_image
Black-and-white collage featuring a child, a plate of pasta, the Eiffel Tower, and a circular logo with the word 'HELPPOA' (no other text or symbols)
natural_image
Black-and-white photo collage of children's portraits and illustrations, no visible text or symbols

natural_image
Black and white photo of a Canon self-printed printer with a child's photo being inserted (no visible text or symbols on the device itself)
natural_image
Line drawing of a Canon EF597 device with control panel and display (no text or symbols)
Tulostinyksikkö

natural_image
Line drawing of a rectangular electronic device with coiled cable (no text or symbols)
Verkkolaite

Virtajohto
natural_image
Line drawing of a closed notebook or binder with a circular top and square base (no text or symbols)
natural_image
Illustration of a Canon EFDPY printer with control panel and paper sheets (no text or symbols on device body)
Mustekasetin vipu
Mustekasettikotelo
Mustekasettikotelon kansi
Tuuletusaukot
Paperin poistolokero

natural_image
Diagram of a mechanical component with an arrow indicating rotation or assembly (no text or symbols present)
3 Aseta paperi.

natural_image
Black-and-white photo of a smiling baby with no visible text or symbols in the main image area
natural_image
Close-up black-and-white photo of a smiling baby with no visible text or symbols
05/05/2008
Correct Red-Eye/Punasilmäkorj.
natural_image
Black-and-white photo of two smiling people seated on a couch, no visible text or symbols

natural_image
Black-and-white photo of two smiling young men sitting on a couch (no text or symbols visible)
My Colors
natural_image
Black-and-white photo of the Eiffel Tower with arches and a tree in the foreground (no visible text or symbols)

natural_image
Black-and-white exterior view of the Eiffel Tower with arches and a tall spire, surrounded by trees (no visible text or symbols)
Page Layout/
Kuva-asetukset
natural_image
Collage of black-and-white family photos including children, adults, and outdoor scenes (no text or symbols visible)

Image Optimize/ Auto-optimointi
natural_image
Black-and-white photo of two smiling children holding ropes, no text or symbols visible
Borders/Kehys
natural_image
Black-and-white photo of two children sitting on a bench, one holding a spoon, in a simple indoor setting (no text or symbols visible)

natural_image
Black-and-white photo of two children sitting on a bench, one in casual attire and the other in dress (no text or symbols visible)
natural_image
Black-and-white photo of a young girl gently touching a brown and white dog outdoors (no text or symbols visible)
natural_image
Black-and-white photo of a young girl holding a dog, no visible text or symbols in the image content

natural_image
Diagram showing a child's photo connected to a digital camera and printer (no text or symbols present)
natural_image
Close-up of a Canon printer's side panel showing the brand name and control buttons (no readable text beyond branding)

natural_image
Illustration of a mobile phone emitting signal waves from a printer (no text or symbols)
Enintään noin 10 m


natural_image
Two grayscale photos: one showing a sleeping child with musical notes, the other showing two children relaxing in a circle (no text or symbols)
◆ ZoomBrowser EX (Windows)/ImageBrowser (Macintosh)

There is a problem with the ink cassette!/Ongelma mustekasetissa!
natural_image
Symbol of a trash bin crossed out by two diagonal lines (no text or numbers present)

natural_image
Black-and-white photo of a family playing on a sandy beach, no text or symbols visible
natural_image
Black-and-white photo of two children sitting on a decorative bench, one in wedding attire and the other in a dress with flowers (no text or symbols visible)
natural_image
Black-and-white photo collage showing a baby crawling on a wooden surface and a close-up of flowers in a garden (no text or symbols)
SKOJ
Skapa ditt eget
album

natural_image
Black-and-white photo of a heart-shaped photo on a checkered tablecloth with a pen and plate of food in the background (no visible text or symbols)

natural_image
Black-and-white photo collage showing a group of people posing together, with indoor furniture and plants in the foreground (no visible text or symbols)
natural_image
Black-and-white collage featuring a child eating with a dandelion, a plate of pasta, and the Eiffel Tower in the background (no text or symbols on main subjects)
ENKELT
Snabb
utskrifter

natural_image
Black-and-white photo collage featuring children's portraits and a baby, arranged on a patterned background (no readable text or symbols)

natural_image
White Canon self-printer with a child's photo being scanned, no visible text or symbols on the device itself.
natural_image
Line drawing of a portable electronic device labeled 'Cunia' with control buttons and display (no readable text beyond label)
Skrivarenhet

natural_image
Line drawing of a rectangular electronic device with a coiled cable (no text or symbols)
Nätaggregat

Nätkabel
natural_image
Line drawing of a closed notebook or binder with a circular top and a small square base (no text or symbols)
Papperskassett (vykortsformat)

Papperskassett (Kortformat)*
• Broschyren European Warranty System (EWS)

natural_image
Illustration of a handheld electronic device with control panel and display (no text or symbols visible)
Bläckkassettspak
Bläckkassettutrymme
Bläckkassettutrymmets lucka
natural_image
Diagram of a mechanical component with an arrow indicating rotation or assembly (no text or symbols present)
3 Lägg i papperet.

natural_image
Illustration of a passenger seat with seats and luggage, no text or symbols present
Image Optimize/Auto-optimizing
Borders/Kanter
natural_image
Close-up black-and-white photo of a smiling baby with hands near face (no text or symbols visible)
05/05/2008
Correct Red-Eye/
Korr. röda ögon
natural_image
Black-and-white photo of two smiling people seated on a sofa, no visible text or symbols

natural_image
Black-and-white photo of two smiling people sitting on a sofa (no text or symbols visible)
natural_image
Black-and-white photo of the Eiffel Tower with visible railings and surrounding trees (no text or symbols)
Page Layout/
Sidlayout
natural_image
Collage of black-and-white family photos including children, adults, and a child sitting on a bench (no text or symbols visible)

Image Optimize/
Auto-optimering
natural_image
Two black-and-white photos of a smiling child holding hands, viewed from behind (no text or symbols visible)
Borders/Kanter
natural_image
Two black-and-white photos of children sitting on chairs, no text or symbols visible
natural_image
Black-and-white photo of a young girl interacting with a dog (no text or symbols visible)
natural_image
Black-and-white photo of a young girl gently holding a dog, with no visible text or symbols in the main image area.

3 Tryck på 📄.
Utskriften startar.

natural_image
Diagram of a Canon printer with a paper clip inserted, showing no text or symbols on the device itself.

natural_image
Illustration of a mobile phone emitting signal waves from a printer (no text or symbols)
Upp till ca. 10 m


natural_image
Two black-and-white photos: one showing a sleeping child with musical notes, the other showing two children in a bedroom with balloons (no text or symbols visible)
◆ ZoomBrowser EX (Windows)/ImageBrowser (Macintosh)

3 Klicka på [Install/Installera].
Macintosh
natural_image
Simple line drawing of a trash bin with two crossed lines indicating no waste or prohibition (no text or symbols)

Gäller endast Europeiska unionen (och EEA).
natural_image
Black-and-white overhead photo of a group of people gathered around a table with a pie chart, no visible text or symbols.

Gör din kamera personlig
natural_image
Black-and-white overhead photo of a group of people gathered around a table with a pie chart, no visible text or symbols.
Open up a world of online digital photos with CANON iIMAGE GATEWAY

natural_image
Group of five people joyfully jumping on a cliff edge against a blue sky with clouds, overlooking green fields and hills (no text or symbols visible)
CANON
iMAGE
GATEWAY
Register your new Canon digital product today and start enjoying 100MB of online space allowing you to share your photos with friends and family. Order photo prints directly from your
online photo album. Get hints, tips and ideas, plus customise your camera with great start-up images and sounds. With Canon iMAGE GATEWAY ^1 you can!